London:
Nationwide:
25,000+
Floors Restored
27 Years Experience
Wood Flooring Association Certified
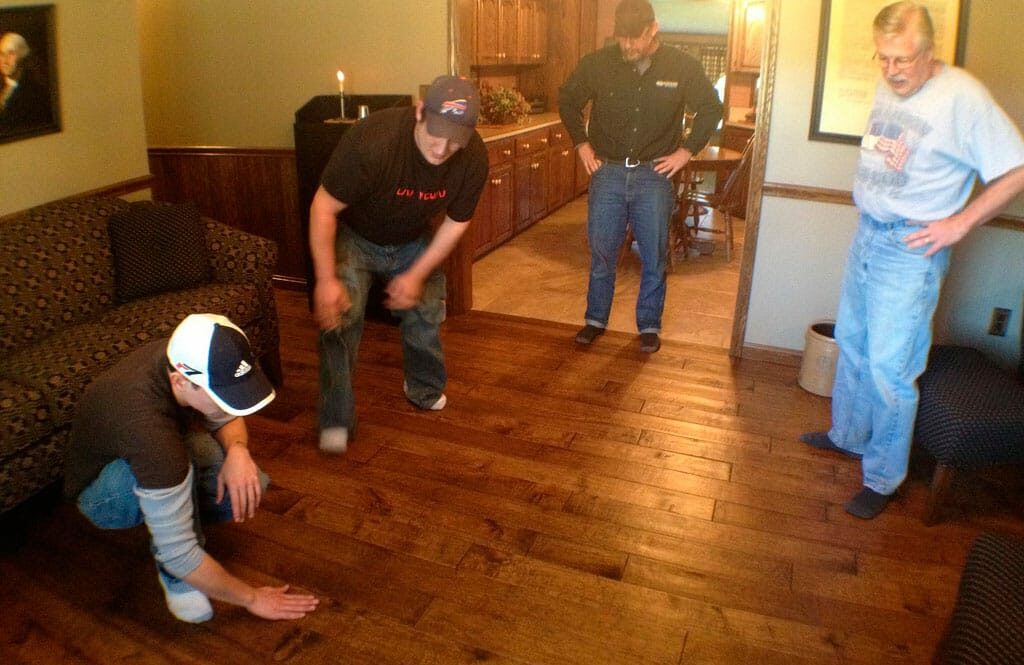
Tips for Buffing Around Edges and Corners
Posted on October 9, 2023
Buffing
Expert Tips for Wood Floor Buffing: Perfecting Edges and Corners
Wooden floors exude timeless elegance and warmth, but maintaining their pristine appearance can be a challenge, especially when it comes to buffing those hard-to-reach edges and corners. While the main expanse of your wood floor may be relatively straightforward to buff, it’s in these tight spaces where imperfections and wear often accumulate. In this guide, we will share invaluable tips and techniques to help you achieve a flawless finish, even in those tricky corners and along the edges of your wood floor. With the right tools, knowledge, and a little patience, you can elevate the appearance of your wooden flooring to new heights, ensuring it remains a beautiful centrepiece of your home. The art of wood floor buffing is a skill that can breathe new life into your home’s interior. It’s the process that brings out the natural beauty of your wood flooring while providing protection against daily wear and tear. However, one of the most common stumbling blocks in this process is ensuring an even finish around edges and corners. Many homeowners find themselves frustrated by uneven results and the potential for damage in these areas. In this comprehensive guide, we will explore a range of expert tips and best practices to help you navigate this challenge with confidence. By following these insights, you’ll be well on your way to achieving a professional-level wood floor buffing job in every nook and cranny. Your wood floors are more than just a functional element of your home; they’re a statement of style and sophistication. However, to maintain that luxurious look, you need to invest time and effort into proper care and maintenance. Buffing your wood floors is a crucial step in this process, but it’s often the areas around edges and corners that pose the greatest challenge. Fear not! In this guide, we’ll unveil a set of invaluable tips and strategies to tackle this exact problem. From selecting the right tools and materials to adopting the correct technique, we’ll empower you with the knowledge you need to transform your wood floors into a showcase of beauty and durability. Say goodbye to uneven edges and corners, and hello to a stunning wood floor finish that will stand the test of time.Understanding the importance of edges and corners
When it comes to wood floor buffing, paying special attention to edges and corners is essential for several reasons. These areas, often referred to as the perimeter of the floor space, are prone to differences in wear, damage, and appearance compared to the main body of the floor. Here’s why edges and corners are so important:- Uniform Appearance: For a floor to look its best, the finish needs to be consistent across the entire surface. If edges and corners are neglected, there can be a noticeable difference in sheen, texture, and colour.
- Wear and tear: Edges and corners are often high-traffic areas, especially near doorways. They can wear out faster than the centre of the room. By giving them proper attention during buffing, you can ensure a more even wear pattern across the entire floor.
- Dirt and Buildup: Edges and corners are notorious for accumulating dirt, dust, and grime, as they often aren’t cleaned as thoroughly or as frequently as the main floor area. This buildup can affect the adhesion and penetration of sealers or finishes. Buffing these areas ensures that they are clean and ready for any treatments.
- Limited Space: Edges and corners often pose a challenge because standard buffing machines might not reach them effectively. This requires the use of smaller tools or hand methods, making it even more essential to ensure they’re addressed with care.
- Detail Work: Much like detailing a car, the fine details make a big difference. Properly buffed edges and corners give a room a polished and complete look. Neglecting them can draw attention to these areas in an undesirable way.
- Protection: Properly buffing and sealing the edges and corners of a wood floor can offer protection against moisture infiltration, especially near exterior doors or windows.
- Maintenance: Addressing the edges and corners during regular buffing can help extend the life of the floor. Regular maintenance prevents the need for more aggressive and costly restoration work down the line.
Tools and materials you’ll need
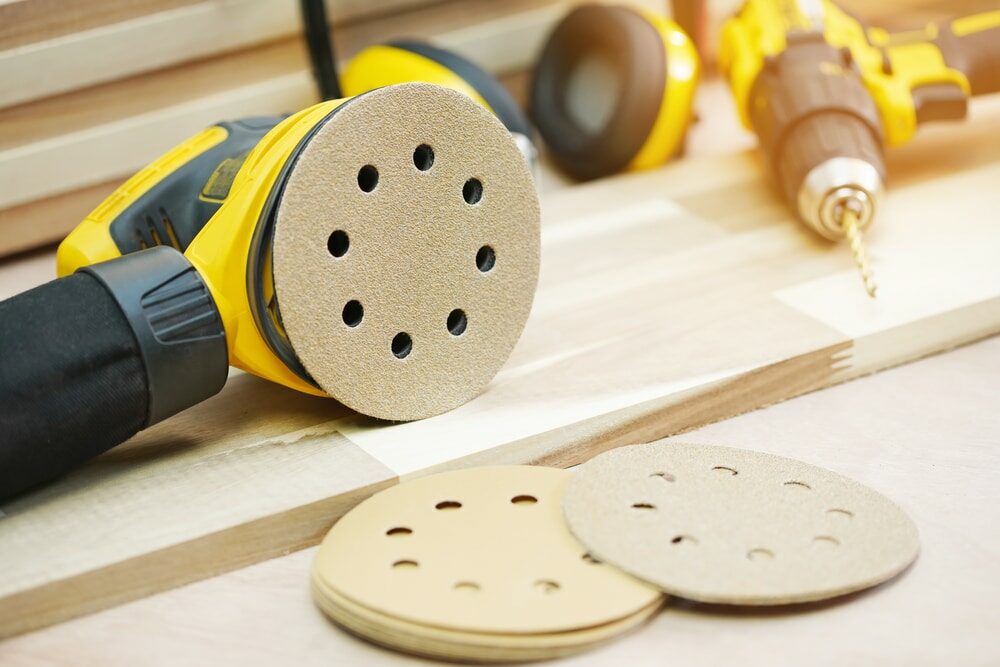
If you’re planning to buff the edges and corners of a wood floor, you’ll require specific tools and materials to get the job done effectively. Here’s a comprehensive list: Tools:- Buffing Machine (Floor Buffer): This is the primary tool used to buff large sections of the floor.
- Edge Sander: This is a smaller machine designed to address the edges of a room where the main buffer can’t reach.
- Handheld Orbital Sander: Useful for detailed work and tighter spaces, especially corners.
- Hand scrapers: for removing old finishes or addressing very tight corners and edges where even an edge sander can’t get to.
- Vacuum or Shop-Vac: To remove dust and debris from the floor after buffing. A vacuum with a good filter is essential to ensure the room is dust-free before applying any finishes.
- Tack Cloth: For wiping down the floor after vacuuming. This cloth is slightly sticky and will pick up any remaining dust particles.
- Protective Gear:
- Safety Glasses: To protect your eyes from dust and debris
- Ear Protection: Buffing machines can be loud.
- Dust Mask or Respirator: To protect against inhaling wood dust.
- Knee Pads: If you’re working on your knees for extended periods, especially during hand scraping or hand sanding.
Materials:
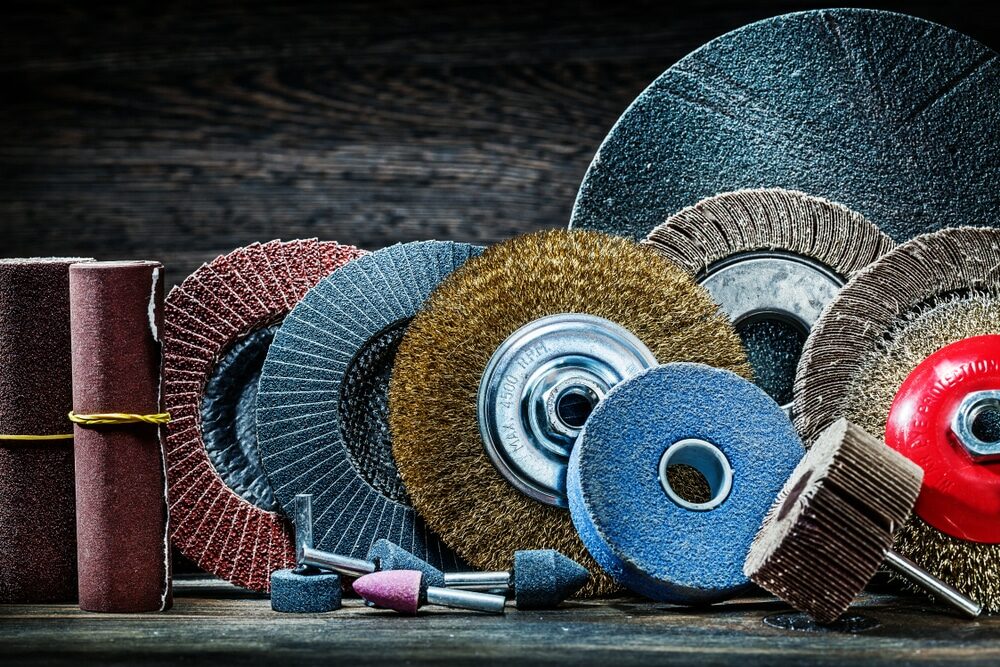
- Sandpaper: You’ll need various grits. Start with a coarser grit (like 60 or 80) and work your way up to finer grits (like 120 or 220) for a smooth finish.
- Buffing pads: These come in different levels of abrasiveness. The type you need will depend on the condition of your floor and the desired finish.
- Wood Floor Cleaner: For cleaning the floor before you start and after you finish.
- Finish or sealer: depending on what your floor needs. This could be a polyurethane finish, oil, or another type of wood floor finish.
- Application Tools: Depending on your chosen finish, you might need brushes, lambswool applicators, or microfiber pads.
- Painter’s Tape: Useful for protecting baseboards or areas that you don’t want to get finished on.
- Plastic Sheets or Drop Cloths: To protect furniture or adjacent areas from dust and finish.
Additional Tips:
- Before starting, ensure the room is well-ventilated, especially when applying finishes.
- Check and follow the manufacturer’s instructions on all products and equipment.
- Always test products or methods in an inconspicuous area of the floor before applying them to the entire surface.
Preparing the floor for buffing
Preparing the floor correctly before buffing is crucial to achieving optimal results. The preparation process helps to ensure that the buffing action is effective and that any subsequent treatments or finishes adhere properly to the wood. Here’s a step-by-step guide to preparing your wood floor for buffing:1. Clear the room.
- Remove all furniture. Ensure the room is completely empty to give yourself an unobstructed workspace.
- Take down drapes and curtains. This prevents them from collecting dust.
2. Clean the floor.
- Sweep or vacuum: Remove all dirt, dust, and debris from the floor. This is important because large debris can get caught under the buffer and scratch the wood.
- Mop with a wood floor cleaner: Use a cleaner specifically designed for wood floors. Avoid overly wet mopping; instead, use a damp mop to prevent water damage to the wood.
3. Check for loose boards or nails.
- Secure any loose floorboards. Loose boards can be problematic during buffing. Use screws or nails to fix them in place, ensuring that the screw or nail heads are below the surface of the wood.
- Set protruding nails: Use a nail set to push any protruding nails below the surface of the wood.
4. Repair major damage.
- Fill gaps or cracks: Use wood filler to repair any gaps, cracks, or holes in the floor. Make sure the filler is suitable for your type of wood and is stainable or paintable if you plan to stain or finish the floor afterward.
- Let the filler dry. Follow the manufacturer’s recommendations for drying time before you proceed.
5. Tape and Protect
- Tape baseboards and mouldings: Use painter’s tape to protect baseboards, mouldings, and any other areas you want to protect from potential scuff marks from the buffer or from finish drips.
- Lay down plastic sheets or drop cloths. If you’re working in an area adjacent to carpeting or other flooring types, protect those surfaces from dust.
6. Choose the Right Sandpaper or Buffing Pad
- If you’re buffing to prepare the floor for a new coat of finish, choose a buffing pad or screen that’s appropriate for your floor’s condition. Typically, a 120- or 150-grit screen is used for this purpose. If you’re trying to remove deeper scratches or more significant imperfections, you might start with a coarser grit and work your way up.
7. Ensure proper ventilation.
- Open windows and doors for adequate airflow, especially if you’ll be applying finishes or solvents afterward. This helps dissipate dust and fumes.
8. Gather safety gear.
- Ensure you have safety glasses, ear protection, and a dust mask or respirator on hand. Proper safety precautions are essential to protect yourself during the buffing process and when applying finishes.
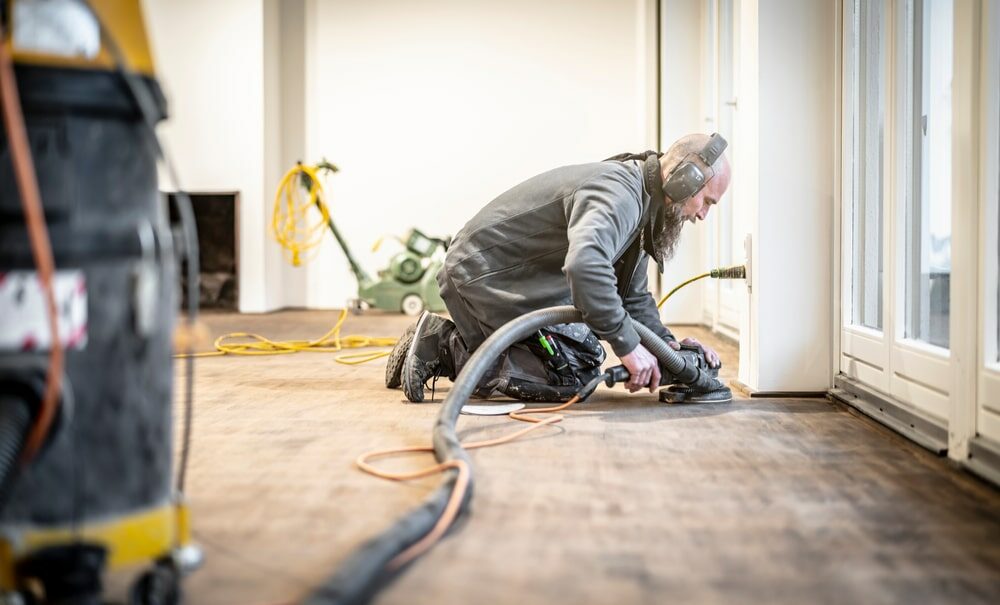
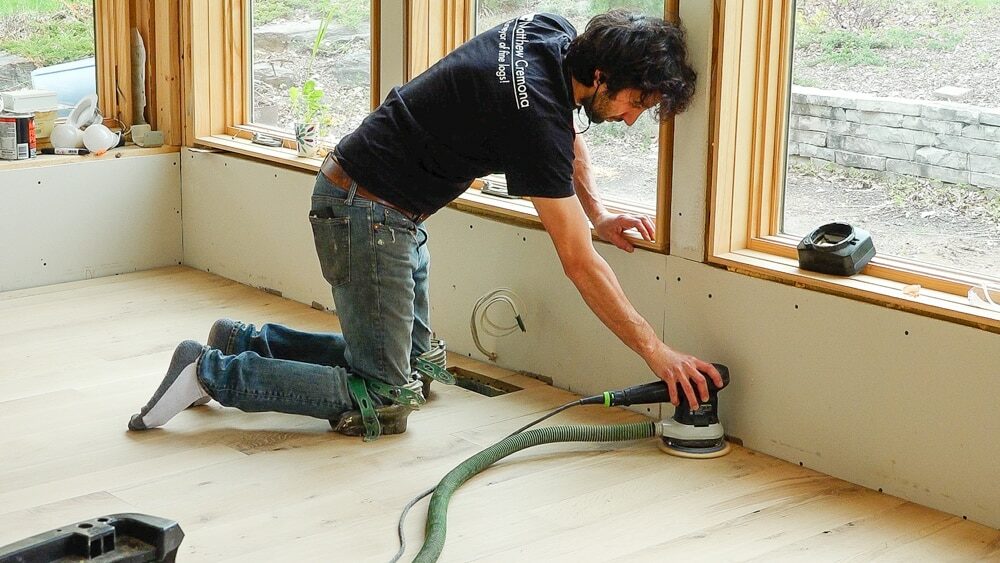
Techniques for buffing edges
Buffing edges can be a bit trickier than buffing the main portion of a floor due to their proximity to walls, baseboards, and other obstacles. However, with the right techniques, you can achieve a consistent and smooth finish along the edges. Here are some techniques and tips for buffing edges:1. Use the Right Equipment:
- Edge Sander: An edge sander is specifically designed for tackling the perimeter of a room. It’s a smaller machine that allows for more precise work along the edges.
- Handheld Orbital Sander: For tighter spaces and corners, a handheld orbital sander can be very effective. It provides good control and is easier to manoeuvre than larger machines.
2. Sand with the Grain:
- Always move the sander with the grain of the wood. This reduces the risk of creating cross-grain scratches, which can be very noticeable once a finish is applied.
3. Progressive Sanding:
- Start with coarser-grit sandpaper to remove old finishes and imperfections. Gradually move to finer grits for a smooth finish. For example, you might start with an 80-grit, move to a 120-grit, and finish with a 220-grit.
4. Pay attention to pressure:
- Apply consistent pressure when sanding, but avoid pressing too hard, as this can create gouges or uneven areas.
- Let the sander do the work; don’t force it.
5. Overlap Passes:
- To ensure a uniform finish, overlap your passes slightly. This will help blend each pass and avoid any missed spots.
6. Use hand tools when necessary.
- In areas where even an edge sander or handheld sander can’t reach, you might need to use a hand scraper or sanding blocks. Remember to follow the grain of the wood and use the same progressive grit strategy.
7. Regularly Check Your Progress:
- Periodically, turn off your sander and check the surface. Feel for smoothness and look for areas you might have missed or where an old finish remains.
8. Keep the sandpaper clean.
- Sandpaper can become clogged with old finish and wood dust. Regularly check and either clean or replace the sandpaper as needed. A clogged sandpaper won’t sand effectively and can also create scratches.
9. Vacuum Between Grits:
- After sanding with each grit, vacuum the area to remove dust. This prevents the dust from creating scratches when you move to a finer grit.
10. Final Inspection:
- Once you’ve finished sanding, inspect the edges closely. Look for any missed spots or inconsistencies. A handheld light can be useful for this, as it can highlight imperfections.
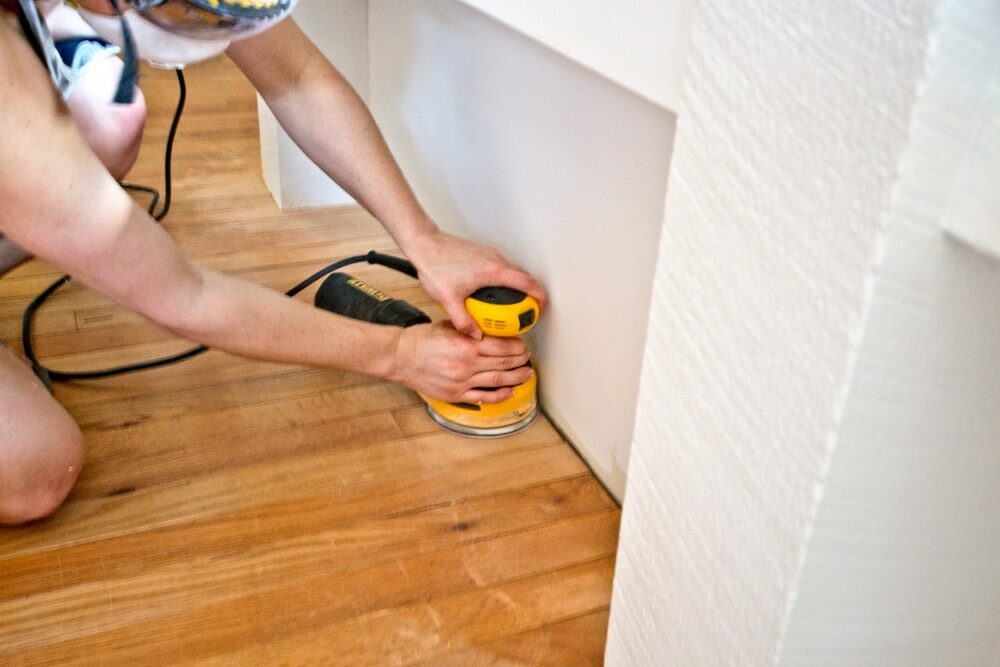
Tips for Buffing Corners
Buffing corners is arguably one of the most challenging parts of refinishing a wood floor. These tight spaces can be tricky to address, but with the right techniques and patience, you can achieve excellent results. Here are some tips to help you buff the corners effectively:1. Use appropriate tools:
- Detail Sanders: These are smaller handheld tools designed to get into tight spaces like corners. A triangle-shaped pad on a detail sander can get right up to the edges.
- Hand Scrapers: For very tight corners, a hand scraper can be used to manually remove old finishes and smooth the wood. Ensure the scraper is sharp and use it carefully to avoid gouging the wood.
- Sanding Blocks and Paper: Folded sandpaper or sanding blocks can be used to manually sand corners, providing a tactile feel for ensuring smoothness.
2. Work with the grain:
Even in corners, always strive to work with the grain of the wood. It minimises the appearance of scratches and maintains the integrity of the wood.3. Lighting is key.
Good lighting will help you see imperfections and ensure you’ve effectively buffed the corners. A handheld light or headlamp can be particularly useful.4. Pacing:
Don’t rush the process. Corners often require a slower pace due to the confined space and need for precision.5. Regularly check the sandpaper:
The sandpaper can get clogged quickly, especially if you’re removing old finishes. Regularly check its condition and replace it as needed.6. Vacuum frequently:
After sanding, especially between grits, ensure you vacuum the corner thoroughly. This will remove any debris or dust that might scratch the floor when using finer grits.7. Hand Feel:
After you think you’ve adequately sanded the corner, run your hand over it (carefully, to avoid splinters). Feeling the surface can often reveal imperfections that the eye might miss.8. Use protective barriers:
When working close to walls or baseboards, consider using painter’s tape to protect them from any accidental scuffs or damage.9. Progressive Grit Approach:
Just like with the rest of the floor, start with coarser grit sandpaper and work your way up to finer grits for a smooth finish in the corners.10. Final Inspection:
Once you’ve finished, inspect the corners closely. Ensure that you’ve achieved a consistent finish and that the corners match the rest of the floor. Buffing corners might be time-consuming, but the attention to detail will pay off in the end with a uniformly refinished floor. Remember, it’s the little details, like well-buffed corners, that can make a big difference in the overall appearance of your wood floor.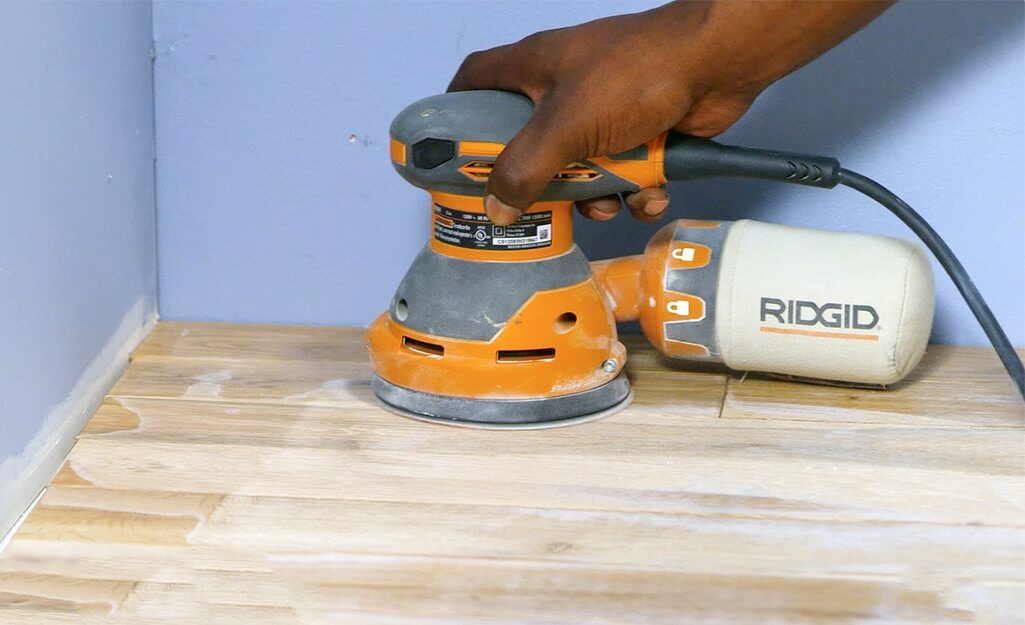
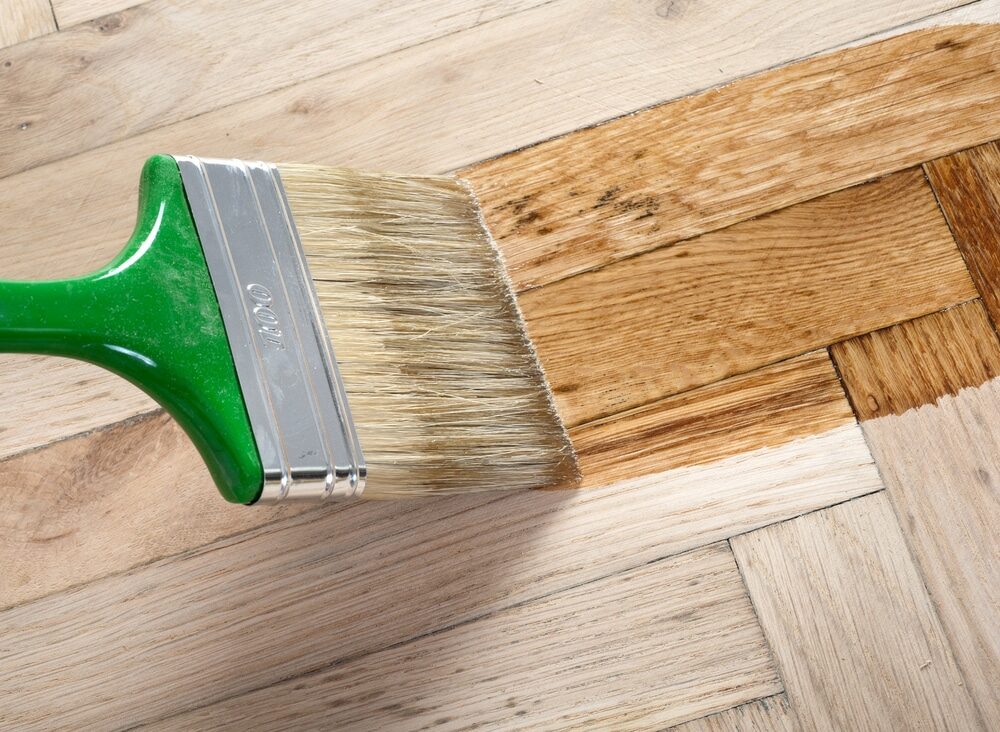
Final touches and aftercare
After buffing and refinishing your wood floor, it’s essential to apply the final touches and understand the aftercare to maintain the floor’s beauty and durability. Here’s a guide to the final touches and subsequent aftercare:Final Touches:
- Vacuum and Clean: Before applying any finish, thoroughly vacuum the floor to remove all dust and debris. Follow up with a tack cloth to ensure the surface is entirely dust-free.
- Finishing: Depending on your desired outcome:
- Oil-based polyurethane: Offers a warm glow but can yellow over time. It’s durable and suitable for high-traffic areas.
- Water-based polyurethane: a clear finish that doesn’t yellow over time. It dries faster and emits fewer odours.
- Natural Oils and Wax: These offer a natural, matte finish. They’re eco-friendly and easy to repair, but they might require more frequent maintenance.
- Application: Use a high-quality brush, lambswool applicator, or microfiber pad to apply the finish. Start in a corner and work your way towards the exit, ensuring even application.
- Multiple Coats: Depending on the finish, 2-3 coats might be necessary. Always sand lightly between coats using a very fine-grit sandpaper (like 220 grit) to ensure proper adhesion and a smooth finish.
- Curing Time: Allow the finish to cure as recommended by the manufacturer. This can range from 24 hours to several days. The floor might feel dry to the touch sooner, but it’s essential to let it harden fully before resuming regular activity.
Aftercare:
- Avoid Foot Traffic: During the curing process, avoid walking on the floor. If you must, wear socks, not shoes.
- Furniture: Wait at least 48 hours (or as recommended) before returning furniture. Use felt pads under furniture legs to prevent scratches.
- Cleaning: Use a soft broom, microfiber mop, or vacuum with a soft brush attachment for regular cleaning. Avoid wet mopping. Instead, use a damp cloth for spot cleaning and cleaners specifically designed for wood floors.
- Protection:
- Use mats at entrances to trap dirt and moisture.
- Use rugs in high-traffic areas to reduce wear.
- Regularly trim pet nails to prevent scratches.
- Maintenance: Depending on the finish and traffic, you might need to recoat the floor every few years to refresh its look and protection. Before recoating, always clean and buff the existing finish to ensure proper adhesion.
- Avoid Direct Sunlight: Prolonged direct sunlight can fade and discolour wood floors. Use blinds, curtains, or UV-protective window films to minimise sun exposure.
- Humidity Control: Wood floors can expand and contract with humidity changes. Use a humidifier during dry months and a dehumidifier during humid months to maintain a consistent indoor environment.
- Address Spills: Clean up spills immediately to prevent staining and potential water damage.
Conclusion
Buffing and refinishing a wood floor is a meticulous process that can rejuvenate the appearance and extend the life of the flooring. From preparing the floor and focusing on detailed areas like edges and corners to the final touches and aftercare, each step is crucial for achieving a professional and lasting result. Utilising the right tools, techniques, and patience, homeowners can transform worn-out floors into beautiful and resilient surfaces. Moreover, the aftercare is as essential as the refinishing process itself. Proper maintenance, protection from external factors, and timely interventions can ensure the floor remains in prime condition for years. When executed correctly, this entire process not only enhances the aesthetic appeal of a space but also adds value to the property. In essence, the effort invested in buffing and maintaining a wood floor is a testament to the timeless charm and durability of wooden flooring.Some Useful Links:
- Stairs Sanding & Refinishing
- Floor Sanding Services
- School Floor Sanding
- Wood Floor Restorations
- Wood Floor Repairs
- Wood Floor Polishing
More from our Blog:
How Often Should You Buff Your Hardwood Floors? Different Buffing Techniques for Hardwood Floors The Role of Buffing in Achieving a Smooth Finish How to Choose the Right Buffer for Floor Sanding How to Repair Damaged Floors with Belt Sanding Step-by-Step Guide to Belt Sanding Your Floors Innovative Techniques for Using Belt Sanders in Floor Refinishing How to Achieve a Perfectly Flat Surface with Belt Sanding for Floor Refinishing Common Belt Sanding Tools and Accessories for Floor Refinishing The Role of Belt Sanding in Achieving a Professional Finish on Your Floors

Sanding
We provide virtually dust-free sanding with our continuous belt machinery with mobile extraction units, giving you a safer environment for your family.
Oiling
This organic finish not only adds beauty to your home but also has exceptional water-repellent characteristics, making it easier to clean and maintain.
Waxing
This natural floor finish offers the softest and most mellow appearance – and leaves your floor able to breath.
Buffing
Using soft buffing machines (and hand-polishing where required) will bring a wonderful sheen to your newly-finished floor.
Repairs
We offer a full assessment of your wooden floors to determine what repairs are needed to provide the perfect working surface for the later stages of sanding, staining and sealing.
Restoration
We offer a comprehensive restoration process designed to address floors that are improperly fitted or damaged over time through wear and tear.
Request a fixed price quote for your wood floor restoration now
Simply enter your postcode below to get started.
Services
Wood Floor Sanding Wood Floor Restoration Wood Floor Scratch Repair Squeaky Wood Floor Repair Parquet Floor Sanding Parquet Floor Restoration Commercial Floor Sanding Church Floor Sanding Community Centre Floor Sanding School Floor Sanding Gap Filling Gap Filling with ResinCopyright © Mr Sander®
Privacy & Cookies Terms & Conditions Complaints Procedure Cancellation Rights Sitemap

Get An Instant Price Estimate Before You Go…
Simply enter the rooms you need sanded and we’ll provide you with a price estimate instantly! Try our price calculator now.
Get a Price Estimate NowLocal Floor Sanding Experts
Over 500 5-Star Reviews
Safe, Dust Free Sanding
Operating Since 1994