London:
Nationwide:
25,000+
Floors Restored
27 Years Experience
Wood Flooring Association Certified
Wood Floor Staining & Gap Filling
VIEW PRICINGWood Floor Staining and Gap filling
Wood Floor Staining
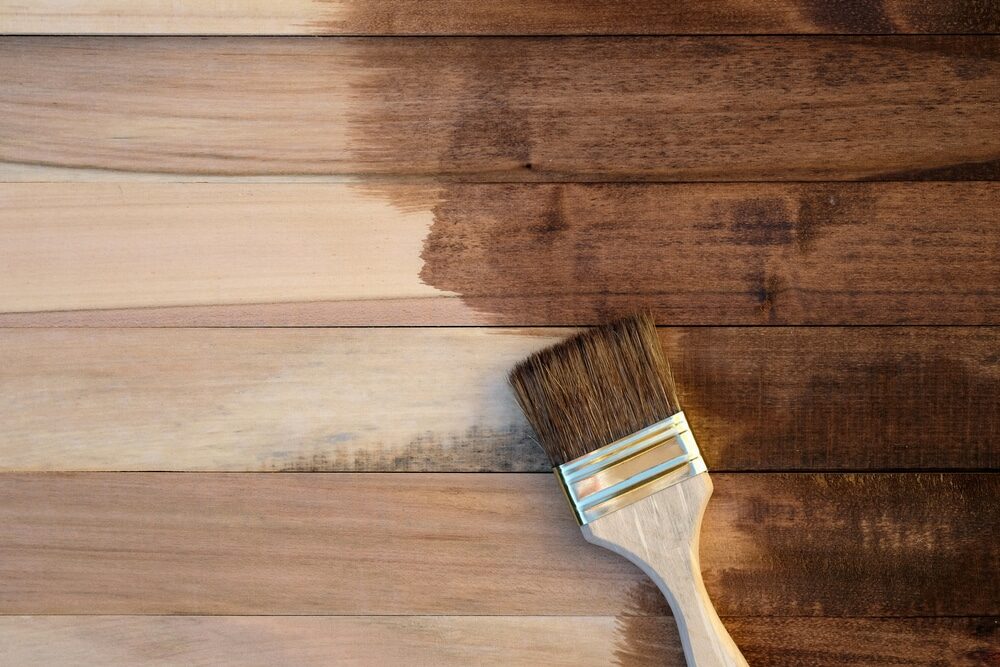
Wood floor staining is not just a process; it’s an art that breathes new life into your floors. Staining alters the wood’s color, such as darkening a pine floor, to match your aesthetic preferences. Unlike paint, which masks the wood’s natural beauty, stains accentuate the grain, adding depth and character to your floors.
Our Process of Staining & Varnishing
The process of staining and varnishing wood floors is a meticulous and transformative technique that enhances the natural beauty of the wood while providing long-lasting protection. Here’s an in-depth look at each step of the process:
1. Choosing the Right Stain The journey begins with selecting the appropriate stain for your wood floor. This choice depends on the type of wood, the desired aesthetic, and the overall design of the space. Stains come in a variety of shades and types, from oil-based to water-based, each imparting a different character to the wood.
2. Preparing the Floor Preparation is key to achieving a flawless finish. The floor must be sanded to a smooth surface, removing any old finish, dirt, or imperfections. This step ensures that the stain applies evenly and adheres properly to the wood.
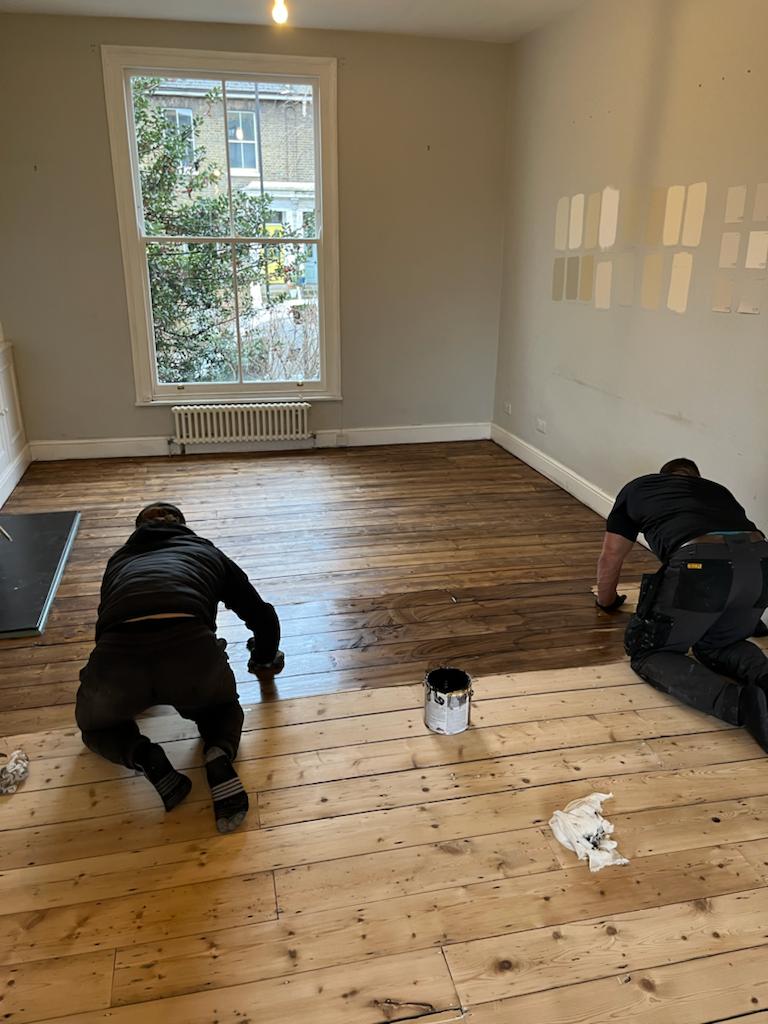
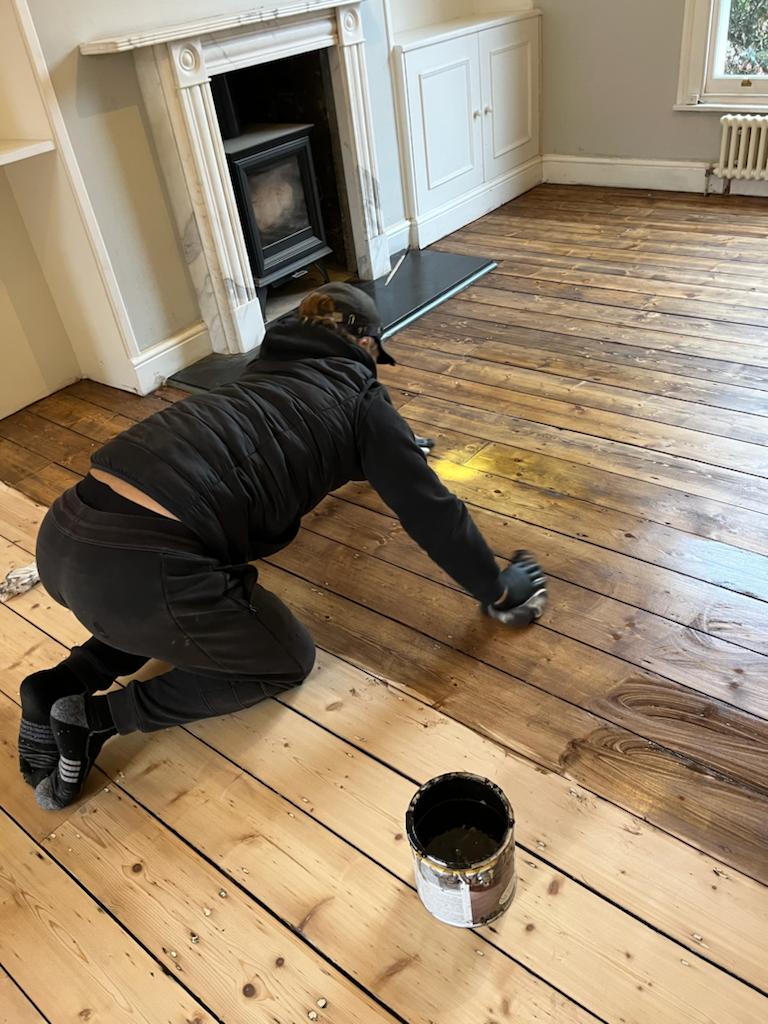
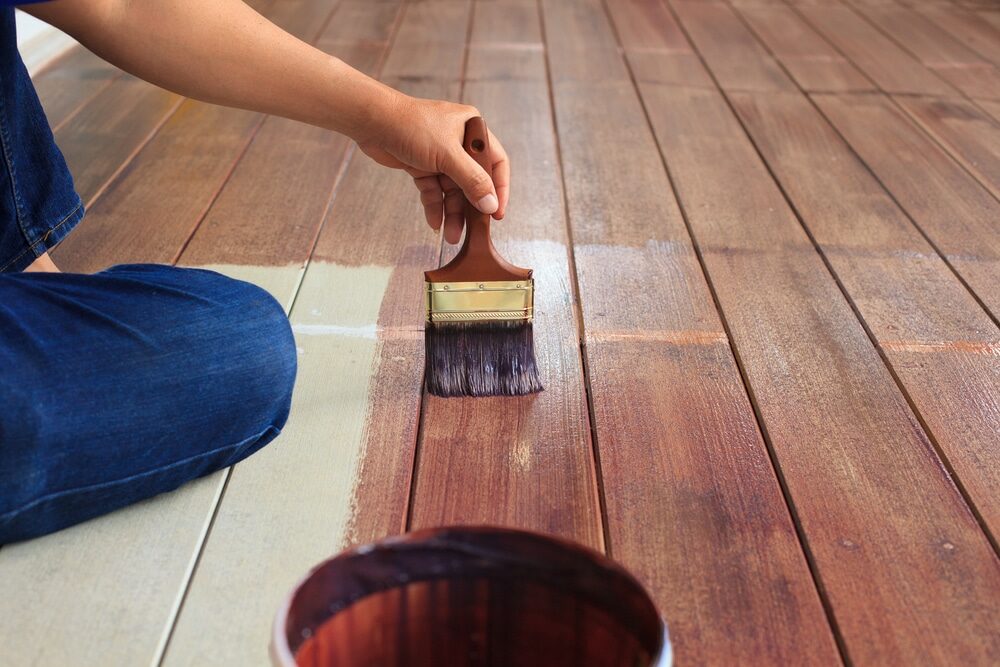
3. Applying the Stain The stain is then applied either by hand or with a roller, depending on the floor’s size and the stain’s characteristics. This process requires precision and an even hand to avoid streaks and ensure uniform coverage. The stain is left to penetrate the wood, with the duration varying based on the type of stain and the desired depth of color.
4. Wiping Off Excess Stain After the stain has sufficiently soaked into the wood, any excess is wiped off. This step is crucial to prevent blotchiness and to maintain an even color across the floor.
5. Allowing Adequate Drying Time The stained floor needs time to dry completely before applying the varnish. The drying time can range from several hours to a day, depending on the stain type and environmental conditions.
6. Applying the Varnish Once the stain is dry, a varnish or sealant is applied. This layer provides a protective coating that guards against wear, tear, and moisture, extending the life of the wood floor. The choice of varnish can range from matte to high gloss, depending on the desired finish.
7. Final Drying The varnished floor requires time to dry thoroughly. During this period, it is important to keep the area free from traffic and dust, which could mar the finish.
8. Optional Second Coat Depending on the desired level of protection and sheen, a second coat of varnish may be applied. This step is typically done after the first coat has dried completely and is often recommended for high-traffic areas.
9. Curing Time After the final coat of varnish, the floor needs a curing period before it can be used normally. This duration varies but is crucial for the longevity and durability of the finish.
Customization Options: Paint and Colored Wax
Customization options in wood floor staining offer a unique opportunity to personalize the look and feel of your living space. Two popular methods are the use of paint and colored wax, each providing distinct finishes and effects on wood floors.
Painting Wood Floors
Painting is an excellent option for those looking to change the appearance of their wood floors dramatically. It offers a wide range of color choices, enabling you to match the floors with the room’s decor or create a bold statement.
- Color Selection: The spectrum of paint colors available is vast, allowing for complete customization. You can choose from subtle, neutral tones to vibrant, bold hues depending on your interior design aspirations.
- Preparation: Like staining, the floor must be properly sanded and cleaned. This step is crucial for paint adherence and achieving a smooth finish.
- Application: Paint is typically applied using rollers or brushes. For a uniform look, it’s essential to apply even coats. Some choose to add decorative patterns or borders for a more customized and artistic effect.
- Durability: Floor paints are formulated to be durable, resisting wear and tear. However, they may require touch-ups over time, especially in high-traffic areas.
- Finish Options: You can choose from various finishes, including matte, satin, or glossy, depending on the desired look and maintenance considerations.
Using Colored Wax
Colored wax, such as Blanchon lime wax, offers a more subtle approach to floor customization. It’s ideal for enhancing the natural beauty of the wood while adding a hint of color.
- Tinting Effect: Colored waxes provide a soft, translucent color effect, allowing the wood grain to show through. This creates a more natural, organic look compared to paint.
- Application: Wax is typically applied with a cloth or brush in thin layers. It’s then buffed to a soft sheen, highlighting the wood’s texture and grain.
- Color Options: The range of colors in wax is more limited than paint but includes various tones that can complement the wood’s natural hues or add a subtle contrast.
- Maintenance: Waxed floors have a unique luster and feel but may require more frequent maintenance. The wax may need to be reapplied periodically to maintain the color and sheen.
- Eco-Friendly and Easy to Change: Waxes are often more environmentally friendly than paints and can be easier to change or remove if you decide to update your floor’s appearance in the future.
Both painting and colored wax treatments offer creative ways to personalize your wood floors. Paint provides a more drastic and opaque color change, while colored wax enhances the floor with a softer, more natural tint. Depending on your aesthetic preferences, maintenance willingness, and the overall design theme of your space, either option can significantly transform and elevate the look of your wood floors.
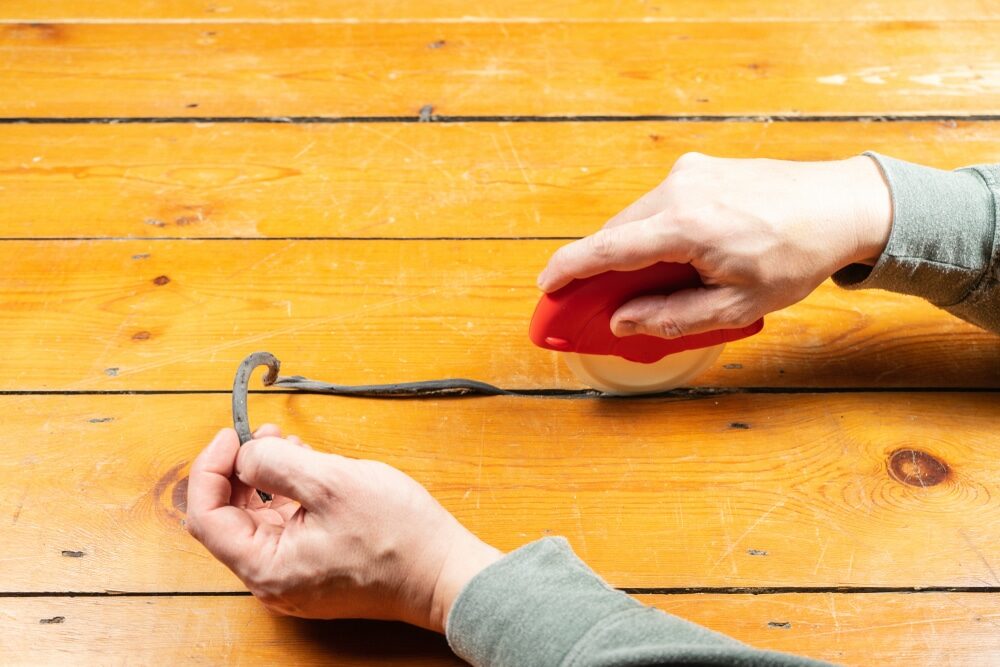
Gap Filling: The Finishing Touch
Gap filling in wood floors is a crucial aspect of the floor refinishing process, often considered the finishing touch that not only enhances the floor’s appearance but also its functionality and longevity. Here’s a detailed overview of the gap filling process:
Understanding the Importance of Gap Filling Gaps in wood floors can occur over time due to the natural expansion and contraction of wood with changes in humidity and temperature. Filling these gaps is important for several reasons:
- Aesthetics: Filling gaps creates a smooth, uniform appearance, making the floor look more polished and cohesive.
- Insulation: Gaps can let in drafts, affecting the thermal efficiency of a room. Filled gaps help improve insulation.
- Cleanliness: Open gaps can accumulate dirt and debris, making the floor harder to clean. Filling them simplifies maintenance.
- Structural Integrity: Filling gaps can help in maintaining the structural integrity of the floor by preventing excessive movement of the floorboards.
Materials Used for Gap Filling Various materials can be used for gap filling, depending on the size of the gaps and the type of wood floor:
- Wood Filler: A common choice for smaller gaps. It comes in different colors to match the wood floor.
- Sawdust and Resin Mixture: For a more natural look, especially for larger gaps, a mixture of sawdust (from the sanding process) and a resin binder can be used. This ensures a perfect color match.
- Slivers of Wood: In cases of wider gaps, slivers of wood can be inserted and then sanded down to create a seamless appearance.
The Gap Filling Process
- Floor Preparation: The floor is thoroughly cleaned and sanded to ensure a smooth surface for effective gap filling.
- Application: The chosen filling material is carefully applied to the gaps. Precision is key to ensure a smooth, even fill without damaging the surrounding wood.
- Drying Time: The filler material needs time to dry and harden. The duration varies based on the material used and environmental conditions.
- Sanding: Once dry, the excess filler is sanded off to create a level surface with the rest of the floor.
- Final Inspection: A thorough inspection is done to ensure all gaps are filled properly and the floor surface is even and smooth.
- Post Gap-Filling Care After gap filling, it’s essential to maintain the floor properly. Regular cleaning and avoiding excessive moisture can help preserve the integrity of the filled gaps and the overall appearance of the floor.
Gap-filling is a delicate process that requires skill and attention to detail. It not only improves the look of your wood floors but also contributes to their durability and functionality. By selecting the right materials and employing proper techniques, gap filling can significantly enhance the overall quality and longevity of your wood flooring.
Maintaining Your Stained Wood Floors
Post-staining maintenance is key to preserving the beauty of your floors. Regular cleaning with appropriate products, avoiding harsh chemicals, and periodic touch-ups help maintain the luster and longevity of the stain.
Expert Consultation and Services
Our team of experts is ready to guide you through the staining process, from selecting the right stain to the final touches. We provide professional services, ensuring your floor transformation is smooth, efficient, and aligned with your vision.
Wood Floor Staining & Gap Filling for All Types of Floors
- Pine floorboards
- Parquet
- Cork
- Granwood
- Engineered wood flooring
- Solid Wood Floors
- Bamboo
Contact US
If you’re ready to transform the look and feel of your wood floors, or have any questions about our services, we invite you to get in touch with us. Our team of skilled professionals is dedicated to providing you with the best solutions for wood floor staining, gap filling, and maintenance. Whether you’re looking for advice on the right stain color, need assistance with a complete floor refurbishment, or have any concerns about maintaining your wood floors, we’re here to help. Contact us today via phone, email, or our online form to schedule a consultation or to discuss your flooring needs. We look forward to helping you enhance the beauty and longevity of your floors with our expert services.
For the best Wood Floor Staining & Gap Filling Service – Get a Quote or Call us on 020 7381 9408

Check out our amazing customer reviews…

Chris and Christina
August 2023

Jeff Jones
August 2023

Rocco DeLuca
July 2023
Sanding
We provide virtually dust-free sanding with our continuous belt machinery with mobile extraction units, giving you a safer environment for your family.
Oiling
This organic finish not only adds beauty to your home but also has exceptional water-repellent characteristics, making it easier to clean and maintain.
Waxing
This natural floor finish offers the softest and most mellow appearance – and leaves your floor able to breath.
Buffing
Using soft buffing machines (and hand-polishing where required) will bring a wonderful sheen to your newly-finished floor.
Repairs
We offer a full assessment of your wooden floors to determine what repairs are needed to provide the perfect working surface for the later stages of sanding, staining and sealing.
Restoration
We offer a comprehensive restoration process designed to address floors that are improperly fitted or damaged over time through wear and tear.
Request a fixed price quote for your wood floor restoration now
Simply enter your postcode below to get started.
Services
Wood Floor Sanding Wood Floor Restoration Wood Floor Scratch Repair Squeaky Wood Floor Repair Parquet Floor Sanding Parquet Floor Restoration Commercial Floor Sanding Church Floor Sanding Community Centre Floor Sanding School Floor Sanding Gap Filling Gap Filling with ResinCopyright © Mr Sander®
Privacy & Cookies Terms & Conditions Complaints Procedure Cancellation Rights Sitemap

Get An Instant Price Estimate Before You Go…
Simply enter the rooms you need sanded and we’ll provide you with a price estimate instantly! Try our price calculator now.
Get a Price Estimate NowLocal Floor Sanding Experts
Over 500 5-Star Reviews
Safe, Dust Free Sanding
Operating Since 1994