London:
Nationwide:
25,000+
Floors Restored
27 Years Experience
Wood Flooring Association Certified
The Science Behind Buffing for Floor Sanding
Posted on October 21, 2023
Buffing
Unveiling the Techniques: The Science Behind Buffing for Wood Floor Sanding
The allure of gleaming, well-maintained wooden floors is undeniable, bringing a sense of warmth, elegance, and natural beauty to any space. However, achieving and maintaining this aesthetic is not just a matter of luck; it requires a deep understanding of the materials and processes involved. One of the critical steps in this journey is the process of buffing during wood floor sanding, a technique that, when executed correctly, can transform a dull, scratched surface into a masterpiece of craftsmanship. This article delves into the fascinating science behind buffing for wood floor sanding, unraveling the complex interactions between tools, materials, and techniques that lead to the perfect finish.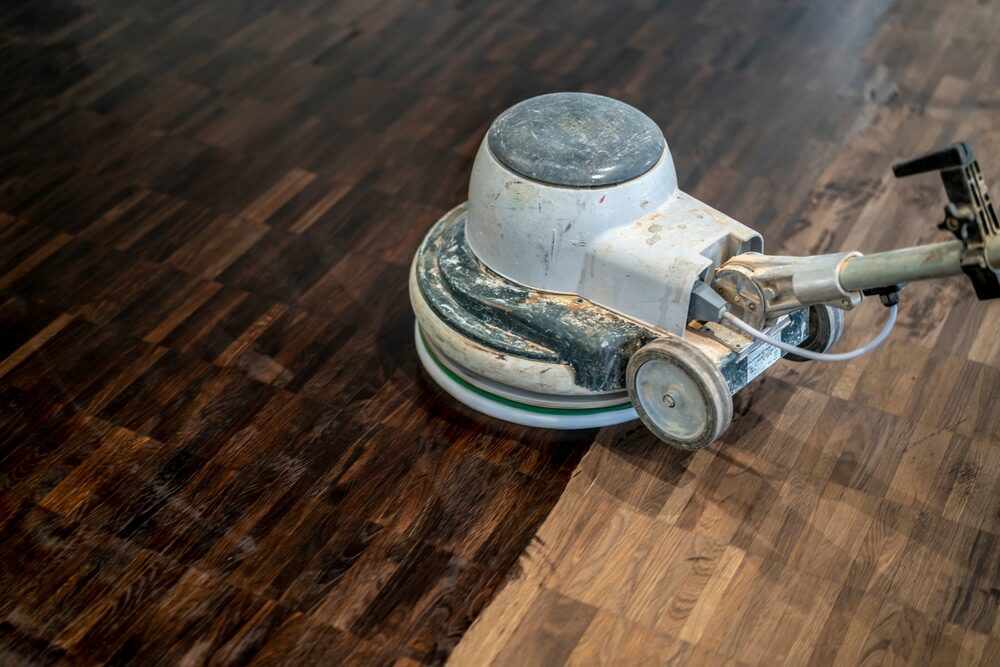 Buffing as a part of wood floor sanding is more than just a mere step in the restoration process; it is an art form backed by science, demanding precision, understanding, and skill. The process involves the use of specialised equipment and abrasives to smooth out the surface of the wood, preparing it for the final finish. However, the science behind buffing is intricate, involving aspects of material science, physics, and engineering. Understanding the fundamentals of how buffing works, the types of machines used, the selection of abrasive materials, and the techniques employed is crucial for anyone looking to master the art of wood floor restoration.
Wooden floors, with their timeless appeal, have been a preferred choice for homeowners and artisans for centuries. The process of sanding and buffing is integral to their upkeep, ensuring they remain in pristine condition despite the wear and tear of daily life. As we explore the scientific principles underpinning the buffing process, it becomes clear that this is a pivotal stage in floor restoration, one that requires careful consideration and expertise. From understanding the properties of the wood itself to selecting the appropriate equipment and materials for the job, every decision made during the buffing process plays a crucial role in achieving the desired outcome. With this comprehensive guide, we aim to demystify the science behind buffing for wood floor sanding, providing insights, tips, and knowledge to empower homeowners and professionals alike.
Buffing as a part of wood floor sanding is more than just a mere step in the restoration process; it is an art form backed by science, demanding precision, understanding, and skill. The process involves the use of specialised equipment and abrasives to smooth out the surface of the wood, preparing it for the final finish. However, the science behind buffing is intricate, involving aspects of material science, physics, and engineering. Understanding the fundamentals of how buffing works, the types of machines used, the selection of abrasive materials, and the techniques employed is crucial for anyone looking to master the art of wood floor restoration.
Wooden floors, with their timeless appeal, have been a preferred choice for homeowners and artisans for centuries. The process of sanding and buffing is integral to their upkeep, ensuring they remain in pristine condition despite the wear and tear of daily life. As we explore the scientific principles underpinning the buffing process, it becomes clear that this is a pivotal stage in floor restoration, one that requires careful consideration and expertise. From understanding the properties of the wood itself to selecting the appropriate equipment and materials for the job, every decision made during the buffing process plays a crucial role in achieving the desired outcome. With this comprehensive guide, we aim to demystify the science behind buffing for wood floor sanding, providing insights, tips, and knowledge to empower homeowners and professionals alike.
Understanding wood floors
Understanding the intricacies of wood floors is crucial for anyone looking to master the art of buffing and floor sanding. Wooden floors are celebrated for their natural beauty, durability, and warmth they bring to a space. However, they also require regular maintenance and a thorough understanding of their properties to ensure they remain in excellent condition. In this section, we’ll delve into the different types of wood floors, their structure, and the factors that can affect their longevity and appearance.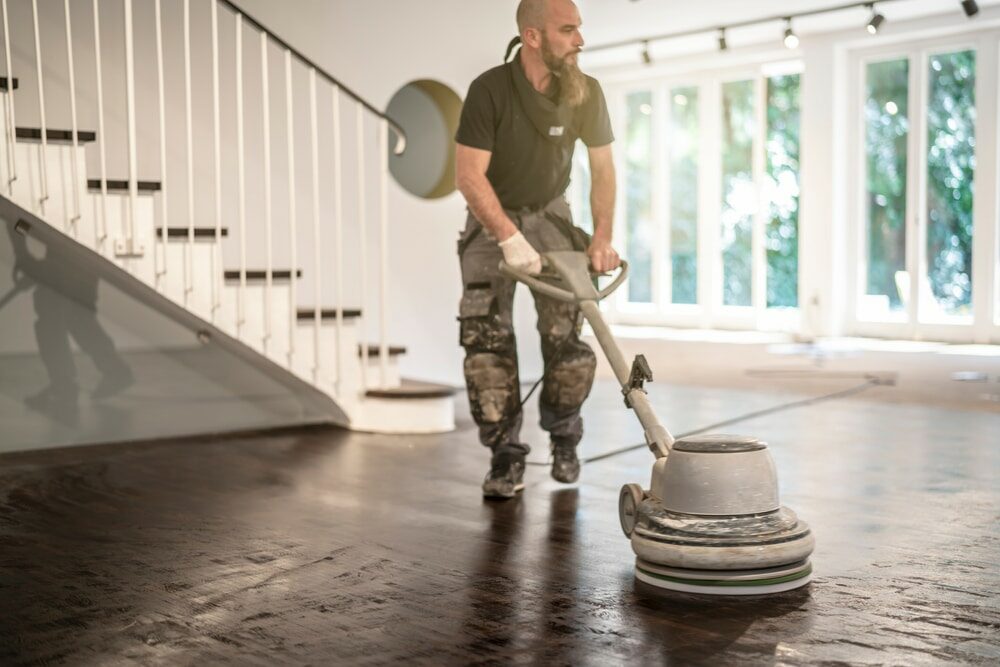
Types of Wood Floors
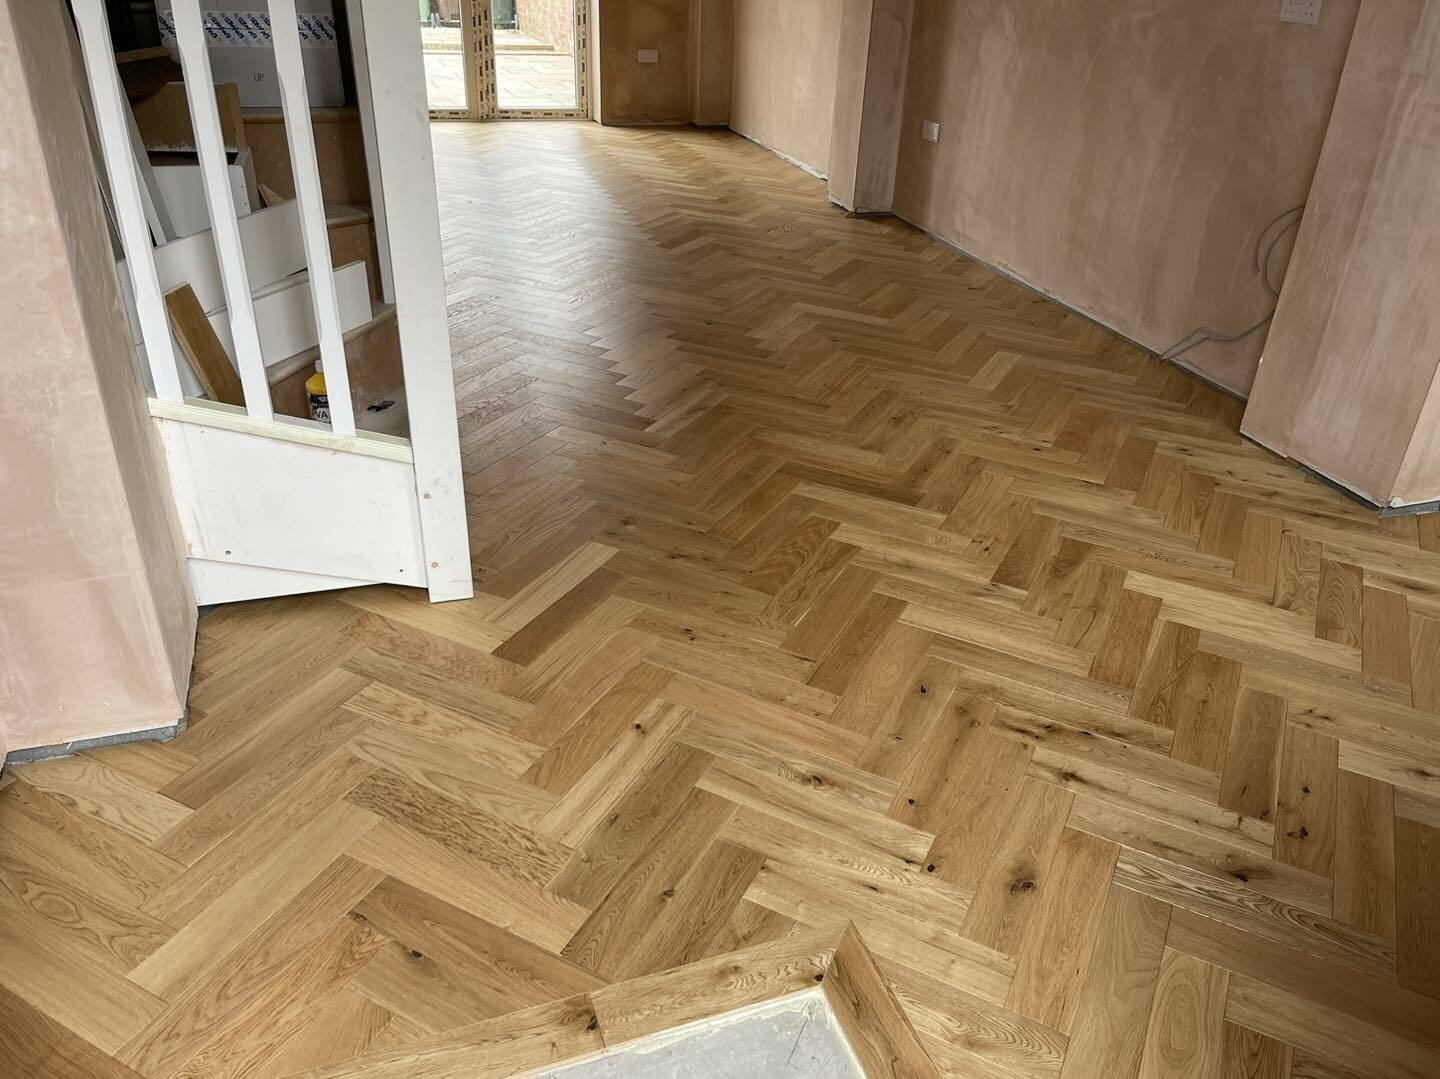
Wood floors can be broadly categorised into three main types: solid hardwood, engineered wood, and laminate.- Solid Hardwood: This type of flooring is made from single pieces of hardwood cut into planks. Popular choices of wood include oak, maple, and cherry. Solid hardwood floors can last for decades if properly maintained, and they can be sanded and refinished multiple times to restore their appearance.
- Engineered Wood: Engineered wood flooring consists of a thin layer of hardwood bonded over a layer of plywood. This construction provides stability and resistance to changes in temperature and humidity, making engineered wood a good choice for areas with varying climate conditions.
- Laminate: While not actually made of wood, laminate flooring consists of a photographic layer of wood atop a core board. It’s more affordable than real wood and is resistant to scratches, making it a popular choice for high-traffic areas.
Structure of Wood Floors
Understanding the structure of wood floors is essential for effective buffing and sanding. Wood is a natural material that reacts to changes in its environment, and its structure can influence how it responds to the sanding and buffing processes.- Grain: The grain of the wood refers to the pattern of its fibers. Woods with a straight grain are typically easier to sand and buff evenly, while woods with a more irregular grain pattern may require more attention to avoid damage.
- Hardness: The Janka Hardness Scale measures the resistance of wood to wear and denting. Harder woods, such as hickory or maple, can be more challenging to sand and buff but are more resistant to damage. Softer woods, like pine, are easier to work with but are more susceptible to dents and scratches.
- Moisture Content: Wood is hygroscopic, meaning it absorbs and releases moisture from the environment. The moisture content of the wood can affect how it responds to sanding and buffing. Woods with a high moisture content may be more prone to damage, while overly dry wood can be brittle.
Factors Affecting Wood Floors
Several external factors can influence the appearance and longevity of wood floors, and understanding these is key to proper maintenance.- Climate: Changes in temperature and humidity can cause wood to expand and contract, potentially leading to warping or gaps between planks.
- Wear and tear: high-traffic areas are more prone to scratches and wear, requiring more frequent maintenance.
- Sunlight: Prolonged exposure to sunlight can cause wood to fade or change colour.
- Cleaning Products: Using the wrong cleaning products can damage the finish of the wood, leading to a dull appearance.

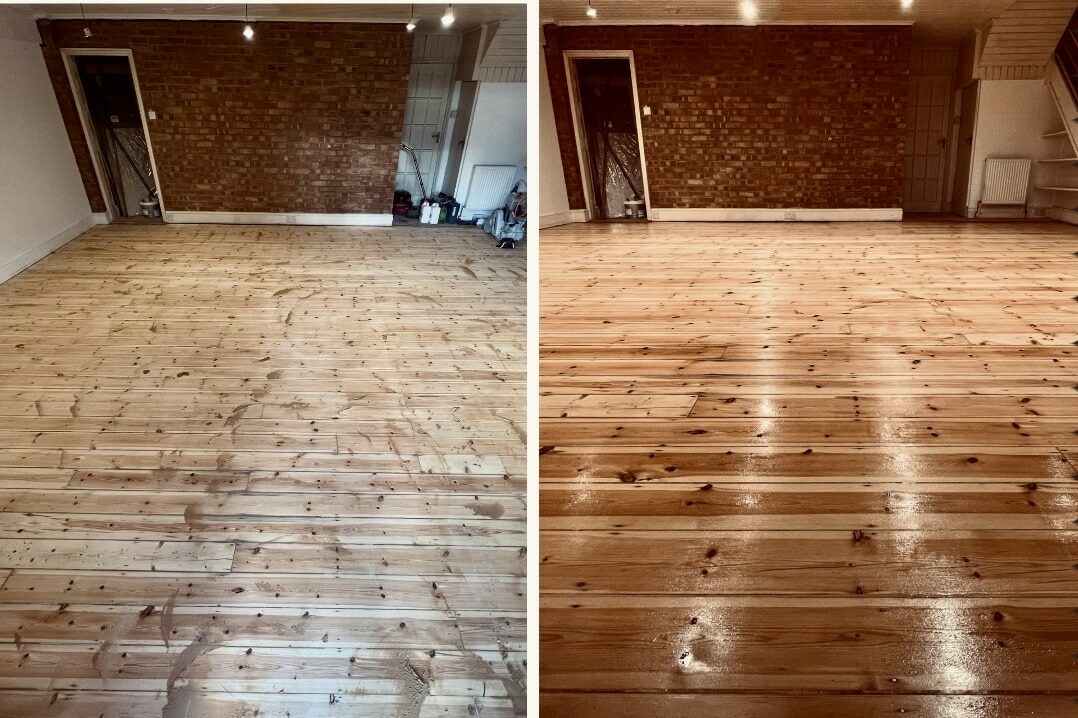
The Science of Wood Floor Sanding
Wood floor sanding is a multifaceted process that involves removing the top surface of a wooden floor, be it solid hardwood, engineered wood, or even laminate, to reveal a fresh, unblemished layer beneath. This process is critical for removing scratches, dents, and old finishes, as well as for levelling the floor and preparing it for a new finish. The science behind wood floor sanding revolves around understanding the properties of the wood, the mechanics of the sanding tools, and the interaction between the abrasive materials and the wood surface.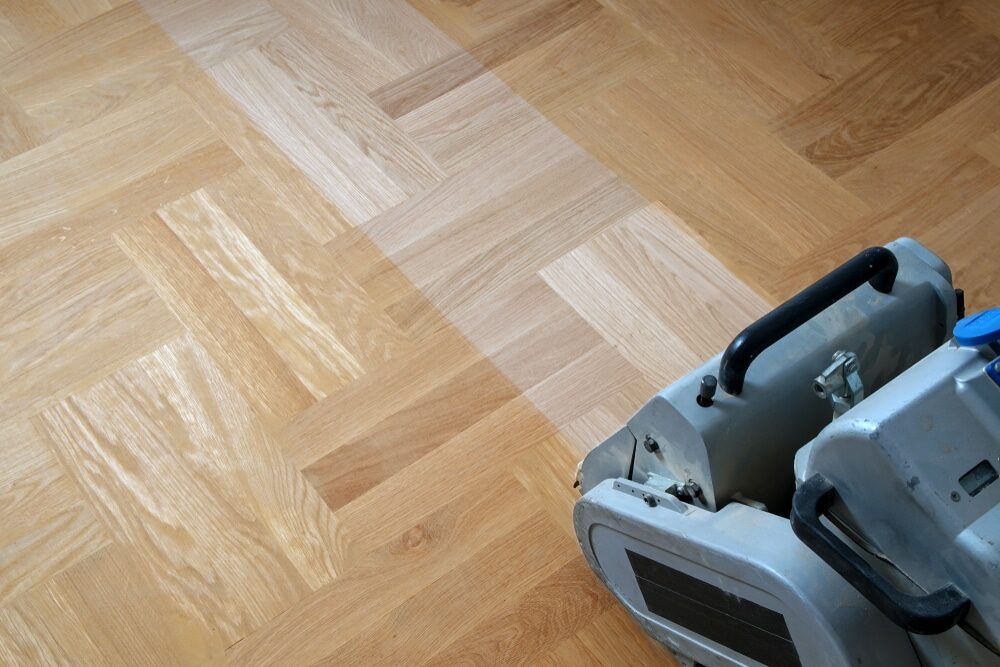
1. The Sanding Process
The sanding process typically involves three main stages: coarse sanding, fine sanding, and buffing.- Coarse Sanding: This initial stage removes the old finish and any significant imperfections in the wood. Coarser-grit sandpaper is used to strip away the top layer quickly.
- Fine Sanding: After the coarse sanding, finer-grit sandpaper is used to smooth out the surface, preparing it for the finishing stage.
- Buffing: The final stage of the sanding process, buffing, uses a buffing machine with a softer pad and fine abrasives to create a perfectly smooth surface. This stage is crucial for achieving a uniform finish and enhancing the natural beauty of the wood.
2. Mechanics of Sanding Tools
Understanding the mechanics of the sanding tools is essential for achieving an even and smooth finish.- Belt Sanders: These powerful tools are typically used for the initial coarse sanding stage. They have a continuous loop of sandpaper that is driven around two drums, quickly removing the top layer of the wood.
- Orbital Sanders: These sanders move in a circular or back-and-forth motion and are used for the finer sanding stages. They are less aggressive than belt sanders and provide more control for achieving a smooth surface.
- Buffing Machines: These machines use a rotating pad to apply a fine abrasive to the wood surface. The pad moves in a circular motion, smoothing out any remaining imperfections and creating a uniform finish.
3. Interaction of Abrasives and Wood
The type of abrasive material used and its interaction with the wood surface are critical aspects of the sanding process.- Grit Size: The size of the abrasive particles, or grit, determines the amount of material that is removed with each pass. Coarser grits remove more material but leave a rougher surface, while finer grits create a smoother surface but remove less material.
- Material of Abrasives: Different abrasive materials have different properties. For example, aluminium oxide is a common abrasive material that is durable and suitable for sanding hardwood floors.
- Pressure and Speed: The amount of pressure applied and the speed of the sanding tools also play a crucial role in the sanding process. Too much pressure or too high a speed can lead to uneven removal of the wood surface, while too little pressure or speed can be inefficient.
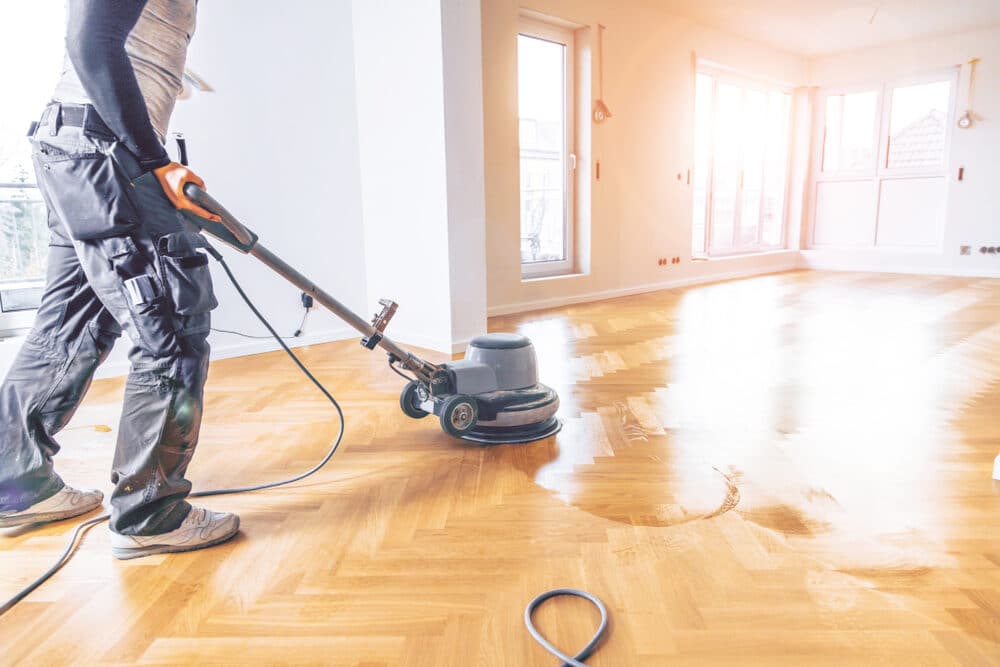
4. The Role of Buffing in Sanding
Buffing is an integral part of the wood floor sanding process, bridging the gap between sanding and finishing.- Smoothing the Surface: Buffing helps to remove any remaining imperfections after sanding, creating a perfectly smooth surface.
- Enhancing the Grain: The buffing process can also help to enhance the natural grain of the wood, bringing out its beauty and character.
- Preparing for Finish: A smoothly buffed floor ensures that the finish can be applied evenly, resulting in a uniform and durable finish.
Buffing: An Essential Step
Buffing stands as an essential and transformative step in the wood floor sanding and refinishing process. This crucial stage bridges the gap between the coarse and fine sanding phases and the application of the finish, ensuring a flawless and durable final product. By delving into the mechanics, techniques, and benefits of buffing, we can gain a comprehensive understanding of its vital role in wood floor restoration.
The mechanics of buffing
Buffing utilises a high-speed rotary machine equipped with a pad that spins at velocities ranging from 175 to 3000 RPM. This rapid motion generates heat and friction, which, when combined with fine abrasive particles, work to smooth and polish the wood surface. 1. Buffing Pads: Buffing pads are typically made of soft, resilient materials like microfibre or synthetic fibre, which conform to the wood’s surface, ensuring an even application of pressure and abrasion. 2. Abrasive Particles: Fine abrasive particles, often in the form of a screen or pad, are used in conjunction with the buffing pad. These particles gently abrade the wood surface, smoothing out any remaining imperfections from the sanding process.Techniques and best practices
Achieving optimal results from buffing requires mastery of specific techniques and adherence to best practices. 1. Consistent Overlap: Moving the buffer along a path where each pass overlaps the previous one ensures uniform coverage and prevents missed spots or uneven abrasion. 2. Gradual Progression: Just as with sanding, it’s important to progress gradually from coarser to finer abrasives during buffing to ensure the smoothest possible finish. 3. Controlled Speed and Pressure: Maintaining a consistent speed and pressure prevents swirl marks and ensures an even polish. Too much pressure or speed can lead to uneven buffing, while too little can be ineffective.Benefits of Wood Floor Buffing
Wood Floor Buffing provides a multitude of benefits, making it an indispensable step in the wood floor restoration process. 1. Removal of Fine Scratches: Even after fine sanding, microscopic scratches may remain on the wood surface. Buffing effectively removes these scratches, creating a glass-smooth finish. 2. Enhanced Wood Grain: The buffing process can accentuate the natural grain of the wood, bringing out its inherent beauty and character. 3. Optimal Finish Adhesion: Buffing creates a surface that is perfectly prepared for the application of finish, ensuring optimal adhesion and longevity of the protective coating. 4. Uniform Sheen: Buffing helps to create a consistent sheen across the floor, resulting in a more professional and aesthetically pleasing final product.Common Challenges and Solutions
While buffing is a powerful tool in wood floor restoration, it is not without its challenges. 1. Swirl Marks: These are circular scratches that can be caused by uneven buffing. Ensuring consistent overlap and maintaining a steady speed and pressure can mitigate this issue. 2. Dust Control: Buffing can generate a significant amount of fine dust. Using a buffer equipped with a dust containment system helps to minimise this issue and maintain a clean work environment. 3. Choosing the Right Abrasives: Selecting the appropriate abrasive for the specific type of wood and desired finish is crucial for achieving the best results. Buffing is a pivotal step in the wood floor restoration process, integral to achieving a smooth, even, and durable finish. By mastering the mechanics and techniques and addressing the common challenges associated with buffing, one can ensure that this vital step enhances the natural beauty of the wood and provides a stable foundation for the protective finish. The results are floors that not only look stunning but also stand the test of time, preserving the integrity and aesthetic appeal of the wood for years to come.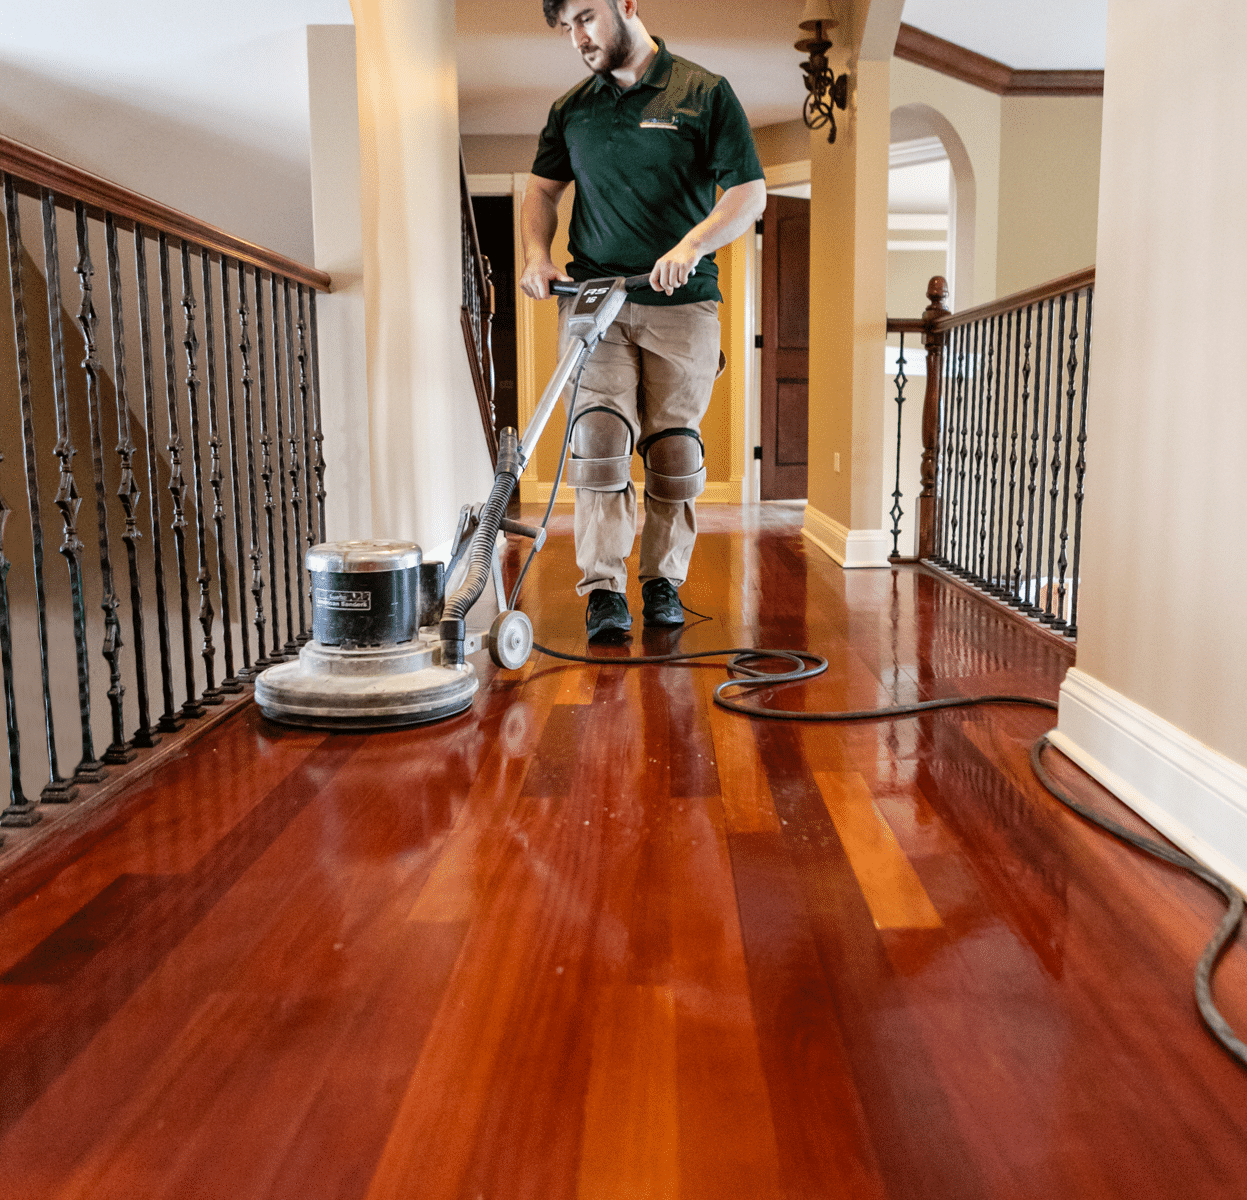
Best Practices for Buffing
Buffing is a critical step in the wood floor refinishing process, ensuring a smooth, flawless finish and preparing the floor for the final protective coating. To achieve the best results, it’s essential to follow best practices that take into account the type of wood, the condition of the floor, and the desired outcome. Here are some of the best practices for buffing wood floors:1. Proper preparation:
Before starting the buffing process, ensure that the floor is properly prepared. This includes completing all necessary sanding steps and thoroughly cleaning the floor to remove any dust or debris. Any nails or protrusions should be set below the surface of the wood to prevent damage to the buffing pad.2. Select the Right Buffing Pad and Abrasive:
Choose a buffing pad that is appropriate for the type of wood and the condition of the floor. Harder woods may require a more aggressive pad, while softer woods may need a softer pad. Similarly, select the right abrasive for the job. Finer abrasives will create a smoother finish, while coarser abrasives may be necessary for floors with more significant imperfections.3. Check the buffing machine:
Ensure that the buffing machine is in good working condition before starting. Check that the pad is securely attached and that there are no loose parts. If using a dust containment system, make sure it is properly connected and functioning.4. Work in Sections:
Divide the floor into sections and work on one section at a time. This ensures that you maintain a consistent pattern and pressure throughout the buffing process.5. Maintain a steady pace:
Move the buffer at a steady pace, overlapping each pass by about half the width of the buffer. Avoid moving too quickly, as this can lead to an uneven finish, but also avoid moving too slowly, which can generate excess heat and potentially damage the floor.6. Apply even pressure.
Apply even pressure throughout the buffing process. Uneven pressure can lead to swirl marks or an uneven finish.7. Keep the buffer moving:
Keep the buffer moving at all times when it is in contact with the floor. Allowing the buffer to remain in one spot for too long can cause damage to the floor.8. Regularly change abrasives:
As the abrasive wears down, it becomes less effective. Regularly check the abrasive and replace it as necessary to ensure consistent results.9. Clean Between Grits:
If progressing from coarser to finer abrasives, be sure to thoroughly clean the floor between each grit to remove any residual abrasive particles. This helps prevent scratches and ensures a smoother finish.10. Inspect the floor regularly.
Regularly inspect the floor to ensure that the buffing process is achieving the desired results. Look for any remaining imperfections or areas that may need additional attention.11. Use Proper Safety Equipment:
Buffing can generate a significant amount of dust, even if you use a dust containment system. Wear proper safety equipment, including a dust mask, eye protection, and ear protection, to protect yourself during the buffing process.12. Follow the manufacturer’s instructions:
If using a specific product or machine, be sure to follow the manufacturer’s instructions for use and safety.13. Finish with a Fine Grit:
For the smoothest finish, complete the Wood Floor Buffing process with the finest grit abrasive that is appropriate for the floor. By following these best practices, you can ensure a successful buffing process that results in a smooth, even finish, ready for the final protective coating. The extra care and attention to detail during the buffing process will pay off in the longevity and beauty of the finished floor.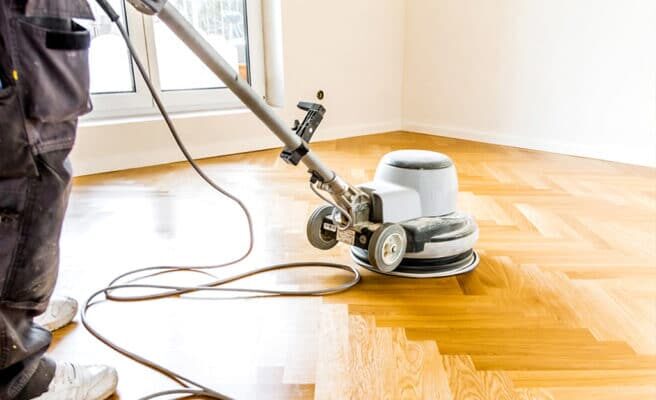
Common Mistakes to Avoid
Buffing is a crucial step in the wood floor refinishing process, and when done correctly, it can yield stunning results. However, there are several common mistakes that individuals often make during this process, which can lead to suboptimal outcomes. By being aware of these pitfalls, you can take proactive steps to avoid them and ensure a flawless finish.1. Insufficient preparation:
One of the most critical steps in buffing is adequate preparation. This includes thoroughly cleaning the floor to remove any dust, dirt, or debris and ensuring that all nails are properly set. Failure to properly prepare the floor can lead to scratches, swirl marks, and an uneven finish.2. Using the Wrong Grit Abrasive:
Choosing the correct grit of abrasive is essential. Using a grit that is too coarse can lead to scratches that are difficult to remove, while using a grit that is too fine may not effectively smooth out the floor. Ensure you are using the appropriate grit for the specific stage of the refinishing process and the condition of the floor.3. Inconsistent Overlap and Speed:
Maintaining a consistent overlap and speed is crucial for achieving a uniform finish. Failing to overlap passes adequately can result in missed spots, while moving the buffer too quickly or too slowly can lead to an uneven finish.4. Applying Uneven Pressure:
Applying uneven pressure during buffing can result in an uneven finish, with some areas smoother than others. Ensure that you are applying even pressure throughout the process to achieve a consistent finish.5. Not Changing Abrasives Regularly:
As abrasives wear down, they become less effective. Failing to change them regularly can lead to an uneven finish and prolong the buffing process. Regularly check the condition of the abrasive and replace it as needed.6. Neglecting to Clean Between Grits:
If you are progressing from a coarser to a finer grit, it is crucial to thoroughly clean the floor between each stage to remove any residual abrasive particles. Failure to do so can result in scratches and an uneven finish.7. Ignoring the grain direction:
For the best results, buff in the direction of the wood grain. Buffing against the grain can lead to scratches and an uneven finish.8. Failing to check the buffer:
Before starting the buffing process, ensure that the buffer is in good working condition and that the pad is securely attached. A malfunctioning buffer or loose pad can lead to an uneven finish.9. Not Using Proper Safety Equipment:
Buffing can generate a significant amount of dust, and it is crucial to use proper safety equipment, including a dust mask, eye protection, and ear protection.10. Rushing the Process:
Buffing requires patience and attention to detail. Rushing through the process can lead to mistakes and an uneven finish. Take your time and ensure that you are following all best practices.11. Neglecting to Finish with a Fine Grit:
For the smoothest possible finish, complete the buffing process with the finest grit abrasive that is appropriate for the floor. Skipping this step can result in a less-than-optimal finish.12. Ignoring the Manufacturer’s Instructions:
If using a specific product or machine, be sure to follow the manufacturer’s instructions for use and safety. By being aware of these common mistakes and taking steps to avoid them, you can ensure a successful buffing process that results in a smooth, even, and stunning wood floor finish. Remember, patience and attention to detail are key to achieving the best possible results.Advanced Buffing Techniques
Buffing wood floors is a skill that can be honed over time, and with the right techniques, it’s possible to achieve a flawless finish. Advanced buffing techniques go beyond the basics, utilising specialised equipment, materials, and methods to enhance the quality of the work. Here, we delve into some of these advanced techniques to help you take your buffing skills to the next level.1. Water Popping:
Water popping is a technique used to open the grain of the wood to allow for more even absorption of stains or finishes. After sanding and cleaning the floor, a damp (not wet) mop is used to apply water to the floor. The water causes the wood fibres to swell, opening up the grain. After the floor has dried completely, buffing is done with a very fine abrasive. This results in an exceptionally smooth surface and ensures a more uniform colour when stain is applied.
2. Using a Multi-Disc Sander:
A multi-disc sander (also known as a planetary sander) can be used for the buffing process. This type of machine has multiple rotating heads, providing more uniform pressure and reducing the risk of swirl marks. When using a multi-disc sander, it’s important to choose the right type of abrasive and to ensure that the machine is properly balanced.3. Burnishing:
Burnishing is a technique that involves buffing the floor at a very high speed, usually with a soft pad and no abrasive. This generates heat and friction, creating a glossy, polished finish. Burnishing is often done after the application of a finish to enhance the sheen of the floor. It requires a high-speed buffer and careful control to avoid overheating the floor.4. Using Specialty Abrasives:
There are a variety of specialty abrasives available that can be used for buffing. These include diamond abrasives, which are extremely durable and can provide a very smooth finish. There are also cushioned abrasives that have a foam backing, providing a more even finish on uneven floors.5. Edge buffing:
Edge buffing is a technique used to ensure that the edges of the floor are as smooth and consistent as the rest of the floor. This is done using a smaller, handheld buffer or a buffer with an edging attachment. It requires a steady hand and careful control to avoid damaging the baseboards or walls.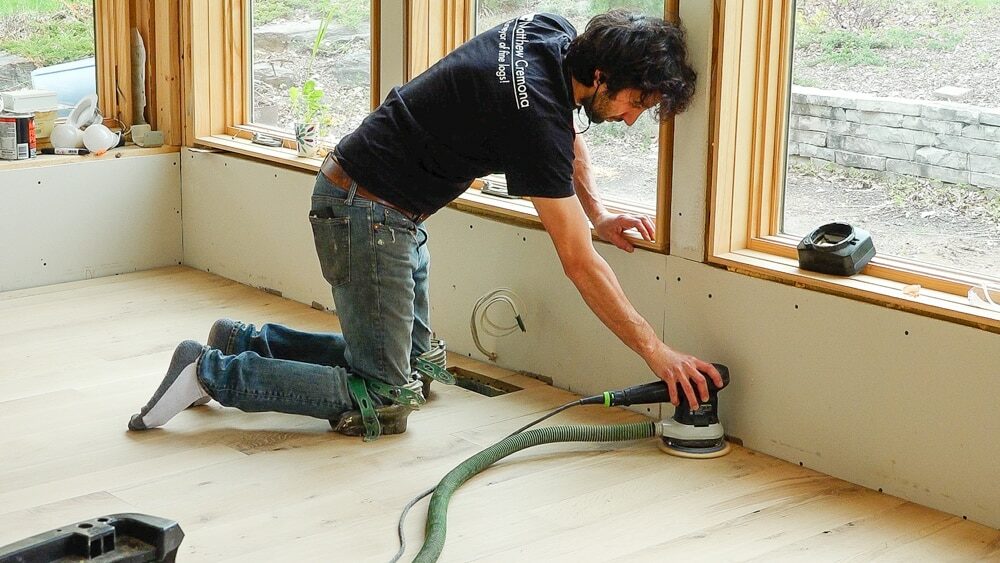
6. Blending Repaired Areas:
When repairing a section of flooring, it’s crucial to blend the repaired area with the rest of the floor. This is done by feathering out the buffing from the repaired area into the surrounding floor. It may require multiple passes with different grits to achieve a seamless transition.7. Advanced Dust Containment:
Dust can be a major issue during the buffing process, affecting both the quality of the finish and the health of the worker. Advanced dust containment systems can be used to minimise dust in the air and ensure a cleaner work environment. These systems attach to the buffer and use a vacuum to suck up the dust as it’s generated.8. Customising the Buffing Pad:
Customising the buffing pad can enhance the quality of the buffing. This can include using a thicker or thinner pad or layering multiple pads to achieve a specific result. The type of pad used can have a significant impact on the finish, and experimenting with different pads can lead to better results.9. Slow and controlled movements:
Advanced buffing often involves slower, more controlled movements. This allows for more precise control over the process and can result in a smoother finish. It requires patience and a steady hand, but the results are well worth the effort.10. Monitoring temperature and humidity:
The temperature and humidity in the room can affect the buffing process. Wood expands and contracts with changes in humidity, and high temperatures can cause finishes to dry too quickly. Monitoring and controlling environmental conditions can lead to more consistent results. By mastering these advanced buffing techniques, you can enhance the quality of your work and achieve stunning, professional-grade finishes. Remember that practice makes perfect, and don’t be afraid to experiment with different techniques to find what works best for you.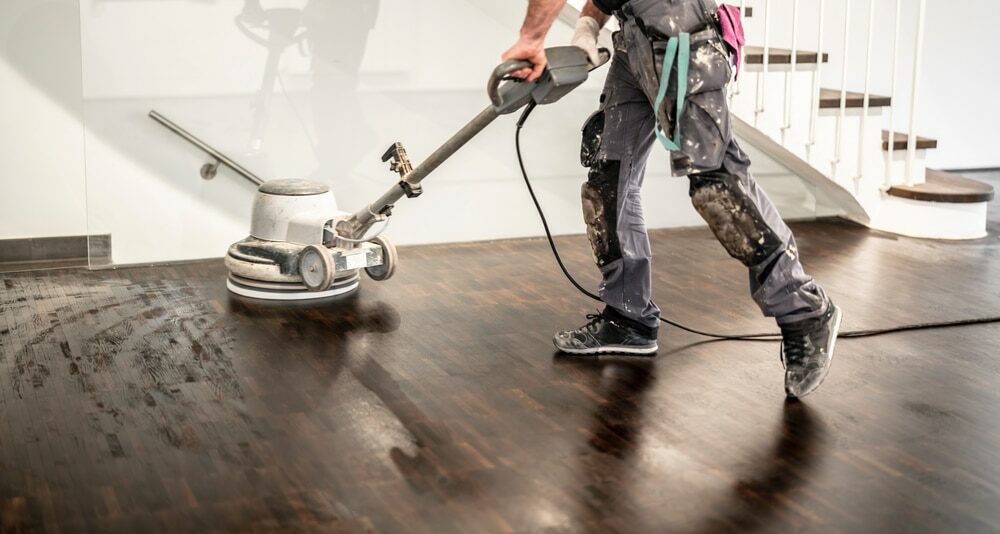
Conclusion
In conclusion, the art and science of buffing wood floors play a crucial role in achieving a flawless and durable finish. This intricate process requires a deep understanding of the wood’s characteristics, the proper equipment, and the adoption of precise techniques. By meticulously preparing the floor, selecting the appropriate abrasives, and executing advanced buffing techniques, one can ensure a smooth and even surface, ready for the final protective coating. Buffing Wood Floor not only helps to eliminate any remaining imperfections after sanding but also enhances the wood’s natural grain, resulting in a more aesthetically pleasing finish. It’s a step that should not be rushed or overlooked, as it significantly contributes to the longevity and beauty of the wood floor. Common mistakes during the buffing process, such as using the wrong grit abrasive, applying uneven pressure, or neglecting to clean between grits, can lead to unsatisfactory results. However, these pitfalls can be avoided by adhering to best practices, maintaining a keen eye for detail, and employing patience throughout the process. In the realm of wood floor refinishing, buffing stands out as a pivotal step that bridges the gap between the coarse work of sanding and the delicate application of finishes. It’s an opportunity to fine-tune the surface, ensuring that every inch of the floor reflects the care and craftsmanship invested in the process. As we embrace the science behind buffing and dedicate ourselves to mastering its techniques, we unlock the potential to transform any hardwood floor into a work of art, radiating warmth and elegance for years to come.Some Useful Links:
- Stairs Sanding & Refinishing
- Floor Sanding Services
- School Floor Sanding
- Wood Floor Restorations
- Wood Floor Repairs
- Wood Floor Polishing
More from our Blog:
DIY Buffing Techniques for Homeowners Buffing vs Polishing: What’s the Difference? Different Buffing Techniques for Hardwood Floors The Role of Buffing in Achieving a Smooth Finish How to Choose the Right Buffer for Floor Sanding How to Repair Damaged Floors with Belt Sanding Step-by-Step Guide to Belt Sanding Your Floors Innovative Techniques for Using Belt Sanders in Floor Refinishing How to Achieve a Perfectly Flat Surface with Belt Sanding for Floor Refinishing
Sanding
We provide virtually dust-free sanding with our continuous belt machinery with mobile extraction units, giving you a safer environment for your family.
Oiling
This organic finish not only adds beauty to your home but also has exceptional water-repellent characteristics, making it easier to clean and maintain.
Waxing
This natural floor finish offers the softest and most mellow appearance – and leaves your floor able to breath.
Buffing
Using soft buffing machines (and hand-polishing where required) will bring a wonderful sheen to your newly-finished floor.
Repairs
We offer a full assessment of your wooden floors to determine what repairs are needed to provide the perfect working surface for the later stages of sanding, staining and sealing.
Restoration
We offer a comprehensive restoration process designed to address floors that are improperly fitted or damaged over time through wear and tear.
Request a fixed price quote for your wood floor restoration now
Simply enter your postcode below to get started.
Services
Wood Floor Sanding Wood Floor Restoration Wood Floor Scratch Repair Squeaky Wood Floor Repair Parquet Floor Sanding Parquet Floor Restoration Commercial Floor Sanding Church Floor Sanding Community Centre Floor Sanding School Floor Sanding Gap Filling Gap Filling with ResinCopyright © Mr Sander®
Privacy & Cookies Terms & Conditions Complaints Procedure Cancellation Rights Sitemap

Get An Instant Price Estimate Before You Go…
Simply enter the rooms you need sanded and we’ll provide you with a price estimate instantly! Try our price calculator now.
Get a Price Estimate NowLocal Floor Sanding Experts
Over 500 5-Star Reviews
Safe, Dust Free Sanding
Operating Since 1994