London:
Nationwide:
25,000+
Floors Restored
27 Years Experience
Wood Flooring Association Certified
How to Achieve a Mirror-Like Finish with Buffing
Posted on December 31, 2023
Buffing

Mastering the Art of Achieving a Mirror-Like Finish through Buffing
When you admire the sleek shine of a luxury car’s exterior or the flawless finish on a fine piece of furniture, you’re likely looking at the result of a meticulous floor buffing process. Achieving a mirror-like finish through buffing is an art that not only enhances the aesthetic appeal of various surfaces but also speaks volumes about the craftsmanship behind it.
In this comprehensive guide, we’ll delve deep into the world of floor buffing and explore the techniques, tools, and materials required to transform dull and lacklustre surfaces into captivating reflections. Whether you’re an automotive enthusiast, a DIY home renovator, or a craftsman aiming for perfection, this blog post is your key to mastering the art of buffing.
Before we dive into the nitty-gritty of floor buffing, let’s first understand why achieving a mirror-like finish is so essential and what buffing actually entails. So, let’s get started on this journey to unlock the secrets behind creating surfaces that are not just polished but gleam with mirror-like perfection.
Materials and tools you’ll need
Before you embark on your journey to achieve a mirror-like finish through floor buffing, it’s essential to gather the right materials and tools. Having the appropriate supplies on hand will not only make the buffing process smoother but also ensure that you achieve the desired results. Here’s a list of the materials and tools you’ll need:
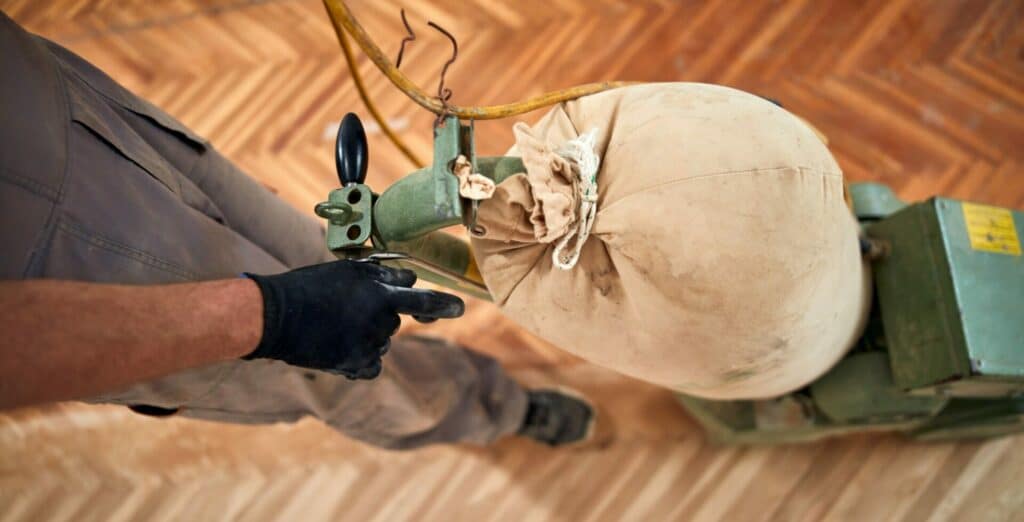
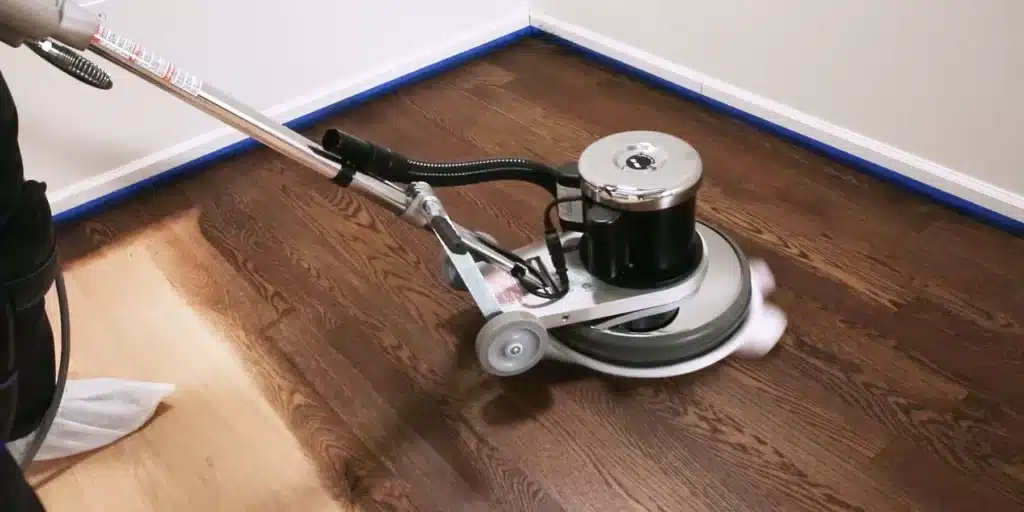
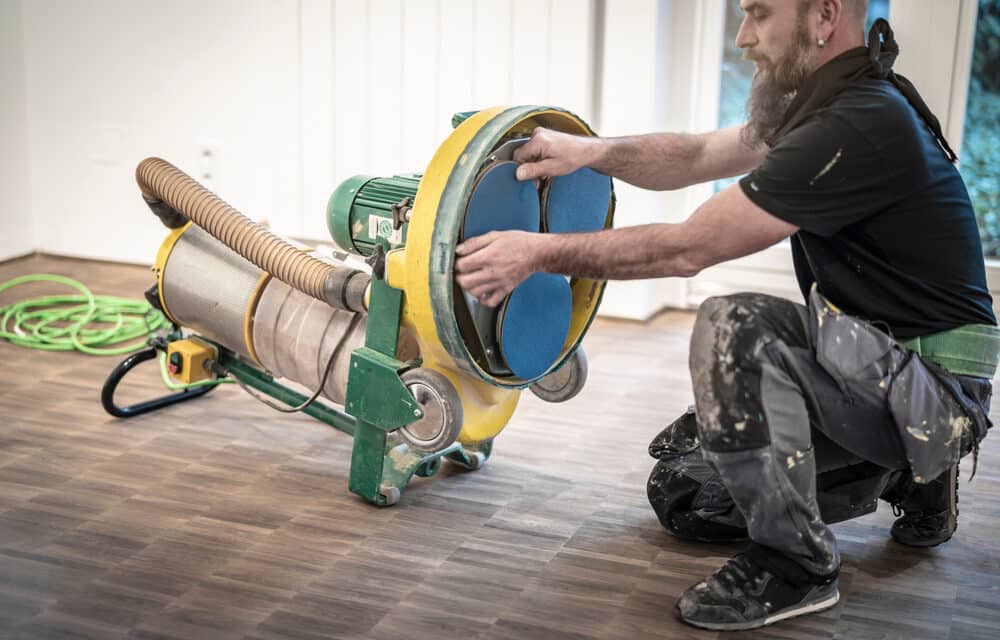
Buffing Machine:
- Depending on your specific project, you may require a rotary buffer, dual-action (DA) polisher, or orbital buffer. Choose the machine that suits your skill level and the surface you’re working on.

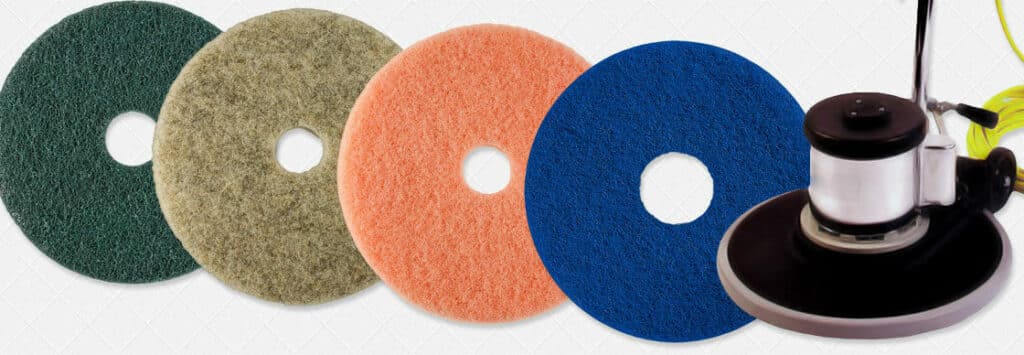
Buffing Pads:
- Buffing pads come in various materials and levels of aggressiveness. Select foam, wool, or microfiber pads based on the type of compound and the surface you’re buffing.
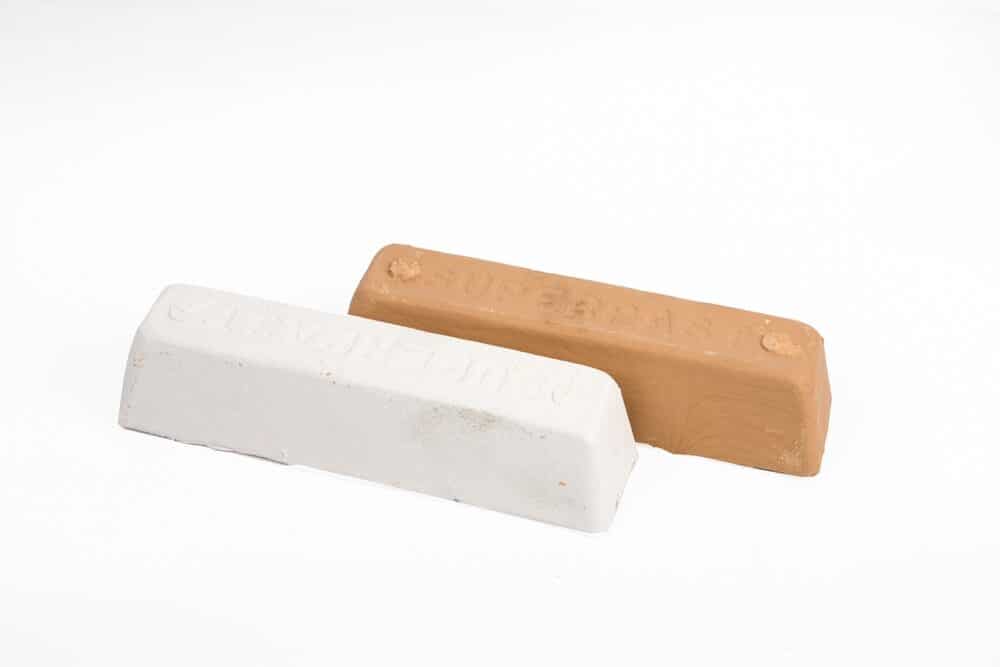
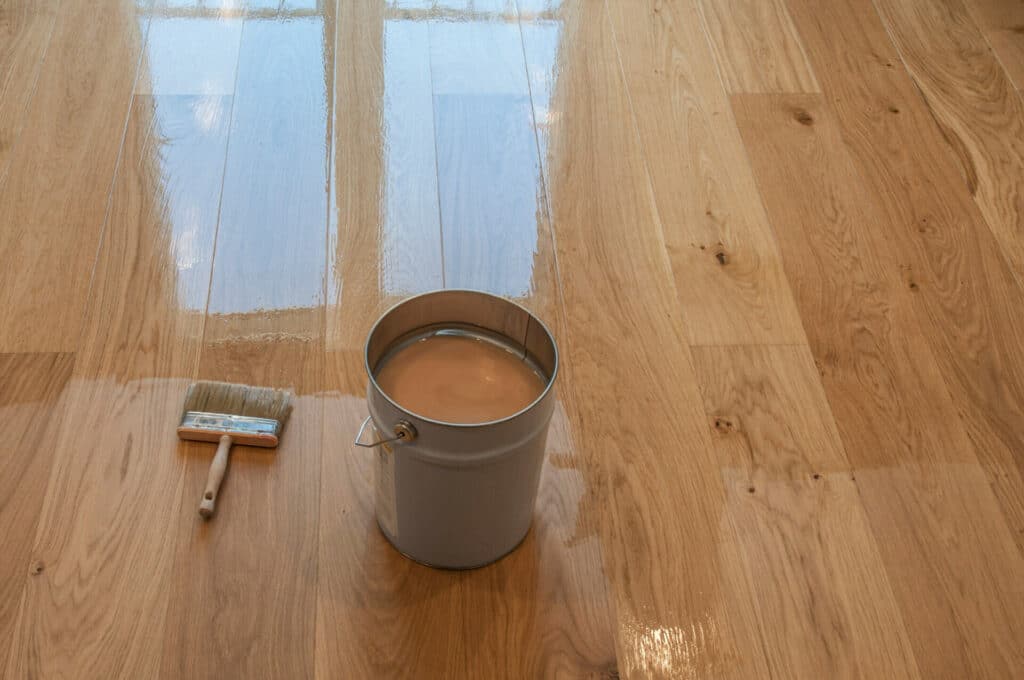
Buffing Compounds:
- Buffing compounds are available in different grits and formulations. Choose compounds suited to your project, including cutting compounds for initial passes and finishing compounds for the final shine.
Cleaners and degreasers:
- You’ll need appropriate cleaning products to remove dirt, grease, and contaminants from the surface before buffing.
Sanding Materials:
- Sandpaper or sanding blocks with varying grits (from coarse to fine) may be necessary for surface preparation, especially if you’re dealing with imperfections or scratches.
Safety Gear:
- Ensure your safety with personal protective equipment, including safety goggles, gloves, and a dust mask or respirator to protect against dust and chemical fumes.

Tape and plastic sheeting:
- Use masking tape and plastic sheeting to protect adjacent areas from splatter or compound overspray.
Extension Cords:
- Depending on your workspace, you might need extension cords to provide adequate reach for your buffing machine.
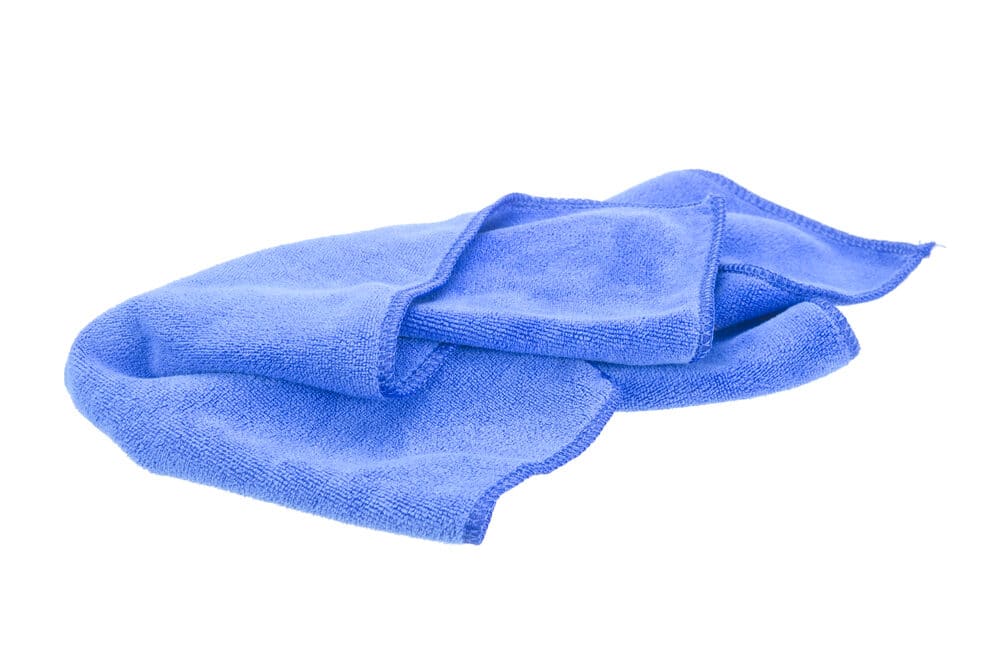
Microfiber Towels and Polishing Cloths:
- These are essential for wiping off excess compound and achieving the final gleaming finish.
Ventilation and lighting:
- Ensure good ventilation in your workspace to dissipate fumes, and have sufficient lighting to inspect your work closely.
Workbench or support stand:
- A stable work surface or support stand will make the floor buffing process more manageable and comfortable.
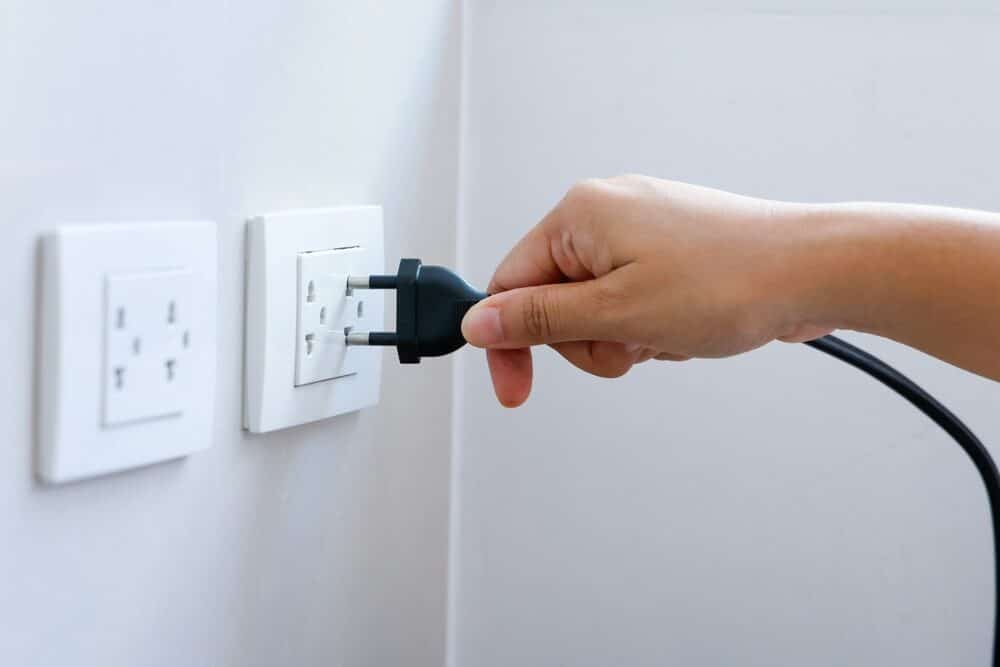
Power Source:
- Make sure you have access to a reliable power source to run your buffing machine without interruption.
Surface Preparation
Before you dive into the buffing process and aim for that mirror-like finish, it’s crucial to prepare the surface properly. Surface preparation lays the foundation for a flawless result, ensuring that imperfections, dirt, and contaminants are removed. Here’s how to prepare your surface effectively:
Cleaning and degreasing:
- Start by thoroughly cleaning the surface you intend to buff. Remove dirt, dust, and grime using a gentle detergent or an appropriate cleaner. For automotive surfaces, car wash soap or degreaser works well. For other materials, like metal or wood, choose cleaners that are compatible with the surface type.
Rinse and dry:
- After cleaning, rinse the surface with clean water to remove any residue from the cleaning agents. Use a clean cloth or microfiber towel to dry the surface completely. A dry surface is essential to prevent water spots or streaks during buffing.
Inspect for imperfections:
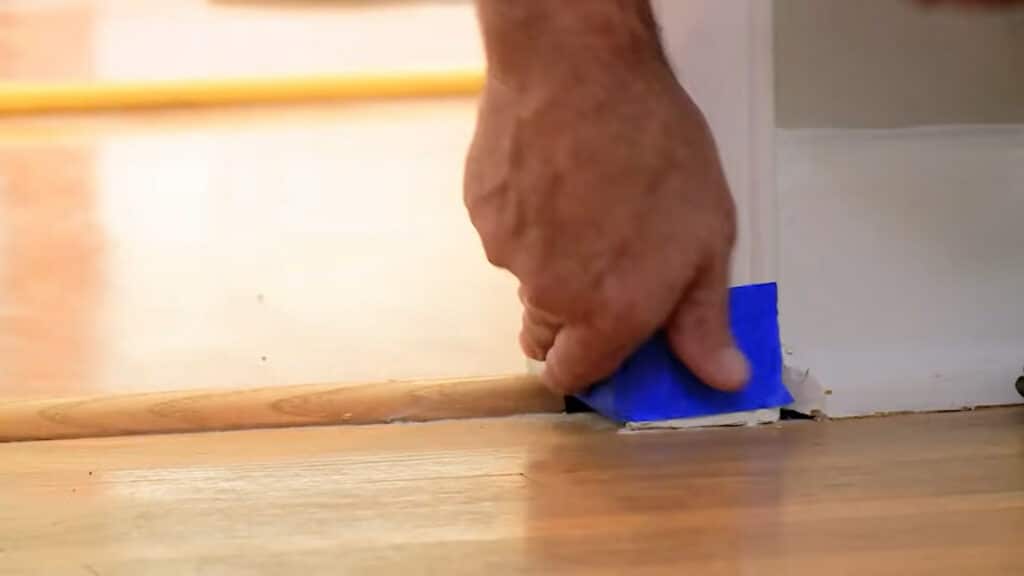
- Carefully inspect the surface for imperfections such as scratches, swirl marks, or deep blemishes. Mark any areas that need special attention. Depending on the severity of the imperfections, you may need to use sandpaper or abrasive pads to level the surface before buffing.
Sanding (if necessary):
- If you discover scratches or imperfections that cannot be removed through buffing alone, you’ll need to sand the surface. Begin with coarser grit sandpaper (e.g., 1000 or 1500) and gradually progress to finer grits (e.g., 2000 or 3000) until the imperfections are smoothed out. Always sand in the direction of the grain or contours of the surface.
Wipe Down Again:
- After sanding, wipe down the surface once more to remove any sanding residue and ensure it’s clean and ready for buffing.
Selecting the Right Buffing Compounds
Choosing the appropriate buffing compounds is a critical step in achieving a mirror-like finish through floor buffing. These compounds are abrasive pastes or liquids that, when applied to the surface, help remove imperfections, scratches, and oxidation, ultimately leaving behind a polished and reflective surface. Here’s how to select the right buffing compounds for your project:
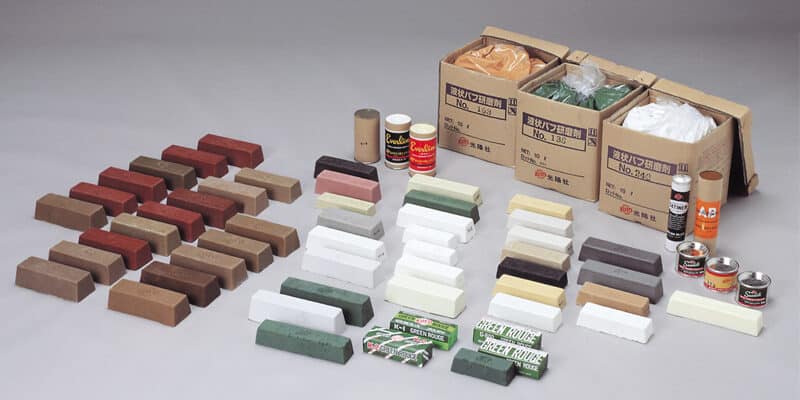
Understand the Types of Buffing Compounds:
- Buffing compounds come in various types, each designed for specific purposes:
- Cutting Compounds: These are abrasive compounds designed to remove deeper scratches, oxidation, and imperfections. They are typically used in the initial stages of buffing.
- Polishing Compounds: Polishing compounds have finer abrasives and are used to refine the surface after initial cutting. They help bring out a smoother and shinier finish.
- Finishing Compounds: These compounds have the finest abrasives and are used in the final stages to achieve the highest level of shine and clarity.
Consider the surface material:
- The type of surface you’re buffing will influence your choice of buffing compound. Different compounds are suitable for various materials, such as automotive paint, metal, wood, and plastics. Ensure that the compound you select is compatible with your project’s surface.
Grit Size and Abrasiveness:
- Buffing compounds come in different grit sizes, ranging from coarse to fine. Coarser compounds are more abrasive and are used for heavy cutting, while finer compounds are for polishing and finishing. Match the compound’s abrasiveness to the level of correction required for your surface.
Compound Formulation:
- Buffing compounds can be found in various formulations, including liquid, paste, or wax. The formulation you choose may depend on personal preference and the buffing equipment you’re using.
Read product labels and recommendations:
- Always read the manufacturer’s recommendations and product labels. They often provide guidance on which types of surfaces the compound is suitable for and the recommended buffing pad to use with it.
Test on a Small Area:
- If you’re unsure about which compound to use, consider testing it on a small, inconspicuous area of the surface. This will allow you to assess the compound’s effectiveness and whether it achieves the desired results.
Progressive Buffing:
- In many cases, a progressive approach works best. Start with a cutting compound to address imperfections, then move on to polishing and finishing compounds to enhance the shine and clarity progressively.
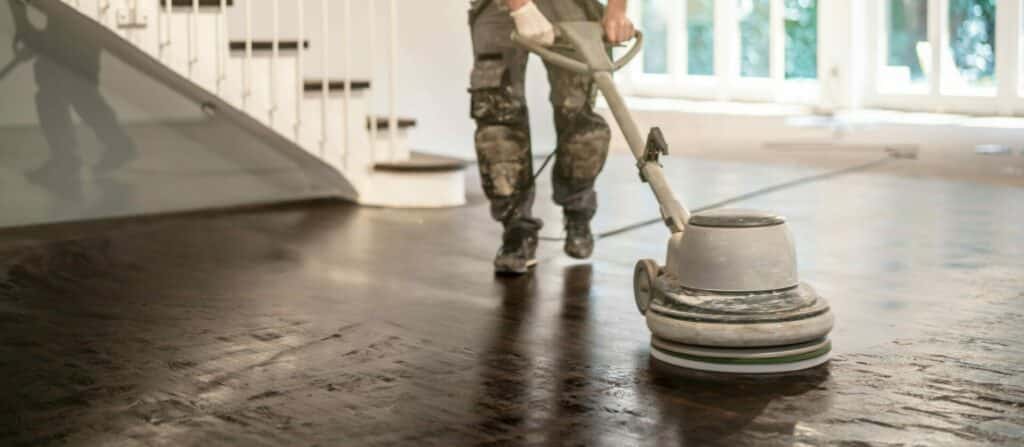
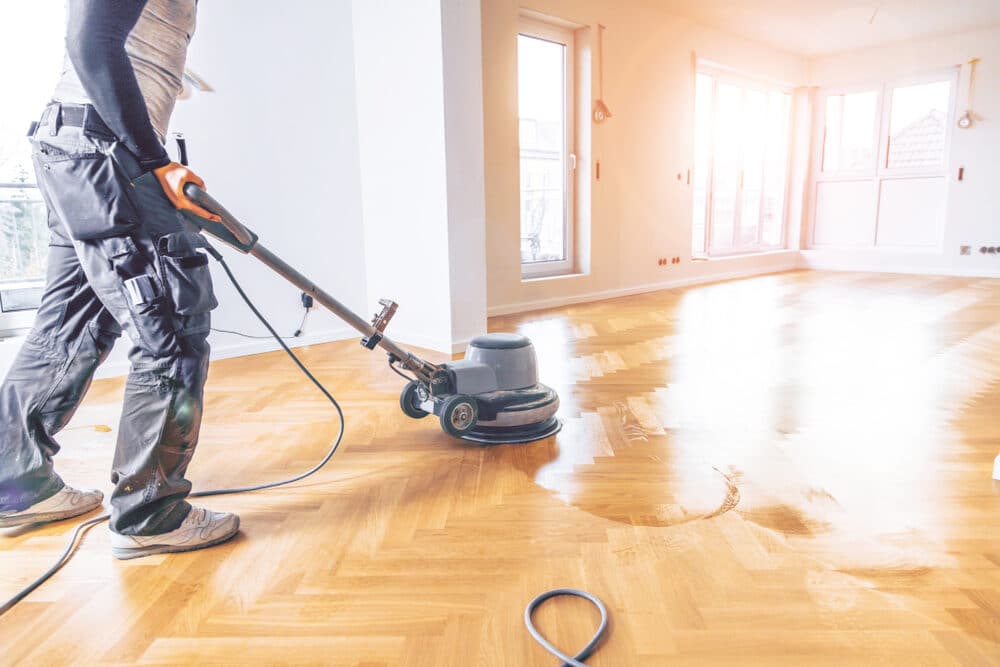
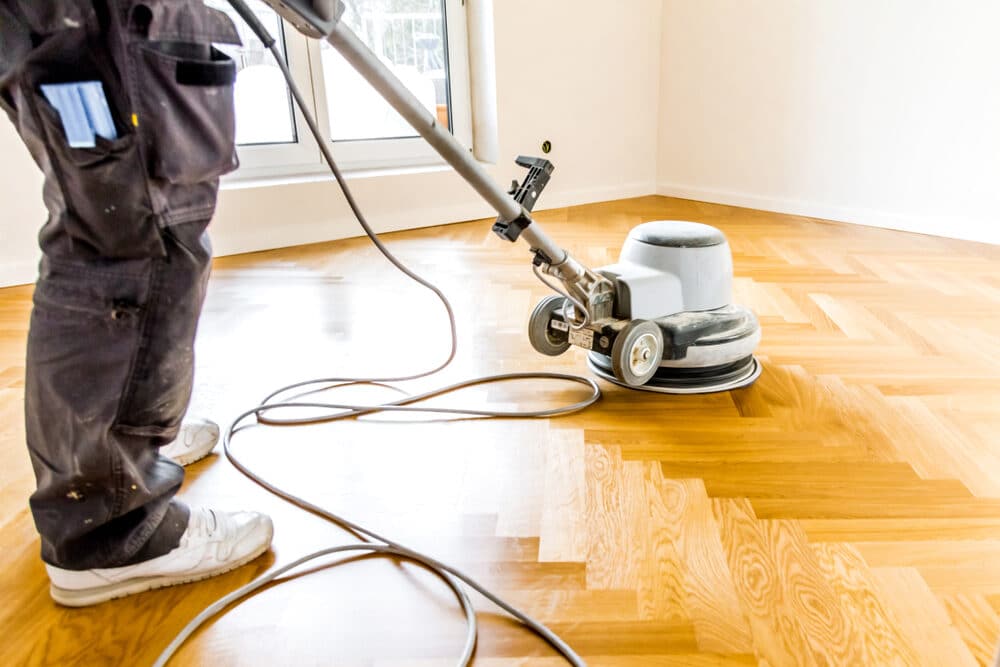
Buffing Techniques
Now that you have gathered the necessary materials, prepared your surface, and selected the right buffing compounds, it’s time to delve into the actual floor buffing process. Achieving a mirror-like finish requires not only the right equipment but also proper technique. Here’s a step-by-step guide to mastering buffing techniques:
Safety First:
- Before you begin buffing, ensure you’re wearing the necessary safety gear, including safety goggles, gloves, and, if applicable, a dust mask or respirator.
Attach the buffing pad.
- Depending on your buffing machine, attach the appropriate buffing pad. Ensure it’s securely fastened to the machine’s backing plate or spindle.
Apply Buffing Compound:
- Start with a small amount of the selected buffing compound on the pad. Spread it evenly across the surface you’ll be working on. Use a low-speed setting on the machine to avoid splattering.
Prime the Pad:
- Before engaging the full speed of the machine, “prime” the buffing pad by gently moving it over the surface without applying much pressure. This evenly distributes the compound and reduces the risk of splatter.
Set the buffing machine speed:
- Adjust the machine’s speed based on the task at hand. Higher speeds are typically used for cutting and removing imperfections, while lower speeds are suitable for polishing and finishing.

Overlap and Controlled Movements:
- When buffing, use controlled back-and-forth or overlapping motions. Avoid aggressive or erratic movements, as this can create uneven results. Keep the machine flat against the surface.
Pressure and Time:
- The amount of pressure you apply should be appropriate to the task and the buffing compound being used. Generally, let the machine’s weight do the work and avoid pressing too hard, which could lead to swirl marks.
- Buff each section for an adequate amount of time to ensure even results. Follow the manufacturer’s recommendations for compound-specific guidelines.
Inspect Your Progress:
- Periodically stop and inspect the surface’s progress. Wipe away excess compound with a clean microfiber cloth to check for imperfections or areas that require further buffing.
Clean and reapply:
- As the buffing pad becomes saturated with compound or residue, clean it or replace it with a fresh pad. Reapply the buffing compound as needed.
Transition to polishing and finishing:
- After achieving the desired level of correction, transition to finer buffing compounds for polishing and finishing. Repeat the same buffing process with the new compound.
Final passes and inspection:
- During the final passes, reduce pressure and slow down the machine to achieve the highest level of shine. Inspect the surface closely to ensure it meets your mirror-like finish expectations.
Clean and Protect:
- Once you’re satisfied with the finish, thoroughly clean the surface to remove any remaining compound residue. Then, consider applying a protective wax or sealant to maintain the shine.
Safety Precautions
Buffing can be a rewarding process, but it also involves the use of machinery and potentially hazardous materials. Ensuring your safety and the safety of others is paramount. Here are some important safety precautions to follow while buffing:
Protective Gear:
- Wear appropriate safety gear, including safety goggles or a face shield to protect your eyes from flying debris and splatters, gloves to shield your hands, and, if necessary, a dust mask or respirator to guard against dust and fumes.

Ventilation:
- Work in a well-ventilated area or use proper ventilation equipment, especially when working with buffing compounds or materials that produce fumes. Adequate ventilation helps dissipate harmful chemicals and ensures fresh air circulation.
Workspace Safety:
- Keep your workspace clean and organised to prevent tripping hazards. Clear away clutter and obstructions that could interfere with your work.
Machine Safety:
- Familiarise yourself with the operation and safety features of your buffing machine. Ensure it’s in good working condition before use, and always follow the manufacturer’s guidelines for safe operation.
Electrical Safety:
- If your buffing machine requires electrical power, use it with grounded outlets and appropriate extension cords. Inspect cords for any damage or wear, and replace them if necessary.
Stability:
- Ensure that your workpiece is secured firmly during buffing to prevent it from moving or falling. For larger or unwieldy objects, use clamps or supports to stabilise them.
Operator Positioning:
- Position yourself in a way that allows you full control of the buffing machine and a clear view of the work area. Maintain a stable stance to prevent accidents caused by a loss of balance.
Avoid loose clothing and jewellery.
- Wear fitted clothing and remove any loose items, such as necklaces, bracelets, or long sleeves, that could become entangled in the buffing machine.
Emergency Stop:
- Familiarise yourself with the emergency stop or shut-off mechanism of your buffing machine. Be ready to use it in case of unexpected issues or dangers.
Eye Protection from Compound Splatter:
- Buffing compounds can splatter during the process. Ensure your eye protection gear is in place to guard against compound particles entering your eyes.
Fire Safety:
- Be cautious when working near flammable materials. Some buffing compounds may generate heat, so keep fire-extinguishing equipment nearby and be aware of fire hazards.
Chemical Safety:
- When using buffing compounds, follow the manufacturer’s safety data sheet (SDS) for handling and disposal instructions. Avoid skin contact and inhalation of fumes. Wash your hands thoroughly after handling compounds.
Emergency Response Plan:
- Know how to respond to accidents or injuries. Have a first aid kit on hand and know the location of emergency exits and contact information for medical assistance.
Step-by-Step Guide to Achieving a Mirror-Like Finish
Now that you’ve gathered your materials, prepared the surface, selected the right buffing compounds, and taken safety precautions, it’s time to dive into the buffing process itself. Follow these steps to achieve a mirror-like finish with precision and confidence:
Pre-Buffing Inspection:
- Examine the surface one last time before you begin floor buffing. Ensure it’s clean and free from contaminants. Identify any imperfections or scratches that may require special attention.
Initial Buffing Pass:
- Start with a cutting compound and a coarse buffing pad. Apply a small amount of the compound to the pad and spread it evenly on the surface.
- Begin buffing using controlled, overlapping motions. Maintain a consistent speed and pressure, focusing on the areas with imperfections.
- Continue buffing until the imperfections are removed, periodically wiping the surface with a clean microfiber cloth to check your progress.
Intermediate Buffing:
- Switch to a polishing compound and a medium-grit buffing pad. Apply the compound as before, and buff the entire surface using the same controlled motions.
- This stage refines the surface, removing fine scratches left by the initial pass and enhancing the shine.
Final Buffing:
- Transition to a finishing compound and a fine buffing pad. Apply the compound and buff the surface at a lower speed with reduced pressure.
- This step brings out the mirror-like shine. Continue buffing until you achieve the desired level of gloss and clarity.
Inspect and touch-up:
- Stop periodically to inspect your work closely. Wipe off excess compound to check for any remaining imperfections or swirl marks.
- If needed, perform touch-up buffing in specific areas to address any remaining issues.
Clean and Remove Residue:
- Once you’re satisfied with the finish, thoroughly clean the surface using a clean microfiber cloth or a separate cleaning product to remove any remaining buffing compound residue.
Apply protective coating (optional):
- Consider applying a protective wax or sealant to maintain the mirror-like finish and protect it from environmental factors. Follow the manufacturer’s instructions for application.
Final Inspection:
- After the protective coating has dried or cured, perform a final inspection to ensure the surface meets your expectations. Your hard work should result in a stunning, mirror-like finish.
Cleanup:
- Clean your buffing machine and tools thoroughly. Dispose of used pads and cleaning materials properly. Store your equipment and compounds in a cool, dry place for future use.
Admire Your Work:
- Step back and admire the gleaming, mirror-like finish you’ve achieved. Whether it’s on a car, metalwork, wood, or any other surface, your attention to detail has paid off.
Finishing Touches
Once you’ve successfully achieved a mirror-like finish through floor buffing, there are a few additional steps and considerations to ensure your work maintains its shine and quality over time. Here are some finishing touches to consider:
Final Inspection:
- Take a close look at the entire surface to ensure it meets your expectations. Check for any remaining imperfections, swirl marks, or areas that may need touch-ups.

Cleaning and Removing Residue:
- Thoroughly clean the surface with a clean, lint-free microfiber cloth to remove any remaining buffing compound residue. Ensure that the surface is entirely free from debris.
Protective Coating (Optional):
- Consider applying a protective coating to maintain the mirror-like finish and protect it from environmental factors. The type of coating you choose will depend on the material and your specific project. For automotive finishes, wax or ceramic coatings are common choices.
Polishing and detailing:
- If you’re working on a vehicle, consider taking your floor buffing process a step further by using a high-quality car polish or detailing spray to enhance the shine and provide additional protection. Follow the product instructions carefully.
Touch-Up as Needed:
- Over time, minor imperfections or scratches may appear on the surface. Keep your buffing compounds and equipment handy for touch-up work as required.
Regular Maintenance:
- To maintain the mirror-like finish, establish a regular maintenance routine. This may include regular washing, waxing, and periodic re-buffing as needed.
Protection from the Elements:
- If your project is exposed to the elements, such as a vehicle, consider using a car cover or storing it in a garage to protect the finish from UV rays, rain, and other environmental factors.
Documentation and Records:
- Keep records of the products and techniques you use for future reference. This can be especially helpful if you plan to perform similar buffing work on other surfaces.
Showcase your work:
- Proudly showcase your mirror-like finish to friends, clients, or fellow enthusiasts. Your attention to detail and dedication to achieving perfection are worth celebrating.
Continuous Learning:
- Buffing is a skill that can always be refined. Stay updated with new techniques, products, and equipment in the buffing industry to continually improve your results.
Maintenance and care
Maintaining a mirror-like finish obtained through buffing requires ongoing care and attention. Proper maintenance will help preserve the shine and quality of the surface over an extended period of time. Here’s how to ensure your buffed surface remains in pristine condition:
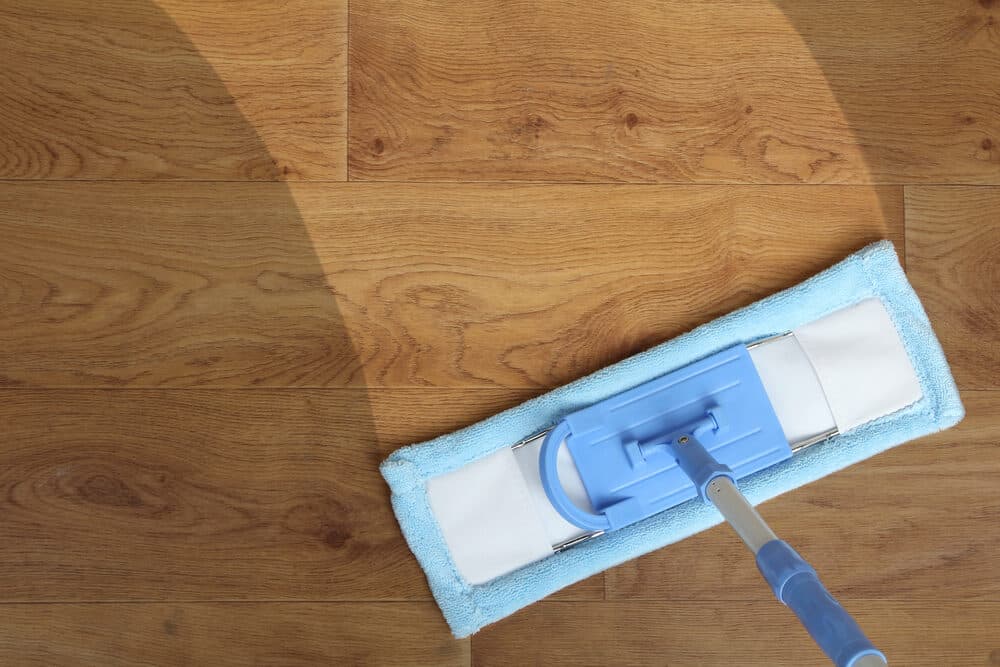
Regular Cleaning:
- Implement a regular cleaning routine to remove dust, dirt, and contaminants from the surface. Use a mild, pH-balanced automotive or surface-specific cleaner that won’t harm the finish.

Avoid Abrasive Materials:
- Be cautious when cleaning or touching the surface. Avoid using abrasive materials, harsh scrubbers, or brushes that can scratch or mar the finish.
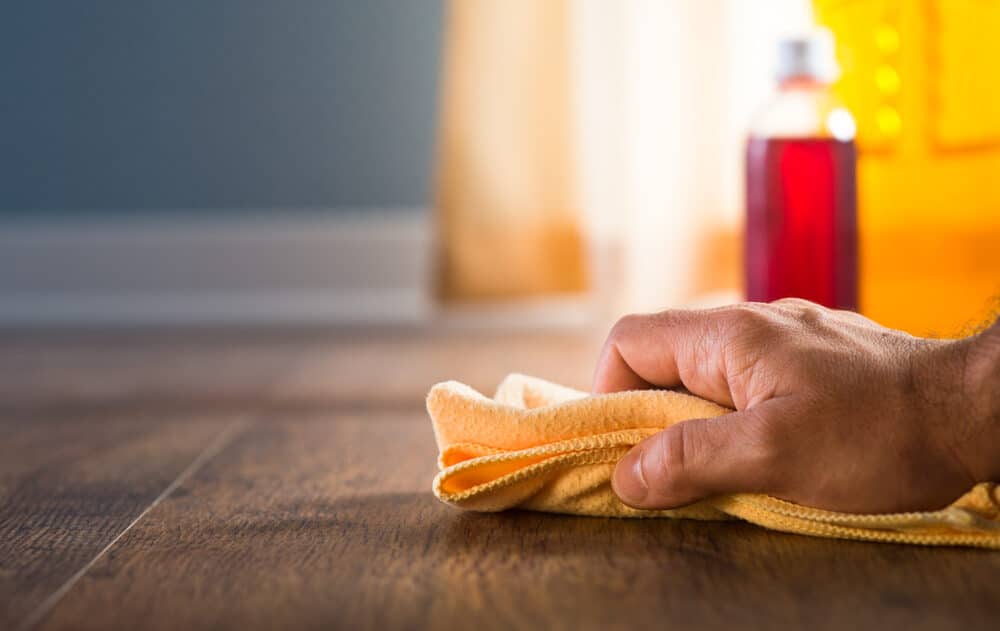
Microfiber Towels:
- Use clean and soft microfiber towels or polishing cloths for wiping and drying the surface. Microfiber is gentle on the finish and reduces the risk of scratching.
Gentle Washing Techniques:
- If you’re maintaining an automotive finish, use the two-bucket method when washing your vehicle. This involves one bucket for soapy water and another for rinsing your wash mitt or sponge to prevent contaminants from getting back onto the surface.
Wax or sealant reapplication:
- If you applied a protective wax or sealant after floor buffing, follow the manufacturer’s recommendations for reapplication. Typically, this should be done every few months or as needed to maintain protection and shine.
Avoid direct sunlight:
- Whenever possible, park your vehicle or place the buffed object in shaded or covered areas. Direct sunlight can cause the finish to deteriorate over time.
Avoid harmful chemicals:
- Avoid using harsh chemicals, solvents, or abrasive cleaners that can damage the finish. If you need to remove specific contaminants or stains, use a mild, surface-appropriate cleaner.
Rebuff as necessary:
- Over time, the mirror-like finish may show signs of wear or develop minor imperfections. If this occurs, consider performing light buffing touch-ups to restore the shine.
Inspect Regularly:
- Periodically inspect the surface for any issues, such as swirl marks, water spots, or oxidation. Address these issues promptly to prevent further deterioration.
Protect against environmental factors:
- Shield the buffed surface from environmental factors such as bird droppings, tree sap, and road salts. Promptly remove any contaminants to prevent damage.
Storage Considerations:
- If the buffed object is seasonal or not in use, store it properly in a clean and controlled environment. Cover it with a protective cloth or cover to prevent dust accumulation.
Documentation:
- Maintain records of your maintenance schedule, products used, and any touch-up work performed. This documentation can help you track the surface’s condition and ensure consistent care.
Conclusion
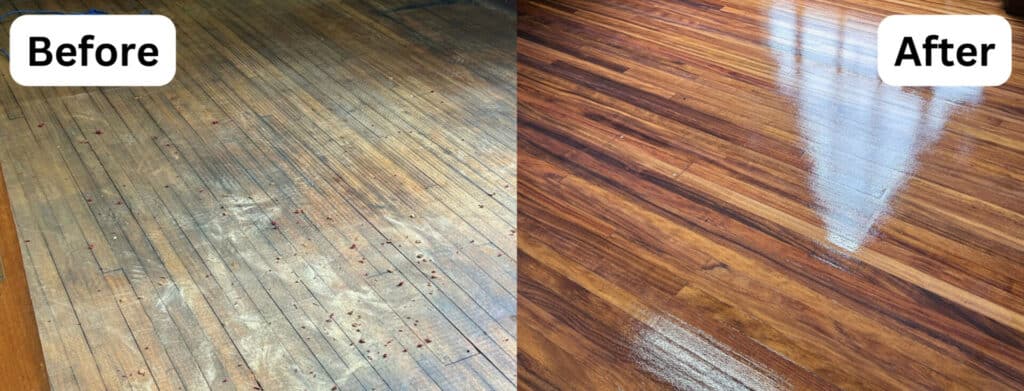
In the world of craftsmanship and aesthetics, achieving a mirror-like finish through floor buffing is a testament to skill, precision, and dedication. Whether you’re a professional auto detailer, a woodworking enthusiast, or someone passionate about restoring the lustre of various surfaces, this journey through the art of buffing has equipped you with the knowledge and techniques to transform the ordinary into the extraordinary.
Throughout this guide, we’ve explored every aspect of the buffing process, from selecting the right materials and tools to mastering buffing techniques and ensuring safety at every step. We’ve delved into the nuances of surface preparation, the importance of choosing the correct floor buffing compounds, and the finishing touches that elevate your work to the level of a mirror-like shine.
Remember that achieving a mirror-like finish is not just about the end result but also about the journey of perfecting your skills and honing your craftsmanship. It’s a pursuit of excellence, attention to detail, and a commitment to quality that sets your work apart.
As you embark on your buffing projects, whether it’s bringing out the gleam of an automobile, revitalising metalwork, or enhancing the beauty of wood, always approach each task with care, patience, and a passion for excellence. Your mirror-like finishes will not only reflect your dedication but also capture the attention and admiration of those who behold them.
Floor Buffing is both an art and a science, and with every successful finish, you add another layer to your expertise. Keep exploring, experimenting, and pushing the boundaries of your skills to achieve even greater levels of perfection in your buffing endeavours.
Thank you for joining us on this journey to unlock the secrets of achieving a mirror-like finish with buffing. We hope this guide has been a valuable resource on your path to mastering this transformative technique. May your future buffing projects always shine with brilliance and pride.

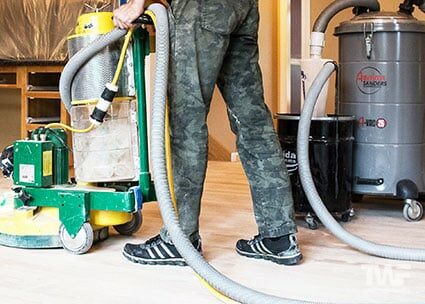
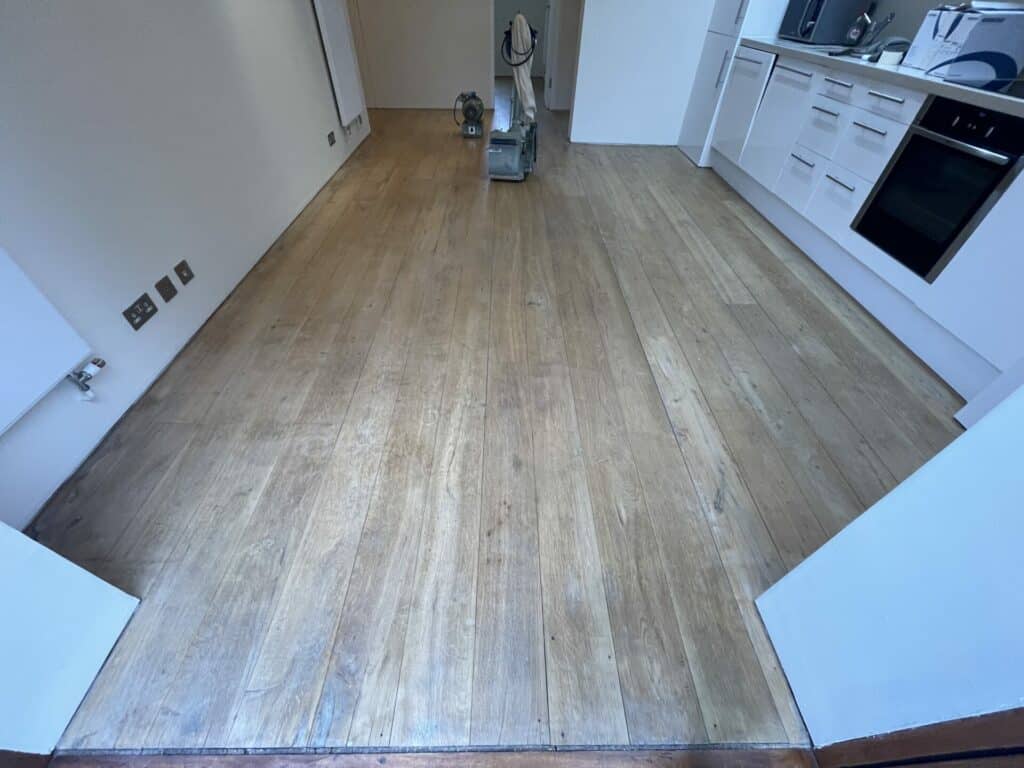
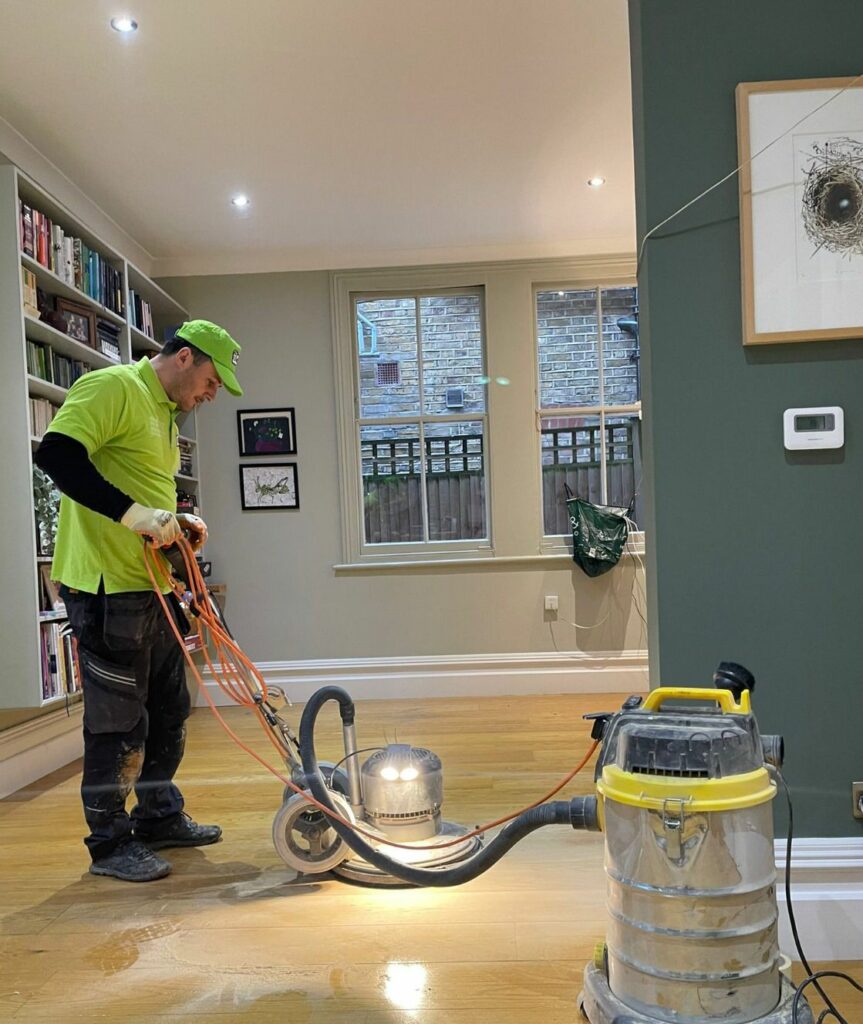
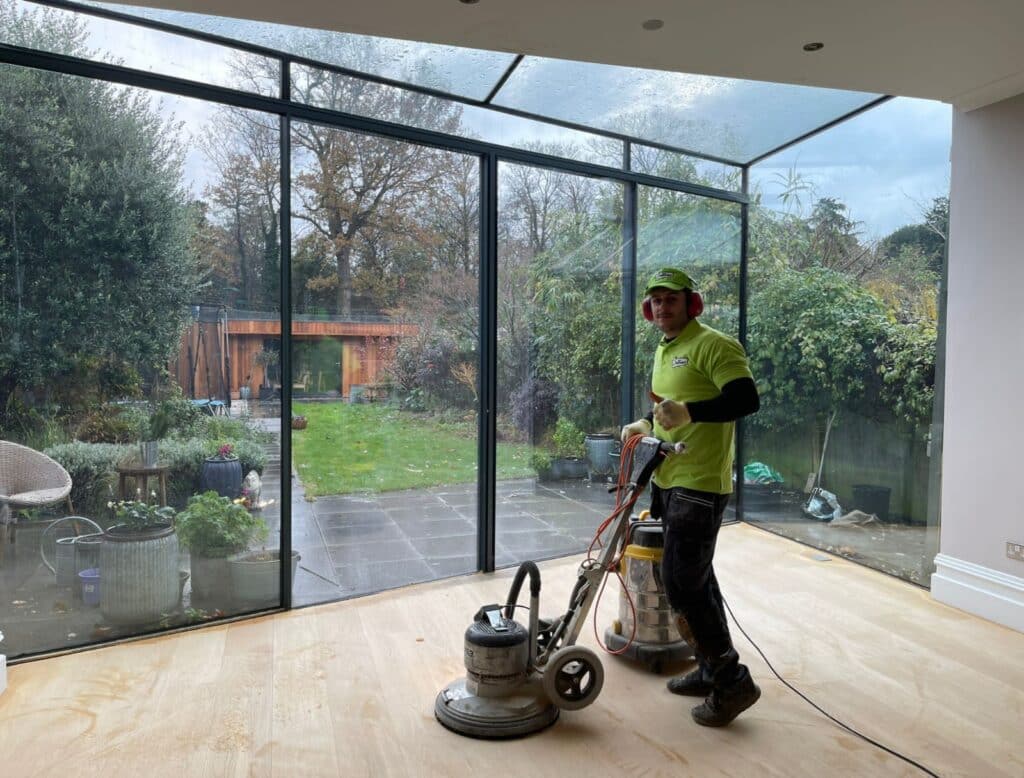
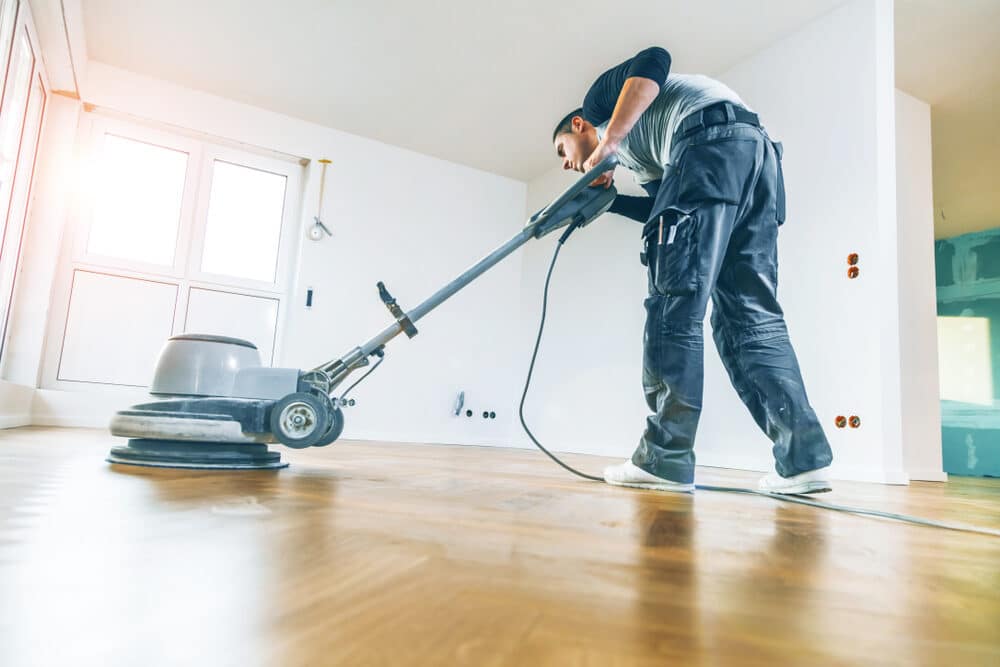
Sanding
We provide virtually dust-free sanding with our continuous belt machinery with mobile extraction units, giving you a safer environment for your family.
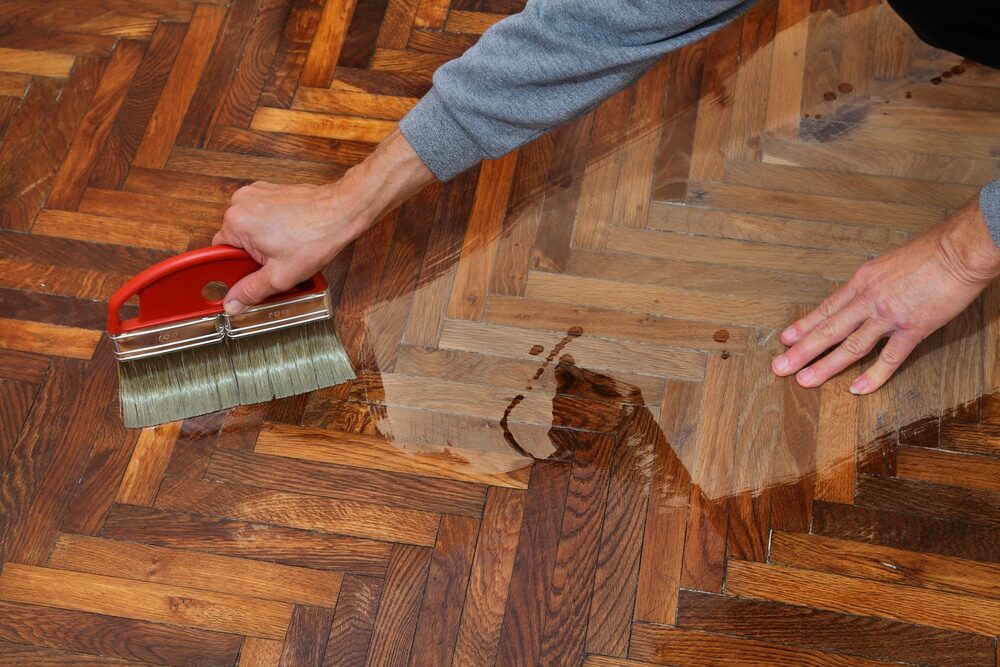
Oiling
This organic finish not only adds beauty to your home but also has exceptional water-repellent characteristics, making it easier to clean and maintain.
Waxing
This natural floor finish offers the softest and most mellow appearance – and leaves your floor able to breath.
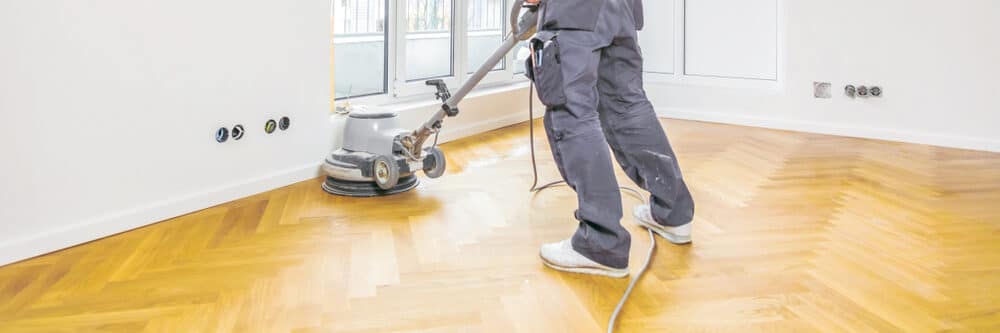
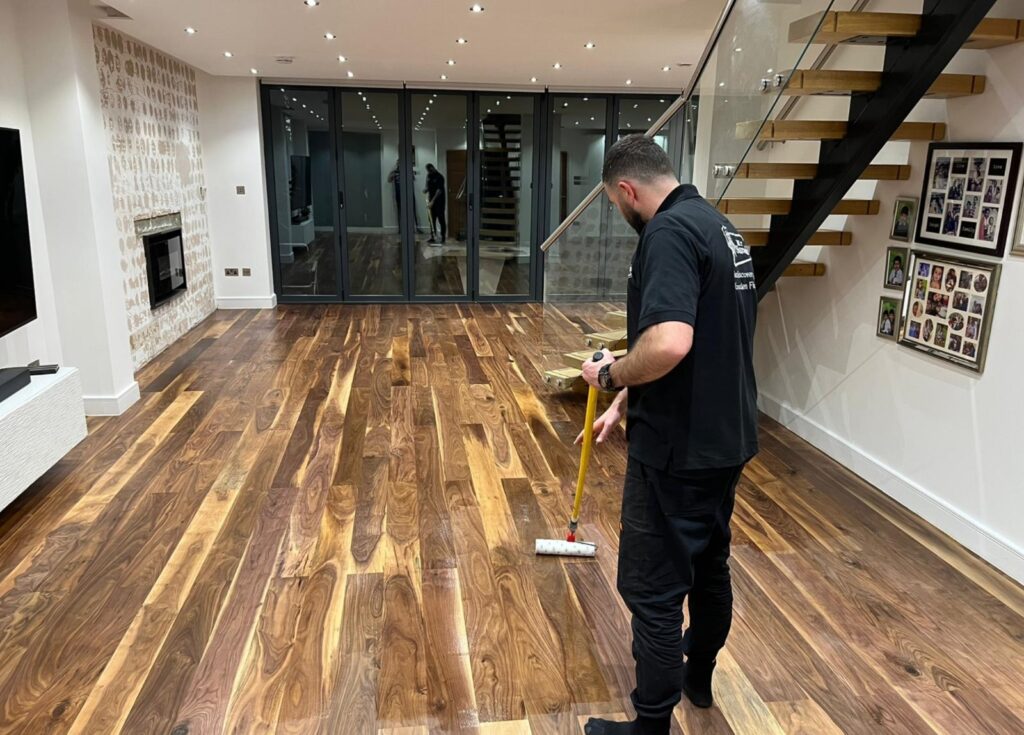
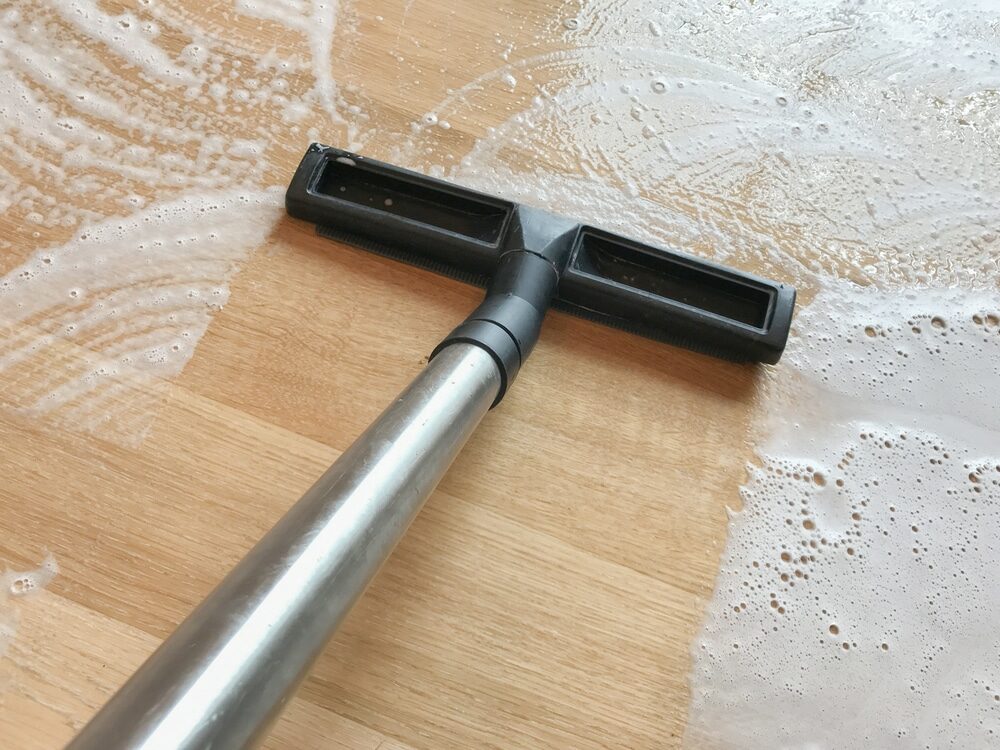
Buffing
Using soft buffing machines (and hand-polishing where required) will bring a wonderful sheen to your newly-finished floor.
Repairs
We offer a full assessment of your wooden floors to determine what repairs are needed to provide the perfect working surface for the later stages of sanding, staining and sealing.
Restoration
We offer a comprehensive restoration process designed to address floors that are improperly fitted or damaged over time through wear and tear.
Request a fixed price quote for your wood floor restoration now
Simply enter your postcode below to get started.
Services
Wood Floor Sanding Wood Floor Restoration Wood Floor Scratch Repair Squeaky Wood Floor Repair Parquet Floor Sanding Parquet Floor Restoration Commercial Floor Sanding Church Floor Sanding Community Centre Floor Sanding School Floor Sanding Gap Filling Gap Filling with ResinCopyright © Mr Sander®
Privacy & Cookies Terms & Conditions Complaints Procedure Cancellation Rights Sitemap

Get An Instant Price Estimate Before You Go…
Simply enter the rooms you need sanded and we’ll provide you with a price estimate instantly! Try our price calculator now.
Get a Price Estimate NowLocal Floor Sanding Experts
Over 500 5-Star Reviews
Safe, Dust Free Sanding
Operating Since 1994