London:
Nationwide:
25,000+
Floors Restored
27 Years Experience
Wood Flooring Association Certified
Advanced Techniques for Orbital Sanding on Wood Floors
Posted on August 26, 2023
Floor sanding techniques
Mastering the Orbital Sander: The Art of Wood Floor Refinement
Sanding a wooden floor may initially seem like an artless act, a mere process of subjecting wood to the rough ministrations of a machine. But in reality, when approached with finesse, it can resemble an art form, carefully refining the wood to reveal its utmost beauty. And when it comes to the tools of the trade, the orbital sander stands out, whispering promises of meticulous refinement and splendour. Let’s venture into the world of advanced orbital sanding techniques, the dance of machine and timber, as we seek the holy grail of resplendent wooden floors.
The orbital sander’s role
The beauty of an orbital sander lies in its circular motion, which ensures that sanding marks and patterns remain largely unnoticeable. But like every tool of distinction, it’s only as good as the hand guiding it. The orbital sander is the symphony, and you, dear reader, are the conductor.1. The grainy details
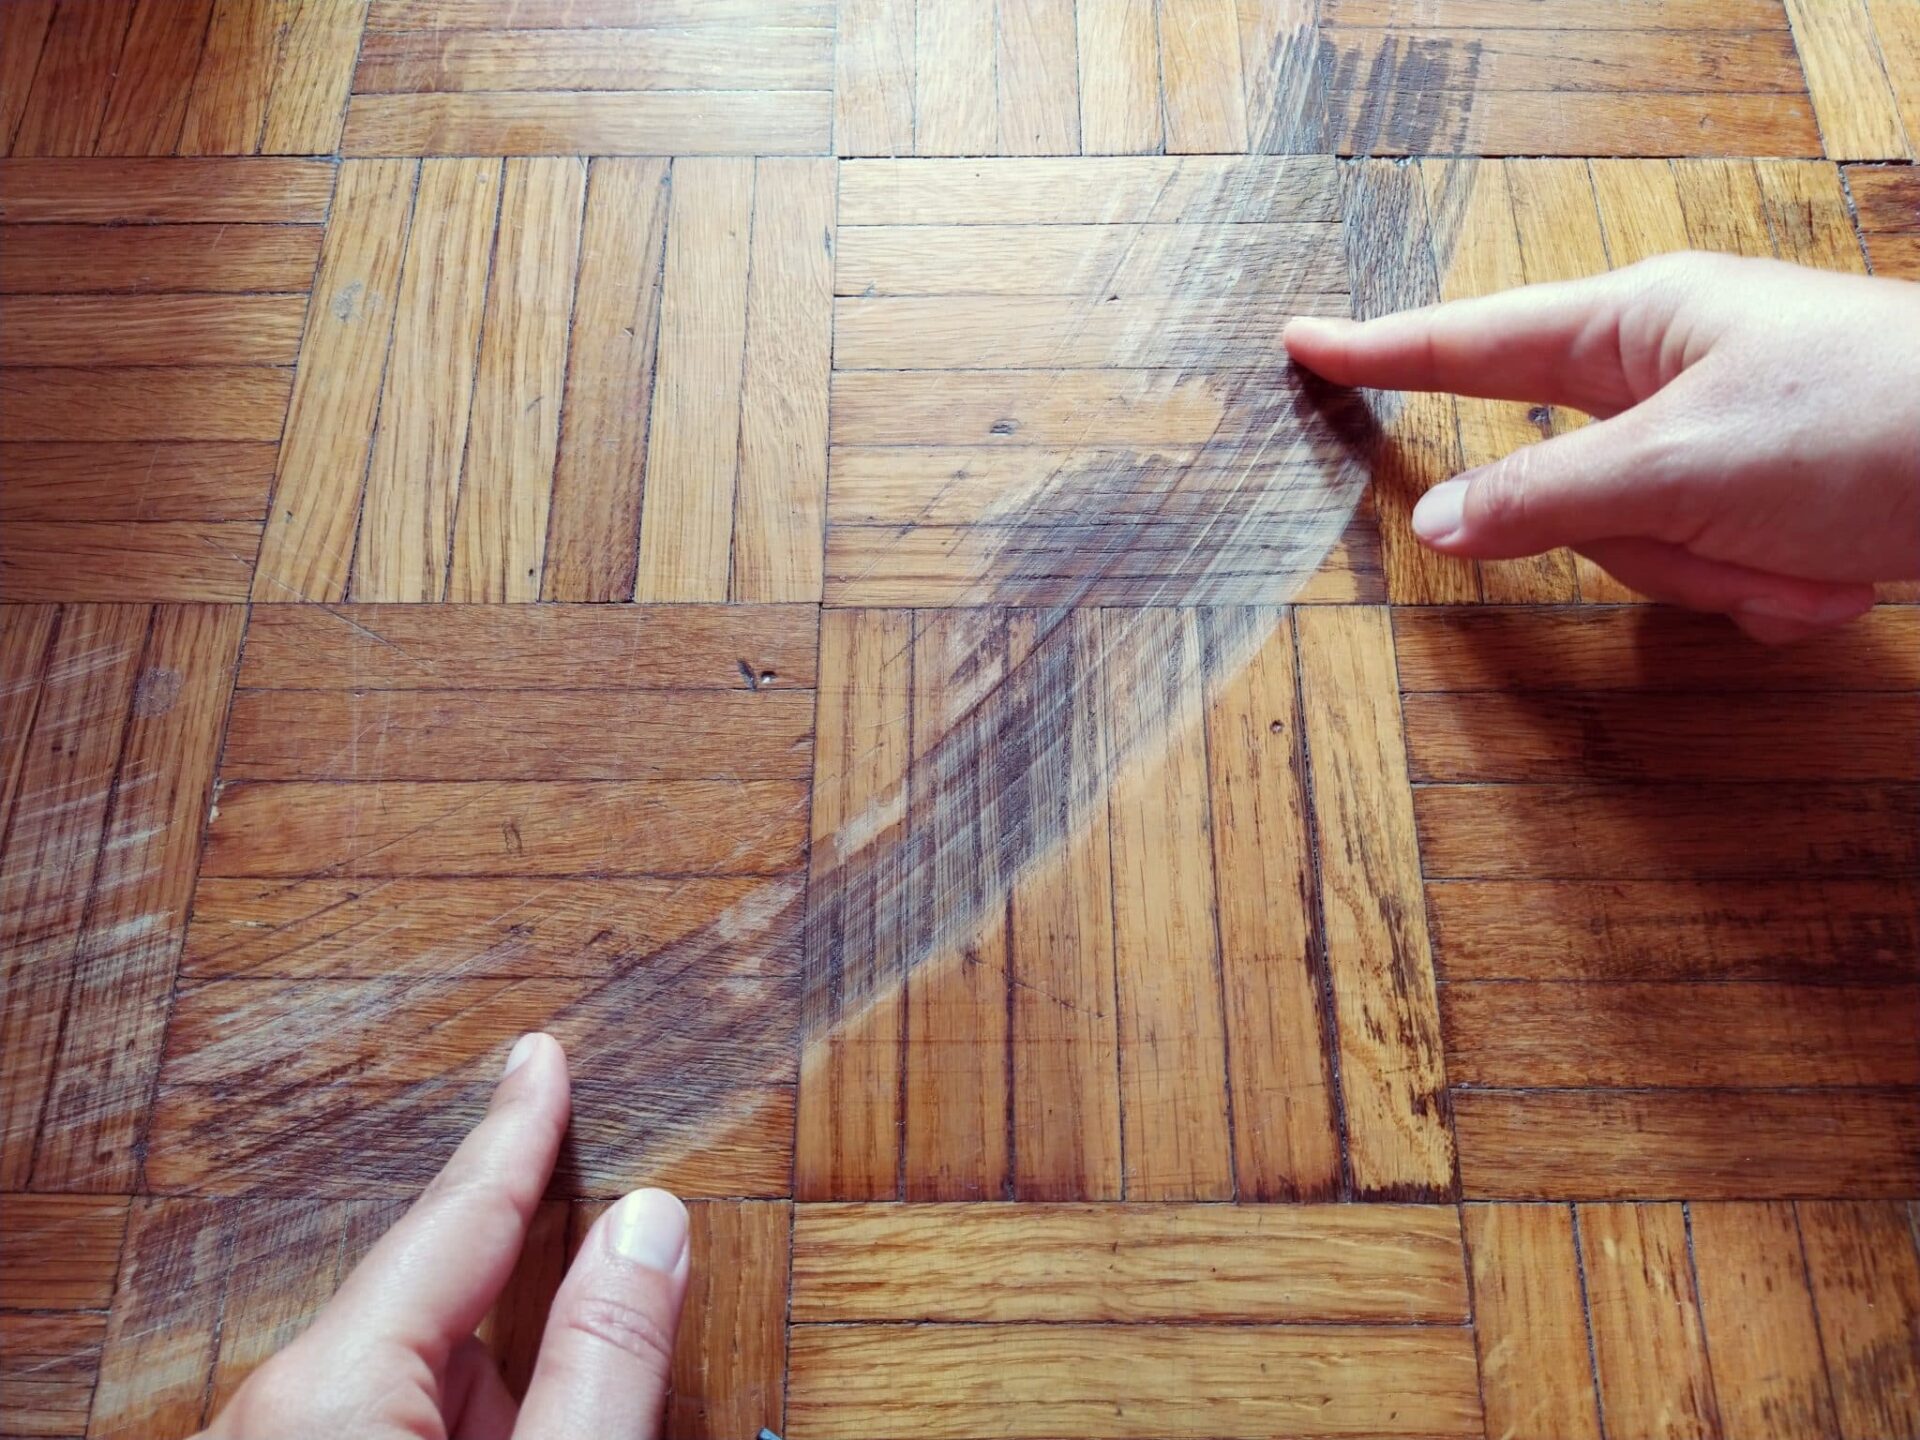
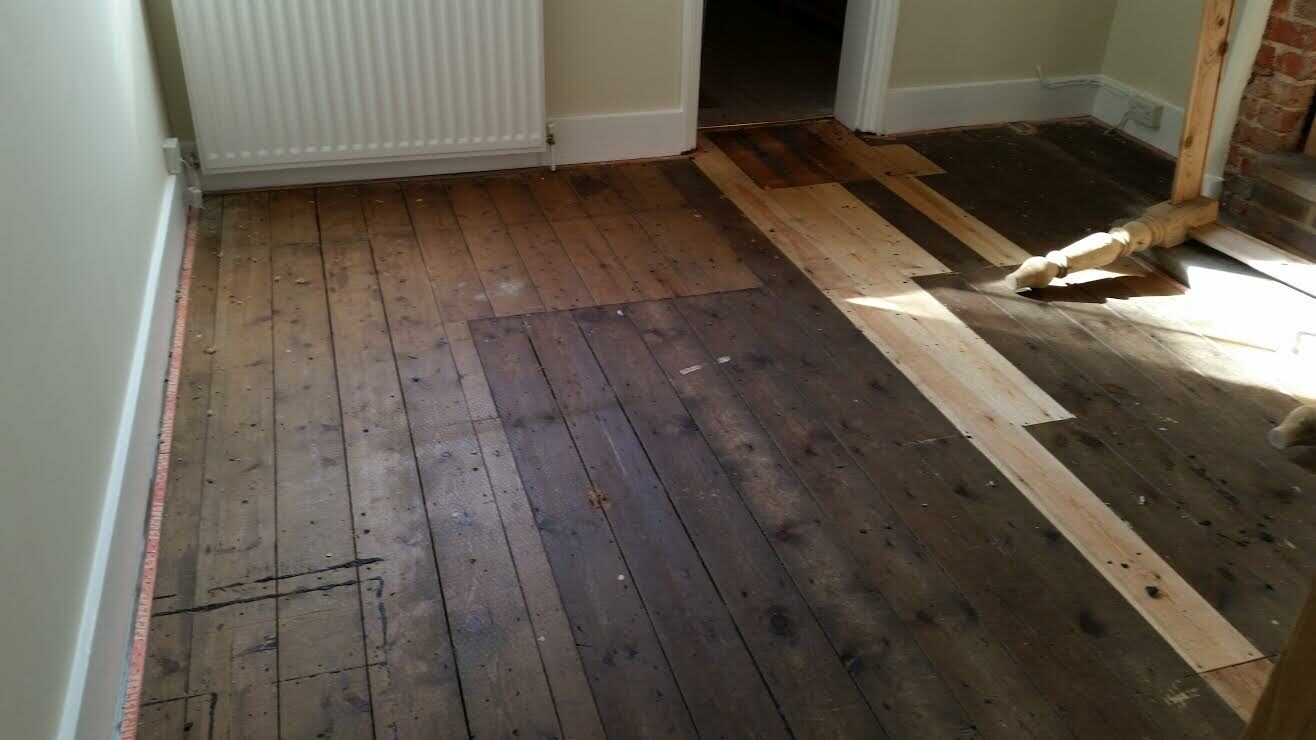
Begin by assessing the floor. A deep understanding of the wood grain is fundamental. Wood, being an organic material, is filled with unique characteristics. The first step is selecting the correct sandpaper grit. Starting with too coarse a grit might remove more than just the flaws; you could strip the wood of its natural beauty. For lightly worn floors, begin with 120-grit sandpaper. For those with deep scratches or in need of a profound refurbishment, 60 or 80 grit might be the starting point. Remember, each transition in grit should be gradual—never jump from extremely coarse to fine. The idea is to smooth out the floor incrementally.2. Preparation is paramount.
Vacuum the floor thoroughly. This isn’t just a nod to cleanliness; it’s about ensuring that every subsequent sanding pass is on the wood, not on residual dust or debris. Not only does this give a cleaner finish, but it also prolongs the life of your sanding pads.3. Guided Movements
The actual sanding should be a thoughtful process. Move the orbital sander steadily, letting the machine do the work. There’s no need to press hard. Allow the weight of the machine to exert the necessary pressure. Remember the grain—always sand with it, never against it. Going against the grain can be the difference between a masterpiece and a disaster.4. Corners and edges
The allure of the orbital sander is its random motion, which can be a bane when you’re trying to tackle edges and corners. For these areas, consider using an edge sander or a smaller hand-held orbital sander. Don’t allow impatience to mar your progress. Give the borders the attention they deserve.5. Incremental Grits and Vacuuming
Once you’ve completed your first pass, vacuum again. You’ll then move to the next sandpaper grit, gradually increasing the fineness. After each sanding pass, vacuuming is critical. This step ensures that the finer particles from the previous round don’t interfere with your next sanding pass. The process is a cycle: sand, vacuum, switch grit, and repeat.6. Final Touches
Once the final sanding pass is complete (usually with a 220-grit or finer), it’s time to prepare for finishing. Vacuum the floor, and then wipe it down with a tack cloth to remove any lingering dust. This meticulous approach ensures that your chosen finish—be it oil, wax, or varnish—applies smoothly and evenly.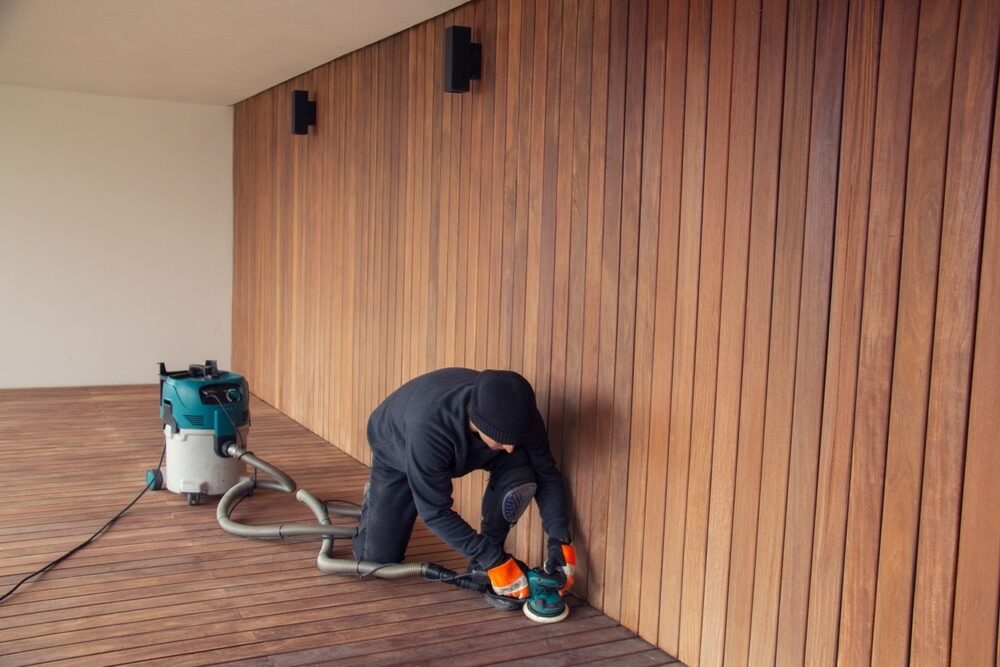
The Nuances of Sandpaper Selection
Sandpaper isn’t just about grit; it’s about understanding the nature of the abrasive material, the backing on which it’s placed, and the adhesive that holds the abrasive to the backing. Consider:- Open Coat vs. Closed Coat: Open coat sandpaper has more space between abrasive particles, which helps prevent clogging, particularly when sanding resinous woods. Closed-coated sandpapers have abrasives covering the backing fully, offering a more aggressive sanding action.
- Aluminium Oxide vs. Silicon Carbide: Aluminium oxide sandpapers are durable and ideal for a variety of woods, while silicon carbide, though it wears out faster, offers a finer finish and is typically used for the last passes.
- Backing Material: Paper backings come in various weights. The letter designations (A, C, D, E, and F) give you an indication of the strength of the paper, with A being the lightest and E the heaviest. For floor sanding, C and D weights are commonly used, offering a good balance of flexibility and strength.
Dust management and safety
While we’ve already discussed the importance of vacuuming from a finishing perspective, it’s equally important to understand the health implications. Wood dust can be a health hazard, so always wear appropriate protective gear, including safety goggles, a dust mask or respirator, and ear protection. Moreover, when it comes to sanding, a dust extraction system or a sander with an integrated dust collection bag can be invaluable. Not only does it protect your lungs, but it also ensures a cleaner work environment, making the process more efficient.Sanding Speed and Pressure Variations
There’s a rhythm to sanding, a pace that, once mastered, becomes intuitive. However, it’s worth noting that different woods respond differently. Softer woods may require a slower, more deliberate pace, while harder woods might handle a slightly brisker movement. Similarly, while we’ve previously touched upon not pressing down hard on the sander, there might be times when you need to apply slight additional pressure on certain stubborn spots. But tread with caution; overzealous pressure can lead to unintentional valleys in the flooring.Troubleshooting Common Issues
Even with the best techniques, occasionally things go awry. Here are solutions to a few common issues:- Swirl Marks: These are usually caused by a worn-out sanding pad or using a grit that’s too coarse. To remedy this, switch to a finer grit or replace the sanding pad.
- Uneven Sanding: This could be a result of applying inconsistent pressure. Ensure that you’re moving steadily and letting the sander’s weight do most of the work.
- Dust Pockets: These manifest as little gritty patches on the floor. Often, they’re a result of not cleaning the floor adequately between sanding passes. Always vacuum and wipe down the floor diligently between grits.
Conclusion
Sanding a wooden floor is akin to sculpting marble. One must strip away the excess and imperfections to reveal the masterpiece underneath. And in this dance of refinement, the orbital sander is a partner par excellence. As with any art form, the depth of your patience, your commitment to understanding the medium, and your precision in technique will determine the quality of the final piece. Your wooden floor is more than just timber beneath your feet; it’s a canvas awaiting your craftsmanship. In the hands of the adept, the orbital sander is not just a tool but a wand ready to conjure magic. Now go forth and create your masterpiece.Some Useful Links:
- Stairs Sanding & Refinishing
- Floor Sanding Services
- School Floor Sanding
- Wood Floor Restorations
- Wood Floor Repairs
- Wood Floor Polishing
More from our Blog:
The Science Behind Orbital Sanding for Floor Restoration Orbital Sanding for Hardwood Floors: Techniques and Tips Orbital Sanding vs. Other Floor Sanding Techniques: Which is Best? Common Mistakes to Avoid in Orbital Sanding for Floors Tips for Achieving Smooth Finishes with Orbital Sanding The Importance of Dust Extraction in Orbital Sanding The Role of Sandpaper in Orbital Sanding for Floors Best Practices for Orbital Sanding Techniques


Sanding
We provide virtually dust-free sanding with our continuous belt machinery with mobile extraction units, giving you a safer environment for your family.
Oiling
This organic finish not only adds beauty to your home but also has exceptional water-repellent characteristics, making it easier to clean and maintain.
Waxing
This natural floor finish offers the softest and most mellow appearance – and leaves your floor able to breath.
Buffing
Using soft buffing machines (and hand-polishing where required) will bring a wonderful sheen to your newly-finished floor.
Repairs
We offer a full assessment of your wooden floors to determine what repairs are needed to provide the perfect working surface for the later stages of sanding, staining and sealing.
Restoration
We offer a comprehensive restoration process designed to address floors that are improperly fitted or damaged over time through wear and tear.
Request a fixed price quote for your wood floor restoration now
Simply enter your postcode below to get started.
Services
Wood Floor Sanding Wood Floor Restoration Wood Floor Scratch Repair Squeaky Wood Floor Repair Parquet Floor Sanding Parquet Floor Restoration Commercial Floor Sanding Church Floor Sanding Community Centre Floor Sanding School Floor Sanding Gap Filling Gap Filling with ResinCopyright © Mr Sander®
Privacy & Cookies Terms & Conditions Complaints Procedure Cancellation Rights Sitemap

Get An Instant Price Estimate Before You Go…
Simply enter the rooms you need sanded and we’ll provide you with a price estimate instantly! Try our price calculator now.
Get a Price Estimate NowLocal Floor Sanding Experts
Over 500 5-Star Reviews
Safe, Dust Free Sanding
Operating Since 1994