London:
Nationwide:
25,000+
Floors Restored
27 Years Experience
Wood Flooring Association Certified
Seamless Transitions: A Guide to Installing and Choosing Floor Molding
Posted on December 7, 2023
Wood Flooring
Creating Smooth Transitions: An In-Depth Guide to Installing and Selecting Floor Molding
Floor molding, often overlooked but crucial to the overall aesthetics of your home, plays a pivotal role in creating seamless transitions between your floors and walls. Whether you’re renovating your space or simply looking for a way to enhance its appearance, understanding how to choose and install the right floor molding is essential.
In this comprehensive guide, we’ll delve into the world of floor molding, exploring the various types available and providing you with expert tips on selecting the perfect molding for your needs. We’ll also take you through the step-by-step process of installation, ensuring that you achieve a professional finish that seamlessly ties your rooms together.
So, whether you’re a seasoned DIY enthusiast or a novice looking to tackle your first home improvement project, join us on this journey to discover the art of creating flawless transitions with floor molding. By the end of this guide, you’ll have the knowledge and confidence to transform your living space and give it the finishing touch it deserves. Let’s get started!
Understanding floor molding
Floor molding, also known as baseboard or skirting board, is a fundamental element of interior design that often goes unnoticed. However, its significance in enhancing the visual appeal of a room and providing a seamless transition between your floors and walls cannot be overstated. In this section, we’ll explore the basics of floor molding, its various types, and their distinct roles in your home’s aesthetics and functionality.
What is floor molding?
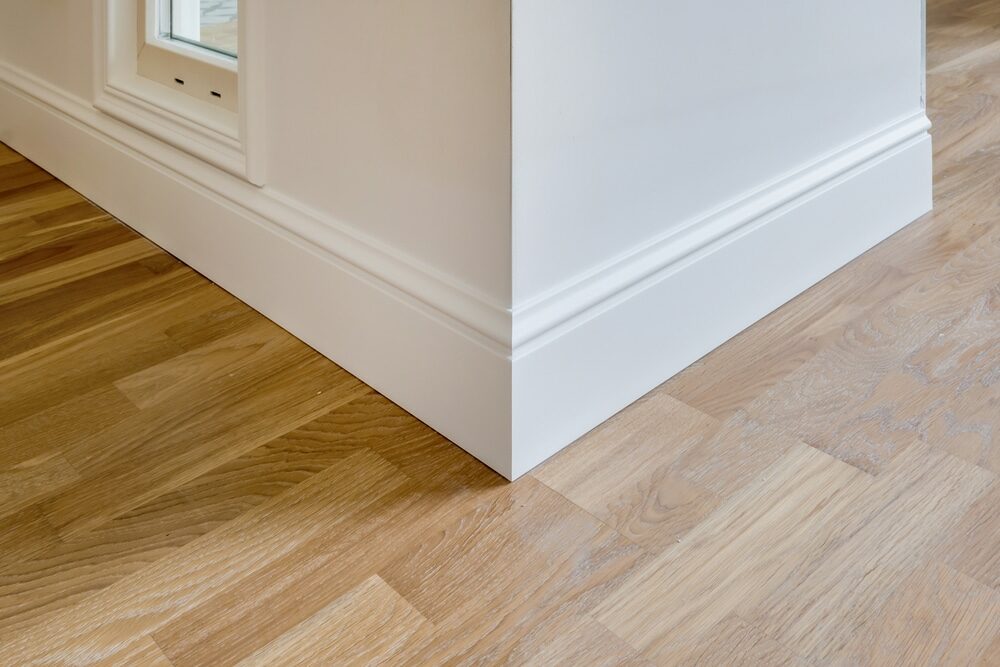
Floor molding is a decorative and functional element that covers the joint where the wall and floor meet. Its primary purpose is to conceal gaps and imperfections in this transition area while adding a polished and finished look to your interior spaces. While it may seem like a minor detail, the right floor molding can significantly impact the overall appearance of a room.
Types of Floor Molding
There are several types of floor molding, each designed to serve a specific purpose and offer distinct visual effects. Understanding these types will help you make an informed choice when selecting molding for your home. Here are the most common types:
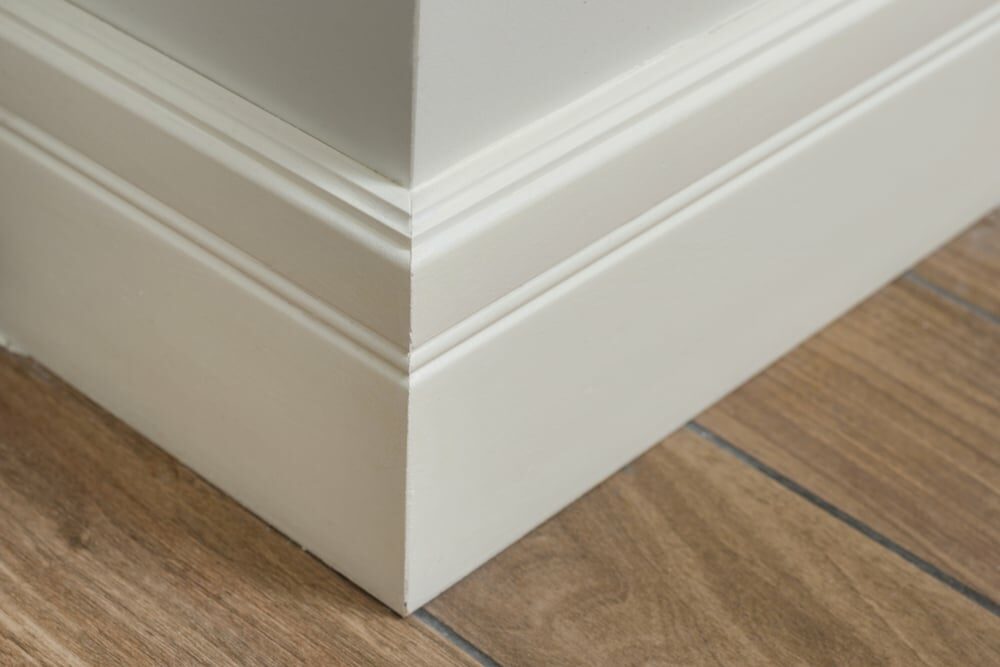
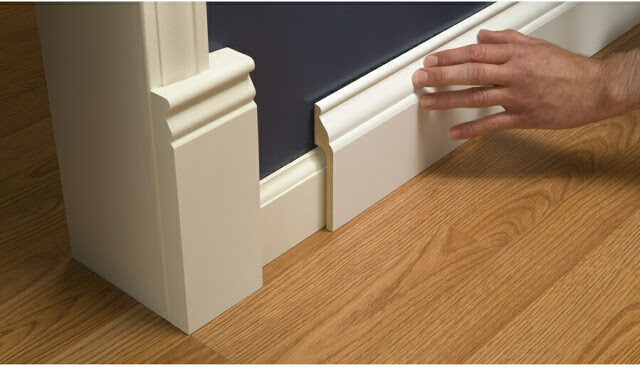
- Baseboard Molding: This is the most common type of floor molding. It runs along the bottom of the wall and covers the gap between the wall and the floor. Baseboard molding comes in various styles, heights, and profiles, allowing you to choose one that complements your room’s decor.
- Quarter-Round Molding: Quarter-round molding is a curved, quarter-circle-shaped trim that is often used in conjunction with baseboards. It covers the gap left by the baseboard, creating a smooth transition between the floor and the wall.
- T-Molding: T-molding is primarily used when you have two different types of flooring meeting in a doorway or transition area. It forms a T-shaped bridge between the two floor surfaces, ensuring a clean and even transition.
- Threshold Molding: Threshold molding is typically used in doorways and entryways to bridge the gap between two different flooring materials. It provides a smooth transition while preventing tripping hazards.
- Reducer Molding: Reducer molding is used when one flooring type is thicker than the other, creating an uneven surface. It gradually reduces the height difference, allowing for a safe and visually pleasing transition.
In the following sections of this guide, we will delve deeper into each type of floor molding, discussing their specific applications, styles, and installation techniques. By the end, you’ll have a comprehensive understanding of how to choose the right molding to complement your room’s style and ensure a harmonious transition between your floors and walls.
Choosing the Right Floor Molding
Selecting the perfect floor molding for your home involves more than just picking a style that looks appealing. It requires careful consideration of various factors, including the type of flooring you have, the aesthetics of the room, and the specific function of the molding. In this section, we’ll explore the key factors to keep in mind when choosing floor molding and provide you with expert tips to help you make the right decision.
Factors to consider:
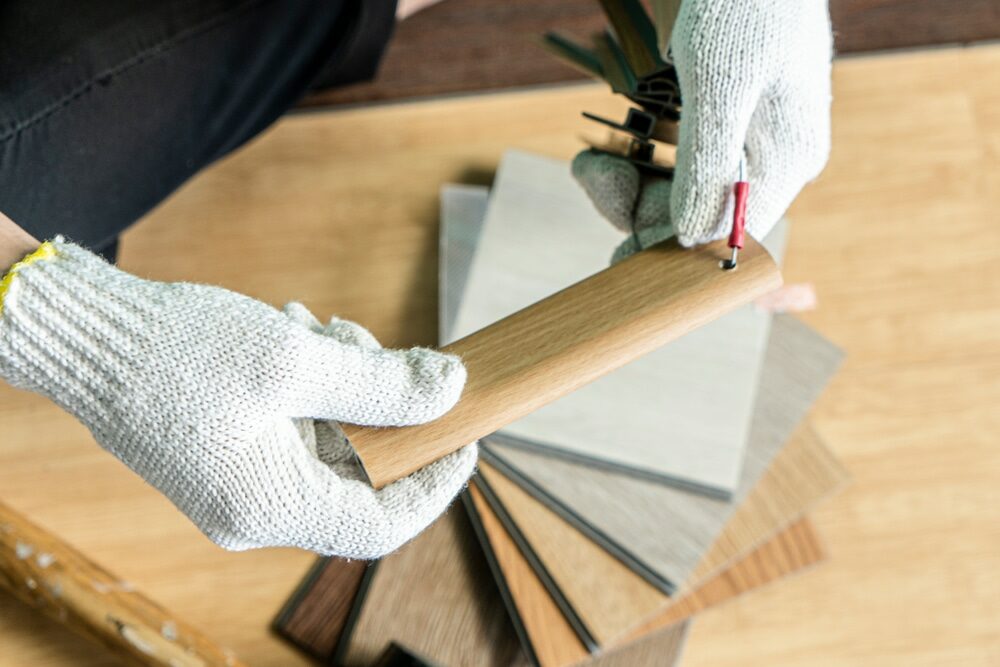
- Flooring Type: The type of flooring you have in your home plays a significant role in your molding selection. Different types of flooring, such as hardwood, tile, laminate, or carpet, may require different types of molding to achieve a seamless transition. Consider the thickness, material, and color of your flooring when making your choice.
- Room Aesthetics: Your room’s style and decor should guide your molding selection. Traditional, modern, rustic, or eclectic rooms each benefit from different molding styles. The molding you choose should complement the overall design and contribute to the room’s visual appeal.
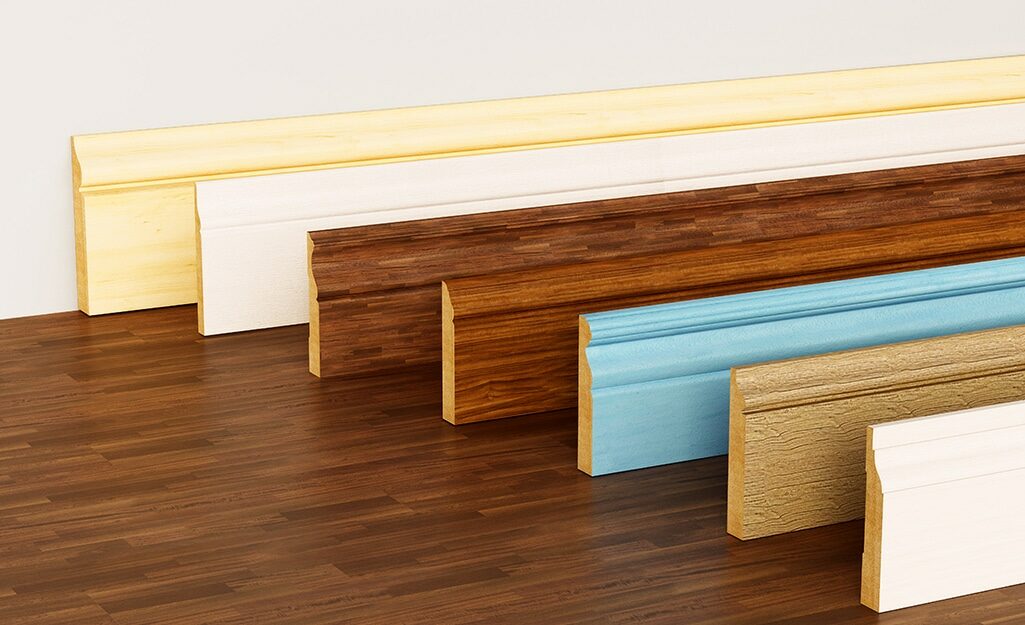
- Height and Width: Floor molding comes in various heights and widths. Taller baseboard molding can add an elegant and grand look to a room, while shorter options may suit smaller spaces or minimalist designs. The width of the molding should also be proportional to the size of the room and the height of the ceiling.
- Material and Finish: Floor molding can be made from a variety of materials, including wood, MDF (medium-density fiberboard), PVC, and even metal. Consider the durability, maintenance requirements, and cost of the material. The finish, whether painted, stained, or left natural, should harmonize with the room’s color scheme and style.
Tips for Matching Floor Molding to Your Home’s Style:
- Traditional Style: For classic and traditional interiors, opt for wider baseboard molding with intricate profiles and decorative details. Wood molding with a rich, stained finish complements this style beautifully.
- Modern Style: Modern and minimalist rooms benefit from sleek and simple baseboard molding. Choose clean lines and a neutral color that blends seamlessly with the walls and flooring.
- Rustic Style: Rustic interiors call for natural wood finishes and thicker, textured baseboard molding. Consider rough-hewn wood or reclaimed materials to enhance the rustic charm.
- Eclectic Style: In eclectic rooms where various styles come together, you have more creative freedom. Experiment with unique molding profiles, colors, and materials that reflect your eclectic taste.
- Color Harmony: Ensure that your molding color coordinates with your room’s color palette. It can either match the wall color for a seamless look or provide contrast to create visual interest.
By carefully considering these factors and style tips, you can make an informed decision when choosing floor molding that not only complements your home’s aesthetics but also functions effectively in creating a harmonious transition between your floors and walls. In the following sections, we’ll guide you through the installation process, ensuring that your chosen molding enhances the beauty of your living spaces.
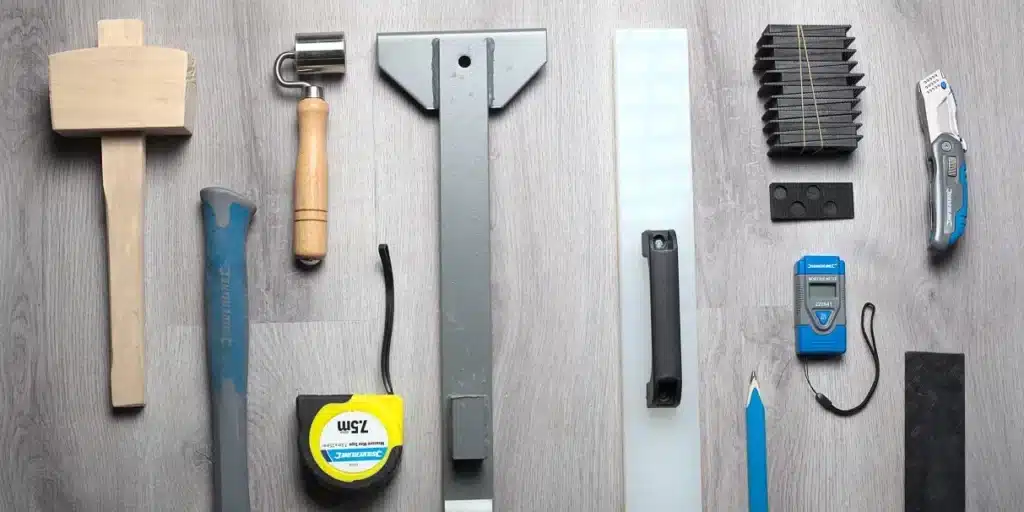
Tools and materials you’ll need
Before you embark on the installation of floor molding, it’s essential to gather the necessary tools and materials. Having the right equipment on hand will make the installation process more efficient and help you achieve a professional finish. Here’s a list of the tools and materials you’ll need:
Essential Tools for Installation:
- Measuring Tape: Accurate measurements are crucial for a seamless fit. A measuring tape helps you determine the length of molding required.
- Miter Saw: A miter saw, also known as a chop saw, allows you to make precise angle cuts for corners and joints.
- Coping Saw: For coping inside corners, a coping saw is essential. It helps create snug-fitting joints when baseboard pieces meet at an inside angle.
- Hammer and Nails: You’ll need a hammer to secure the molding to the wall. Choose finishing nails that are long enough to penetrate the molding and wall but won’t split the wood.
- Nail Set: A nail set is used to drive nails below the surface of the molding, so they can be concealed with putty or wood filler.
- Level: A level ensures that your molding is straight and level during installation, preventing crooked or uneven results.
- Caulking Gun: To seal gaps and joints, a caulking gun is necessary. It’s used to apply caulk along the top and bottom edges of the molding.
- Putty Knife: A putty knife helps you smooth and shape caulk or wood filler for a clean, finished look.
- Safety Gear: Don’t forget safety gear, including safety glasses and ear protection, when using power tools.
Materials for a Successful Installation:
- Floor Molding: Purchase enough molding to cover the perimeter of the room. Make sure it matches the style and material you’ve chosen based on your earlier considerations.
- Nails: Buy finishing nails that are the appropriate length for your molding and wall type (drywall or plaster).
- Wood Putty or Wood Filler: You’ll need putty or filler to conceal nail holes and gaps in the molding.
- Caulk: Choose paintable caulk that matches the molding color. Caulk is used to seal the gap between the molding and the wall, creating a smooth transition.
- Primer and Paint/Stain: If your molding is unfinished or if you plan to change its color, primer and paint or stain are essential.
- Sandpaper: Sandpaper is useful for smoothing rough edges, especially if you’re cutting or coping the molding.
- Construction Adhesive: This is optional but can provide extra stability. Use it sparingly on the back of the molding before nailing it to the wall.
- Painter’s Tape: Painter’s tape helps protect the walls and floor from accidental paint splatters or caulk smears.
By gathering these tools and materials in advance, you’ll be well-prepared to tackle the floor molding installation process smoothly and efficiently. Properly equipping yourself ensures that you can achieve the desired seamless transition between your floors and walls while maintaining a professional and polished finish.
Preparing for Installation
Before you begin the installation of floor molding, it’s crucial to thoroughly prepare the area and gather all the necessary tools and materials. Proper preparation will ensure a smooth and successful installation process. Here’s a step-by-step guide on how to prepare for installing floor molding:
-
Measure and plan:
- Start by measuring the perimeter of the room where you’ll be installing the molding. Take accurate measurements of each wall segment, including the length of straight sections and the angles of corners.
- Create a detailed plan that outlines where each piece of molding will go, including how they will join at corners and transitions. This plan will serve as your installation guide.
-
Gather tools and materials:
- Refer to the list of tools and materials you’ll need for the installation (as discussed in the previous section) and ensure that you have everything on hand.
-
Clear the workspace.
- Remove any furniture, obstacles, or debris from the area where you’ll be installing the molding. A clear workspace will make it easier to work and ensure a clean installation.
-
Check for smooth and clean surfaces.
- Inspect the walls and the floor where the molding will be installed. Ensure that they are clean, dry, and free from any debris, dust, or protruding nails. Smooth surfaces will allow the molding to adhere securely.
-
Make the necessary repairs:
- If you notice any imperfections on the walls or floor, such as cracks or holes, take the time to repair them. Patch any holes with spackling compound and sand the surfaces until they are smooth.
-
Paint or stain the molding (optional):
- If your floor molding is unfinished or if you plan to change its color, now is the time to apply primer, paint, or stain. Allow ample time for the paint or stain to dry completely before installation.
-
Cut and Coping (for Inside Corners):
- Using your measurements and the plan you created, cut the molding pieces to the appropriate lengths. Use a miter saw for straight cuts and a coping saw for inside corners. Ensure that the angles are accurate for a snug fit at corners.
-
Arrange and label molding pieces:
- Lay out all the molding pieces in the order they will be installed. If necessary, label each piece with its location on your plan to avoid confusion during installation.
-
Ensure Safety:
- Before you start cutting or nailing, put on your safety gear, including safety glasses and ear protection if using power tools.
-
Review your plan:
- Take a final look at your installation plan to confirm that everything is in order. Make any last-minute adjustments if needed.
By following these preparation steps, you’ll be well-equipped and organized to begin the installation of your floor molding. Proper preparation is essential for achieving a clean and professional finish, ensuring that your molding not only enhances the aesthetics of your room but also functions effectively in creating seamless transitions between your floors and walls.
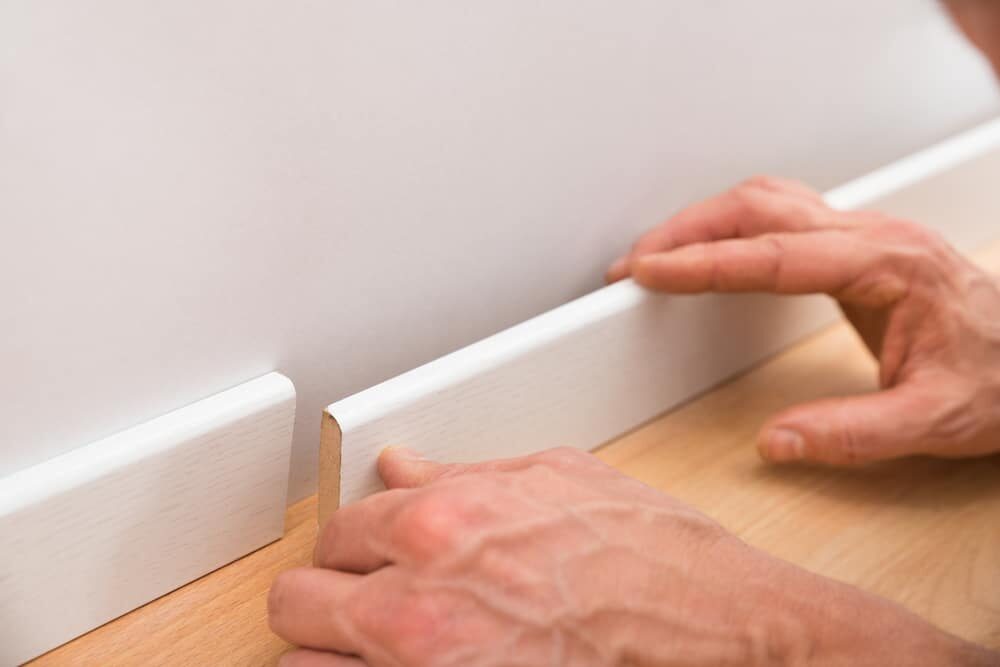
Installing baseboard molding
Installing baseboard molding is a rewarding DIY project that can dramatically improve the appearance of your room. Proper installation ensures a seamless transition between the walls and the floor. Follow these step-by-step instructions to install baseboard molding like a pro:
Tools and Materials You’ll Need (Recap):
- Baseboard molding
- Measuring tape
- Miter saw
- Coping saw
- Hammer
- Finishing nails
- Nail set
- Level
- Caulking gun
- Putty knife
- Safety gear
Step 1: Prepare the area
- Ensure that you’ve completed the preparation steps mentioned earlier, including measuring, planning, and gathering tools and materials.
- Clear the workspace of any obstacles and debris.
- Make sure the walls and floor are clean and smooth.
Step 2: Start with an Inside Corner
- Begin the installation in an inside corner, if possible. It’s often the most challenging part, and starting here ensures a seamless fit.
- Measure and cut the first piece of baseboard molding using a miter saw at a 45-degree angle, making sure it’s the correct length for the wall segment.
- Attach the first piece to the wall using finishing nails. Position the top edge of the molding at the desired height above the floor.
Step 3: Cut the Next Piece for the Adjacent Wall
- Measure the length needed for the next piece of molding that will run along the adjacent wall.
- Use a miter saw to make a straight 90-degree cut on one end of the molding.
- If this piece meets an inside corner, use a coping saw to create a coping cut on the other end. This will ensure a snug fit with the first piece in the inside corner.
Step 4: Attach the Next Piece
- Apply a bead of construction adhesive on the back of the molding for added stability (optional).
- Position the second piece against the wall, aligning it with the first piece. Ensure that the cope cut fits snugly against the inside corner.
- Use finishing nails to secure the second piece to the wall. Nail it into the studs for a secure hold.
Step 5: Continue Installing the Baseboard
- Repeat the process, measuring, cutting, and attaching baseboard pieces along the walls, working your way around the room.
- When you encounter outside corners, cut the molding at a 45-degree angle, ensuring that the pieces meet cleanly at the corner.
- For long wall segments, it may be necessary to splice two pieces of molding together with a scarf joint for a seamless look.
Step 6: Check for Level and Alignment
- Periodically, check that the baseboard molding is level and aligns correctly with the walls and corners.
- Make any necessary adjustments to ensure a straight and even installation.
Step 7: Fill Nail Holes and Gaps
- Once all the baseboard molding is installed, use a nail set to sink any visible nail heads slightly below the surface.
- Fill nail holes and gaps between the molding and the wall with wood putty or filler. Smooth the putty with a putty knife.
Step 8: Caulk and Finish
- Run a bead of paintable caulk along the top and bottom edges of the baseboard molding to seal the gap between the molding and the wall. Smooth the caulk with your finger or a damp cloth for a clean finish.
- Allow the caulk to dry completely.
Step 9: Paint or stain (optional)
- If you haven’t already painted or stained your baseboard molding, now is the time to do so.
- Apply a primer coat, followed by your chosen paint or stain color. Follow the manufacturer’s instructions for drying times between coats.
With these steps, you can successfully install baseboard molding, achieving a polished and seamless look in your room. Proper installation not only enhances the aesthetics of your space but also ensures a functional transition between your floors and walls.
Installing Quarter-Round Molding
Quarter-round molding is an excellent choice for creating a seamless transition between your floors and walls, especially when used in conjunction with baseboard molding. Here’s a step-by-step guide on how to install quarter-round molding:
Tools and Materials You’ll Need (Recap):
- Quarter-round molding
- Measuring tape
- Miter saw
- Hammer
- Finishing nails
- Nail set
- Level
- Caulking gun
- Putty knife
- Safety gear
Step 1: Prepare the area
- Ensure that you’ve completed the preparation steps mentioned earlier, including measuring, planning, and gathering tools and materials.
- Clear the workspace of any obstacles and debris.
- Make sure the walls and floor are clean and smooth.
Step 2: Measure and Cut Quarter-Round Molding
- Start by measuring the length of the wall where you’ll be installing the quarter-round molding.
- Using a miter saw, cut the first piece of quarter-round molding at a 45-degree angle on one end. This end will meet the next piece at a corner.
- If your wall has inside corners, cut the next piece with a cope cut, ensuring a snug fit with the first piece at the inside corner. If it’s an outside corner, simply cut it at a 45-degree angle.
- Repeat the measuring and cutting process for each wall segment.
Step 3: Install the First Piece
- Begin with an inside corner if possible, as it’s often the trickiest part of the installation.
- Apply a bead of construction adhesive on the back of the molding (optional but adds stability).
- Position the first piece of quarter-round molding against the wall, aligning the cut end with the inside corner or the adjacent wall.
- Use finishing nails to secure the molding to the wall. Nail it into the studs for a secure hold.
Step 4: Install Subsequent Pieces
- Continue installing quarter-round molding along the walls, working your way around the room.
- For inside corners, ensure that the cope cut fits snugly against the previously installed piece.
- For outside corners, simply cut the molding at a 45-degree angle and position it so that it meets cleanly with the adjacent piece.
- Nail each piece into place, making sure they are level and align correctly with the walls and corners.
Step 5: Fill Nail Holes and Gaps
- Once all the quarter-round molding is installed, use a nail set to sink any visible nail heads slightly below the surface.
- Fill nail holes and any gaps between the molding and the wall with wood putty or filler. Smooth the putty with a putty knife.
Step 6: Caulk and Finish
- Run a bead of paintable caulk along the top and bottom edges of the quarter-round molding to seal the gap between the molding and the wall. Smooth the caulk with your finger or a damp cloth for a clean finish.
- Allow the caulk to dry completely.
Step 7: Paint or stain (optional)
- If you haven’t already painted or stained your quarter-round molding, now is the time to do so.
- Apply a primer coat, followed by your chosen paint or stain color. Follow the manufacturer’s instructions for drying times between coats.
Installing quarter-round molding can provide a polished and seamless transition between your floors and walls. Proper installation ensures that the molding not only enhances the aesthetics of your space but also functions effectively.
Installing T-Molding, Threshold, and Reducer Molding
T-molding, threshold molding, and reducer molding are essential for creating smooth transitions between different types of flooring or between rooms. Here’s a step-by-step guide on how to install these types of molding:
Tools and Materials You’ll Need (Recap):
- T-molding, threshold molding, or reducer molding (as needed)
- Measuring tape
- Miter saw
- Hammer
- Finishing nails
- Nail set
- Level
- Caulking gun
- Putty knife
- Safety gear
Step 1: Prepare the area
- Ensure that you’ve completed the preparation steps mentioned earlier, including measuring, planning, and gathering tools and materials.
- Clear the workspace of any obstacles and debris.
- Make sure the floor surfaces are clean and free from debris or adhesive residue.
Step 2: Measure and cut the molding.
- Measure the width of the doorway or transition area where the molding will be installed.
- Using a miter saw, cut the T-molding, threshold molding, or reducer molding to the measured width. Ensure that the cut is straight and precise.
Step 3: Position and Align the Molding
- Position the molding in the doorway or transition area where it will be installed.
- Ensure that it aligns evenly with the surfaces of both adjoining floors. Use a level to check for evenness.
Step 4: Attach the molding.
- Attach the molding by nailing it down to the subfloor or the floor surface. Ensure that you drive the nails in at an angle to secure the molding firmly in place.
- For T-molding and threshold molding, nails should be driven into the molding itself, while for reducer molding, nails should be driven into the subfloor to secure it.
- Space the nails evenly along the length of the molding to prevent any warping or lifting.
Step 5: Fill Nail Holes and Gaps
- Once the molding is securely attached, use a nail set to sink any visible nail heads slightly below the surface.
- Fill nail holes and any gaps between the molding and the floor or subfloor with wood putty or filler. Smooth the putty with a putty knife.
Step 6: Caulk and Finish
- Run a bead of paintable caulk along the top edges and any gaps between the molding and the adjoining surfaces to create a seamless and watertight seal.
- Smooth the caulk with your finger or a damp cloth for a clean finish.
- Allow the caulk to dry completely.
Step 7: Paint or stain (optional)
- If you haven’t already painted or stained your molding to match the floor or decor, you can do so now.
- Apply a primer coat, followed by your chosen paint or stain color. Follow the manufacturer’s instructions for drying times between coats.
By following these steps, you can successfully install T-molding, threshold molding, and reducer molding to create smooth and visually appealing transitions between different flooring materials or between rooms. Proper installation ensures that the molding functions effectively and enhances the overall aesthetics of your space.
Finishing Touches
After you’ve installed your floor molding, whether it’s baseboard, quarter-round, T-molding, threshold, or reducer molding, there are a few essential finishing touches to ensure a professional and polished look. These final steps will help you achieve a seamless transition between your floors and walls while enhancing the overall aesthetics of your room.
-
Caulking and Filling Gaps:
- Inspect the entire length of the molding, including corners and joints, for any gaps between the molding and the wall or floor.
- Use a caulking gun to apply paintable caulk along the top and bottom edges of the molding, as well as in any visible gaps.
- Smooth the caulk with your finger or a damp cloth to create a clean, finished appearance.
- Allow the caulk to dry completely before proceeding.
-
Painting or staining:
- If you haven’t already painted or stained your molding, this is the time to do so.
- Apply a primer coat to the molding, followed by your chosen paint or stain color. Follow the manufacturer’s instructions for drying times between coats.
- Ensure that the paint or stain complements your room’s decor and style.
-
Cleaning and Maintenance:
- After the paint or stain has dried and the caulk has cured, give the molding and the surrounding area a thorough cleaning.
- Use a damp cloth or a mild cleaning solution to remove any dust, fingerprints, or smudges from the molding.
- Regularly dust or vacuum the molding to keep it looking clean and free of debris.
-
Touch-Up:
- Periodically inspect the molding for any signs of wear, damage, or discoloration.
- Touch up any scuffs or scratches with matching paint or stain.
- Replace any damaged sections of molding as needed.
-
Consider additional decorative elements:
- To enhance the overall aesthetics of the room, consider adding other decorative elements such as crown molding or chair rails that complement your floor molding.
-
Evaluate the transitions:
- Walk through the room and pay close attention to the transitions between different types of flooring or rooms.
- Ensure that the installed molding effectively conceals gaps and creates smooth, level transitions.
-
Final Inspection:
- Take a final look at your installed floor molding and the overall appearance of the room.
- Ensure that everything is secure, level, and visually pleasing.
- Make any additional adjustments or touch-ups as needed to achieve your desired result.
By completing these finishing touches and paying attention to the details, you’ll not only create a seamless transition between your floors and walls but also elevate the overall look and feel of your living space. A well-executed installation and attention to detail can make a significant difference in the aesthetics and functionality of your room.
Troubleshooting and common challenges
While installing floor molding can be a relatively straightforward DIY project, there are common challenges and issues that may arise during the process. Being prepared to troubleshoot and address these challenges can help ensure a successful installation. Here are some troubleshooting tips for common problems:
-
Uneven Floors:
- Problem: If your floor is uneven or slopes, it can be challenging to install molding that sits flat against the wall.
- Solution:
- Use shims: Insert shims behind the molding where needed to level it.
- Adjust the molding: If your floor slopes, you may need to cut the molding at a slight angle to match the floor’s slope. A contour gauge can help you trace the floor’s shape.
-
Tricky Corners:
- Problem: Inside and outside corners can be challenging to cut and join precisely, leading to gaps or poor fit.
- Solution:
- Coping: Use a coping saw to create cope cuts for inside corners, ensuring a snug fit.
- Angle cuts: Make precise 45-degree angle cuts for outside corners.
- Practice: Practice coping and making angle cuts on scrap pieces before working on your actual molding.
-
Loose or damaged molding:
- Problem: Over time, molding can become loose or damaged, leading to gaps between the molding and the wall or floor.
- Solution:
- Remove the molding: Carefully remove the affected section of molding.
- Repairs: Repair any damage, such as cracks or splits, and reattach the molding securely.
- Use adhesive: Apply construction adhesive to the back of the molding before nailing it down for added stability.
-
Gaps and imperfections:
- Problem: Gaps or imperfections can occur between the molding and the wall or floor, even after installation.
- Solution:
- Caulk: Fill gaps and imperfections with paintable caulk to create a seamless appearance.
- Wood filler: Use wood putty or filler to fill nail holes and gaps between the molding and the wall. Sand and paint over the filler for a smooth finish.
-
Choosing the Right Material:
- Problem: Selecting the wrong type of molding material can lead to issues like warping, splitting, or not matching the room’s style.
- Solution:
- Research: Choose molding materials that are appropriate for your environment and style preferences. For example, consider moisture-resistant materials for bathrooms or kitchens.
- Quality matters. Invest in quality molding materials to ensure durability and longevity.
-
Alignment and leveling:
- Problem: If the molding is not level or properly aligned, it can create an unprofessional appearance.
- Solution:
- Use a level: Continuously check for level and alignment as you install the molding.
- Adjust as needed. Make the necessary adjustments to ensure that the molding is straight and aligned with the walls and corners.
-
Matching Styles:
- Problem: Selecting molding that doesn’t match the room’s style or decor can lead to visual inconsistencies.
- Solution:
- Research styles: Carefully research and choose molding styles that complement the room’s aesthetics.
- Test samples: Obtain samples or swatches to compare with your room’s existing design elements before making a final selection.
Addressing these common challenges and troubleshooting issues as they arise will help you achieve a professional and polished look in your molding installation. Don’t hesitate to seek advice or assistance from experienced professionals or resources if you encounter unique or particularly challenging problems during your project.
Conclusion
Congratulations on completing your journey to install and choose floor molding successfully! By following this comprehensive guide, you’ve gained the knowledge and skills needed to enhance the aesthetics and functionality of your living space. Floor molding not only provides a seamless transition between your floors and walls but also adds a touch of elegance to your rooms.
Remember that floor molding not only serves a functional purpose but also adds a finishing touch that enhances the overall beauty of your living spaces. Regular maintenance and attention to detail will keep your molding looking its best for years to come.
We hope this guide has empowered you to take on your floor molding project with confidence. Whether you’re a seasoned DIY enthusiast or a novice, you now have the knowledge and skills to create a seamless and visually appealing transition between your floors and walls, transforming your home into a more polished and elegant space. Enjoy the results of your hard work and creativity!

Sanding
We provide virtually dust-free sanding with our continuous belt machinery with mobile extraction units, giving you a safer environment for your family.
Oiling
This organic finish not only adds beauty to your home but also has exceptional water-repellent characteristics, making it easier to clean and maintain.
Waxing
This natural floor finish offers the softest and most mellow appearance – and leaves your floor able to breath.
Buffing
Using soft buffing machines (and hand-polishing where required) will bring a wonderful sheen to your newly-finished floor.
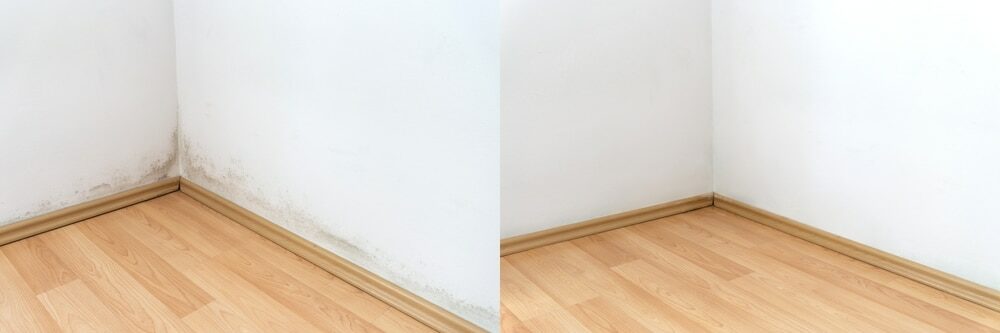
Repairs
We offer a full assessment of your wooden floors to determine what repairs are needed to provide the perfect working surface for the later stages of sanding, staining and sealing.
Restoration
We offer a comprehensive restoration process designed to address floors that are improperly fitted or damaged over time through wear and tear.
Request a fixed price quote for your wood floor restoration now
Simply enter your postcode below to get started.
Services
Wood Floor Sanding Wood Floor Restoration Wood Floor Scratch Repair Squeaky Wood Floor Repair Parquet Floor Sanding Parquet Floor Restoration Commercial Floor Sanding Church Floor Sanding Community Centre Floor Sanding School Floor Sanding Gap Filling Gap Filling with ResinCopyright © Mr Sander®
Privacy & Cookies Terms & Conditions Complaints Procedure Cancellation Rights Sitemap

Get An Instant Price Estimate Before You Go…
Simply enter the rooms you need sanded and we’ll provide you with a price estimate instantly! Try our price calculator now.
Get a Price Estimate NowLocal Floor Sanding Experts
Over 500 5-Star Reviews
Safe, Dust Free Sanding
Operating Since 1994