London:
Nationwide:
25,000+
Floors Restored
27 Years Experience
Wood Flooring Association Certified
The Best Products for Reviving Old Decks
Posted on December 23, 2023
Deck Sanding
Top Products for Renewing Weathered Decks: Comprehensive Guide
Welcome to our comprehensive guide to reviving old decks! If you’re reading this, chances are your deck has seen better days and is in dire need of a makeover. Decks are more than just structures; they are where memories are made, from summer barbecues to quiet evenings under the stars. However, over time, exposure to the elements can take a toll on even the sturdiest decks, leaving them faded, worn, and less inviting.
This blog post is crafted for homeowners who cherish their outdoor spaces and are eager to breathe new life into their aged decks. We understand that the process of reviving a deck can be daunting, from choosing the right cleaning agents to selecting the perfect stain or paint. But worry not! We’re here to guide you through every step of this transformative journey.
In the following sections, we will delve into the signs of deck ageing, the essential preparation steps, and, most importantly, review the best products available for Deck Restoration. Whether you’re a seasoned DIY enthusiast or a first-time deck owner, this guide is designed to equip you with the knowledge and confidence needed to restore your deck to its former glory. So, grab your tools, and let’s get started on giving your old deck a new lease on life!
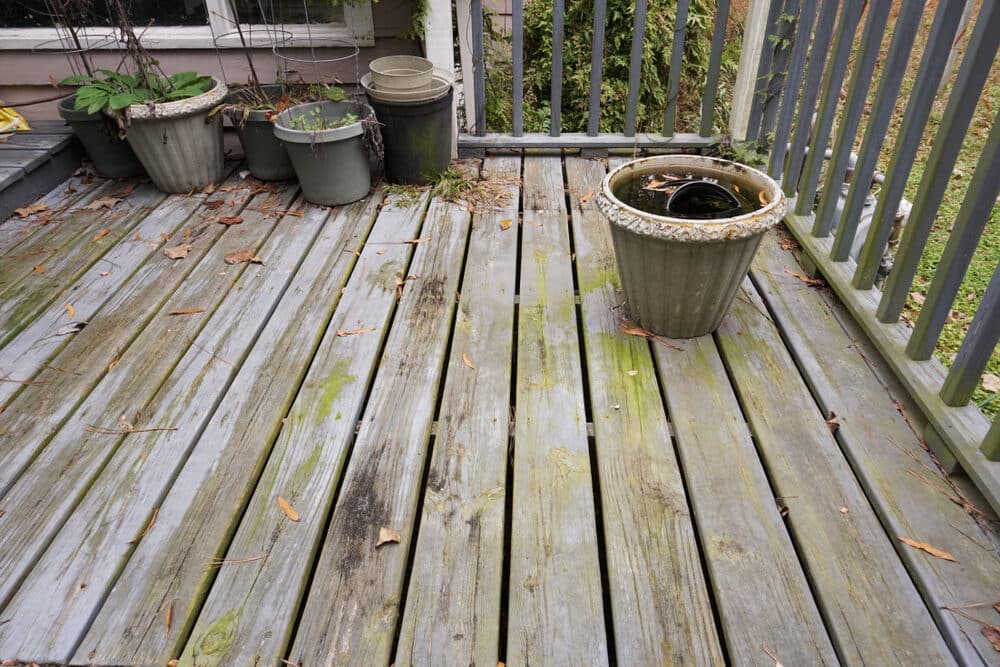
Understanding deck ageing
When it comes to home improvement, the deck is often an overlooked asset. Yet, it endures the brunt of nature’s elements more than most parts of our homes. Understanding how and why decks age is crucial in the process of reviving them. This knowledge not only helps in choosing the right revival products but also in preventing future wear and tear.
1. The Impact of Weather and Environment
- Sun Exposure: Prolonged exposure to sunlight can fade deck surfaces, causing them to lose their colour and vibrancy. Ultraviolet (UV) rays can break down the fibres in the wood, leading to brittleness and cracking.
- Moisture and Humidity: Decks are often exposed to rain, snow, and varying humidity levels. Constant moisture exposure can lead to rot, mould, and mildew, especially in untreated or poorly sealed wood.
- Temperature Fluctuations: Extreme temperature changes can cause wood to expand and contract, leading to warping, splitting, and the loosening of fasteners.
2. Physical Wear and Tear
- Foot Traffic: Regular use of the deck contributes to wear and tear. High-traffic areas often show signs of ageing more quickly than less-used sections.
- Furniture and Fixtures: The weight and movement of outdoor furniture and fixtures can scratch, dent, or otherwise damage the deck surface.
3. Biological Factors
- Insect Infestation: Wood-boring insects like termites and carpenter bees can compromise the structural integrity of a deck.
- Plant and Algae Growth: Plants growing too close to the deck or algae formation on the wood can lead to decay and discoloration.
4. Maintenance History
- Previous Treatments: The type and quality of previous treatments (like sealants, stains, or paints) significantly affect the ageing process of a deck.
- Cleaning Practices: Inadequate or harsh cleaning methods can accelerate the deterioration of the deck.
Preparation Steps Before Revival
Reviving an old deck is more than just applying a new coat of paint or stain. Proper preparation is key to ensuring that the revival products adhere correctly and last longer. This section will guide you through the essential steps to prepare your deck for a successful makeover.
1. Inspection and Assessment
- Check for Damage: Begin by inspecting your deck for any signs of damage, such as rot, splintering wood, loose nails or screws, and structural issues. Addressing these problems before proceeding ensures a stable and safe deck.
- Identify Areas Needing Special Attention: Look for high-traffic areas, spots with significant wear, or sections with mould and mildew growth. These areas might require extra care during the cleaning and treatment process.
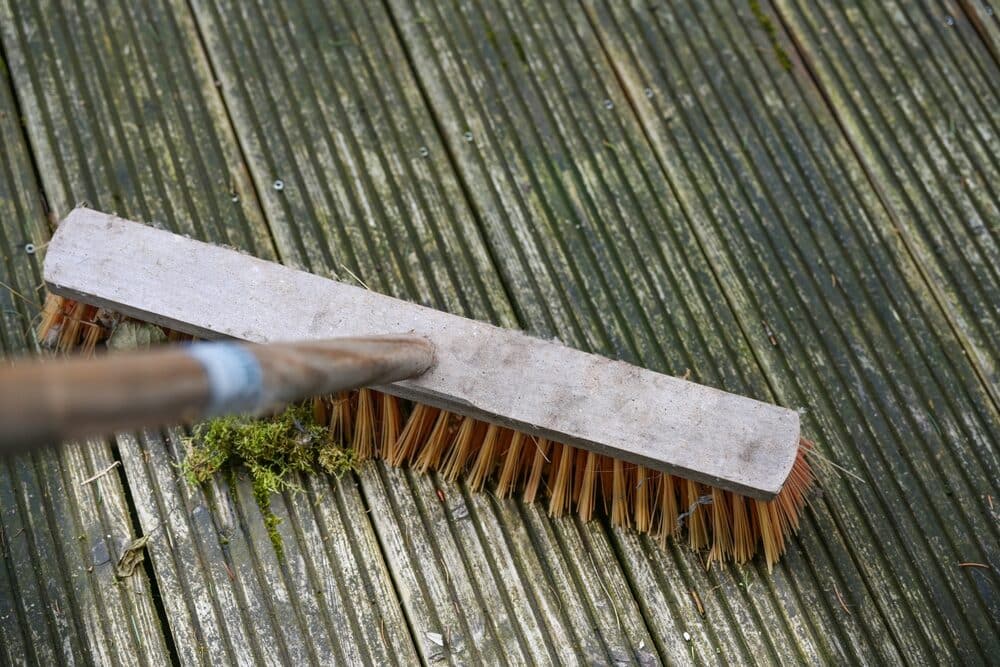
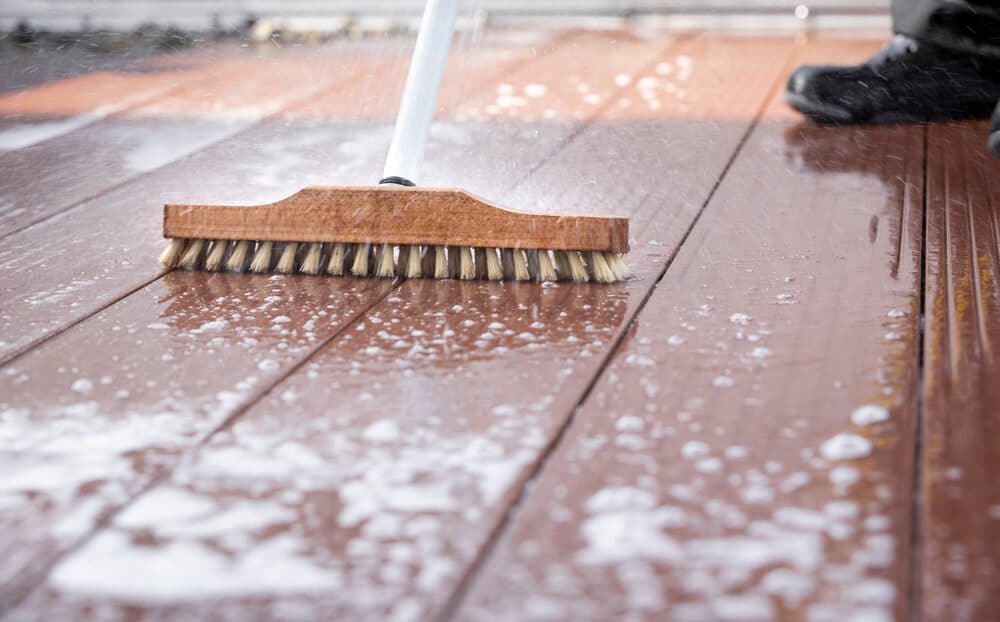
2. Cleaning the deck
- Clear the Surface: Remove all furniture, grills, planters, and other items from the deck. This step provides unobstructed access to the entire surface.
- Sweep and Wash: Sweep the deck to remove loose dirt, leaves, and debris. Follow this with a thorough wash. For this, you can use a deck cleaner suitable for your deck’s material. Apply the cleaner and scrub the deck to remove dirt, grime, and any remnants of old sealants or paints.
- Address Mould and Mildew: If your deck has mould or mildew, use a cleaner specifically designed to tackle these issues without damaging the wood.
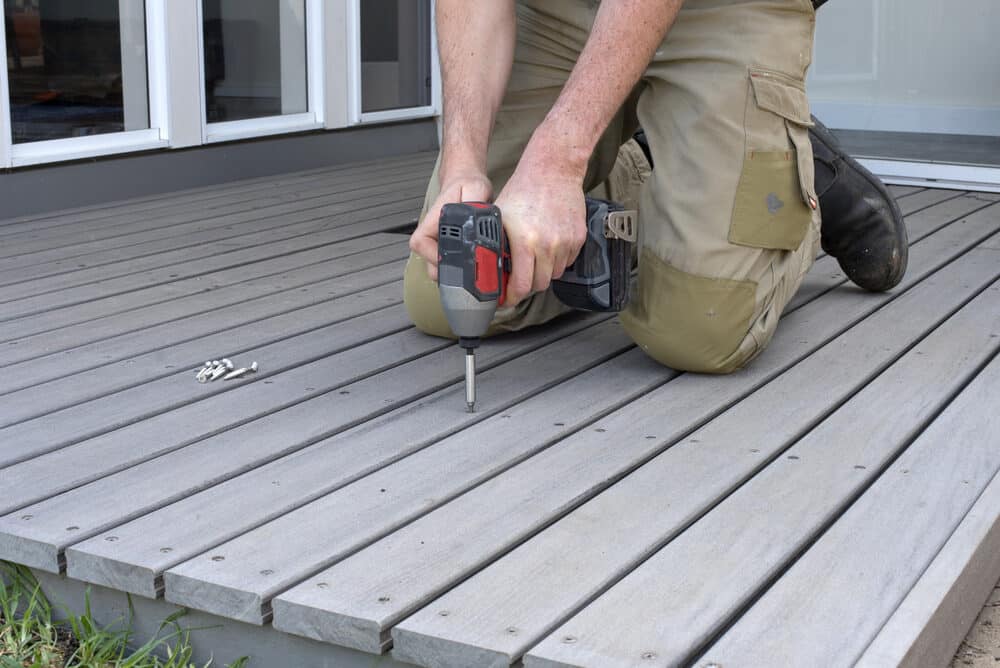
3. Making Repairs
- Replace Damaged Boards: Replace any boards that are too damaged to be repaired. Ensure the new boards are of the same type and finish as the existing ones.
- Secure Loose Elements: Tighten or replace any loose nails, screws, or fasteners. This step is crucial for the safety and longevity of the deck.
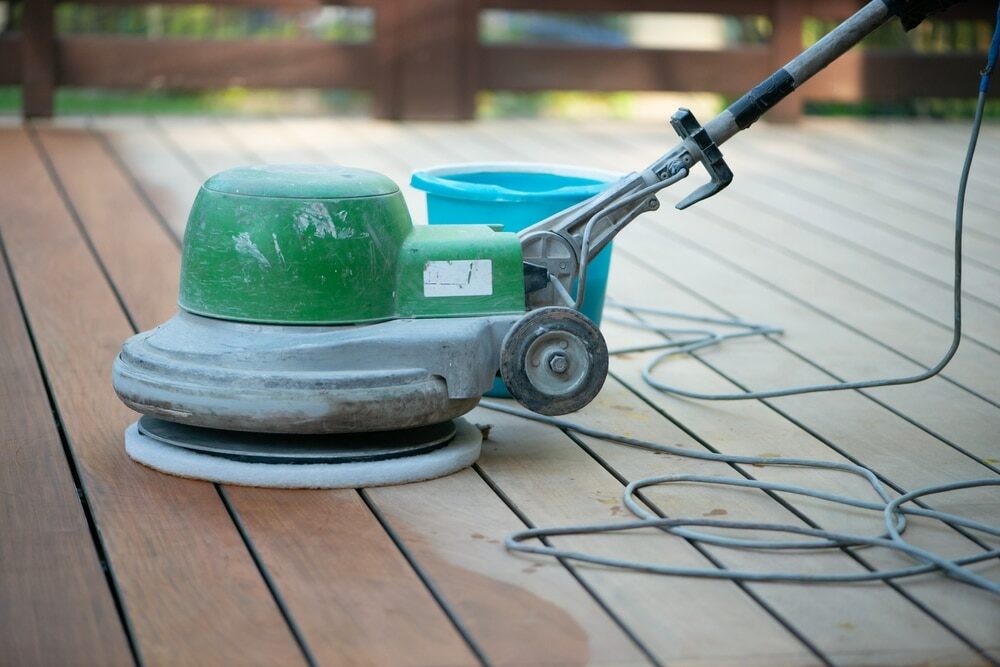
- Sand Rough Areas: Sand down splintered sections and rough edges. Deck Sanding not only smoothens the surface but also helps the new stain or paint adhere better.
4. Preparing the Surrounding Area
- Protect Landscaping: Cover nearby plants and grass with tarps to protect them from cleaners, stains, or paints.
- Prepare for Weather Conditions: Choose a day with favourable weather for your deck revival project. Avoid days with extreme temperatures, high humidity, or rain.
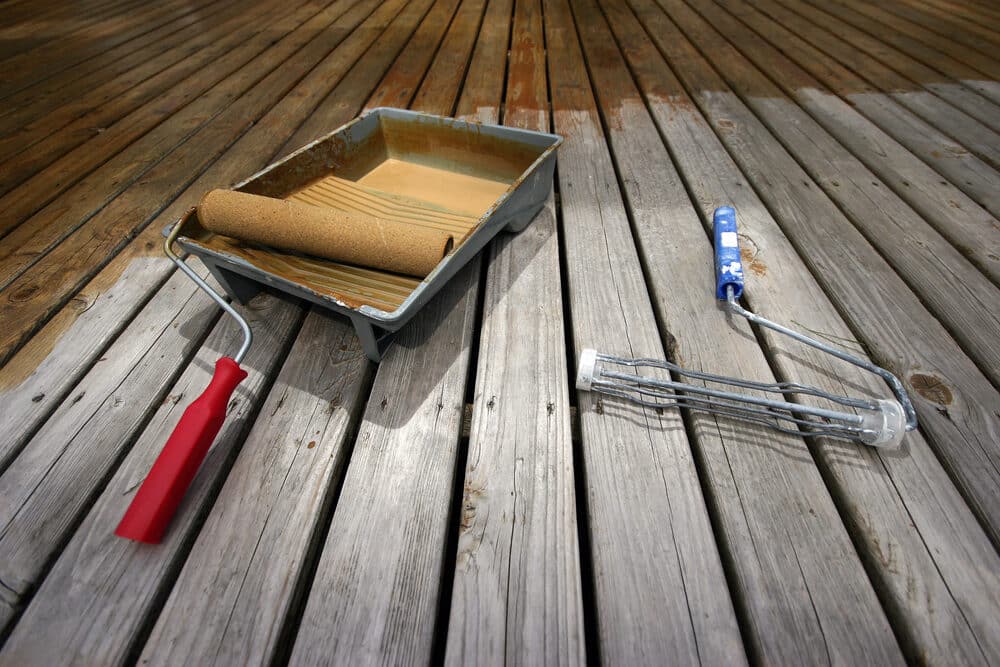
5. Gathering Necessary Tools and Materials
- Tools for Cleaning and Repairs: deck cleaner, brushes, sandpaper, hammer, nails, or screws.
- Safety Equipment: gloves, goggles, and masks, especially if you’re using chemical cleaners or doing sanding work.
Choosing the Right Products
The success of your deck revival largely depends on the products you choose. With a myriad of options available, selecting the right cleaners, stains, paints, and sealers can be overwhelming. This section aims to simplify that decision-making process, ensuring you select products that not only rejuvenate your deck but also provide long-lasting protection.
1. Understanding Your Deck’s Material
- Wood Type: Different woods have varying characteristics and may respond differently to certain products. For instance, hardwoods like teak or ipe require different treatments than softer woods like pine or cedar.
- Current Condition: The age and current condition of your deck will also influence your product choices. Older, more weathered decks might need more robust restoration products.
2. Selecting Cleaners and Strippers
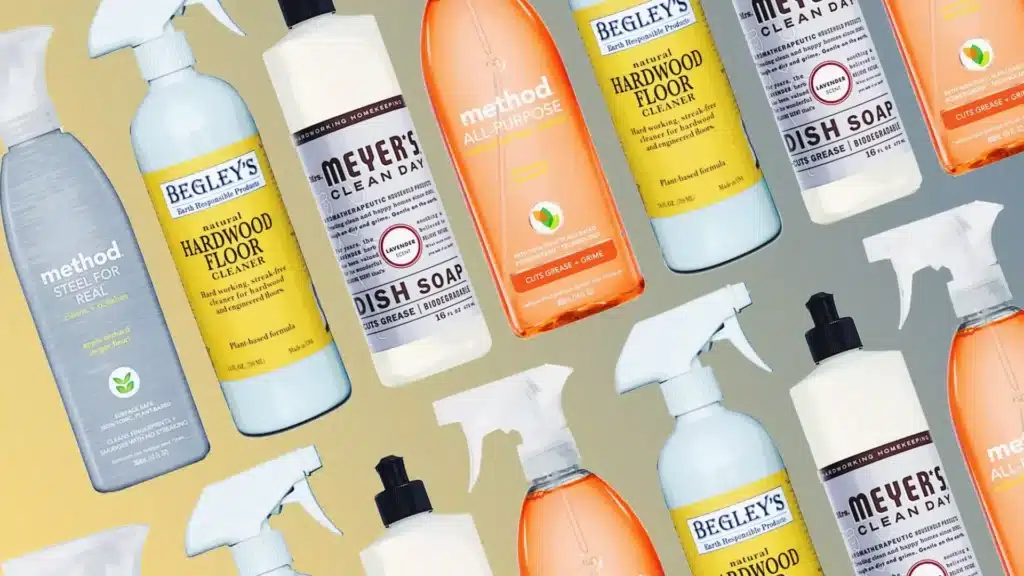
- For general cleaning, choose a deck cleaner that suits your deck’s material. Biodegradable, non-toxic cleaners are preferable for their environmental friendliness and safety.
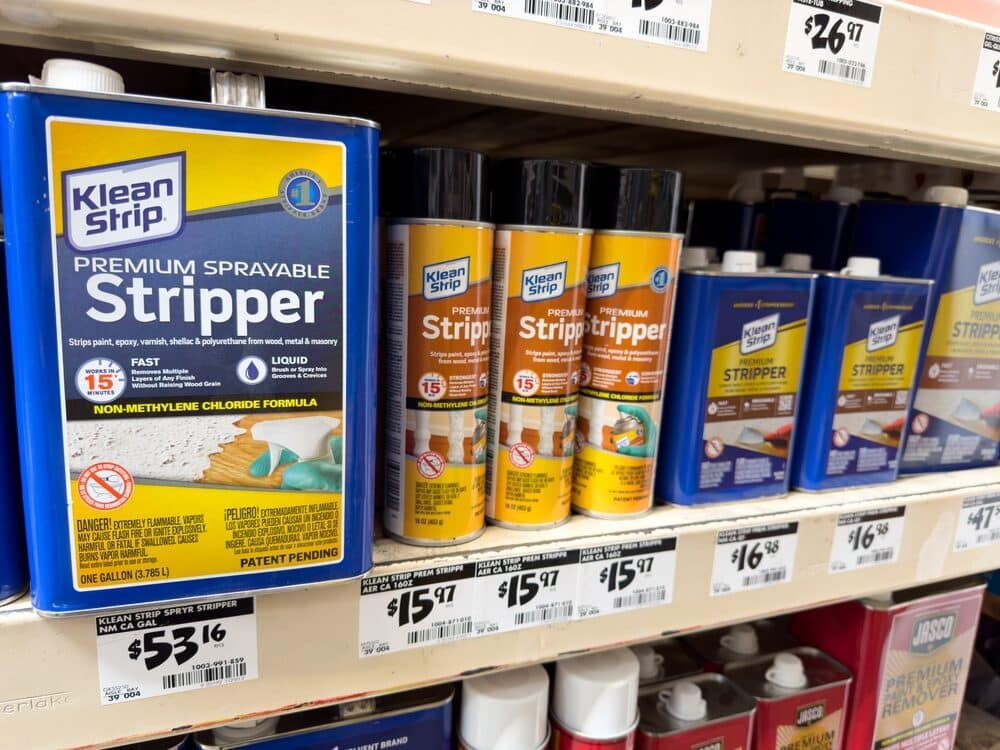
- For Removing Old Finishes: If your deck has remnants of old paint or stain, you might need a stripping product. Ensure the stripper is compatible with your deck material and the type of finish you’re removing.
3. Choosing Stains and Paints
- Stains: Stains penetrate the wood and offer varying levels of opacity, from transparent to solid. They protect against moisture and UV rays while enhancing the natural beauty of the wood.
- Opacity Levels: Choose based on the desired appearance and the amount of natural wood grain you want to show.
- Colour: Consider the existing colour scheme of your house and landscape. Test small areas before committing to a full application.
- Paints: Deck paints provide a thicker protective layer and come in a wide range of colors. They are ideal for decks that are more worn, as they can better hide imperfections.
- Quality: Opt for high-quality, durable outdoor paint designed to withstand foot traffic and weather conditions.
4. Deciding on sealers
- Water vs. Oil-Based Sealers: Water-based sealers are easier to apply and clean up, while oil-based sealers penetrate deeper for longer-lasting protection.
- UV Protection and Waterproofing: Look for sealers that offer UV protection to prevent fading and waterproofing to guard against moisture.
5. Additional Considerations
- Eco-Friendliness: If environmental impact is a concern, look for products with low volatile organic compounds (VOCs) and natural ingredients.
- Ease of Application: Consider how easy the product is to apply. Some may require professional equipment or techniques.
- Maintenance and Durability: Assess the maintenance requirements and durability of the product. Some finishes last longer but might be more challenging to apply or maintain.
The Best Cleaners for Pre-Treatment
Before applying stains, paints, or sealers to your deck, it’s crucial to thoroughly clean the surface. Cleaning removes dirt, grime, mould, and old finishes, ensuring that the new products adhere properly. Here are some of the best cleaners for pre-treating your deck:
1. Oxygen-Based Deck Cleaners
- Benefits: These cleaners are environmentally friendly and safe for plants and pets. They use oxygen bleach to remove stains and discoloration.
- Usage: Mix with water as per the product instructions. Apply, scrub, and rinse.
2. Alkaline Deck Cleaners
- Benefits: Effective at removing tough stains, mildew, and algae. They work well on heavily soiled decks.
- Usage: Follow the manufacturer’s guidelines for dilution and application. Scrub with a brush or broom, then rinse.
3. Citrus-Based Cleaners
- Benefits: These cleaners are non-toxic and biodegradable, making them safe for the environment. They have a pleasant citrus scent.
- Usage: Dilute as directed, apply, and scrub the deck surface. Rinse thoroughly.
4. Acid-Based Deck Cleaners (for Specific Stains)
- Benefits: Acid-based cleaners are effective against rust stains, tannin stains (from leaves), and hard water stains.
- Usage: Follow safety precautions, including wearing protective gear. Dilute as instructed, apply, and rinse promptly.
5. Specialty Mould and Mildew Cleaners
- Benefits: Specifically designed to tackle mould and mildew growth on decks. They often come in spray bottles for easy application.
- Usage: Spray directly on mould and mildew, let it sit for the recommended time, then scrub and rinse.
6. Pressure Washers
- Benefits: While not cleaner in themselves, pressure washers are powerful tools for cleaning decks. They can be used in combination with deck cleaners to remove deeply embedded dirt.
- Usage: Be cautious with pressure washers, as too much pressure can damage the wood. Use a wide spray pattern and keep the nozzle moving to prevent wood damage.
7. Biodegradable and Non-Toxic Cleaners
- Benefits: These cleaners are eco-friendly and safe for both your deck and the environment. They are a good choice if you’re concerned about chemical exposure.
- Usage: Follow the manufacturer’s instructions for dilution and application. Scrub and rinse.
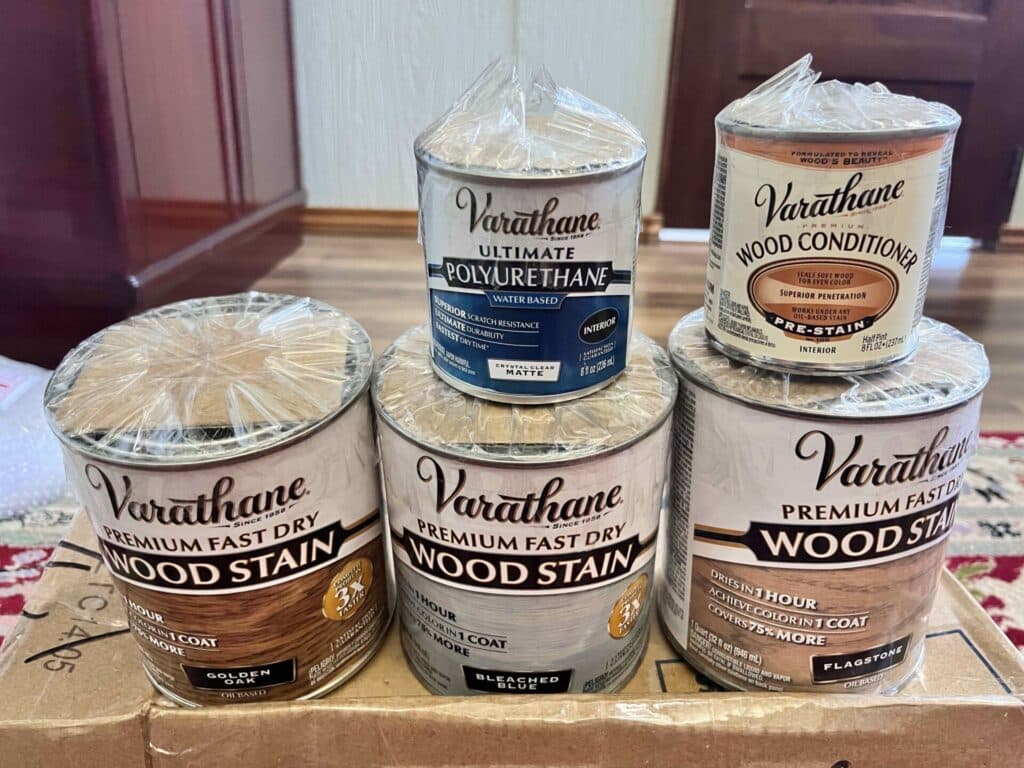
Top Stains and Paints for Decks
Choosing the right stain or paint for your deck is crucial for both aesthetics and protection. Here are some of the top stains and paints that are highly rated by homeowners and professionals:
Stains:
1. Semi-Transparent Stains
- Benefits: These stains enhance the natural beauty of the wood while providing protection. They allow the wood grain to show through.
- Recommended Product: Behr Premium Semi-Transparent Wood Stain: Known for its durability and wide range of colour options.
2. Solid Stains
- Benefits: Solid stains offer a painted appearance while still allowing some wood texture to show through. They provide excellent protection against UV rays and moisture.
- Recommended Product: Cabot Solid Colour Acrylic Deck Stain: Trusted for its long-lasting finish and variety of colour choices.
3. Transparent Stains
- Benefits: Transparent stains provide minimal colour but emphasise the wood’s natural appearance. They offer good UV protection and are easy to maintain.
- Recommended Product: Thompson’s WaterSeal Transparent Stain, known for its water-repelling properties and UV resistance.
Deck Paints:
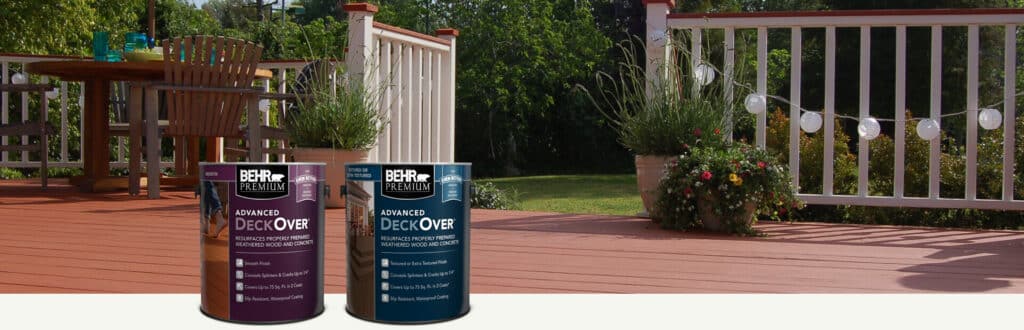
1. BEHR Premium Advanced DeckOver:
- Benefits: This thick, textured paint is designed to fill cracks and hide imperfections. It’s highly durable and comes in a range of colours.
- Recommended Product: BEHR Premium Advanced DeckOver.
2. KILZ Over Armour Textured Wood/Concrete Coating:
- Benefits: This heavy-duty paint is ideal for severely weathered decks. It provides a textured, slip-resistant surface.
- Recommended Product: KILZ Over Armour Textured Wood/Concrete Coating.
3. Valspar Porch and Floor Latex Paint:
- Benefits: Valspar offers a range of colours and is known for its durability on high-traffic surfaces.
Sealers: The Final Touch
Once you’ve cleaned, stained, or painted your deck, the final step in the restoration process is applying a sealer. Deck sealers are essential for protecting the finish and ensuring your hard work lasts for years. Here’s what you need to know about sealers:
1. Purpose of sealers
- Sealers are designed to provide an additional layer of protection for your deck.
- They help to lock in the stain or paint, preventing it from fading or deteriorating due to exposure to UV rays and moisture.
- Sealers also create a barrier against water penetration, reducing the risk of rot, mould, and mildew growth.
2. Types of deck sealers
- Water-Based Sealers: These sealers are easy to work with, dry quickly, and emit fewer fumes. They are a good choice for environmentally conscious homeowners.
- Oil-Based Sealers: Oil-based sealers penetrate deeper into the wood, providing longer-lasting protection. They are often recommended for hardwood decks.
- Clear vs. Tinted Sealers: Clear sealers provide a natural look, while tinted sealers can enhance or alter the deck’s colour.
3. Application Tips
- Ensure your deck is clean and dry before applying the sealer.
- Use a high-quality brush, roller, or sprayer for even application.
- Apply the sealer in thin, even coats, following the manufacturer’s instructions regarding drying times between coats.
- Pay special attention to areas with high exposure, such as railings and stairs.
- Avoid over-application, as it can lead to a sticky or tacky finish.
4. Top Deck Sealers
- Thompson’s WaterSeal Advanced Natural Wood Protector: This clear sealer provides excellent water resistance and UV protection.
- Ready Seal 512 Pecan Exterior Wood Stain and Sealer: A combined stain and sealer product known for its easy application and durability.
- Cabot Australian Timber Oil: Ideal for hardwood decks, this sealer offers deep penetration and rich colour enhancement.
5. Maintenance and Reapplication
- Regular maintenance is key to extending the life of your deck’s finish. Inspect your deck annually for signs of wear and tear.
- Depending on the type of sealer and the deck’s exposure to the elements, you may need to reapply the sealer every 1 to 3 years.
6. Safety Precautions
- Wear appropriate protective gear, including gloves and safety goggles, when applying sealers.
- Dispose of used rags and materials properly, as some sealers are flammable.
DIY tips and tricks
Taking on a DIY deck revival project can be rewarding, but it also requires careful planning and execution. These tips and tricks will help you achieve professional-looking results while avoiding common pitfalls:
1. Plan and prepare
- Start with a clear plan outlining the steps, materials, and timeline for your project.
- Gather all the necessary tools and materials before you begin to avoid interruptions.
2. Safety First
- Wear appropriate safety gear, including gloves, safety goggles, and a dust mask, when sanding or working with chemicals.
- Be cautious when using power tools or pressure washers to avoid injury.
3. Cleaning and sanding
- Invest time in thorough cleaning and sanding. A clean and smooth surface is essential for a successful finish.
- Sanding can be labor-intensive, but it is crucial for removing old finishes and creating a smooth canvas.
4. Test Colours
- Before applying stains or paints, test them on a small, inconspicuous area of your deck to ensure they provide the desired colour and finish.
5. Work in Sections
- Divide your deck into manageable sections and tackle one area at a time. This approach ensures consistent results and prevents the need to walk on wet surfaces.
6. Follow the product instructions
- Always follow the manufacturer’s instructions for cleaning, staining, painting, and sealing products.
- Pay attention to the recommended drying times between coats.
7. Use quality tools
- Invest in high-quality brushes, rollers, or sprayers for applying stains, paints, and sealers. Quality tools make a significant difference in the final result.
8. Maintain Consistency
- Maintain a consistent application technique, whether brushing, rolling, or spraying, to achieve an even finish.
- Avoid lap marks by working from one end of a board to the other without stopping.
9. Protect Surroundings
- Cover nearby plants, grass, and any surfaces you don’t want to be affected by cleaners, stains, or paints.
- Use drop cloths to catch drips and spills.
- Check the Weather: Choose a day with suitable weather conditions for your project. Avoid working in extreme heat, cold, or high humidity.
- Regular Maintenance: After your deck revival, establish a routine maintenance schedule to keep it looking great. Regular cleaning and resealing will prolong the finish’s life.
- Safety During and After: Be mindful of slip hazards when working with wet finishes. Apply non-slip additives to stairs and high-traffic areas if needed. Keep safety in mind when using your deck, and promptly clean up spills to prevent accidents.
- Enjoy the process: Embrace the DIY project as an opportunity to connect with your outdoor space. Take breaks to admire your progress and envision the final result.
Maintenance Post-Revival
Congratulations on successfully reviving your deck! However, the work doesn’t end there. Proper maintenance is crucial to ensuring your newly restored deck stays beautiful and functional for years to come. Here are the essential maintenance steps to follow:
1. Regular Cleaning
- Keep your deck clean by sweeping away debris and leaves regularly. Use a leaf blower or a stiff broom to prevent dirt and grime buildup.
2. Periodic Washing
- Schedule a thorough deck wash at least once a year. Use a deck cleaner to remove dirt, mildew, and stains. Follow the product instructions for the best results.
3. Inspection
- Conduct regular inspections to check for any signs of wear, loose boards, or damage. Address issues promptly to prevent further deterioration.
4. Reapply Sealant
- Depending on your deck’s exposure to the elements and the type of sealer used, you may need to reapply the sealer every 1 to 3 years. This step is crucial for maintaining water resistance and UV protection.
5. Touch-Ups
- Keep some leftover stain or paint for touch-ups. Small scratches and blemishes can be easily repaired to maintain the deck’s appearance.
6. Furniture Care
- Use furniture pads or coasters under outdoor furniture to prevent scratches and wear on the deck surface.
- Move furniture periodically to prevent moisture from getting trapped underneath.
7. Prevent mould and mildew
- Trim back overhanging branches or plants that may block sunlight and promote mould and mildew growth.
- Consider installing gutters or downspouts to redirect water away from the deck.
8. Snow and Ice Removal
- Shovel the snow carefully to avoid damaging the deck. Use a plastic shovel or a broom with soft bristles.
- Avoid using salt or de-icing chemicals, as they can harm the finish and wood.
9. Address Stains Promptly
- If spills occur, clean them up promptly to prevent staining. Use a mild detergent and water for most spills.
- For stubborn stains, refer to the manufacturer’s guidelines for stain removal.
- Regular Inspections: Check the stability of railings, stairs, and structural elements. Tighten loose fasteners and replace damaged parts.
- Pest Control: Keep an eye out for signs of wood-boring insects or termite infestations. Address these issues promptly to prevent structural damage.
- Aesthetic Upkeep: Consider refreshing the deck’s appearance with a new coat of stain or paint every few years to maintain its look and protection.
Conclusion
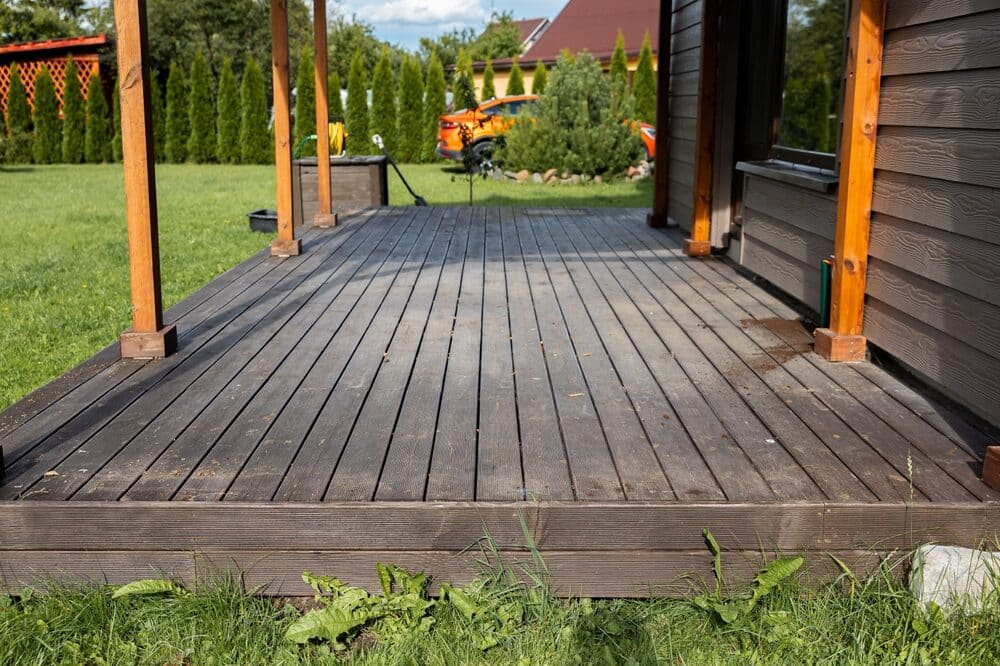
Reviving an old deck is a labour of love that pays off in spades. From the initial cleaning and preparation to the careful selection of stains, paints, and sealers, every step is an investment in the longevity and beauty of your outdoor living space. By following the tips and guidelines outlined in this comprehensive guide, you’ve taken the first step towards transforming your weathered deck into a rejuvenated haven for relaxation and entertainment.
Remember, the process may be challenging at times, but the results are well worth the effort. Your deck is more than just an extension of your home; it’s a place where memories are made, where you bask in the warmth of the sun, and where you gather with loved ones. With proper maintenance and care, your newly revived deck will continue to be a cherished part of your home for years to come.
As you embark on your deck revival journey, keep in mind that each step, from understanding deck ageing to choosing the right products and implementing DIY tips and tricks, contributes to the overall success of your project. Whether you’re a seasoned DIY enthusiast or a first-time deck owner, this guide has provided you with the knowledge and confidence needed to tackle this transformative endeavour.
So, pick up your tools, don your safety gear, and let your creativity flow. Your revitalised deck awaits, ready to shine as a testament to your hard work and dedication. Enjoy the process, embrace the outdoors, and relish the beauty of your newly revived deck.

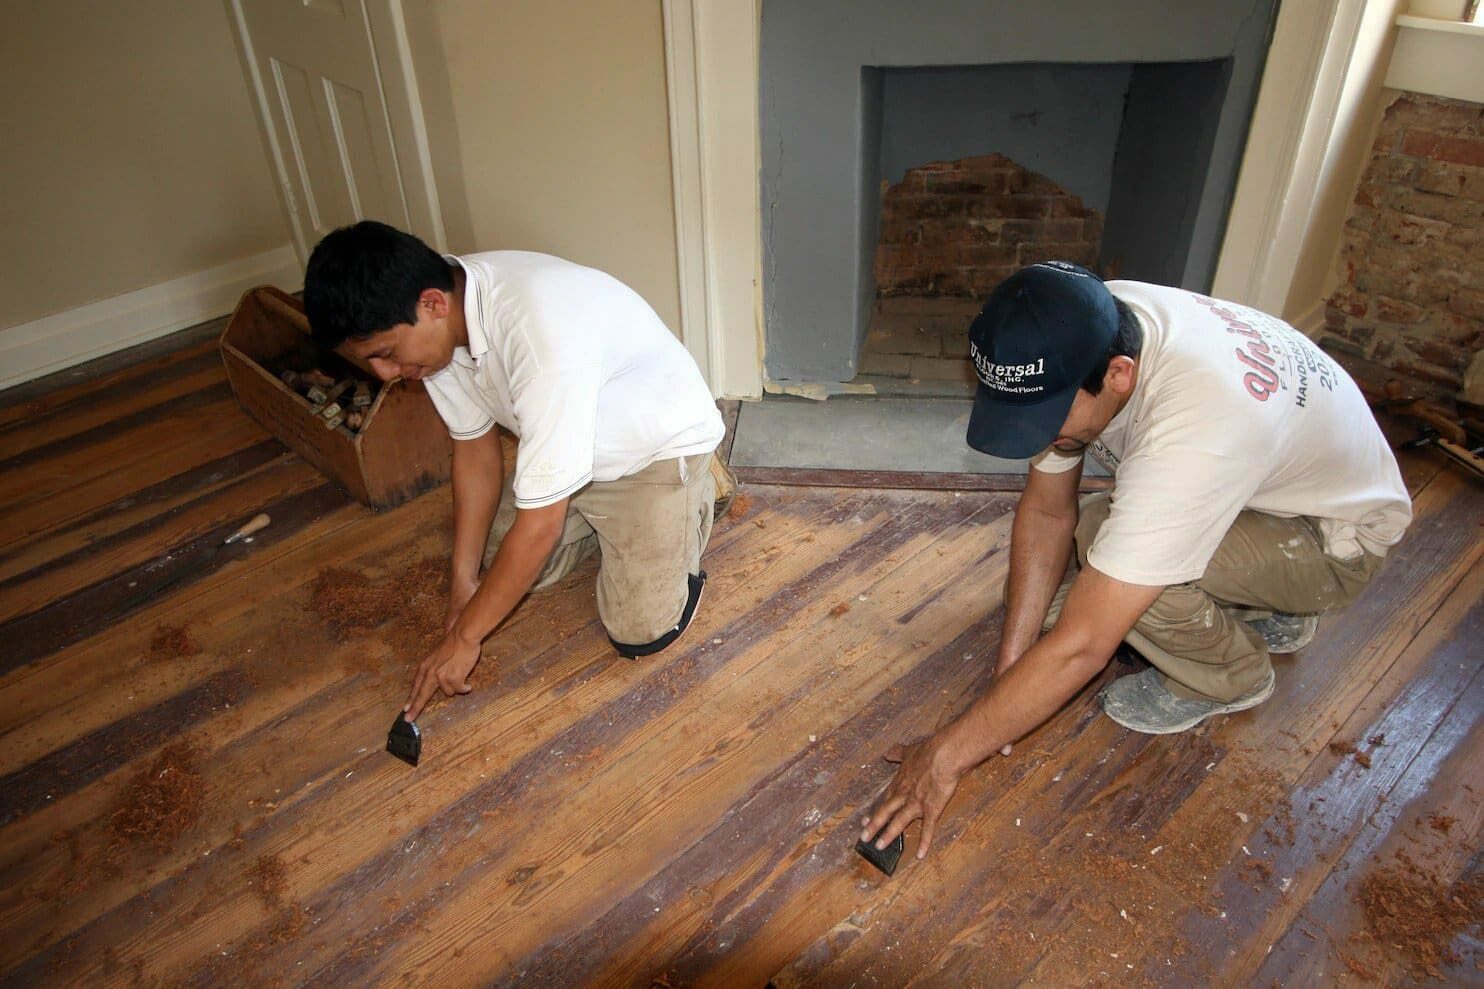


Sanding
We provide virtually dust-free sanding with our continuous belt machinery with mobile extraction units, giving you a safer environment for your family.
Oiling
This organic finish not only adds beauty to your home but also has exceptional water-repellent characteristics, making it easier to clean and maintain.
Waxing
This natural floor finish offers the softest and most mellow appearance – and leaves your floor able to breath.
Buffing
Using soft buffing machines (and hand-polishing where required) will bring a wonderful sheen to your newly-finished floor.
Repairs
We offer a full assessment of your wooden floors to determine what repairs are needed to provide the perfect working surface for the later stages of sanding, staining and sealing.
Restoration
We offer a comprehensive restoration process designed to address floors that are improperly fitted or damaged over time through wear and tear.
Request a fixed price quote for your wood floor restoration now
Simply enter your postcode below to get started.
Services
Wood Floor Sanding Wood Floor Restoration Wood Floor Scratch Repair Squeaky Wood Floor Repair Parquet Floor Sanding Parquet Floor Restoration Commercial Floor Sanding Church Floor Sanding Community Centre Floor Sanding School Floor Sanding Gap Filling Gap Filling with ResinCopyright © Mr Sander®
Privacy & Cookies Terms & Conditions Complaints Procedure Cancellation Rights Sitemap

Get An Instant Price Estimate Before You Go…
Simply enter the rooms you need sanded and we’ll provide you with a price estimate instantly! Try our price calculator now.
Get a Price Estimate NowLocal Floor Sanding Experts
Over 500 5-Star Reviews
Safe, Dust Free Sanding
Operating Since 1994