London:
Nationwide:
25,000+
Floors Restored
27 Years Experience
Wood Flooring Association Certified
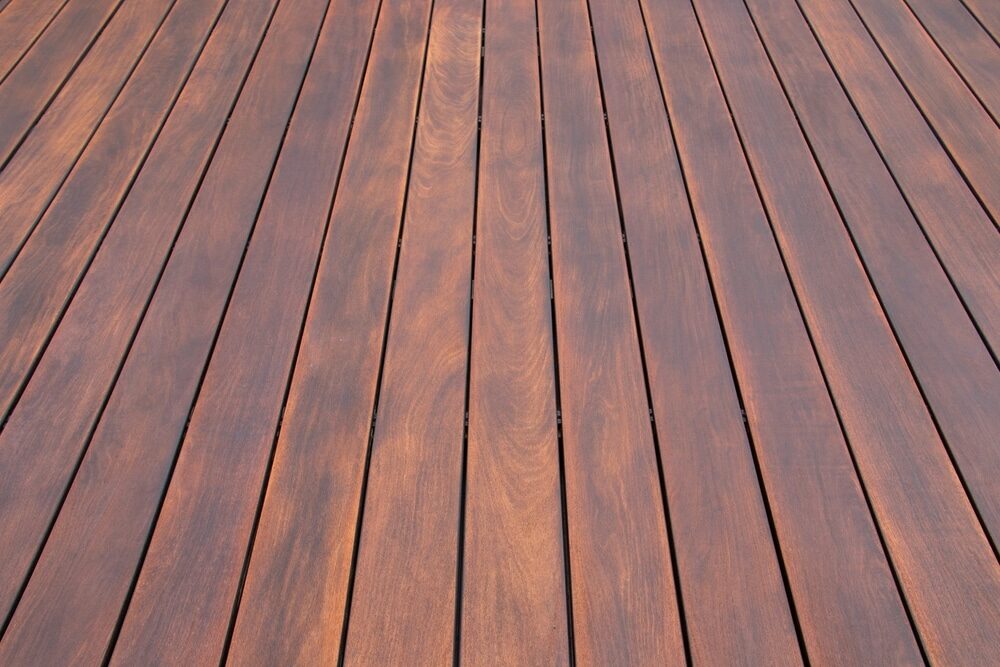
Sanding or Stripping: What’s Best for Your Wood Deck?
Posted on December 8, 2023
Wood Floor Sanding and Oiling
Choosing Between Sanding and Stripping for Your Wood Deck: Which Is Right for You?
Your wood deck is a beloved outdoor space where you can relax, entertain, and soak up the beauty of nature. Over time, though, exposure to the elements can take its toll, leaving your deck weathered, worn, and in need of some TLC. The key to restoring its former glory lies in choosing the right method: sanding or stripping.
In this comprehensive guide, we’ll explore the nuances of deck sanding and stripping as methods for rejuvenating your wood deck. We’ll help you understand the factors to consider when making this crucial decision, provide step-by-step instructions for each process, and offer expert recommendations to ensure your deck maintenance project is a success.
Whether you’re a seasoned DIY enthusiast or a first-time deck caretaker, this article will equip you with the knowledge and tools you need to make the best choice for your wood deck. So, let’s dive in and discover whether sanding or stripping is the ideal solution for breathing new life into your outdoor oasis.

Understanding Your Wood Deck
Before diving into the sanding vs. stripping debate, it’s essential to have a solid grasp of your wood deck’s unique characteristics. Every deck is different, and understanding its composition, age, and condition will guide you in making the right choice for maintenance.
Types of Wood Commonly Used in Decks
- Identifying the wood species: pine, cedar, redwood, and more.
- How the type of wood affects maintenance requirements.
The Age and Condition of Your Deck
- Assessing the age of your deck: new, moderately aged, or old.
- Signs of wear and tear: cracks, splinters, warping, and rot.
Existing finishes and coatings
- Identifying previous stains, paints, or sealants.
- The impact of existing finishes on your maintenance options.
Your wood deck’s characteristics is the first step in determining whether sanding or stripping is the best route to a beautifully restored outdoor space. Let’s explore these factors in more detail to help you make an informed decision.
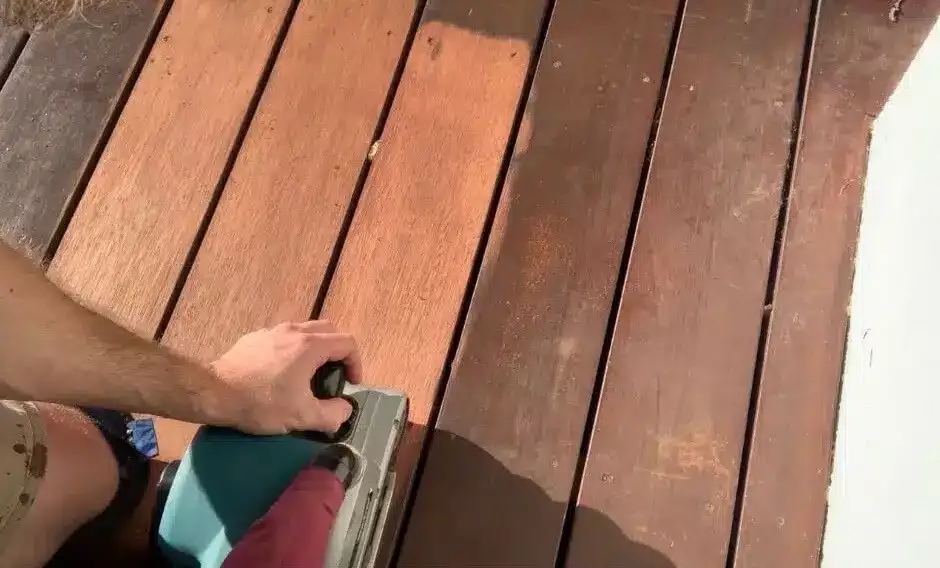
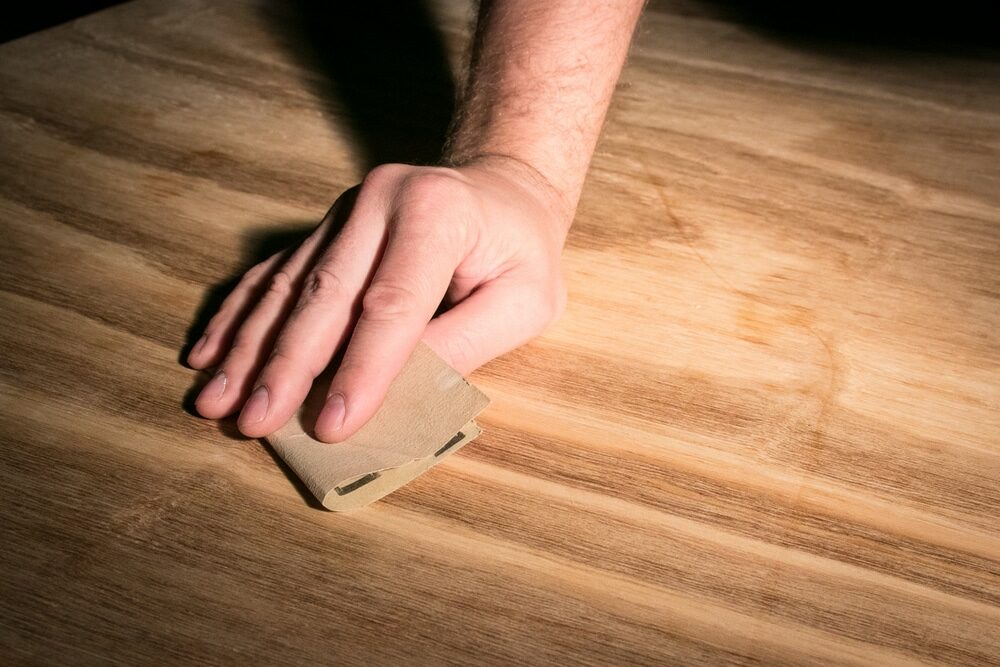
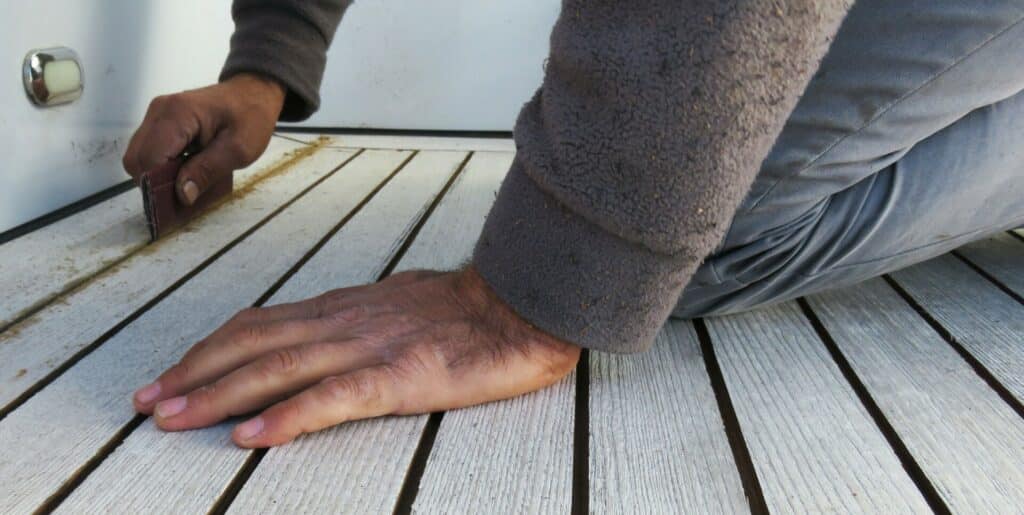
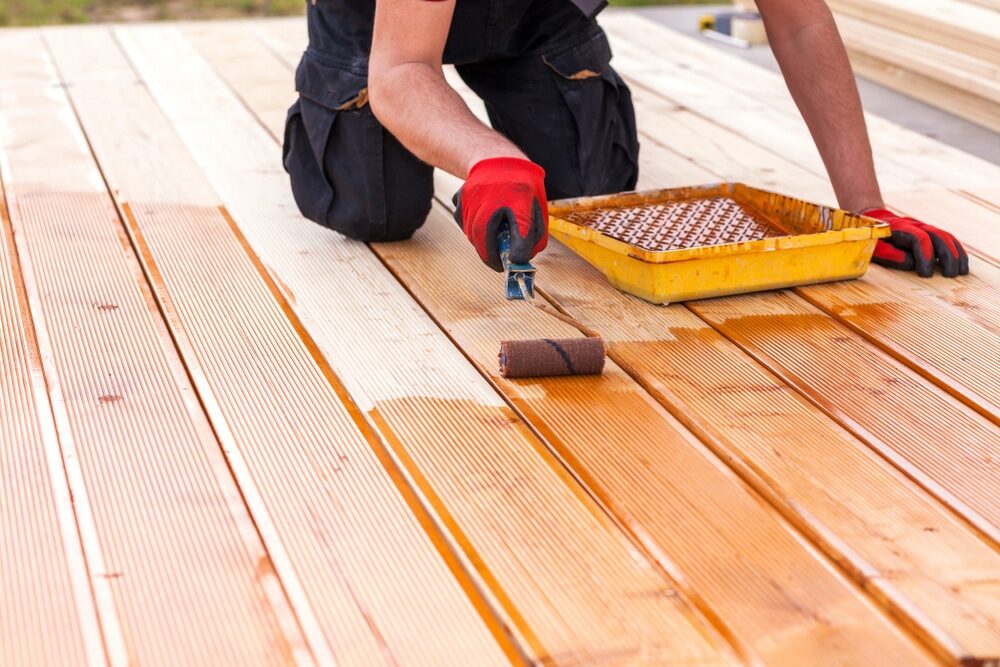
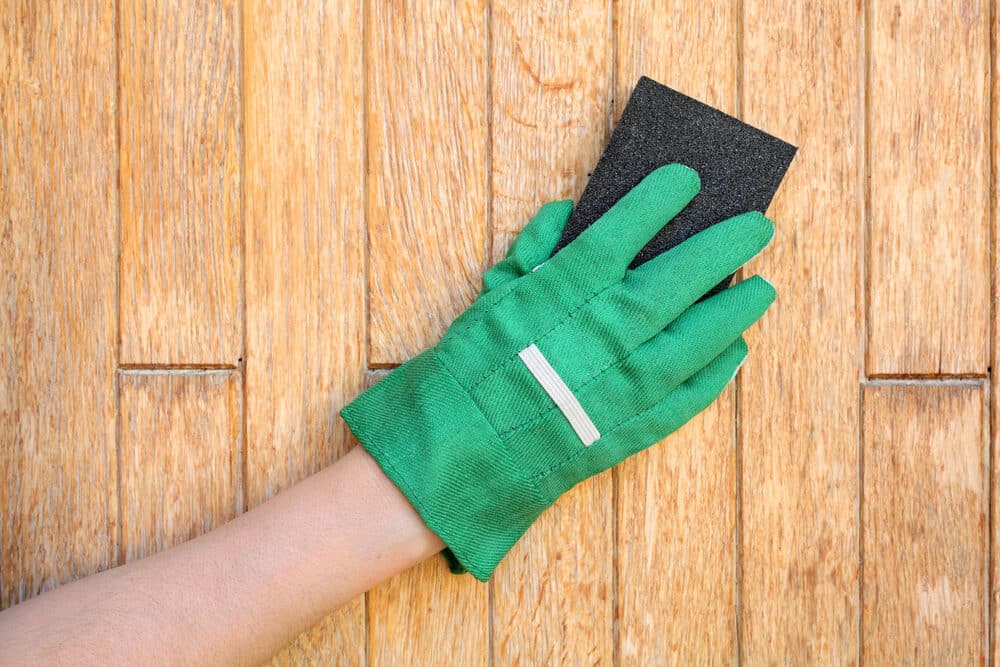
Sanding Your Wood Deck
When it comes to revitalizing your wood deck, sanding is a popular method that can yield impressive results. This process involves the removal of the top layer of wood, effectively eliminating imperfections and revealing a fresh, smooth surface. Here’s a closer look at sanding your wood deck:
The Sanding Process Explained
- How sanding works to restore your deck’s appearance.
- The role of abrasive materials in the sanding process.
When to Choose Sanding Over Stripping
- Situations where sanding is the preferred option.
- Advantages of sanding for certain deck conditions.
Tools and materials needed for sanding
- Essential equipment for a successful sanding project.
- Safety gear and precautions to follow during sanding.
Step-by-Step Guide: Sanding Your Wood Deck
- Detailed instructions on how to sand your deck effectively.
- Tips and techniques for a smooth, even finish.
Pros and Cons of Sanding
- Advantages of choosing sanding as your deck restoration method.
- There are potential drawbacks and limitations to consider.
Sanding your wood deck can be a rewarding DIY project that breathes new life into your outdoor space. This section will provide you with all the information you need to confidently undertake a sanding project and achieve stunning results.
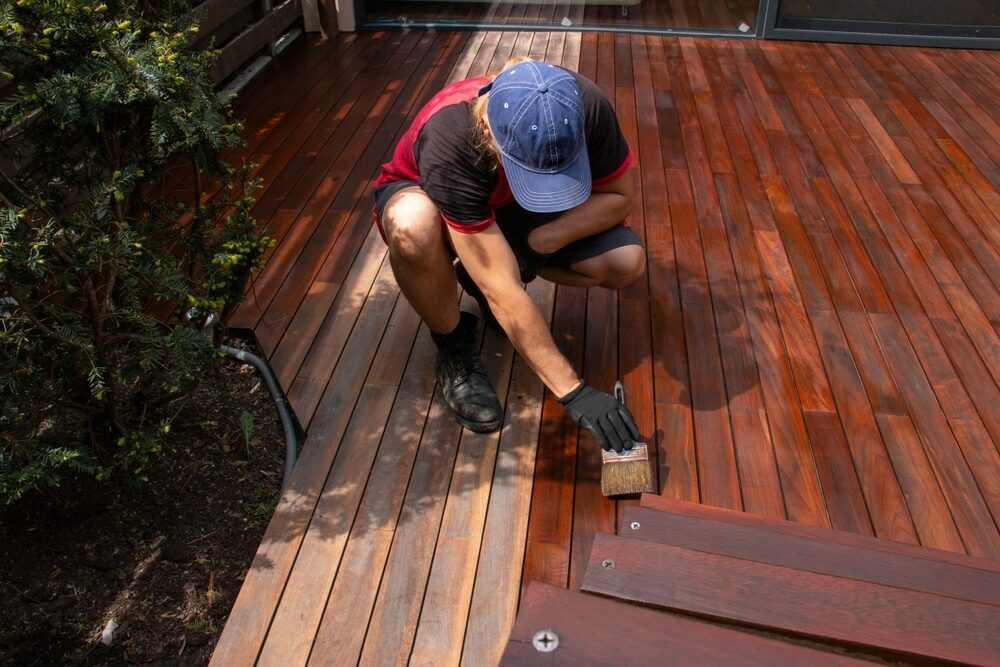
Stripping Your Wood Deck
Stripping is another viable method for rejuvenating your wood deck, particularly when dealing with old or heavily coated surfaces. This process involves the removal of existing finishes, paints, or sealants to expose the natural wood underneath. Here’s a comprehensive look at stripping your wood deck:
What does stumbling involve?
- Understanding the purpose and benefits of deck stripping.
- The chemical and mechanical methods used in the stripping process.
When is stripping the better option?
- Situations where stripping is the preferred choice.
- Advantages of stripping for specific deck conditions.
Tools and Materials Needed for Stripping
- Essential equipment for a successful stripping project.
- Safety precautions and protective gear for handling stripping agents.
Step-by-Step Guide: Stripping Your Wood Deck
- Detailed instructions on how to strip your deck effectively.
- Tips and techniques for safe and efficient stripping.
Pros and Cons of Stripping
- Advantages of choosing stripping as your deck restoration method.
- Potential challenges and considerations associated with stripping.
Stripping your wood deck can be a transformative process, especially when dealing with layers of old finishes or paint. This section will equip you with the knowledge and guidance to tackle a stripping project with confidence and achieve impressive results.
Pros and Cons of Stripping Your Wood Deck
Stripping your wood deck can be an effective method for revitalizing it, but it’s important to weigh the advantages and disadvantages to make an informed decision. Here are the pros and cons of using the stripping method:
Pros:
- Complete Removal of Old Finishes: Stripping ensures all previous stains, paints, and sealants are entirely removed, allowing you to start with a clean slate.
- Restores Natural Beauty: Stripping reveals the natural wood grain and color, which can be particularly appealing if you want to showcase the wood’s inherent beauty.
- Optimal Surface for New Finish: The stripped surface provides an ideal foundation for applying a new finish or stain, ensuring better adhesion and a longer-lasting result.
- Effective for Heavily Coated Decks: Stripping is often the best choice for decks with multiple layers of paint or stubborn finishes that are difficult to sand off.
- Longer Maintenance Intervals: A properly stripped and refinished deck may require less frequent maintenance compared to other methods, saving you time and effort in the long run.
Cons:
- Chemical Exposure: Some stripping agents contain harsh chemicals that can be harmful to the environment and require proper disposal. Personal protective equipment is essential.
- Labor-Intensive: Stripping a deck can be a time-consuming and physically demanding process, especially for larger decks or intricate designs.
- Potential Damage: Inexperienced users may inadvertently damage the wood if they use excessive force or leave stripping agents on for too long.
- Additional Steps Required: Stripping is just one part of the process. After stripping, you’ll need to clean and possibly neutralize the wood before applying a new finish, adding more steps to the project.
- Cost: The cost of stripping agents, equipment, and protective gear can add up, making it a more expensive option compared to sanding in some cases.
Stripping your wood deck can be an effective method for achieving a fresh, natural look, especially when dealing with heavily coated or old decks. However, it comes with its challenges and requires careful handling of chemicals and proper preparation to achieve the desired results. Be sure to assess your deck’s condition and your own skill level before deciding on this method.
Choosing the Right Method for Your Deck
Now that you have a thorough understanding of both sanding and stripping methods, it’s time to make the critical decision of which one is best suited, Sanding or Stripping for Wood Deck. Here’s a guide to help you navigate this choice:
Assess your deck’s current condition.
- Examine the type of wood used, age, and overall condition.
- Identify any existing finishes, coatings, or damage.
- Consider the size and complexity of your deck.
Determine your restoration goals.
- Define your desired outcome: a natural wood look, a specific stain color, or a protective sealant.
- Think about the long-term maintenance you’re willing to commit to.
Consider the environmental impact.
- Evaluate the environmental consequences of each method, including chemical use and waste disposal.
- Explore eco-friendly alternatives if sustainability is a priority.
Assess your DIY skills and resources.
- Be honest about your level of expertise and the tools and equipment you have access to.
- Decide whether you’ll undertake the project yourself or hire a professional.
Budget and time constraints
- Compare the cost and time required for sanding and stripping.
- Factor in the cost of materials, equipment, and any potential professional services.
Seek expert recommendations.
- Consult with experts or professionals in deck restoration for personalized advice.
- Get referrals or recommendations from trusted sources.
Test a Small Area
- If you’re uncertain, conduct a small test using both methods to see which yields the best results for your deck.
Final Decision
- Based on your assessment, goals, skills, and budget, make an informed decision between sanding and stripping.
- Consider a hybrid approach, combining both methods if necessary for different areas of your deck.
Remember that there is no one-size-fits-all answer when choosing between sanding and stripping. Your decision should align with your deck’s unique characteristics and your personal preferences. With careful consideration, you’ll be well on your way to restoring your wood deck to its former glory.
Preparing Your Deck
Before you embark on the journey of sanding or stripping your wood deck, proper preparation is essential to ensuring a successful and safe project. This section will guide you through the crucial steps to get your deck ready for restoration:
Cleaning and clearing the deck area
- Remove all furniture, plants, and other items from the deck.
- Sweep or use a leaf blower to clear debris like leaves, dirt, and twigs.
- Clean any mold, mildew, or algae growth using a suitable cleaner and a stiff brush.
- Repair or replace damaged or loose boards, nails, and screws.
Safety Precautions
- Prioritize safety by wearing appropriate protective gear, including safety goggles, gloves, and a dust mask.
- Ensure the work area is well ventilated, especially when using chemicals for stripping.
- Keep children and pets away from the work area during the project.
Weather Considerations
- Plan your project during a period of dry weather to prevent rain from interfering with the process.
- Avoid working in extreme heat or direct sunlight, as it can make the task more challenging.
Gather the necessary tools and materials.
- Double-check that you have all the equipment and supplies required for sanding or stripping.
- Arrange your tools and materials in an organized manner for easy access during the project.
Prepare your work surface.
- Lay down drop cloths or plastic sheeting to protect nearby surfaces from debris, dust, or chemicals.
- Mask off any adjacent areas you want to keep clean, such as walls or railings.
Dispose of waste responsibly.
- If using stripping agents, follow proper disposal guidelines for hazardous materials.
- Consider eco-friendly disposal options or recycling programs for any waste generated during the project.
Create a workspace.
- Set up a designated workspace with your tools and materials within easy reach.
- Ensure you have a comfortable and safe working environment.
By taking these preparatory steps, you’ll create the ideal foundation for your deck restoration project. Proper preparation not only ensures the safety of both you and your deck but also contributes to the overall success of the sanding or stripping process.
Finishing Touches
After completing the sanding or stripping process, your wood deck is well on its way to being beautifully restored. However, there are essential finishing touches and post-restoration steps to ensure the project’s success and long-lasting results:
Cleaning Up After Sanding or Stripping:
- Thoroughly clean the deck to remove dust, debris, and any residual stripping agents or sanding dust.
- Use a broom, vacuum, or air blower to get rid of fine particles.
- Consider washing the deck with a mild detergent and water to remove any remaining residues.
Deciding on the Best Finish for Your Deck:
- Choose the type of finish that suits your aesthetic preferences and deck’s requirements, such as clear sealers, semi-transparent stains, or solid color stains.
- Consider using a finish with UV protection to prevent sun damage and fading.
Applying a Protective Coat:
- Follow the manufacturer’s instructions for your chosen finish or sealant.
- Use a brush, roller, or sprayer to apply the finish evenly.
- Pay special attention to edges, corners, and any intricate areas.
- Allow the finish to dry thoroughly between coats, and apply multiple coats as recommended for optimal protection.
Inspecting for Touch-Ups:
- Examine the deck’s surface for any missed spots, uneven finishes, or imperfections.
- Address any touch-ups needed to ensure a uniform and attractive result.
Replacing Furniture and Decor:
- Once the finish has dried completely, place your furniture, plants, and decorative elements back onto the deck.
- Consider using furniture pads or coasters to prevent scratches and marks on the newly restored surface.
Adding Final Decorative Touches:
- Enhance the overall appearance of your deck with outdoor rugs, cushions, and lighting.
- Incorporate potted plants or hanging baskets to create an inviting outdoor space.
Establishing a Maintenance Routine:
- Create a schedule for regular deck maintenance, including cleaning, inspections, and reapplying finishes as needed.
- Follow best practices for deck care to prolong the life and beauty of your wood deck.
Enjoying Your Renewed Deck:
- Take the time to relax and appreciate your deck’s rejuvenated appearance.
- Invite friends and family to enjoy your outdoor oasis together.
By paying attention to these finishing touches, you’ll not only complete your wood deck restoration project but also ensure that your deck remains a source of pride and enjoyment for years to come. Proper maintenance and care will help preserve its beauty and protect your investment.
Maintenance and Care for Your Wood Deck
Maintaining and caring for your wood deck is crucial to preserving its beauty and functionality over time. Regular upkeep can extend the lifespan of your deck and ensure it remains a welcoming outdoor space. Here’s a comprehensive guide to deck maintenance and care:
Regular Cleaning:
- Sweep or use a leaf blower to remove debris, leaves, and dirt from your deck regularly.
- Clean the deck surface with a mild detergent and water solution to remove stains, mold, and mildew.
- Consider using a pressure washer with a low-pressure setting to deep clean the wood periodically.
Inspect for damage:
- Routinely inspect your deck for signs of wear, including loose boards, popped nails or screws, and splintered wood.
- Replace or repair damaged components promptly to prevent further deterioration.
Annual Inspection and Maintenance:
- Conduct a thorough annual inspection of your deck in the spring or early summer.
- Check for signs of rot, decay, or insect infestations in the wood.
- Tighten any loose hardware and reapply caulk or sealant where needed.
Reapply Finish or Sealant:
- Depending on your deck’s exposure to the elements and the type of finish used, you may need to reapply a protective finish or sealant every 1–3 years.
- Follow the manufacturer’s recommendations for your specific product.
Regularly trim plants and trees.
- Trim back overhanging branches, shrubs, or vines to prevent excess moisture and debris buildup on the deck.
- Ensure proper drainage to avoid water pooling.
Furniture Maintenance:
- Inspect and clean your deck furniture regularly.
- Use furniture covers or store items indoors during the winter to protect them from the elements.
Preventative Measures:
- Use coasters or furniture pads to prevent scratches and marks from heavy or abrasive items.
- Place planters on saucers or stands to prevent moisture damage to the wood.
Winter Care:
- Clear your deck of snow and ice promptly to prevent moisture-related issues.
- Avoid using ice-melt products that can damage the wood.
Consider rugs and mats:
- Place outdoor rugs or mats in high-traffic areas to protect the deck’s surface from excessive wear.
Stain and Finish Maintenance:
- If you’ve applied a stain or finish, inspect it regularly for signs of wear and fading.
- Reapply a fresh coat as needed to maintain the deck’s appearance and protection.
Annual Safety Check:
- Ensure that handrails and guardrails are secure and meet local building codes.
- Check for any potential safety hazards.
Professional Inspections:
- Consider hiring a professional deck inspector to assess your deck’s structural integrity and safety, especially for older decks, or if you have any concerns.
By following these maintenance and care guidelines, you’ll keep your wood deck in excellent condition, allowing you to enjoy its beauty and functionality for years to come. A well-maintained deck not only enhances your outdoor living space but also protects your investment in your home.
Conclusion
In the world of home improvement and outdoor living, your wood deck holds a special place. It’s a sanctuary for relaxation, a venue for gatherings, and a bridge between your indoor and outdoor spaces. Whether you’ve chosen sanding or stripping, or perhaps a combination of both, to rejuvenate your wood deck, you’ve embarked on a journey to maintain and enhance this essential part of your home.
Throughout this comprehensive guide, we’ve explored the nuances of deck maintenance, guiding you through the decision-making process, preparation, and actual restoration methods. We’ve covered the pros and cons of sanding and stripping, highlighted the importance of understanding your deck’s unique characteristics, and provided tips for post-restoration care.
Your choice between sanding and stripping depends on various factors, including your deck’s age, condition, and personal preferences. Sanding offers a smooth surface and a fresh start, while stripping is effective for removing stubborn finishes and unveiling the natural beauty of the wood. Both methods, when executed with care, can result in a deck that’s not only visually appealing but also well-protected against the elements.
Remember, the journey doesn’t end with restoration. Regular maintenance and care are vital to preserving your deck’s allure and functionality. Through routine cleaning, inspections, and protective measures, you can ensure that your deck remains a source of enjoyment for years to come.
So, whether you’re savoring a morning coffee, hosting a barbecue with friends, or simply basking in the beauty of your outdoor oasis, your well-maintained wood deck will continue to be a cherished part of your home. Embrace the process, invest the time, and reap the rewards of a deck that’s not just wood and nails, but an extension of your living space and a testament to your commitment to maintaining your home’s beauty and value.


Sanding
We provide virtually dust-free sanding with our continuous belt machinery with mobile extraction units, giving you a safer environment for your family.
Oiling
This organic finish not only adds beauty to your home but also has exceptional water-repellent characteristics, making it easier to clean and maintain.
Waxing
This natural floor finish offers the softest and most mellow appearance – and leaves your floor able to breath.
Buffing
Using soft buffing machines (and hand-polishing where required) will bring a wonderful sheen to your newly-finished floor.
Repairs
We offer a full assessment of your wooden floors to determine what repairs are needed to provide the perfect working surface for the later stages of sanding, staining and sealing.
Restoration
We offer a comprehensive restoration process designed to address floors that are improperly fitted or damaged over time through wear and tear.
Request a fixed price quote for your wood floor restoration now
Simply enter your postcode below to get started.
Services
Wood Floor Sanding Wood Floor Restoration Wood Floor Scratch Repair Squeaky Wood Floor Repair Parquet Floor Sanding Parquet Floor Restoration Commercial Floor Sanding Church Floor Sanding Community Centre Floor Sanding School Floor Sanding Gap Filling Gap Filling with ResinCopyright © Mr Sander®
Privacy & Cookies Terms & Conditions Complaints Procedure Cancellation Rights Sitemap

Get An Instant Price Estimate Before You Go…
Simply enter the rooms you need sanded and we’ll provide you with a price estimate instantly! Try our price calculator now.
Get a Price Estimate NowLocal Floor Sanding Experts
Over 500 5-Star Reviews
Safe, Dust Free Sanding
Operating Since 1994