London:
Nationwide:
25,000+
Floors Restored
27 Years Experience
Wood Flooring Association Certified
How to Hand Sand Edges and Corners of Floors
Posted on January 20, 2024
Floor sanding techniques
Mastering the Art of Hand Sanding for Floors: Edges, Corners, and Perfection
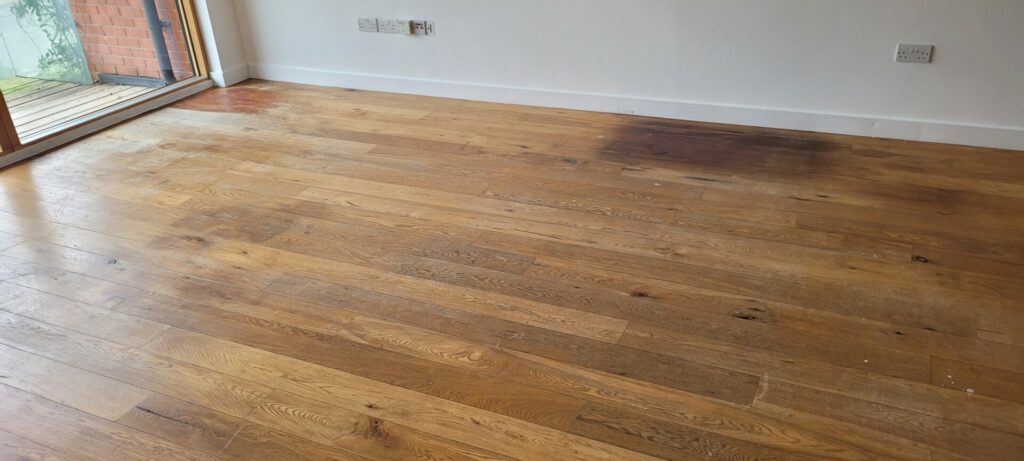
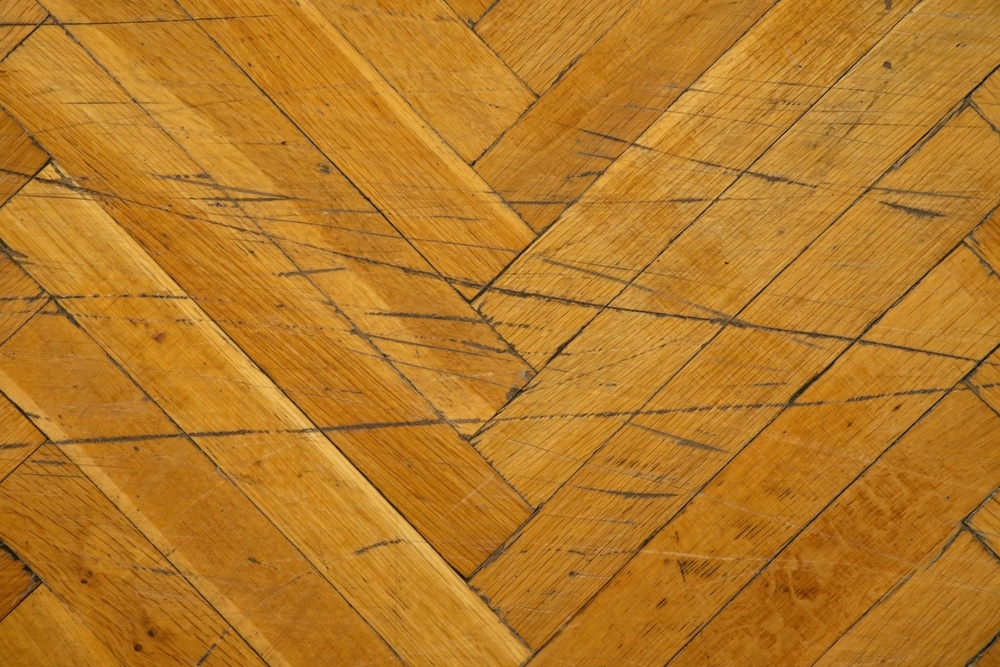
In the realm of floor restoration, hand sanding is a skill that stands the test of time. Unlike mechanical sanders, the human touch allows for a level of finesse and control that machines often fail to replicate. This is particularly true for the edges and corners of rooms where floors meet walls and other fixed obstacles. These spots require a discerning eye and a careful approach to prevent damage and ensure an even finish that blends seamlessly with the rest of the floor.
Moreover, hand sanding is not just a matter of technique but also an art form that respects the wood’s history and grain. Every floor has its own story, its own nuances, and its own unique patterns. By hand sanding, we pay homage to the craftsmanship that went into laying these floors, many of which have stood for decades, if not centuries. It’s a process that demands respect for the material and patience in execution, resulting in a floor that’s not just refurbished but revitalised, its character and history preserved for future generations to appreciate.
When it comes to restoring the beauty of wooden floors, attention to detail makes all the difference. Particularly challenging are the edges and corners, which are often neglected in standard sanding processes. Hand-sanding these areas is not just about aesthetics; it’s about preserving the integrity and extending the life of your flooring.
This guide is crafted to walk you through the meticulous process of hand-sanding the edges and corners of floors. Whether you’re a seasoned DIY enthusiast or a novice taking on a new project, our step-by-step approach will ensure that you achieve a professional finish, maintaining the charm and character of your wooden floors.
Hand sanding requires patience, a steady hand, and an understanding of the wood’s grain. It’s a task that, when done correctly, can transform a room, enhancing the natural beauty of the wood. Let’s embark on this journey together, ensuring your floors receive the care and attention they deserve.
Necessary Tools and Materials
Before embarking on the task of hand-sanding the edges and corners of your floors, it’s essential to gather the right tools and materials. This preparation is key to ensuring a smooth and efficient process. Here’s a comprehensive list of what you’ll need:
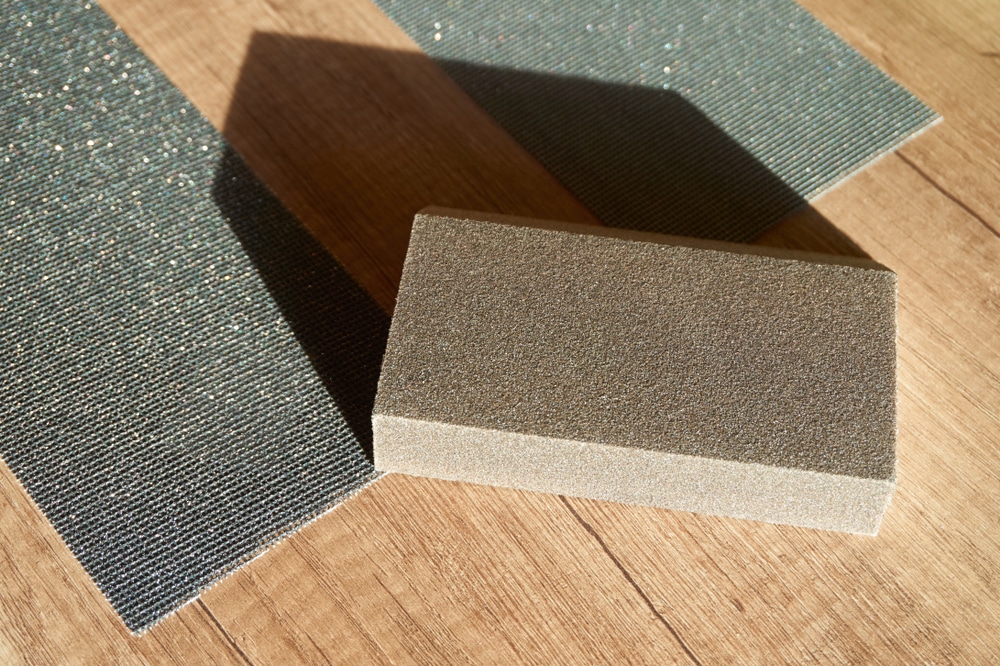
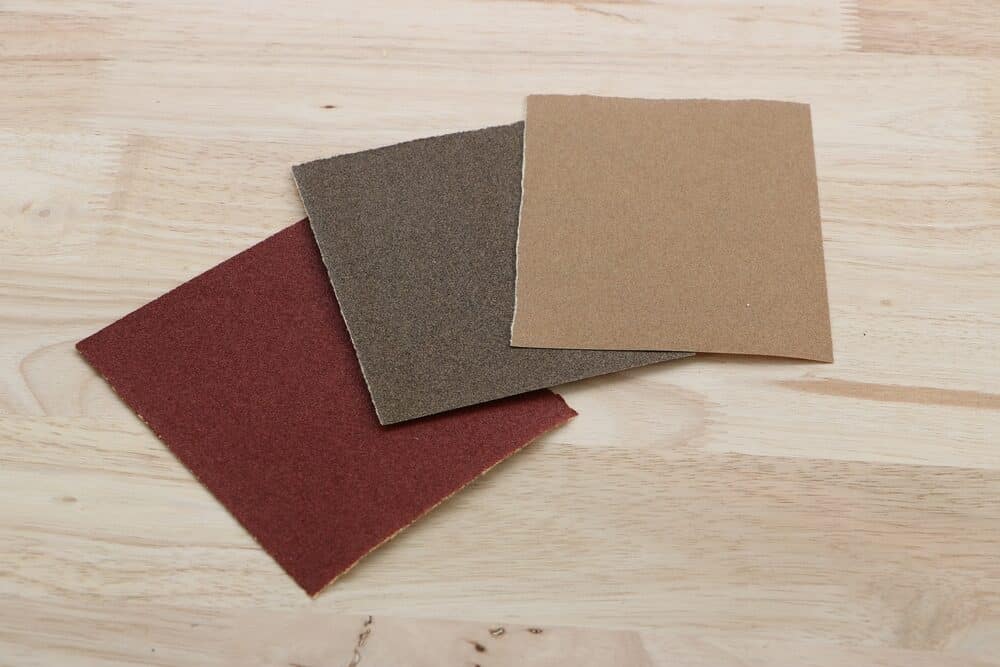
Sandpaper:
A selection of sandpaper with various grits is crucial. Start with a coarser grit (around 60–80) for initial sanding, and then progress to finer grits (up to 200) for a smooth finish.
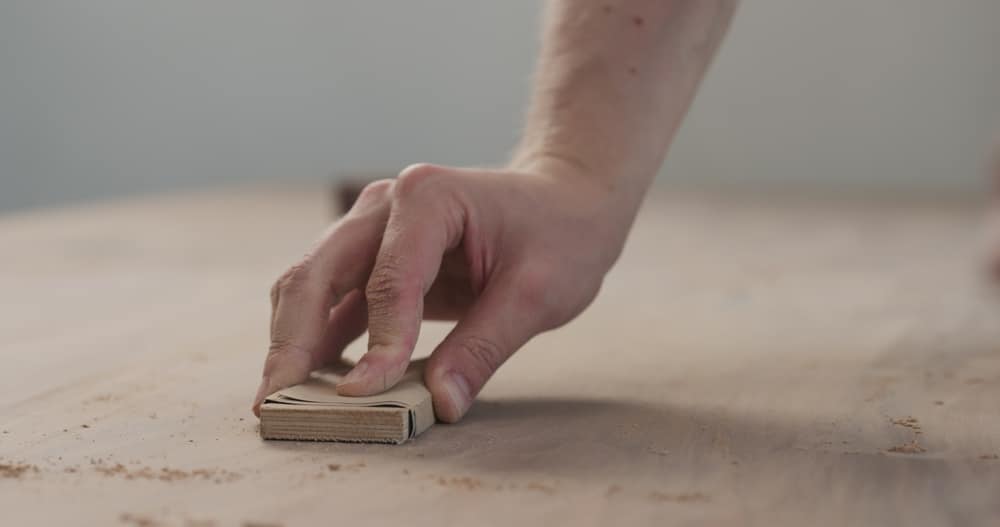
Sanding Block:
A good-quality sanding block will offer a firm grip and even pressure distribution. This is vital for achieving a uniform sanding pattern.
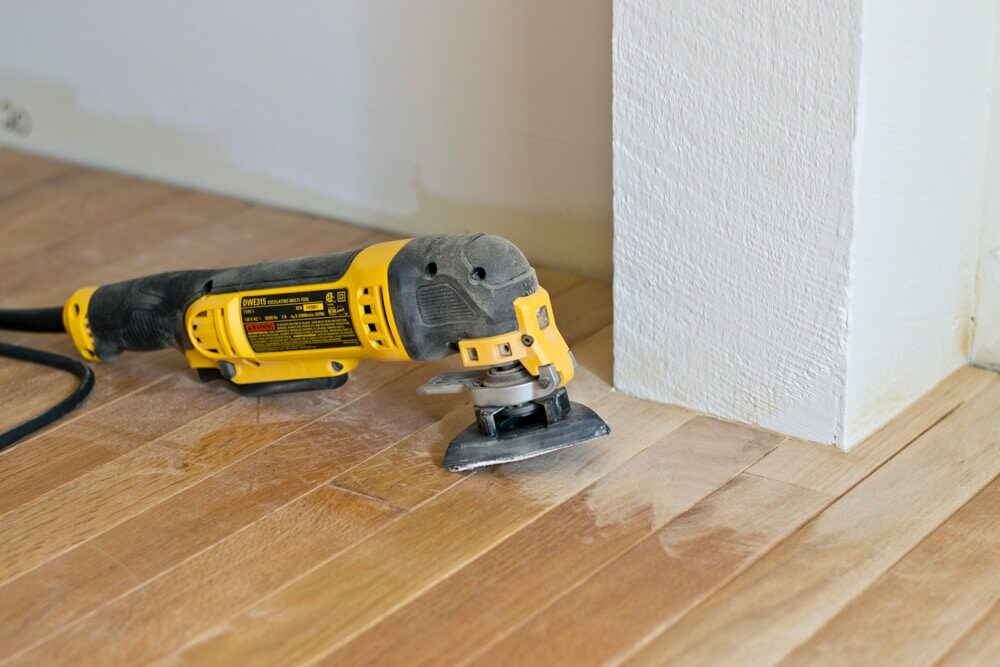
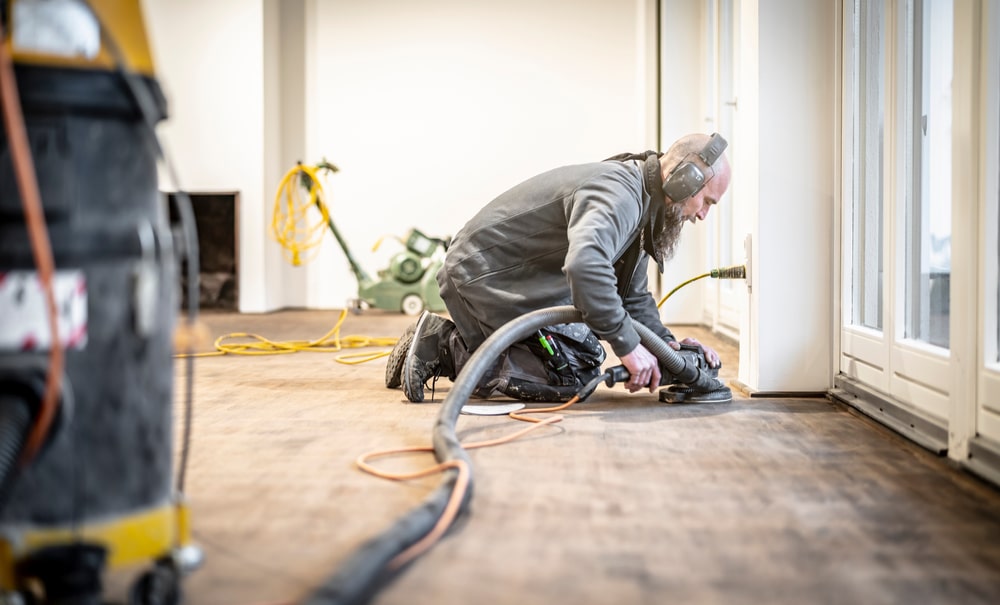
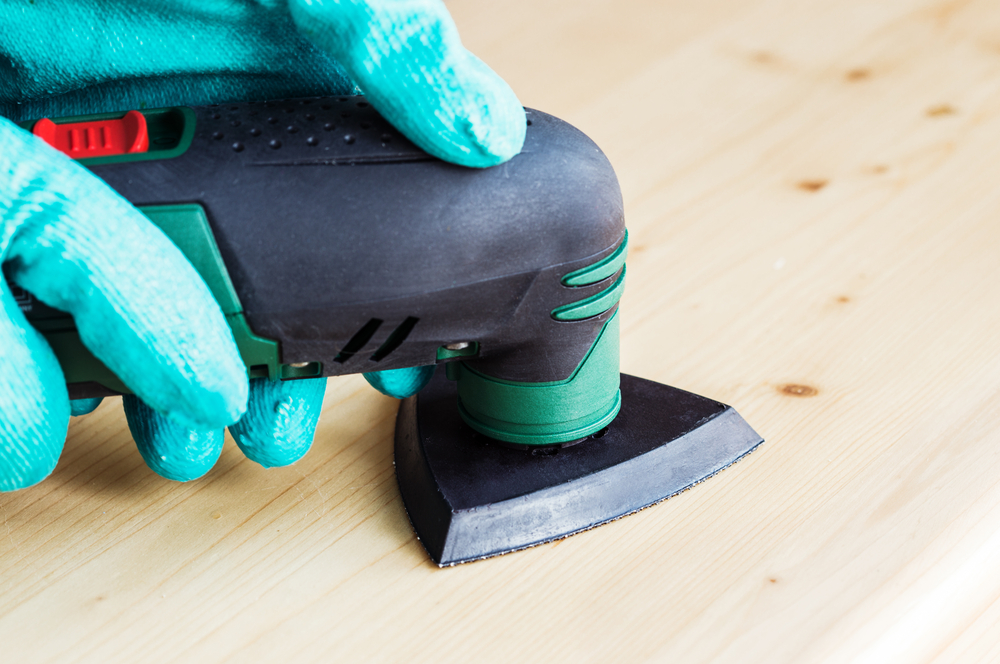
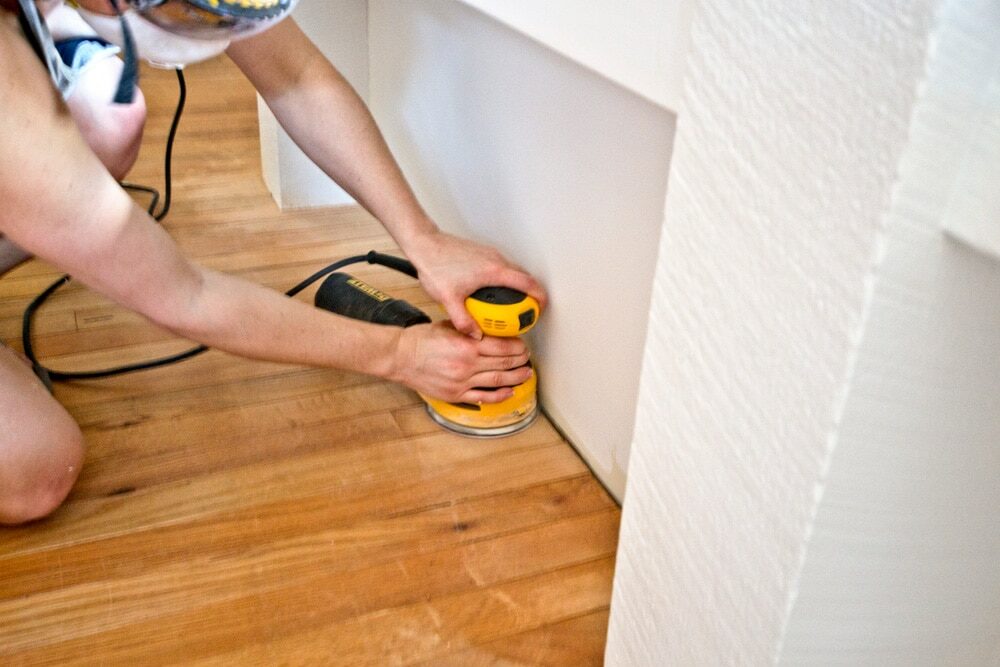
Edge Sander:
For those difficult-to-reach edges, an edge sander, though not a hand tool, can be incredibly helpful. It’s especially useful for larger projects.

Corner Sanding Tool:
This tool is specifically designed for sanding tight corners and hard-to-reach spots.
Dust mask and safety goggles:
safety first. Always wear a dust mask to avoid inhaling wood dust and safety goggles to protect your eyes.

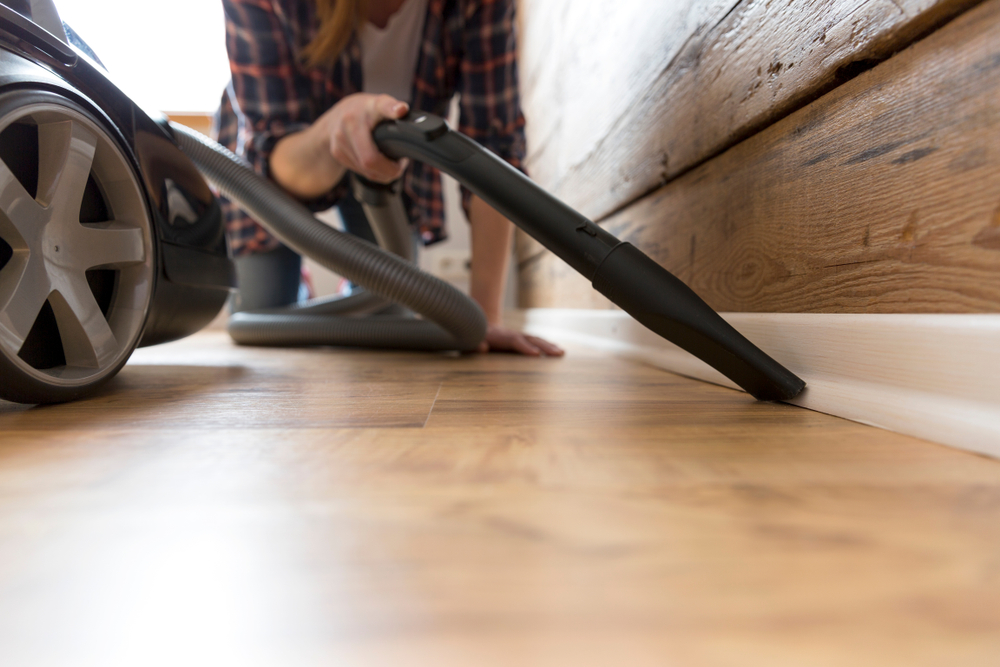
Vacuum Cleaner and Brush:
Keeping the area clean as you work is essential. A vacuum cleaner and a brush will help you remove dust and debris.

Tack Cloth:
After sanding, a tack cloth is useful for picking up any remaining dust, ensuring a clean surface before applying any finishes.

Protective Gloves:
To protect your hands from splinters and abrasions, durable work gloves are recommended.

Knee Pads:
If you’re going to be working on the floor, knee pads can provide comfort and protection.

Ear Protection (Optional):
If using power tools like an edge sander, ear protection is advisable to guard against noise.

Remember, the quality of your tools and materials can greatly influence the outcome of your project. Investing in the right items not only makes the work easier but also ensures a professional finish to your floors.
Preparing the Work Area
The preparation of the work area is a critical step in the process of hand-sanding floors. Proper preparation not only ensures safety but also significantly enhances the efficiency and quality of your work. Here are the key steps to prepare your work area:
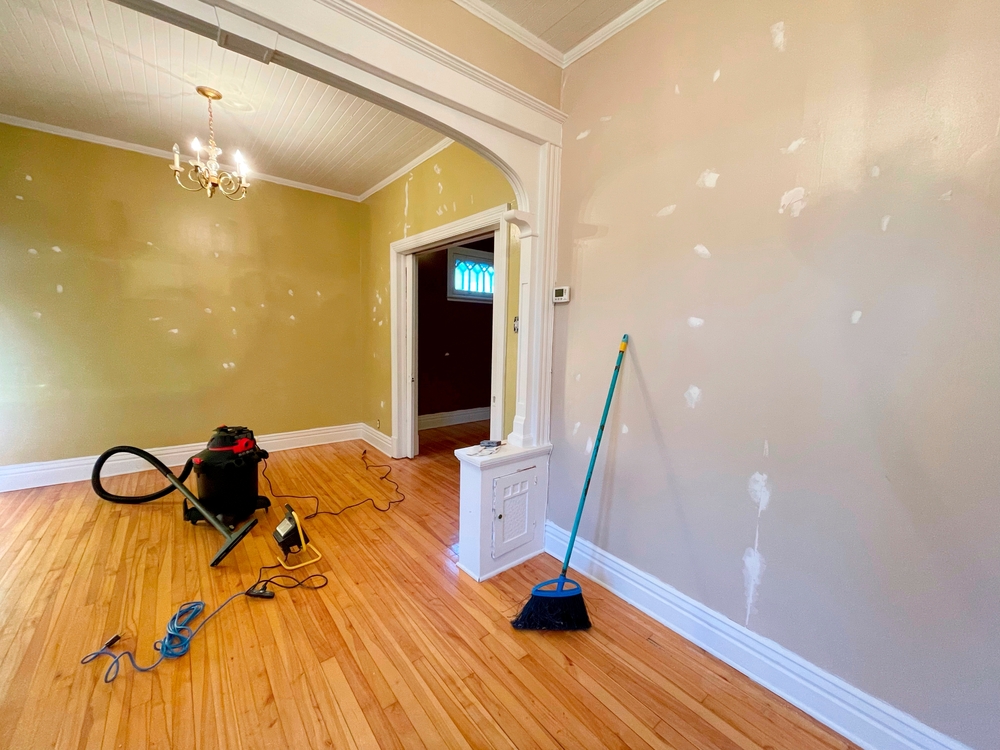
- Clear the Room: Begin by removing furniture, rugs, and any other items from the room. This provides unobstructed access to the entire floor, particularly the edges and corners.
- Inspect the Floor: Carefully inspect the floor for any protruding nails, staples, or other sharp objects. These should be removed or hammered flat to prevent damage to your tools and ensure a smooth sanding process.
- Clean the Floor: Sweep or vacuum the floor thoroughly to remove dust, debris, and any loose particles. This helps in achieving a cleaner sanding process and a better finish.
- Check for damage: Look for any cracks, chips, or significant wear in the wood. These areas might need special attention or repair before you start sanding.
- Tape and Cover: Use painter’s tape to protect the baseboards and any adjacent surfaces that you don’t want to accidentally sand or mark. It’s also wise to cover doorways with plastic sheeting to prevent dust from spreading to other parts of your home.
- Lighting: Ensure good lighting in the room. Adequate lighting is crucial for spotting imperfections and ensuring a uniformly sanded surface.
- Ventilation: Open windows or set up fans for proper ventilation. Sanding can produce a lot of dust, and good airflow will help to keep the air quality safe.
- Safety Preparations: Have your safety gear, like dust masks, goggles, and gloves, ready and accessible. Always prioritise your health and safety during DIY projects.
- Set Up Your Tools: Organise your sanding tools and materials so they are easily reachable during the work. This helps in maintaining a smooth workflow.
Techniques for Hand Sanding Edges
Hand-sanding edges of floors is a task that demands precision and patience. The technique differs slightly from sanding larger, flat surfaces due to the intricate nature of the work. Here’s how to approach it:
Choosing the Right Grit:
Begin with a coarse-grit sandpaper (around 60–80 grit) for the initial sanding. This will help remove the old finish and smooth out any rough spots. Gradually move to finer grits (up to 200 grit) for a smooth, final finish.
Sanding Block Use:
Attach your sandpaper to a sanding block. This provides a flat surface that distributes pressure evenly, helping to avoid gouges in the wood. It also allows for better control and less strain on your hands.
Direction of Sanding:
Always sand in the direction of the wood grain. This prevents scratches that can be conspicuously against the grain. For edges, this usually means sanding in a linear motion along the length of the board.
Applying Even Pressure:
Apply steady, even pressure as you sand. Avoid pressing too hard in one area, as this can create dips in the wood. Let the sandpaper do the work.
Regularly Check Your Progress:
Frequently step back and inspect your work. This helps ensure you are not oversanding or missing any spots. A uniform appearance without any shiny spots (which indicate a remaining old finish) is your goal.
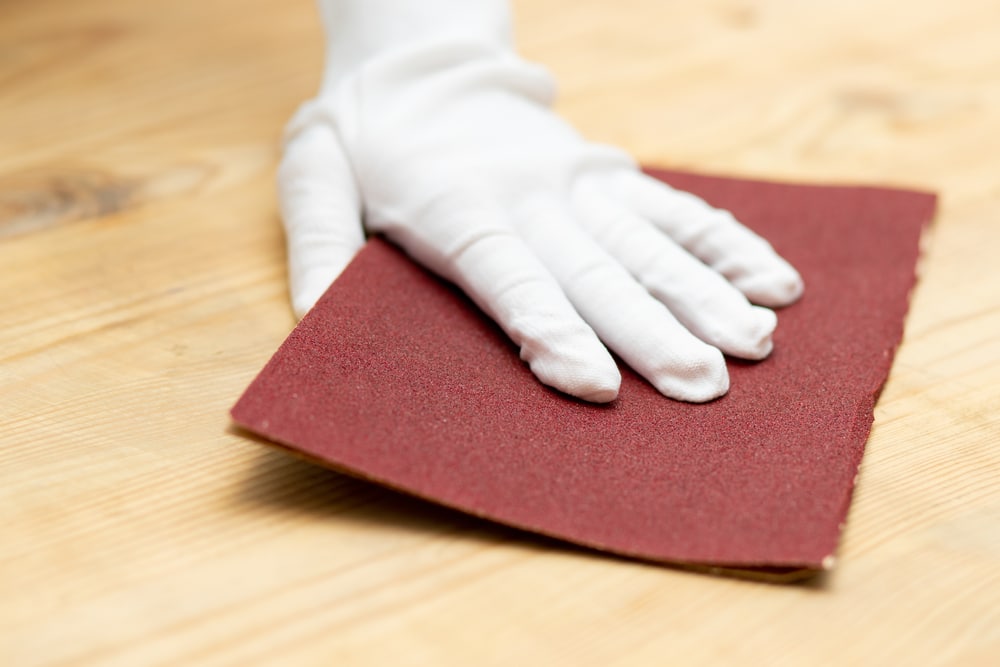
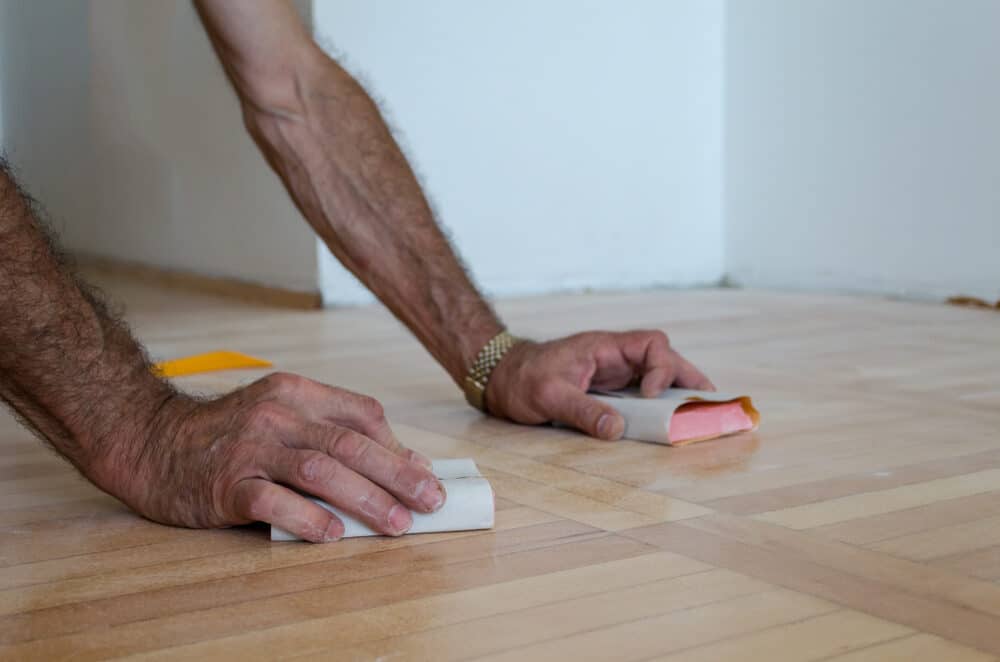
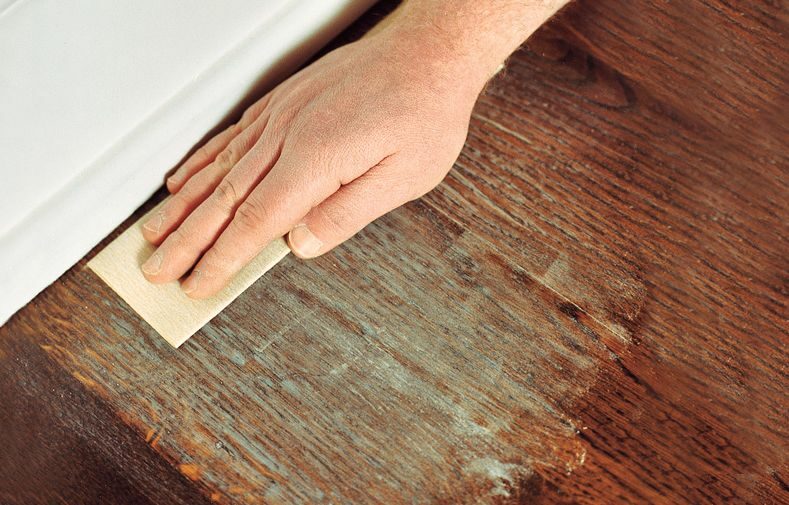
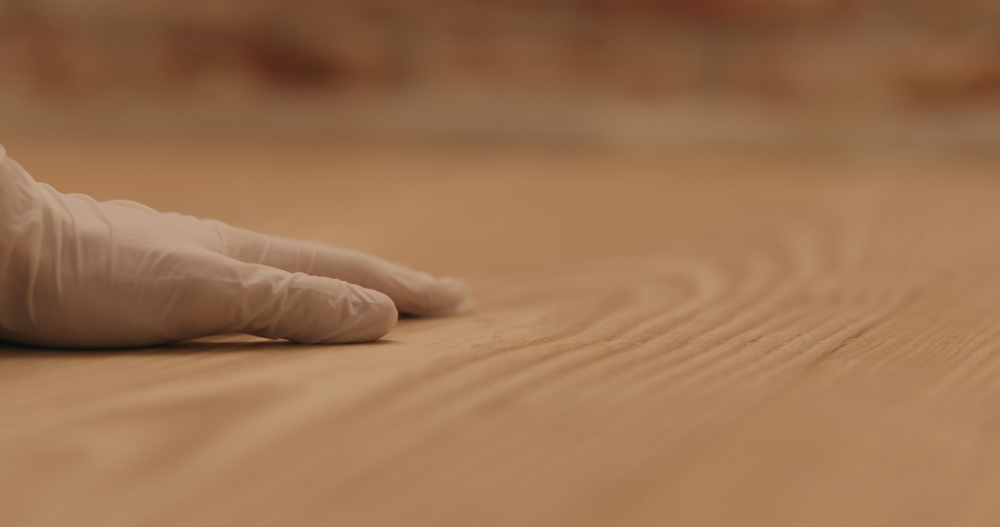
Edge Details:
For the very edges of the floor, where it meets the wall, use a smaller piece of sandpaper folded to fit into these tight spaces. This manual detail work ensures that you reach every part of the edge.
Transitioning Between Grits:
When moving from a coarser grit to a finer one, make sure to thoroughly clean the area of any dust and debris. This prevents coarse particles from scratching the surface during the finer sanding stages.
Avoiding Over-Sanding:
Be mindful not to over-sand. Excessive sanding can thin the wood too much, especially at the edges, where the wood is often already thinner.
Final Inspection:
Once you are done with the finest grit, do a thorough inspection under good lighting to ensure a consistently smooth surface.
Hand-sanding the edges of a floor can be a time-consuming process, but attention to detail will pay off in the final appearance of your floor. It’s about blending the edges seamlessly with the rest of the floor for a uniform, professional-looking finish.
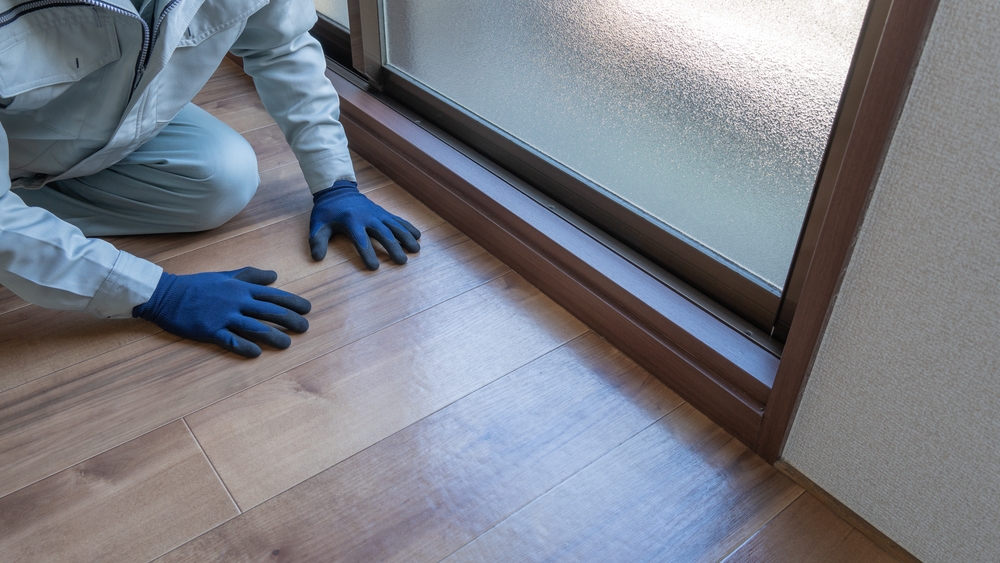
Hand Sanding Corners: A Detailed Approach
Sanding corners is perhaps the most challenging aspect of hand-sanding floors. Corners are tight spaces that demand careful handling to achieve a flawless finish. Here’s a step-by-step guide to tackling this intricate task:
- Select the Right Sandpaper: Just like with edge sanding, begin with a coarse-grit sandpaper (around 60–80 grit) for initial sanding and gradually progress to finer grits (up to 200 grit) for a polished finish.
- Corner Sanding Tool: For corners, a corner sanding tool is indispensable. This tool is designed to reach into tight spaces and ensure even sanding. Attach the appropriate sandpaper grit to the tool.
- Safety Precautions: Wear safety goggles and a dust mask to protect your eyes and lungs from dust and debris that may be generated during sanding.
- Approach Corners Strategically: Begin sanding in the corner furthest from the exit of the room. This way, you won’t accidentally walk on freshly sanded areas as you work.
- Sanding Motion: Use a steady back-and-forth motion with the corner sanding tool. Keep it flat against the wood surface to prevent gouging.
- Change Sandpaper Regularly: As the sandpaper becomes worn or clogged with dust, replace it with a fresh sheet. This ensures consistent and effective sanding.
- Work Gradually: Move systematically from one corner to the next, taking your time to ensure that you’ve sanded every inch. Corners can be tricky, so patience is key.
- Inspect Your Work: Periodically step back and inspect your progress. Ensure that you’ve sanded uniformly and that there are no visible imperfections or rough spots.
- Hand Sanding for Detailing: For very tight corners where the corner sanding tool can’t reach, you may need to resort to hand sanding with a small piece of sandpaper. Fold the sandpaper to create a pointed edge, which can be manoeuvred into these narrow areas.
- Transitioning Between Grits: Just like with edge sanding, clean the area of any dust and debris when transitioning from a coarser grit to a finer one.
- Final Inspection: After sanding with the finest grit, perform a final inspection under good lighting to ensure that the corners are perfectly smooth and uniform.
- Clean Up: Once satisfied with your sanding, use a tack cloth or vacuum to remove any remaining dust and debris from the corners.
Sanding corners requires meticulous attention to detail, a steady hand, and patience. It’s a task that can be physically demanding due to the tight spaces and repetitive motions, but the result is well worth the effort—a beautifully finished floor with flawlessly sanded corners that add a touch of perfection to your space.
Dust Management and Clean-Up
Effective dust management and clean-up are essential aspects of hand-sanding floors. Wood dust not only poses health risks but can also mar the finish of your project if not properly managed. Here’s a comprehensive guide on how to keep your work area clean and safe:
Dust Management During Sanding:
- Ventilation: Ensure good airflow in the room by opening windows or using fans. This helps to disperse dust and maintain better air quality.
- Dust Mask: Always wear a high-quality dust mask to prevent inhaling wood dust. Choose a mask rated for fine dust particles.
- Safety Goggles: Protect your eyes from dust and debris with safety goggles.
- Vacuum Attachment: If your sanding tools have vacuum attachments, use them. These attachments help capture a significant amount of dust at the source.
- Tarp or Drop Cloth: Lay down a tarp or drop cloth around the work area to catch falling dust and make clean-up easier.

Clean-Up After Sanding:
- Vacuum Thoroughly: Use a vacuum cleaner with a HEPA filter to pick up as much dust as possible from the floor, walls, and any other surfaces. Vacuum multiple times to ensure a thorough cleaning.
- Tack Cloth: After vacuuming, use a tack cloth to wipe down all surfaces. A tack cloth is a sticky cloth that effectively picks up any remaining dust particles.
- Change HVAC Filters: If your heating, ventilation, and air conditioning (HVAC) system has filters, consider changing them to prevent dust from circulating throughout your home.
- Wash Walls and Windows: Depending on the extent of dust, you may need to wash the walls and windows to remove any residue. Use a damp cloth or sponge for this task.
- Dispose of Dust Safely: Empty the vacuum cleaner’s dustbin or bag carefully, ensuring that dust is disposed of in a sealed plastic bag. This prevents dust from escaping into the air again.
- Clean Tools: Clean your sanding tools thoroughly to remove any accumulated dust. This extends the life of your tools and prevents dust from being transferred to future projects.
- Inspect Finish: After clean-up, inspect the sanded area under good lighting to ensure there is no residual dust on the surface.
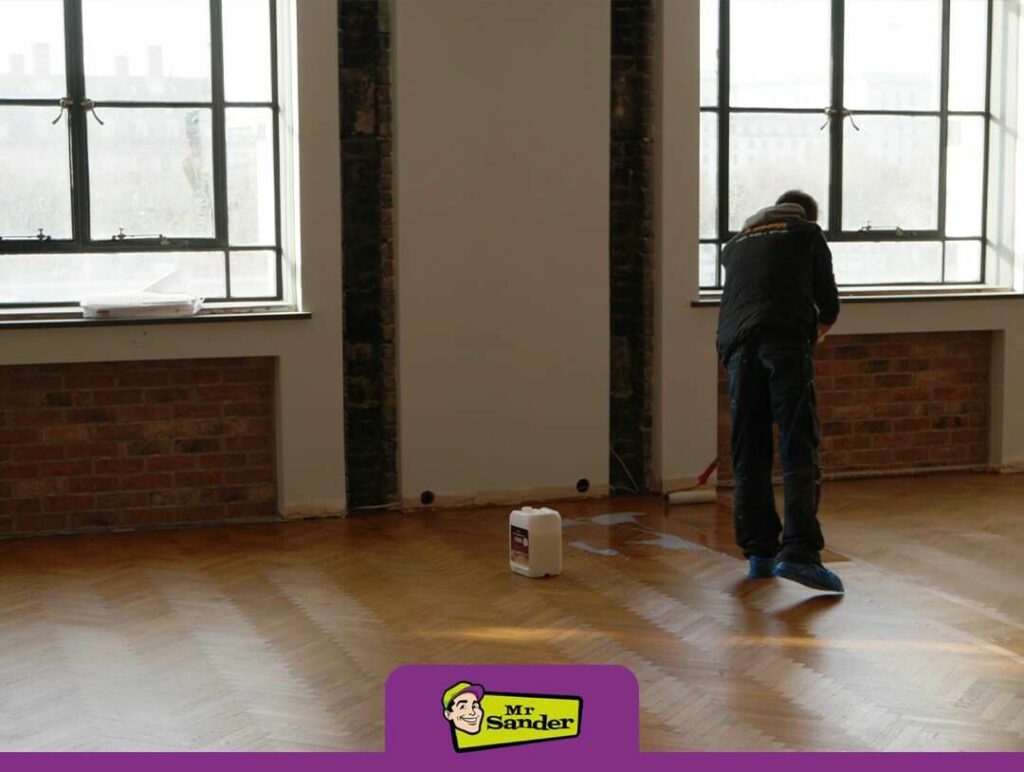
Finishing Touches: Applying Sealants and Varnishes
After meticulously hand-sanding the edges, corners, and main surfaces of your wooden floors, it’s time to apply the finishing touches that will not only enhance the appearance but also protect and preserve the wood. Here’s how to apply sealants and varnishes for a professional and long-lasting finish:
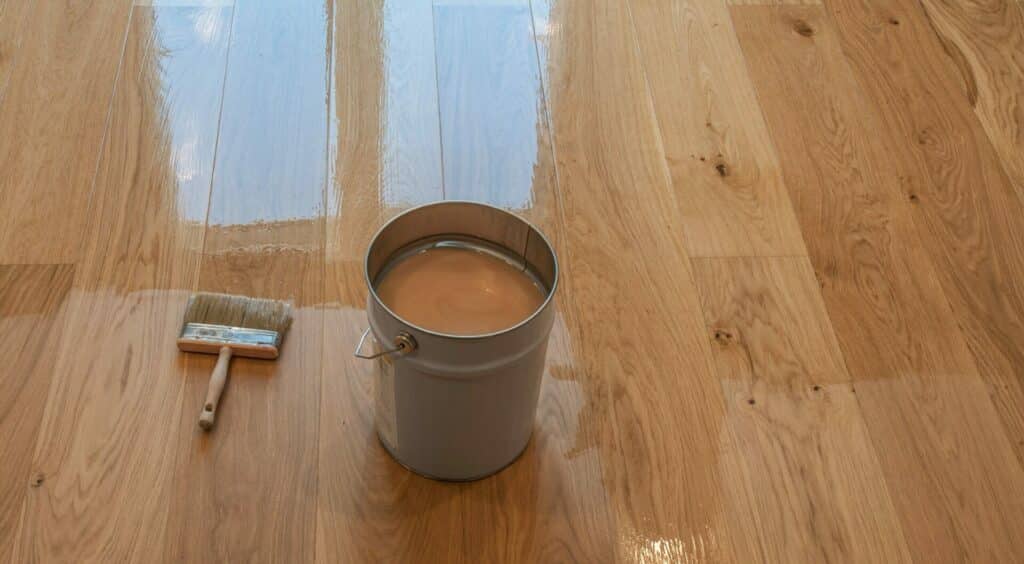
Choosing the Right Sealant and Varnish:
- Type of Finish: Decide whether you want a matte, satin, or glossy finish. Each has its own aesthetic appeal, so choose one that complements your decor.
- Compatibility: Ensure that the sealant and varnish you select are compatible with each other and with the type of wood you’re working with.
- Water- or oil-based: Sealants and varnishes come in both water-based and oil-based formulas. Water-based options tend to dry faster and have lower fumes, while oil-based ones often provide a more durable finish. Choose according to your preferences and the specific needs of your project.

Application Steps:
- Prepare the surface: Ensure that the sanded surface is clean, dry, and free of dust or debris. Any residue left on the wood can affect the finish.
- Stir Thoroughly: If the sealant or varnish has been sitting, stir it thoroughly to ensure an even consistency.
- Apply Thin Coats: Use a high-quality brush, roller, or applicator pad to apply thin and even coats of sealant. Start in the corner furthest from the exit to avoid walking on the freshly coated floor. Follow the wood grain for a smooth finish.
- Allow Drying Time: Let each coat dry according to the manufacturer’s instructions. Usually, this will involve waiting for a few hours before applying subsequent coats.
- Sand Between Coats: Lightly sand the surface with a fine-grit sandpaper (220 grit or higher) between each coat. This smooths out imperfections and promotes adhesion for the next coat.
- Repeat as Needed: Depending on the type of varnish and the level of sheen you desire, you may need to apply multiple coats. Always refer to the product label for guidance.
- Final Inspection: After the final coat has dried, perform a final inspection to ensure that the finish is uniform and free of imperfections.
- Cure Properly: Allow the floor to cure fully before moving furniture back into the room. This can take several days, depending on the product used and environmental conditions.
- Regular Maintenance: To keep your floors looking their best, follow the recommended maintenance routine for the specific sealant and varnish you’ve used.
Conclusion
Hand-sanding the edges and corners of your wooden floors is a labour of love that transforms worn and weathered wood into a thing of beauty. This meticulous process demands patience, precision, and a commitment to preserving the natural character of the wood. As you conclude your floor sanding project, here are some key takeaways to keep in mind:
- Attention to Detail: Hand sanding is all about the details. Take your time to ensure every edge and corner is smooth and free of imperfections.
- Safety First: Prioritise safety by wearing the appropriate protective gear, including a dust mask, safety goggles, and gloves. Good ventilation is essential as well.
- Proper preparation: Adequate preparation of your work area is crucial. Clear the room, inspect the floor, and protect adjacent surfaces to create an ideal environment for sanding.
- The Right Tools and Materials: Invest in high-quality tools and materials, as they greatly influence the quality of your work.
- Technique Matters: Follow the recommended techniques for edge and corner sanding to achieve professional results.
- Dust Management: Proper dust management during sanding and thorough clean-up afterward are essential for a healthy living environment and a flawless finish.
- Sealants and Varnishes: Select the right sealants and varnishes for your project, and follow the application steps carefully to protect and enhance your floors.
- Cure and Maintain: Allow your finished floors to cure fully and follow a regular maintenance routine to keep them looking their best.
Hand sanding is a labour-intensive process, but the satisfaction of transforming your floors into a work of art is unmatched. It’s a journey that connects you with the craftsmanship of those who laid the floors and adds a touch of timeless elegance to your home.
As you step back to admire your beautifully sanded and finished floors, take pride in the knowledge that you’ve not only revived the wood but also created a welcoming and inviting space that will be cherished for generations to come. Happy sanding!


Sanding
We provide virtually dust-free sanding with our continuous belt machinery with mobile extraction units, giving you a safer environment for your family.
Oiling
This organic finish not only adds beauty to your home but also has exceptional water-repellent characteristics, making it easier to clean and maintain.
Waxing
This natural floor finish offers the softest and most mellow appearance – and leaves your floor able to breath.
Buffing
Using soft buffing machines (and hand-polishing where required) will bring a wonderful sheen to your newly-finished floor.
Repairs
We offer a full assessment of your wooden floors to determine what repairs are needed to provide the perfect working surface for the later stages of sanding, staining and sealing.
Restoration
We offer a comprehensive restoration process designed to address floors that are improperly fitted or damaged over time through wear and tear.
Request a fixed price quote for your wood floor restoration now
Simply enter your postcode below to get started.
Services
Wood Floor Sanding Wood Floor Restoration Wood Floor Scratch Repair Squeaky Wood Floor Repair Parquet Floor Sanding Parquet Floor Restoration Commercial Floor Sanding Church Floor Sanding Community Centre Floor Sanding School Floor Sanding Gap Filling Gap Filling with ResinCopyright © Mr Sander®
Privacy & Cookies Terms & Conditions Complaints Procedure Cancellation Rights Sitemap

Get An Instant Price Estimate Before You Go…
Simply enter the rooms you need sanded and we’ll provide you with a price estimate instantly! Try our price calculator now.
Get a Price Estimate NowLocal Floor Sanding Experts
Over 500 5-Star Reviews
Safe, Dust Free Sanding
Operating Since 1994