London:
Nationwide:
25,000+
Floors Restored
27 Years Experience
Wood Flooring Association Certified
How to Choose the Right Buffer for Floor Sanding
Posted on October 4, 2023
Buffing
Choosing the Right Buffer for Floor Sanding: A Comprehensive Guide
When it comes to floor sanding, choosing the right buffer is crucial to ensuring both the efficiency of the job and the desired finish. The buffer, also known as a floor polisher or floor machine, is used to smooth out the surface of wooden floors and prepare them for sealing or refinishing. A misstep in this selection process can result in a poor finish, increased labour, and potentially irreversible damage to the wood. Here’s a guide to help you make the right choice. First, consider the size and power of the machine. For large, open areas such as ballrooms or commercial spaces, a larger, more powerful buffer is essential to cover the ground efficiently. However, for residential spaces or rooms with tight corners, a smaller buffer will offer more maneuverability. It’s also vital to look at the motor’s horsepower and the rotations per minute (RPM) the machine can achieve. A machine with higher RPM will generally provide a smoother finish but also require more expertise to control. Lastly, take into account the type of floor you’re working on and the finish you desire. Different buffers can accommodate various pads and screens, and each is suited to different floor types and finishes. For instance, if you’re working on an old, thickly varnished floor, you might need a coarser pad or screen to break through the layers. On the other hand, a newly installed or lightly worn floor might require a finer pad to achieve a smooth finish. Always consult with professionals or do thorough research to match the buffer to your specific needs.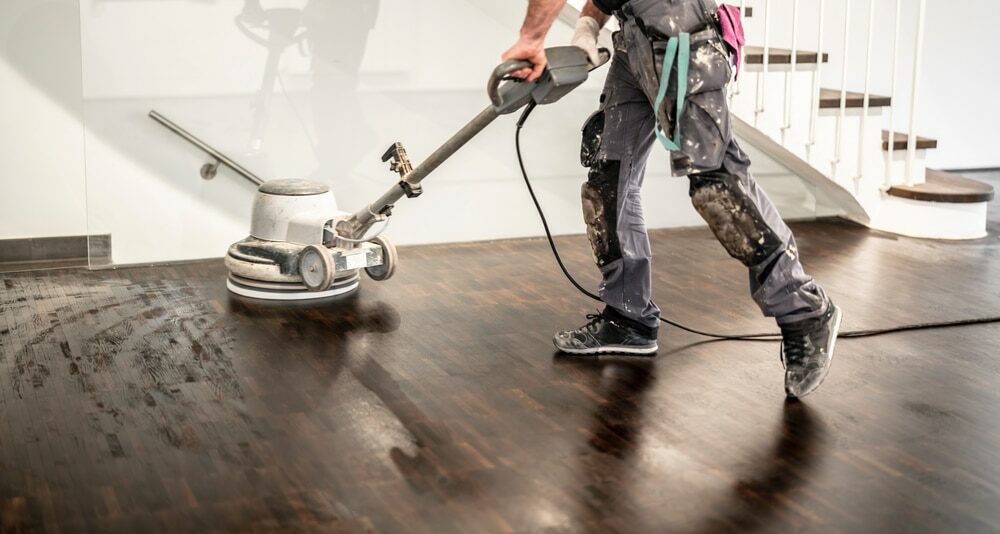
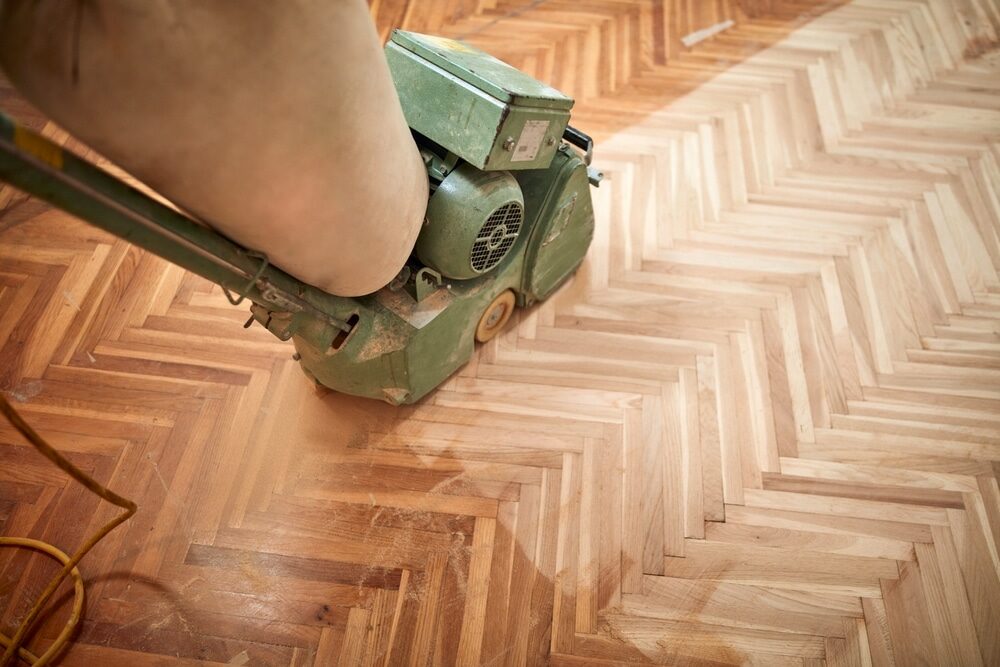
Understanding the Basics of Floor Sanding
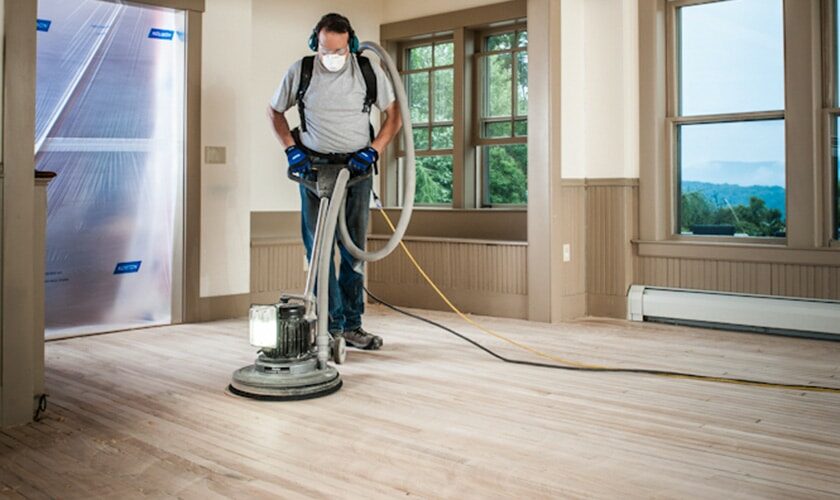
Floor sanding is a process that rejuvenates wooden floors, bringing out their natural beauty and enhancing their lifespan. Whether you’re tackling a DIY project or simply want to understand what professionals do, here’s a breakdown of the basics of floor sanding. 1. Preparation: Before sanding begins, it’s crucial to prepare the area. This includes removing all furniture, fixtures, and any loose items from the floor. If there are any protruding nails or staples, these should be set below the wood’s surface or removed entirely. The floor should also be cleaned thoroughly to eliminate any dirt or debris, as these can cause scratches or uneven sanding. 2. Selecting the Right Equipment: Depending on the condition of the floor and the desired result, the right sanding equipment must be chosen. This includes both the sanding machine and the sandpaper grit. For heavily worn floors or those with deep scratches, you might start with coarse grit sandpaper (like 36 or 40 grit) and then progressively move to finer grits (like 80 or 100 grit) as the floor becomes smoother. 3. The Sanding Process: Floor sanding usually involves three main stages:- Rough Sanding: This is the initial stage where most of the old finish, imperfections, and deep scratches are removed using coarse-grit sandpaper.
- Medium Sanding: This intermediate stage smooths the floor further, preparing it for the final finish. Medium-grit sandpapers, typically in the range of 60–80 grit, are used.
- Fine Sanding: The final stage uses fine-grit sandpapers (like 100–120 grit) to give the floor a smooth finish, ready for staining or sealing.
The Role of a Buffer in Floor Sanding
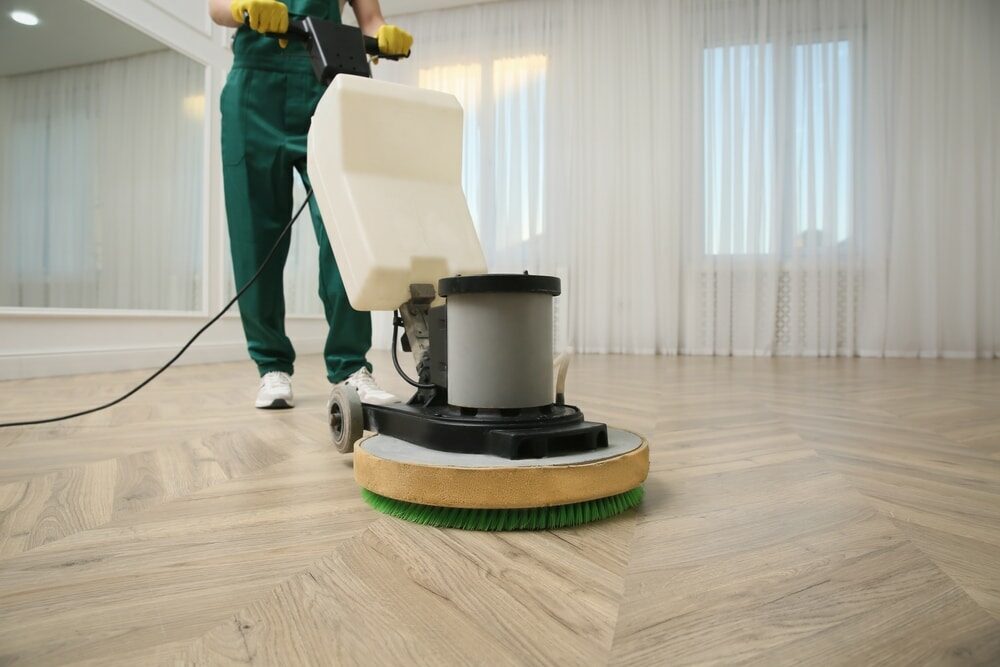
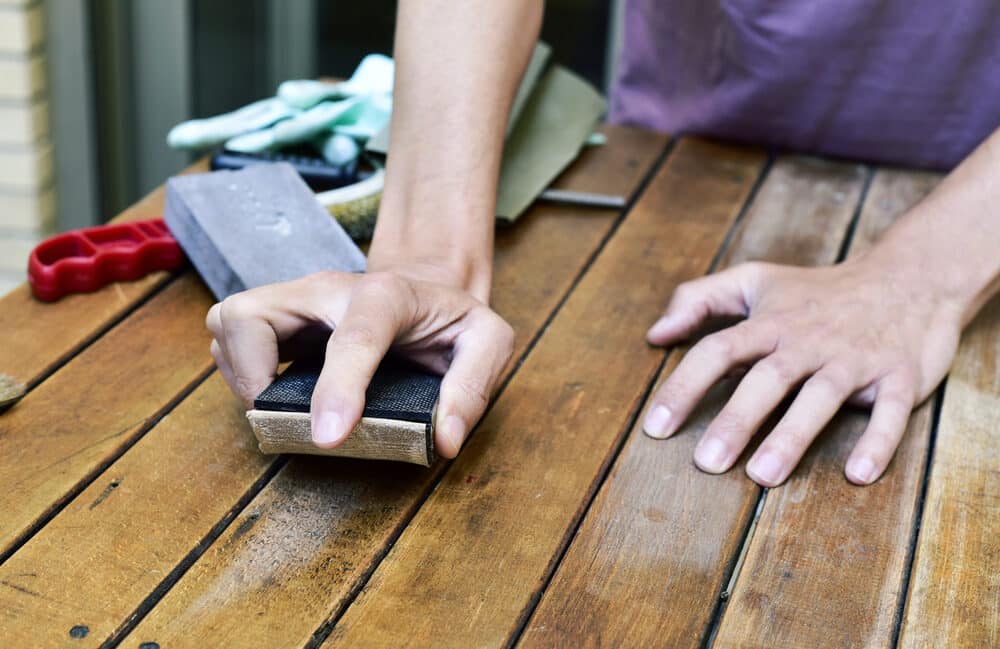
Floor sanding is an essential procedure to bring out the elegance and charm of wooden floors. While many are familiar with the more aggressive drum and belt sanders, the buffer, often overlooked, plays a pivotal role in achieving the perfect finish. Understanding the function and benefits of a buffer in floor sanding can help one appreciate the nuanced steps involved in floor restoration. 1. Intermediate Sanding: After the initial aggressive sanding with drum or belt sanders, there can be minor imperfections or swirl marks left on the floor. Buffers, equipped with the appropriate sanding screens or mesh discs, are ideal for this intermediate sanding phase. They smooth these marks and prepare the wood for the finishing touches, ensuring an even and consistent surface. 2. Fine Finishing: Buffers excel in the fine finishing aspect of sanding. Operating in a circular motion, they are designed to delicately abrade the wood surface without removing significant material. This function is especially vital after the floor has been stained. A buffer ensures that the finish applied on top will adhere properly and look smooth and uniform. 3. Versatility in Tight Spaces: While drum and belt sanders are bulky and can’t reach into corners or tight spaces, buffers are more maneuverable. Their design allows for closer access to walls, corners, and other challenging areas, ensuring the entire floor has a consistent finish. 4. Polishing and Final Sealing: Beyond sanding, buffers are also instrumental in the application and polishing of sealants, oils, and varnishes. They can be fitted with various pads suitable for applying these finishes or for buffing them to a high shine, thus enhancing the wood’s natural beauty. 5. Adaptability with Different Materials: While primarily used on wooden floors, buffers are versatile enough to be used on other flooring materials like marble, granite, or concrete. This adaptability means they can smoothen and polish a variety of surfaces, making them valuable assets in the floor restoration industry.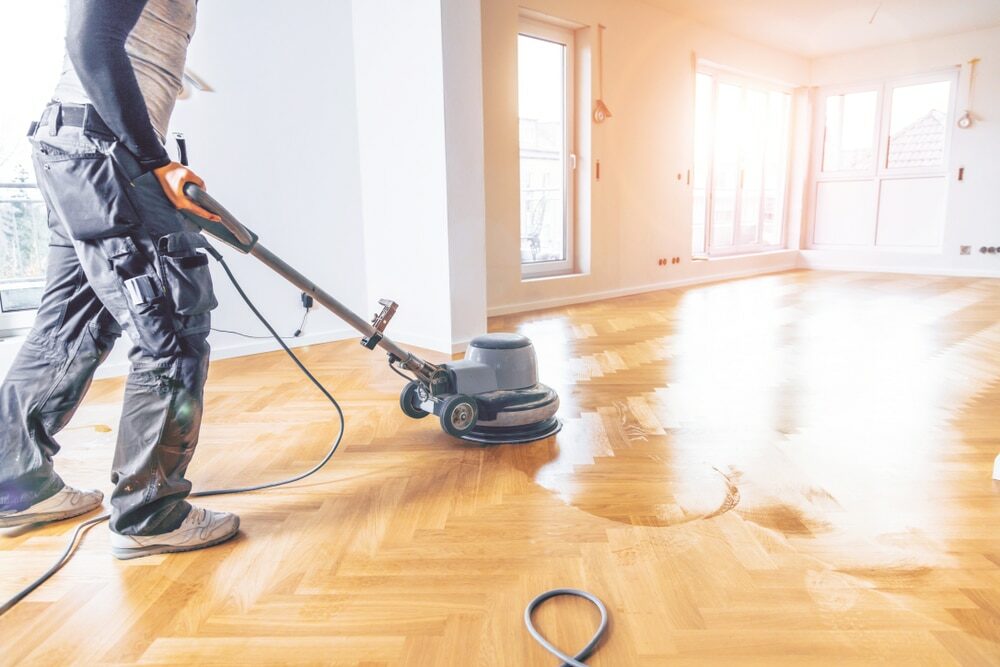
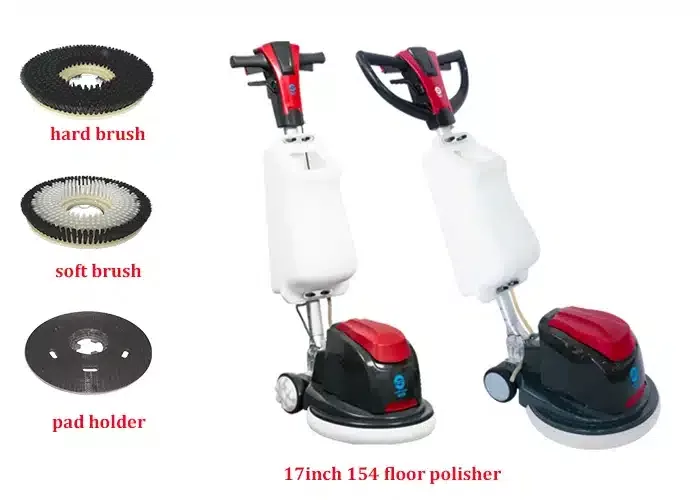
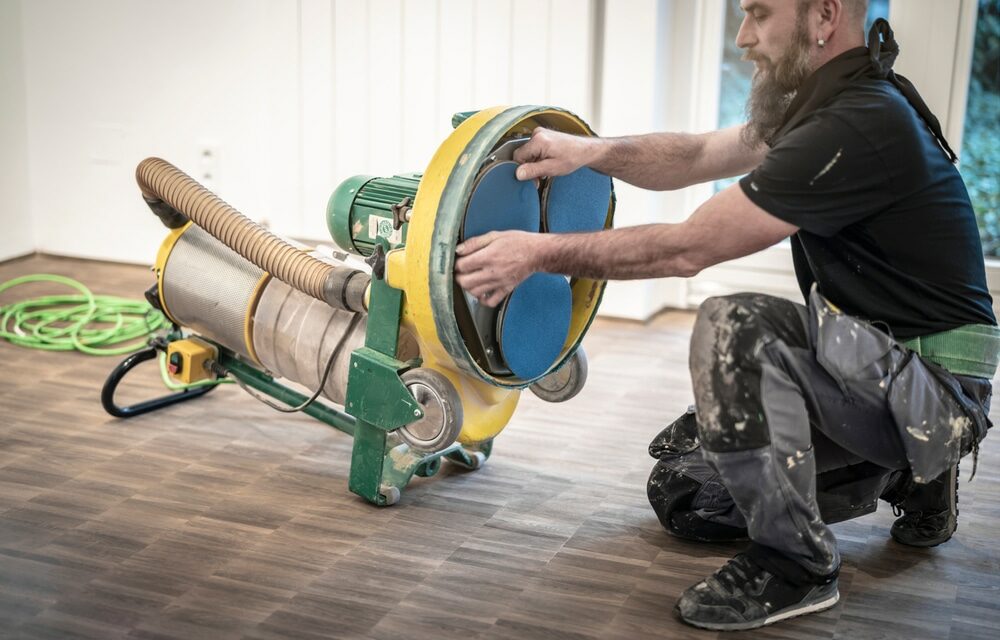
Different Types of Wood Floor Buffers
Wood floor buffers play a critical role in the maintenance and restoration of wooden flooring. Their primary function is to smoothen and polish wood surfaces, but the type of buffer one should use depends on the specific needs and the size of the project. Here are the main types of wood floor buffers available: 1. Standard Rotary Buffers:- Description: These are the most common types of floor buffers. They have a single, large pad that rotates in a circular motion.
- Usage: Suitable for both sanding and polishing tasks. Rotary buffers are versatile and can be used with various pads and screens for different stages of floor treatment.
- Size and Speed: They typically range from 13 to 20 inches in diameter and operate at speeds between 150 and 350 RPM.
- Description: Unlike rotary buffers, orbital buffers have a rectangular base that moves in a small, oscillating motion. This movement ensures a more even and consistent finish.
- Usage: Ideal for fine sanding and polishing, especially for floors with intricate patterns or inlaid designs.
- Size and Speed: Usually smaller than rotary buffers, they operate at a higher RPM, often between 1,500 and 3,500 RPM.
- Description: These machines operate at very high speeds and are primarily used to achieve a high-gloss finish.
- Usage: Best suited for polishing tasks, especially when looking to achieve a mirror-like shine on the wood or on coated surfaces.
- Size and Speed: They typically have a pad diameter of around 20 inches and operate at speeds between 1,500 and 2,500 RPM.
- Description: These buffers combine both rotary and oscillating motions, ensuring a swirl-free finish.
- Usage: Great for both sanding and polishing tasks. Their dual motion helps achieve a smoother finish without visible swirl marks.
- Size and Speed: Size varies but usually falls between standard rotary buffers and orbital buffers. RPM can range widely based on the model.
- Description: As the name suggests, these buffers have multiple discs, each rotating independently, providing more aggressive sanding or polishing.
- Usage: Suitable for large-scale projects or when rapid floor treatment is needed. They’re particularly effective on tough finishes or when levelling uneven surfaces.
- Size and Speed: Often larger than other types, with varying RPMs depending on the model and intended function.
Factors to Consider When Choosing a Wood Floor Buffer
Choosing the right wood floor buffer can significantly impact the quality and efficiency of your floor refinishing project. Whether you’re a professional or a homeowner aiming for a DIY project, considering certain key factors will ensure you make an informed decision. Here’s a comprehensive list: 1. Type of Floor:- Hardwood vs. Softwood: Hardwoods like oak and maple may require a buffer with more power and aggressive pads, while softer woods like pine might benefit from a gentler buffer to prevent damage.
- Large spaces like commercial areas or ballrooms might necessitate bigger, industrial-grade buffers, whereas residential spaces or smaller rooms might benefit from more compact and manoeuvrable models.
- The buffer’s size, often indicated by its pad diameter, will determine its coverage area. Common sizes range from 13 to 20 inches.
- Weight can influence the aggressiveness of sanding. Heavier machines can sand more deeply but may also be harder to manoeuvre.
- Expressed in horsepower (HP), the motor’s power determines the machine’s capability. For more demanding jobs, consider a buffer with higher HP.
- Adjustable speed settings can offer versatility. High-speed burnishers are ideal for polishing, while low-speed buffers are more suitable for sanding and scrubbing.
- Rotary vs. Orbital vs. Random Orbit: Your choice will depend on the desired finish. For instance, random orbit buffers are known for providing swirl-free finishes.
- Consider factors like handle ergonomics, control placements, and the overall design of the buffer. A machine that’s comfortable and intuitive will make the job smoother.
- Check if the buffer can easily switch between various pads, screens, and brushes. This versatility allows for a range of tasks, from sanding to polishing.
- Some buffers come equipped with dust collection systems or can be attached to external vacuums. This feature helps in keeping the workspace clean and reducing airborne particles, which is crucial for both health and achieving a clean finish.
- Especially important in residential areas or places where noise could be a disturbance. Some models are designed to operate more quietly than others.
- A buffer’s build quality will determine its longevity. Look for machines that have a reputation for durability and come with warranties. Also, consider how easy it is to find replacement parts or service the machine.
- While it’s tempting to opt for the least expensive option, it’s essential to balance cost with the machine’s features, durability, and effectiveness.
Maintenance and Care for Buffers
Buffers are invaluable tools for floor refinishing and maintenance. Like any equipment, ensuring their longevity and optimal performance means giving them regular care and maintenance. Here’s a guide on how to keep your buffer in top-notch condition: 1. Beforeeachuse each use:- Inspect thepowercord. power cord. Check for fraying, exposed wires, or any other damage. A damaged power cord can be a safety hazard.
- Examine the Handle and Controls: Ensure that the handles are secure and that all control buttons or levers are functioning correctly.
- Clean the Pad or Brush: Remove any accumulated debris, dust, or residues. This will guarantee uniform performance.
- Clean thebase base:remove remove any residual dust, wood particles, or chemicals. A simple wipe-down with a damp cloth should suffice.
- Pad Replacement: Check the pad or brush for wear and tear. If it’s too worn out, replace it to ensure effective buffing.
- Store Properly: Store the buffer in a dry place, away from moisture or extreme temperatures. If possible, hang or store it off the ground to prevent any potential water damage.
- Lubricate Moving Parts: Apply lubrication to any moving parts, such as bearings or any other friction points, to ensure smooth operation and prevent premature wear.
- Check the motor: Listen for any unusual noises when the buffer is running. Grinding or squealing could indicate a problem that needs attention.
- Drive Belt Inspection: If your buffer has a drive belt, inspect it for cracks, stretching, or wear. Replace it if necessary.
- Examine the wheels. Ensure that they roll smoothly and are free of any obstructions or damages.
- If your buffer is equipped with a dust collection system or can be attached to an external vacuum, regularly check the system for clogs.
- Empty and clean the dust bag or replace filters as required to maintain efficient dust collection.
- Tighten any loose components on the handle or control panel. This not only ensures safety but also makes the buffer easier to control.
- Depending on how frequently you use the buffer, consider having it professionally serviced once a year or every couple of years. Professionals can offer a thorough inspection and deep cleaning and address any potential issues that might go unnoticed.
- Always refer to the user manual specific to your buffer model. It will provide detailed care and maintenance instructions tailored to your machine.
Safety Tips When Using a Wood Floor Buffer
Using a wood floor buffer requires a blend of skill and caution. While these machines are designed to be user-friendly, they can be potentially dangerous if not used correctly. Here’s a list of safety tips to follow when using a wood floor buffer: 1. Read the manual: Before using any machine, always read the user manual thoroughly. It will provide specific instructions, safety guidelines, and features unique to the buffer model you’re using. 2. Wear appropriate personal protective equipment (PPE):- Ear Protection: Buffers can be loud, especially when used for extended periods. Earplugs or earmuffs can help protect your hearing.
- Eye Protection: Safety goggles prevent dust or debris from getting into your eyes.
- Gloves: Wear non-slip gloves to ensure a firm grip on the buffer’s handle.
- Dust Masks: Particularly when sanding, a mask can prevent you from inhaling fine wood dust particles.
Final Thoughts
Floor buffing is an art and science combined, a technique that breathes life back into worn-out floors, revealing their innate lustre and charm. However, the tools and techniques we employ in this process carry their weight in responsibility. A wood floor buffer, while indispensable, demands respect in its operation. Mastery of this tool lies not only in skillful use but also in adherence to safety protocols and regular maintenance. Furthermore, the choice of a buffer and its associated accessories should be made with care, considering the type of wood, the scale of the project, and the desired outcome. As with many things in life, preparation and knowledge are key. Thoroughly understanding your tools, the nature of your project, and the importance of safety can make the difference between a beautifully revived floor and a potentially damaged one. Whether you’re a seasoned professional or a DIY enthusiast, always approach floor buffing with the reverence it deserves. After all, our floors not only represent a significant investment but also form the very foundation upon which our homes and spaces are built. Treating them with care ensures they remain beautiful, durable, and safe for years to come.Some Useful Links:
- Stairs Sanding & Refinishing
- Floor Sanding Services
- School Floor Sanding
- Wood Floor Restorations
- Wood Floor Repairs
- Wood Floor Polishing
More from our Blog:
How to Repair Damaged Floors with Belt Sanding Step-by-Step Guide to Belt Sanding Your Floors Innovative Techniques for Using Belt Sanders in Floor Refinishing How to Achieve a Perfectly Flat Surface with Belt Sanding for Floor Refinishing Common Belt Sanding Tools and Accessories for Floor Refinishing The Role of Belt Sanding in Achieving a Professional Finish on Your Floors
Sanding
We provide virtually dust-free sanding with our continuous belt machinery with mobile extraction units, giving you a safer environment for your family.
Oiling
This organic finish not only adds beauty to your home but also has exceptional water-repellent characteristics, making it easier to clean and maintain.
Waxing
This natural floor finish offers the softest and most mellow appearance – and leaves your floor able to breath.
Buffing
Using soft buffing machines (and hand-polishing where required) will bring a wonderful sheen to your newly-finished floor.
Repairs
We offer a full assessment of your wooden floors to determine what repairs are needed to provide the perfect working surface for the later stages of sanding, staining and sealing.
Restoration
We offer a comprehensive restoration process designed to address floors that are improperly fitted or damaged over time through wear and tear.
Request a fixed price quote for your wood floor restoration now
Simply enter your postcode below to get started.
Services
Wood Floor Sanding Wood Floor Restoration Wood Floor Scratch Repair Squeaky Wood Floor Repair Parquet Floor Sanding Parquet Floor Restoration Commercial Floor Sanding Church Floor Sanding Community Centre Floor Sanding School Floor Sanding Gap Filling Gap Filling with ResinCopyright © Mr Sander®
Privacy & Cookies Terms & Conditions Complaints Procedure Cancellation Rights Sitemap

Get An Instant Price Estimate Before You Go…
Simply enter the rooms you need sanded and we’ll provide you with a price estimate instantly! Try our price calculator now.
Get a Price Estimate NowLocal Floor Sanding Experts
Over 500 5-Star Reviews
Safe, Dust Free Sanding
Operating Since 1994