London:
Nationwide:
25,000+
Floors Restored
27 Years Experience
Wood Flooring Association Certified
How Often Should You Buff Your Hardwood Floors?
Posted on October 9, 2023
Buffing
Guidelines for Buffing Hardwood Floors: Frequency & Best Practices
Hardwood floors are renowned for their timeless beauty and lasting durability. However, like all things of value, they require regular maintenance to preserve their lustre and prolong their lifespan. One common question among homeowners is: how often should one buff their hardwood floors? Buffing, which is a less intensive process than sanding, revitalises the surface of the wood by smoothing out minor scratches and restoring shine. Understanding the right frequency for this procedure can make a marked difference in maintaining the aesthetic and functional qualities of your hardwood flooring. A gleaming expanse of hardwood flooring can elevate the elegance of any room, but maintaining that shine and scratch-free surface can be a bit of a puzzle for many homeowners. Buffing, an essential component of hardwood floor care, helps restore the sheen and even out minor imperfections without the need for a complete refinish. But how often should this process be undertaken? Striking the right balance between under-buffing and over-buffing is key to ensuring your floors remain both stunning and sturdy. The charm of hardwood floors lies not only in their aesthetic appeal but also in their longevity. To keep them looking their best, periodic maintenance, like buffing, becomes essential. Buffing is a gentle procedure that helps in smoothing out light surface scratches and reviving the floor’s natural shine without removing layers of wood. However, the frequency of this maintenance ritual often perplexes many. Dive into understanding when and why buffing becomes necessary, ensuring your hardwood floors remain in impeccable condition for years to come.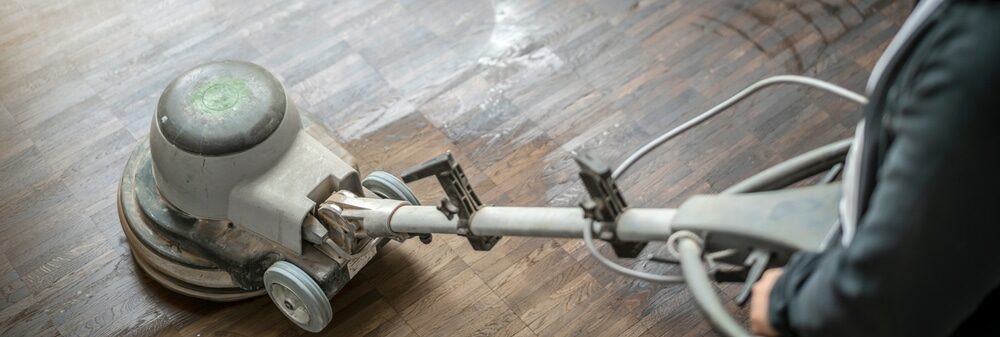
Introduction to Buffing
Hardwood floors are a classic addition to homes, exuding warmth, character, and elegance. Over time, however, even the most meticulously cared-for wood floors can begin to lose their luster, marred by the inevitable scratches, scuffs, and daily wear and tear. Enter the world of wood floor buffing. This process, a vital aspect of floor maintenance, involves gently abrading the surface of the wood to smooth out imperfections and prepare it for a fresh coat of finish. Unlike sanding, which is more aggressive and removes a significant layer of the wood’s surface, buffing is a milder yet effective procedure. Understanding the art and science of wood floor buffing can pave the way for homeowners to restore the beauty of their floors without undergoing a full-scale refinishing project.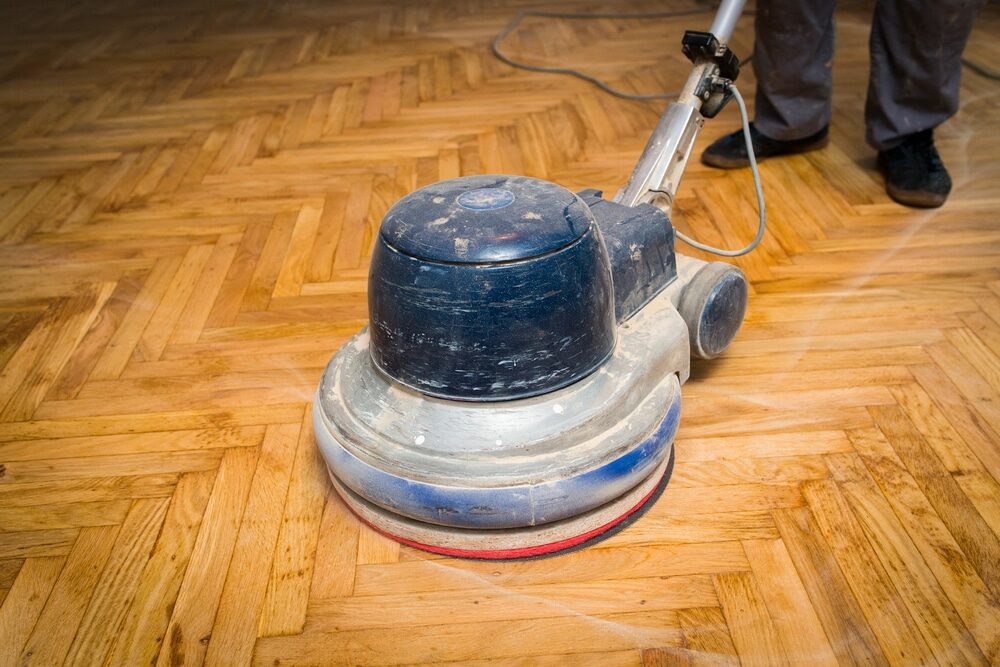
The Importance of Buffing Hardwood Floors
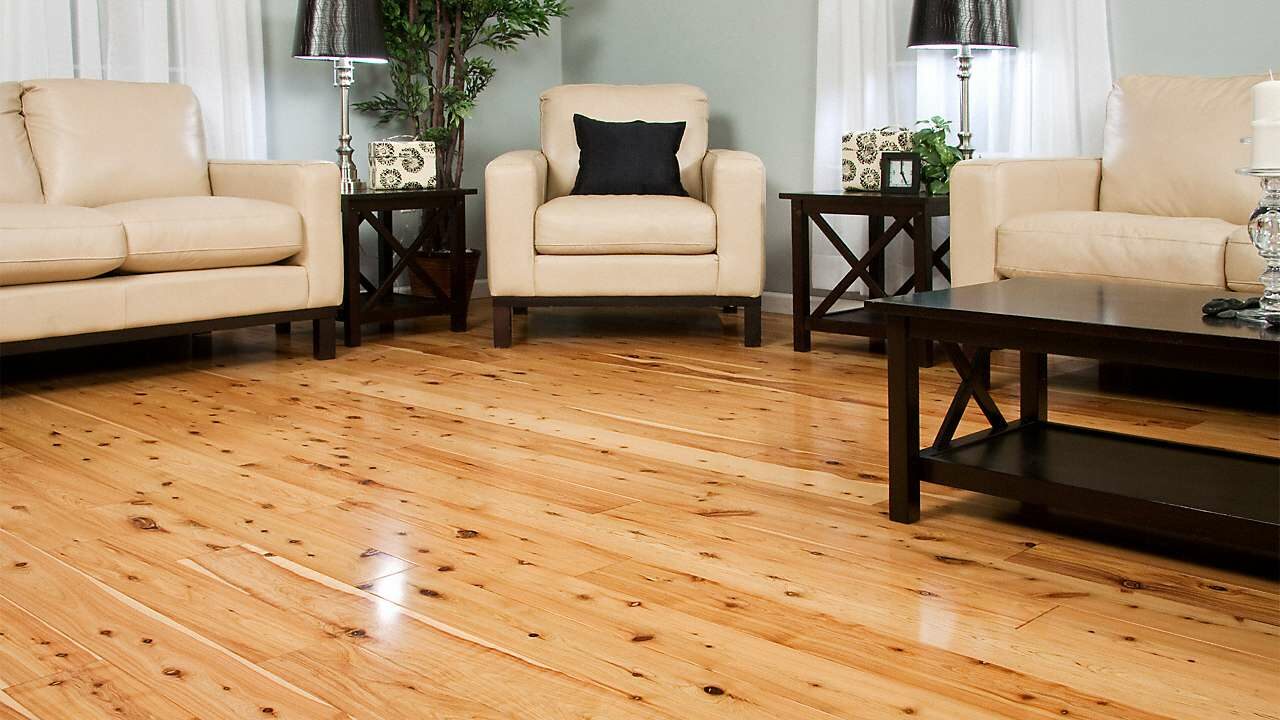
Hardwood floors are synonymous with timeless beauty, offering a touch of nature’s elegance to the interiors of our homes. While their aesthetic appeal is undeniable, these floors, like all things, endure the brunt of daily life, accumulating scratches, scuffs, and a dulling of their once-vibrant sheen over time. This is where the importance of buffing comes into play. Buffing is an integral aspect of hardwood floor maintenance that goes beyond mere aesthetics. Firstly, it serves as a preventive measure. By periodically buffing the floor, minor imperfections are addressed before they escalate into deeper damages that might necessitate costlier interventions. This process helps smooth out the surface, ensuring that light surface scratches and dings do not evolve into deeper, more permanent grooves. Moreover, buffing also plays a pivotal role in the refinishing process. Before applying a new coat of sealant or finish, buffing ensures that the surface is even and free from contaminants. This not only results in a smoother finish but also enhances the adhesion of the sealant, ensuring longevity and protection against external elements. From an aesthetic standpoint, buffing rejuvenates hardwood floors, restoring their original shine and luster. It acts as a mini facelift, enhancing the vibrancy of the wood grains, which can become muted over time due to wear and exposure. In essence, buffing is not merely a superficial process. It’s a preservation technique, an aesthetic enhancer, and a guardian against wear and tear. Recognising its importance is the first step towards ensuring that hardwood floors remain as captivating and durable as the day they were installed.Factors Influencing Buffing Frequency
The frequency with which hardwood floors should be buffed depends on several factors. Recognising and understanding these variables can help homeowners make informed decisions on the maintenance of their beloved hardwood floors. Here are the primary factors influencing buffing frequency:- Traffic Volume: The most significant factor is the amount of foot traffic the floor experiences. High-traffic areas like hallways, kitchens, and living rooms may require more frequent buffing than lesser-used spaces like guest rooms.
- Presence of Pets: Pets, especially dogs with harder claws, can introduce more scratches and scuffs to the floor. If pets frequently roam around, buffing might need to be done more often.
- Type of Finish: Some finishes are more resilient than others. For instance, floors with oil-based polyurethane finishes might require more frequent buffing than those with water-based finishes, which are typically harder.
- Floor Age: Older floors, especially those that haven’t been refinished in a long time, might benefit from more frequent buffing to maintain their lustre and address minor imperfections.
- Cleaning and Maintenance Practices: Using abrasive cleaners or hard-bristled brooms can introduce micro-scratches. Regular and appropriate cleaning can reduce the need for frequent buffing.
- Shoe Policy: Homes where outdoor shoes are regularly worn indoors may notice more wear and tear on the floors. In such cases, buffing might be required more often to address the damages caused by hard-soled or heeled shoes.
- Environmental Factors: Hardwood floors in areas exposed to high amounts of direct sunlight or fluctuating humidity levels might show signs of fading or warping, respectively. These conditions can affect the frequency of buffing.
- Type of Wood: Harder woods like oak or maple tend to resist scratches better than softer woods like pine. Thus, the type of wood can influence buffing needs.
- Aesthetic Expectations: Homeowners who desire a consistently gleaming and perfect floor might opt to buff more frequently, even if the wear is minimal.
- Previous Maintenance: Floors that have been regularly maintained, including periodic buffing, might not require as frequent attention compared to those that have been neglected.
General Buffing Guidelines
Buffing hardwood floors is a task that requires some knowledge and care to ensure the best results. Here are some general buffing guidelines to help homeowners navigate the process:- Assessment: Before buffing, evaluate the floor’s condition. If there are deep scratches, stains, or significant wear, the floor might require a more comprehensive refinishing than just buffing.
- Clean the floor: Before buffing, thoroughly clean the floor. Sweep or vacuum to remove loose dirt and debris. This step is crucial to avoid grinding dirt into the floor during buffing, which could lead to more scratches.
- Choose the right equipment: Use a buffer with the appropriate pad. For light buffing, a fine pad or a white polishing pad is recommended. If preparing for a recoat, a slightly more abrasive pad, like a red pad, can be used.
- Safety First: Always wear protective gear, including safety goggles and a dust mask. This will protect you from dust and any particles that may fly up during the buffing process.
- Test a Small Area: Before buffing the entire floor, test a small, inconspicuous area to ensure you’re getting the desired results without causing damage.
- Buff Along the Grain: When using the buffer, move it in the direction of the wood grain. This will help reduce the appearance of any potential swirl marks and achieve a more uniform finish.
- Maintain a Steady Pace: Don’t let the buffer sit in one place for too long. Keep it moving at a consistent, steady pace to ensure even treatment across the floor.
- Clean Up After Buffing: Once buffing is complete, vacuum the floor to remove any dust and particles. If you’re applying a new coat of finish, this will ensure a clean surface for better adhesion.
- Consider Professional Help: If you’re unsure about the buffing process or don’t have the necessary equipment, consider hiring a professional. They’ll have the expertise and tools to ensure optimal results.
- Routine Maintenance: After buffing, maintain the floor’s shine and minimise wear by sweeping or vacuuming regularly, using protective pads under furniture legs, and cleaning up spills promptly.
- Recoating: If buffing was done to prepare the floor for a new coat of finish, ensure the floor is clean and dry. Follow the manufacturer’s guidelines for the chosen finish, ensuring adequate ventilation during and after application.
Signs Your Hardwood Floor Needs Buffing
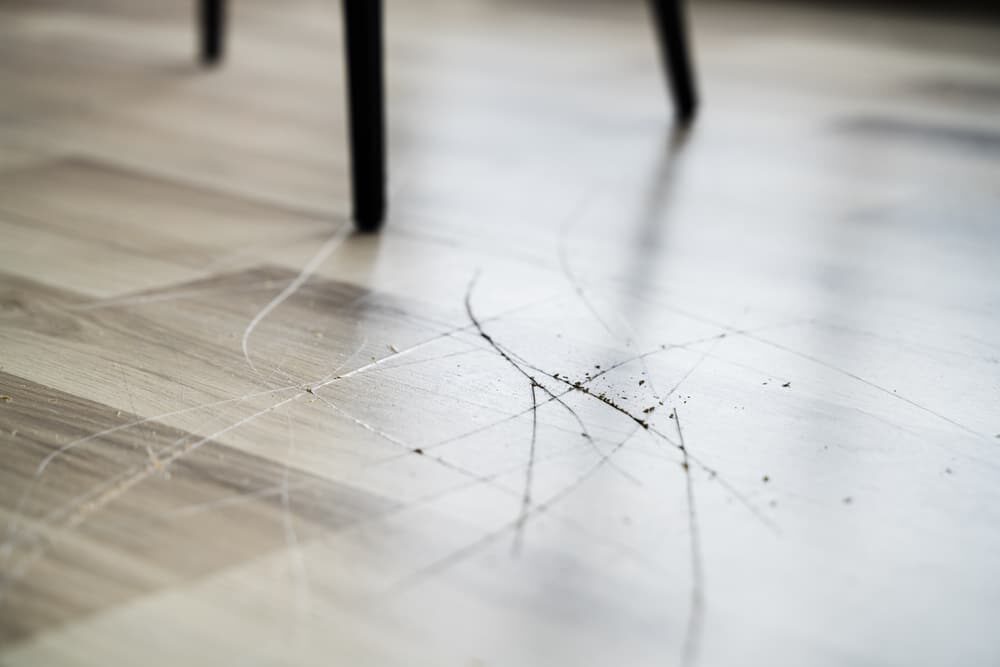
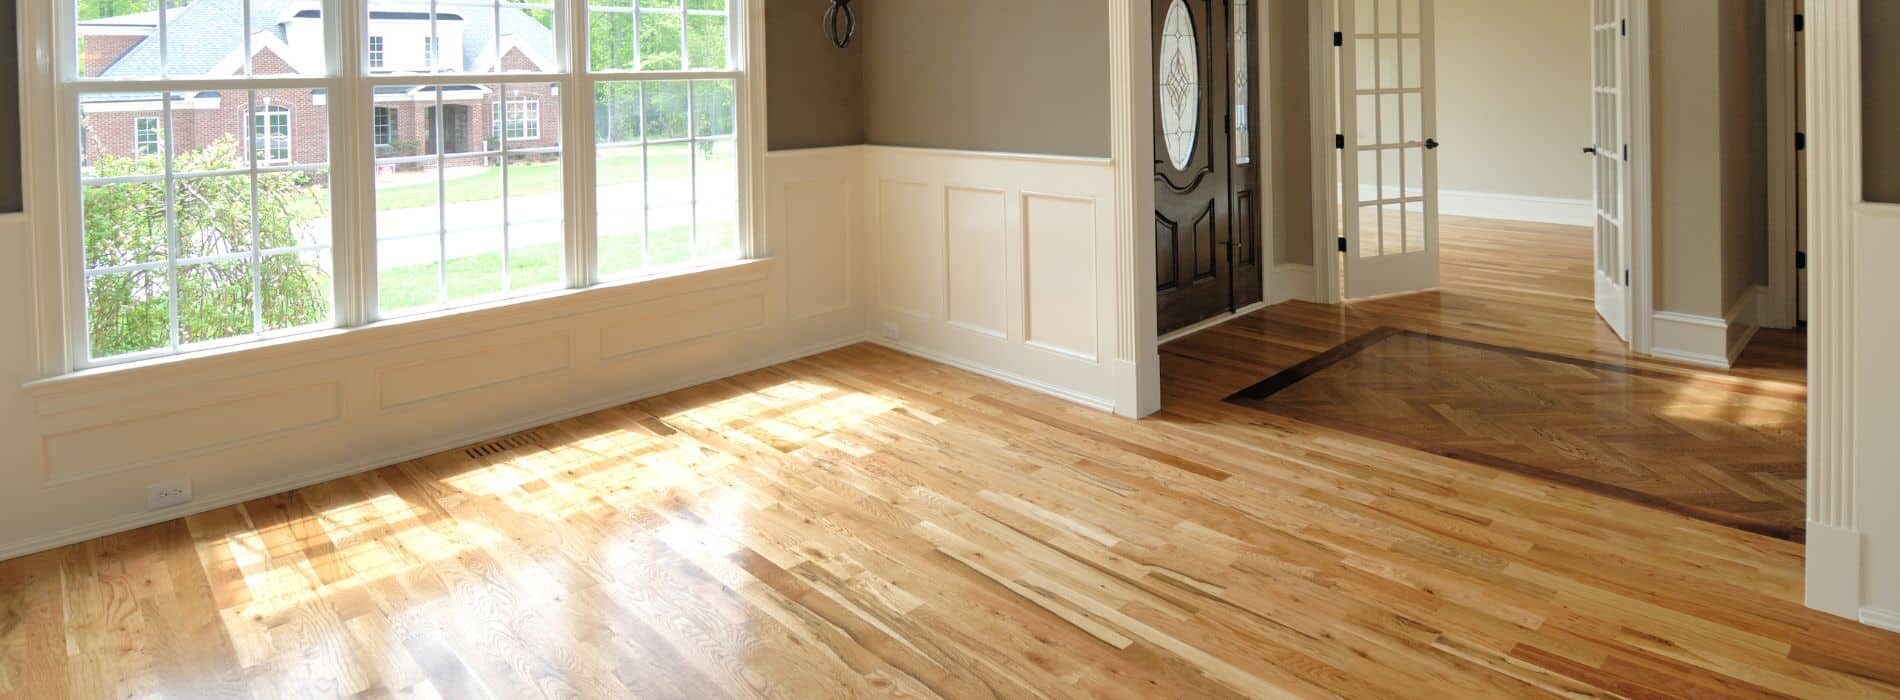
Recognising the telltale signs that your hardwood floor may need buffing is essential to maintaining its beauty and integrity. Here are some common indicators that suggest it might be time to give your floor a little TLC through the buffing process:- Loss of Shine: One of the most evident signs is a dull appearance. If your hardwood floors no longer reflect light as they once did or lack their previous lustre, buffing can restore their shine.
- Surface Scratches: Minor surface scratches that haven’t penetrated deep into the wood grain can be smoothed out with buffing. These scratches often result from daily foot traffic, moving furniture, or pet claws.
- Discoloration: If certain areas of your floor have started to discolour, especially from sun exposure or UV damage, buffing might help to even out the tone before reapplying a protective finish.
- Slight Scuffs: Small scuff marks or areas that appear slightly worn, especially in high-traffic zones, are indicators that buffing could be beneficial.
- Finish Breakdown: Over time, the protective finish on hardwood floors can break down, becoming patchy or uneven. If the sealant is showing signs of wear but the wood beneath is still in good shape, buffing can prepare the surface for a new coat of finish.
- Footprints and Marks: If footprints, cleaning streaks, or other marks are more visible and don’t disappear after cleaning, it could be a sign that the protective layer on the hardwood is diminishing. Buffing and resealing might be the answer.
- Uneven Texture: If you run your hand over the floor and feel slight roughness or inconsistencies in certain areas, it could benefit from buffing to restore a smooth finish.
- Previous Maintenance: If it’s been several years since the last maintenance or if you’re unsure of the last time the floor was buffed, it might be a good preventative measure to consider buffing.
- Before Refinishing: If you’re planning to refinish your hardwood floors but the damage is not deep, a thorough buffing might be all you need before applying a new finish coat.
- Aesthetic Preference: Sometimes, even if there isn’t significant damage or wear, homeowners might opt for buffing simply to rejuvenate the look of their floors.
Tools and materials for buffing
To achieve the best results when dry buffing a wood floor, it’s essential to have the right tools and materials on hand. Here’s a comprehensive list to ensure you’re well-prepared for the task: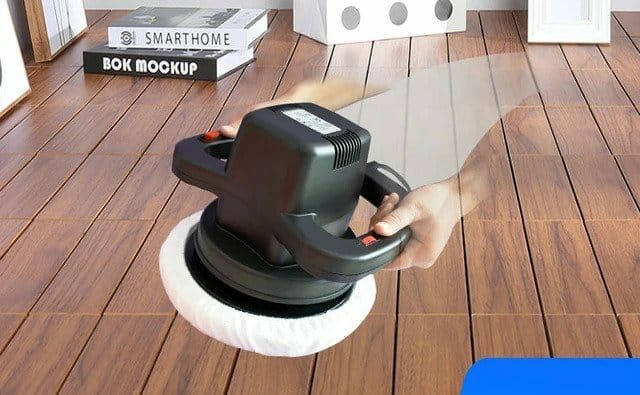
Tools:
- Buffing Machine (Floor Buffer): This is the primary tool for dry buffing. They come in various sizes, but for residential use, a 13- to 17-inch-diameter pad drive is commonly used.
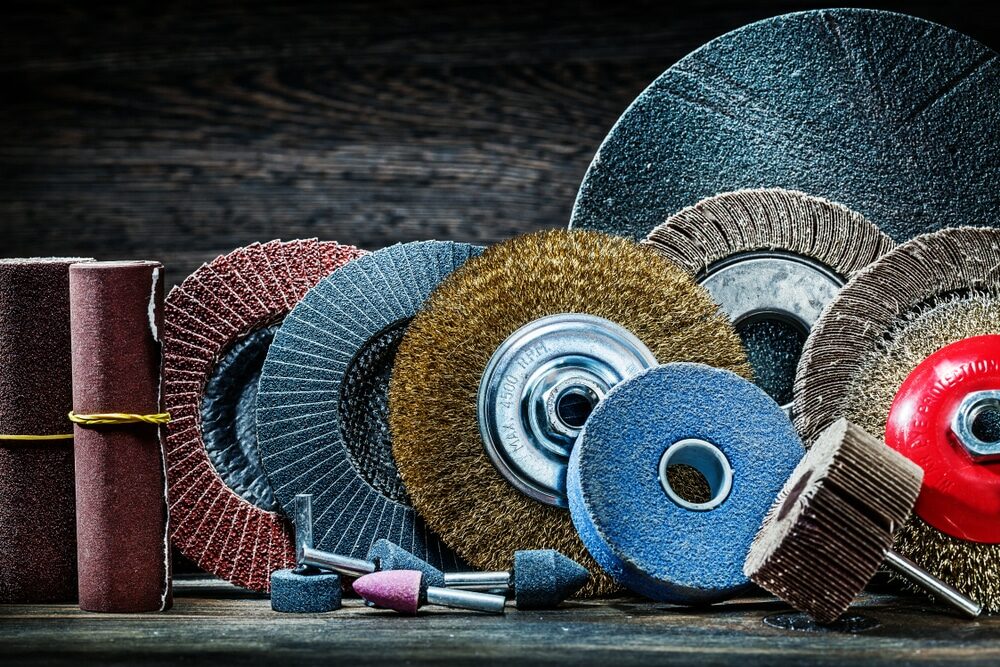
- Buffing Pads: These are attached to the bottom of the buffing machine. You’ll want a variety of grit levels, depending on the condition of your floor and the desired finish.
- Dust Masks and Safety Glasses: It’s essential to protect yourself from dust and any potential wood particles that can be harmful when inhaled or can enter the eyes.
- Ear Protection: Buffing machines can be noisy, so it’s a good idea to use earplugs or earmuffs.
- Vacuum Cleaner: A good vacuum helps remove the dust after buffing, ensuring a clean surface for applying finishes if desired.
- Extension Cord: Ensure that it’s long enough to reach all parts of the room without having to constantly switch outlets.
- Soft Bristle Brush or Broom: This is for initial cleaning of the floor before buffing.
Materials:
- Screening Discs: These abrasive screens are used in conjunction with the buffer to lightly abrade the wood surface, preparing it for the final finish.
- Wood Floor Cleaner: A pH-neutral cleaner is recommended to ensure there’s no damage to the wood.
- Tack Cloth: This sticky cloth is helpful for picking up any leftover dust or debris after vacuuming.
- Wood Floor Finish (optional): If you’re planning to apply a new finish after buffing, have this on hand. Make sure it’s compatible with your wood type.
- Applicator (optional): If you’re refinishing the floor after buffing, you’ll need an applicator to spread the finish evenly.
- Clean Rags: Essential for cleaning up any spills and for hand wiping certain areas if necessary.
- Knee Pads: If you need to work on specific spots by hand or if you’re applying a finish manually, knee pads can save your knees from discomfort.
The Buffing Process, Step-by-Step
The wood floor buffing process is a technique to restore the sheen and smoothness of hardwood floors without the invasiveness of full sanding and refinishing. By following a step-by-step guide, you can ensure optimal results: 1. Preparation:- Remove Furniture: Ensure the room is cleared of all furniture, rugs, and other obstacles.
- Clean the Floor: Sweep or vacuum the floor thoroughly to remove any dirt, debris, or loose particles. This prevents the debris from causing further scratches during the buffing process.
- Look for any deep scratches, gouges, or stains. Remember, buffing is effective for light scratches and wear but won’t fix deeper damage.
- Rent or purchase a buffer, also known as a floor maintainer. These are available at most home improvement stores.
- Select the appropriate buffing pad. For most hardwood floors, a white or red pad is suitable, but consult with a flooring expert if unsure.
- Attach the chosen pad to the buffer.
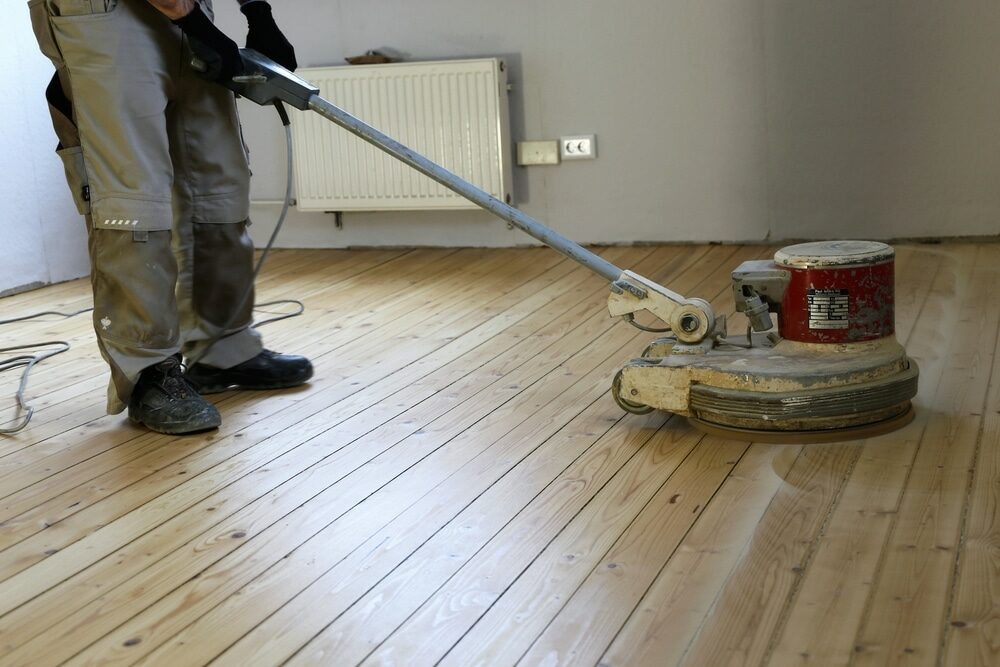
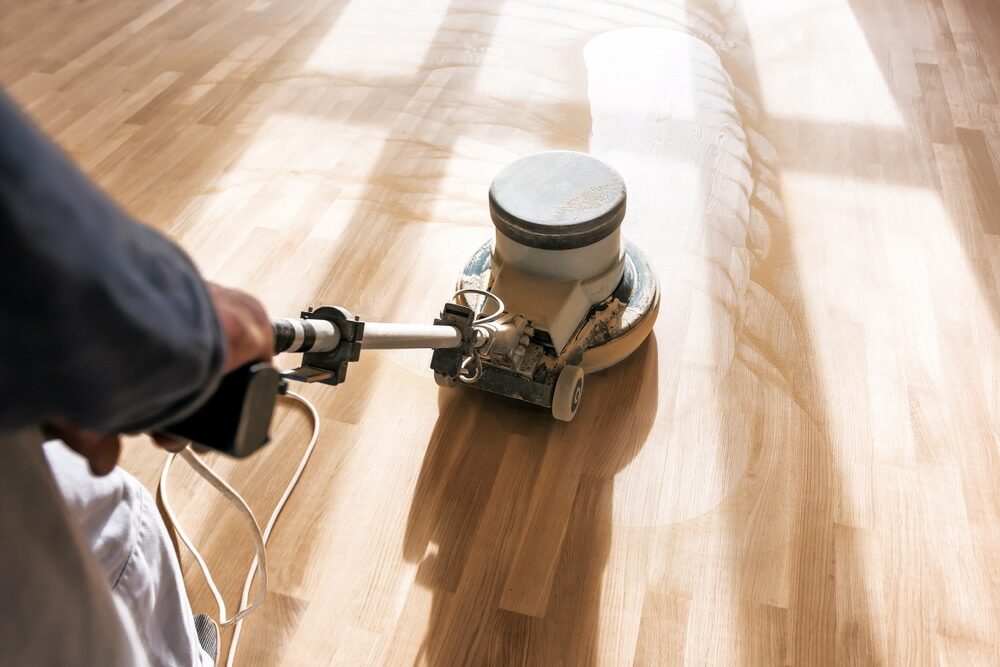
- Turn on the machine and, beginning at one end of the room, move the buffer side-to-side across the floor, going with the grain of the wood. Keep the buffer in motion to avoid over-sanding any particular spot.
- Ensure even coverage by slightly overlapping each pass.
- Since buffers are circular, they can’t reach right up to the edges or corners of the room. Use a handheld orbital sander or sanding block with fine-grit sandpaper to lightly buff these areas manually.
- Once buffing is complete, vacuum the floor to remove any dust or particles generated by the process.
- Wipe down the floor with a damp (not wet) cloth or a tack cloth to pick up any remaining dust.
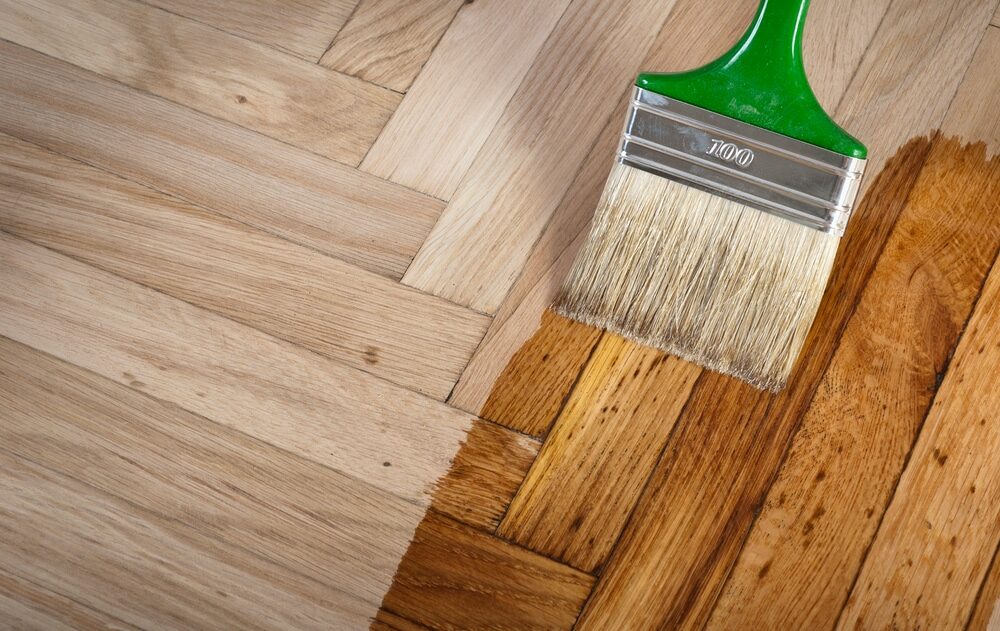
- If you’re looking to refresh the protective layer on your floor, now is the time to apply a new coat of finish or sealant.
- Ensure the floor is entirely dust-free and clean.
- Follow the manufacturer’s instructions for the finish you’re using. Typically, you’d use a lambswool applicator or roller to apply the finish evenly across the floor, working with the grain.
- Allow the finish to dry as per the manufacturer’s recommended time.
- Wait until the finish has fully cured (if applied) before returning furniture to the room. This curing time can vary but usually ranges from 24 to 72 hours.
- To prolong the life of your freshly buffed floor, ensure regular cleaning and avoid wearing hard-soled shoes indoors. Place protective pads under furniture legs to prevent scratches.
Aftercare and Maintenance
Preserving the renewed beauty of your buffed hardwood floors requires diligent aftercare and maintenance. Here’s how you can ensure they remain in pristine condition: 1. Immediate aftercare:- Avoid Traffic: Especially if you’ve applied a new finish after buffing, it’s crucial to prevent foot traffic for a specified period, usually 24 to 72 hours, depending on the product used.
- Furniture and Rugs: Wait a few days before placing furniture back. If you’ve applied a new finish, wait at least a week before laying down rugs to ensure the finish has fully cured.
- Dust/Sweep Daily: Dust, dirt, and grit can act as sandpaper, scratching your floor over time. Use a soft-bristled broom or microfiber mop to sweep daily.
- Vacuum Weekly: Use a vacuum cleaner without a beater bar, or ensure it’s turned off. The soft brush attachment is best.
- Clean Spills Promptly: Any liquid can damage hardwood if left sitting for too long. Clean up spills immediately with a soft, dry cloth.
- Damp Mop: Every month (or as needed), clean the floor with a damp mop using a designated wood floor cleaner. Avoid using excessive water, and never use a wet mop.
- Avoid Harsh Cleaners: Stay away from oil soaps, wax, or any product that promises to add shine. They can dull the finish over time or make re-coating impossible in the future.
- Use Protective Pads: Attach felt pads to the bottoms of furniture, especially chairs that move frequently, to prevent scratching.
- Area Rugs: Use rugs in high-traffic areas, like entrances and hallways, but ensure they are non-skid and breathable.
- Shoe Policy: Consider implementing a ‘no-shoe’ policy indoors, especially high heels or shoes that can cause dents and scratches.
- UV Rays: Prolonged exposure to direct sunlight can fade hardwood over time. Use curtains, blinds, or UV protective films on windows to minimise sun damage.
- Humidity Levels: Wood floors can expand and contract with changing humidity. Aim to keep indoor humidity levels between 35% and 55% to prevent warping or gapping.
- Annual Inspection: At least once a year, inspect your floor for signs of wear or damage. This can help you determine if another round of buffing or more intensive care is needed.
- If you’ve opted for a modern polyurethane finish on your hardwood, avoid waxing or polishing the floor. These can interfere with the finish and might complicate future refinishing efforts.
Common Buffing Mistakes to Avoid
Buffing is an effective way to rejuvenate hardwood floors, but mistakes in the process can lead to undesirable results or even damage. Being aware of common mistakes ensures you achieve the best outcome for your floors.Common Buffing Mistakes to Avoid:
- Not Pre-Cleaning the Floor: Failing to thoroughly clean the floor before buffing can cause dirt and debris to scratch the wood during the buffing process.
- Using the Wrong Buffing Pad: Different floors and finishes might require different pads. Using an overly abrasive pad can damage the finish or the wood itself.
- Buffing Too Frequently: Over-buffing can wear down the protective finish faster, reducing the lifespan of your floors.
- Overworking an Area: Spending too much time buffing a particular spot can lead to uneven results or even damage.
- Ignoring Edges and Corners: Failing to hand-sand or buff the edges and corners can result in an uneven finish, with these areas looking noticeably different from the rest of the floor.
- Not Testing an Area First: Before buffing the entire floor, it’s wise to test a small, inconspicuous area to ensure the process doesn’t damage the finish or wood.
- Using Harsh Chemicals: Applying inappropriate or harsh cleaning agents before or after buffing can damage the floor’s finish.
- Not Wearing Safety Gear: Overlooking safety can lead to personal injury. Always wear protective eyewear, masks, and suitable footwear when buffing.
- Rushing the Finish: If you’re applying a new finish after buffing, failing to wait for the floor to be completely free of dust or not allowing adequate drying time can result in a flawed finish.
- Not Seeking Professional Advice: If you’re unfamiliar with the process or the floor has unique characteristics, neglecting to consult a professional can lead to mistakes.
Final Thoughts
Buffing is an invaluable tool in the arsenal of hardwood floor maintenance, bridging the gap between daily cleaning and the occasional need for full refinishing. While it’s a less intensive process, attention to detail is paramount. Avoiding common mistakes ensures the integrity and beauty of the floor are preserved. Whether you choose a DIY approach or hire professionals, understanding potential pitfalls can guide decisions, ensuring your hardwood floors remain a radiant and durable feature of your home for years to come.Some Useful Links:
- Stairs Sanding & Refinishing
- Floor Sanding Services
- School Floor Sanding
- Wood Floor Restorations
- Wood Floor Repairs
- Wood Floor Polishing
More from our Blog:
Different Buffing Techniques for Hardwood Floors The Role of Buffing in Achieving a Smooth Finish How to Choose the Right Buffer for Floor Sanding How to Repair Damaged Floors with Belt Sanding Step-by-Step Guide to Belt Sanding Your Floors Innovative Techniques for Using Belt Sanders in Floor Refinishing How to Achieve a Perfectly Flat Surface with Belt Sanding for Floor Refinishing Common Belt Sanding Tools and Accessories for Floor Refinishing The Role of Belt Sanding in Achieving a Professional Finish on Your Floors
Sanding
We provide virtually dust-free sanding with our continuous belt machinery with mobile extraction units, giving you a safer environment for your family.
Oiling
This organic finish not only adds beauty to your home but also has exceptional water-repellent characteristics, making it easier to clean and maintain.
Waxing
This natural floor finish offers the softest and most mellow appearance – and leaves your floor able to breath.
Buffing
Using soft buffing machines (and hand-polishing where required) will bring a wonderful sheen to your newly-finished floor.
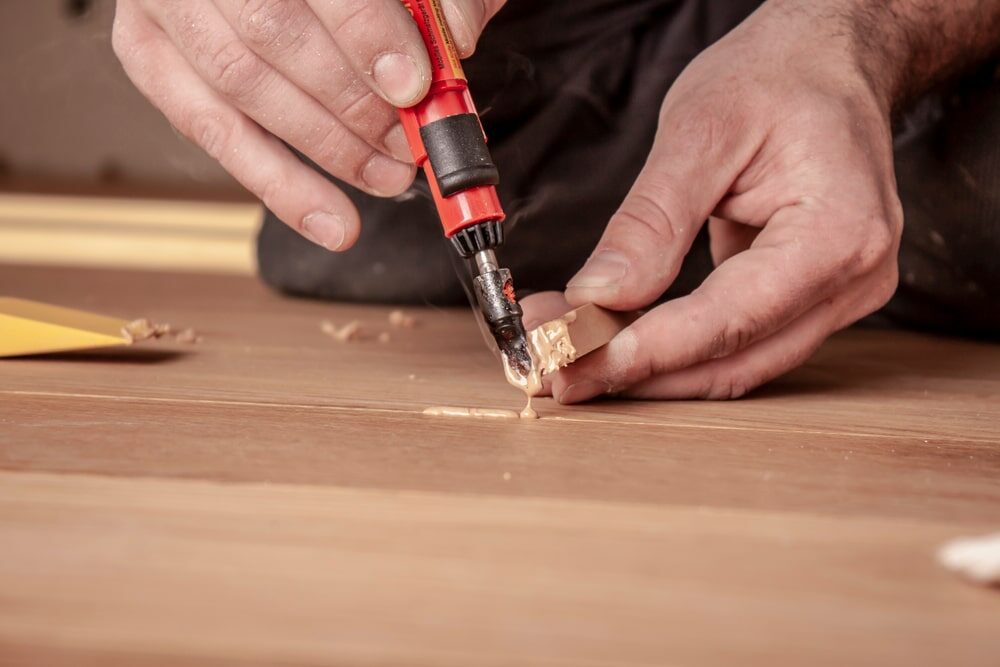
Repairs
We offer a full assessment of your wooden floors to determine what repairs are needed to provide the perfect working surface for the later stages of sanding, staining and sealing.
Restoration
We offer a comprehensive restoration process designed to address floors that are improperly fitted or damaged over time through wear and tear.
Request a fixed price quote for your wood floor restoration now
Simply enter your postcode below to get started.
Services
Wood Floor Sanding Wood Floor Restoration Wood Floor Scratch Repair Squeaky Wood Floor Repair Parquet Floor Sanding Parquet Floor Restoration Commercial Floor Sanding Church Floor Sanding Community Centre Floor Sanding School Floor Sanding Gap Filling Gap Filling with ResinCopyright © Mr Sander®
Privacy & Cookies Terms & Conditions Complaints Procedure Cancellation Rights Sitemap

Get An Instant Price Estimate Before You Go…
Simply enter the rooms you need sanded and we’ll provide you with a price estimate instantly! Try our price calculator now.
Get a Price Estimate NowLocal Floor Sanding Experts
Over 500 5-Star Reviews
Safe, Dust Free Sanding
Operating Since 1994