London:
Nationwide:
25,000+
Floors Restored
27 Years Experience
Wood Flooring Association Certified
Tongue and Groove Floors: A Comprehensive Guide
Posted on December 8, 2023
Wood Flooring
Exploring Tongue and Groove Flooring: A Complete Guide
When it comes to timeless and durable flooring options, few can match the elegance and resilience of tongue and groove floors. Whether you’re embarking on a home renovation or planning a new construction project, understanding the ins and outs of this classic flooring method can be a game-changer for your interior design.
In this comprehensive guide, we’ll delve deep into the world of tongue and groove flooring, equipping you with the knowledge and confidence to make informed decisions. From the different types of materials available to the step-by-step installation process, we’ve got you covered.
Tongue and groove flooring isn’t just a practical choice; it’s a design statement that can elevate the aesthetics of any space. But it’s not without its challenges. That’s why we’re here to walk you through every aspect, offering insights, tips, and expert advice along the way.
Whether you’re a seasoned DIY enthusiast or a homeowner considering professional installation, this guide will empower you to make the right choices, ensuring that your tongue and groove floors not only stand the test of time but also become a centerpiece of your home’s charm.
So, let’s embark on this flooring journey together, exploring the beauty and craftsmanship of tongue-and-groove floors. From selecting the right materials to mastering the installation process, you’re about to discover the art and science of creating stunning, long-lasting floors for your living spaces.
Types of Tongue and Groove Flooring
Tongue and groove flooring is not a one-size-fits-all solution; it comes in various types, each with its own unique characteristics and advantages. Understanding the different options allows you to choose the perfect fit for your home. Here are the main types of tongue-and-groove flooring:
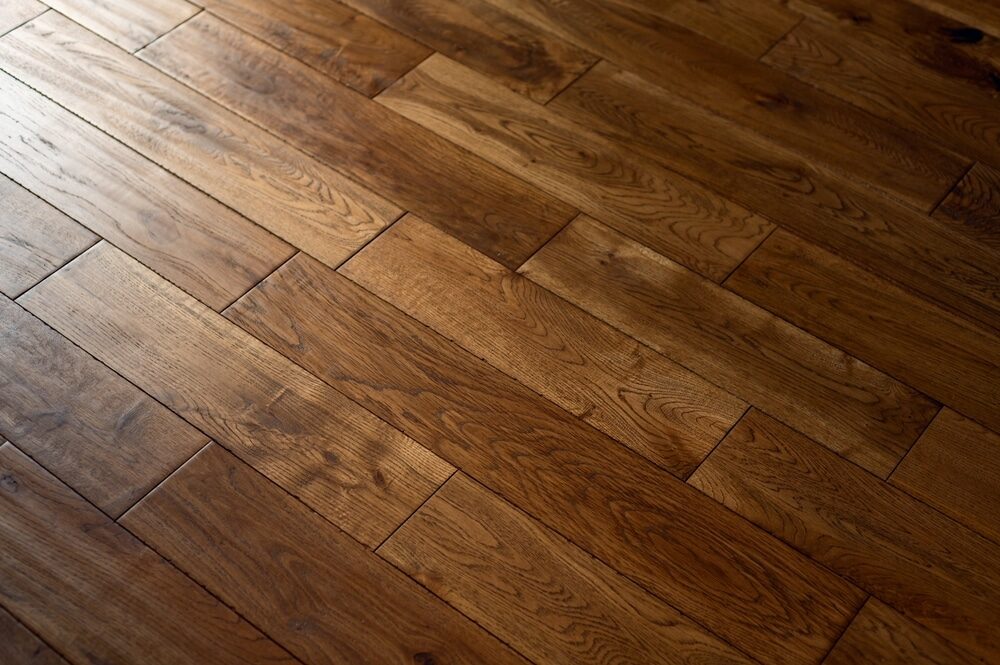
Hardwood Tongue and Groove Flooring:
- Description: Hardwood tongue-and-groove flooring is known for its timeless beauty and durability. It consists of solid wood planks with interlocking tongues and grooves.
- Advantages: natural beauty, longevity, can be sanded and refinished multiple times, adds value to the home.
- Considerations: Prone to moisture-related issues, it requires periodic refinishing and can be more expensive than other options.
Engineered Wood Tongue and Groove Flooring:
- Description: Engineered wood flooring is composed of a real wood veneer (the “wear layer”) on top of a plywood or high-density fiberboard (HDF) core. It features tongue and groove edges for easy installation.
- Advantages: It looks like hardwood, is stable in varying humidity levels, is suitable for basements, and requires easy installation.
- Considerations: Limited refinishing options (due to the thinner wear layer) may not add as much value as solid hardwood.
Laminate Tongue and Groove Flooring:
- Description: Laminate flooring is a budget-friendly option that mimics the appearance of hardwood. It consists of multiple layers, including a high-resolution image of wood, and features tongue and groove edges for installation.
- Advantages: cost-effective, easy to install, scratch- and stain-resistant, suitable for high-traffic areas.
- Considerations: not real wood; limited refinishing options; shorter lifespan compared to hardwood or engineered wood.
Vinyl Tongue and Groove Flooring:
- Description: Vinyl tongue-and-groove flooring is a versatile and water-resistant option. It can mimic the look of wood, stone, or tile and is available in various styles.
- Advantages: water-resistant, easy maintenance, budget-friendly, comfortable underfoot.
- Considerations: Not real wood; may have a shorter lifespan than other options; limited design choices compared to natural materials.
Each type of tongue-and-groove flooring has its own set of characteristics and benefits. Your choice will depend on your budget, design preferences, location within your home, and maintenance considerations. Whether you opt for the timeless elegance of hardwood or the practicality of vinyl, understanding the options available ensures you make an informed decision that suits your needs.
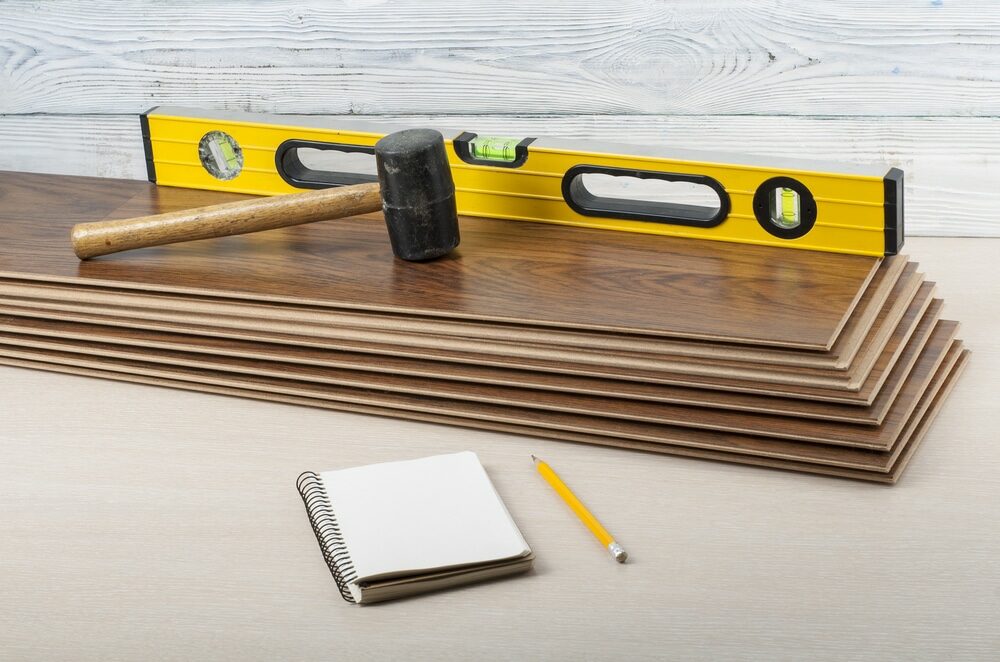
Tools and Materials Needed
Before you embark on the installation of tongue and groove flooring, it’s essential to gather all the necessary tools and materials. Proper preparation ensures a smoother and more efficient installation process. Here’s a list of what you’ll need:
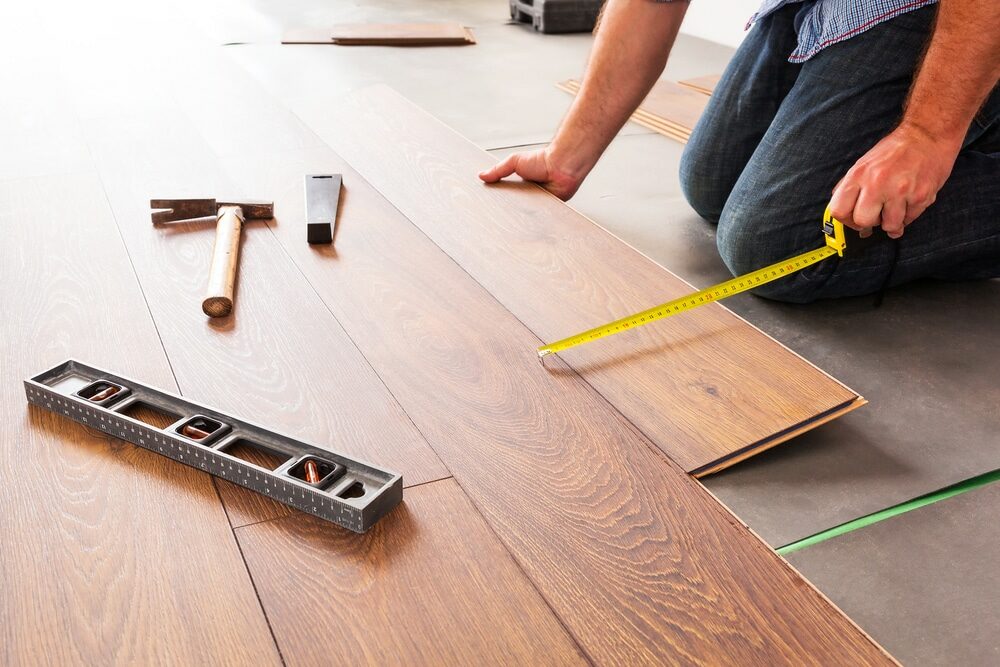
Tools:
- Measuring Tape: For accurate measurements and layout planning.
- Safety Gear: including safety goggles and knee pads for protection during installation.
- Carpenter’s Square: Helps ensure square cuts and proper alignment.
- Pencil and Chalk Line: For marking guidelines on the subfloor.
- Circular Saw or Miter Saw: To cut flooring planks to size, especially for end cuts and fitting around obstacles.
- Table Saw (Optional): Useful for ripping the last row of flooring to fit against the wall.
- Tapping Block and Pull Bar: Helps to secure the tongue and groove joints without damaging the planks.
- Spacers: Maintain the required expansion gap between the flooring and the walls.
- Jigsaw or Coping Saw: For making intricate cuts around door frames or irregular shapes.
- Nail Gun or Flooring Nailer: Depending on your chosen installation method, you’ll need either a pneumatic nail gun or a manual flooring nailer.
- Hammer: To manually drive nails if you’re not using a nail gun.
- Level: Ensures the floor is flat, even during installation.
- Tapping Block and Pull Bar: Used to gently tap and secure the tongue and groove joints together.
- Wood glue (if recommended): Some installations may require adhesive for added stability.

Materials:
- Tongue and Groove Flooring: Choose the type and species of wood or material that suits your preferences and needs.
- Underlayment: Depending on your subfloor and local building codes, you may need an underlayment to provide moisture protection and noise reduction.
- Moisture Barrier (if necessary): If you’re installing over a concrete subfloor, a moisture barrier may be required to prevent moisture seepage.
- Nails or Flooring Staples: Depending on your chosen installation method, you’ll need appropriate fasteners.
- Wood Filler: To fill any gaps, cracks, or nail holes in the finished floor.
- Finishing Materials: stain, sealant, or finish for hardwood floors (if desired).
- Transition Strips: For a clean transition between different flooring types or between rooms.
- Caulk: for sealing gaps at edges or transitions.
- Adhesive (if recommended): If the manufacturer recommends adhesive, ensure you have the appropriate type.
- Cleaning Supplies: Rags, a broom, and a vacuum cleaner for cleaning the subfloor and the finished floor.
- Flooring Installation Manual: Always refer to the manufacturer’s installation instructions specific to your flooring product.
Having all these tools and materials ready before you start the installation process will save you time and make the project run more smoothly. It’s important to use the right tools for the job and follow safety guidelines throughout the installation.
Preparing the Subfloor
Proper preparation of the subfloor is crucial to ensuring the longevity and stability of your tongue-and-groove flooring. Before you begin the installation process, follow these essential steps to prepare the subfloor:
- Clean the Subfloor: Start by thoroughly cleaning the subfloor to remove any dust, debris, or residues. Sweep the area, vacuum it, and wipe it down with a damp cloth if necessary. A clean surface ensures better adhesion and a level installation.
- Check for Flatness: Use a straightedge, such as a long level or a carpenter’s square, to check the subfloor for flatness. If you notice any significant high spots or low spots, mark them for further attention.
- Level Low Spots: Low spots on the subfloor can lead to uneven flooring. Fill these areas with a self-leveling compound. Follow the manufacturer’s instructions for mixing and application. Allow it to dry completely before proceeding.
- Repair Imperfections: If you encounter any cracks, holes, or damaged areas on the subfloor, repair them using an appropriate filler or patching compound. Sand the patched areas smooth once they are dry.
- Moisture Testing (if necessary): Depending on the type of subfloor and your location, you may need to perform a moisture test. Excessive moisture can damage the flooring over time. Follow the manufacturer’s guidelines for conducting moisture tests and addressing any issues.
- Install Underlayment (if required): Some flooring types and installations may require an underlayment. Install the underlayment according to the manufacturer’s instructions. It provides additional moisture protection, sound insulation, and can help smooth out minor imperfections.
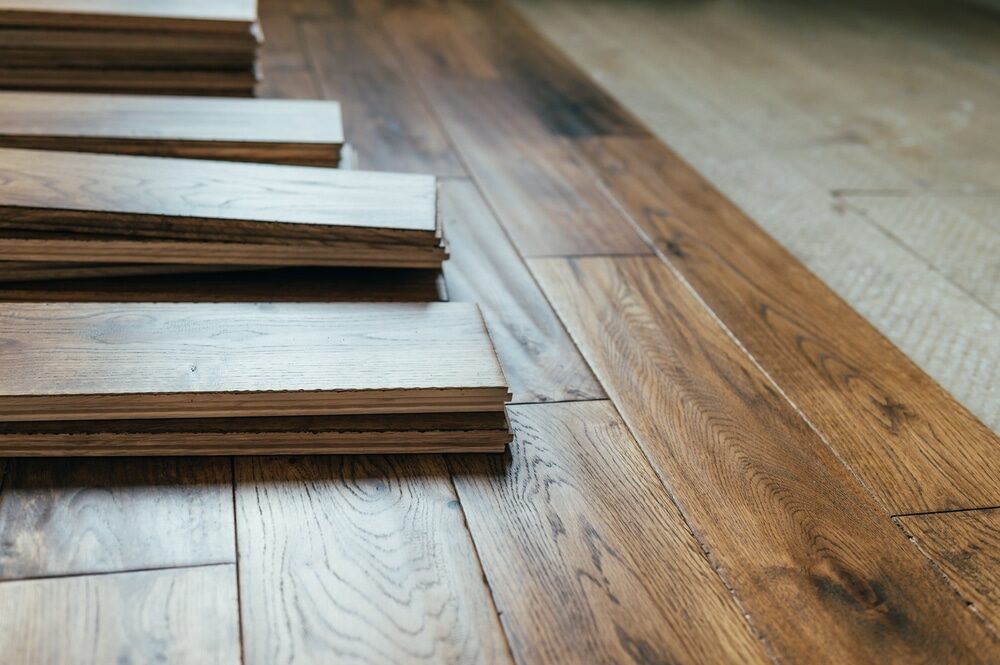
- Acclimate the Flooring: Before installation, allow the tongue and groove flooring to acclimate to the room’s temperature and humidity levels. This helps prevent warping or cupping after installation. Follow the manufacturer’s recommendations for acclimation time.
- Plan the Layout: Plan the layout of your flooring, considering the orientation and aesthetics. Decide on the starting point, usually along a wall or in the center of the room, depending on the design.
- Maintain Expansion Gaps: Leave an expansion gap around the perimeter of the room to accommodate natural wood expansion. Use spacers to maintain this gap and ensure it’s consistent.
- Check for Obstacles: Identify any obstacles or architectural features that may require special attention during installation, such as doorways, corners, or vents.
- Double-Check Readiness: Before proceeding with installation, double-check that the subfloor is clean, level, dry, and free of any imperfections. Once you’re confident in the subfloor’s condition, you can begin the exciting process of laying down your tongue and groove flooring.
Proper subfloor preparation is the foundation of a successful tongue-and-groove flooring installation. Taking the time to ensure a clean, level, and dry subfloor will contribute to a beautiful and long-lasting floor.
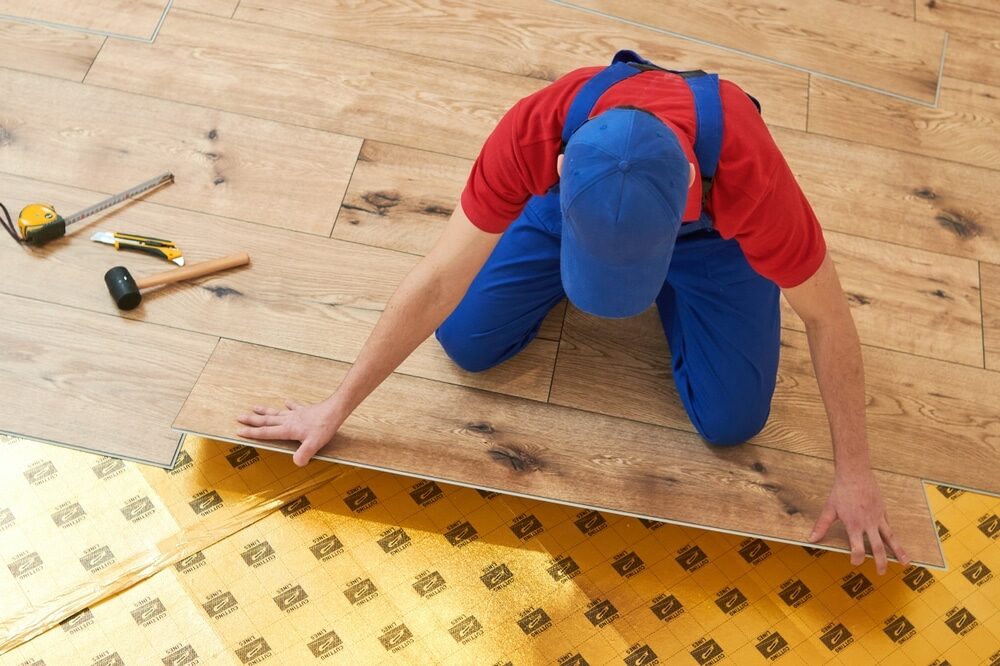
Installing Tongue and Groove Flooring
Now that your subfloor is prepared, you’re ready to start the exciting process of installing tongue and groove flooring. Follow these step-by-step instructions for a successful installation:
Materials and tools you’ll need:
- Tongue-and-groove flooring
- Underlayment (if required)
- Moisture barrier (if necessary)
- Nails or flooring staples
- Nailer or nail gun
- Circular saw or miter saw
- Carpenter’s square
- safety goggles and knee pads
- Tapping block and pull bar
- Spacers
- Pencil and chalk line
- Level
Step 1: Plan the layout
- Begin by planning the layout of your flooring. Determine the starting point, usually along a wall, and the direction of the boards. Consider aesthetics and the room’s shape.
Step 2: Install the underlayment (if needed).
- If your installation requires an underlayment, follow the manufacturer’s instructions to install it now. Ensure it covers the entire subfloor and that seams are properly taped or overlapped.
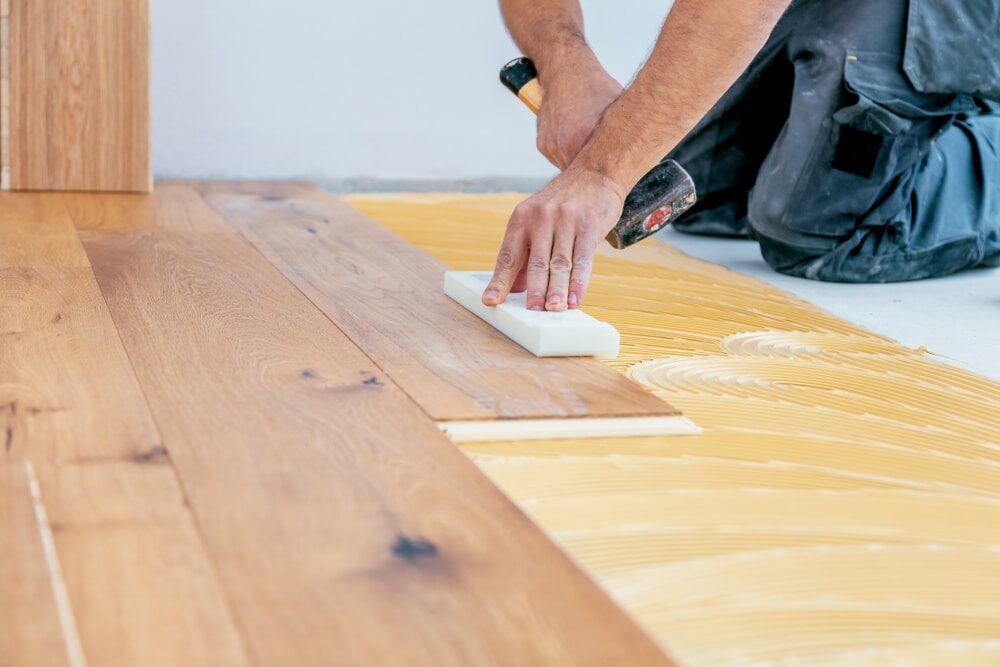
Step 3: Install a moisture barrier (if necessary).
- In cases where moisture is a concern, install a moisture barrier according to the manufacturer’s guidelines. This additional layer helps protect the flooring from moisture damage.
Step 4: Begin Installation
- Start by placing the first row of tongue and groove boards along the starting wall. Ensure that the groove side of the boards faces the wall. Use spacers to maintain the necessary expansion gap along the walls.
Step 5: Secure the boards
- Using a nailer or nail gun, secure the first row of boards by driving nails or staples at a slight angle through the tongue, spacing them as recommended by the manufacturer. Be sure to leave a small gap between the boards for expansion.
Step 6: Continue the rows
- Install the next rows of boards by inserting the tongue of each board into the groove of the previous row. Use a tapping block and pull bar to help secure the joints tightly. Stagger the end joints for a more stable floor.
Step 7: Trim the Last Row
- Measure and cut the last row of boards to fit, leaving an expansion gap along the wall. A table saw or circular saw is useful for making these cuts. Use a pull bar to fit the last row in place.
Step 8: Work Around Obstacles
- When encountering obstacles like doorways or vents, carefully measure and cut the boards to fit around them. Use a jigsaw or coping saw for irregular shapes.
Step 9: Check for Level
- Periodically check the level of the flooring using a straightedge or a level. Ensure that the floor remains flat throughout the installation.
Step 10: Complete the Installation
- Continue installing rows of tongue and groove boards until you reach the opposite wall. Use the nailer or nail gun to secure the final rows.
Step 11: Install transition strips.
- If transitioning to another flooring type or between rooms, install transition strips according to your design and needs.
Step 12: Remove spaces
- Once the installation is complete, remove the spacers from around the edges and replace them with baseboards or molding.
Step 13: Finish and clean
- Fill any nail holes or gaps with wood filler that matches your flooring. Sand the floor if necessary. Finish the floor according to your desired look, whether it’s staining, sealing, or leaving it natural. Clean the floor thoroughly to remove any dust or debris.
Congratulations! You’ve successfully installed tongue and groove flooring! Proper installation ensures a beautiful and durable floor that will enhance the aesthetics of your space for years to come.
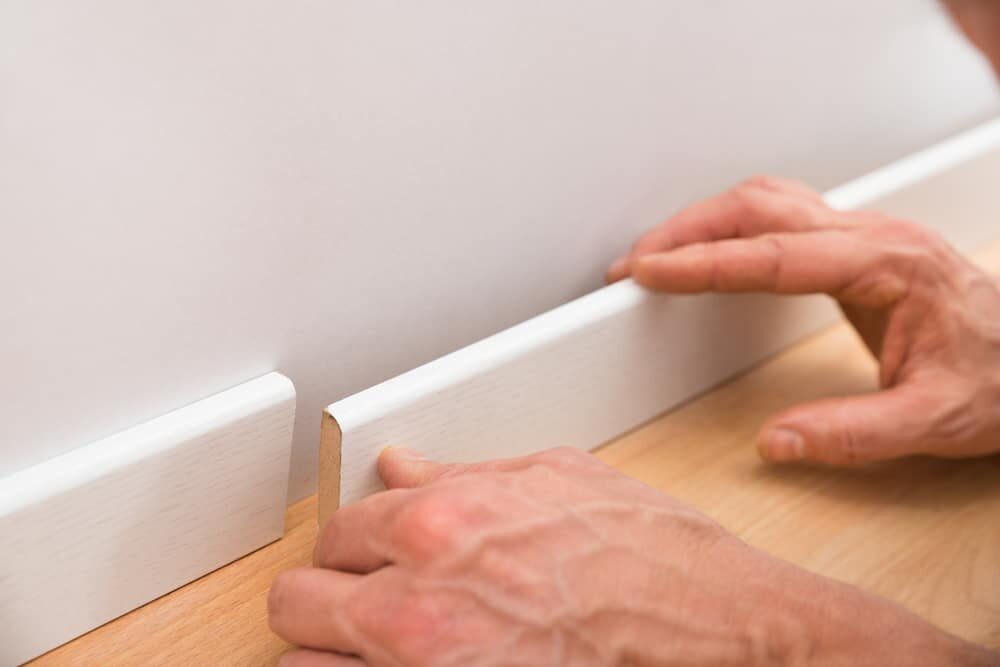
Finishing and Trim
The finishing touches and trim work are crucial for giving your tongue and groove flooring installation a polished and professional appearance. Follow these steps to complete the finishing and trimming process:
Materials and tools you’ll need:
- Wood filler that matches your flooring
- Sandpaper (various grits)
- Stain, sealant, or finish (if desired)
- Paintbrush or applicator
- Baseboards or molding
- Measuring tape
- Miter saw or coping saw (for trim cuts)
- Nailer or finishing nails
- Caulk and caulk gun (if needed)
Step 1: Fill nail holes and gaps.
- Inspect the flooring for any remaining nail holes or gaps between boards. Fill these imperfections with wood filler that matches the color of your flooring. Allow the filler to dry completely.
Step 2: Sand the Floor
- Sand the entire floor surface to smooth out any rough spots and ensure a uniform finish. Start with coarse-grit sandpaper and progress to finer grits for a smoother finish. Remove all sanding dust.
Step 3: Apply stain, sealant, or finish (if desired).
- If you wish to change the color or enhance the natural beauty of the wood, apply a stain following the manufacturer’s instructions. Allow it to dry completely. Alternatively, you can apply a sealant or finish for protection and added luster. Ensure the room is well-ventilated during this process.
Step 4: Install baseboards or molding.
- Measure the perimeter of the room and cut baseboards or molding to size using a miter saw for precise angles. Install these trim pieces along the walls to cover the expansion gap and create a seamless transition. Use a nailer or finishing nails to secure them to the wall, making sure they are level and snug.
Step 5: Address Doorway Transitions
- If your tongue and groove flooring transitions to another type of flooring or room, install transition strips or thresholds to create a smooth and visually pleasing transition. Measure and cut these strips to fit the doorway.
Step 6: Caulk gaps (if needed)
- In some cases, there may be small gaps between the baseboards or molding and the wall. Caulk these gaps to create a seamless and finished look. Use a caulk gun and smooth the caulk with a damp cloth or finger.
Step 7: Final Inspection
- Carefully inspect the entire installation for any remaining imperfections, loose trim, or areas that need touch-ups. Make any necessary corrections or refinements.
Step 8: Clean and Protect
- Clean the floor one final time to remove any dust or debris from the finishing process. This step ensures that your finished floor remains clean and beautiful.
With the finishing touches and trim work complete, your tongue and groove flooring will not only be structurally sound but also visually appealing. The attention to detail in this final stage of installation will leave you with a floor that enhances the overall aesthetic of your space. Enjoy the beauty and durability of your newly finished floor for years to come.
Maintaining Your Tongue and Groove Floors
Proper Wood Floor Maintenance is key to preserving the beauty and durability of your tongue-and-groove floors. With regular care and attention, you can ensure that your flooring continues to shine. Here are some maintenance tips to keep your floors looking their best:
Routine Cleaning:
Regularly sweep or vacuum your floors to remove dirt and debris that can scratch the surface. Use a soft-bristle brush attachment to prevent scratches.
Damp Mopping:
For deeper cleaning, use a damp mop with a mild wood floor cleaner. Avoid excessive moisture, as it can damage wood. Always follow the manufacturer’s cleaning recommendations.
Spills and stains:
Clean up spills promptly to prevent staining. Blot the spill with a clean, dry cloth, and then use a damp cloth with wood floor cleaner for thorough cleaning.
Furniture Protection:
Use felt pads or furniture glides under the legs of chairs, tables, and heavy furniture to prevent scratches and dents when moving them.
Mats and Rugs:
Place mats or rugs at entryways to trap dirt and moisture. Be sure they have non-slip backing to prevent slipping and sliding.
Pet Care:
Trim your pets’ nails regularly to prevent scratches on the floor. Wipe up any pet accidents promptly.
Avoid high heels.
Encourage family and guests to avoid walking on the floor with high heels or shoes with damaged soles that could cause dents or scratches.
Sunlight Protection:
Protect your floors from prolonged exposure to direct sunlight, as it can cause fading. Use blinds or curtains to block UV rays during peak sun hours.
Area Rugs:
Rearrange area rugs and furniture periodically to ensure even exposure to light and wear.
- Regular Inspection: Periodically inspect your floors for any signs of wear, damage, or gaps between boards. Address any issues promptly to prevent further damage.
- Refinishing (as needed): Depending on the wear and tear, you may need to refinish your tongue and groove floors every few years. This process involves sanding down the top layer and applying a new finish or sealant.
- Manufacturer Guidelines: Follow the manufacturer’s maintenance and care guidelines specific to your flooring type and finish. Different materials may require different care routines.
By following these maintenance tips and giving your tongue and groove floors the care they deserve, you can ensure they remain a stunning and enduring feature of your home for years to come. Regular upkeep not only enhances their appearance but also extends their lifespan, making it a worthwhile investment in your home’s beauty and value.

Pros and Cons of Tongue and Groove Flooring
Tongue and groove flooring offers a timeless and durable option for your home, but like any flooring type, it comes with its own set of advantages and disadvantages. Here’s a breakdown of the pros and cons to help you make an informed decision:
Pros:
- Timeless Aesthetics: Tongue and groove flooring, especially hardwood, adds a classic and elegant look to any room. Its natural beauty never goes out of style.
- Durability: Hardwood tongue-and-groove flooring, in particular, is known for its longevity. With proper care, it can last for generations.
- Variety of Materials: Tongue and groove flooring is available in various materials, including hardwood, engineered wood, laminate, and vinyl, allowing you to choose the best fit for your needs and budget.
- Ease of Installation: The tongue-and-groove design simplifies installation, making it accessible to both DIY enthusiasts and professionals.
- Stability: Tongue and groove construction provides stability and minimizes movement, reducing the risk of gaps or squeaks over time.
- Easy Maintenance: Regular sweeping and occasional damp mopping are typically sufficient to maintain the floor’s appearance.
- Value Addition: High-quality tongue and groove flooring can increase the value of your home, making it an investment in both aesthetics and property worth.
Cons:
- Cost (Hardwood): Hardwood tongue and groove flooring can be expensive upfront compared to other flooring options.
- Susceptibility to Moisture (Wood): Natural wood flooring, including tongue and groove hardwood, is sensitive to moisture and can warp or cup if exposed to excessive humidity or water.
- Maintenance (wood): Wood floors may require periodic refinishing, which can be time-consuming and costly.
- Installation Complexity (Hardwood): Installing hardwood tongue and groove flooring requires skill and precision to achieve a professional finish.
- Scratches and Dents (Wood): Despite their durability, wood floors can still be susceptible to scratches from sharp objects and dents from heavy impacts.
- Limited Design Options (Vinyl and Laminate): Vinyl and laminate tongue and groove flooring may have fewer design options compared to natural wood.
- Not Ideal for Basements (Some Types): Certain types of tongue-and-groove flooring, particularly solid hardwood, may not be suitable for installation in basements due to moisture concerns.
- Initial Acclimatization (Wood): Wood flooring needs time to acclimate to the room’s humidity and temperature before installation, which can delay the project.
In summary, tongue and groove flooring offers a blend of timeless beauty and durability, but the specific pros and cons can vary depending on the material you choose. It’s important to consider your budget, maintenance preferences, and the conditions of your home when selecting the right tongue and groove flooring for your space. Proper care and maintenance can help mitigate some of the drawbacks, making it a worthwhile investment in the long run.
Conclusion
In conclusion, tongue-and-groove flooring is a versatile and timeless choice for your home’s flooring needs. Whether you opt for hardwood, engineered wood, laminate, or another material, tongue and groove flooring offers a classic and elegant aesthetic that can enhance the beauty of any room.
When selecting flooring for your home, it’s essential to weigh the pros and cons of tongue-and-groove flooring against your specific needs and preferences. Consider factors such as budget, maintenance commitment, moisture levels, and design preferences. Each flooring type has its own unique advantages, so choose the one that best suits your lifestyle and complements the overall aesthetic of your space.
Whether you opt for the warmth and elegance of hardwood tongue and groove flooring or the budget-friendly versatility of laminate or vinyl, a well-informed choice will result in a beautiful and enduring addition to your home. With proper care and maintenance, your tongue and groove floors will continue to shine for years to come, providing a comfortable and inviting atmosphere for your family and guests.


Sanding
We provide virtually dust-free sanding with our continuous belt machinery with mobile extraction units, giving you a safer environment for your family.
Oiling
This organic finish not only adds beauty to your home but also has exceptional water-repellent characteristics, making it easier to clean and maintain.
Waxing
This natural floor finish offers the softest and most mellow appearance – and leaves your floor able to breath.
Buffing
Using soft buffing machines (and hand-polishing where required) will bring a wonderful sheen to your newly-finished floor.
Repairs
We offer a full assessment of your wooden floors to determine what repairs are needed to provide the perfect working surface for the later stages of sanding, staining and sealing.
Restoration
We offer a comprehensive restoration process designed to address floors that are improperly fitted or damaged over time through wear and tear.
Request a fixed price quote for your wood floor restoration now
Simply enter your postcode below to get started.
Services
Wood Floor Sanding Wood Floor Restoration Wood Floor Scratch Repair Squeaky Wood Floor Repair Parquet Floor Sanding Parquet Floor Restoration Commercial Floor Sanding Church Floor Sanding Community Centre Floor Sanding School Floor Sanding Gap Filling Gap Filling with ResinCopyright © Mr Sander®
Privacy & Cookies Terms & Conditions Complaints Procedure Cancellation Rights Sitemap

Get An Instant Price Estimate Before You Go…
Simply enter the rooms you need sanded and we’ll provide you with a price estimate instantly! Try our price calculator now.
Get a Price Estimate NowLocal Floor Sanding Experts
Over 500 5-Star Reviews
Safe, Dust Free Sanding
Operating Since 1994