London:
Nationwide:
25,000+
Floors Restored
27 Years Experience
Wood Flooring Association Certified
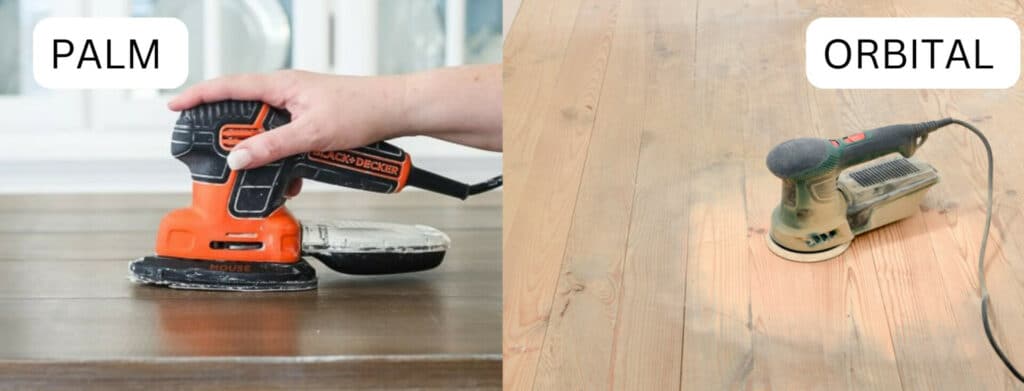
How to Use a Palm Sander with Orbital and Palm Sander Comparison
Posted on December 4, 2023
Wood Floor Sanding
Mastering Palm Sanders: An In-Depth Manual and Palm vs. Orbital Sander Comparison
Sanding is a fundamental step in many DIY, woodworking projects and also In Wood Floor Sanding whether you’re refinishing furniture, smoothing rough surfaces, or preparing wood for a flawless finish. To achieve the best results, you need the right tools, and two popular options are the palm sander and the orbital sander. In this comprehensive guide, we’ll delve into the world of sanding and explore how to use a palm sander effectively. We’ll also compare palm sanders with their orbital counterparts to help you make an informed choice for your next project.
Before you dive into your sanding tasks, it’s crucial to understand the intricacies of each type of sander, their advantages, and their limitations. Whether you’re a seasoned woodworker or a novice DIY enthusiast, this guide will equip you with the knowledge and skills needed to achieve smooth and professional results. So, let’s sand away the mysteries and make your projects shine!
Getting Know Palm Sander
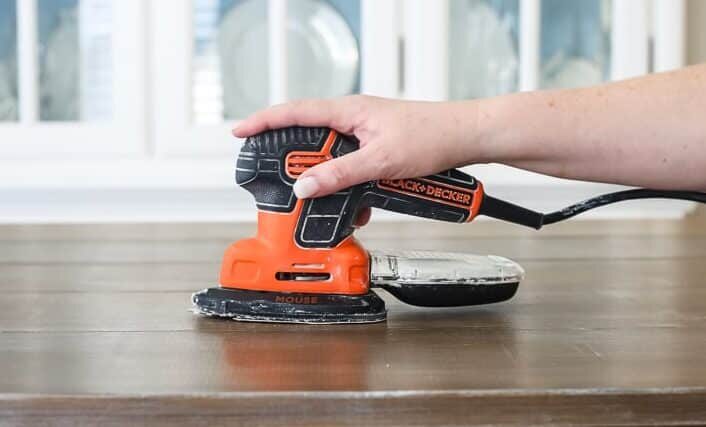
Before we dive into using a palm sander effectively, it’s essential to become acquainted with this versatile tool. A palm sander, also known as a finish sander or quarter-sheet sander, is a handheld power tool designed for sanding various surfaces, particularly in woodworking and DIY projects. Let’s break down the key components and types of palm sanders to help you get a better understanding.
1. What is a palm sander?
A palm sander is a compact and user-friendly power tool that’s designed to make sanding tasks more efficient and less labor-intensive. It gets its name from the fact that it comfortably fits in the palm of your hand, allowing for excellent control and maneuverability. Palm sanders are primarily used for finishing tasks, such as smoothing surfaces and removing imperfections, in preparation for painting, staining, or varnishing.

2. Components of a Palm Sander
Understanding the components of a palm sander is crucial for safe and effective operation. Here are the primary parts:
- Base Plate: The flat, rectangular surface that comes into direct contact with the material being sanded. It typically accommodates a quarter-sheet of sandpaper.
- Motor: The motor powers the sanding action and is housed within the main body of the sander.
- Dust Collection System: Many palm sanders come equipped with a dust collection bag or port to minimize airborne dust and keep your workspace cleaner.
- On/Off Switch: This is typically located on the handle or body of the sander and allows you to control the tool’s operation.
- Handle: The handle provides a secure grip and control over the sander during use.
3. Different Types of Palm Sanders
Palm sanders come in a few different variations, each suited for specific applications:
- Palm Grip Sanders: These are the most common type of palm sanders and are designed with a handle on top, making them easy to hold and maneuver. They are excellent for general Wood Floor sanding tasks and are suitable for both beginners and experienced users.
- Orbital Sanders: Sometimes referred to as random orbital sanders, these palm sanders have a circular sanding motion that minimizes visible sanding marks on the material’s surface. They are ideal for achieving a smooth finish.
- Detail Sanders: Detail sanders, also known as mouse sanders, have a triangular sanding pad. They are perfect for sanding tight corners, edges, and other hard-to-reach areas.
- Cordless Palm Sanders: Cordless palm sanders offer the convenience of working without a power cord, making them suitable for outdoor projects or areas without easy access to electrical outlets.
How to Use a Palm Sander
Using a palm sander efficiently is key to achieving smooth and professional results in your Wood Floor Sanding and DIY projects. Here’s a step-by-step guide on how to use a palm sander effectively:
Step 1: Safety Precautions
Before you start using your palm sander, it’s essential to prioritize safety.
- Wear safety gear: Always wear safety goggles, a dust mask, and hearing protection to protect your eyes, lungs, and ears from dust and noise.
- Work in a Well-Ventilated Area: Sanding generates dust, which can be harmful when inhaled. If possible, work outdoors or in a well-ventilated space to minimize dust buildup.
- Secure Your Workpiece: Ensure that the material you’re sanding is firmly secured, either with clamps or a workbench, to prevent it from moving during sanding.
Step 2: Choose the Right Sandpaper Grit
Selecting the appropriate sandpaper grit is crucial for achieving the desired results.
- Coarse Grits (40–80): Use coarse grits for heavy material removal, such as stripping paint or smoothing rough surfaces.
- Medium Grits (100–150): Medium grits are suitable for general sanding and preparing the surface for finishing.
- Fine Grits (180–220): Fine grits are used for finishing and achieving a smooth surface.
Step 3: Prepare the Palm Sander
- Attach Sandpaper: Depending on your sander’s design, either attach a quarter-sheet of sandpaper or secure the sanding pad using the manufacturer’s instructions.
- Connect Dust Collection: If your palm sander has a dust collection system, ensure it’s properly connected to minimize dust buildup.
Step 4: Sanding Techniques
- Start Slowly: Turn on the palm sander and start with a low speed setting. This allows you to get a feel for the sander’s movement and prevents gouging or uneven sanding.
- Move Evenly: Hold the sander firmly but not too tightly. Move it evenly across the surface in straight lines, following the grain of the wood, if applicable. Avoid applying excessive pressure; let the sander do the work.
- Overlap Strokes: Overlap each pass by about 1/3 of the sanding pad’s width to ensure consistent coverage.
- Change Direction: To avoid creating deep scratches, change the sanding direction by 90 degrees periodically.
Step 5: Monitor Progress
Frequently stop and check your progress. The goal is to achieve a consistent and smooth surface. If you notice any uneven spots or imperfections, spend more time sanding those areas.
Step 6: Finish and Clean Up
- Switch Off the Sander: Turn off the palm sander before setting it down or changing the sandpaper.
- Remove Dust: Empty the dust collection bag or clean the dust collection system to maintain effective dust removal.
- Inspect the Surface: After sanding, inspect the surface for any remaining imperfections or rough spots. You may need to do additional sanding with finer grits for a smoother finish.
Orbital Sander Overview
In the world of sanding, the orbital sander stands out as a versatile and powerful tool. Before we dive into a comparison between palm sanders and orbital sanders, let’s take a closer look at what an orbital sander is and how it works.
1. What is an orbital sander?
An orbital sander, often referred to as a random orbital sander, is a handheld power tool designed for sanding a variety of surfaces, including wood, metal, and plastic. It gets its name from the unique sanding motion it employs, which combines rotary and orbital movements to provide a smooth and swirl-free finish.
2. Key Features of Orbital Sanders:
- Dual Action: Orbital sanders feature a circular sanding pad that not only rotates but also moves in an elliptical or orbital pattern. This dual-action motion minimizes the risk of sanding marks or swirls on the surface.
- Variable Speed Control: Many orbital sanders come equipped with variable speed settings, allowing you to adjust the sanding speed according to the task at hand. This feature is particularly useful when working on different materials or finishes.
- Dust Collection System: To maintain a clean workspace and reduce airborne dust, orbital sanders often include a built-in dust collection system. This system can consist of a dust bag or a connection point for attaching a vacuum.
- Quick Paper Changes: Orbital sanders typically have a convenient paper-changing mechanism, making it easy to swap out sandpaper sheets without the need for tools.
3. Advantages of Orbital Sanders:
- Smooth Finish: The dual-action sanding motion of orbital sanders ensures a smooth and even finish, making them ideal for tasks that require a high degree of surface perfection.
- Reduced Sanding Marks: Unlike some other sanders, orbital sanders are excellent at minimizing visible sanding marks and swirls on the material’s surface.
- Efficient Material Removal: Orbital sanders are capable of removing material efficiently, making them suitable for tasks like paint removal or leveling uneven surfaces.
- Versatility: Orbital sanders can handle a wide range of materials and applications, from fine woodworking to automotive refinishing.
4. Limitations of Orbital Sanders:
- Price: High-quality orbital sanders can be more expensive than basic palm sanders, making them an investment for serious DIYers and professionals.
- Heavier: Orbital sanders tend to be bulkier and heavier compared to palm sanders, which may affect maneuverability and fatigue during prolonged use.
- Less Aggressive: While orbital sanders provide a smooth finish, they may not be as aggressive as some other sanders for heavy material removal tasks.
Understanding the orbital sander’s unique features and advantages is essential when considering it for your sanding needs. In the following sections, we will delve into a detailed comparison between palm sanders and orbital sanders, helping you make an informed choice for your specific projects.

Palm Sander vs. Orbital Sander: A Detailed Comparison
When it comes to choosing the right sander for your woodworking and DIY projects, understanding the differences between a palm sander and an orbital sander is crucial. Each type of sander has its own set of advantages and limitations. Let’s dive into a comprehensive comparison to help you make an informed choice:
1. Performance Comparison:
- Palm Sander:
- Palm sanders are excellent for fine-finishing tasks.
- They are less aggressive and remove material at a slower rate compared to orbital sanders.
- ideal for achieving a smooth and polished surface on wood.
- Less likely to leave sanding marks or swirls on the material’s surface.
- Orbital Sander:
- Orbital sanders are versatile and capable of both material removal and fine finishing.
- They remove material more efficiently than palm sanders, making them suitable for tasks like paint or varnish removal.
- Provide a smooth finish with minimal sanding marks.
2. Sanding Speed and Power:
- Palm Sander:
- Palm sanders are known for their precision and control, but they may require more time to complete tasks.
- They are generally less powerful compared to orbital sanders.
- Orbital Sander:
- Orbital sanders are faster and more powerful, making them a better choice for larger projects or tasks requiring quicker material removal.
- Their dual-action motion ensures efficient sanding without excessive force.
3. Precision and Control:
- Palm Sander:
- Palm sanders excel at precision work, making them ideal for delicate projects or tasks that require meticulous attention to detail.
- They are easy to control and maneuver, allowing for uniform results.
- Orbital Sander:
- While orbital sanders offer good control, they may not be as precise as palm sanders due to their larger size and more aggressive sanding action.
4. Versatility and Applications:
- Palm Sander:
- It is best suited for finish sanding, fine woodworking, and tasks that demand a high-quality surface.
- Ideal for furniture refinishing, cabinetry, and small to medium-sized projects
- less suitable for tasks that require heavy material removal.
- Orbital Sander:
- Orbital sanders are versatile and can handle a wide range of applications.
- They are effective for both material removal and fine finishing.
- suitable for large projects, deck refinishing, automotive work, and more.
5. Price and Budget Considerations:
- Palm Sander:
- Palm sanders are generally more budget-friendly, making them a good choice for beginners and DIY enthusiasts.
- Basic models are affordable and widely available.
- Orbital Sander:
- Orbital sanders tend to be more expensive than palm sanders, especially for high-quality models with advanced features.
- They are often considered an investment for professionals and those tackling extensive projects.
When to Use a Palm Sander vs. an Orbital Sander
Choosing between a palm sander and an orbital sander depends on the specific task at hand and the results you want to achieve. Let’s explore when each type of sander is most appropriate:
Use a Palm Sander When:
- Fine Finishing is Required: Palm sanders excel at providing a smooth and polished finish. Use them when you need to achieve a high level of precision and surface perfection, such as for fine woodworking, cabinetry, or furniture refinishing.
- Delicate or Detailed Work: Palm sanders are ideal for tasks that require intricate work, such as sanding intricate carvings, moldings, or edges. Their compact size and precise control make them perfect for delicate projects.
- Minimizing Sanding Marks: If you want to minimize the risk of visible sanding marks or swirls on the material’s surface, a palm sander is your best choice. It’s less likely to leave such marks compared to other sanders.
- Small to Medium-Sized Projects: Palm sanders are well-suited for smaller to medium-sized projects where precision and attention to detail are crucial. They are a go-to tool for hobbyists and DIY enthusiasts.
- Budget is Limited: If you’re on a tight budget, palm sanders are generally more affordable and accessible, making them a practical choice for beginners and occasional users.
Use an Orbital Sander When:
- Efficient Material Removal is Needed: When tackling tasks that require significant material removal, such as paint or varnish removal, smoothing large surfaces, or leveling uneven areas, an orbital sander is more efficient due to its speed and power.
- Versatility is Required: Orbital sanders are versatile and can handle various applications, from rough material removal to fine finishing. They are suitable for both small and large projects.
- Time is of the Essence: If you’re working on a project with a tight deadline, an orbital sander can help you complete tasks more quickly due to its faster sanding speed and power.
- Handling Larger Projects: For extensive projects like deck refinishing, automotive work, or large-scale furniture projects, an orbital sander’s ability to handle larger surface areas makes it a practical choice.
- Budget Allows for Investment: If you’re a professional woodworker or DIY enthusiast with a more flexible budget, investing in a high-quality orbital sander with advanced features can be a valuable addition to your tool collection.

Maintenance and care
Proper maintenance and care of your palm and orbital sanders are essential to ensuring their longevity and consistent performance. Neglecting maintenance can lead to premature wear and decreased efficiency. Here are some maintenance and care tips to keep your sanders in top condition:
1. Cleaning Your Palm and Orbital Sanders:
- After each use, unplug the sander and let it cool down if it has been running for an extended period of time.
- Use a brush or compressed air to remove dust and debris from the sander’s exterior, motor vents, and ventilation ports. Dust buildup can affect the tool’s cooling and performance.
- Wipe down the sander with a clean, damp cloth to remove any remaining dust or residue. Avoid using solvents or harsh chemicals that could damage the tool’s components.
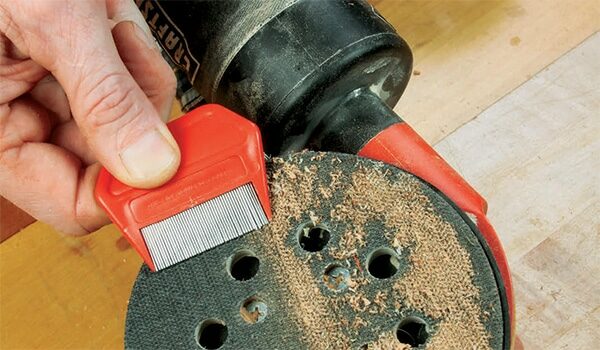
2. Inspect and clean the sanding pads.
- Regularly check the sanding pad for wear and tear. If it’s excessively worn or damaged, replace it with a new one according to the manufacturer’s instructions.
- Clean the sanding pads by tapping them gently against a hard surface or using a rubber cleaning stick. This helps remove clogged abrasive particles, extending the life of the sandpaper.
3. Dust Collection System:
- If your sander has a dust collection system, empty the dust bag or container after each use. Dispose of the collected dust in a proper waste receptacle.
- Check the dust collection system’s hoses and connections for any blockages or damage. Ensure they are properly attached and functional.
4. Sandpaper Replacement:
- Replace the sandpaper when it becomes worn or loses its abrasive qualities. Using dull or worn sandpaper can result in poor sanding performance and uneven finishes.
- Follow the manufacturer’s recommendations for securing the sandpaper to the sander. Ensure it’s properly aligned and secured to prevent slipping during use.
5. Lubrication:
- Some palm and orbital sanders may have moving parts that require occasional lubrication. Check the user manual for guidance on lubricating points, and use the recommended lubricants.
6. Power Cord Inspection:
- Examine the power cord for any signs of damage, such as fraying or exposed wires. If you notice any issues, replace the cord or have it repaired by a qualified technician.
7. Storage:
- Store your sanders in a dry and cool place, away from extreme temperatures and humidity. Avoid storing them in direct sunlight, as this can cause plastic components to degrade over time.
- Use appropriate storage solutions, such as toolboxes or cases, to protect your sanders from dust and potential damage during transport or storage.
8. Regular maintenance checks:
- Periodically review the user manual for your specific sander model to identify any manufacturer-recommended maintenance tasks or intervals.
Conclusion
In the world of Wood Floor sanding, woodworking and DIY projects, the choice between a palm sander and an orbital sander can significantly impact the outcome of your work. As we’ve explored in this guide, each type of sander has its own unique characteristics, advantages, and ideal use cases.
Palm sanders, with their precision and control, shine in tasks that demand a fine finish, intricate detailing, and minimal risk of sanding marks. They are the go-to choice for achieving polished surfaces on small to medium-sized projects.
On the other hand, orbital sanders offer versatility and power, making them suitable for a wide range of applications, from material removal to fine finishing. They excel when efficiency, speed, and the ability to handle larger projects are required.
Your choice between these sanders should be based on the specific needs of your project, your level of expertise, and your budget. Whether you’re a woodworking enthusiast crafting intricate designs or a professional contractor tackling extensive renovations, having the right sander in your toolkit is essential to achieving top-notch results.
Remember, the key to success lies not only in choosing the right tool but also in understanding how to use it effectively and maintaining it properly. By following the guidelines and tips outlined in this guide, you can harness the full potential of your palm and orbital sanders and ensure they serve you well for years to come.


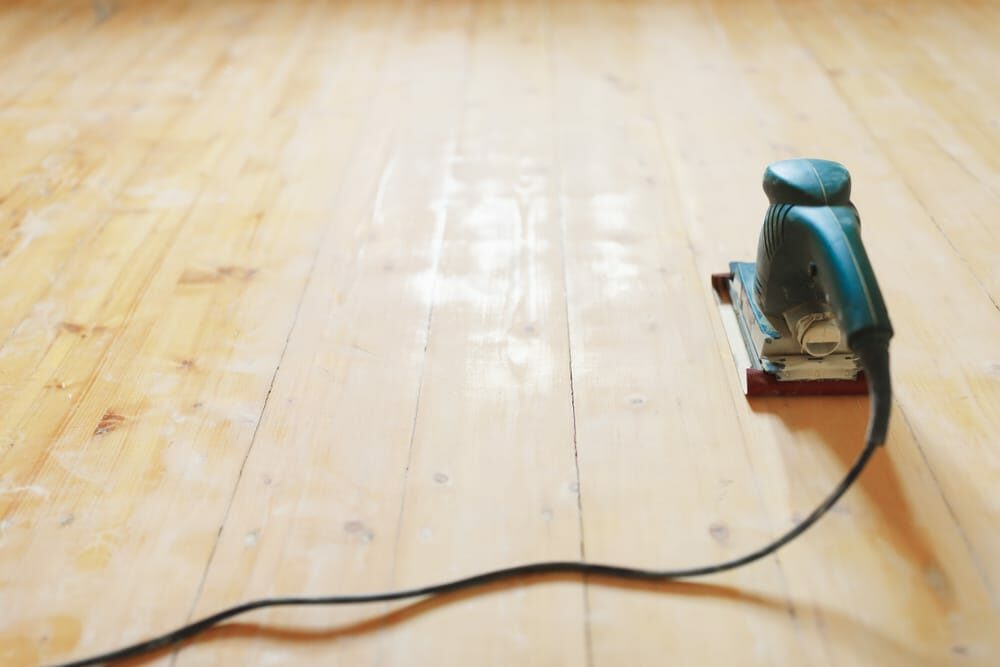
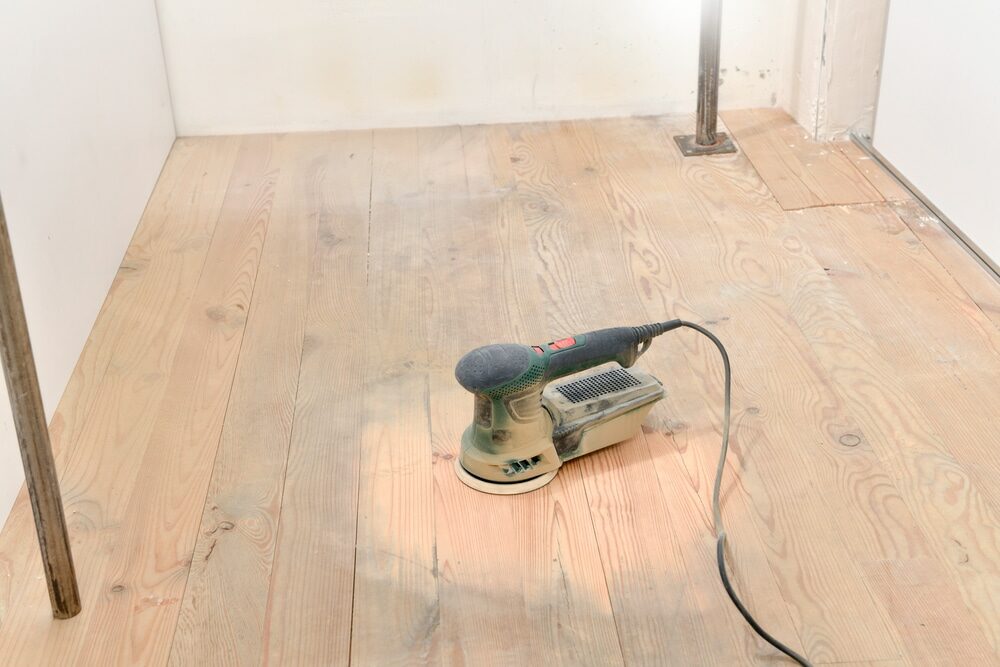
Sanding
We provide virtually dust-free sanding with our continuous belt machinery with mobile extraction units, giving you a safer environment for your family.
Oiling
This organic finish not only adds beauty to your home but also has exceptional water-repellent characteristics, making it easier to clean and maintain.
Waxing
This natural floor finish offers the softest and most mellow appearance – and leaves your floor able to breath.
Buffing
Using soft buffing machines (and hand-polishing where required) will bring a wonderful sheen to your newly-finished floor.
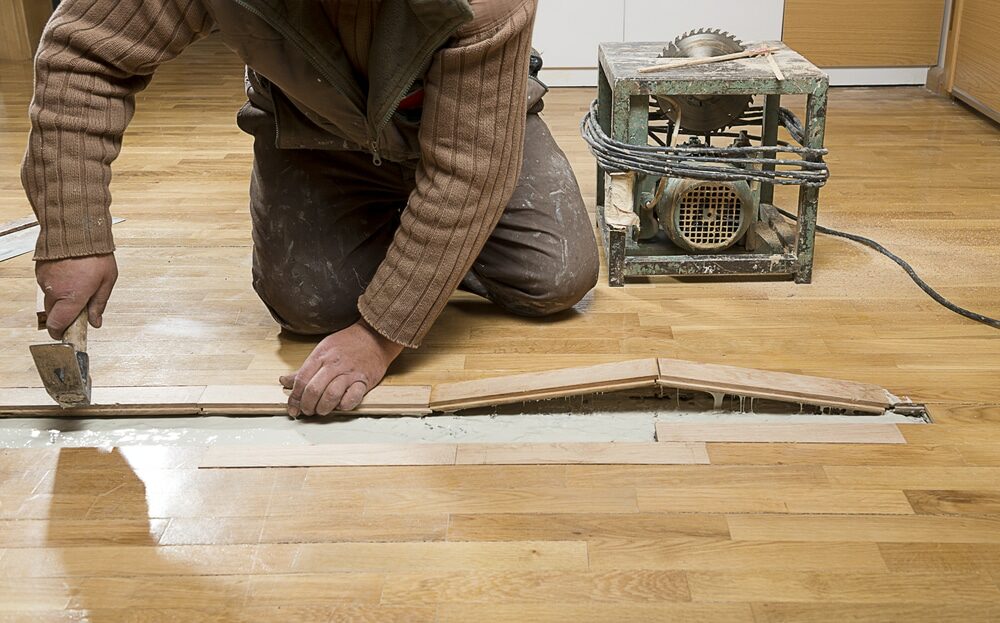
Repairs
We offer a full assessment of your wooden floors to determine what repairs are needed to provide the perfect working surface for the later stages of sanding, staining and sealing.
Restoration
We offer a comprehensive restoration process designed to address floors that are improperly fitted or damaged over time through wear and tear.
Request a fixed price quote for your wood floor restoration now
Simply enter your postcode below to get started.
Services
Wood Floor Sanding Wood Floor Restoration Wood Floor Scratch Repair Squeaky Wood Floor Repair Parquet Floor Sanding Parquet Floor Restoration Commercial Floor Sanding Church Floor Sanding Community Centre Floor Sanding School Floor Sanding Gap Filling Gap Filling with ResinCopyright © Mr Sander®
Privacy & Cookies Terms & Conditions Complaints Procedure Cancellation Rights Sitemap

Get An Instant Price Estimate Before You Go…
Simply enter the rooms you need sanded and we’ll provide you with a price estimate instantly! Try our price calculator now.
Get a Price Estimate NowLocal Floor Sanding Experts
Over 500 5-Star Reviews
Safe, Dust Free Sanding
Operating Since 1994