London:
Nationwide:
25,000+
Floors Restored
27 Years Experience
Wood Flooring Association Certified
The Pros and Cons of Sanding Your Deck
Posted on December 7, 2023
Wood Floor Sanding
Understanding Deck Sanding: Advantages and Challenges Explored
Welcome to our comprehensive guide on the pros and cons of sanding your deck. A deck is more than just an outdoor extension of your home; it’s a place of relaxation, family gatherings, and memorable barbecues. However, like any part of your home, it requires maintenance to keep it looking great and functioning well. One common maintenance task is deck sanding, a process that can breathe new life into an old deck but also comes with its own set of considerations.
In this post, we’ll delve deep into what deck sanding entails and why it’s an essential aspect of deck maintenance. We’ll explore the benefits, such as improved appearance, increased durability, and better adherence to stains and sealants. Additionally, we’ll also consider the downsides, including the effort and cost involved, potential risks of damage, and environmental factors.
Whether you’re a DIY enthusiast considering sanding your deck yourself or you’re thinking about hiring professionals, this guide aims to provide you with all the information you need to make an informed decision. From understanding the basic process of sanding to weighing the pros and cons, we’ve got you covered.
So grab a cup of coffee, and let’s dive into the world of deck sanding. By the end of this post, you’ll have a clearer picture of whether sanding your deck is the right choice for you and how to go about it effectively.
What is deck sanding?
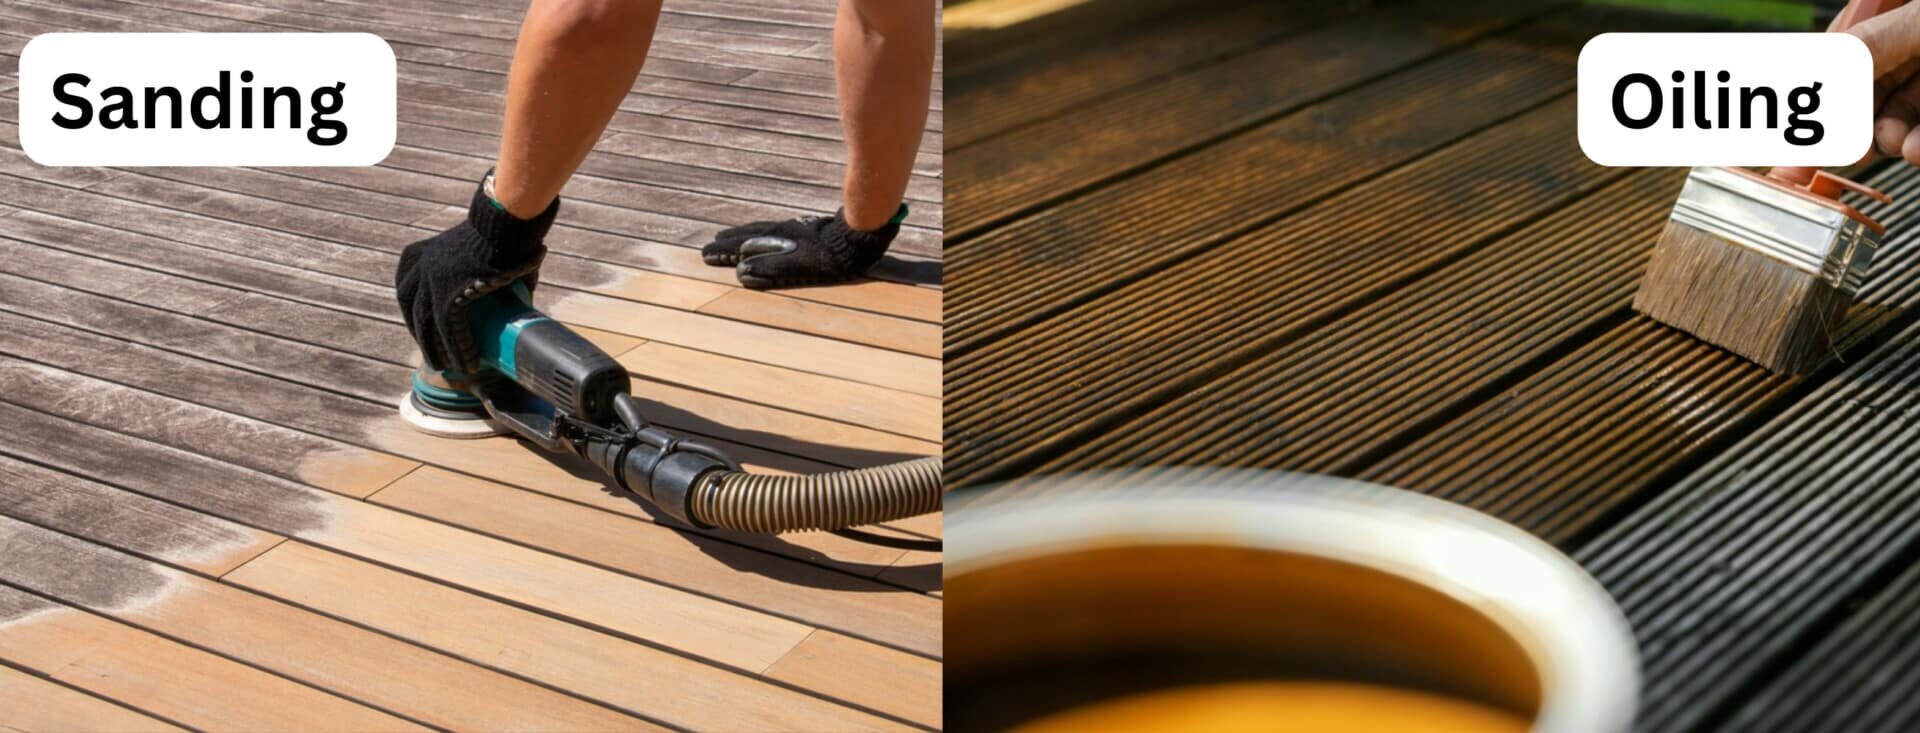
Deck sanding is a pivotal process in the upkeep of wooden decks, essential for both aesthetic appeal and structural integrity. It involves the use of sandpaper or a power sander to smoothen the surface of the wood, removing the top layer that might be damaged, weathered, or rough. This process is not only about enhancing the appearance of the deck but also about preparing the wood for further treatment, such as staining or sealing.
Definition and Purpose
At its core, deck sanding is a refinishing process. Over time, exposure to the elements can cause the wood of your deck to warp, crack, or become rough. Sunlight, rain, and fluctuations in temperature can all take a toll, leading to a deck that looks old and is uncomfortable to walk on. Sanding removes these imperfections, revealing the fresher, unspoiled wood underneath.
Basic Process Overview
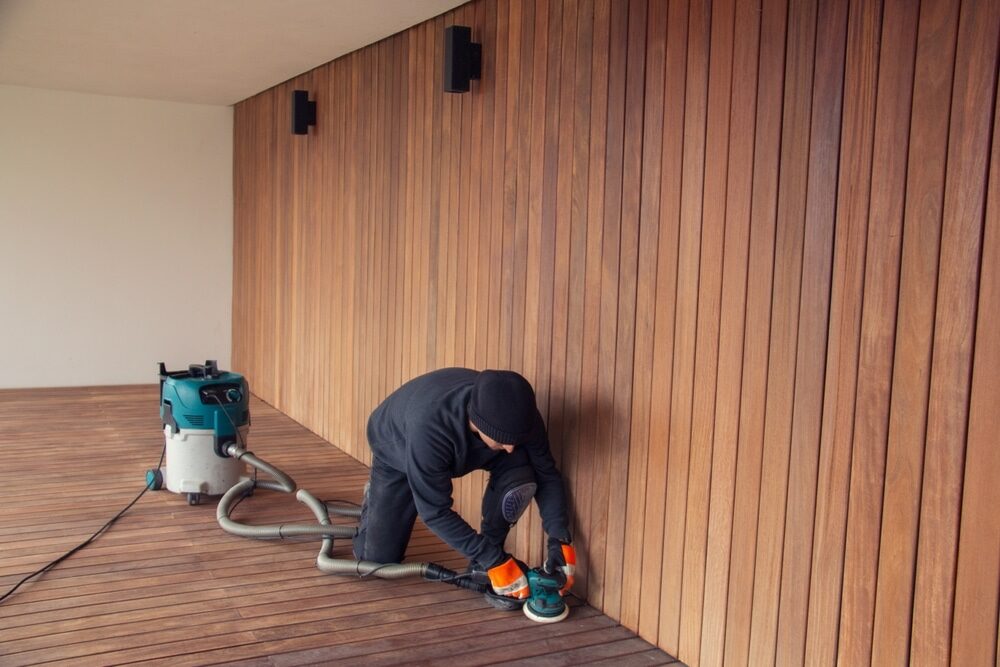
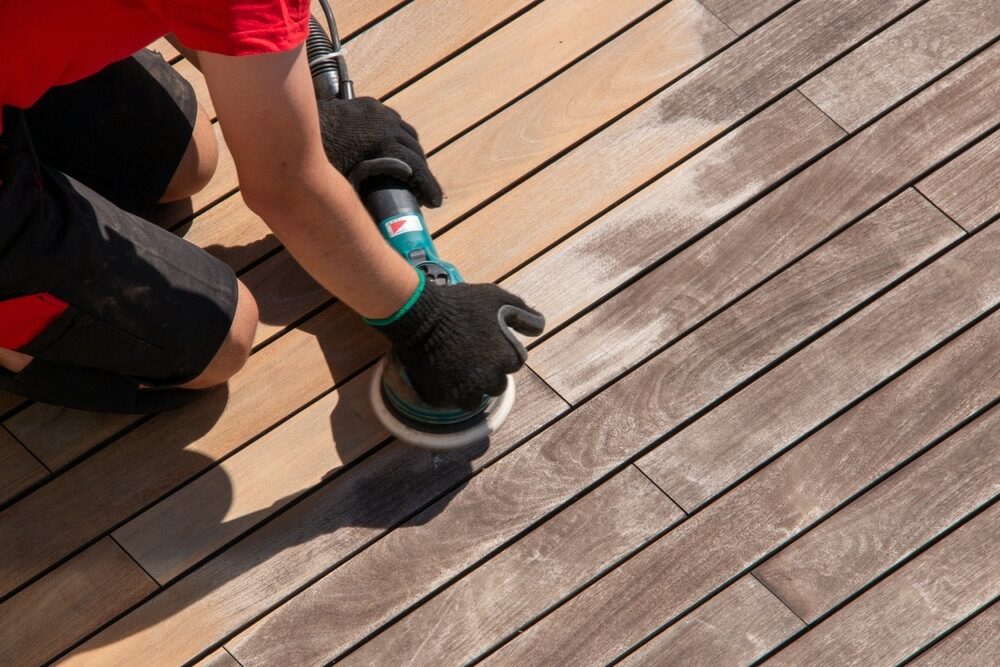
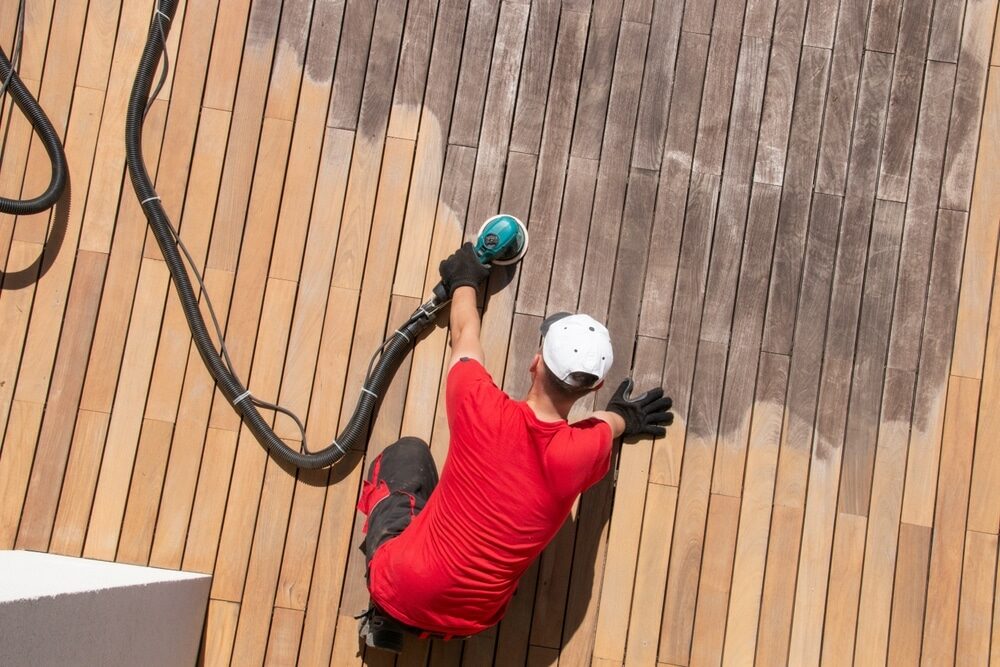
The process typically starts with choosing the right grit of sandpaper. A coarse grit is used to remove the rougher top layer, and then progressively finer grits are used to create a smooth finish. For larger decks, a power sander or a deck sanding machine is often employed to make the job more efficient and less labor-intensive.
Safety during sanding is paramount. It involves wearing protective gear like masks and goggles to avoid inhaling wood dust and to protect your eyes from debris. Additionally, it’s crucial to ensure that any loose nails or screws are fixed before sanding, as these can damage the sanding equipment or cause injuries.
In summary, deck sanding is more than just a cosmetic fix; it’s a vital maintenance task that extends the life of your deck and ensures it remains a safe, enjoyable space for your outdoor activities.
Pros of Sanding Your Deck
Sanding your deck comes with several advantages that not only improve its appearance but also enhance its longevity and functionality. Here are some of the key benefits:
Improved appearance and texture
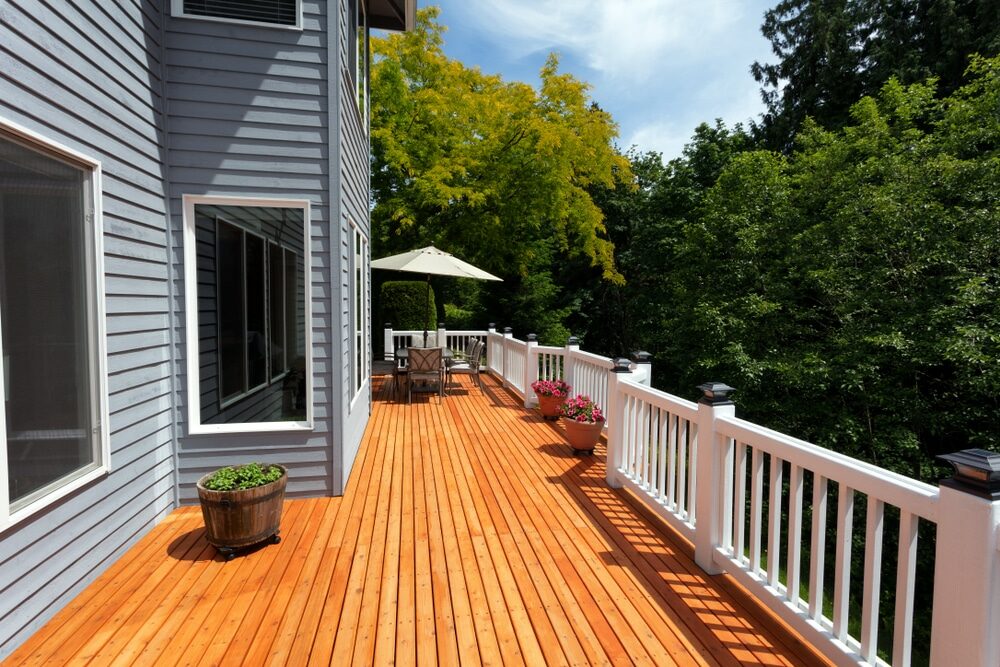
One of the most immediate benefits of sanding your deck is the aesthetic improvement. Sanding removes the weathered and worn top layer of wood, revealing the fresher, unblemished wood beneath. This process can dramatically improve the look of your deck, making it appear almost new. Additionally, sanding smooths the surface, eliminating rough patches that can be uncomfortable for bare feet.
Enhanced Longevity and Durability
Regular sanding can significantly extend the life of your deck. By removing the damaged outer layer of wood, you reduce the risk of further decay and damage. This is especially important on decks exposed to harsh weather conditions, as it prevents moisture and pests from penetrating and damaging the wood.
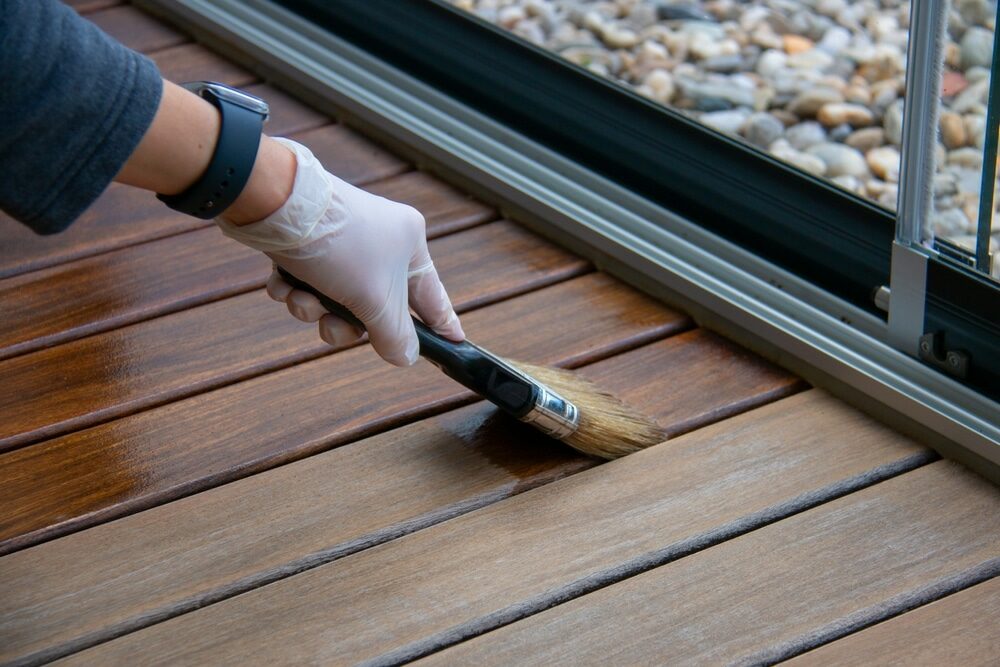
Better Stain and Sealant Adherence
A sanded deck provides an ideal surface for the application of stains and sealants. These protective coatings adhere better to smooth, sanded wood, providing more effective and longer-lasting protection against the elements. This means your deck will not only look better but will also be more resistant to water, sun, and fungal growth.
Safety Benefits: Reducing Splinters and Rough Spots
Sanding is crucial for the safety of those who use your deck. Over time, wood can splinter and develop rough spots, posing a hazard, especially to children and pets. Sanding smooths these areas, reducing the risk of injury. A well-sanded deck is safer to walk on, especially barefoot, and reduces the likelihood of splinters.
Environmental Considerations
While not a direct benefit of the sanding process itself, choosing to sand and refinish your deck rather than replace it can be seen as an environmentally friendly choice. By maintaining and preserving the wood, you are reducing waste and the need for additional lumber.
Cons of Sanding Your Deck
While sanding your deck offers numerous benefits, it’s also important to consider the potential drawbacks. Understanding these can help you make an informed decision about whether deck sanding is right for you.
Time and effort are required.
Deck sanding is not a quick or effortless task. It requires significant time and physical effort, especially if you’re doing it manually with hand-held sanders. Even with power sanders, the process can be time-consuming, as it requires careful attention to detail to ensure an even finish.
Potential for Damage if Improperly Done
If not done correctly, sanding can cause damage to your deck. Over-sanding can wear down the wood too much, weakening its structure. Additionally, using the wrong grit of sandpaper or sanding unevenly can leave the surface rough or uneven, which might necessitate further repair or refinishing.
Equipment and material costs
Sanding a deck requires specific tools and materials, such as sandpaper, power sanders, and safety equipment. These can be costly, especially if you don’t already own them. Renting equipment is an option, but it also adds to the cost. For those not accustomed to DIY projects, this initial investment can be a deterrent.
Environmental Considerations
Sanding produces a significant amount of wood dust, which can be harmful to both the environment and personal health if not managed properly. Protective gear is necessary to prevent the inhalation of dust particles. Moreover, the disposal of this dust and old finish materials must be done responsibly to avoid environmental contamination.
Maintenance After Sanding
Once your deck is sanded, it will require ongoing maintenance, including regular cleaning and reapplication of protective finishes. This maintenance is crucial to protect the newly exposed wood from the elements and to maintain the aesthetic and structural benefits of the sanding process.
Preparation for Deck Sanding
Proper preparation is key to the success of any deck-sanding project. Adequate preparation not only makes the sanding process smoother but also ensures the safety of the person performing the work and the longevity of the deck. Here are the essential steps to prepare your deck for sanding:
Necessary Tools and Materials
Before you start, gather all the necessary tools and materials. You will need:
- Sandpaper or sanding discs (various grits)
- Power sander (if available)
- A broom and dustpan or a leaf blower
- Protective gear (safety glasses, dust mask, gloves)
- Wood filler (for repairing small holes or cracks)
- Hammer or screwdriver (for securing loose boards or nails)
Cleaning the deck
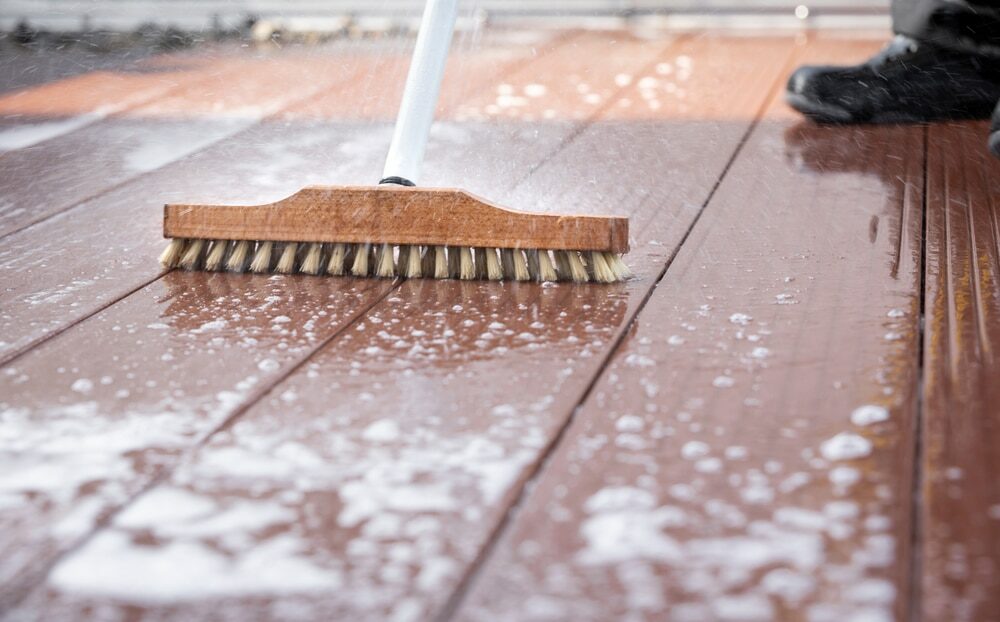
Begin by thoroughly cleaning your deck. Remove all furniture, grills, and other items. Sweep the deck to remove loose dirt, leaves, and debris. For a deeper clean, consider using a deck cleaner or a mild detergent solution to wash away grime, mildew, or old stains. Let the deck dry completely before proceeding.
Inspecting and Repairing the Deck
Inspect your deck for any damaged areas, loose boards, or protruding nails and screws. Secure any loose boards and hammer down the raised nails. For larger repair needs, such as replacing broken boards, address these before sanding. Use wood filler to repair small cracks and holes, ensuring a smooth surface for sanding.
Sanding Safety
Safety is paramount. Wear protective gear, including safety glasses to protect your eyes from flying debris and a dust mask to prevent the inhalation of wood dust. Ensure that the work area is well-ventilated, especially if using a power sander.
Choosing the Right Sandpaper Grit
Selecting the correct grit of sandpaper is crucial. Start with a coarser grit to remove the rough top layer, and gradually move to finer grits for a smooth finish. The exact grits will depend on the condition of your deck and the desired smoothness.
Plan your approach
Finally, plan your sanding strategy. If using a power sander, work in the direction of the wood grain and maintain a consistent pressure. For hand-sanding, use a block to ensure even pressure. Divide the deck into sections and sand one section at a time for a uniform finish.

DIY vs. Professional Deck Sanding
When it comes to sanding your deck, one of the critical decisions you’ll face is whether to tackle the job yourself (DIY) or hire a professional. Both options have their pros and cons, and the best choice depends on various factors, including your skill level, the project’s scale, and your budget.
DIY Deck Sanding: Pros and Cons
Pros:
- Cost-effective: Doing it yourself can be more budget-friendly, especially if you already have the necessary tools.
- Satisfaction: There’s a sense of accomplishment in completing a home improvement project on your own.
- Control: You have complete control over the project, from the choice of materials to the schedule.
Cons:
- Time and effort: DIY sanding is labor-intensive and time-consuming, especially for larger decks.
- Learning Curve: If you’re new to this type of work, there’s a steep learning curve, and mistakes can be costly.
- Equipment Rental: If you don’t own a power sander, you might need to rent one, which can add to the cost.
Professional Deck Sanding: Pros and Cons
Pros:
- Expertise and Experience: Professionals bring years of experience, ensuring the job is done correctly and efficiently.
- Quality and Efficiency: A professional crew can complete the job faster and often with better results than an amateur.
- Less Hassle: Hiring a professional means you don’t have to deal with the physical labor or time commitment yourself.
Cons:
- Cost: Professional services can be significantly more expensive than doing it yourself.
- Scheduling: You’ll need to work around the contractor’s schedule, which may not align with your own.
- Less Personal Control: You’ll have less control over the specific details of the project.
Making the decision
To decide between DIY and hiring a professional, consider the following:
- Skill Level: Are you comfortable and experienced with home improvement projects?
- Project Size: Is your deck small and manageable, or large and complex?
- Budget: Do you have the budget for professional services, or would you prefer to save money with a DIY approach?
- Time Availability: Do you have the time to dedicate to this project?
In conclusion, DIY deck sanding can be a rewarding and cost-effective approach for those with the time and skills, while professional sanding is best for those who prefer a hassle-free, high-quality finish.
Maintenance After Sanding
Once your deck has been sanded, it’s essential to follow up with proper maintenance to preserve its appearance and prolong its lifespan. Regular and effective maintenance will protect your investment and keep your deck looking great for years to come. Here are key steps to consider in maintaining your freshly sanded deck:
Applying protective coatings
- Staining and Sealing: After sanding, it’s crucial to apply a stain or sealant to protect the wood from moisture, UV rays, and other environmental factors. Choose a high-quality product suitable for your deck’s wood type and climate.
- Regular Reapplication: Depending on the product used and the deck’s exposure to elements, reapply stain or sealant every one to three years.
Regular Cleaning
- Routine Sweeping: Regularly sweep your deck to remove dirt, leaves, and debris that can trap moisture and cause damage.
- Periodic Washing: Use a mild deck cleaner or a simple soap and water solution to wash your deck. Avoid harsh chemicals and power washing with high pressure, which can damage the wood.
Inspecting and Repairing
- Regular Inspections: Periodically inspect your deck for signs of wear or damage, such as loose boards, protruding nails, or rot.
- Prompt Repairs: Address any issues immediately to prevent further damage. Simple repairs, like tightening screws or replacing worn boards, can significantly extend your deck’s life.
Preventing moisture damage
- Proper Drainage: Ensure your deck has proper drainage to prevent water accumulation, which can lead to wood rot and decay.
- Avoid Standing Water: Remove planters, decor, or furniture that may trap water against the deck surface.
Avoiding excessive wear and tear
- Furniture Pads: Use protective pads under furniture legs to prevent scratches and wear.
- Rug Placement: If using outdoor rugs, choose breathable materials and move them periodically to prevent moisture entrapment and color fading on the wood.
Seasonal Considerations
- Winter Care: In snowy climates, use a plastic shovel to remove snow. Avoid using salt or chemical deicers that can damage the wood.
- Sun Protection: In hot, sunny climates, consider using a UV-protective finish or positioning a canopy or umbrella to reduce direct sun exposure.
Conclusion
Sanding your deck is a significant but rewarding undertaking. Throughout this guide, we’ve explored the various facets of deck sanding, from understanding what it entails to weighing its pros and cons, preparing for the task, and choosing between a DIY approach and hiring professionals. We also discussed the vital steps for maintaining your deck post-sanding.
The decision to sand your deck should not be taken lightly. It requires a careful assessment of the time, effort, and resources you’re willing to invest. While there are considerable benefits, such as improved appearance, durability, and safety, it’s also important to consider the drawbacks, including the potential for damage if done incorrectly and the ongoing maintenance requirements.
Whether you choose to sand your deck yourself or hire a professional, the key is to approach the project with thorough preparation and a clear understanding of the steps involved. Remember, the effort you put into maintaining your deck not only enhances its beauty and usability but also contributes to the overall value of your property.
We hope this guide has provided you with valuable insights and the confidence to make the best decision for your deck’s maintenance. With the right approach and care, your deck can continue to be a cherished space for relaxation and enjoyment for many years to come.


Sanding
We provide virtually dust-free sanding with our continuous belt machinery with mobile extraction units, giving you a safer environment for your family.
Oiling
This organic finish not only adds beauty to your home but also has exceptional water-repellent characteristics, making it easier to clean and maintain.
Waxing
This natural floor finish offers the softest and most mellow appearance – and leaves your floor able to breath.
Buffing
Using soft buffing machines (and hand-polishing where required) will bring a wonderful sheen to your newly-finished floor.
Repairs
We offer a full assessment of your wooden floors to determine what repairs are needed to provide the perfect working surface for the later stages of sanding, staining and sealing.
Restoration
We offer a comprehensive restoration process designed to address floors that are improperly fitted or damaged over time through wear and tear.
Request a fixed price quote for your wood floor restoration now
Simply enter your postcode below to get started.
Services
Wood Floor Sanding Wood Floor Restoration Wood Floor Scratch Repair Squeaky Wood Floor Repair Parquet Floor Sanding Parquet Floor Restoration Commercial Floor Sanding Church Floor Sanding Community Centre Floor Sanding School Floor Sanding Gap Filling Gap Filling with ResinCopyright © Mr Sander®
Privacy & Cookies Terms & Conditions Complaints Procedure Cancellation Rights Sitemap

Get An Instant Price Estimate Before You Go…
Simply enter the rooms you need sanded and we’ll provide you with a price estimate instantly! Try our price calculator now.
Get a Price Estimate NowLocal Floor Sanding Experts
Over 500 5-Star Reviews
Safe, Dust Free Sanding
Operating Since 1994