London:
Nationwide:
25,000+
Floors Restored
27 Years Experience
Wood Flooring Association Certified
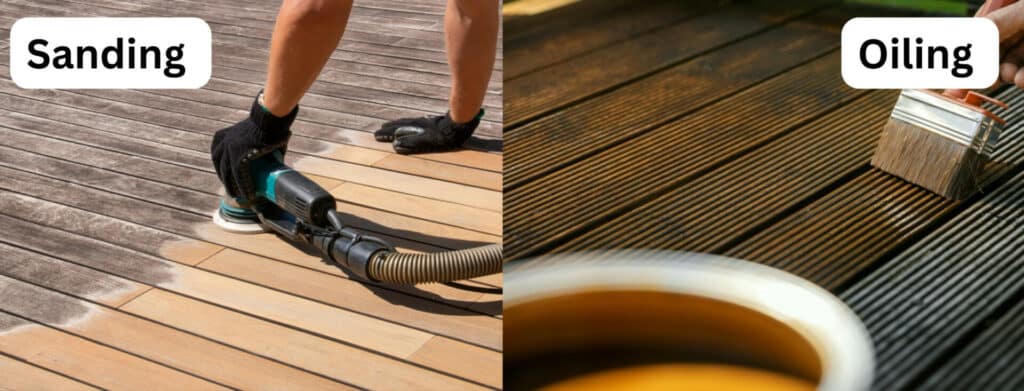
Cost Analysis: Sanding and Oiling Your Deck
Posted on December 8, 2023
Wood Floor Sanding and Oiling
Deck Maintenance Cost Analysis: Sanding and Oiling Guide
Welcome to our comprehensive guide to maintaining the beauty and longevity of your deck through sanding and oiling. Decks are not just an extension of our homes; they are also a reflection of our lifestyle and a space for relaxation and social gatherings. However, exposure to the elements can take a toll on your deck, leaving it looking worn and weathered. This is where the importance of proper deck maintenance comes into play.
In this blog post, we will delve into the intricacies of sanding and oiling your deck, a crucial routine to ensure its durability and aesthetic appeal. We will guide you through the entire process, from understanding the specific needs of your deck to choosing the right materials and tools. Additionally, we will provide a detailed cost analysis to help you budget effectively, whether you plan to do it yourself or hire a professional.
Sanding and oiling are more than just maintenance tasks; they are investments in the life of your deck. By regularly caring for your deck, you not only enhance its appearance but also protect it from the harsh outdoor environment. So, let’s embark on this journey to rejuvenate your deck and make it a source of pride and joy for many years to come.
Stay tuned as we explore the essential steps and tips for effective deck maintenance and offer insights into managing the costs associated with sanding and oiling your deck.
Understanding Your Deck
Before diving into the process of sanding and oiling, it’s essential to have a good understanding of your deck’s current condition and the materials it’s made of. This knowledge will not only influence your approach to maintenance but also impact the overall cost and effectiveness of the project.
Types of Wood and Their Characteristics
Decks can be constructed from a variety of wood types, each with unique properties and care requirements. Common materials include:
- Pressure-treated wood is widely used due to its durability and affordability. However, it requires regular maintenance to prevent decay and fading.
- Cedar and Redwood: Known for their natural resistance to rot and pests, these woods have a beautiful natural color but can be more expensive.
- Hardwoods like Ipe and Teak are extremely durable and resistant to weathering, but they come at a higher cost and may require specific types of oil for maintenance.
Understanding the type of wood your deck is made from will guide you in selecting the right products and methods for sanding and oiling.
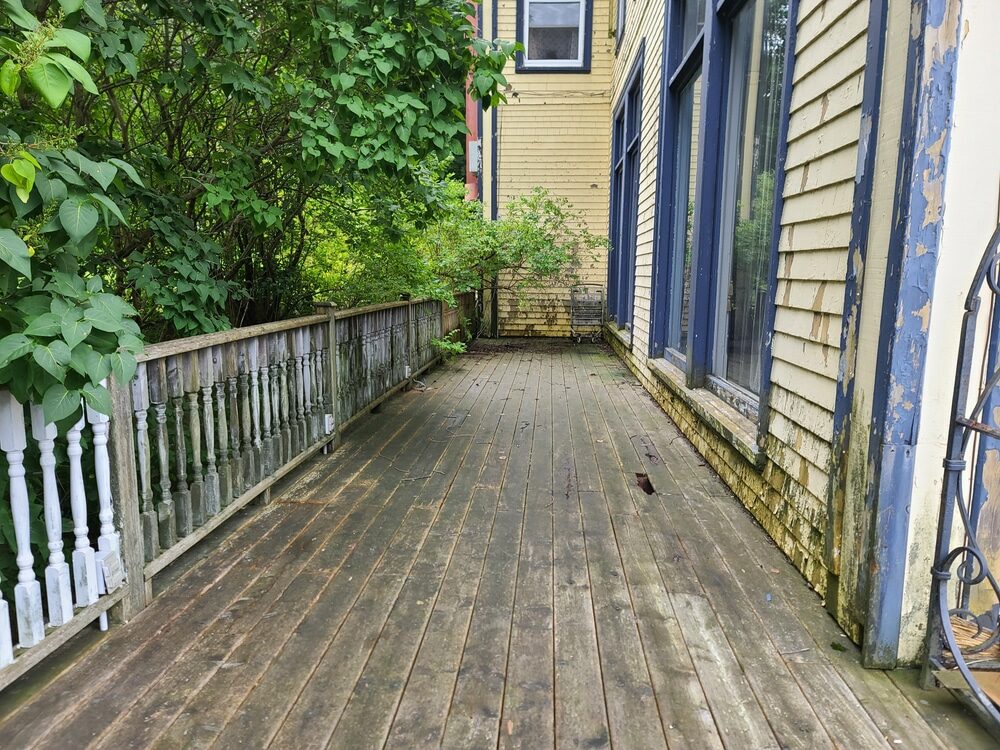
Assessing the Current Condition of Your Deck
A thorough inspection of your deck is crucial to identifying any issues, such as:
- Cracks and splinters: Indicate that sanding is necessary to smooth out the surface.
- Signs of rot or pest damage: These require immediate attention and potentially professional repair before proceeding with sanding and oiling.
- Discoloration and fading are common issues that can often be remedied with a fresh coat of oil.
Evaluating the condition of your deck helps in determining the extent of work needed and the potential costs involved. It’s also a good time to check for loose nails or screws and ensure that the structure is sound and safe.
By understanding the specifics of your deck, you’ll be better equipped to embark on the maintenance process, ensuring that your efforts are both effective and cost-efficient. In the next sections, we’ll delve into the preparation steps, the sanding and oiling process, and the crucial cost analysis to help you make informed decisions for your deck’s upkeep.
Preparation for Sanding and Oiling
Proper preparation is key to the success of your deck maintenance project. This phase involves gathering the right tools and materials, as well as setting up your workspace for safety and efficiency. Here’s what you need to know to get started:.
Necessary Tools and Materials
To ensure a smooth sanding and oiling process, you will need the following:
- Sanding Equipment: Depending on the size of your deck and the condition of the wood, you may need a power sander or just sandpaper and a sanding block for manual sanding.
- Deck Cleaner: A quality deck cleaner will help remove dirt, grime, and old finishes, preparing the wood for oiling.
- Oil and Applicators: Choose a deck oil suitable for your wood type. You’ll also need brushes, rollers, or a sprayer for application.
- Protective Gear: Safety glasses, gloves, and a dust mask are essential to protect yourself during the process.
Remember, investing in quality tools and materials can influence the outcome of your project and potentially save costs in the long run.

Safety Precautions and Preparation Steps
Safety and thorough preparation are critical. Follow these steps to prepare your deck:
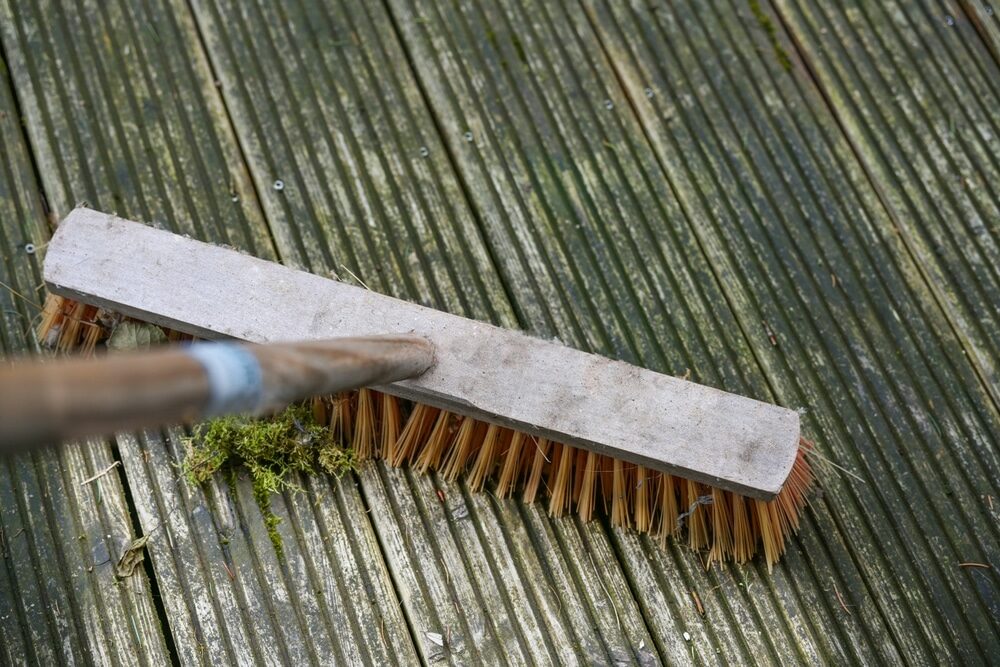
- Clean the Deck: Start by removing all furniture and fixtures from the deck. Use the deck cleaner to thoroughly clean the surface and allow it to dry completely.
- Repair and Replace: Fix any loose nails or screws. Replace damaged boards as needed.
- Safety Measures: Ensure your work area is well-ventilated, especially when working with oils and cleaners. Wear your protective gear at all times.
- Sanding Prep: Before you start sanding, make sure the deck is dry and free of debris. If you’re using a power sander, get familiar with its operation to ensure even sanding.
Taking the time to properly prepare your deck and workspace will not only make the sanding and oiling process smoother but also help prevent costly mistakes or accidents. In the following sections, we’ll explore the detailed steps for sanding and oiling your deck, as well as provide a thorough cost analysis to guide your budgeting decisions.
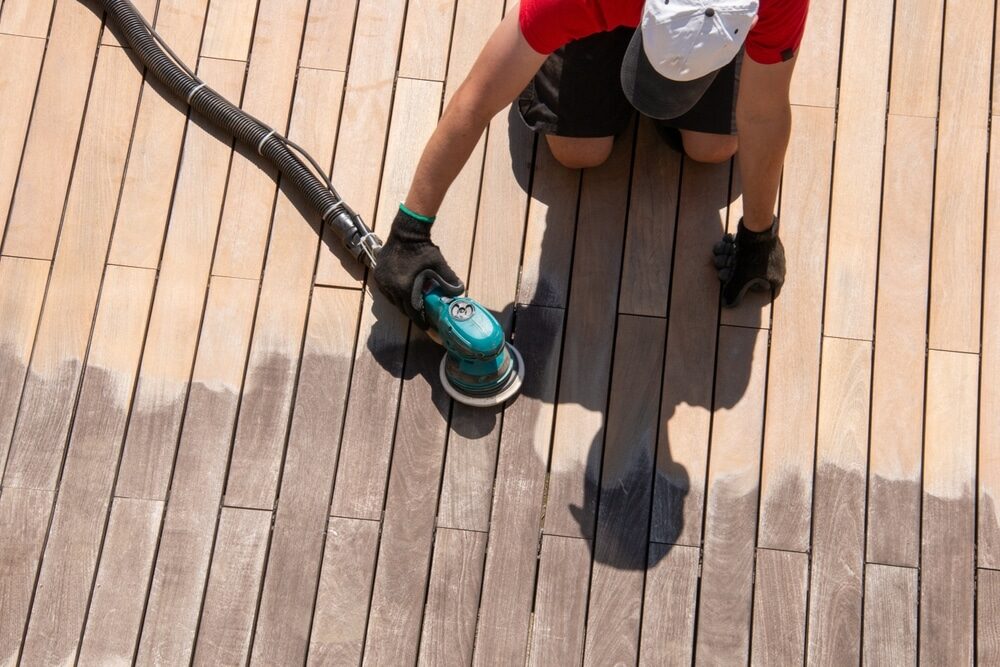
Step-by-Step Guide to Sanding Your Deck
Sanding your deck is a crucial step in the maintenance process. It not only smooths the surface but also prepares it for the oiling treatment. Here’s a detailed guide to help you effectively sand your deck:
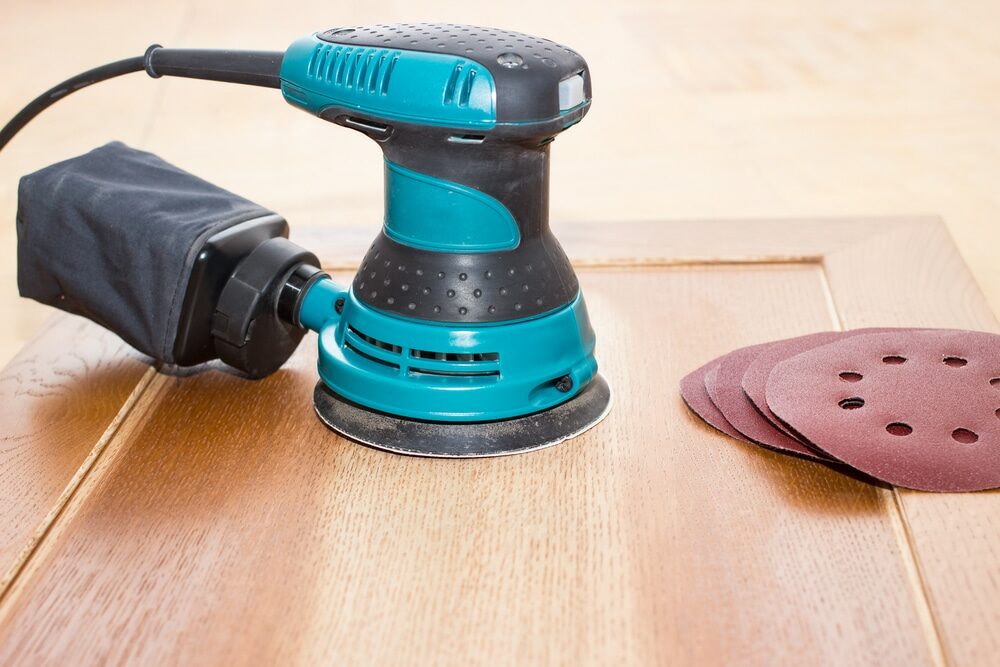
Choosing the Right Sandpaper
- Grit Selection: Start with a coarser grit (like 60 or 80) for decks with rough surfaces or old coatings. Finish with a finer grit (like 120) to smooth the surface.
- Type of Sandpaper: For power sanders, use discs or belts designed for outdoor use. For manual sanding, long-lasting sandpaper that can handle moisture is ideal.
Techniques for Effective Sanding
- Safety First: Wear protective gear, including a dust mask, safety glasses, and gloves.
- Initial Sanding: Begin with the coarser-grit sandpaper to remove old finishes, stains, and splinters. Always sand in the direction of the wood grain to avoid scratches.
- Edge and Detail Work: For edges and hard-to-reach areas, use a sanding block or a smaller hand sander.
- Cleaning Between Sanding: After each pass, clean the deck to remove sawdust. This ensures you can see any areas that need more attention.
- Final Sanding: Switch to finer-grit sandpaper and go over the entire deck. This smooths the wood and prepares it for oiling.
- Final Cleaning: Once the sanding is complete, thoroughly clean the deck to remove all dust and debris.
Additional Tips
- Even Pressure: Apply consistent pressure when sanding to avoid uneven spots.
- Check for nails and screws. Make sure they are flush with the wood surface or slightly countersunk to avoid tearing the sandpaper.
- Take Your Time: Rushing the sanding process can lead to mistakes and uneven surfaces.
Sanding your deck requires patience and attention to detail. By following these steps, you’ll create a smooth, clean surface that’s ready for oiling. Next, we’ll explore the process of choosing and applying the right oil to protect and beautify your deck, along with a detailed cost analysis to help manage your budget.
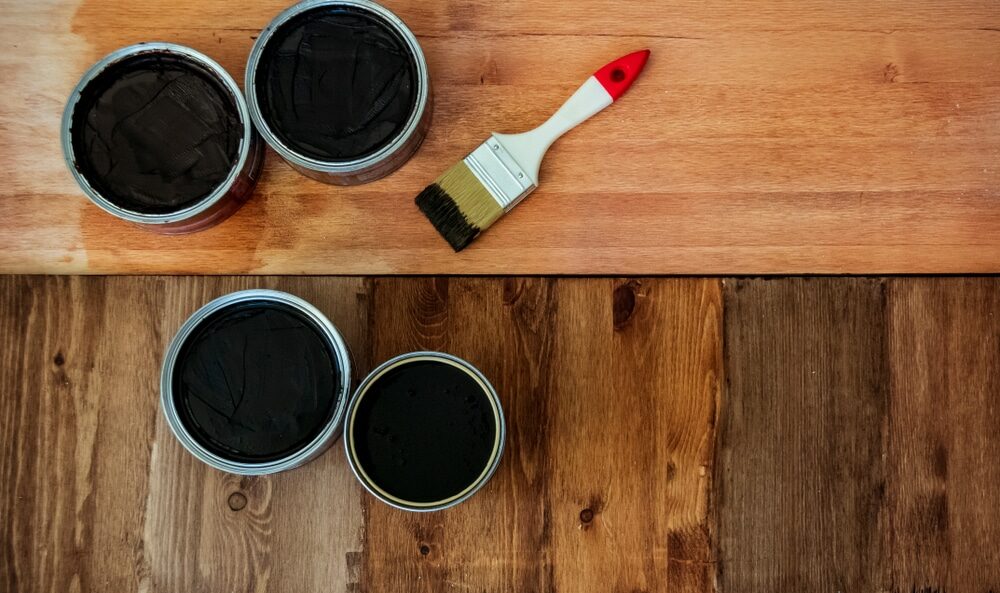
Choosing the Right Oil for Your Deck
After sanding your deck, the next crucial step is selecting the right oil to protect and enhance the wood. The type of oil you choose can significantly affect the appearance, durability, and maintenance frequency of your deck. Here’s how to make the best choice:
Types of Deck Oils
- Natural oils: These include linseed and tung oil. They penetrate deeply, providing good protection while enhancing the natural beauty of the wood. However, they may require more frequent reapplications.
- Synthetic Oils: Usually more durable than natural oils, synthetic options offer better resistance to weathering and fading. They might alter the wood’s natural color but require less frequent maintenance.
- Water-Based vs. Oil-Based: Water-based oils dry faster and are less prone to mildew and mold, while oil-based oils provide deeper penetration and longer-lasting protection.
Factors to Consider When Selecting Deck Oil
- Wood Type: Different woods absorb oil differently. For example, hardwoods like Ipe might require specific types of oil for effective penetration.
- Climate Conditions: Consider your local weather. Decks in wet climates may benefit from oils with mold and mildew inhibitors.
- Aesthetic Preferences: Different oils can affect the color and finish of your deck. Decide whether you want a natural look, a tinted finish, or a particular sheen.
- Maintenance Commitment: If you prefer less frequent maintenance, choose an oil with longer-lasting protection. Be aware that this might come at a higher cost.
- Environmental Considerations: Eco-friendly options are available for those who prioritize sustainability.
Application Tips
- Test First: Apply a small amount of oil to an inconspicuous area to ensure you’re happy with the appearance.
- Follow the manufacturer’s instructions. Each product may have specific application methods and drying times.
Selecting the right oil for your deck is a balance between practical considerations and aesthetic preferences. In the next section, we’ll guide you through the process of applying the oil to your deck, ensuring long-lasting protection and beauty. Additionally, we’ll delve into the cost implications of different types of oils to help you make a budget-friendly choice.
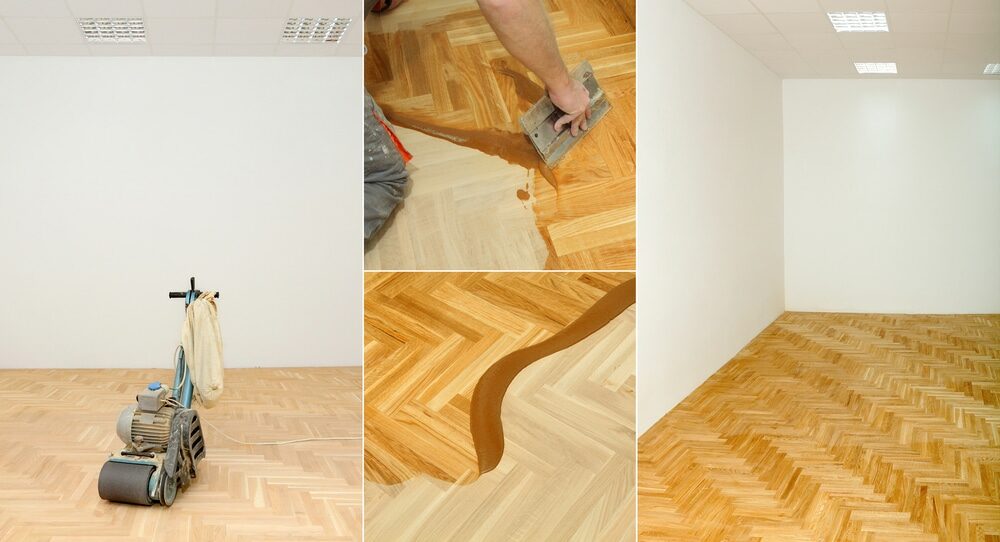
Applying Oil to Your Deck
Once you have chosen the right oil for your deck, the next step is the application. This process is critical for ensuring the longevity and aesthetic appeal of your deck. Here’s a step-by-step guide to help you apply the oil effectively:
Preparation and Application Techniques
- Weather Check: Choose a dry day with moderate temperatures for oiling. Avoid extremely hot or cold conditions, as they can affect the drying and absorption of the oil.
- Surface preparation: Ensure the deck is clean, dry, and free from dust after sanding. Any remaining debris can interfere with the oil’s penetration and finish.
- Stir the Oil: Thoroughly mix the oil before application to ensure consistent color and components.
- Applying the Oil: Use a brush, roller, or sprayer to apply the oil. Start from one end of the deck and work your way to the other. Make sure to evenly cover all surfaces, including edges and railings.
- Work in manageable sections: Apply oil to a few boards at a time to maintain a ‘wet edge’ and avoid lap marks.
- Second Coat: Depending on the product and the wood’s absorption, a second coat may be necessary. Refer to the manufacturer’s guidelines for recommendations on timing and application.
Tips for Even and Effective Coverage
- Brush Technique: Use long, smooth strokes in the direction of the wood grain for even coverage.
- Avoid Puddles: Ensure that the oil is spread thinly and evenly. Excess oil can create a sticky surface and attract dirt.
- Drying Time: Allow sufficient time for the oil to dry before using the deck. Drying times can vary based on the type of oil and weather conditions.
Maintenance Post-Oiling
- Regular Cleaning: Keep the deck clean from dirt and debris to prolong the life of the oil finish.
- Reapplication: Plan for periodic reapplication of oil based on the product’s longevity and your deck’s exposure to the elements.
Applying oil to your deck is an investment in its durability and beauty. With careful application and regular maintenance, your deck can remain a stunning feature of your home for years to come. In the next section, we will provide a detailed cost analysis of the entire sanding and oiling process, helping you to manage your budget effectively.
Cost Analysis
Understanding the costs involved in sanding and oiling your deck is crucial for effective budgeting. This section breaks down the potential expenses, helping you make informed financial decisions whether you choose to DIY or hire a professional.
Estimating material costs
The material costs for sanding and oiling a deck can vary widely based on the size of your deck, the quality of materials used, and your geographical location. Here’s a rough breakdown:
- Sanding Equipment: Renting a power sander might cost around $40–$60 per day. Manual sanding supplies (sandpaper, sanding block) could be around $20–$50.
- Deck Cleaner: Prices range from $10 to $30, depending on the brand and quantity.
- Deck Oil: The cost can vary significantly, from $30 to over $100 per gallon, depending on the type and brand. The amount needed depends on the size of your deck and the number of coats required.
- Applicators (brushes, rollers, sprayers): Expect to spend $10–$40.
Remember, investing in higher-quality products can lead to better and longer-lasting results, potentially saving money in the long run.
Labor Costs: DIY vs. Professional Services
- DIY Costs: If you’re doing the work yourself, your primary expenses will be materials and tool rentals. The advantage is the savings on labor costs.
- Professional Services: Hiring a professional can range from $2 to $5 per square foot, which includes both sanding and oiling. This rate varies based on your location, the condition of your deck, and the complexity of the work.
Additional Considerations
- Size of the Deck: Larger decks will require more materials and potentially more labor time, increasing the overall cost.
- Condition of the Deck: Decks in poor condition may require more extensive prep work or repairs, adding to the cost.
- Frequency of Maintenance: Decks that are regularly maintained may cost less to sand and oil, as they might require less work each time.
Long-Term Investment
While the upfront cost of sanding and oiling your deck can be significant, it’s important to consider this as an investment in the longevity and appearance of your outdoor space. Regular maintenance can prevent more costly repairs in the future and maintain the value of your home.
In conclusion, whether you decide to DIY or hire professionals, a clear understanding of the costs involved in sanding and oiling your deck will help you allocate your budget wisely and ensure the best care for your outdoor space.

Maintenance Tips Post-Sanding and Oiling
Proper maintenance After sanding and oiling your deck, it is essential to extend its life and preserve its beauty. Regular upkeep not only enhances the deck’s appearance but also prevents costly repairs in the future. Here are some key maintenance tips:
Routine maintenance practices
- Regular Cleaning: Sweep your deck regularly to remove dirt, leaves, and debris. Use a mild deck cleaner for deeper cleaning a few times a year to prevent the buildup of mold and mildew.
- Immediate Spill Clean-up: Quickly clean up any spills to avoid staining the wood. Certain substances, like grease or wine, can be particularly damaging if not addressed promptly.
- Avoid Water Pooling: Ensure that your deck has proper drainage to prevent water accumulation, which can lead to wood rot and decay.
- Inspect Regularly: Check your deck periodically for signs of wear, loose boards, or nails. Promptly address any issues to prevent further damage.
Signs Your Deck Needs Re-Treatment
- Fading and Discoloration: Over time, UV rays and weather conditions can cause the oil finish to fade, indicating the need for re-application.
- Water Absorption: If water stops beading up on the surface of the wood, it’s a sign that the oil is no longer providing adequate protection.
- Wear and tear: Areas with high foot traffic may show signs of wear faster and might need more frequent re-treatment.
Long-Term Care
- Annual Check-ups: Conduct a thorough inspection of your deck each year, ideally in spring or fall. Look for signs of structural damage, rot, or needed repairs.
- Re-Oiling Frequency: The frequency of re-oiling depends on various factors, including the type of oil used, weather conditions, and usage of the deck. Generally, re-oiling every 1 to 2 years is recommended.
Eco-Friendly Practices
- Sustainable Products: Whenever possible, use eco-friendly cleaners and oils to reduce environmental impact.
- Water Conservation: Use water-efficient methods for cleaning your deck, such as brooms or damp mops, instead of hosing down frequently.
Maintaining your deck after sanding and oiling is a continuous process. By following these tips, you can ensure that your deck remains a safe, enjoyable, and beautiful space for years to come. Remember, regular maintenance not only protects your investment but also enhances the enjoyment of your outdoor living space.
Conclusion
In this comprehensive guide, we have explored the critical steps involved in maintaining your deck through sanding and oiling. From understanding the type of wood and condition of your deck to the detailed processes of preparation, sanding, choosing the right oil, and applying it, we’ve covered the essential aspects to help you rejuvenate your deck. Additionally, the cost analysis provided insights into the financial aspect of this maintenance task, whether you choose to DIY or hire professionals.
Regular maintenance of your deck is more than just a cosmetic improvement; it’s an investment in the longevity and safety of your outdoor space. By following the steps outlined in this guide, you can protect your deck from the elements, enhance its natural beauty, and create a welcoming environment for family and friends to enjoy.
Remember, the key to successful deck maintenance lies in regular care and attention to detail. With the right approach and a commitment to periodic upkeep, your deck can remain a beautiful and valuable part of your home for many years to come.
We hope this guide has been informative and helpful in planning your deck maintenance project. Happy sanding and oiling!


Sanding
We provide virtually dust-free sanding with our continuous belt machinery with mobile extraction units, giving you a safer environment for your family.
Oiling
This organic finish not only adds beauty to your home but also has exceptional water-repellent characteristics, making it easier to clean and maintain.
Waxing
This natural floor finish offers the softest and most mellow appearance – and leaves your floor able to breath.
Buffing
Using soft buffing machines (and hand-polishing where required) will bring a wonderful sheen to your newly-finished floor.
Repairs
We offer a full assessment of your wooden floors to determine what repairs are needed to provide the perfect working surface for the later stages of sanding, staining and sealing.
Restoration
We offer a comprehensive restoration process designed to address floors that are improperly fitted or damaged over time through wear and tear.
Request a fixed price quote for your wood floor restoration now
Simply enter your postcode below to get started.
Services
Wood Floor Sanding Wood Floor Restoration Wood Floor Scratch Repair Squeaky Wood Floor Repair Parquet Floor Sanding Parquet Floor Restoration Commercial Floor Sanding Church Floor Sanding Community Centre Floor Sanding School Floor Sanding Gap Filling Gap Filling with ResinCopyright © Mr Sander®
Privacy & Cookies Terms & Conditions Complaints Procedure Cancellation Rights Sitemap

Get An Instant Price Estimate Before You Go…
Simply enter the rooms you need sanded and we’ll provide you with a price estimate instantly! Try our price calculator now.
Get a Price Estimate NowLocal Floor Sanding Experts
Over 500 5-Star Reviews
Safe, Dust Free Sanding
Operating Since 1994