London:
Nationwide:
25,000+
Floors Restored
27 Years Experience
Wood Flooring Association Certified
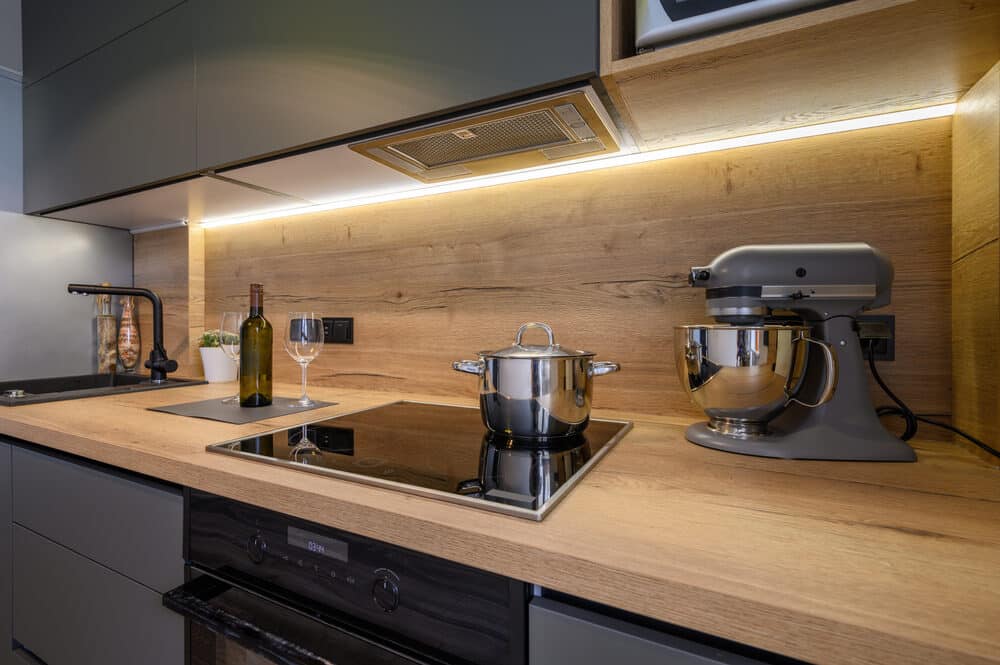
How to Sand a Large Kitchen Worktop: Tips and Tricks
Posted on December 25, 2023
Kitchen Worktop sanding
Mastering the Art of Sanding: A Complete Guide to Refinishing Large Kitchen Worktops
Welcome to our comprehensive guide on how to sand a large kitchen worktop. Whether you’re a DIY enthusiast or tackling this task for the first time, this post is designed to walk you through the process step-by-step, ensuring a smooth and professional finish.
Sanding a kitchen worktop is not just about improving its appearance; it’s also about extending its life and functionality. Over time, kitchen worktops can suffer from wear and tear, scratches, or stains, detracting from the overall look of your kitchen. By sanding your worktop, you can revitalise its surface, making it look almost as good as new.
However, sanding a large surface like a kitchen worktop can be daunting. It requires patience, the right tools, and a proper technique to achieve an even, smooth finish. This guide will equip you with essential tips and tricks, from choosing the right sandpaper to employing the best sanding techniques, to ensure your worktop looks its best.
Whether your worktop is made of wood, granite, or any other material, our guide will cover the specific considerations you need to keep in mind. We’ll also touch on how to prepare your work area, what safety equipment you should use, and how to take care of the finer details for a professional-grade finish.
So, let’s get started and turn that worn-out worktop into a stunning centrepiece for your kitchen!
Materials and Tools Needed
Before you begin the process of sanding your kitchen worktop, it’s crucial to gather all the necessary materials and tools. Having everything on hand will make the job more efficient and ensure you achieve the best possible finish. Here’s a comprehensive list of what you’ll need:
1. Sandpaper:
- Various Grits: Start with a coarser grit for initial sanding (e.g., 80–120 grit) and progress to finer grits (e.g., 220-320 grit) for finishing touches.
- Specialty Sandpaper: If you’re working with a specific material like granite or marble, ensure you have the appropriate sandpaper for that surface.
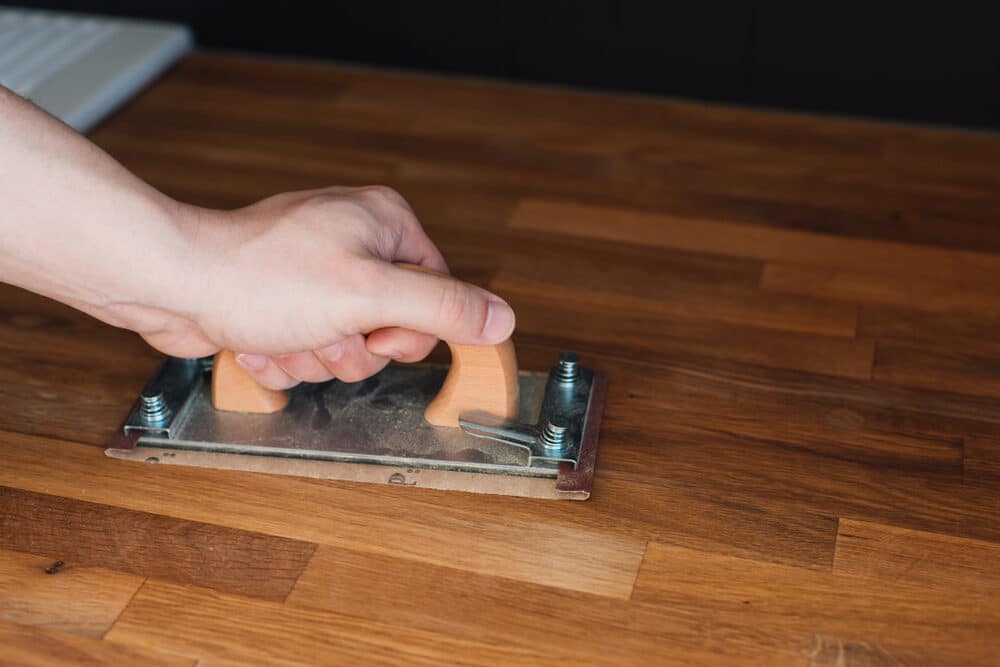
2. Sanding Tools:
- Hand Sanding Block: Essential for manual sanding, providing an even pressure distribution.
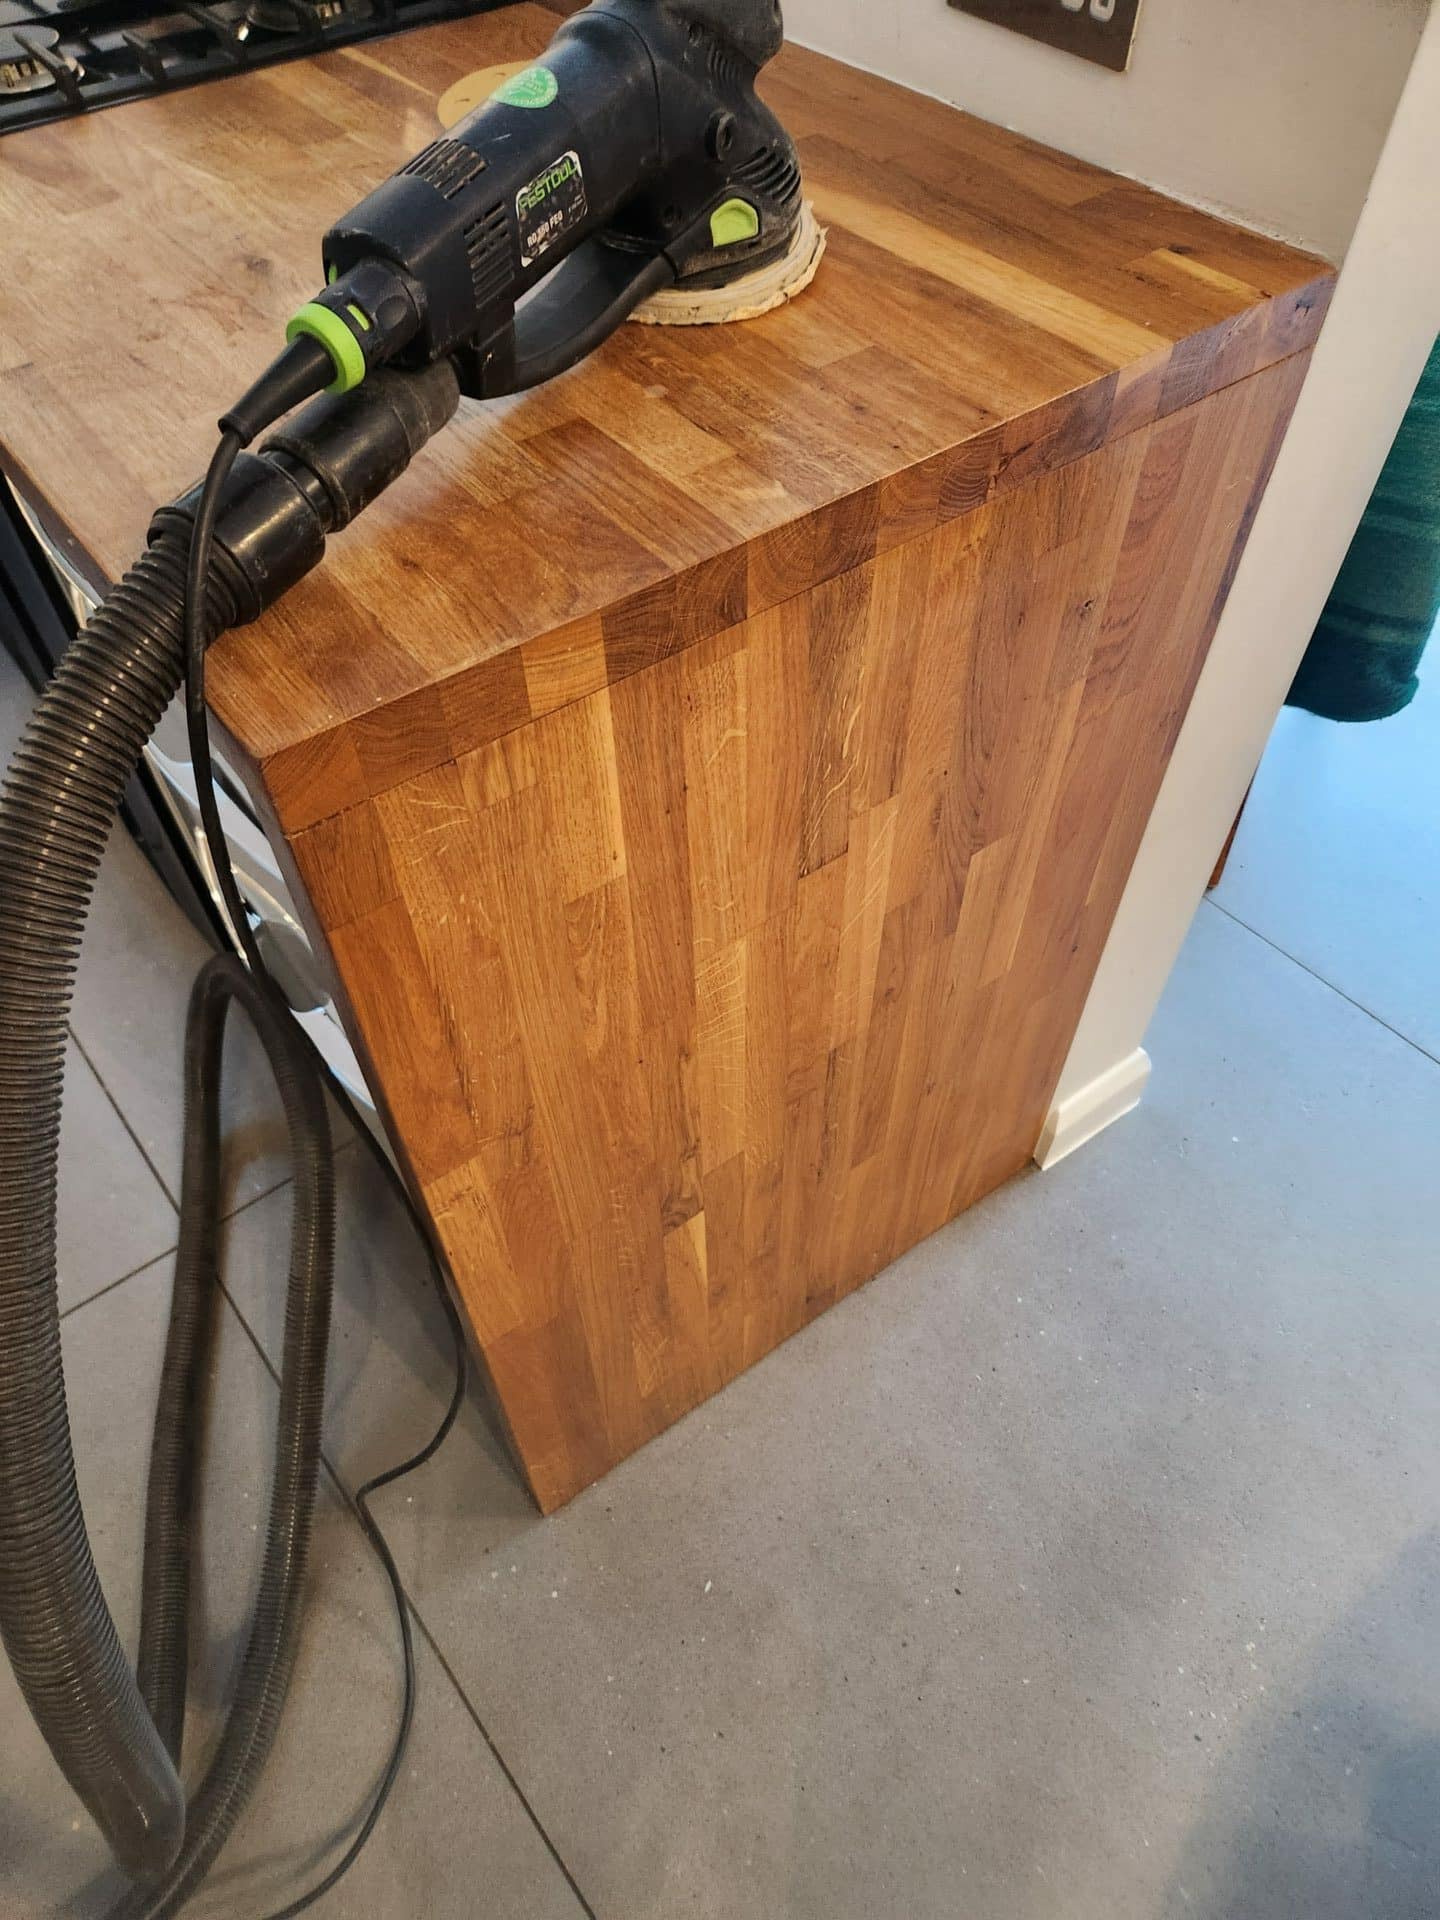
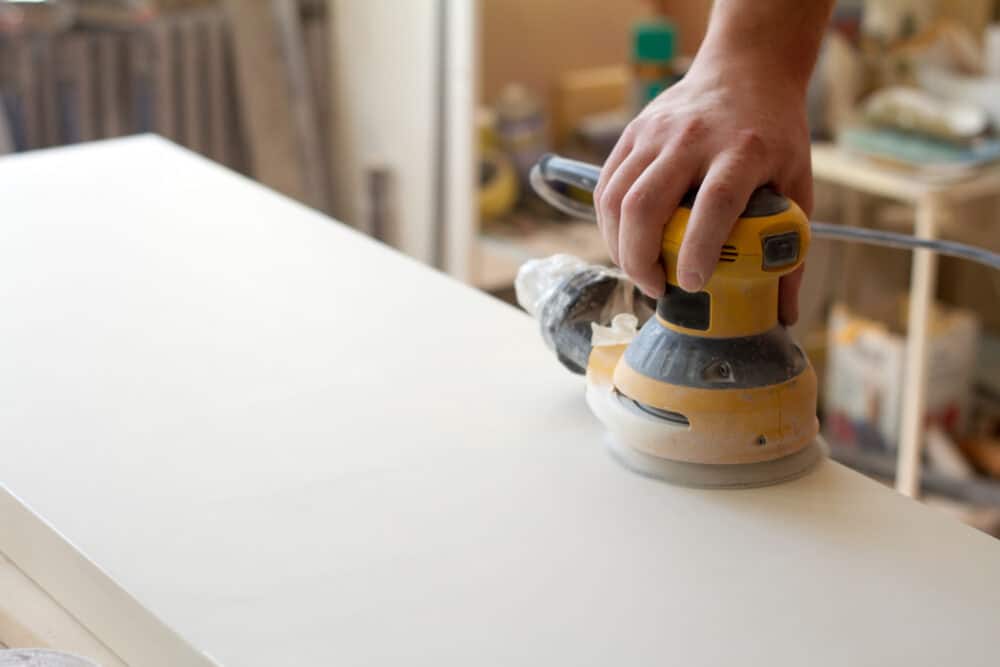
- Orbital Sander: Ideal for large, flat surfaces. It speeds up the process and provides a consistent finish.
- Detail Sander: Useful for getting into corners and tight spaces.


3. Safety Equipment:
- Dust Mask: To protect you from inhaling dust particles.
- Safety Goggles: To keep dust and debris away from your eyes.
- Ear Protection (if using power sanders): To protect your hearing from the noise of the sanders.
4. Cleaning Supplies:
- Tack Cloth: To wipe away dust between sanding stages.
- Vacuum Cleaner (with a fine dust filter): For cleaning up larger debris and dust.
5. Additional Supplies:
- Painter’s Tape: To protect areas adjacent to the worktop that you don’t want to sand.
- Plastic sheeting: to cover and protect surrounding areas from dust.
- Work gloves: To protect your hands during the sanding process.
6. Finishing Materials:
- Wood Stain or Oil (for wooden worktops): To enhance the colour and grain after sanding.
- Sealant or varnish: to protect the sanded surface and give it a finished look.

Preparing the Worktop and Workspace
Proper preparation is key to a successful sanding project. Not only does it involve getting the worktop ready, but it also includes setting up your workspace to ensure safety and efficiency. Here’s how to effectively prepare both your worktop and workspace:
Preparing the worktop
1. Clean the surface:
- Begin by thoroughly cleaning the worktop. Remove any debris, dust, or grease. This can be done with a mild detergent and a damp cloth.
- Allow the surface to dry completely before proceeding.
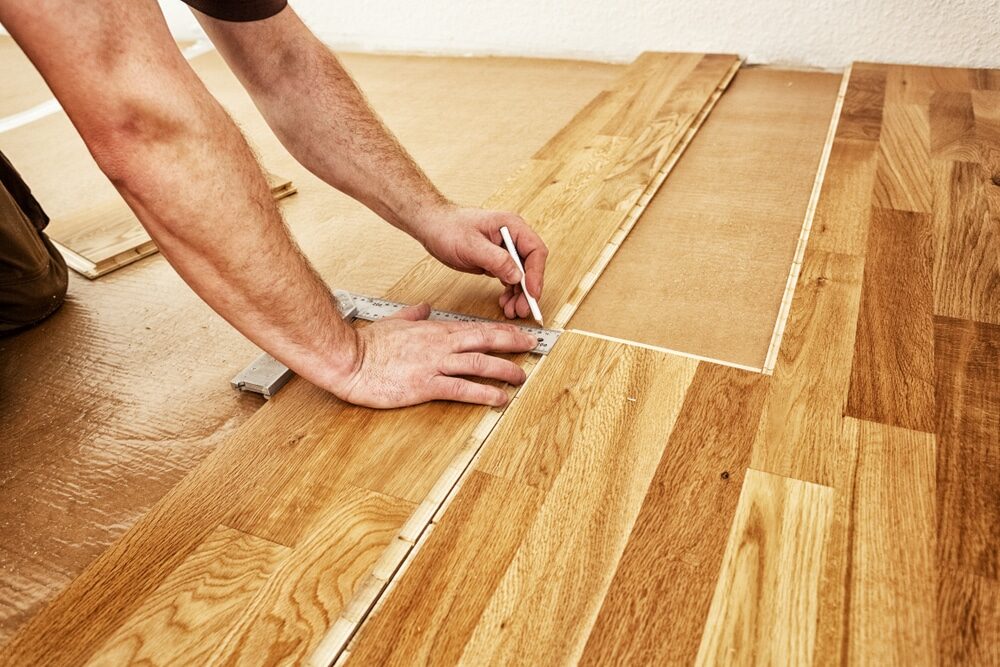
2. Inspect the worktop:
- Check for any damage, such as deep scratches, dents, or uneven areas. These might require special attention during the sanding process.
3. Remove or protect fixtures:
- If possible, remove any fixtures, like sinks or hobs, from the worktop. If they cannot be removed, cover them securely with painter’s tape or plastic sheeting to protect them from sanding debris.
4. Secure the worktop:
- Ensure the worktop is firmly fixed in place. If it wobbles or shifts, it can lead to uneven sanding.
Setting up the workspace
1. Ensure adequate ventilation:
- Sanding can create a lot of dust. Work in a well-ventilated area or keep windows open to allow airflow.
2. Dust Management:
- Set up a vacuum cleaner with a fine dust filter nearby to clean up as you go.
- Consider using plastic sheeting to create a dust barrier, protecting the rest of the room.
3. Lighting:
- Good lighting is essential. Ensure your workspace is well-lit so you can see the progress of your work and any imperfections that need attention.
4. Safety Precautions:
- Have your safety equipment (dust mask, safety goggles, and ear protection) at hand and ready to use.
5. Organise Your Tools and Materials:
- Arrange all your sanding tools, sandpaper, and additional supplies within easy reach to streamline the workflow.
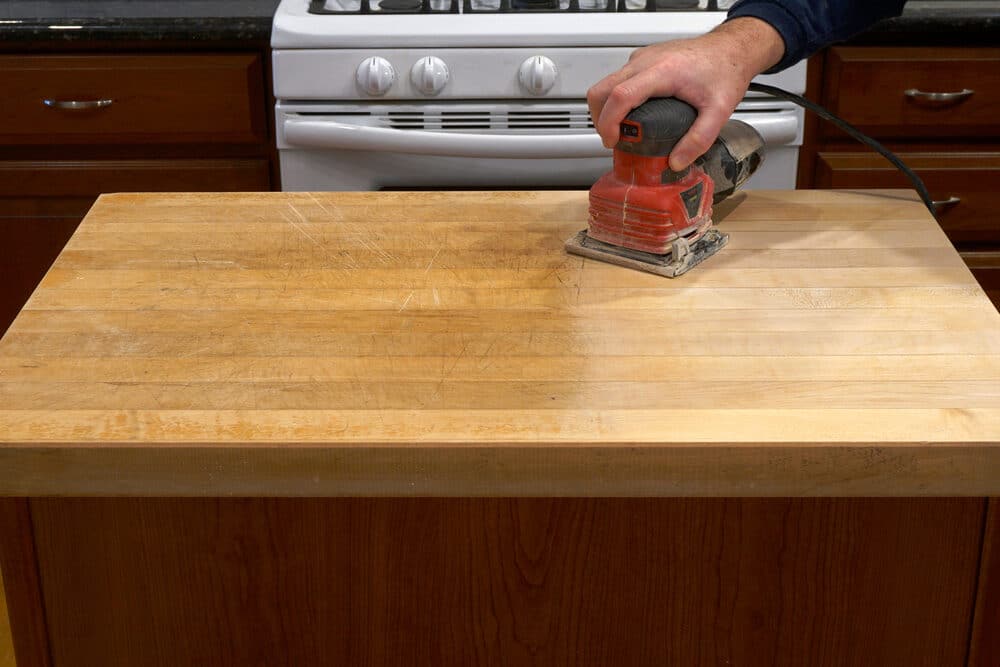
Sanding Techniques for Large Worktops
Sanding a large kitchen worktop requires specific techniques to ensure an even and smooth finish. Here are the steps and tips to effectively sand large worktops:
Step-by-Step Guide to Sanding
1. Start with coarser-grit sandpaper.
- Begin with a lower-grit sandpaper (such as 80 or 120 grit) to remove old finishes, stains, or any major imperfections.
- Sand in the direction of the grain if you’re working with wood. For other materials, follow the manufacturer’s recommendations.
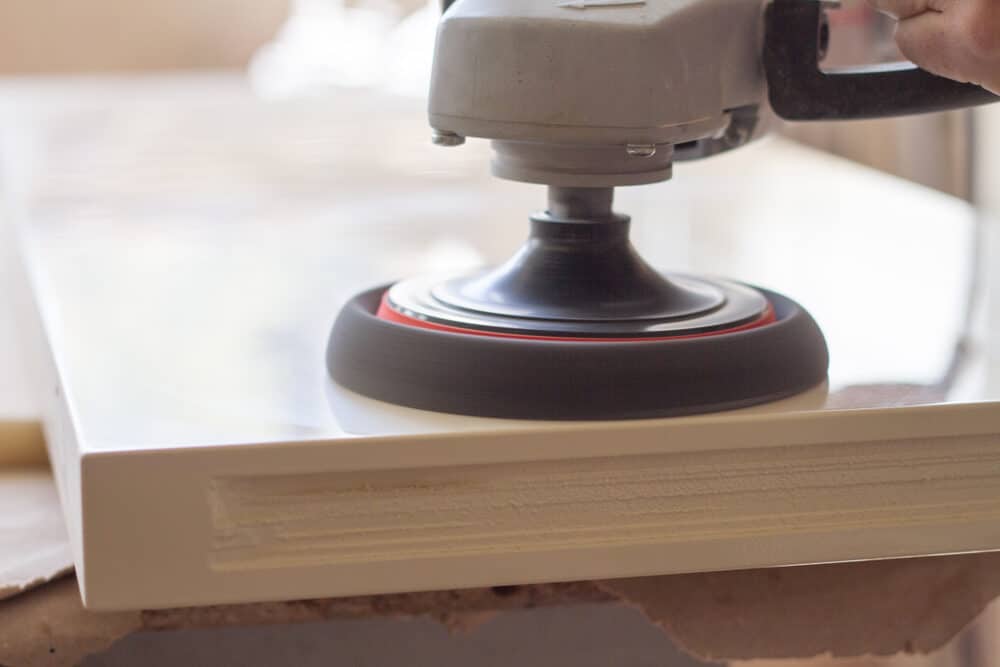
2. Use the right tools:
- For large, flat areas, an orbital sander is ideal. It covers more surface area and provides a consistent finish.
- Use a hand sanding block or a detail sander for edges and corners.
3. Apply even pressure.
- Apply steady, even pressure as you sand. Avoid pressing too hard to prevent gouging the surface.
4. Keep the Sander Moving:
- Continuously move the sander to avoid creating uneven spots or sanding too much in one area.
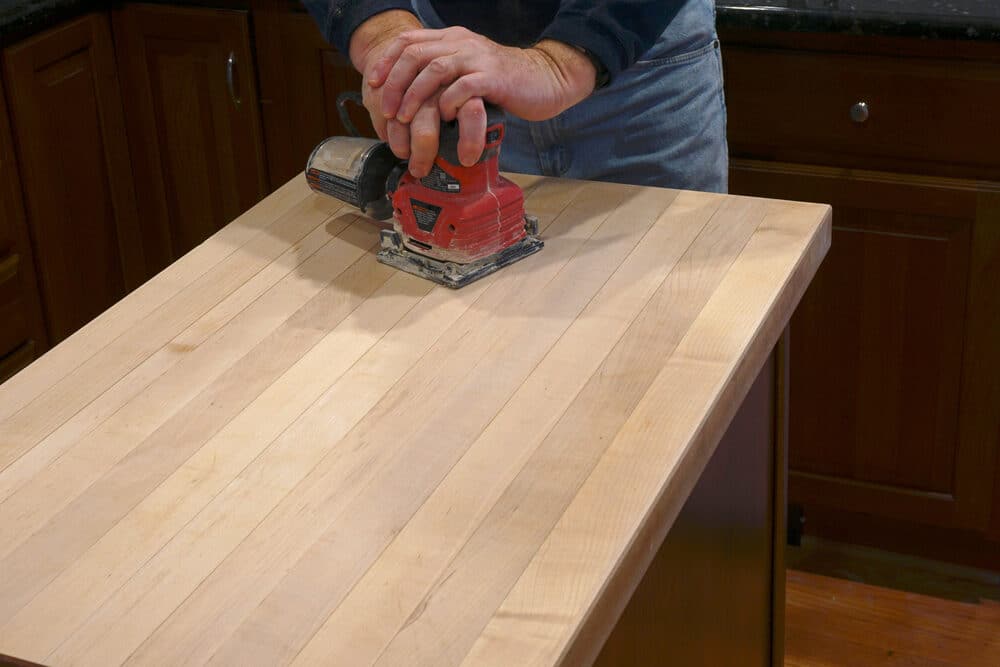
5. Progress to Finer Grits:
- After the initial rough sanding, progress to finer grits (such as 220 or 320 grit) to smooth out the surface.
- Each pass should make the surface smoother and ready for finishing.
6. Regularly clean the surface.
- Use a tack cloth or vacuum to remove dust between sanding stages. This ensures you can clearly see your progress and prevents dust from mixing into the finish.
Tips for Even Sanding Over Large Surfaces
- Overlap Your Passes: When using an orbital sander, overlap each pass by about one-half of the sander’s width. This ensures you don’t miss any spots.
- Check your progress: Periodically stop and visually inspect the worktop. Feel the surface with your hand for any rough spots.
- Change the sandpaper regularly. Don’t let the sandpaper get too worn. Change it as soon as it starts to lose its effectiveness.
Dealing with Common Worktop Materials
- Wood: Always sand in the direction of the wood grain to avoid scratches.
- Granite or Marble: Use a wet sanding technique with diamond sanding pads, and be sure to keep the surface wet to reduce dust.
- Laminate: Be cautious, as laminate can easily get damaged. Use a fine grit and gentle pressure.
Advanced Sanding Tips and Tricks
For those looking to achieve a flawless finish on their kitchen worktop, here are some advanced sanding tips and tricks that can elevate your results:
1. Mastering the Art of Sanding Curves and Edges
- Using Flexible Sanding Pads: When dealing with curved edges or intricate designs, use flexible sanding pads that can conform to the shape.
- Hand sanding for Precision: Hand sanding occasionally produces the best results on edges and curves. It gives you more control over the pressure and area being sanded.
2. Achieving a uniform finish
- Maintain Consistent Sanding Patterns: Use uniform strokes and follow a pattern. This helps in achieving an even finish without missing any spots.
- Use a Guide Coat: Applying a thin layer of a contrasting colour can help identify low spots or imperfections. Sand until the guide coat is uniformly removed.
3. Dealing with Difficult Spots
- Spot Sanding: For areas with deep scratches or dents, spot sand these areas first before sanding the entire surface.
- Using Specialised Tools: For very tight spaces or detailed areas, consider using specialised sanding tools like detail sanders or sanding swabs.
4. Minimising Dust and Maximising Cleanliness
- Connecting a Shop Vacuum: If using power tools, connect them to a shop vacuum with a dust collection system. This minimises dust and keeps your workspace clean.
- Wet Sanding Technique: For materials like stone, wet sanding not only minimises dust but also provides a smoother finish.
5. Finishing Touches
- Fine Grit Finishing: After the main sanding, use a very fine grit (400 or higher) for the final pass. This will give a smooth, professional finish.
- Buffing After Sanding: Use a buffing pad or a soft cloth to buff the surface after the final sanding. This enhances the sheen and smoothness.
6. Maintaining Sandpaper Efficiency
- Cleaning the Sandpaper: Periodically clean the sandpaper to remove dust and buildup. For belt sanders, use a crepe-rubber sanding belt cleaner.
- Rotating Sandpaper: Rotate or replace sandpaper frequently to maintain its effectiveness and ensure even wear.

Finishing Touches
After you have sanded your kitchen worktop to a smooth and even finish, the final steps are crucial to protect the surface and enhance its appearance. Here’s a guide to the finishing touches you should consider:
1. Final Cleaning
- Remove All Dust: To ensure that the worktop is completely free of sanding dust, use a vacuum cleaner and a tack cloth.
- Wipe with a Damp Cloth: For an extra level of cleanliness, lightly wipe the surface with a damp cloth and allow it to dry thoroughly.
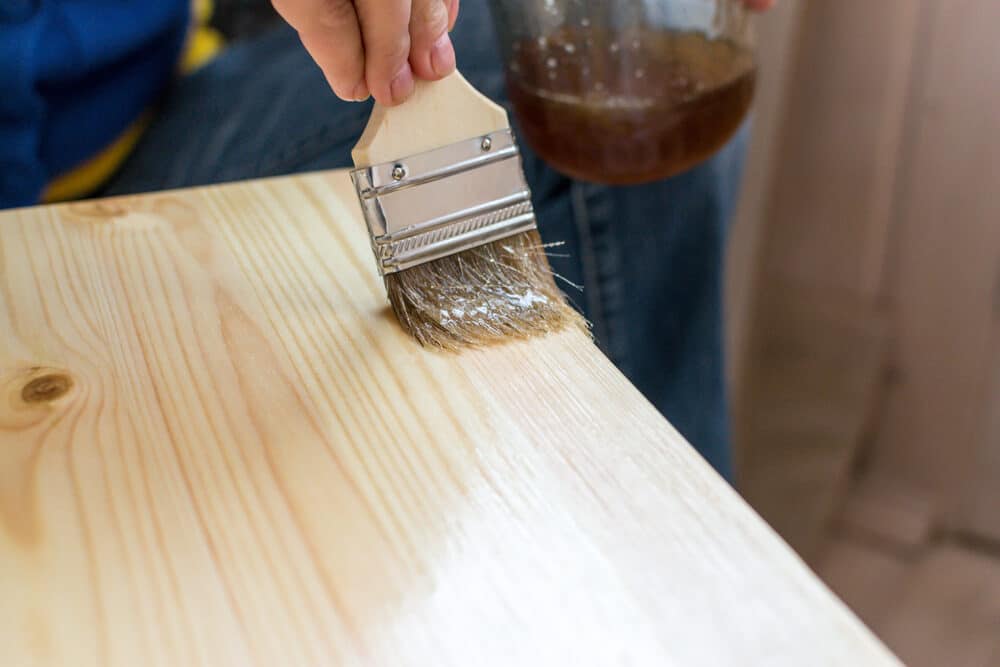
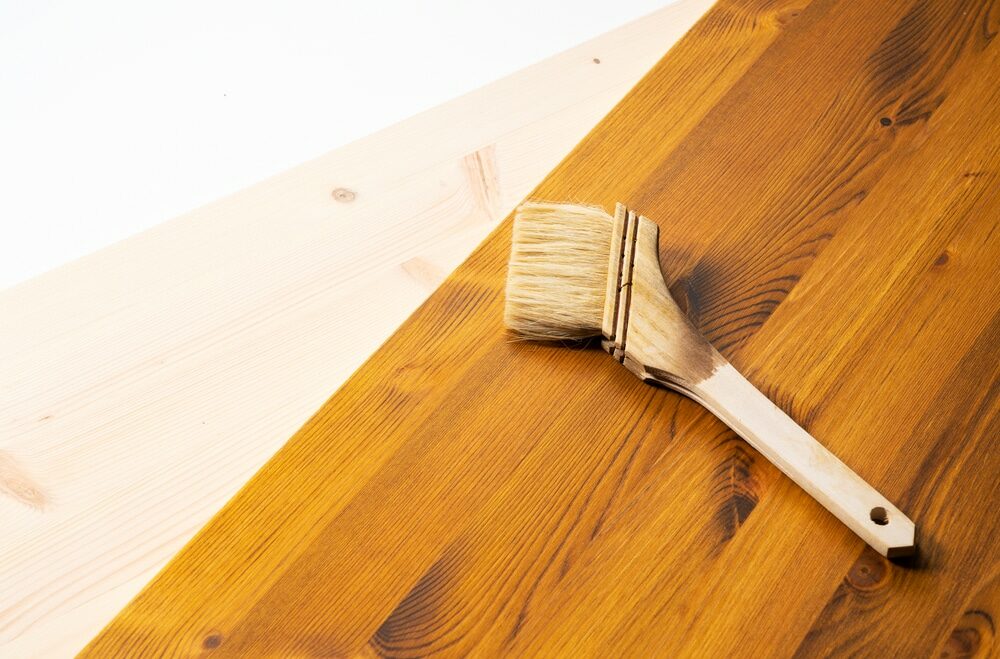
2. Applying Finish
- Choose the Right Finish: Depending on your worktop material, choose a suitable finish. For wood, options include oil, varnish, or sealant. For stone or composite materials, a specific sealant or polish might be required.
- Application Technique: Apply the finish evenly using a brush or a clean, lint-free cloth. Follow the manufacturer’s instructions for the best results.
- Allow Adequate Drying Time: Let the first coat dry completely before applying additional coats if needed. This might take several hours overnight.
3. Buffing and polishing
- Buff the Finish: Once the final coat of finish is dry, buff the surface with a soft cloth or buffing pad to bring out the shine.
- Polishing for Extra Sheen: For materials like granite or marble, use a polish to enhance the sheen and provide an extra layer of protection.
4. Sealing the worktop
- Sealing for Protection: Especially for wood and stone worktops, applying a sealant can protect against water damage, stains, and scratches.
- Regular Maintenance: Apply sealant periodically, following the recommended frequency for your specific worktop material.
5. Caring for Your Worktop
- Regular Cleaning: Keep the worktop clean with appropriate cleaners, avoiding harsh chemicals that can damage the finish.
- Avoid Direct Heat and Sharp Objects: To maintain the integrity of the finish, avoid placing hot pots directly on the surface and use cutting boards to prevent scratches.
6. Inspection and touch-ups
- Final Inspection: After all the finishing touches, inspect the worktop for any missed spots or areas that might need a touch-up.
- Touch-Ups as Needed: If you find imperfections, address them promptly with a small brush or cloth, applying more finish or sealant as needed.
Conclusion
We’ve reached the end of our journey on how to sand a large kitchen worktop, and it’s time to wrap up and reflect on what we’ve covered. This guide has taken you through each step of the process, from the initial preparation of your worktop and workspace to the detailed sanding techniques and, finally, the crucial finishing touches that make all the difference.
Sanding and refinishing your kitchen worktop is more than just a DIY project; it’s an opportunity to rejuvenate the heart of your home. The kitchen, after all, is where meals are prepared, memories are made, and stories are shared. By investing your time and effort into this task, you’ve not only enhanced the aesthetic appeal of your kitchen but also added to its warmth and character.
Remember, the key to a successful sanding project lies in careful preparation, patience during the sanding process, and attention to detail in the finishing stages. Whether you’re dealing with a wooden, granite, or laminate worktop, the principles of thorough sanding and careful finishing remain the same.
We hope this guide has empowered you with the knowledge and confidence to tackle your kitchen worktop sanding project. With the right tools, techniques, and a bit of elbow grease, you can transform a worn-out surface into a beautiful and functional worktop that you can be proud of.
Should you have any further questions or need more advice, don’t hesitate to explore additional resources or seek guidance from professional woodworkers or home improvement experts. Remember, the world of DIY is vast and always welcoming to those eager to learn and improve their skills.
Thank you for following along, and here’s to your next successful home improvement project!


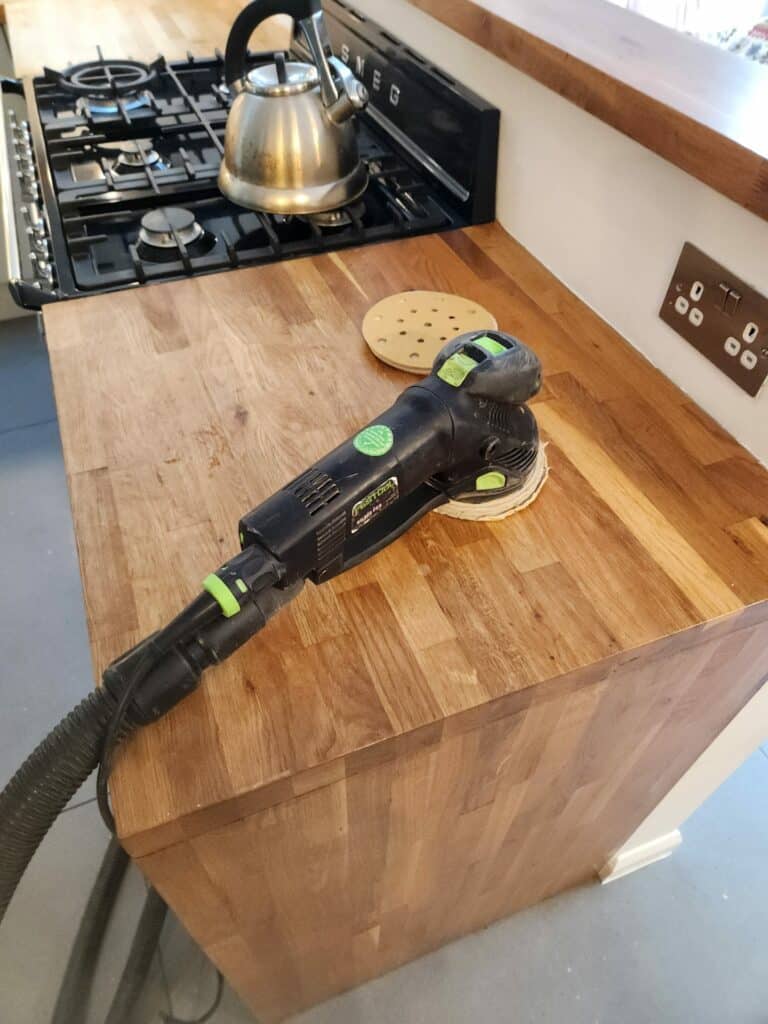
Sanding
We provide virtually dust-free sanding with our continuous belt machinery with mobile extraction units, giving you a safer environment for your family.
Oiling
This organic finish not only adds beauty to your home but also has exceptional water-repellent characteristics, making it easier to clean and maintain.
Waxing
This natural floor finish offers the softest and most mellow appearance – and leaves your floor able to breath.
Buffing
Using soft buffing machines (and hand-polishing where required) will bring a wonderful sheen to your newly-finished floor.
Repairs
We offer a full assessment of your wooden floors to determine what repairs are needed to provide the perfect working surface for the later stages of sanding, staining and sealing.
Restoration
We offer a comprehensive restoration process designed to address floors that are improperly fitted or damaged over time through wear and tear.
Request a fixed price quote for your wood floor restoration now
Simply enter your postcode below to get started.
Services
Wood Floor Sanding Wood Floor Restoration Wood Floor Scratch Repair Squeaky Wood Floor Repair Parquet Floor Sanding Parquet Floor Restoration Commercial Floor Sanding Church Floor Sanding Community Centre Floor Sanding School Floor Sanding Gap Filling Gap Filling with ResinCopyright © Mr Sander®
Privacy & Cookies Terms & Conditions Complaints Procedure Cancellation Rights Sitemap

Get An Instant Price Estimate Before You Go…
Simply enter the rooms you need sanded and we’ll provide you with a price estimate instantly! Try our price calculator now.
Get a Price Estimate NowLocal Floor Sanding Experts
Over 500 5-Star Reviews
Safe, Dust Free Sanding
Operating Since 1994