London:
Nationwide:
25,000+
Floors Restored
27 Years Experience
Wood Flooring Association Certified
How to Remove Old Oil from Your Kitchen Worktop
Posted on December 25, 2023
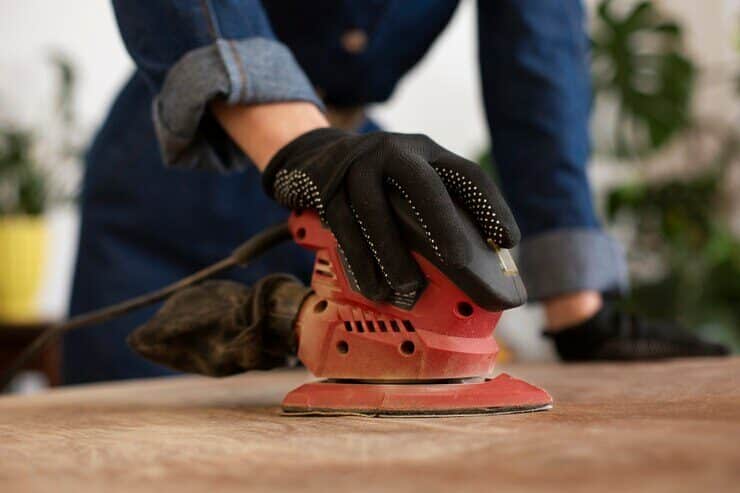
Kitchen Worktop sanding
Say Goodbye to Old Oil Stains on Your Kitchen Worktop: Removal Tips
Your kitchen worktop is the heart of your culinary domain, where you prepare delicious meals and create memorable moments with family and friends. However, over time, the inevitable happens: oil stains accumulate, creating unsightly blemishes that can be a real eyesore. Whether it’s from cooking spills, greasy hands, or other mishaps, those old oil stains can be stubborn and seem impossible to remove.
But fear not! In this comprehensive guide, we will walk you through the steps to rejuvenate your kitchen worktop and restore its pristine beauty. Say goodbye to those unsightly oil stains and hello to a clean and inviting cooking space.
In the following sections, we’ll explore the reasons behind the persistence of old oil stains, provide you with a list of essential tools and materials, and present a variety of methods to effectively remove them. Whether your worktop is made of wood, granite, laminate, or another material, we’ve got you covered with tailored solutions. We’ll also offer preventive tips to ensure those stains stay at bay and share advice on maintaining your worktop’s appearance in the long run.
So, if you’re ready to transform your kitchen and rediscover the joy of a spotless worktop, let’s dive in and learn how to bid those old oil stains farewell once and for all!
Gathering Your Supplies
Before embarking on the journey to remove those stubborn old oil stains from your kitchen worktop, it’s essential to assemble the right tools and materials. Having the correct supplies on hand will not only make the job easier but also increase your chances of success. Here’s a list of essential items you’ll need:

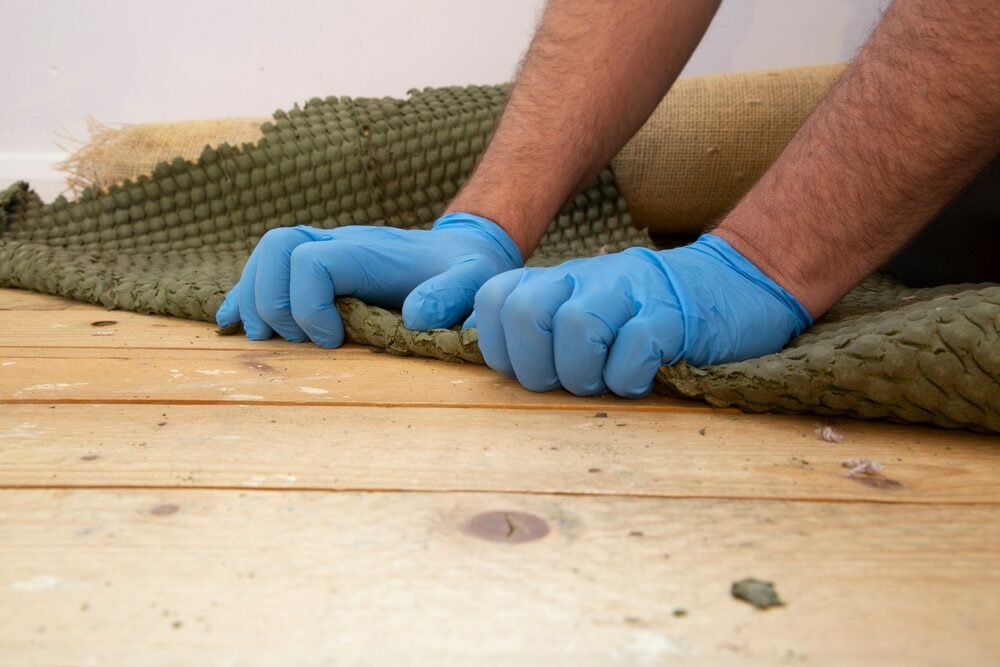
- Protective Gear:
- Disposable gloves to protect your hands.
- Safety goggles to shield your eyes, especially if you’re using chemicals.
- Cleaning Cloths and Paper Towels:
- Soft, lint-free cloths or paper towels for wiping and drying.
- Cleaning Solutions:
- Depending on the method you choose (which we’ll discuss in detail later), you may need:
- Use natural ingredients like vinegar, baking soda, or lemon juice for DIY solutions.
- Commercial oil stain removers.
- Specific cleaning products are recommended for your worktop material.
- Depending on the method you choose (which we’ll discuss in detail later), you may need:
- Scrubbing Tools:
- Non-abrasive scrubbing pads or brushes suitable for your worktop surface (e.g., nylon, microfiber, or soft-bristle brushes).
- Solvents (if necessary):
- For tougher stains, you may need solvents like acetone, mineral spirits, or rubbing alcohol. Ensure these are appropriate for your worktop material.
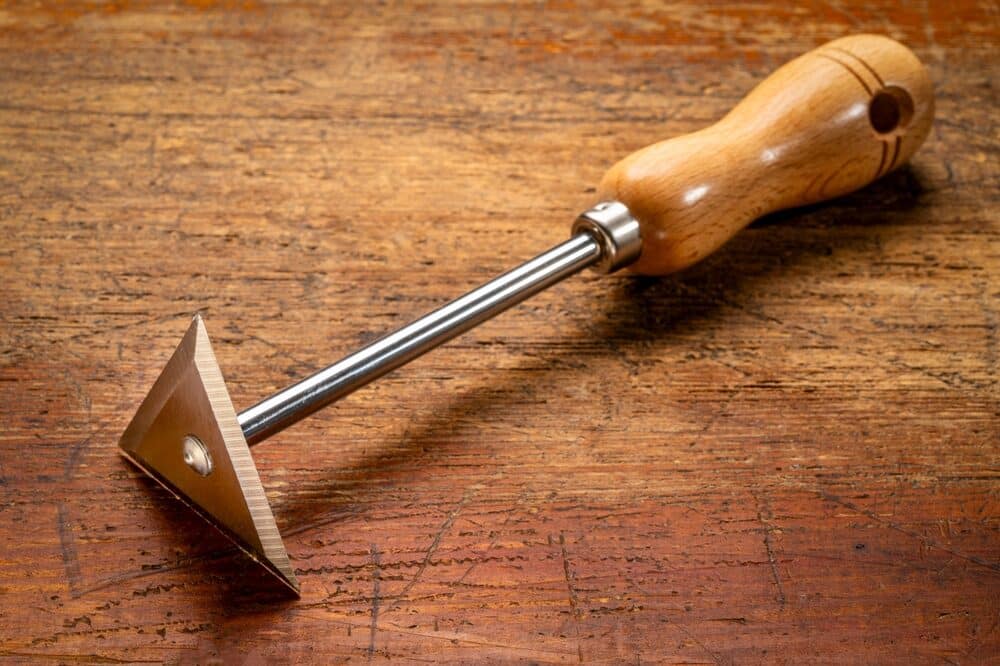
- Plastic or wooden scrapers:
- These can be helpful for gently scraping off excess oil residue without damaging the worktop.
- Sealing Agent (Optional):
- If your worktop requires resealing after cleaning, make sure you have the appropriate sealing product on hand.
- Bucket or Container:
- To mix and hold cleaning solutions if needed.
- Water and soap:
- For a final rinse and cleaning after stain removal.
- Timer or stopwatch:
- Some cleaning solutions require specific contact times for maximum effectiveness.
- Patience:
- Removing old oil stains can be a time-consuming process, so be prepared to invest some time and effort into the task.
Ensure you’ve gathered all these supplies before you start the cleaning process. Having everything ready will make the job smoother and more efficient, ensuring that you’re well-prepared to tackle those persistent oil stains on your kitchen worktop.
Assessing the Worktop Material
One of the key factors in successfully removing old oil stains from your kitchen worktop is understanding the type of material your worktop is made of. Different materials require different cleaning methods to ensure that the stains are effectively removed without causing damage. Here’s how to assess your worktop material and determine the best approach:
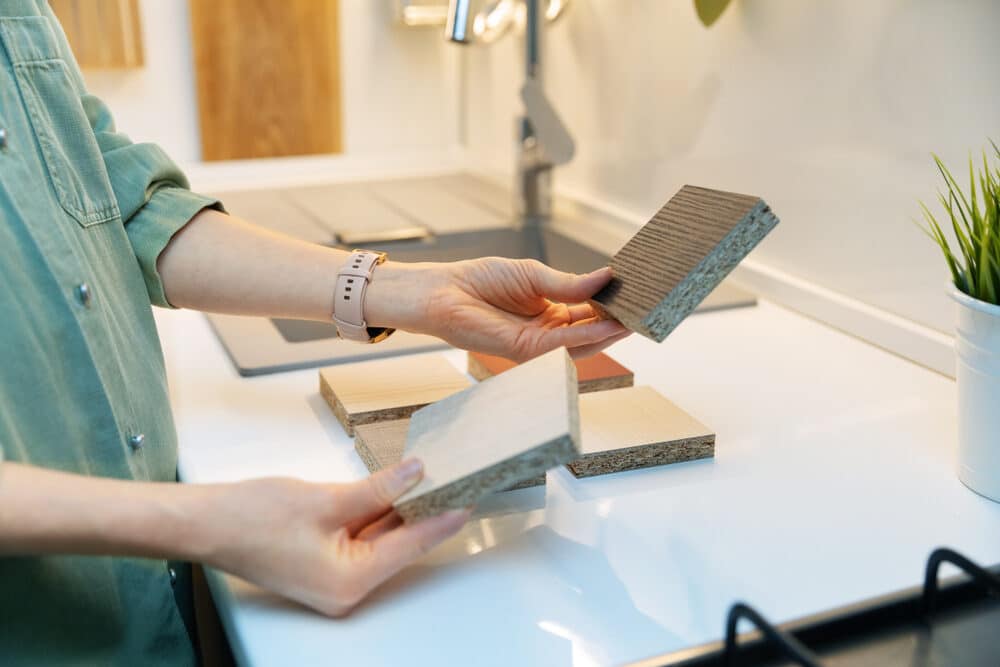
Identify Your Worktop Material:
- Wood: Wood worktops are popular for their natural beauty. They are often sealed with various finishes, like oil, wax, or varnish.
- Granite/Stone: Granite, marble, and other natural stones are known for their durability and elegance. They are usually sealed to protect against stains.
- Laminate: Laminate worktops are budget-friendly and come in a variety of designs. They have a smooth, non-porous surface.
- Stainless Steel: Stainless steel worktops are known for their sleek appearance and resistance to staining.
- Solid Surface (e.g., Corian): These synthetic worktops are seamless and can mimic the look of natural stone.
- Quartz: Quartz worktops are engineered stone surfaces that are durable and resistant to stains.
- Tile: Tile worktops are made from ceramic or porcelain tiles and may have grout lines.
Check for existing damage:
- Inspect your worktop for any existing damage, such as scratches, dents, or cracks. It’s important to be aware of these issues before cleaning, as some cleaning methods may worsen them.
Review Manufacturer Guidelines:
- Consult the manufacturer’s guidelines or care instructions that came with your worktop. They often provide specific recommendations for cleaning and maintenance.
Consider sealing or finishing:
- Determine if your worktop has a sealant or finish applied. This will influence the types of cleaning agents you can use.
Test an Inconspicuous Area:
- Before applying any cleaning solution to the stained area, it’s a good practice to test it on a small, inconspicuous area of the worktop to ensure it won’t cause damage or discoloration.
Select appropriate cleaning methods:
- Based on the material and condition of your worktop, choose the appropriate cleaning method. We’ll explore various methods in detail later in this guide, tailored to different worktop materials.
Understanding your worktop material is crucial because it guides you in selecting the most effective and safe method for oil stain removal. Using the wrong cleaning technique could potentially damage the worktop’s surface or finish. Now that you’ve assessed your worktop material, let’s move on to the specific methods for removing old oil stains based on the type of surface you’re dealing with.
Preparing the Work Area
Before diving into the process of removing old oil stains from your kitchen worktop, it’s essential to prepare the work area properly. Taking a few steps to get organised and ensure safety can make the cleaning process more efficient and trouble-free. Here’s how to prepare your work area:
Clear the worktop:
- Remove any items, appliances, or utensils from the worktop to give yourself ample space to work. This includes cutting boards, toasters, spice containers, and anything else that might be in the way.
Protect surrounding areas:
- Cover or move nearby items and surfaces that you want to protect from potential splashes or spills during the cleaning process. This can include cabinet fronts, walls, and flooring.
Ventilate the area:
- Ensure good ventilation by opening windows and doors or using a fan. Some cleaning solutions may have strong odours or fumes, so proper ventilation is essential for your comfort and safety.
Wear protective gear:
- Put on disposable gloves to protect your hands from chemicals or cleaning agents. Safety goggles are also advisable if you’ll be using strong solvents.
Read labels and instructions:
- If you’re using commercial cleaning products, read the labels and follow the manufacturer’s instructions carefully. Some products may require specific safety precautions or dilution ratios.
Gather your cleaning supplies:
- As mentioned in the previous section, ensure you have all the necessary cleaning supplies and tools within easy reach. This includes cleaning cloths, scrubbing pads, cleaning solutions, and any other items needed for your chosen method.
Prepare a safe work surface:
- Lay down a clean, absorbent cloth or paper towel on the worktop. This will serve as a temporary workspace for mixing cleaning solutions, testing them, and placing tools. It also helps catch any drips or spills.
Keep children and pets away:
- If you have children or pets, ensure they are safely away from the work area during the cleaning process. Some cleaning solutions can be harmful if ingested or if they come into contact with the skin or eyes.
Set a timer:
- If your chosen cleaning method requires a specific contact time, set a timer to ensure you don’t exceed the recommended duration. Overexposure to certain chemicals can be harmful.
Have a first-aid kit handy:
- While unlikely, accidents can happen. Having a basic first aid kit nearby is a good precaution in case of minor injuries.
Step-by-Step Guide: Removing Old Oil Stains
Now that you’ve assessed your worktop material and prepared the work area, it’s time to roll up your sleeves and tackle those stubborn old oil stains. We’ve compiled a step-by-step guide with various methods tailored to different worktop materials. Follow the method that corresponds to your worktop type for the best results:
Method 1: Natural Remedies and DIY Cleaners
For Wood, Laminate, or Non-Porous Worktops
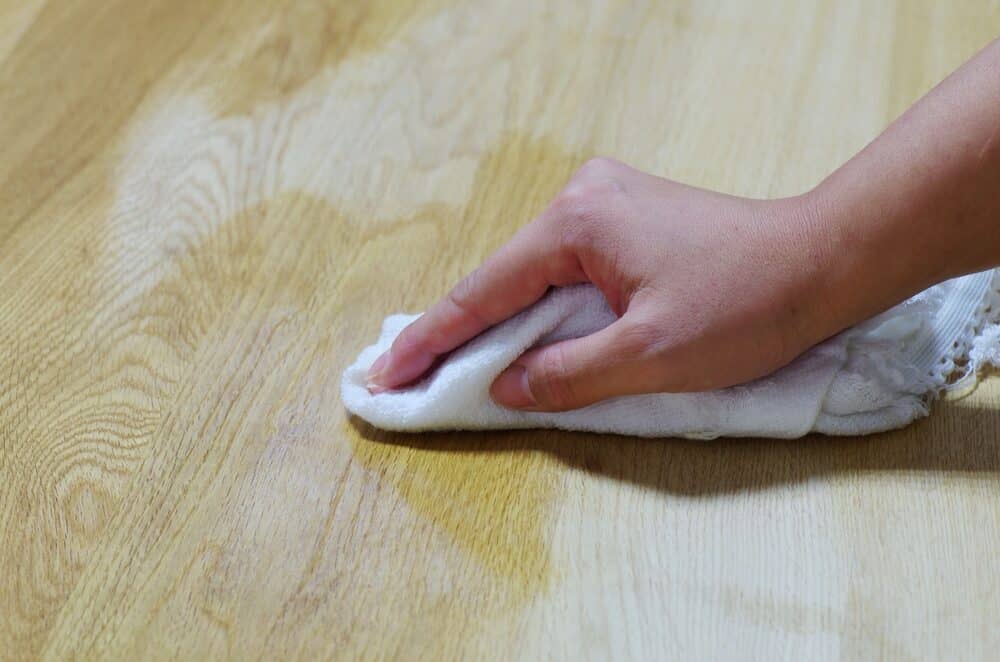
- Blot the Stain: If there’s any excess oil on the surface, gently blot it with a clean paper towel to soak up as much as possible.
- Mix a cleaning solution:
- For wood or laminate worktops, create a mixture of equal parts water and vinegar or water and baking soda to form a paste. For non-porous surfaces like laminate, you can also use a mixture of dish soap and warm water.
- Apply the solution: Spread the mixture evenly over the stained area and let it sit for 10–15 minutes.
- Scrub Gently: Use a soft cloth or non-abrasive scrubbing pad to gently scrub the stained area in a circular motion. Avoid using excessive pressure to prevent damage.
- Rinse and Dry: Wipe the worktop clean with a damp cloth to remove the cleaning solution, then dry it thoroughly.
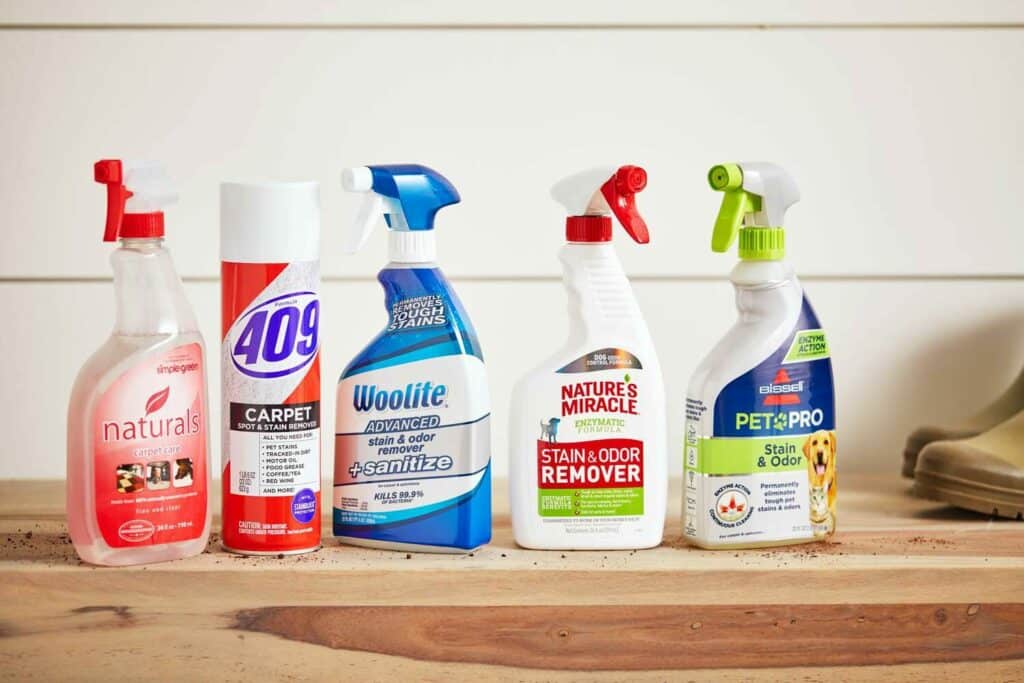
Method 2: Commercial Oil Stain Removers
For All Worktop Types
- Read Instructions: Follow the manufacturer’s instructions on the commercial oil stain remover product you’ve chosen. Be sure to wear gloves and eye protection, if recommended.
- Apply the product: Apply the oil stain remover as directed. This typically involves spraying or applying a liquid to the stained area.
- Wait: Allow the product to sit on the stain for the recommended time, usually specified on the product label.
- Scrub or wipe: After the waiting period, gently scrub or wipe the stained area according to the product instructions.
- Rinse and Dry: Clean the worktop with water and a clean cloth to remove any residue, then dry it thoroughly.
Method 3: Professional Help
For Severe Stains or Sensitive Worktops
- Consult a professional: If the oil stains are deeply ingrained, extensive, or if you have a worktop material that requires specialised care (e.g., delicate stone surfaces), it’s advisable to consult a professional cleaner or restorer.
- Get a Quote: Contact a professional cleaning service or restoration expert to assess the situation and provide a quote for their services.
- Schedule the cleaning: If you decide to proceed with professional help, schedule the cleaning service at a convenient time.
- Follow Post-Cleaning Care: After the professional cleaning, follow any post-cleaning care instructions provided to maintain the worktop’s appearance and prevent future stains.
Remember that patience and persistence are key when dealing with old oil stains. You may need to repeat the cleaning process a few times for particularly stubborn stains. Once the stains are gone, it’s essential to follow proper Kitchen Worktop Maintenance and preventive measures to keep your kitchen worktop looking its best.

Preventing future oil stains
While successfully removing old oil stains is a significant accomplishment, it’s equally important to take preventive measures to avoid future stains on your kitchen worktop. Here are some practical tips to help you keep your worktop oil-free:
Use cutting boards and trivets:
Place cutting boards under food preparation areas, and use trivets or heat-resistant mats under hot pots and pans. This not only protects your worktop from oil stains but also prevents scratches and burns.
Wipe Spills Promptly:
Accidents happen, but quick action can prevent stains. As soon as you notice a spill, whether it’s oil, sauce, or any other liquid, blot it up immediately with a clean cloth or paper towel.
Regularly clean and seal:
Follow the manufacturer’s guidelines for cleaning and maintaining your worktop material. For some surfaces, like granite, marble, or stone, regular sealing can help repel liquids and prevent stains.
Avoid cooking oil splatters:
When cooking, especially with oils, use splatter screens or lids to contain splatters and prevent them from reaching your worktop. This simple accessory can make a big difference.
Use coasters and mats.
Place coasters under cups and glasses to catch condensation, and use mats or placemats under plates and utensils to catch any drips or spills during meals.
Be cautious with oily ingredients.
When handling greasy or oily ingredients, such as cooking oils, be extra careful not to spill or splatter. Pour slowly and deliberately, and use funnels or dispensers when necessary.
Regularly inspect and clean the stove area.
Keep the area around your stove clean and free from oil buildup. Grease can accumulate on nearby surfaces and appliances, leading to potential oil stains.
Store oils properly.
Ensure that oil bottles and containers are tightly sealed to prevent leaks. Store them in a dedicated area away from the worktop.
Use oil mats or Teflon sheets.
Consider placing oil mats or Teflon sheets in areas where oil splatters are common, such as behind the stovetop. These can be easily cleaned or replaced.
Practice good cooking habits.
When sautéing or frying, use lids or screens to reduce oil splatters. Adjust cooking techniques to minimise oil use when possible.
Educate family members:
Ensure that everyone in your household is aware of the importance of preventing oil stains and follows the guidelines for maintaining a clean and stain-free kitchen worktop.
By implementing these preventive measures, you can significantly reduce the risk of future oil stains on your kitchen worktop. A little proactive effort can go a long way towards keeping your kitchen workspace looking clean and inviting.
Maintaining Your Kitchen Worktop
Now that you’ve learned how to remove old oil stains and prevent future ones, it’s crucial to establish a regular maintenance routine to keep your kitchen worktop in excellent condition. Proper maintenance of your Kitchen WorkTop not only prolongs the life of your worktop but also ensures it continues to look its best. Here’s how to maintain your kitchen worktop:
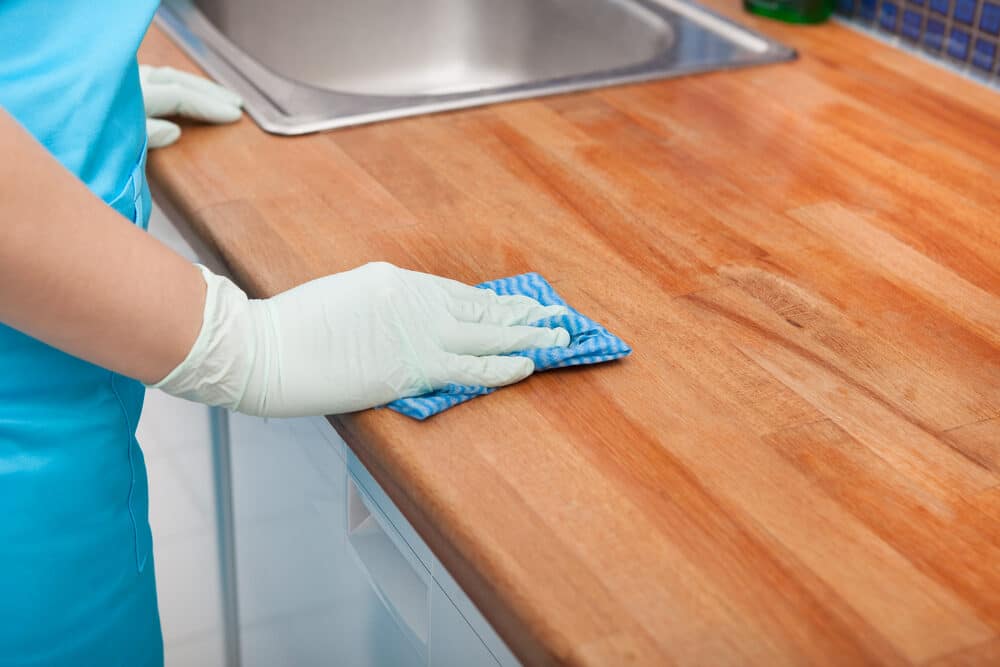
- Daily Cleaning:
- Wipe down your worktop daily with a damp cloth to remove crumbs, spills, and minor stains. This prevents buildup and makes deep cleaning less frequent.
- Use mild cleaning agents.
- Stick to gentle, pH-balanced cleaners for routine cleaning. Harsh chemicals can damage the surface or finish over time.
- Avoid Abrasive Scrubbing:
- When scrubbing, use soft, non-abrasive cloths or scrubbing pads to avoid scratching the surface. For tough stains, apply gentle pressure.
- Regular Sealing (If Required):
- If your worktop is made of natural stone like granite or marble, or if it has a porous surface, follow the manufacturer’s recommendations for resealing to maintain its stain resistance.
- Clean Spills Immediately:
- Deal with spills promptly to prevent staining. Blot up liquids and clean the area with a mild detergent and warm water.
- Mind the Grout (for Tile Worktops):
- If you have a tile worktop with grout lines, keep the grout clean and sealed to prevent stains and discoloration. Use a grout sealer as needed.
- Protect against heat:
- Use trivets or heat-resistant mats under hot pots, pans, and cookware to prevent heat damage or scorching.
- Prevent Scratches:
- Place cutting boards under knives and avoid sliding heavy pots or utensils directly on the worktop surface to prevent scratches.
- Respect the finish:
- If your worktop has a specific finish (e.g., oil, wax, or varnish), avoid abrasive cleaning methods that can strip the finish. Follow the recommended care instructions.
- Keep It Dry:
- Ensure that the worktop is kept dry after cleaning. Standing water or moisture can damage some surfaces and lead to staining.
- Inspect for damage:
- Regularly inspect your worktop for any signs of damage, such as cracks, chips, or loose seams. Address issues promptly to prevent further damage.
- Educate household members:
- Make sure everyone in your household is aware of proper worktop maintenance practices and encourages them to follow the guidelines.

Troubleshooting Common Issues
Despite your best efforts to remove old oil stains, maintain your worktop, and prevent future problems, you may encounter some common issues along the way. Here’s how to troubleshoot and address these challenges:
- Persistent Stains:
- If stains persist after following the cleaning methods outlined in this guide, consider repeating the cleaning process with more persistence. For tough stains, you may need to apply the cleaning solution multiple times, allowing it to sit for longer periods of time.
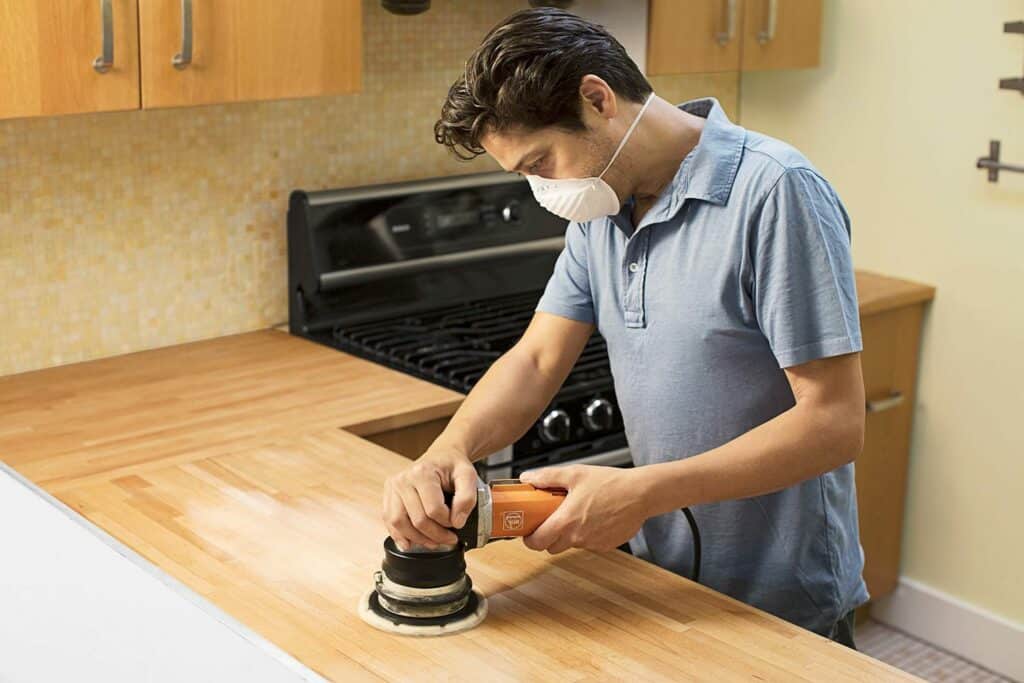
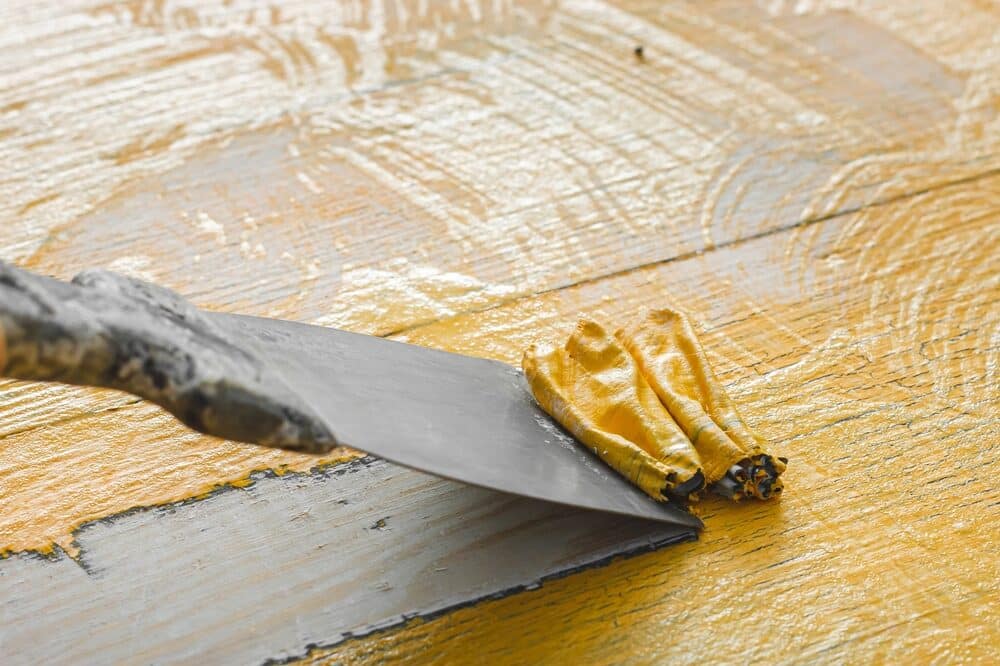
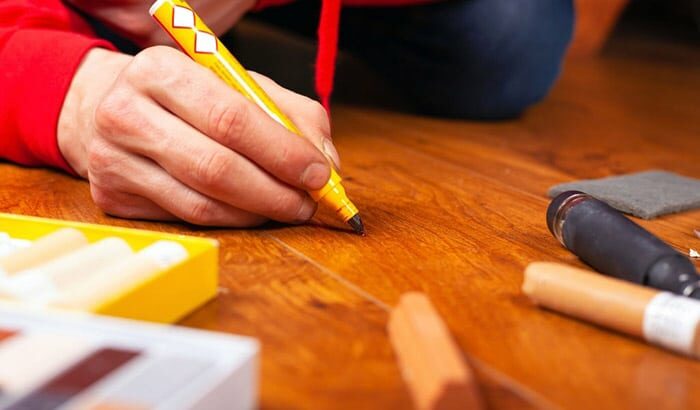
- Scratches:
- Minor scratches can occur over time, especially on wood and some laminate surfaces. To address this issue, lightly sand the scratched area with fine-grit sandpaper and then reapply a finish or sealant, if applicable.
- Dullness or Haze:
- Some cleaning products or hard water can leave a dull or hazy residue on your worktop. To remove this, clean the surface with a mixture of equal parts water and white vinegar, then rinse and dry thoroughly.
- Damage to the finish:
- If the finish on your worktop has been damaged, such as varnish or oil, you may need to refinish the affected area. Sand the damaged area gently, apply a new finish, and follow the manufacturer’s instructions for drying and curing.
- Burn Marks:
- If you accidentally placed a hot pan or pot directly on your worktop and it left a burn mark, consult the manufacturer’s guidelines for repairing the specific material. For some surfaces, like solid surfaces or quartz, you may need to contact a professional for repair.
- Chips or cracks:
- For chips or cracks in your worktop, especially on stone surfaces, consult a professional for repair or replacement. Attempting to fix these issues on your own may worsen the damage.
- Discoloration:
- Discoloration can occur due to various reasons, including exposure to direct sunlight, harsh chemicals, or aging. Addressing discoloration may require professional restoration, especially for natural stone surfaces.
- Grout Issues (For Tile Worktops):
- If grout between tiles is discoloured or deteriorating, consider regrouting the affected areas. Properly sealing grout lines can also prevent future staining.
- Inadequate Sealing:
- If your worktop requires sealing, ensure you maintain a regular schedule for resealing as recommended by the manufacturer. Neglecting this can result in reduced stain resistance.
- Seek professional help.
- When in doubt or when dealing with severe issues, it’s advisable to consult a professional cleaner or restoration expert who specialises in your worktop material. They can provide expert advice and solutions.
Remember that some issues, especially extensive damage or severe staining, may require professional intervention. Attempting complex repairs on your own could potentially make the situation worse. In such cases, it’s best to seek the expertise of professionals who can assess and address the problem effectively.

Conclusion
Achieving a spotless and inviting kitchen worktop is within your reach, even when faced with stubborn old oil stains. With the knowledge and techniques shared in this comprehensive guide, you’ve taken a significant step towards maintaining a clean and beautiful kitchen space.
We began by understanding why old oil stains happen and moved on to gathering the necessary supplies, assessing your worktop material, and preparing the work area for effective stain removal. We then walked you through step-by-step methods tailored to different worktop materials, ensuring that you have the tools and know-how to combat oil stains effectively.
But our journey doesn’t end with stain removal. We emphasised the importance of preventive measures to keep your worktop oil-free in the future. By adopting good cooking habits, using protective measures, and maintaining a regular cleaning routine, you can enjoy a kitchen that stays pristine and stain-resistant.
Moreover, maintaining your kitchen worktop is an ongoing commitment. By following the maintenance tips provided in this guide, you can extend the life of your worktop and ensure it continues to be a functional and aesthetically pleasing part of your kitchen.
Lastly, we discussed how to troubleshoot common issues you might encounter along the way, reminding you that professional help is always an option when faced with extensive damage or severe staining.
In the end, your kitchen worktop is more than just a functional surface; it’s the heart of your culinary endeavours and the central hub of your home. By investing time and effort into its care and maintenance of your kitchen worktop, you can enjoy a beautiful and clean kitchen workspace for years to come.
Thank you for joining us on this journey to conquer old oil stains and maintain the heart of your kitchen. We hope this guide has been valuable in helping you achieve a spotless kitchen worktop that you can be proud of.
If you have any questions or would like to share your own tips and experiences, please feel free to reach out. We love hearing from our readers and helping you create the kitchen of your dreams.
Happy cooking, and here’s to a beautifully maintained kitchen worktop!

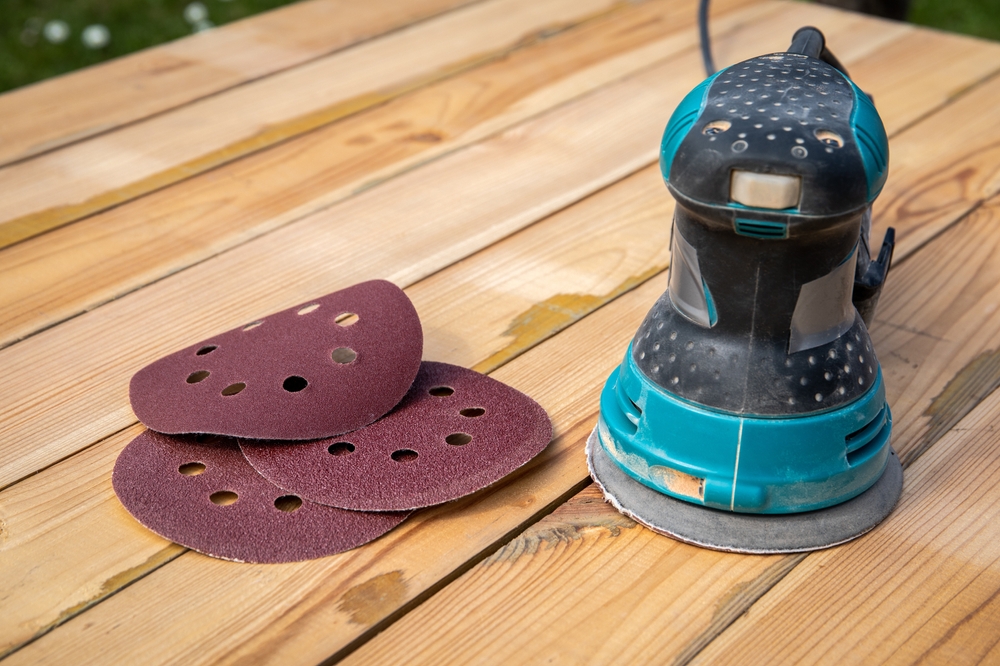
Sanding
We provide virtually dust-free sanding with our continuous belt machinery with mobile extraction units, giving you a safer environment for your family.
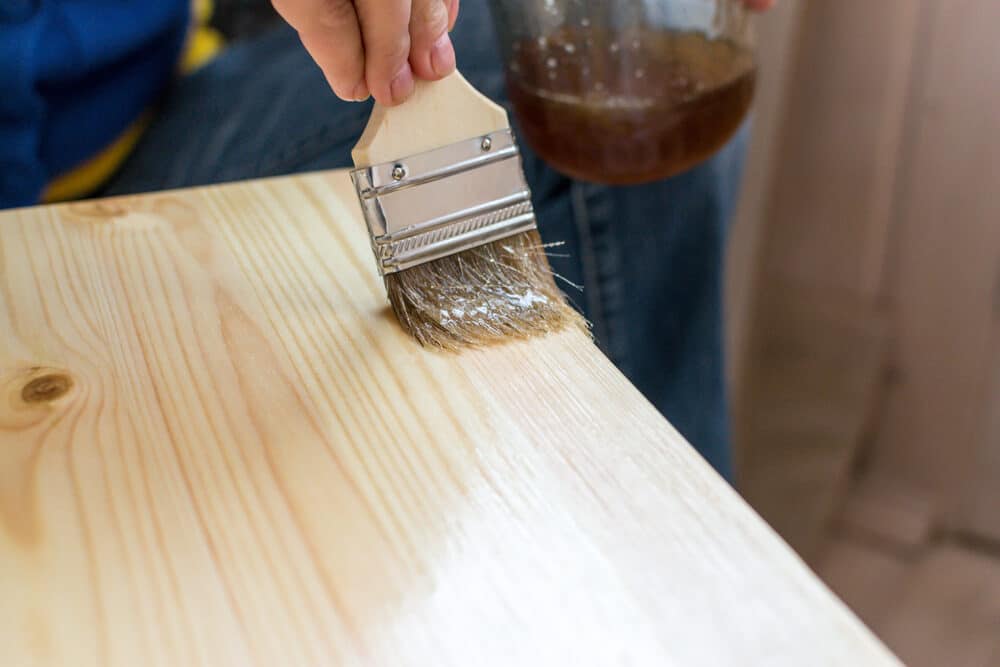
Oiling
This organic finish not only adds beauty to your home but also has exceptional water-repellent characteristics, making it easier to clean and maintain.
Waxing
This natural floor finish offers the softest and most mellow appearance – and leaves your floor able to breath.
Buffing
Using soft buffing machines (and hand-polishing where required) will bring a wonderful sheen to your newly-finished floor.
Repairs
We offer a full assessment of your wooden floors to determine what repairs are needed to provide the perfect working surface for the later stages of sanding, staining and sealing.
Restoration
We offer a comprehensive restoration process designed to address floors that are improperly fitted or damaged over time through wear and tear.
Request a fixed price quote for your wood floor restoration now
Simply enter your postcode below to get started.
Services
Wood Floor Sanding Wood Floor Restoration Wood Floor Scratch Repair Squeaky Wood Floor Repair Parquet Floor Sanding Parquet Floor Restoration Commercial Floor Sanding Church Floor Sanding Community Centre Floor Sanding School Floor Sanding Gap Filling Gap Filling with ResinCopyright © Mr Sander®
Privacy & Cookies Terms & Conditions Complaints Procedure Cancellation Rights Sitemap

Get An Instant Price Estimate Before You Go…
Simply enter the rooms you need sanded and we’ll provide you with a price estimate instantly! Try our price calculator now.
Get a Price Estimate NowLocal Floor Sanding Experts
Over 500 5-Star Reviews
Safe, Dust Free Sanding
Operating Since 1994