London:
Nationwide:
25,000+
Floors Restored
27 Years Experience
Wood Flooring Association Certified
How to Restore a Weathered Kitchen Worktop
Posted on January 15, 2024
Kitchen Worktop Maintenance
How to Restore a Weathered Kitchen Worktop: A Comprehensive Guide
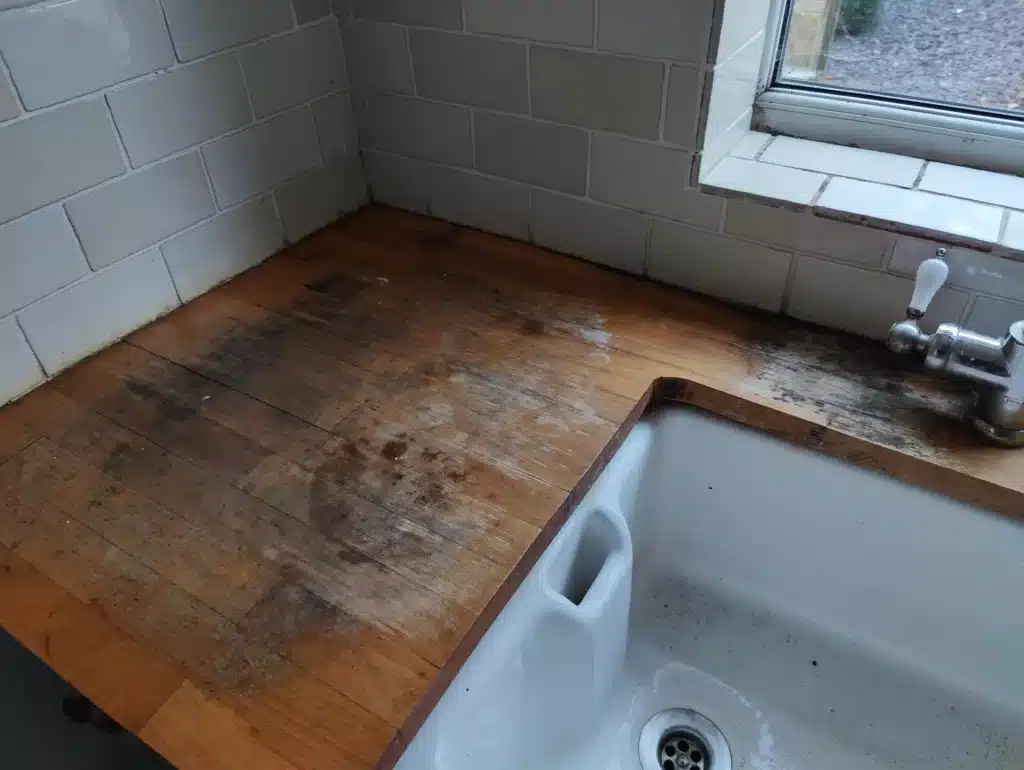
In the heart of every home lies the kitchen, a bustling hub of culinary creativity and daily family interactions. The kitchen worktop, often a focal point in this space, sees a myriad of activities, from slicing bread for the morning toast to rolling pastry for a Sunday pie. Over time, this constant use can leave even the sturdiest of worktops looking weathered and worn.
Restoring a kitchen worktop is not just about bringing back its aesthetic appeal; it is also about preserving the heart of your home. It’s a task that requires patience, care, and a bit of elbow grease, but the results can be truly rewarding. Whether your worktop is made of wood, granite, or a composite material, this guide will provide you with the steps necessary to breathe new life into it.
Embarking on the journey of restoring a kitchen worktop is more than a mere home improvement project; it’s an act of rejuvenation, infusing new energy into a space that holds countless memories and stories. Over the years, your kitchen worktop has witnessed early morning coffees, late-night snacks, holiday preparations, and perhaps the odd kitchen mishap. These marks and scars are not just signs of wear but are testimonies to the life lived around them. By restoring your kitchen worktop, you’re not erasing these stories but honouring them, giving your kitchen a renewed sense of character and warmth.
In this guide, we will walk through the process step-by-step, ensuring that no matter your skill level, you can achieve professional-looking results. From assessing the damage to the final touches of maintenance, every stage is crucial for a successful restoration. So, whether you’re a seasoned DIY enthusiast or a first-timer looking to improve your home, this guide is tailored to help you every step of the way. Let’s embark on this rewarding endeavour to rejuvenate the heart of your home, transforming your kitchen worktop into a testament of both beauty and resilience.
Assessing the damage
1. Identifying the Material
Before delving into the restoration process, the first crucial step is to identify the material of your kitchen worktop. Different materials, be they natural wood, granite, marble, or laminate, require specific care and techniques for restoration. For instance, wooden worktops are prone to scratches and water damage but can be sanded and resealed. On the other hand, stone surfaces like granite might need professional re-polishing if severely scratched. Understanding your worktop’s material will guide you in choosing the right restoration method, ensuring both effectiveness and safety.
2. Determining the Extent of Wear
Once the material is identified, thoroughly inspect the worktop to gauge the extent of damage. Look for common issues such as scratches, stains, burns, or chips. For wooden surfaces, check for signs of warping or water damage, which might necessitate more intensive restoration work. In the case of laminate worktops, peeling or lifting could be a concern.
It’s important to be realistic about what can be achieved. While minor scratches and stains can often be remedied with DIY methods, more severe damage, like deep burns or significant structural issues, may require professional intervention. The goal of this assessment is not just to catalogue the issues but to understand the level of restoration needed to bring your worktop back to its former glory.
3. Checking for Structural Integrity
Beyond the surface level, it’s important to assess the structural integrity of your kitchen worktop. This involves examining the worktop for any signs of warping, cracks that go all the way through, or areas where it may be coming away from its base or wall. In the case of wooden worktops, check for signs of rot, particularly around sinks or areas frequently exposed to water. For stone worktops, look for cracks that could indicate a weakness in the stone. Structural issues are more complex than cosmetic ones and may require professional kitchen worktop repair or, in some cases, replacement.
4. Evaluating Previous Treatments
Consider the history of treatments your worktop has undergone. This includes previous paint jobs, varnishing, oiling, or any other finishes that have been applied. Understanding what has been used in the past is crucial for selecting compatible products for your restoration project. Some finishes, especially on wooden worktops, might require specific types of strippers or preparation techniques for effective restoration. Ignoring this step can lead to poor adhesion to new finishes or unexpected reactions between different products.
Gathering necessary supplies
1. List of Materials
To ensure a smooth and successful restoration process, it’s essential to have all the necessary supplies at hand. Here’s a comprehensive list tailored to cover most worktop materials:
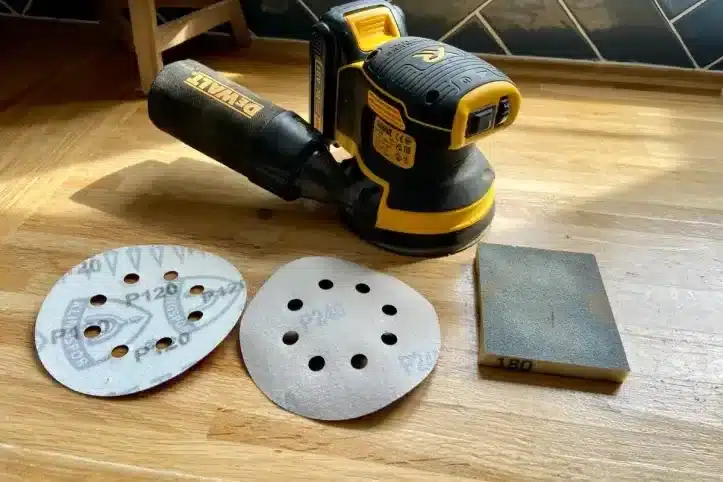
- Fine-grit sandpaper (220 to 320 grit): ideal for smoothing out minor scratches and preparing the surface.
- Coarse-grit sandpaper (80 to 150 grit): Required for addressing deeper scratches and more significant damage.
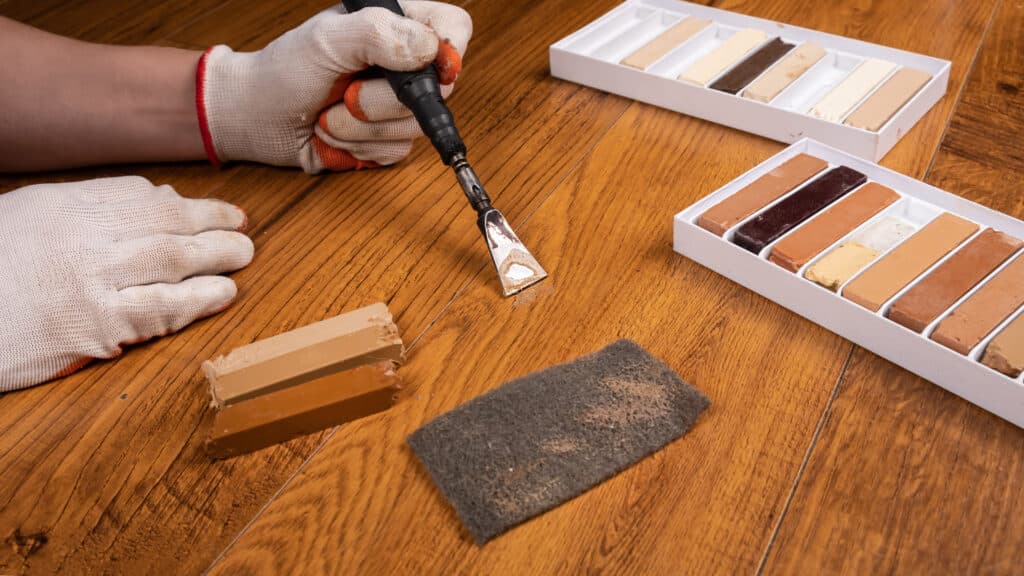
- Wood Filler or Epoxy Resin: For filling in chips or deep scratches, particularly in wooden or stone worktops.
- Cleaning Supplies: gentle detergent, microfiber cloths, and a soft brush for initial cleaning.
- Rubber gloves and safety goggles: are essential for personal protection, especially when sanding or using chemical products.
- Sealant or Oil (Appropriate for the Material): For wooden worktops, a food-safe oil or sealant; for stone surfaces, a specific stone sealant.
- Paint or varnish (if applicable): in cases where the original colour needs to be matched or refreshed.
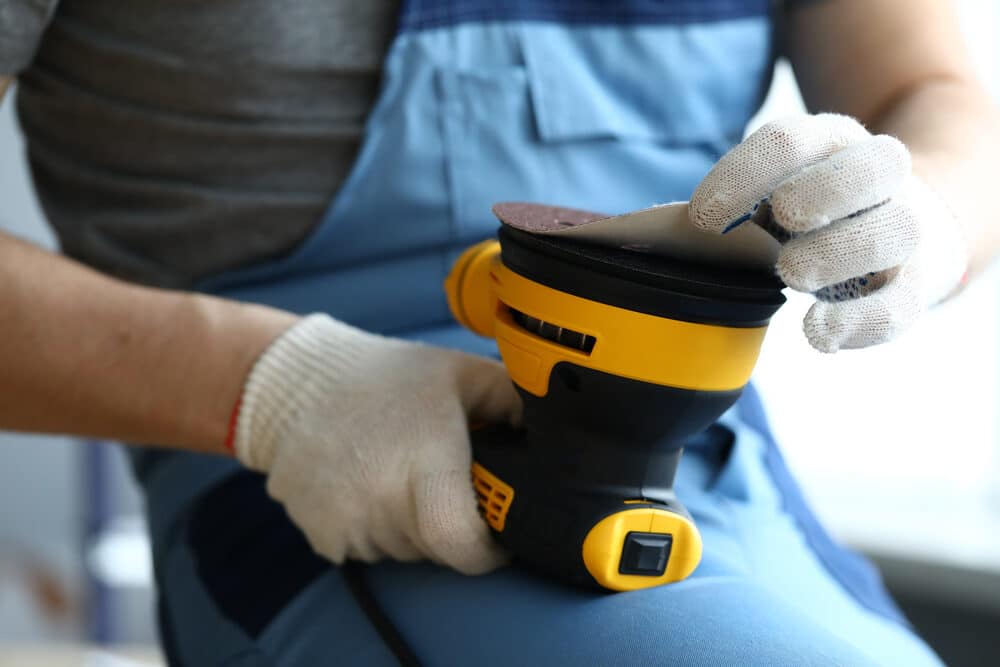
- Sanding Block or Electric Sander: To facilitate even sanding, especially for larger surfaces.
- Tack Cloth: For removing dust particles after sanding.
- Masking tape and plastic sheeting: to protect surrounding areas from dust and spills.
2. Choosing the Right Tools
Selecting the right tools is as important as gathering the materials. If you’re working with wood, an electric sander can save time and effort, but hand sanding might be more appropriate for fine work or smaller areas. For applying sealants or varnishes, high-quality brushes or rollers ensure a smooth, even finish.
Remember, the quality of your tools and materials can significantly affect the outcome. While it might be tempting to opt for cheaper alternatives, investing in good-quality supplies pays off in the long run, both in the ease of the restoration process and in the durability of the finish. With your materials and tools ready, you’re set to embark on the restoration process, bringing your weathered kitchen worktop back to life.
The Restoration Process
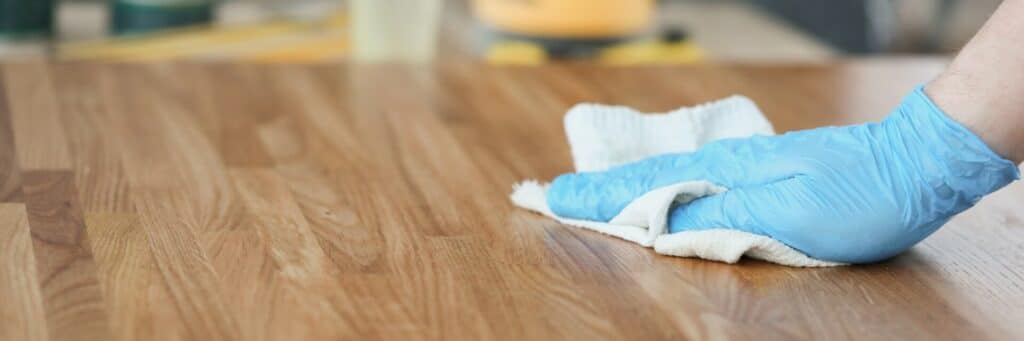
1. Cleaning the Surface
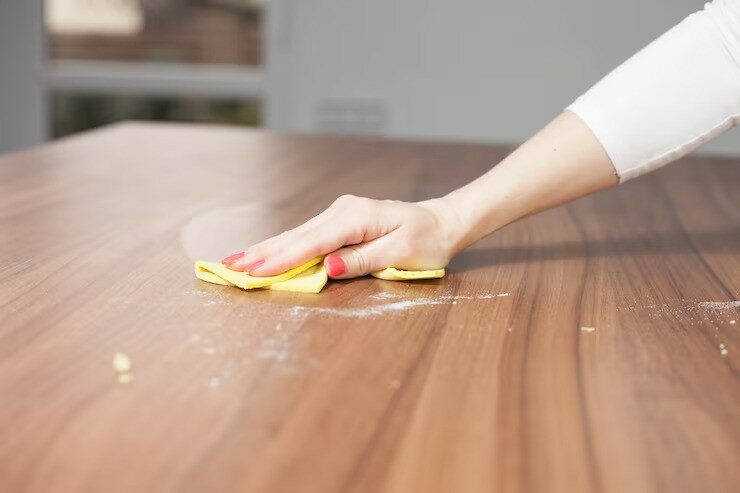
Before any restoration work begins, it’s essential to thoroughly clean the worktop. This step removes any dirt, grime, or residue that could interfere with the restoration process. Use a gentle detergent mixed with warm water, and wipe down the surface with a soft cloth. For tougher stains, a mild abrasive cleaner can be used, but be cautious not to scratch the surface. Once cleaned, allow the worktop to dry completely.
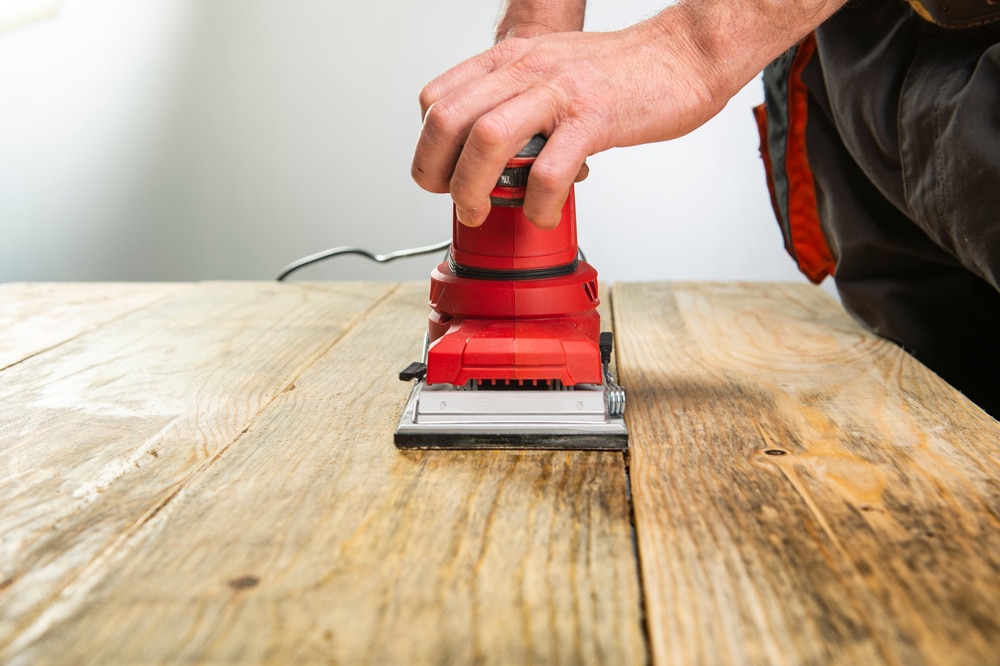
2. Sanding Down Imperfections
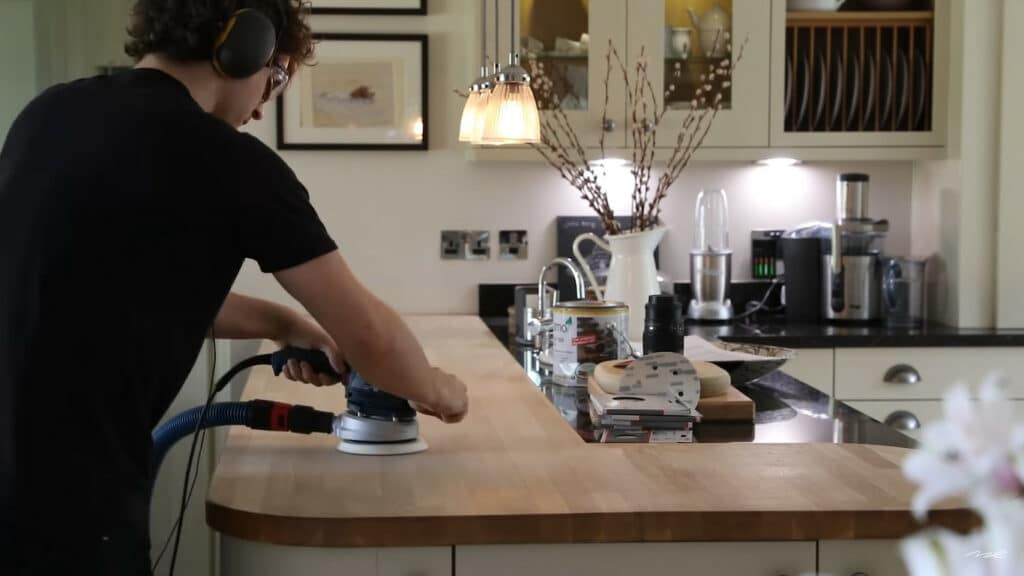
The next step is to address any physical imperfections, such as scratches, unevenness, or old finishes. Start with coarse-grit sandpaper if there are deep scratches or significant damage, then gradually move to a finer grit to smooth out the surface. For wooden worktops, sand in the direction of the grain to avoid additional scratches. An electric sander can be a great help in this process, but for finer control, hand sanding might be preferable. Once the kitchen worktop sanding is complete, use a tack cloth to remove all the dust.
3. Repairing Minor Damage
For chips, deep scratches, or burns, use wood filler (for wooden worktops) or epoxy resin (for stone or composite materials) to fill in these areas. Follow the manufacturer’s instructions for the best results. Allow the filler to dry completely, then sand it down smoothly to blend with the rest of the surface.
4. Refinishing the Surface
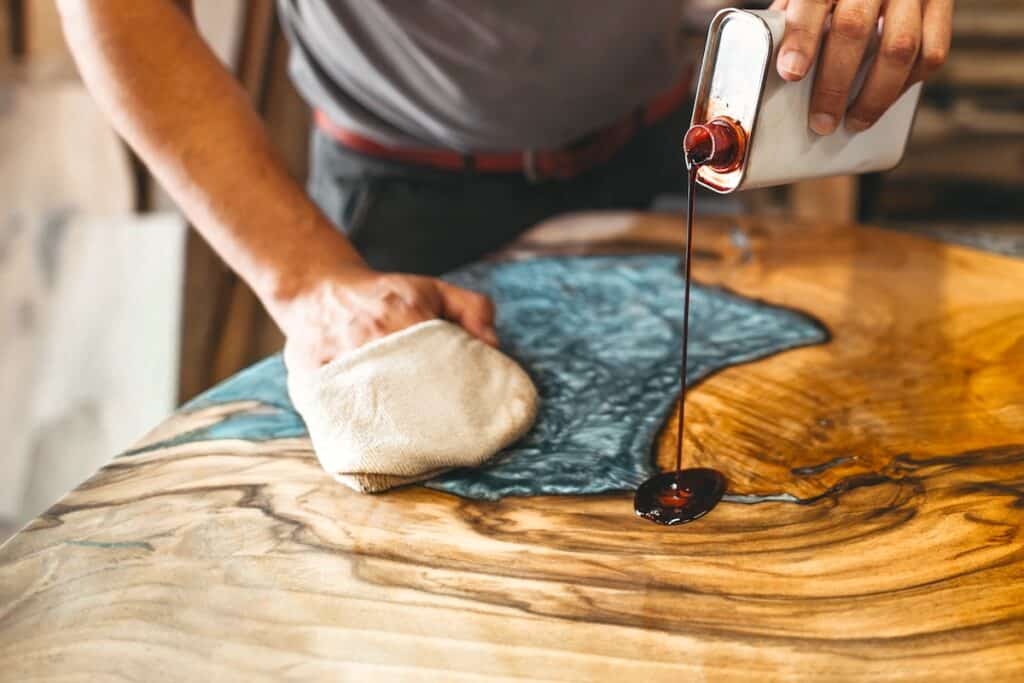
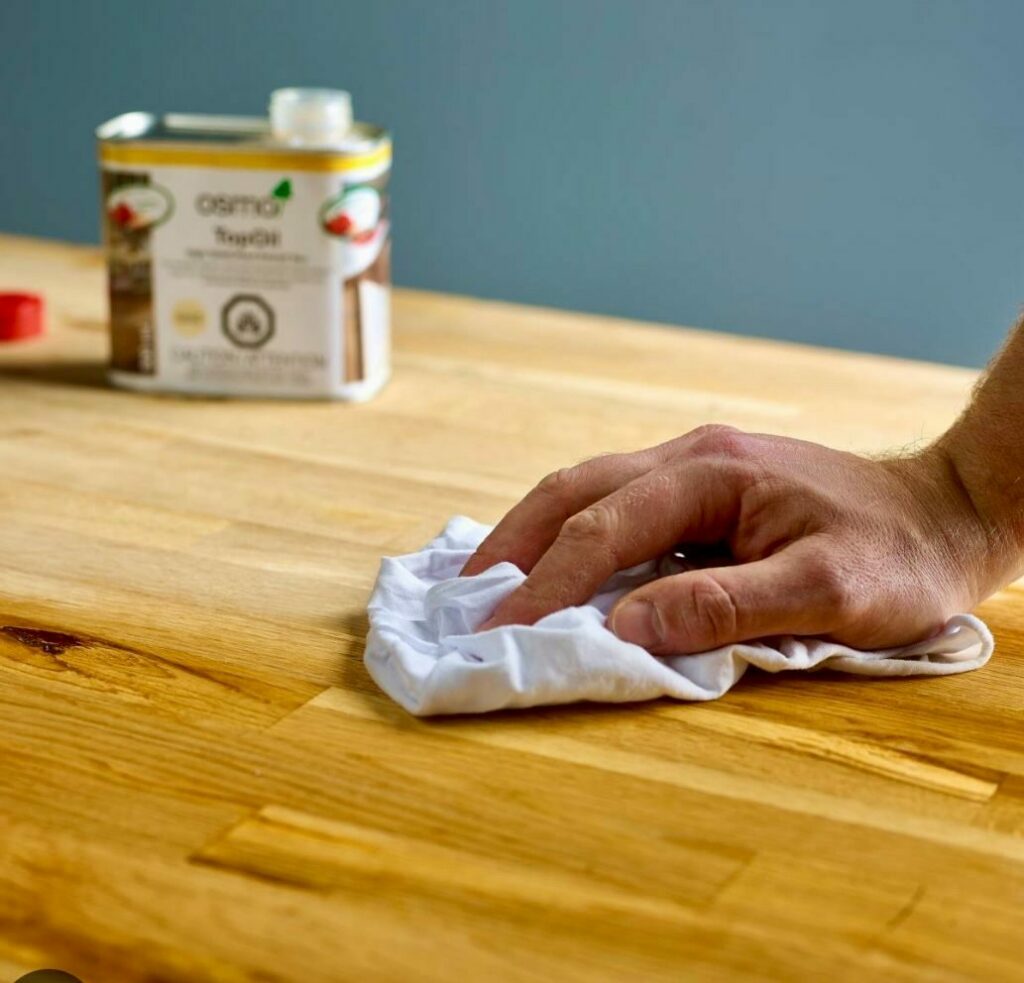
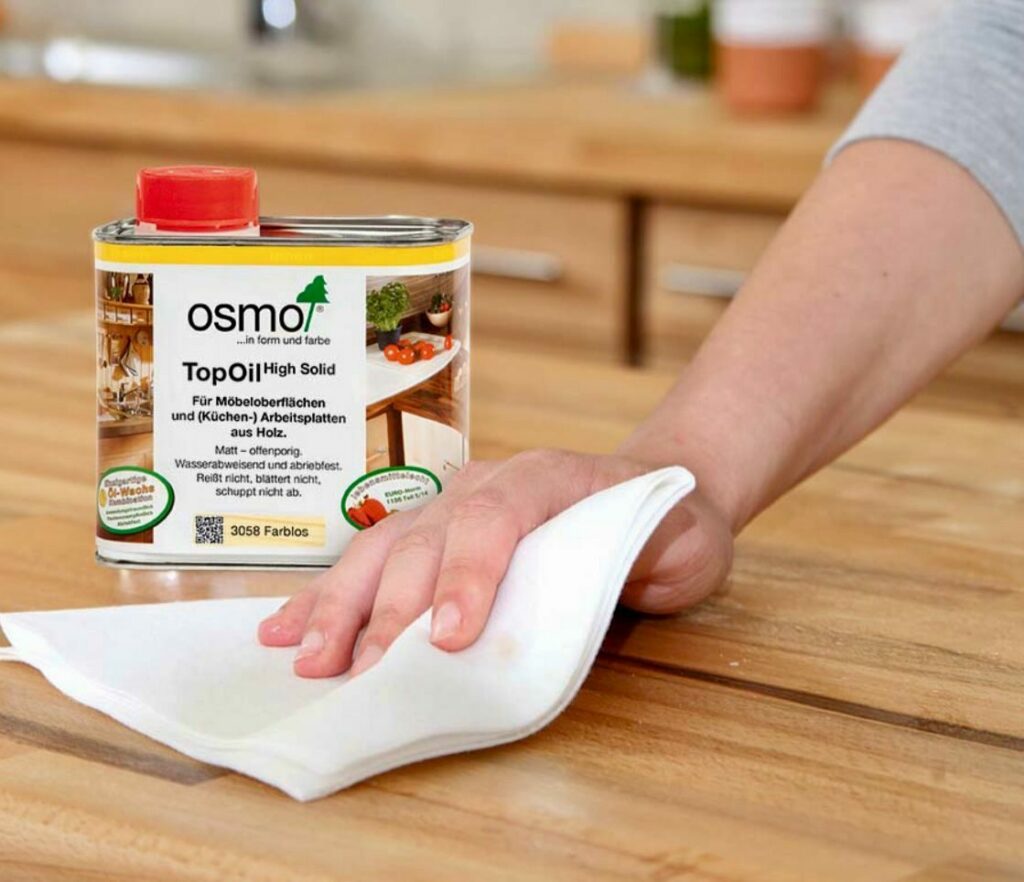
Once the surface is smooth and free of imperfections, it’s time to apply the finish. For wooden worktops, this might involve applying a food-safe oil or sealant to protect the wood and bring out its natural beauty. For stone or composite materials, a specific sealant or polish can be used to enhance the appearance and protect the surface. Apply the finish as directed, using even strokes, and allow it to dry completely. Multiple coats may be needed for optimal protection and appearance.
Remember, patience is key in each step of the restoration process. Rushing through sanding or finishing can result in a less-than-ideal outcome. By taking your time and paying attention to detail, you can achieve a beautifully restored kitchen worktop that not only looks renewed but also stands the test of time in both functionality and style.
Maintaining Your Restored Worktop
1. Regular Cleaning Tips
Maintaining the rejuvenated look of your kitchen worktop involves regular cleaning and care. To preserve its finish and prevent damage, use a soft cloth or sponge with warm, soapy water for daily cleaning. Avoid using harsh chemicals or abrasive cleaners, as these can damage the sealant or finish. For wooden worktops, immediately wipe up any spills, especially liquids like wine, oil, or acidic substances that can stain or damage the wood. For stone or composite worktops, use cleaners specifically designed for these materials to prevent etching or dulling of the surface.

2. Preventing Future Damage
To keep your worktop looking its best for years to come, there are several preventative measures you can take:
- Use Cutting Boards and Trivets: Always use cutting boards when chopping or slicing to prevent scratches. Place trivets or heat-resistant mats under hot pans to avoid heat damage.
- Regular Oiling or Sealing: For wooden worktops, regular oiling every few months helps to keep the wood hydrated and protected. For stone worktops, reseal the surface as recommended by the manufacturer to maintain its resilience against stains and damage.
- Avoid Direct Sunlight: Prolonged exposure to direct sunlight can fade the colour of your worktop. If possible, use blinds or curtains to minimise this exposure, especially during the sunniest parts of the day.
- Gentle Use: While kitchen worktops are designed for daily use, treat them with care. Avoid dropping heavy objects on the surface, and don’t use the worktop as a cutting surface or for hammering.
- Immediate Attention to Damages: If you notice any new scratches, burns, or stains, attend to them as soon as possible. Early intervention can prevent minor damage from becoming a major issue.
Regular maintenance and careful use will not only keep your restored worktop looking beautiful but will also extend its lifespan, ensuring that it remains a cherished and functional feature in your kitchen for many years.
Conclusion
Restoring a weathered kitchen worktop is more than just a home improvement task; it is a rejuvenating process that breathes new life into a space that holds the essence of home life. Through the steps of cleaning, sanding, repairing, and refinishing, we not only restore a surface but also revive the memories and moments shared in the kitchen. This guide has walked you through each stage, equipping you with the knowledge and techniques to successfully bring back the charm and functionality of your kitchen’s centrepiece.
Remember, the key to maintaining the beauty and longevity of your restored worktop lies in regular care and mindful usage. By following the maintenance tips provided, you can ensure that your worktop remains a source of pride and practicality in your kitchen. Whether you’re preparing a family meal, hosting a dinner party, or simply enjoying a quiet cup of tea, your newly restored worktop will be there, sturdy and splendid, a testament to your effort and care.
In conclusion, the journey of restoring your kitchen worktop is a fulfilling endeavour, one that not only enhances the aesthetic of your kitchen but also adds value to your home. It’s a project that blends craftsmanship with the warmth of home life, leaving you with not just a piece of furniture but a story of restoration and renewal.
The restoration of a kitchen worktop stands as a deeply satisfying project, melding practical skills with the nurturing of one’s home environment. As you admire your revitalised worktop, remember that it represents more than just a surface for daily chores. It’s a canvas that captures the essence of your home, reflecting the care, attention, and love poured into every restored inch. This journey of restoration not only leaves you with a beautifully renewed space but also instills a sense of accomplishment and a deeper connection to your home. May your worktop not only serve as a functional asset but also as a cherished part of your household’s story, enriched with renewed beauty and enduring resilience.

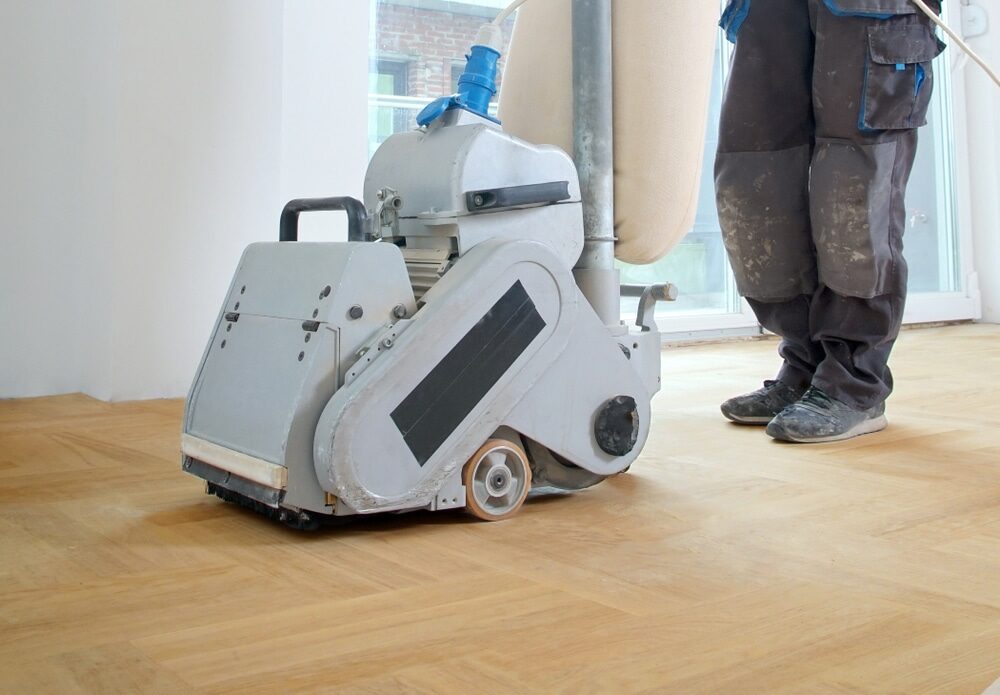
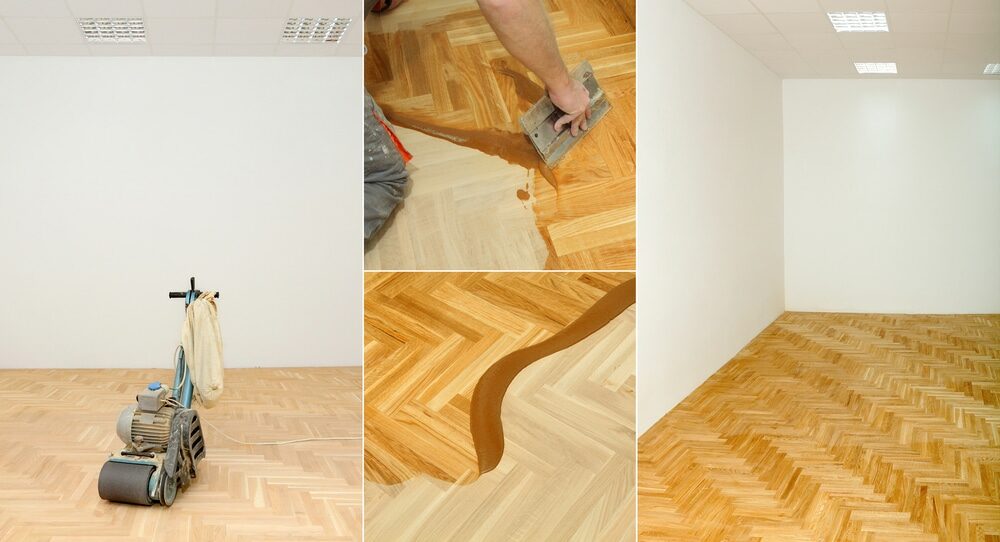

Sanding
We provide virtually dust-free sanding with our continuous belt machinery with mobile extraction units, giving you a safer environment for your family.
Oiling
This organic finish not only adds beauty to your home but also has exceptional water-repellent characteristics, making it easier to clean and maintain.
Waxing
This natural floor finish offers the softest and most mellow appearance – and leaves your floor able to breath.
Buffing
Using soft buffing machines (and hand-polishing where required) will bring a wonderful sheen to your newly-finished floor.
Repairs
We offer a full assessment of your wooden floors to determine what repairs are needed to provide the perfect working surface for the later stages of sanding, staining and sealing.
Restoration
We offer a comprehensive restoration process designed to address floors that are improperly fitted or damaged over time through wear and tear.
Request a fixed price quote for your wood floor restoration now
Simply enter your postcode below to get started.
Services
Wood Floor Sanding Wood Floor Restoration Wood Floor Scratch Repair Squeaky Wood Floor Repair Parquet Floor Sanding Parquet Floor Restoration Commercial Floor Sanding Church Floor Sanding Community Centre Floor Sanding School Floor Sanding Gap Filling Gap Filling with ResinCopyright © Mr Sander®
Privacy & Cookies Terms & Conditions Complaints Procedure Cancellation Rights Sitemap

Get An Instant Price Estimate Before You Go…
Simply enter the rooms you need sanded and we’ll provide you with a price estimate instantly! Try our price calculator now.
Get a Price Estimate NowLocal Floor Sanding Experts
Over 500 5-Star Reviews
Safe, Dust Free Sanding
Operating Since 1994