London:
Nationwide:
25,000+
Floors Restored
27 Years Experience
Wood Flooring Association Certified
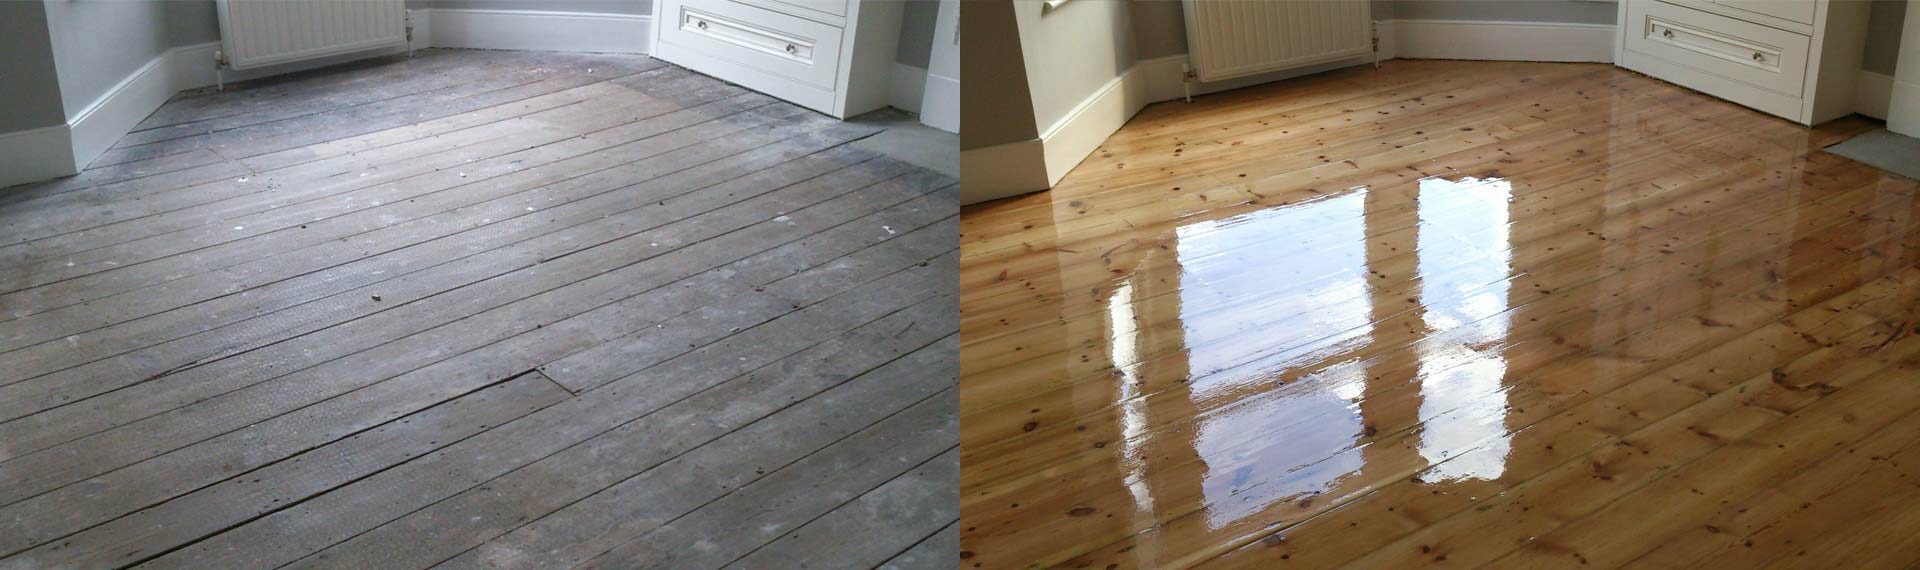
The Role of Buffing in Achieving a Smooth Finish
Posted on October 4, 2023
Buffing
Mastering the Art of Buffing: The Key to Flawless Finishes
In the world of fine craftsmanship and surface perfection, the finishing touch often determines the difference between mediocrity and mastery. One such final step, essential in ensuring that objects shine with an impeccable finish, is buffing. This process, often overlooked by novices, stands as a sentinel at the gates of perfection, offering a pathway to achieving a smooth and polished surface. This article delves deep into the art and science of buffing, demonstrating its integral role in achieving the kind of smooth finishes that distinguish top-tier products from their less polished counterparts. Every artisan, whether they’re working with wood, metal, or any other material, knows that the beauty of an item isn’t just in its design but also in its finish. The shine, the gloss, and the tactile feel of a surface can transform an ordinary object into an extraordinary one. Central to this transformation is the process of buffing. Through gentle abrasion and polishing, buffing unlocks the full potential of surfaces, revealing their inherent beauty. In this exploration, we’ll uncover the pivotal role buffing plays in creating surfaces that not only look exquisite but feel luxuriously smooth to the touch. The journey of creating a masterpiece doesn’t end once the main structure is built; it concludes when the surface tells a story of meticulous attention to detail. Buffing, a technique that refines and smooths out imperfections, is a testament to this dedication. It’s a process that has been adopted across various crafts, from automotive detailing to furniture making, highlighting its universal significance in the quest for a flawless finish. Join us as we navigate the intricacies of buffing and its undeniable role in bestowing objects with a silky-smooth veneer.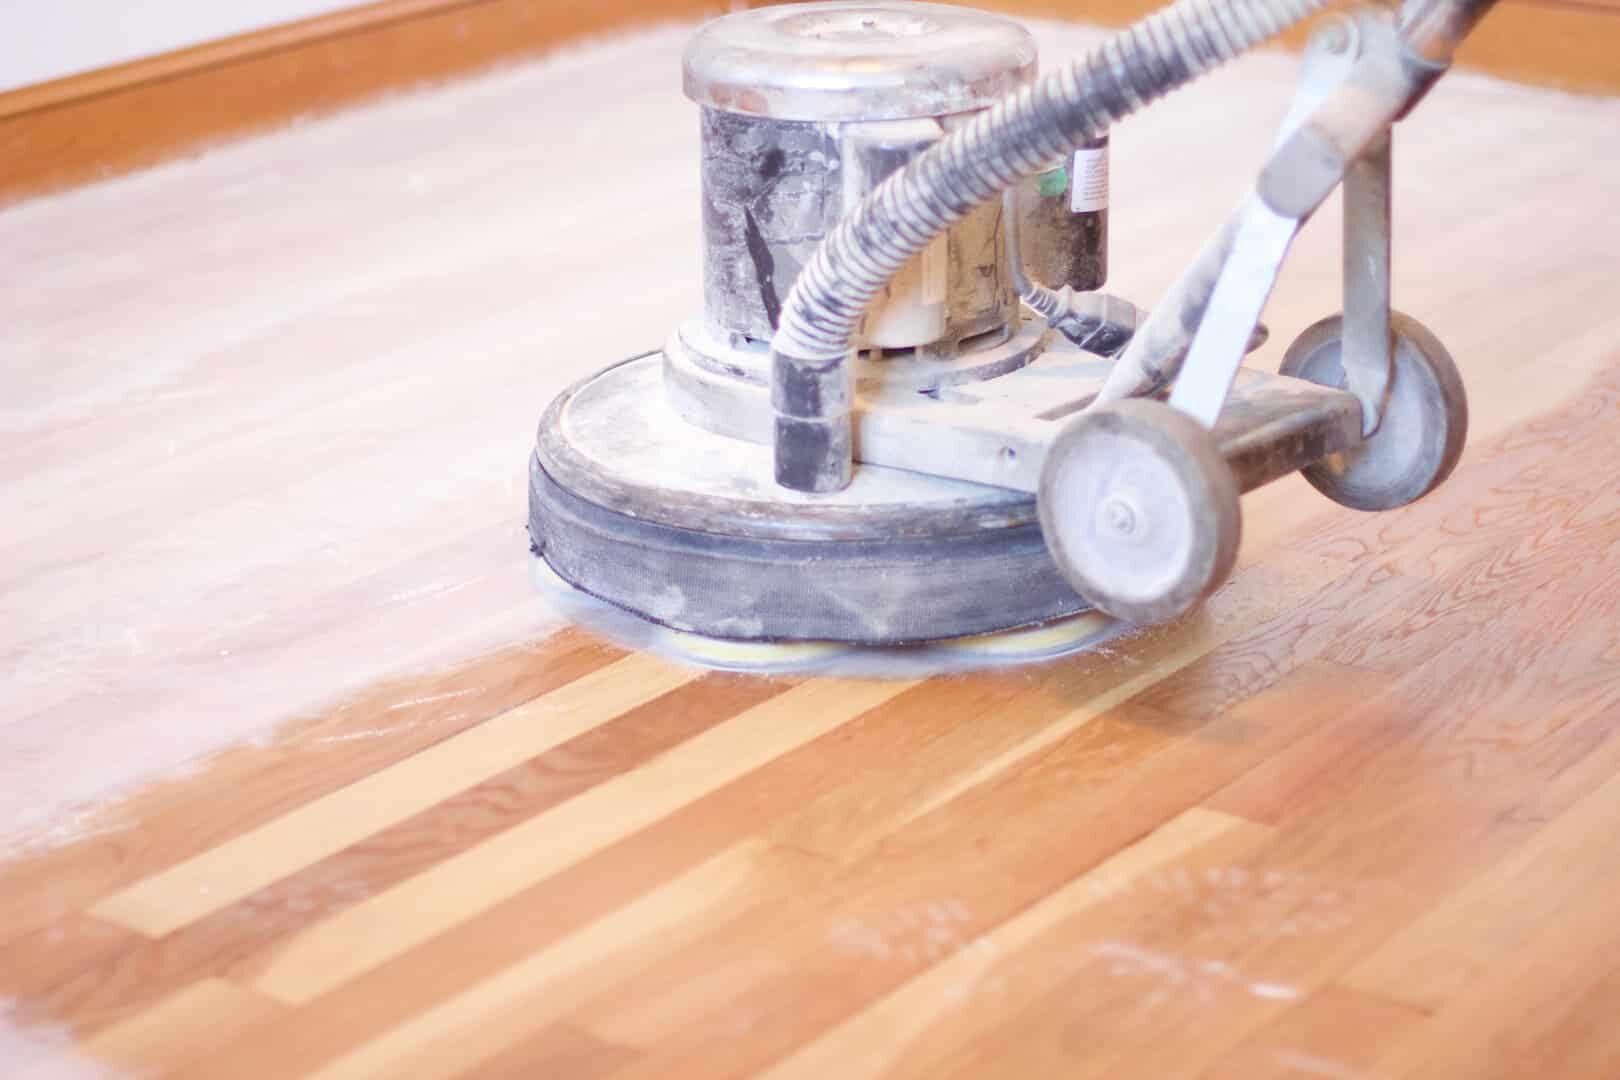
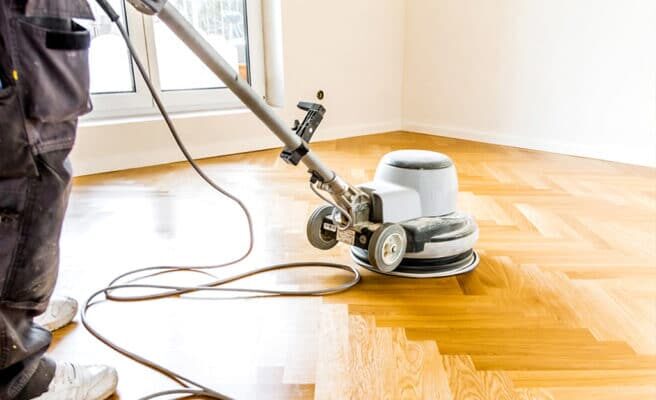
Introduction to Wood Floor Buffing
Wood flooring has long been celebrated for its natural beauty, durability, and timelessness. However, over time, with regular foot traffic, shifting furniture, and daily wear and tear, even the sturdiest wood floors can lose their lustrous shine and smooth texture. Enter the art and science of wood floor buffing. Buffing is a key maintenance procedure that can restore the gleam to a dull wood floor, eliminating superficial scratches and offering a fresh, polished look. It’s an intermediate step between simple cleaning and more intensive refinishing, and it serves as a critical practice in extending the life and enhancing the aesthetics of wood flooring. The buffing process typically employs a rotating floor buffer machine equipped with a series of pads or brushes. As this machine glides over the wooden surface, it gently sands off a thin top layer, eradicating minor imperfections and preparing the floor for a fresh coat of finish or polish. Not only does this process revive the wood’s natural shine, but it also provides an opportunity to apply protective sealants, ensuring longevity and resistance against potential damage. For homeowners and professionals alike, understanding the nuances of wood floor buffing can lead to more effective floor care, preservation of the wood’s integrity, and increased property value. Whether you’re considering a do-it-yourself buffing project or seeking the expertise of professionals, familiarising oneself with the process ensures that wood floors remain as breathtaking as the day they were installed.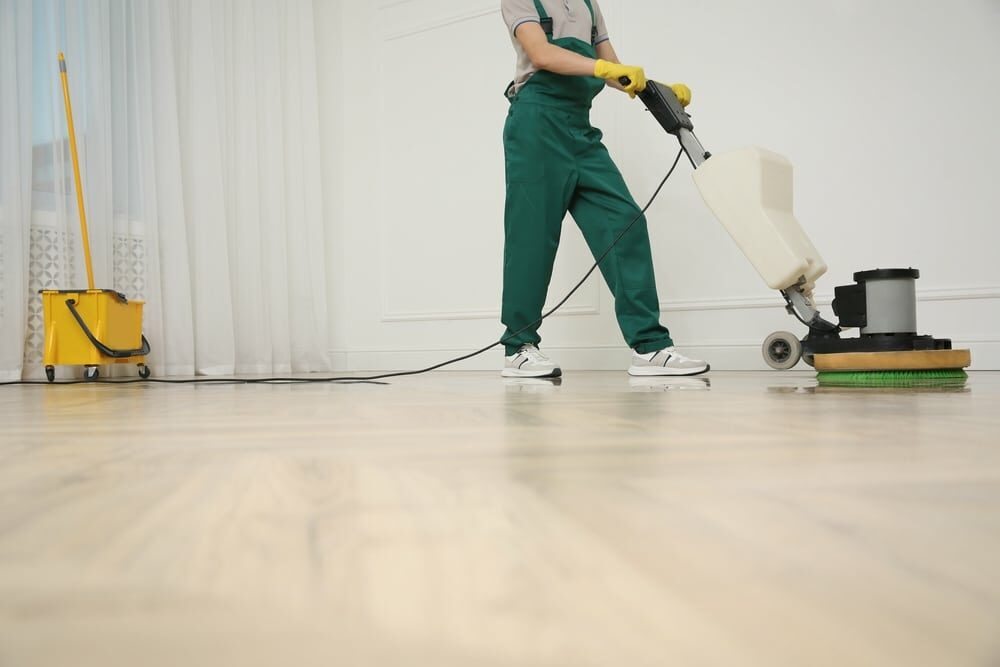
Why is buffing important?
Buffing stands as a cornerstone in the maintenance and care of many surfaces, especially wood flooring. Its importance cannot be overstated, and here’s why:- Restoration and Aesthetics: Over time, wood floors can lose their original shine due to the accumulation of dirt, grime, and minor scratches. These imperfections can make the entire room look old and worn out. Buffing effectively addresses these superficial damages, revitalising the wood to bring back its natural lustre and beauty. A well-buffed floor can instantly uplift the aesthetics of a space, making it appear more inviting and well-maintained.
- Protection and Longevity: Beyond mere appearance, buffing offers a functional advantage by providing a protective barrier. Once the buffing process removes the thin top layer of the wood and its imperfections, a new finish or sealant can be applied. This protective coat not only enhances the floor’s appearance but also shields the wood from potential damage like water spills, UV rays, and daily wear and tear. By doing so, buffing contributes significantly to extending the lifespan of the wood, ensuring that it remains strong and beautiful for years to come.
- Cost-Effective Maintenance: Replacing or extensively refinishing a wood floor can be both time-consuming and costly. Buffing, on the other hand, offers a more economical solution to maintain the wood’s condition. By routinely buffing and caring for the floor, homeowners can delay the need for a complete overhaul, saving both time and money in the long run. Furthermore, by preserving the floor’s condition, it can also enhance the overall value of the property, making it a wise investment for homeowners.
Types of Buffing Processes
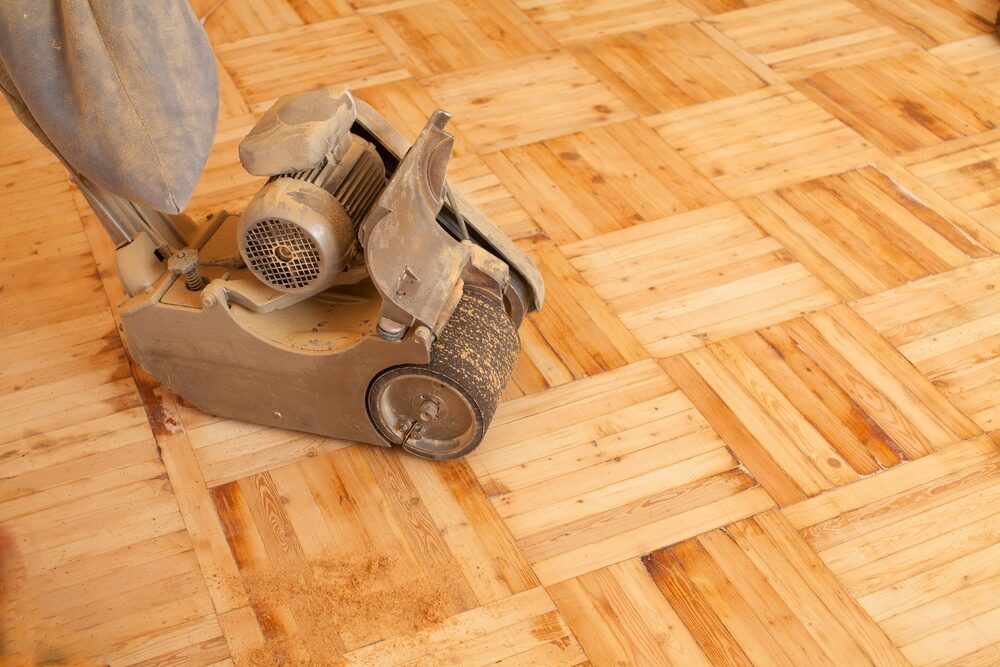
Buffing, as a broad term, encompasses a range of processes tailored to different surfaces, materials, and desired outcomes. In the context of wood flooring and other applications, several buffing processes can be employed, each with its own unique approach and benefits. Here’s a breakdown of some of the primary types of buffing processes:- Basic Buffing: This is the most straightforward buffing process. Using a low-speed floor buffer with a soft pad, the surface is gently polished to restore its shine. This process doesn’t involve any chemicals or finishes; it’s purely mechanical and is best suited for floors that are in relatively good condition but have lost some shine.
- Screen Buffing: Also known as “screen and recoat,” this process involves using a buffer with a special screen disc designed to lightly abrade the wood surface. This gentle abrasion prepares the floor for a new layer of finish. It’s a popular choice for wood floors with superficial scratches and scuffs that a basic buff won’t address, making the floor ready for a fresh protective coat.
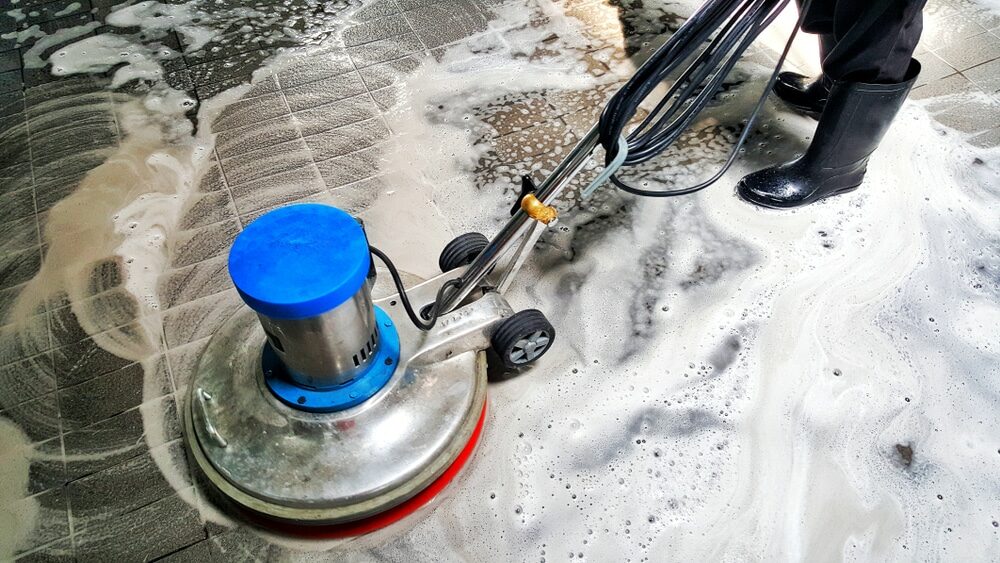
- Spray Buffing: In this method, a spray solution (often a combination of cleaning agents and gloss enhancers) is applied directly to the floor or the buffing pad. As the buffer moves over the surface, the solution is spread evenly, cleaning the floor and enhancing its shine simultaneously. This method is often used for vinyl or linoleum floors but can also be applied to certain wood finishes.
- Burnishing: Burnishing is a high-speed buffing process typically used on floors with a protective coating, like polyurethane finishes or certain waxed surfaces. The high-speed rotation produces heat, which helps achieve a glossy, mirror-like finish. Burnishing pads are often colour-coded, with different colours denoting varying levels of abrasiveness.
- Wet Buffing: Wet buffing uses water or a special liquid solution in tandem with the buffing process. The moisture helps reduce dust and can provide a smoother finish, especially when dealing with coarser surfaces. It’s essential to ensure the surface is suitable for wet buffing to prevent potential water damage.
- Diamond Buffing: An advanced technique, diamond buffing utilises pads embedded with fine diamond particles. It’s particularly effective for harder surfaces like stone or certain industrial applications, ensuring a highly polished finish.
Tools and materials required for buffing:
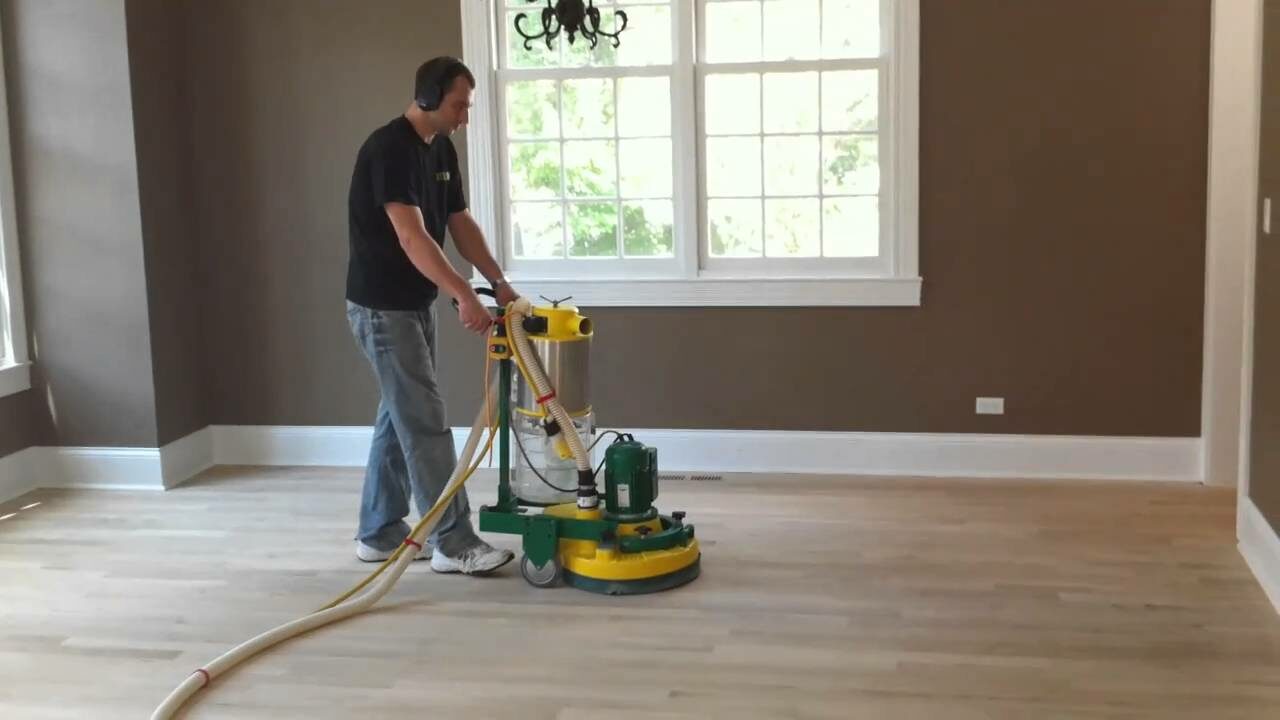
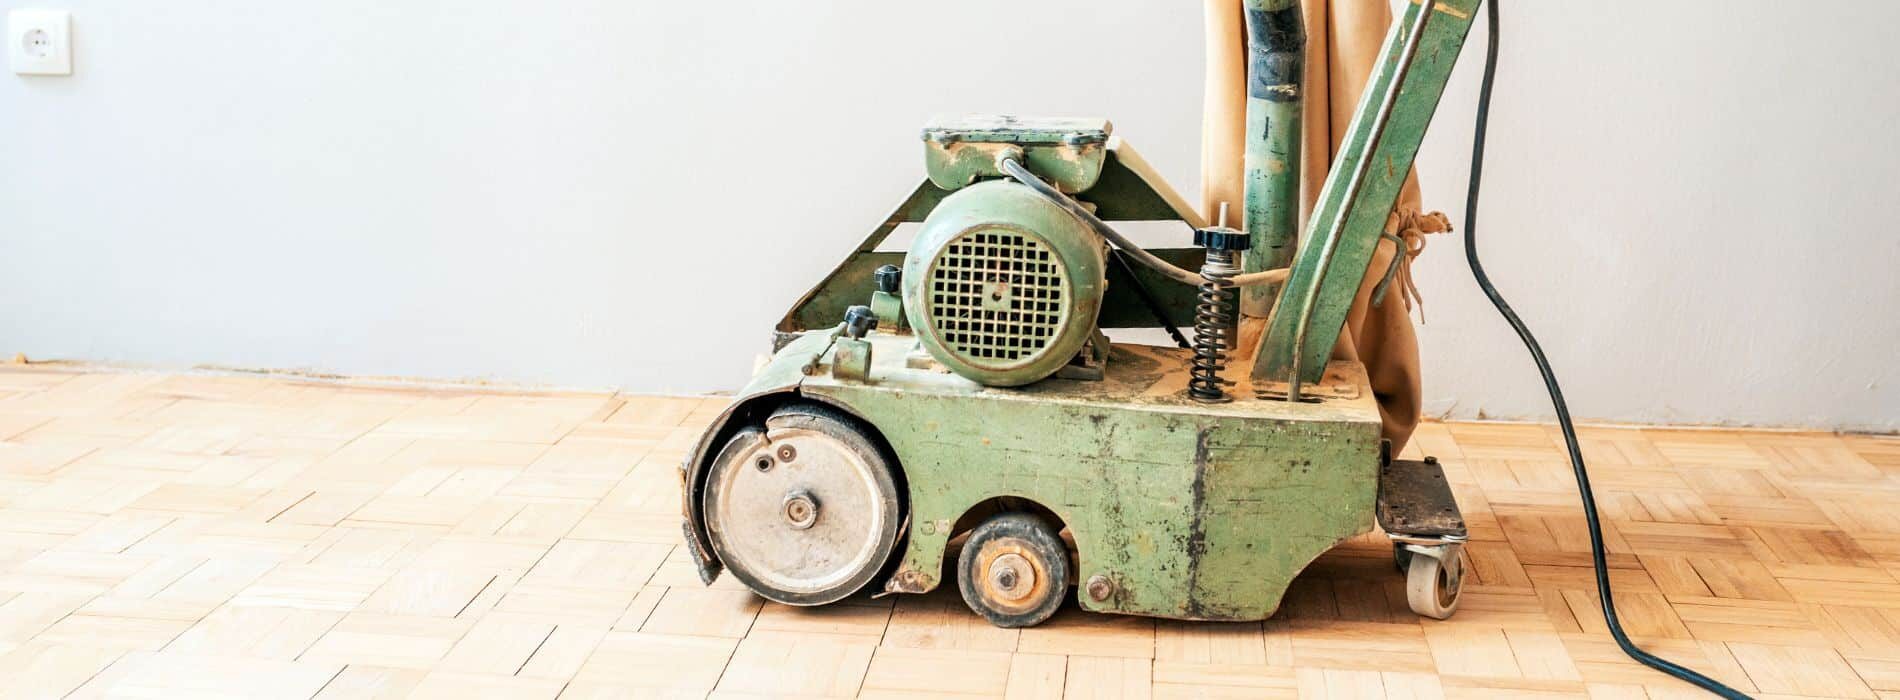
Buffing, whether for wood floors or other surfaces, necessitates the use of specific tools and materials to achieve the desired finish. Here’s a comprehensive list of tools and materials typically required for a buffing project:- Floor Buffer: This is the primary tool used in the buffing process. Floor buffers come in different sizes and speeds. Low-speed buffers are generally used for basic buffing, while high-speed burnishers are used for achieving a high-gloss finish.
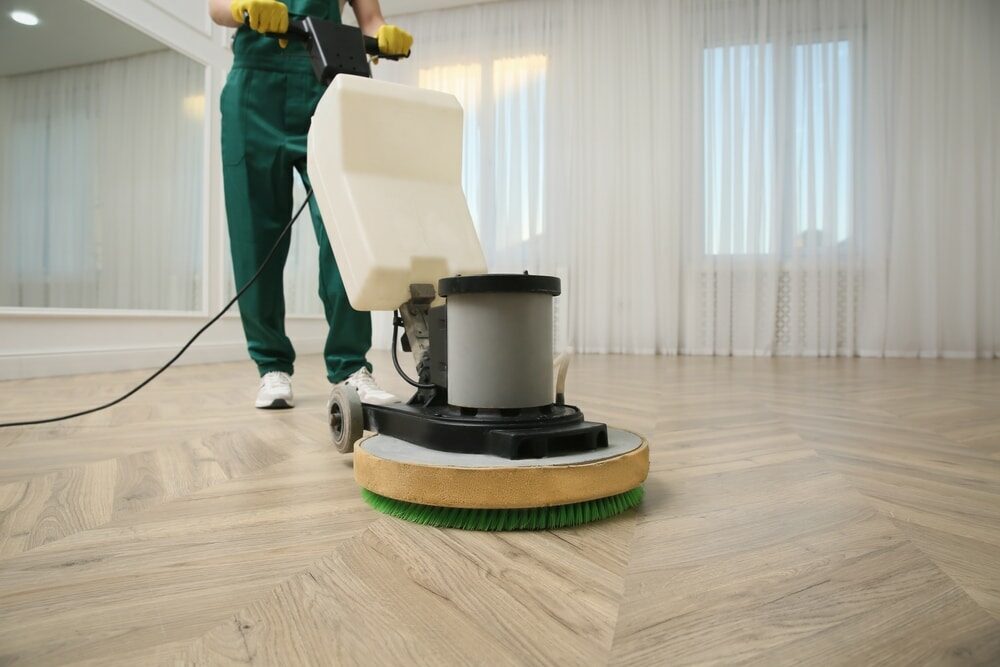
- Buffing Pads: These attach to the base of the buffer and come in various textures and abrasives. They are often colour-coded, with different colours representing different levels of abrasiveness. For instance, white or beige pads are typically soft and non-abrasive, suitable for polishing, while green or blue pads might offer medium-level abrasion.
- Screen Discs: Used primarily for screen buffing, these discs lightly sand the wood surface to prepare it for a fresh coat of finish.
- Buffing Solutions or Sprays: These are specially formulated solutions that can be sprayed directly onto the surface or the buffing pad to aid in the process. They might have cleaning agents, shine enhancers, or other components to provide both cleanliness and gloss.
- Dust Masks and Safety Goggles: Buffing can release particles into the air, so it’s essential to have protective gear like dust masks and safety goggles to protect against dust inhalation and keep particles out of the eyes.
- Ear Protection: Since buffing machines can be loud, especially in confined spaces, ear protection like earmuffs or earplugs is recommended.
- Broom or Dust Mop: Before buffing, the floor should be thoroughly cleaned to remove any loose debris. This ensures that dirt and grit don’t cause additional scratches during the buffing process.
- Vacuum Cleaner: A vacuum, preferably one with a soft brush attachment, can be used to remove dust and particles after the initial cleaning and post-buffing.
- Microfiber Cloth or Towels: These are used to wipe down the floor, either after cleaning or after applying any solutions, to ensure a clean and streak-free finish.
- Cleaning Solutions: If the floor is particularly dirty, you might need a gentle cleaning solution to prep the surface before buffing.
- Finishing Products: Depending on the type of buffing process and the desired outcome, you might need sealants, waxes, or other finishing products to apply post-buffing.
- Extension Cords: Floor buffers often have a limited cord length, so having a good-quality extension cord can ensure uninterrupted movement across larger spaces.

Steps to Achieve a Smooth Finish Through Buffing
Achieving a smooth finish through buffing requires careful preparation and a methodical approach. Here’s a step-by-step guide to ensure your buffing project culminates in a pristine, polished surface:- Preparation:
- Clean the Surface: Start by removing all furniture and obstructions from the area. Thoroughly sweep or vacuum the floor to eliminate dirt, dust, and debris. Any gritty particles left on the surface can cause further scratches during buffing.
- Inspect for damage: Look for deep scratches, gouges, or areas of significant wear. Buffing primarily addresses superficial scratches. Deeper imperfections might require more intensive treatments like sanding or refinishing.
- Choose the right tools and materials:
- Select the Appropriate Buffer: Depending on the size of your space and the condition of your floor, choose between a low-speed buffer for basic buffing or a high-speed burnisher for a shinier finish.
- Pick the Right Buffing Pad: Match the pad’s abrasiveness to your floor’s needs. A softer pad is suitable for general polishing, while a coarser pad can help address minor scuffs and scratches.
- Buffing Process:
- Begin at the Edge: Start buffing from one corner of the room, working your way outwards and towards the exit. This ensures you don’t step on or scuff the freshly buffed areas.
- Move in a Systematic Pattern: Guide the buffer in smooth, overlapping passes, ensuring uniform pressure throughout. Move in a straight line, then come back alongside your previous pass.
- Monitor Your Progress: Periodically, turn off the buffer and inspect the floor. Check for any uneven spots or areas that might need additional attention.
- Apply buffing solutions (if required):
- If using a spray buffing solution, mist it lightly onto the floor or directly onto the buffing pad. Ensure the solution is spread evenly and consistently as you buff.
- Post-Buffing Clean-Up:
- Once you’ve finished buffing the entire area, use a microfiber cloth or mop to wipe down the floor. This removes any residual buffing solution or generated dust.
- Vacuum the area once more to ensure complete cleanliness.
- Apply a protective finish (if desired):
- If you’ve been screen buffing to prepare for a new coat of finish, now is the time to apply it. Ensure you follow the manufacturer’s instructions carefully, considering drying times and ventilation needs.
- Inspect the final outcome:
- After all finishes have dried, inspect the floor for a smooth and even shine. Ensure there are no streaks, swirl marks, or uneven areas.
- Return Furniture:
- Before replacing the furniture, consider adding felt pads to the bottoms of chairs, tables, and other movable items. This will help prevent future scratches on your newly buffed floor.
- Regular Maintenance:
- To maintain the smooth finish, regularly clean the floor using a soft broom or mop. Avoid abrasive cleaners, and immediately clean up any spills to preserve the floor’s integrity.

Buffing vs. Polishing: What’s the Difference?
Both buffing and polishing are finishing processes that improve the appearance and condition of a surface, but they serve distinct purposes and achieve different results. While they are sometimes used interchangeably in everyday language, in the context of surface treatment, they have specific meanings. Here’s a breakdown of their differences:- Purpose:
- Buffing: Buffing aims to smooth out any imperfections on the surface, such as minor scratches, oxidation, or stains. It’s a preparatory step that ensures a surface is smooth and even.
- Polishing: Polishing, on the other hand, seeks to provide a shiny, mirror-like finish to the surface. It emphasises enhancing the surface’s shine and gloss.
- Process:
- Buffing: This process usually involves the use of a buffing compound—a mildly abrasive substance that helps in removing a thin layer from the surface, thus smoothing out imperfections. Buffing can be done in two phases: cutting (or coarse buffing) to remove scratches and colouring (or fine buffing) to achieve a smooth texture.
- Polishing: Polishing uses finer abrasives than buffing, often in the form of polishing compounds or fine-grit sandpapers. The goal is to achieve a super-smooth finish that reflects light uniformly, giving the surface a shiny appearance.
- Tools and Materials:
- Buffing: Buffing typically requires pads that are slightly abrasive, sometimes combined with buffing compounds. Buffing pads can be made of various materials like wool, foam, or microfiber, each serving different levels of abrasiveness.
- Polishing: Polishing pads are usually softer and are paired with polishing compounds that contain ultra-fine abrasives. These compounds might be liquid, paste, or solid, depending on the application.
- End Result:
- Buffing: The result of buffing is a smoother and even surface, but it might not necessarily be shiny. Buffed surfaces often have a matte or satin finish unless followed by a polishing process.
- Polishing: The outcome of polishing is a high-gloss, mirror-like finish. The surface not only feels smooth but also reflects light uniformly, creating a bright and lustrous appearance.
- Applications:
- Buffing: Commonly used in the preliminary stages of surface treatment, especially on metals, woods, or automotive finishes, to prep the surface for further finishing.
- Polishing is frequently seen in applications that require a shiny finish, such as car detailing, jewellery making, and metalwork.
Common Mistakes While Buffing and How to Avoid Them
Buffing is a delicate process that can either elevate the appearance of a surface or, if done incorrectly, exacerbate existing issues or create new ones. Here are some common mistakes people make during buffing and ways to avoid them:- Not Cleaning the Surface Properly:
- Mistake: Skipping or rushing the cleaning step, leading to dirt and debris being ground into the surface during buffing.
- Solution: Always thoroughly clean the surface before buffing. Vacuum or sweep the area, and consider a damp mop or cloth to pick up finer particles.
- Using the Wrong Abrasiveness:
- Mistake: Using a pad or compound that’s too abrasive can lead to unnecessary removal of material or deeper scratches.
- Solution: Start with a less abrasive pad and compound, then gradually move to a coarser option if needed. It’s always easier to increase abrasiveness than to repair damage from an overly aggressive approach.
- Uneven pressure and speed:
- Mistake: Applying inconsistent pressure or moving the buffer too quickly or slowly can result in an uneven finish.
- Solution: Maintain a steady pace and consistent pressure while buffing. Familiarise yourself with the equipment and practice in a less conspicuous area if unsure.
- Not Checking Your Work:
- Mistake: Continuously buffing without periodic checks can lead to over-buffing or missed spots.
- Solution: Regularly turn off the machine and inspect the surface in different lighting to ensure you’re achieving the desired effect.
- Overloading with Compounds:
- Mistake: Applying too much buffing compound at once can create a messy residue or an uneven finish.
- Solution: Use buffing compounds sparingly. It’s better to add a bit more when needed than to deal with an excess.
- Buffing in the Wrong Environment:
- Mistake: Buffing in an area with lots of dust or debris in the air can lead to particles settling on the freshly buffed surface.
- Solution: Ensure the workspace is clean and free from airborne contaminants. Close windows and doors if necessary.
- Using damaged or dirty pads:
- Mistake: Using a pad that’s worn out or has accumulated dirt can scratch the surface or produce an uneven finish.
- Solution: Regularly check and clean your buffing pads. Replace them when they show signs of wear or damage.
- Not following safety protocols:
- Mistake: Overlooking safety gear or not adhering to safety precautions can lead to personal injury.
- Solution: Always wear appropriate protective equipment, like safety goggles, dust masks, and ear protection. Ensure the workspace is well-ventilated if working with chemicals.
- Not Testing on a Small Area First:
- Mistake: Diving straight into buffing a large or main area without testing can lead to unexpected results.
- Solution: Before buffing a significant portion, test your process on a small, inconspicuous spot to ensure it achieves the desired result without damage.
- Ignoring the Manufacturer’s Instructions:
- Mistake: Not following the guidelines provided by equipment or product manufacturers can lead to subpar results or equipment damage.
- Solution: Always read and adhere to the manufacturer’s recommendations for both the buffer machine and any compounds or pads being used.
Concluding Thoughts
Buffing, as a critical aspect of surface maintenance and enhancement, demands a nuanced understanding and meticulous approach. From wood floors to automotive finishes, the value of a well-executed buffing process extends far beyond mere aesthetics. It lays the foundation for protection, longevity, and an overall enrichment of the material in question. As with many artisanal and technical pursuits, mastery in buffing is achieved not just through knowledge but also through practice, patience, and keen attention to detail. The distinction between buffing and related processes, like polishing, further underscores the importance of specialised knowledge. By being aware of common mistakes and proactively avoiding them, individuals can ensure that the buffing process is efficient and effective. In a world where the new’s allure often overshadows the preserved’s charm, buffing stands as a testament to the beauty of rejuvenation. With the right tools, techniques, and care, surfaces once marred by time and use can be revived to their former glory, reminding us of the enduring value of maintenance and renewal.Some Useful Links:
- Stairs Sanding & Refinishing
- Floor Sanding Services
- School Floor Sanding
- Wood Floor Restorations
- Wood Floor Repairs
- Wood Floor Polishing
More from our Blog:
How to Choose the Right Buffer for Floor Sanding How to Repair Damaged Floors with Belt Sanding Step-by-Step Guide to Belt Sanding Your Floors Innovative Techniques for Using Belt Sanders in Floor Refinishing How to Achieve a Perfectly Flat Surface with Belt Sanding for Floor Refinishing Common Belt Sanding Tools and Accessories for Floor Refinishing The Role of Belt Sanding in Achieving a Professional Finish on Your Floors
Sanding
We provide virtually dust-free sanding with our continuous belt machinery with mobile extraction units, giving you a safer environment for your family.
Oiling
This organic finish not only adds beauty to your home but also has exceptional water-repellent characteristics, making it easier to clean and maintain.
Waxing
This natural floor finish offers the softest and most mellow appearance – and leaves your floor able to breath.
Buffing
Using soft buffing machines (and hand-polishing where required) will bring a wonderful sheen to your newly-finished floor.
Repairs
We offer a full assessment of your wooden floors to determine what repairs are needed to provide the perfect working surface for the later stages of sanding, staining and sealing.
Restoration
We offer a comprehensive restoration process designed to address floors that are improperly fitted or damaged over time through wear and tear.
Request a fixed price quote for your wood floor restoration now
Simply enter your postcode below to get started.
Services
Wood Floor Sanding Wood Floor Restoration Wood Floor Scratch Repair Squeaky Wood Floor Repair Parquet Floor Sanding Parquet Floor Restoration Commercial Floor Sanding Church Floor Sanding Community Centre Floor Sanding School Floor Sanding Gap Filling Gap Filling with ResinCopyright © Mr Sander®
Privacy & Cookies Terms & Conditions Complaints Procedure Cancellation Rights Sitemap

Get An Instant Price Estimate Before You Go…
Simply enter the rooms you need sanded and we’ll provide you with a price estimate instantly! Try our price calculator now.
Get a Price Estimate NowLocal Floor Sanding Experts
Over 500 5-Star Reviews
Safe, Dust Free Sanding
Operating Since 1994