London:
Nationwide:
25,000+
Floors Restored
27 Years Experience
Wood Flooring Association Certified
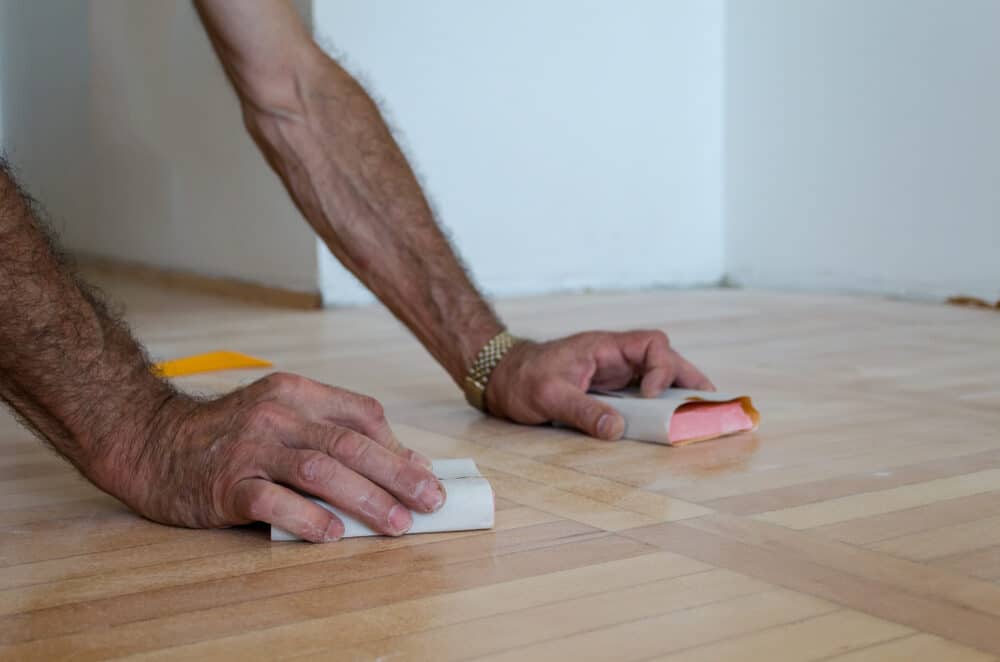
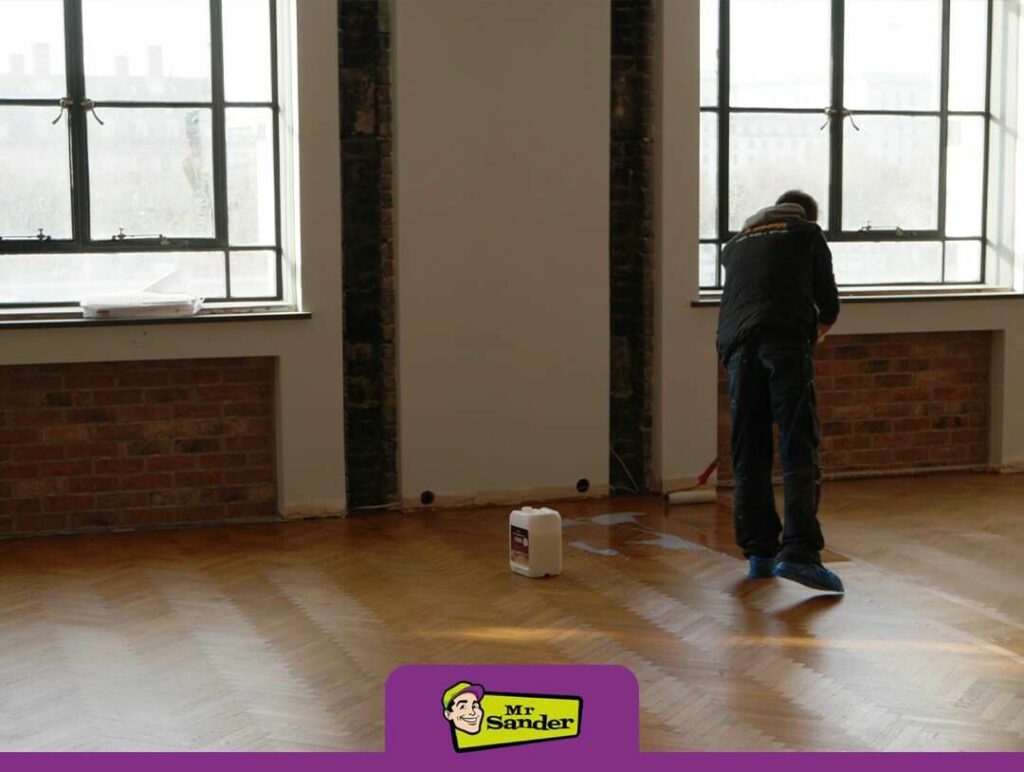
Hand Sanding as a Final Step in the Floor Sanding Process
Posted on January 20, 2024
Floor sanding techniques
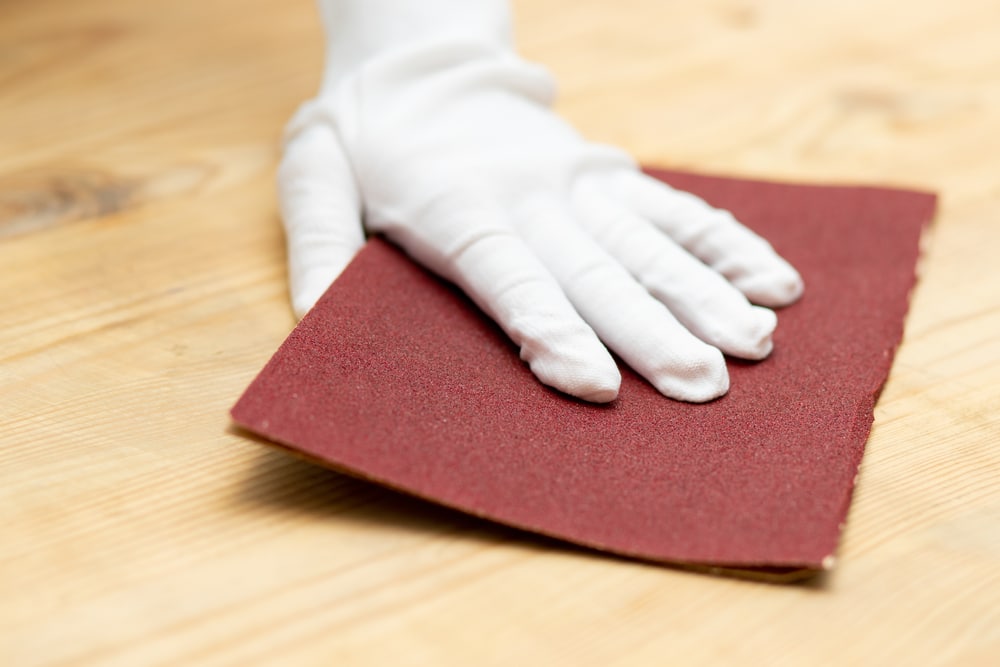
Mastering Hand Sanding: The Essential Final Step in Floor Sanding
The art of wood floor sanding is not merely a task; it is a craft that transforms and revitalises the very essence of a wooden floor. This meticulous process, often perceived as daunting, is integral to restoring the natural allure and extending the longevity of wood flooring. While mechanical sanders undertake the lion’s share of the work, the nuanced role of hand sanding, particularly as a culminating step, is pivotal in achieving a truly professional and elegant finish.
In the realm of floor refurbishment, wood floor hand sanding is the connoisseur’s touch. It offers a level of detail and care unattainable by machines. This subtle yet significant process requires not just the right tools and techniques but also an appreciation of the wood’s unique character. It’s about understanding the interplay of grain, texture, and the hidden beauty waiting to be unveiled under layers of old finish and wear.
This guide is designed to illuminate the importance of hand sanding in the wood floor-sanding process. We will explore its role, the necessary tools, and the meticulous techniques required. Our journey into this final, crucial stage of floor sanding will reveal how patience, precision, and a keen eye for detail can transform an ordinary wooden floor into a masterpiece of home décor.
As we delve into the nuances of hand sanding, remember, it’s not just about following steps; it’s about embracing a philosophy where every stroke of sandpaper is a step towards revealing the hidden beauty of your wooden floor.
The Role of Hand Sanding in Floor Refinishing
Hand-sanding in floor refinishing is akin to the fine brushstrokes of an artist on a canvas. It’s a process where precision and patience converge to elevate the outcome from satisfactory to exceptional. This section delves into the significant, yet often understated, role of wooden floors hand sanding in the floor refinishing process.
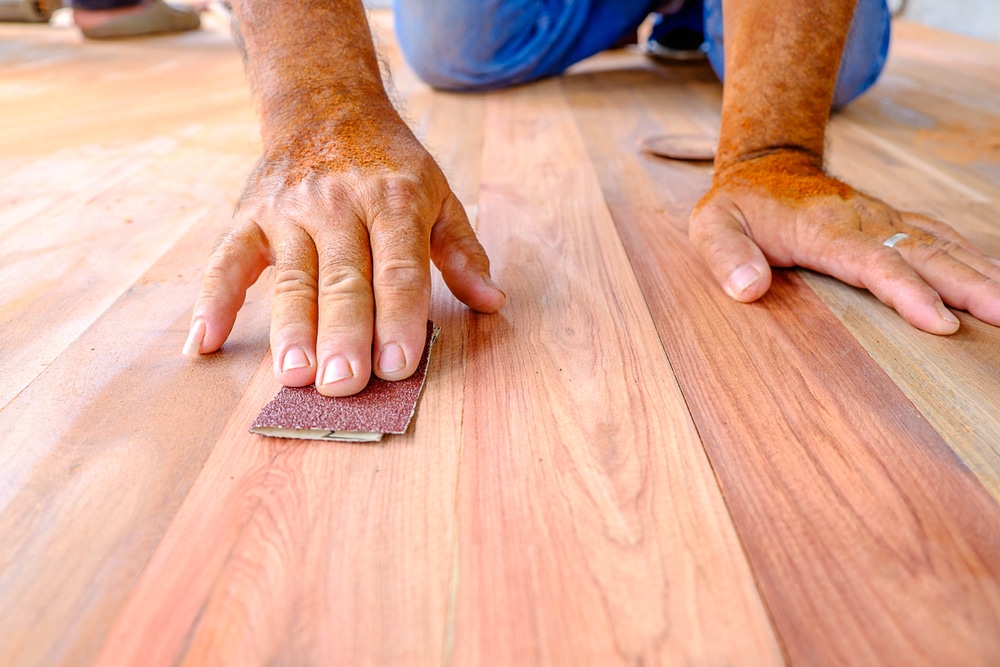
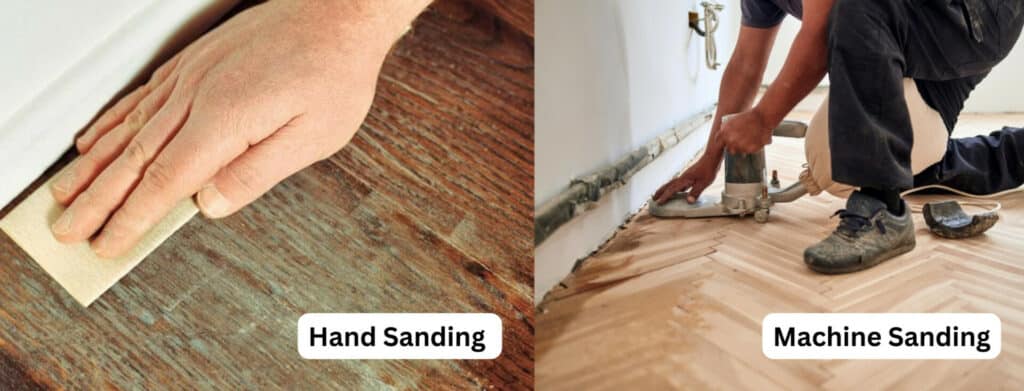
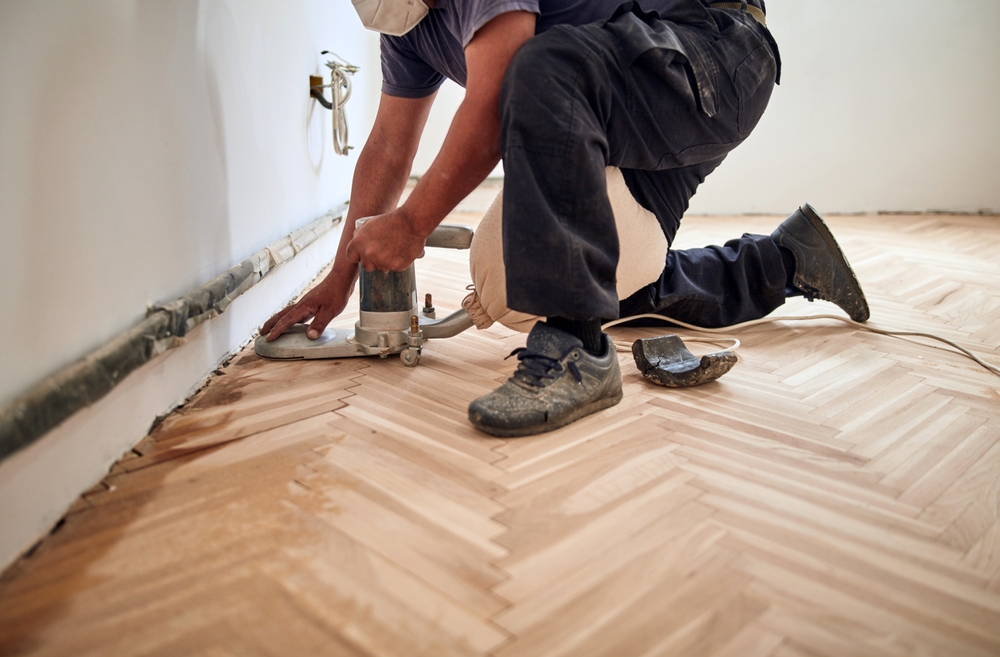
Comparing Machine and Hand Sanding
Machine sanding is undoubtedly efficient, rapidly covering large areas and removing old finishes, dents, and scratches. However, machines have their limitations. They can be too aggressive for delicate floors, unable to reach into nooks, crannies, and edges, and may leave behind circular marks or an uneven finish.
Enter hand sanding, the meticulous counterpart. Hand-sanding steps in where machines falter. It allows for a gentler, more controlled approach, essential for achieving a uniformly smooth surface. Hand sanding is particularly effective in:
- Refining Edges and Corners: Machines often miss the edges and corners. Hand sanding ensures these areas are not neglected, maintaining consistency in texture and finish across the entire floor.
- Smoothing Out Machine Marks: After the aggressive machine sanding, hand sanding helps in smoothing out any residual marks or minor imperfections left behind.
- Preparing for Finishes: The finer grits used in hand sanding create a smooth base, ideal for the application of stains, oils, or varnishes, resulting in a superior finish.
The Unique Advantages of Hand Sanding
Hand sanding is not just a process but an art that requires understanding the wood’s personality. The feel under the hand directs each sandpaper stroke, allowing for adjustments in response to the wood’s reaction. This tactile feedback is crucial for:
- Respecting the Wood’s Integrity: Wood floors hand sanding follows the natural grain of the wood, reducing the risk of damaging its structure and ensuring a natural, organic finish.
- Customised Attention: Every floor has its own unique challenges. Hand sanding offers the flexibility to address specific areas requiring more or less sanding, something machines cannot discern.
- A Finish with Character: The final hand sanding step imparts a smoothness and level of detail that showcases the wood’s natural beauty, enhancing its character and depth.
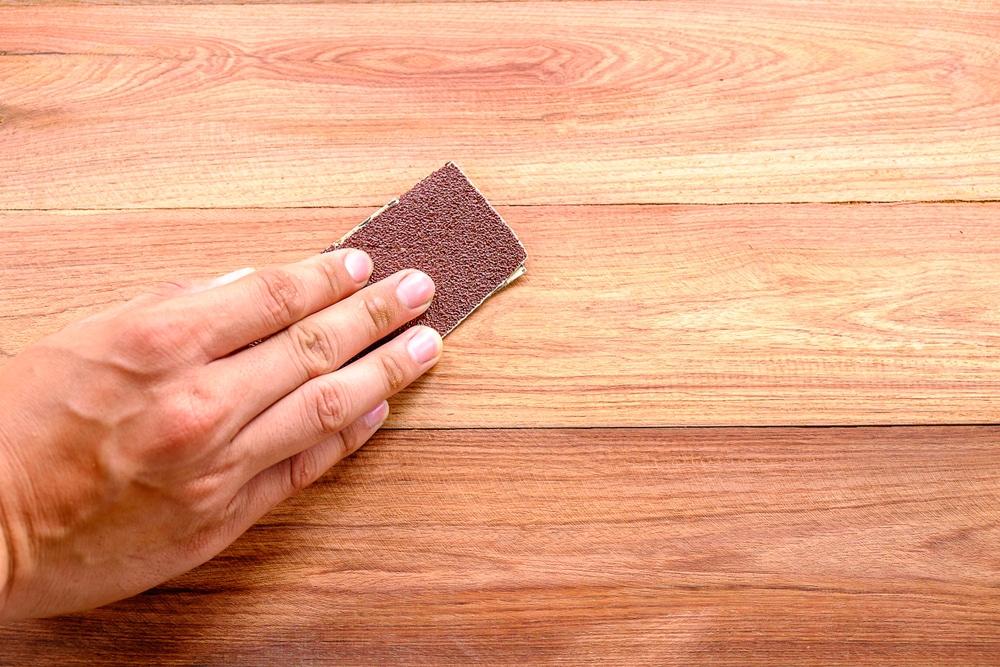
Step-by-Step Guide to Hand Sanding
Embarking on the hand-sanding journey requires a blend of the right technique, tools, and a patient approach. This step-by-step guide is crafted to assist you in mastering the art of hand sanding, ensuring your floor refinishing project achieves a level of excellence akin to a professional finish.
Selecting the Right Tools and Materials
- Sandpaper: Choose a variety of grits. Start with a coarser grit (such as 80 grit) for initial sanding and gradually move to finer grits (up to 220-grit) for finishing touches.
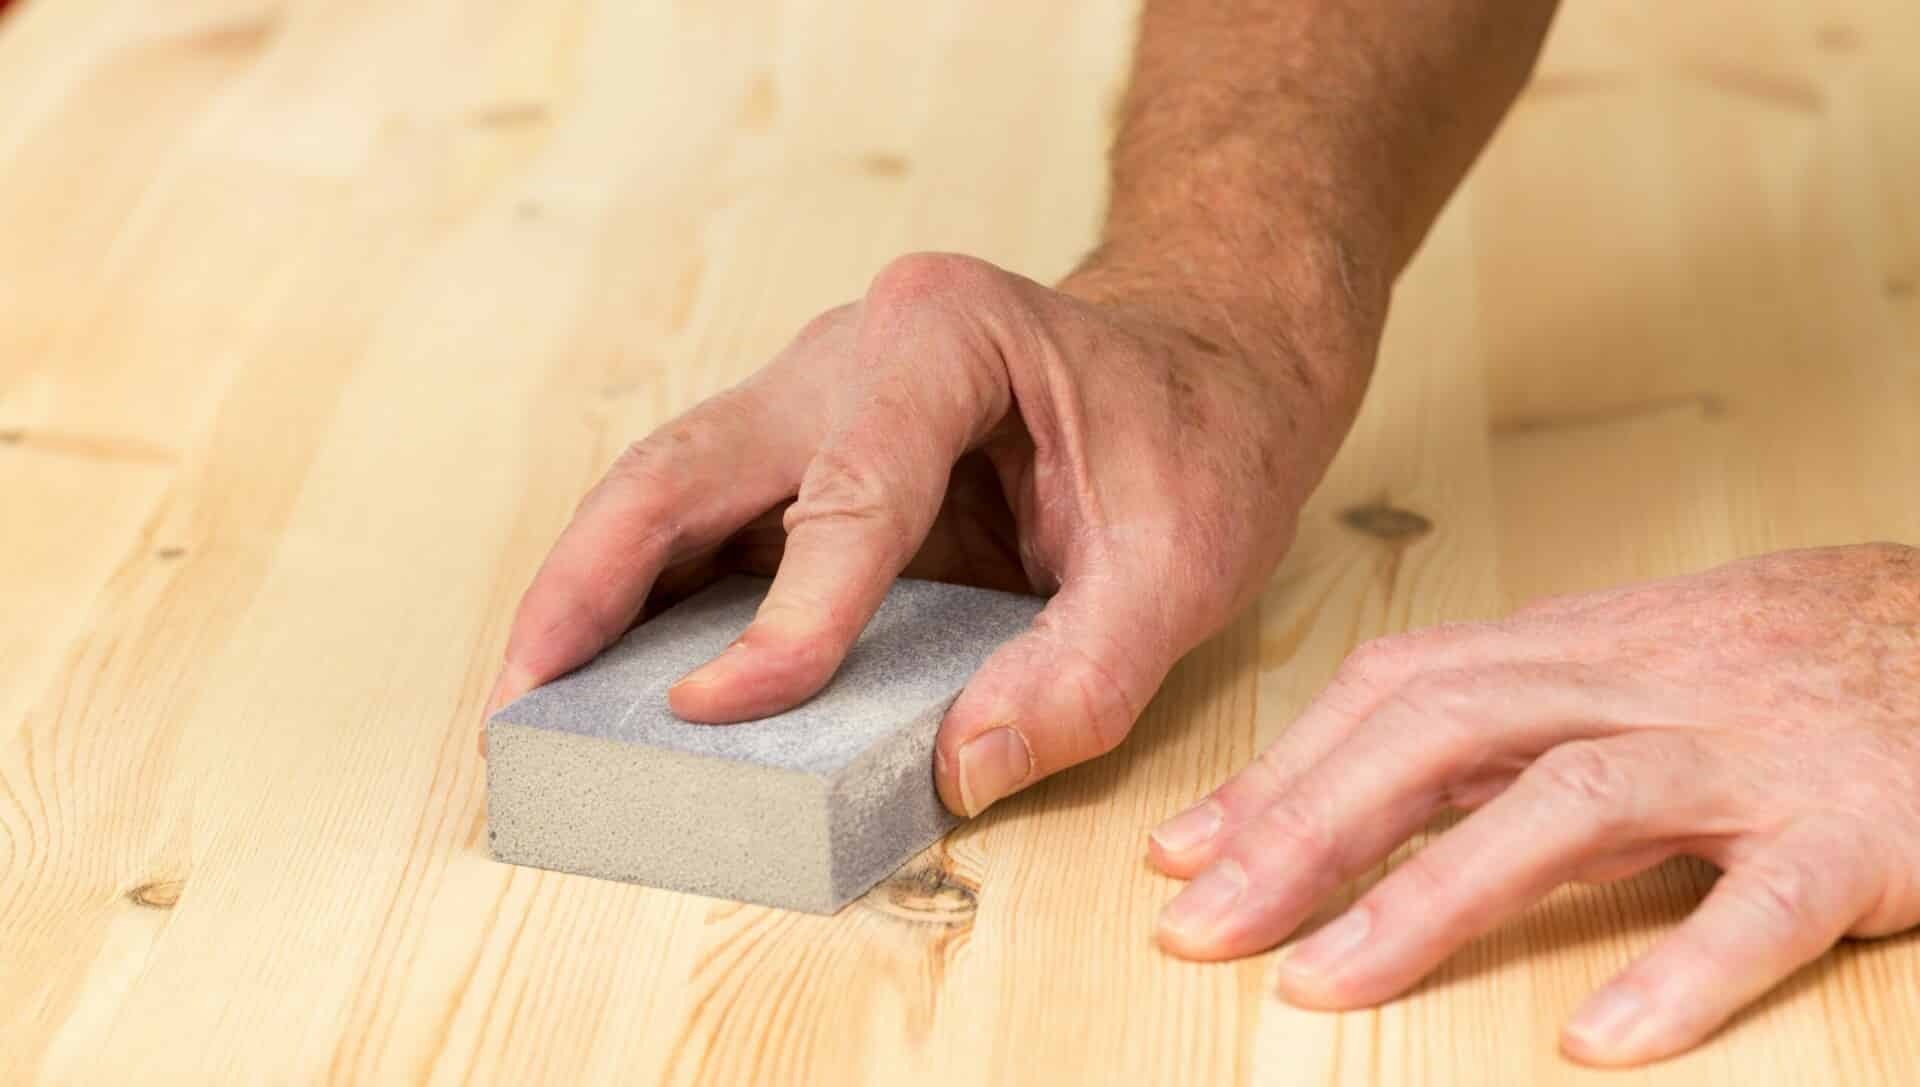
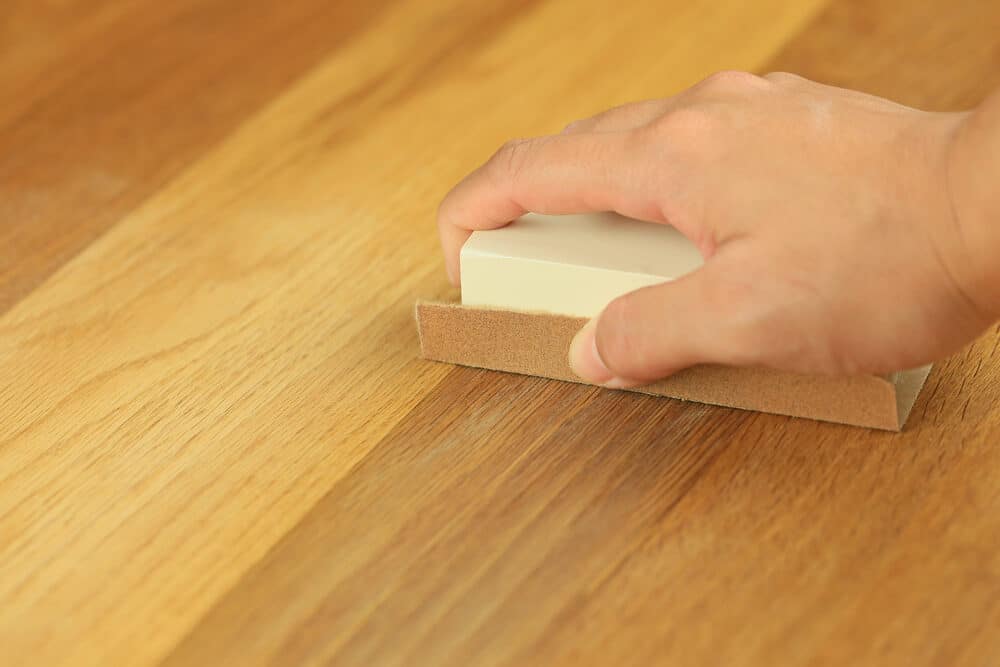
- Sanding Block: A good-quality sanding block ensures even pressure distribution and helps prevent gouging.
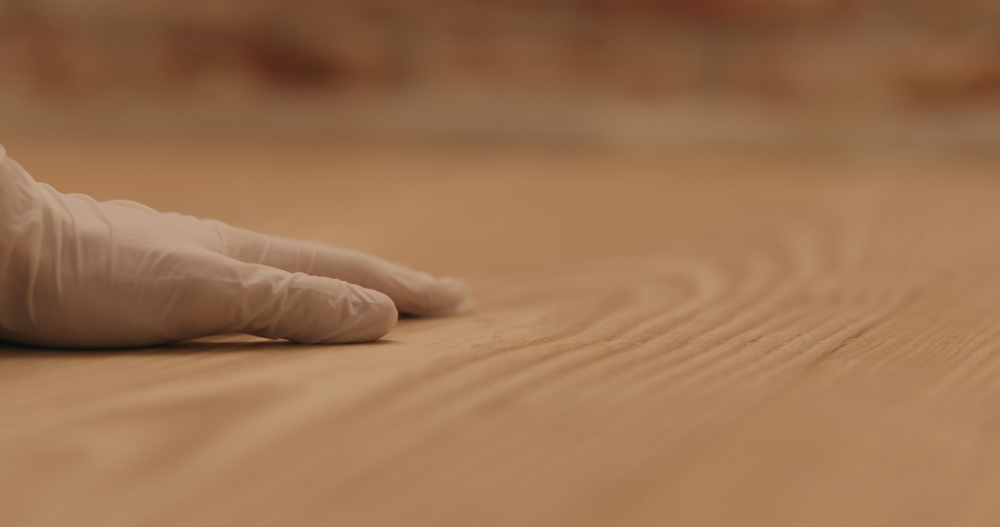
- Protective Gear: Safety goggles and a dust mask are essential to protect yourself from dust particles.
- Preparing the Floor
- Cleaning: Ensure the floor is clean and free of debris. Vacuum thoroughly to remove any loose particles.
- Repairing: Address any floor damages, such as cracks or protruding nails, before beginning the sanding process.

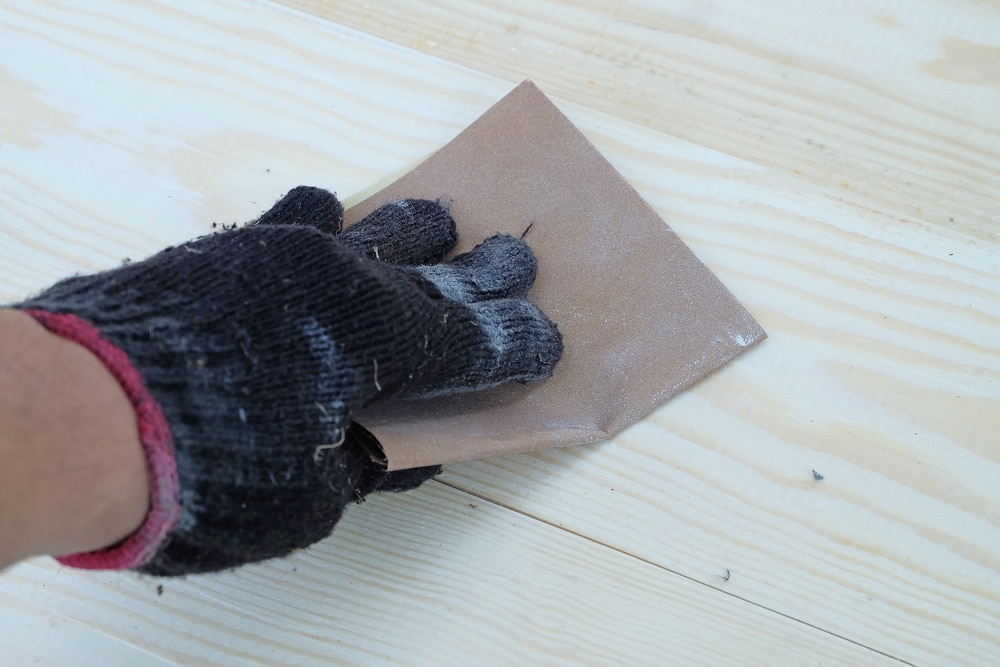
The hand-sanding technique
- Initial Sanding: Start with the coarse-grit sandpaper to remove old finishes and smooth out rough areas. Always sand in the direction of the wood grain to prevent scratches.
- Progressing to Finer Grits: Gradually shift to finer grit sandpapers. This transition is crucial for achieving a smooth surface without deep scratches.
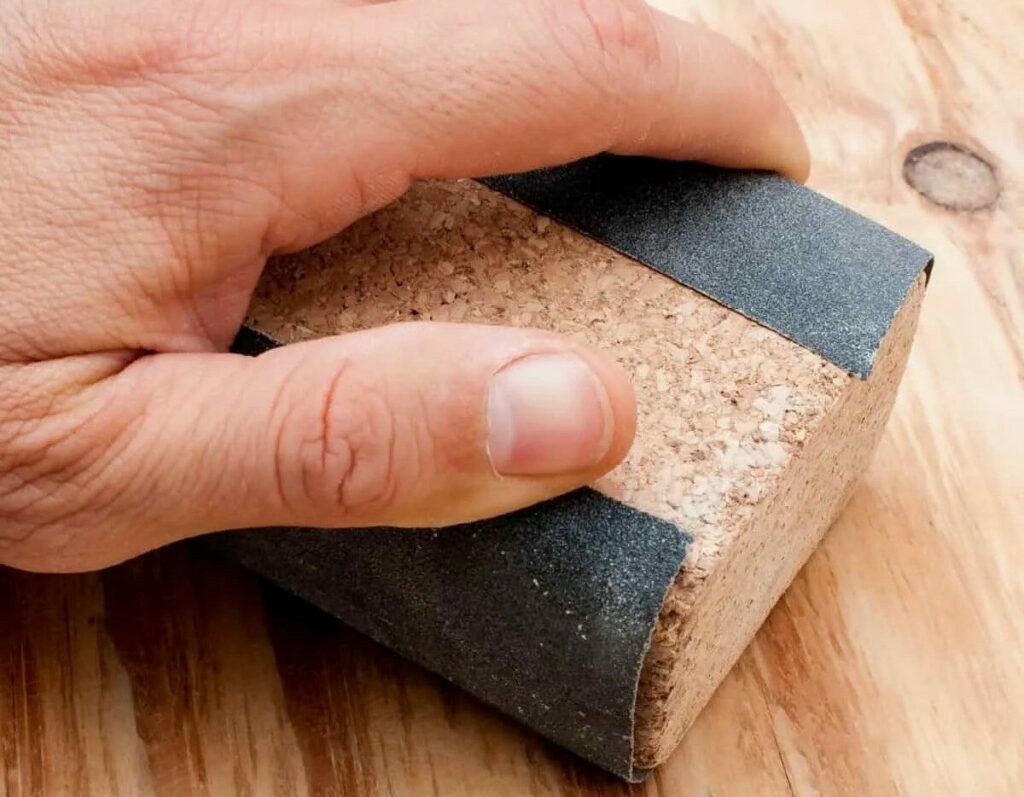
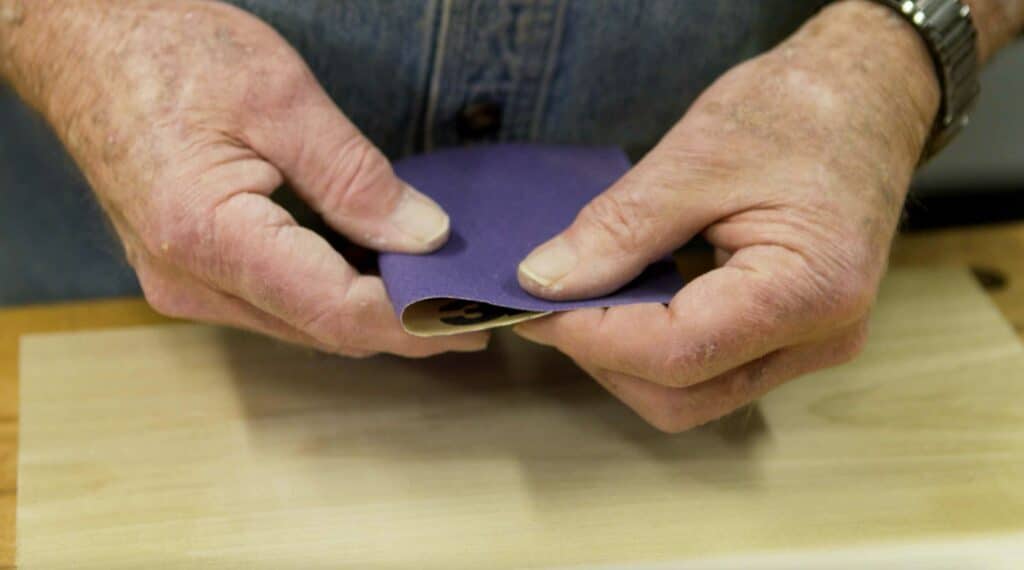
- Attention to Detail: Pay special attention to edges and corners. Use smaller pieces of sandpaper or a sanding sponge for these hard-to-reach areas.
- Even Pressure: Apply consistent pressure throughout the process. Over-sanding or uneven pressure can lead to dips or uneven surfaces.
Finishing Touches
- Final Sanding: Use the finest-grit sandpaper for the last pass. This step is vital for a smooth base suitable for finishing treatments.
- Cleaning Up: Once the final sanding is complete, thoroughly clean the floor. Use a tack cloth or a slightly damp mop to pick up all the dust.
Inspection and touch-ups
- Visual Inspection: After cleaning, inspect the floor for any missed spots or inconsistencies.
- Touch-Ups: If necessary, perform light touch-ups with fine-grit sandpaper to ensure a perfectly smooth surface.
Tips for Achieving a Flawless Finish
Achieving a flawless finish in hand sanding is much like perfecting a fine craft. It’s the culmination of technique, patience, and a deep understanding of the material you are working with. Here are some invaluable tips to guide you towards achieving that impeccable finish on your wooden floor.
Working with the wood’s grain
- Always sand in the direction of the wood grain. This not only ensures a smoother finish but also minimises the risk of leaving unsightly scratches or marks that go against the grain’s natural pattern.
Dealing with Problem Areas
- Be vigilant for areas with deeper scratches or dents. These may require extra attention or start with a slightly coarser grit before transitioning to finer ones.
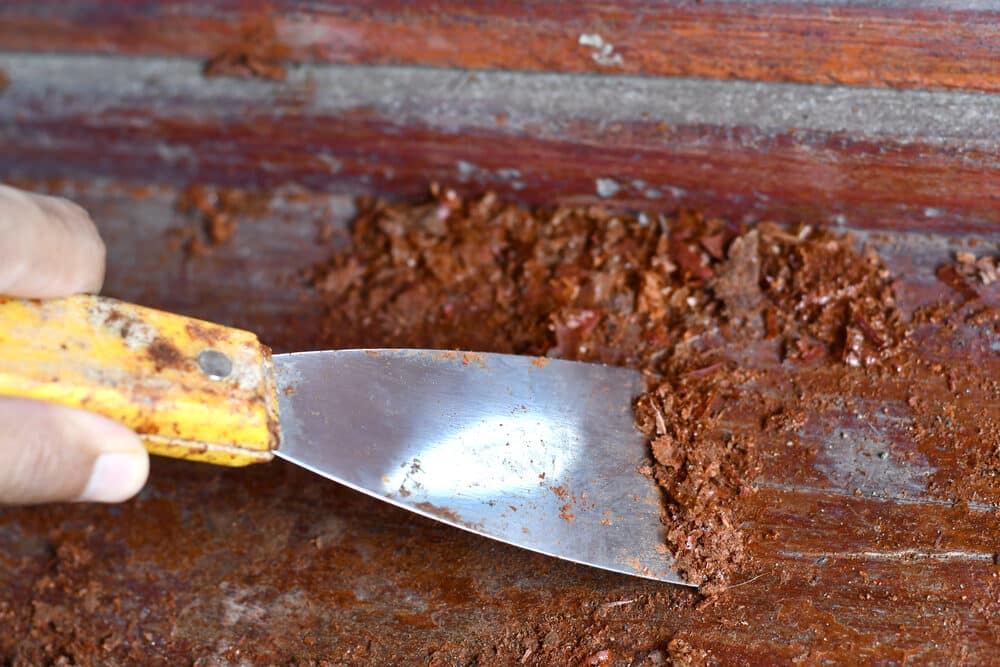
- For stubborn old paint or varnish, consider using a paint scraper or chemical stripper before sanding to make the process more efficient and less labour-intensive.
Sanding Edges and Corners
- Edges and corners can be challenging due to their inaccessibility. Utilise a sanding sponge or fold sandpaper to reach these areas effectively.
- Be gentle in these areas to avoid sanding down too much, which could lead to uneven surfaces.
Maintaining consistent pressure
- Apply even pressure throughout the sanding process. Inconsistent pressure can lead to an uneven surface, with some areas smoother than others.
Regularly changing sandpaper
- Sandpaper can wear down quickly. Regularly switching to fresh sandpaper ensures consistent results and prevents unnecessary extra work.
Dust Management
- Keep the work area clean. Regularly remove dust as you sand. Excess dust can clog the sandpaper and hinder the sanding process.
- Before applying any finish, ensure that all dust is completely removed for a clean, smooth surface.
Final Inspection
- After the final sanding pass, inspect the floor in varying light conditions. Different lighting can reveal missed spots or imperfections.
Applying Finish Thoughtfully
- When applying stain or varnish, follow the manufacturer’s instructions meticulously. Apply thin, even coats and allow adequate drying time.
By adhering to these tips, you ensure that your hand sanding process results in a floor that is not just visually stunning but also feels smooth and even underfoot, a true hallmark of craftsmanship and attention to detail.
Common Mistakes to Avoid in Hand Sanding
Hand sanding is a skill that, like any craft, requires attention to detail and an understanding of common pitfalls. Being aware of these typical mistakes can help ensure your floor sanding project is successful and yields the high-quality finish you desire.
Skipping Grit Sequences
- Avoid jumping directly to a very fine grit without gradually working through the intermediate grits. Skipping grits can leave deeper scratches that are hard to remove and may compromise the final finish.
Over-Sanding
- Excessive sanding, especially in one area, can lead to uneven surfaces or even damage the wood. It’s important to sand just enough to achieve a smooth surface without weakening the structure of the wood.
Ignoring edges and corners
- Neglecting edges and corners can result in an inconsistent finish. These areas require as much attention as the main floor space.
Inconsistent Sanding Pressure
- Applying uneven pressure or sanding in a haphazard manner can create dips and grooves in the wood. Consistent pressure is crucial for a uniform finish.
Not Changing Sandpaper Regularly
- Worn-out sandpaper is less effective and requires more effort to achieve the desired results. Regularly replacing sandpaper ensures efficiency and effectiveness.
Forgetting to Clean Between Grits
- Failing to remove all the dust from previous sanding before moving to a finer grit can cause scratches and an uneven finish. Always clean the surface thoroughly before switching grits.
Rushing the Process
- Hand-sanding requires patience. Rushing can lead to mistakes that are often time-consuming to rectify. Take your time to achieve the best results.
Using the Wrong Sandpaper Type
- Using the incorrect type of sandpaper for the wood or the stage of sanding can hinder the process. Ensure you’re using the right type for each step.
Neglecting safety precautions
- Not wearing appropriate protective gear, like dust masks and safety goggles, can be hazardous to your health. Always prioritise safety.
The Final Touches
As we approach the conclusion of our hand-sanding journey, the final touches are what distinguish a professionally finished floor from an amateur one. These last steps are crucial in ensuring that your hard work culminates in a floor that is not only visually stunning but also enduring in its quality and finish.
Cleaning and Inspection
- Thorough Cleaning: After the final sanding, it’s essential to meticulously clean the floor. Use a tack cloth or a slightly damp mop to ensure all sanding dust is removed. This step is critical for a flawless finish, as any remaining dust can mar the surface when the finish is applied.
- Detailed Inspection: Examine the floor closely, preferably in different lighting conditions. Look for any missed spots, uneven areas, or remaining imperfections. This is your last chance to make any necessary touch-ups.

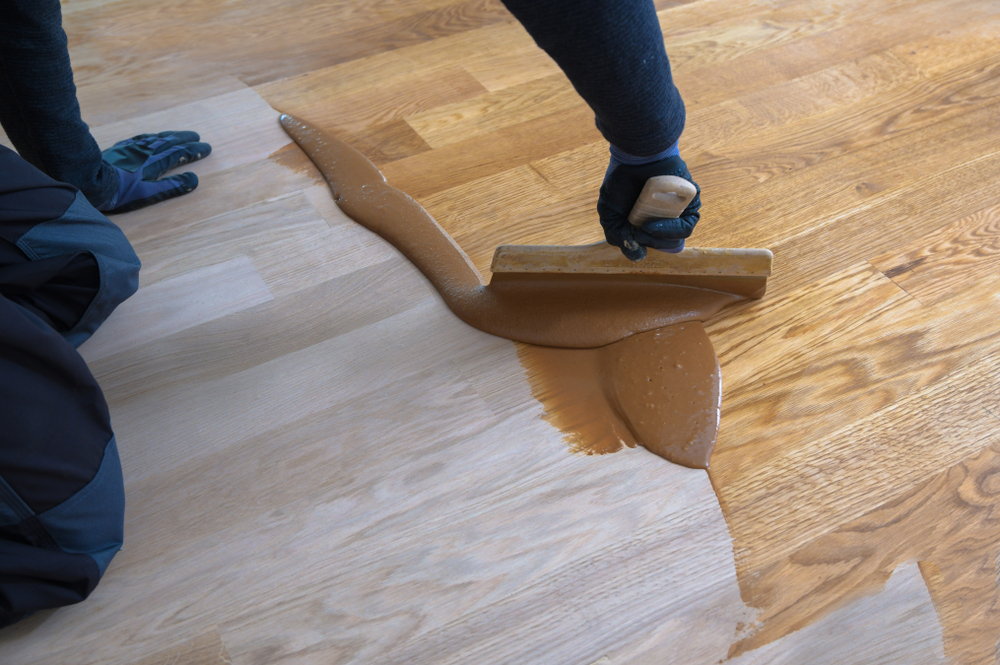
Applying Finishes
- Choosing the Right Finish: Select a finish that complements the type of wood and suits the use of the room. Options include varnish, lacquer, oil, or wax.
- Applying the Finish: Follow the manufacturer’s instructions for your chosen finish. Apply it in thin, even coats, using a brush or roller appropriate for the type of finish. Be sure to work in a well-ventilated area.
- Drying and Curing Time: Allow adequate time for the finish to dry between coats. Rushing this process can lead to a tacky or uneven finish. Once the final coat is applied, give it sufficient time to cure fully before using the room.

Conclusion
The meticulous process of hand sanding in floor refinishing is an art form that balances precision, patience, and a deep respect for the material at hand. While power tools play a significant role in the initial stages of floor sanding, the final hand sanding step is crucial in achieving a finish of unparalleled quality and beauty.
This guide has traversed the essential aspects of wood floor hand sanding, from selecting the right tools to mastering the technique, and from avoiding common pitfalls to perfecting the final touches. Each step in this process is a testament to the value of patience and attention to detail. It’s about understanding the wood’s unique character and working with it to reveal its hidden beauty and potential.
In an era where speed often supersedes quality, hand-sanding stands as a reminder of the virtues of craftsmanship. It is a skill that not only enhances the aesthetic appeal of wooden floors but also contributes to their longevity and durability. The satisfaction derived from transforming a worn-out floor into a work of art is immeasurable and serves as a reward for the effort invested.
As you embark on your hand-sanding journey, remember that the process is as rewarding as the result. The time and care you invest in each stroke of the sandpaper will be evident in the smoothness of the grain, the evenness of the finish, and the overall harmony of the restored floor.
In conclusion, hand sanding is more than just a step in the floor sanding process; it is the defining factor that elevates a good job to a great one. It encapsulates the essence of fine craftsmanship, where attention to the smallest details results in the most significant outcomes.


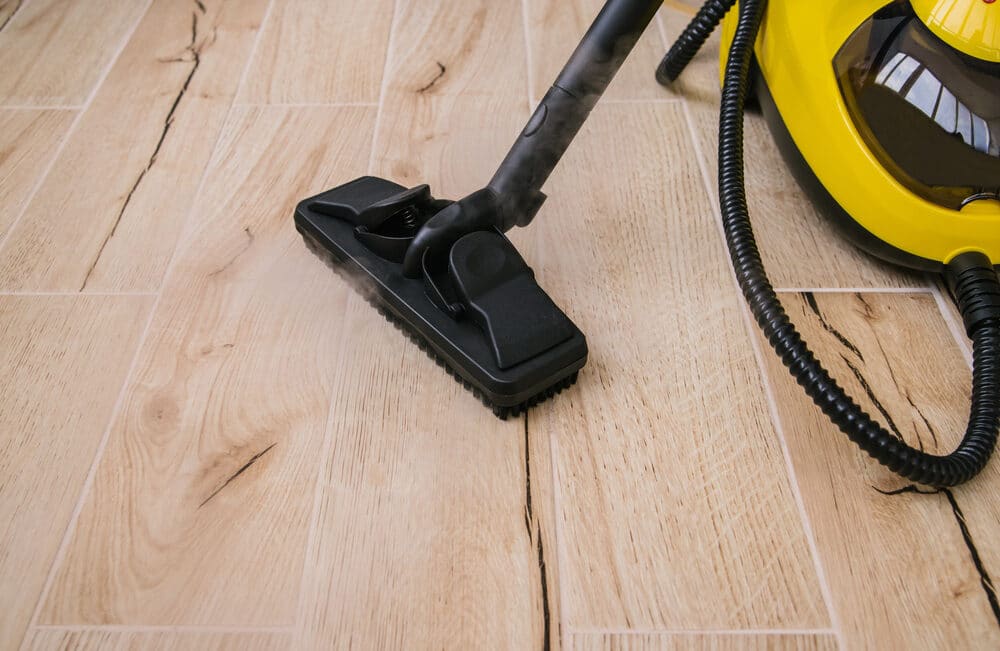
Sanding
We provide virtually dust-free sanding with our continuous belt machinery with mobile extraction units, giving you a safer environment for your family.
Oiling
This organic finish not only adds beauty to your home but also has exceptional water-repellent characteristics, making it easier to clean and maintain.
Waxing
This natural floor finish offers the softest and most mellow appearance – and leaves your floor able to breath.
Buffing
Using soft buffing machines (and hand-polishing where required) will bring a wonderful sheen to your newly-finished floor.
Repairs
We offer a full assessment of your wooden floors to determine what repairs are needed to provide the perfect working surface for the later stages of sanding, staining and sealing.
Restoration
We offer a comprehensive restoration process designed to address floors that are improperly fitted or damaged over time through wear and tear.
Request a fixed price quote for your wood floor restoration now
Simply enter your postcode below to get started.
Services
Wood Floor Sanding Wood Floor Restoration Wood Floor Scratch Repair Squeaky Wood Floor Repair Parquet Floor Sanding Parquet Floor Restoration Commercial Floor Sanding Church Floor Sanding Community Centre Floor Sanding School Floor Sanding Gap Filling Gap Filling with ResinCopyright © Mr Sander®
Privacy & Cookies Terms & Conditions Complaints Procedure Cancellation Rights Sitemap

Get An Instant Price Estimate Before You Go…
Simply enter the rooms you need sanded and we’ll provide you with a price estimate instantly! Try our price calculator now.
Get a Price Estimate NowLocal Floor Sanding Experts
Over 500 5-Star Reviews
Safe, Dust Free Sanding
Operating Since 1994