London:
Nationwide:
25,000+
Floors Restored
27 Years Experience
Wood Flooring Association Certified
Sanding Your Deck: A DIY Guide
Posted on December 8, 2023
Deck Sanding
Revive Your Deck: An In-Depth DIY Sanding Guide
A beautiful, well-maintained deck can be the crown jewel of your outdoor living space. It’s the place where you gather with friends and family for barbecues, relax with a good book, or simply soak up the sun. Over time, however, the wear and tear of the elements can leave your once-pristine deck looking tired and weathered. This is where the magic of deck sanding comes into play.
In this comprehensive DIY guide, we’ll walk you through the art and science of sanding your deck to restore its former glory. Whether you’re a seasoned DIY enthusiast or a first-time homeowner looking to tackle a new project, you’ll find valuable insights, tips, and step-by-step instructions to transform your weathered deck into a rejuvenated outdoor haven.
So, dust off your safety gear, gather your tools, and let’s embark on a DIY journey to learn the art of deck sanding. By the end of this guide, you’ll be well-equipped to tackle this project, leaving your deck looking stunning and ready for many more seasons of outdoor enjoyment. Let’s get started!

Safety Precautions
Before you dive into the exciting world of deck sanding, it’s essential to prioritize safety. This step is non-negotiable, as working with power tools and abrasive materials can pose risks if not approached with caution. Below, we’ve outlined the necessary safety precautions to ensure your DIY deck sanding project goes smoothly and injury-free:
Protective Gear:
- Safety Glasses: Shield your eyes from flying debris and dust.
- Dust Mask or Respirator: Guard against inhaling harmful dust particles.
- Hearing Protection: Power sanders can be loud, so ear protection is crucial.
- Gloves: Protect your hands from splinters, rough surfaces, and chemicals.
Appropriate Clothing:
- Wear long sleeves and long pants to minimize skin exposure to dust and splinters.
- Choose sturdy, closed-toe shoes with non-slip soles for better stability.
Work Area Safety:
- Ensure proper lighting in your work area, especially if you’re working in the evening.
- Keep the work area well-ventilated to disperse dust and fumes.
- Clear the deck of obstacles, tripping hazards, and loose objects.
- Be mindful of the weather; wet or rainy conditions can make surfaces slippery.
Electrical Safety:
- If using electric power sanders, make sure they are plugged into a Ground Fault Circuit Interrupter (GFCI) outlet.
- Check cords for damage before use, and avoid running them over with the sander.
Tool Safety:
- Familiarize yourself with the operation of your sanding tools before use.
- Always follow the manufacturer’s instructions for your specific equipment.
- Ensure that power sanders are turned off and unplugged when not in use.
- Keep tools out of the reach of children and pets.
Chemical Safety:
- If using chemical cleaners or finishes, follow the manufacturer’s safety instructions and wear appropriate protective gear.
- Store chemicals in a safe and secure location, away from direct sunlight and heat sources.
Fire Safety:
- Be cautious when working with flammable materials like stains or finishes. Store them properly and away from open flames.
First Aid Kit:
Have a well-stocked first aid kit nearby in case of minor injuries.
Emergency Plan:
Inform someone you trust about your project and whereabouts, especially if you’re working alone. Have a phone nearby for emergencies.
Know Your Limits:
If you encounter structural issues or challenges beyond your skill level, consider consulting a professional for assistance.
By taking these safety precautions seriously, you’ll create a secure environment for your deck sanding project and reduce the risk of accidents or injuries. Safety should always be your top priority as you embark on this rewarding DIY journey.

Tools and materials
To successfully sand your deck, you’ll need the right tools and materials at your disposal. Proper preparation with the appropriate equipment ensures a smoother and more efficient sanding process. Here’s a list of the essential tools and materials you’ll need for your DIY deck sanding project:
Tools:
- Sander: You have two primary options:
- Belt Sander: Ideal for large, flat areas of the deck.
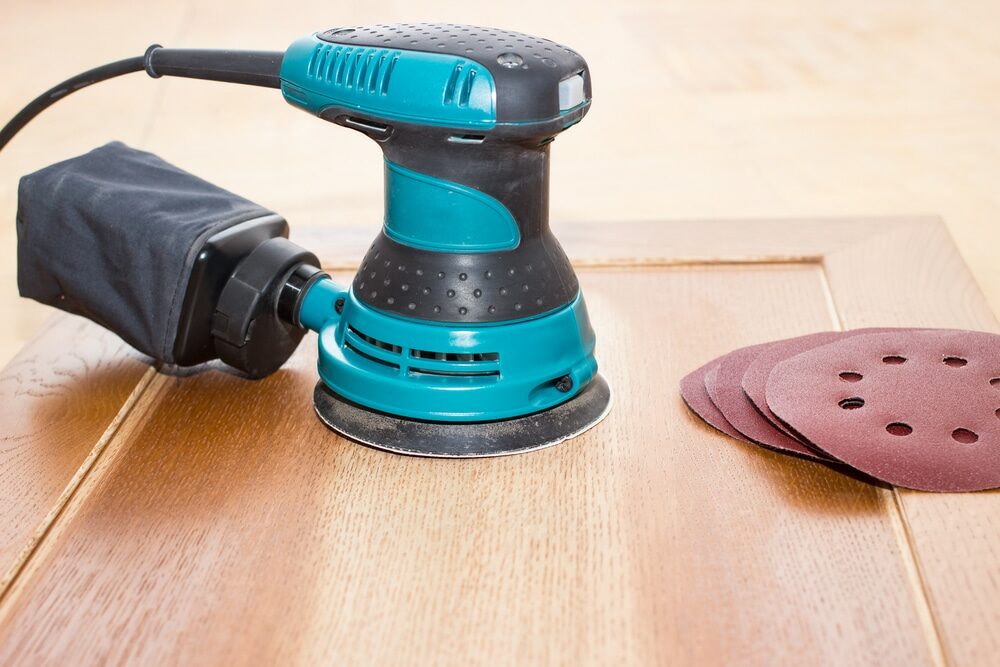
- Random Orbital Sander: Versatile and suitable for various deck surfaces.
- Detail Sander: Useful for reaching tight corners, edges, and intricate areas.
- Sanding Block: A hand-held block for manual sanding in small sections.
- Sanding Pads: Attachable pads for orbital and detail sanders, available in various grits.
- Paint scraper: to remove loose paint, varnish, or stubborn debris.
- Sanding Pole: Extends your reach for sanding large areas without bending over.
- Shop Vacuum: To collect dust and debris as you work, reducing cleanup time.
- Broom and dustpan: for clearing away loose debris before and after sanding.
Materials:
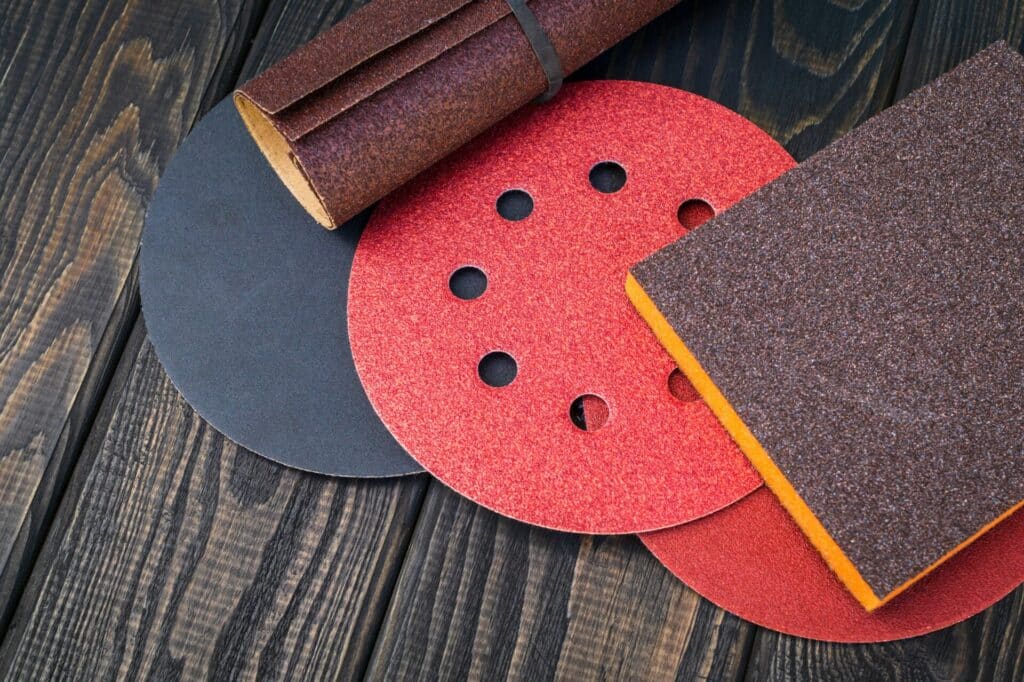
- Sandpaper Grits: Choose a variety of grits to cover the entire sanding process.
- Coarse (60–80 grit): for initial material removal and paint or stain stripping.
- Medium (100–120 grit): For smoothing and removing imperfections.
- Fine (150–220 grit): For final smoothing and preparing the surface for finishing.
- Deck Cleaner: A specialized cleaner to remove dirt, mold, and mildew from the deck’s surface before sanding.
- Wood Filler: For patching and filling in small cracks, holes, or imperfections in the wood.
- Deck Stain or Finish: Choose a high-quality deck stain or finish to protect and enhance the appearance of your deck.
- Paintbrushes and rollers: for applying deck stain or finish.
- Painter’s Tape: To mask off areas you don’t want to stain or paint, such as railings or adjacent structures.
- Safety Gear: As mentioned in the “Safety Precautions” section, include safety glasses, dust masks, hearing protection, gloves, and appropriate work clothing.
- Extension Cords: If using electric sanders, ensure you have adequate extension cords to reach all areas of your deck.
- Trash Bags or Containers: For easy disposal of sanding waste and used materials.
Before starting your deck sanding project, double-check that you have all the necessary tools and materials on hand. Having everything prepared in advance will help you work efficiently and achieve the best results during the sanding process.
Preparing Your Deck
Before you begin the actual deck sanding process, it’s crucial to prepare your deck properly. Adequate preparation ensures that your deck is clean, safe, and ready for sanding. Follow these steps to get your deck in the best condition for the sanding phase:
- Clear the Deck: Remove all furniture, potted plants, and other items from the deck. Clear the area entirely to provide ample working space.
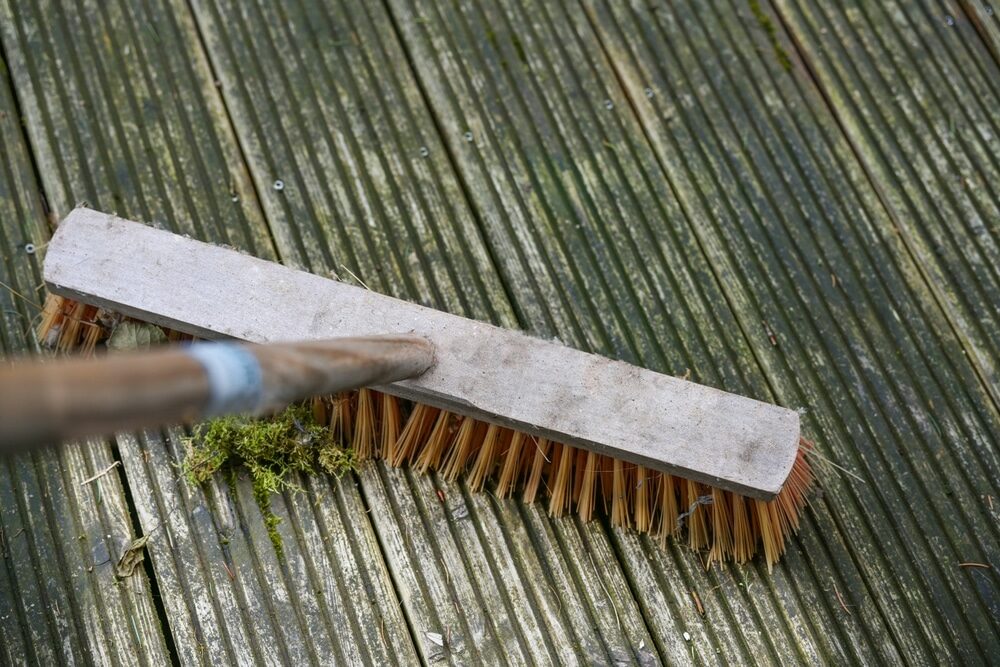
- Sweep and Clean: Use a stiff broom to sweep away loose debris, leaves, and dirt from the deck’s surface. Pay special attention to corners and between deck boards.
- Pressure Wash (Optional): If your deck is particularly dirty, moldy, or covered in stubborn grime, consider using a pressure washer. Follow the manufacturer’s instructions and keep the nozzle at a safe distance to avoid damaging the wood. Allow the deck to dry thoroughly after pressure washing.
- Inspect for Damage: Carefully inspect the deck for any signs of damage or rot. Pay attention to areas around fasteners (screws or nails) and any visibly decaying wood. If you find soft or rotted sections, mark them for repair or replacement.
- Replace or Repair Deck Boards: Replace any severely damaged or rotting deck boards. For minor damage or splintered areas, use a circular saw or a jigsaw to cut away the damaged portions and replace them with new boards. Secure all loose boards with appropriate screws or nails.
- Check for protruding nails or screws. Ensure that no nails or screws are sticking out above the deck’s surface, as they can damage your sandpaper and sanding equipment.
- Sand Any Raised Nail Heads: If there are nails that can’t be repositioned, use a nail set to drive them below the deck’s surface. Then, fill the hole with wood filler and allow it to dry before sanding.
- Secure Loose Railings or Steps: Inspect and tighten any loose railings or steps to ensure they are stable and safe.
- Mask off Adjacent Structures: If your deck is attached to a house or other structures, use painter’s tape to mask off areas you don’t want to accidentally sand or stain.
- Cover Plants and Surroundings: If you have nearby plants or areas that you want to protect from dust and debris, cover them with drop cloths or plastic sheeting.
Once you’ve completed these preparation steps, your deck should be clean, free of hazards, and ready for the sanding process. Proper preparation sets the foundation for a successful deck sanding project, ensuring that you achieve the best results and a safe working environment.
Choosing the Right Sanding Method
When it comes to sanding your deck, you have a choice between different sanding methods, each with its own advantages and considerations. The method you choose depends on your deck’s condition, the tools at your disposal, and your personal preferences. Here’s a breakdown of the two primary sanding methods: hand sanding and power sanding, along with their pros and cons.
1. Hand Sanding:
- Pros:
- Precision: Hand sanding allows you to focus on specific areas that need attention, such as corners, edges, and spots where power sanders may struggle to reach.
- Control: You have complete control over the pressure and direction of sanding, reducing the risk of over-sanding or damaging the wood.
- Minimal Dust: Hand sanding generates less dust compared to power sanding, making it a cleaner option.
- Cons:
- Labor-Intensive: Hand sanding is physically demanding and can be time-consuming, especially for larger decks.
- Slower Progress: It may take longer to achieve a uniformly smooth surface when compared to power sanding.
- Not Suitable for Heavy Stripping: Hand sanding is less efficient for removing old paint or stubborn finishes.
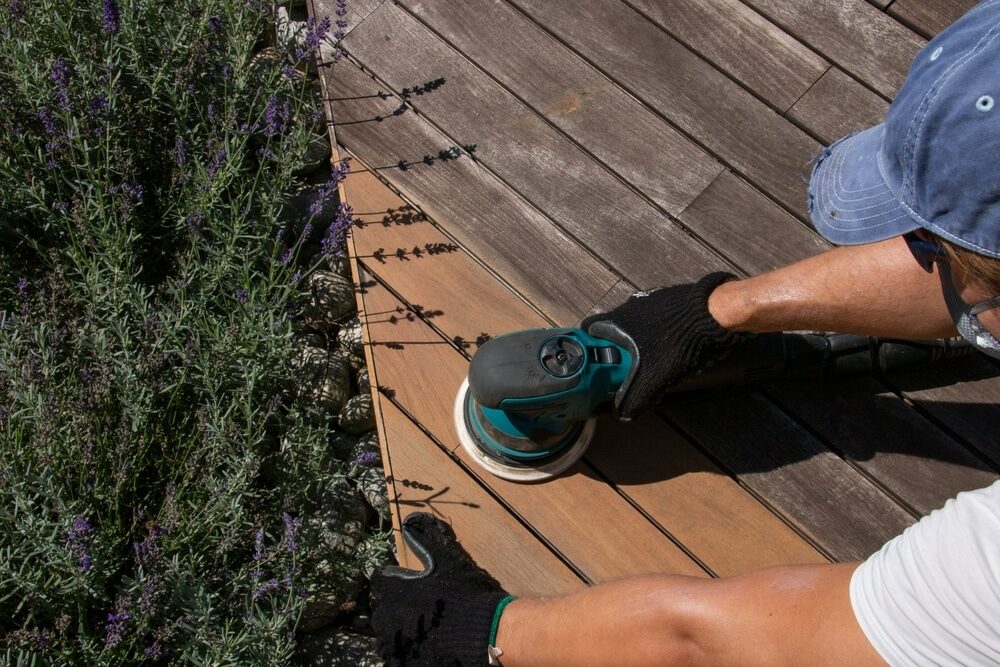
2. Power Sanding:
- Pros:
- Efficiency: Power sanders, such as random orbital sanders or belt sanders, are highly efficient and can cover large areas quickly.
- Consistency: Power sanders provide a more consistent sanding result across the entire deck surface.
- Ideal for Stripping: They are well-suited for tasks like paint or varnish removal, making the process faster and easier.
- Cons:
- Less Precision: Power sanders may be less precise for detail work and can sometimes leave swirl marks if not used carefully.
- Dust Generation: Power sanding generates a significant amount of dust, which requires effective dust collection methods.
- Learning Curve: Some power sanders can be challenging to control, especially for beginners.
Choosing the Right Method:
- Consider the Deck Size: For larger decks, power sanding is generally more practical, as it significantly speeds up the process. Hand sanding is suitable for smaller decks or when addressing specific areas.
- Deck Condition: If your deck has a thick layer of paint or stain that needs to be stripped, power sanding is often the better choice. For routine maintenance and smoothing, hand sanding may suffice.
- Personal Preference: Your comfort and experience with sanding tools play a role in your choice. If you have experience with power sanders and feel confident in using them, they can be a great time-saver.
- Combination Approach: Some DIYers use a combination of hand sanding and power sanding. They use power sanders for the main deck surface and hand sanding for corners, edges, and detail work.
Remember that regardless of the method you choose, it’s essential to use the appropriate grit sandpaper and follow the sanding sequence from coarse to fine to achieve a smooth, ready-to-finish deck surface.
Step-by-Step Deck Sanding Process
Now that you’ve prepared your deck and selected the appropriate sanding method, it’s time to dive into the actual sanding process. Follow these step-by-step instructions to achieve a beautifully sanded deck:
Step 1: Safety first
- Put on your safety gear, including safety glasses, a dust mask or respirator, hearing protection, and gloves.
- Ensure the deck and surrounding area are clear of obstacles.
Step 2: Start with coarse-grit sandpaper.
- If you’re using power sanders, begin with coarse-grit sandpaper (around 60–80 grit) for the initial sanding.
- Sand in the direction of the wood grain to avoid scratches.
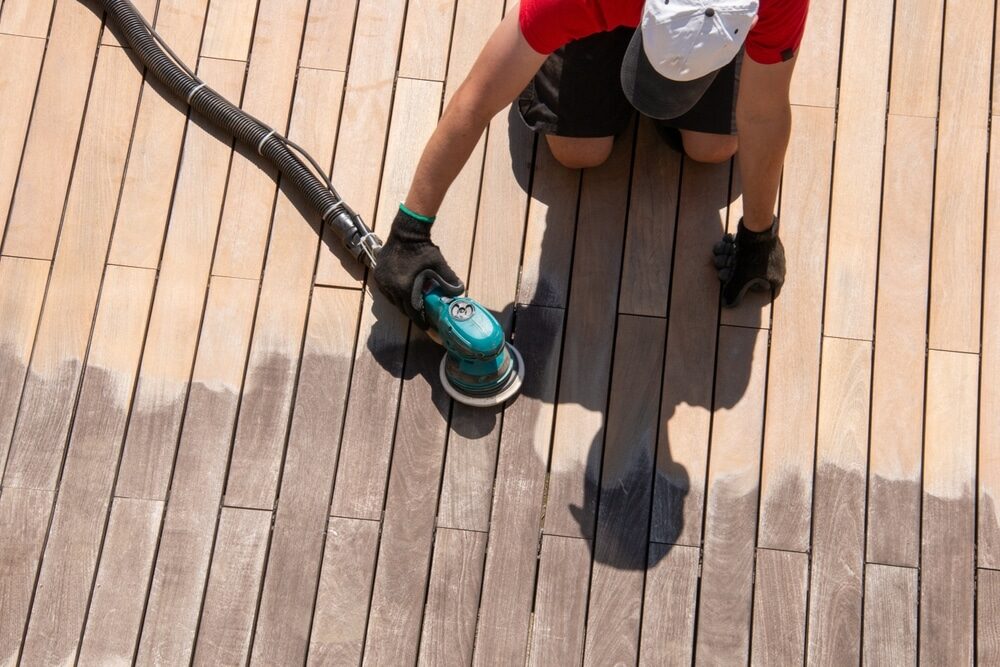
Step 3: Sand the Main Deck Surface
- Work systematically, sanding one section of the deck at a time.
- Keep the sander moving smoothly to prevent uneven sanding or gouging.
- Overlap each pass by about 1/3 of the sander’s width to ensure consistent coverage.
- Continue sanding until you’ve removed old paint, stains, or imperfections and the wood surface appears uniformly smooth.
Step 4: Transition to Medium-Grit Sandpaper
- Switch to a medium-grit sandpaper (around 100–120 grit) for the second round of sanding.
- Sand the entire deck using the same systematic approach as before.
- This step smooths out any remaining rough spots and prepares the wood for finer sanding.
Step 5: Finish with Fine Grit Sandpaper
- Finally, switch to fine-grit sandpaper (around 150–220 grit) for the last sanding pass.
- Sand the entire deck once more to achieve a polished and smooth finish.
- Pay extra attention to edges, corners, and any areas where the coarse-grit sandpaper might have left marks.
Step 6: Sanding Details and Edges
- If you have hard-to-reach areas or tight corners that power sanders can’t access, use a detail sander or sanding block with appropriate grit sandpaper to hand-sand these spots.
Step 7: Dust Collection
- As you work, periodically stop to use a shop vacuum to collect dust and debris from the deck surface. This minimizes the mess and helps you see your progress.
Step 8: Inspect Your Work
- After the final sanding pass, inspect the entire deck surface carefully. Look for any remaining imperfections or areas that need additional attention.
Step 9: Clean the Deck
- Use a broom and dustpan to sweep away the sanding dust and debris from the deck surface.
- Optionally, rinse the deck with water to remove any remaining dust and allow it to dry completely.
Step 10: Evaluate and make repairs
- Review your deck’s condition and address any issues you identified during the sanding process. This may include filling cracks, repairing damaged wood, or tightening loose components.
Step 11: Proceed to Finishing
- With a beautifully sanded deck, you’re now ready to proceed to the finishing phase. Choose the right deck stain or finish, and follow the manufacturer’s instructions for application.
By following this step-by-step deck sanding process, you’ll achieve a smooth, clean, and well-prepared surface that’s ready for the finishing touches. Proper sanding sets the stage for a beautifully rejuvenated deck that will enhance your outdoor living space for years to come.
Dealing with hard-to-reach areas
While power sanders are excellent for large, open deck surfaces, hard-to-reach areas like corners, edges, and intricate details often require special attention. Here are some tips for effectively deck sanding these challenging spots:
1. Hand sanding with sanding blocks:
- For corners and edges, use a sanding block. Sanding blocks provide stability and control for even sanding.
- Wrap the sandpaper around the sanding block and work in a back-and-forth or circular motion.
2. Detail Sander:
- Invest in a detail sander if you have many tight spots or intricate details on your deck, such as decorative railings or carvings.
- Detail sanders are designed to access hard-to-reach areas easily.
3. Contour Sanding Tools:
- Contour sanders, also known as profile sanders, are handy for shaping and sanding curved or contoured surfaces.
- They come with various attachments that match different profiles.
4. Hand Scrapers:
- In some cases, hand scrapers can be useful for removing paint or varnish from tight spots or grooves.
- Carefully scrape away the old finish, being cautious not to damage the wood underneath.
5. Sanding Sponges:
- Sanding sponges are flexible and can conform to curved or irregular surfaces.
- They come in various grits and are ideal for hand-sanding hard-to-reach areas.
6. Patience and Attention:
- Take your time and be patient when sanding intricate areas. Rushing can lead to uneven results.
- Pay close attention to detail, ensuring that you’ve sanded away all old finishes or imperfections.
7. Custom Tools and DIY Solutions:
- In some cases, you may need to create custom tools or attachments to fit specific shapes or contours on your deck.
- Be resourceful and adapt your sanding tools as needed to reach difficult spots.
8. Dust Collection:
- Use a small handheld vacuum or a brush attachment on your shop vacuum to collect dust as you work in hard-to-reach areas. This keeps the workspace clean and allows you to see your progress.
9. Protective Gear:
- Don’t forget to wear your safety gear, even when hand-sanding in tight spots. Dust and debris can still be kicked up during the process.
- Periodically stop and inspect the areas you’re sanding to ensure you’re achieving the desired level of smoothness and removing all imperfections.
- When sanding intricate details, be cautious not to oversand, which can result in a loss of fine features or contours.
By combining these techniques and tools, you can effectively tackle hard-to-reach areas on your deck, ensuring that every part of your outdoor space receives the attention it deserves during the sanding process.
Finishing Touches
With your deck sanded, inspected, and cleaned, it’s time to apply the finishing touches. This step involves choosing the right deck finish or sealant and properly applying it to protect and enhance the appearance of your deck.

Conclusion
Sanding your deck is a rewarding project that allows you to take pride in the work of your own hands. The result is a clean, smooth, and inviting outdoor space where you, your family, and your friends can enjoy countless hours of relaxation and entertainment.
Remember that proper maintenance is key to preserving your deck’s beauty and functionality. Regular cleaning, inspections, and timely repairs will help extend the life of your deck and keep it looking its best for years to come.


Sanding
We provide virtually dust-free sanding with our continuous belt machinery with mobile extraction units, giving you a safer environment for your family.
Oiling
This organic finish not only adds beauty to your home but also has exceptional water-repellent characteristics, making it easier to clean and maintain.
Waxing
This natural floor finish offers the softest and most mellow appearance – and leaves your floor able to breath.
Buffing
Using soft buffing machines (and hand-polishing where required) will bring a wonderful sheen to your newly-finished floor.
Repairs
We offer a full assessment of your wooden floors to determine what repairs are needed to provide the perfect working surface for the later stages of sanding, staining and sealing.
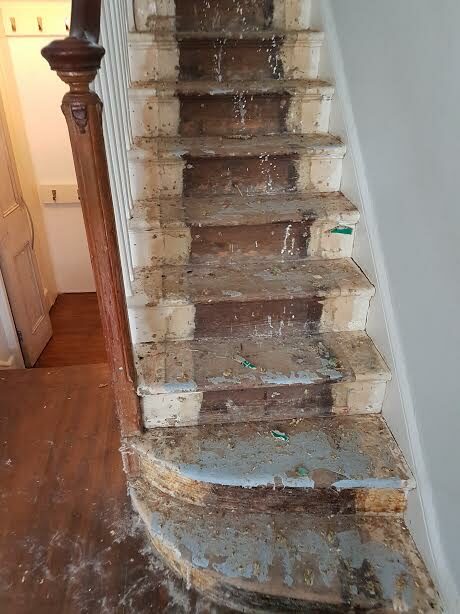
Restoration
We offer a comprehensive restoration process designed to address floors that are improperly fitted or damaged over time through wear and tear.
Request a fixed price quote for your wood floor restoration now
Simply enter your postcode below to get started.
Services
Wood Floor Sanding Wood Floor Restoration Wood Floor Scratch Repair Squeaky Wood Floor Repair Parquet Floor Sanding Parquet Floor Restoration Commercial Floor Sanding Church Floor Sanding Community Centre Floor Sanding School Floor Sanding Gap Filling Gap Filling with ResinCopyright © Mr Sander®
Privacy & Cookies Terms & Conditions Complaints Procedure Cancellation Rights Sitemap

Get An Instant Price Estimate Before You Go…
Simply enter the rooms you need sanded and we’ll provide you with a price estimate instantly! Try our price calculator now.
Get a Price Estimate NowLocal Floor Sanding Experts
Over 500 5-Star Reviews
Safe, Dust Free Sanding
Operating Since 1994