London:
Nationwide:
25,000+
Floors Restored
27 Years Experience
Wood Flooring Association Certified
Pre-Sanding Steps: Should You Pressure Wash Your Deck First?
Posted on January 4, 2024
Deck Sanding
Essential Pre-Sanding Steps: Is Pressure Washing Your Deck Necessary?
Welcome to our comprehensive guide on preparing for deck sanding. Whether you’re a seasoned DIY enthusiast or a homeowner looking to spruce up your outdoor space, this article will provide valuable insights and practical tips for effective deck maintenance. One of the most crucial and often debated pre-sanding steps is pressure washing. Is it necessary? Does it benefit the wood, or could it potentially cause damage? These are common questions that many deck owners grapple with.
In this post, we’ll dive deep into the importance of pre-sanding steps, focusing particularly on the role of pressure washing. We understand that your deck is not just a structure; it’s a part of your home where memories are made, from family barbecues to quiet evenings under the stars. That’s why it’s essential to treat it with care, ensuring it remains safe, functional, and aesthetically pleasing.
We’ll explore the pros and cons of pressure washing, provide insights on when and how to do it effectively, and offer alternatives for those situations where pressure washing might not be the best option. Whether you’re preparing for a complete deck renovation or simply doing routine maintenance, our guide aims to equip you with the knowledge and confidence to make the best decisions for your deck.
So, let’s get started on the journey to understanding the best practices in pre-sanding steps and ensuring your deck is not only clean but also well-preserved for years to come.

Understanding Your Deck’s Condition
Before you start any form of maintenance, it’s crucial to thoroughly assess your deck’s current state. A proper understanding of its condition will guide you in choosing the right methods and tools for its care, including whether pressure washing is a suitable step. Here’s how you can evaluate your deck’s condition:
Assessing Wood Type and Current Condition
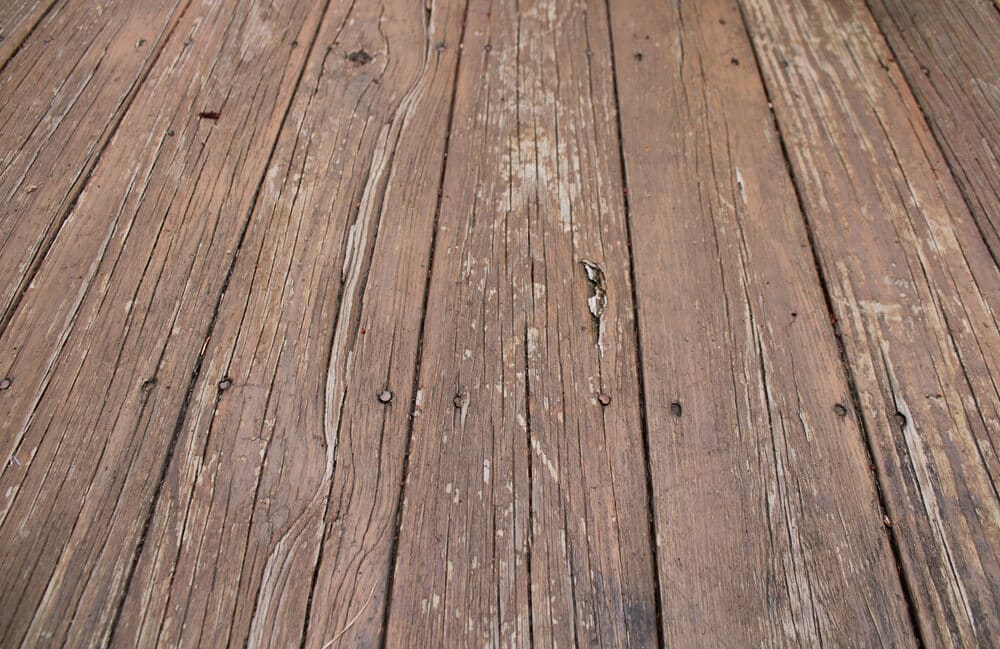
1. Identify the Wood Type: Different types of wood have varying levels of resilience and maintenance needs. For instance, softwoods like pine are more susceptible to damage than hardwoods like teak. Knowing your deck’s material helps tailor your maintenance approach.
2. Check for signs of wear and damage. Look for common issues like splintering, cracks, warping, or rot. These problems not only affect the deck’s appearance but can also be safety hazards.
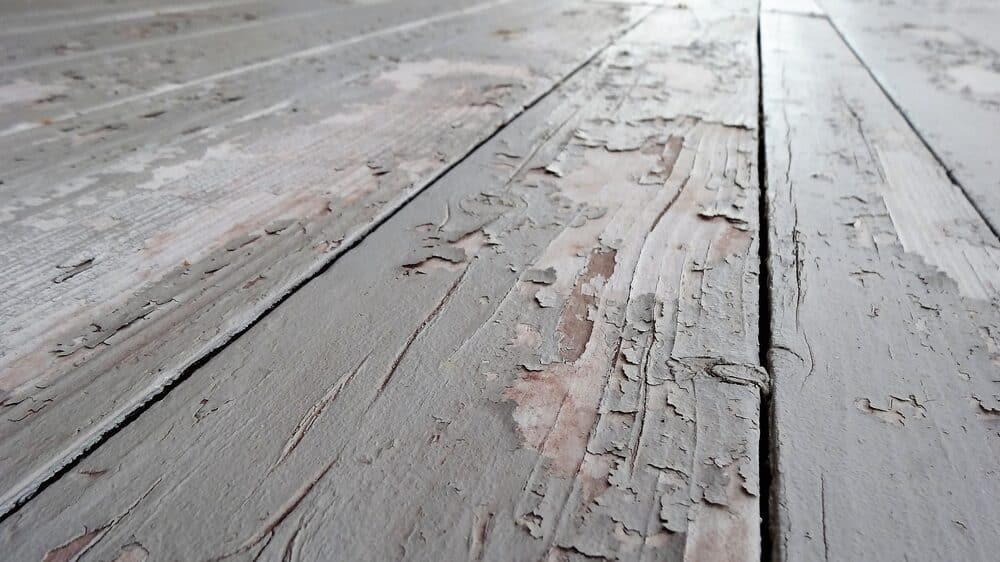
3. Evaluate the Existing Finish: If your deck is painted or stained, assess the condition of the finish. Is it peeling, fading, or chipping? The state of the existing finish can influence your approach to pre-sanding steps.

Identifying Areas Needing Special Attention
1. High-Traffic Areas: Sections of your deck that see more foot traffic usually wear out faster. Pay special attention to these areas, as they might require more intensive care.
2. Moisture-Prone Areas: Areas that are regularly exposed to moisture (near planters, under downspouts) can be more prone to rot and mold. Inspect these spots closely for any signs of decay or fungal growth.
3. Structural Integrity: Ensure that the deck’s structure, including railings and support beams, is sound. Any structural weaknesses need to be addressed before proceeding with cosmetic maintenance.
Understanding your deck’s condition is the foundation of effective maintenance. It informs you about the necessity and extent of pre-sanding steps like pressure washing. In the next sections, we’ll delve into the specifics of pressure washing and how to determine if it’s the right choice for your deck.
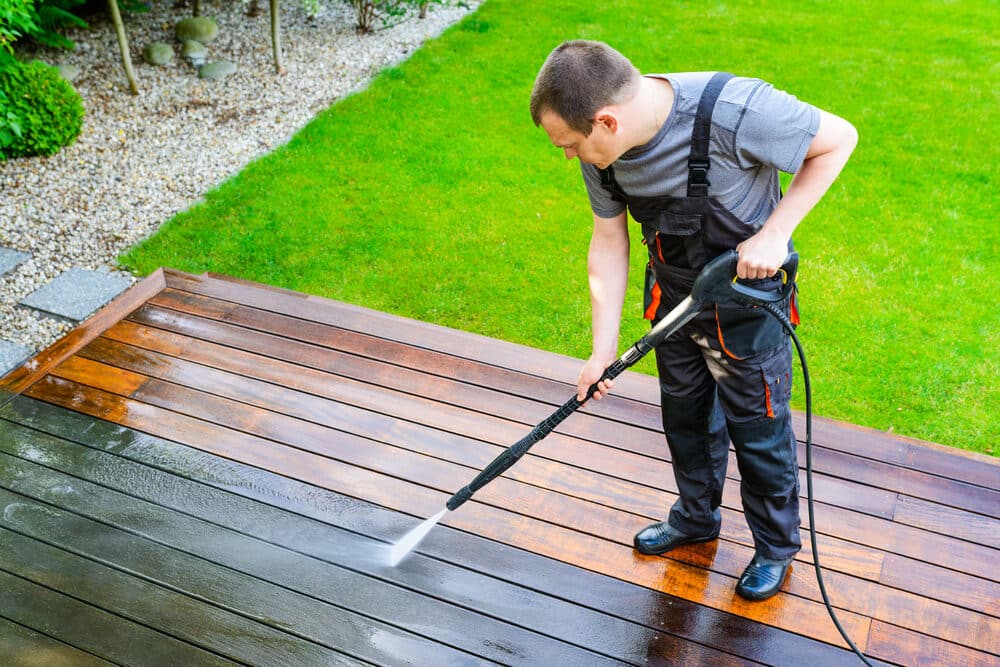
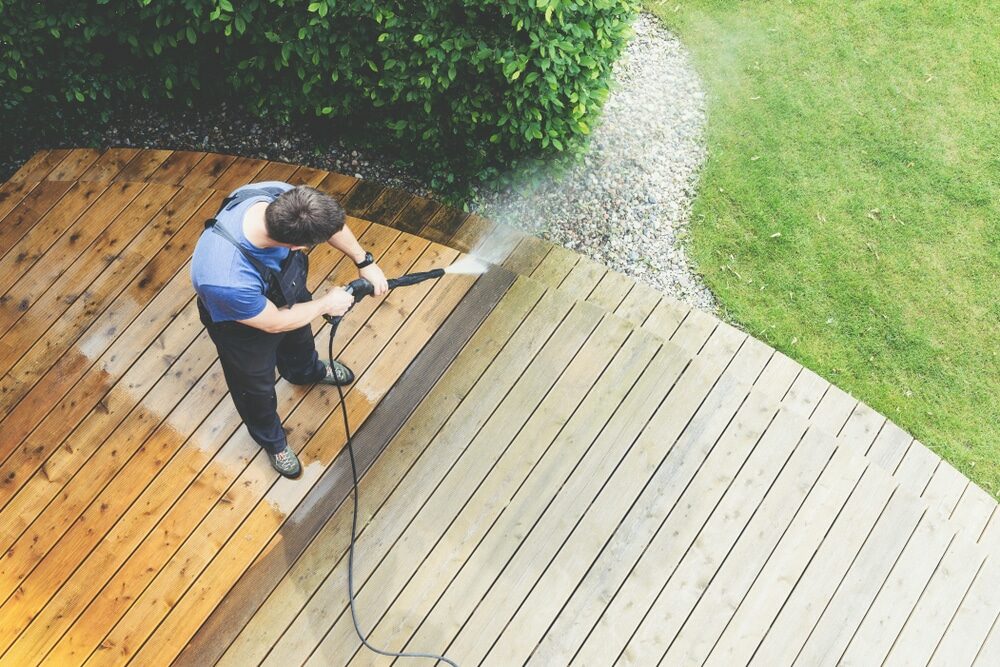
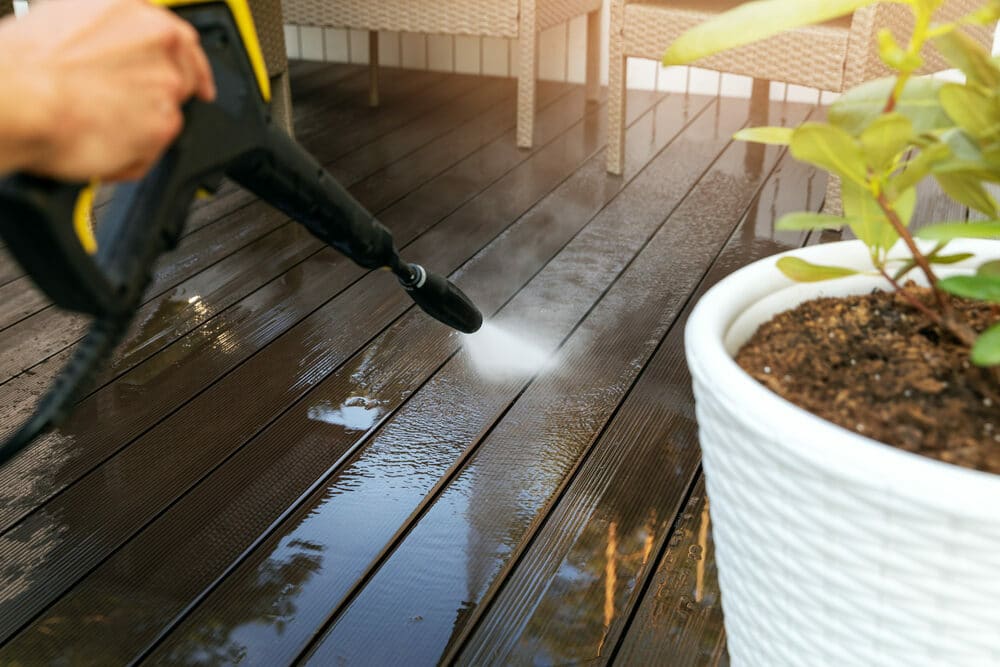
The role of pressure washing
Pressure washing can be a game-changer in deck maintenance, offering a fast and effective way to clean and prepare the surface. However, it’s essential to understand both its benefits and risks to use this method safely and effectively.
What is pressure washing?
Pressure washing involves using a high-pressure water spray to remove dirt, grime, mold, and loose paint from surfaces. It’s a popular method for cleaning decks because it can deeply penetrate the wood’s pores, removing buildup that a regular hose or scrubbing might miss.
Benefits of Pressure Washing for Decks
1. Deep Cleaning: Pressure washing can reach into nooks and crannies, removing accumulated dirt and mildew that can cause wood to deteriorate.
2. Efficiency: It’s a time-saver compared to manual scrubbing, especially for larger decks.
3. Preparation for Further Treatment: By removing the outer layer of grime and old finishes, it prepares the wood for sanding and refinishing, ensuring better adherence and longer-lasting results.
Potential Risks and Precautions
While pressure washing has its advantages, it’s not without risks, particularly if not done correctly.
1. Wood Damage: Incorrect use can lead to the wood being etched, splintered, or scarred. It’s crucial to use the right pressure settings and nozzles.
2. Water Damage: Excessive water can seep into the wood, leading to swelling, warping, or rot if not properly dried.
3. Safety Concerns: The high pressure can cause injuries if not handled with care, and it’s important to wear protective gear.
Best Practices for Pressure Washing
- Use the Right Equipment: Choose a pressure washer with adjustable settings suitable for your deck’s wood type.
- Test a Small Area: Before fully committing, test the washer on a small, inconspicuous area to ensure it doesn’t damage the wood.
- Keep a Consistent Distance: Maintain a uniform distance and angle to avoid uneven cleaning or damage.
- Allow Adequate Drying Time: After washing, give your deck enough time to dry completely before proceeding to sanding or applying any treatments.
Pressure washing can be an invaluable step in your deck’s maintenance, provided it’s done thoughtfully and carefully. It not only cleans the surface but also sets the stage for further refinishing, ultimately extending the life and beauty of your deck.
To Pressure Wash or Not: Making the Decision
Deciding whether to pressure wash your deck is a crucial step in the pre-sanding process. This decision should be based on several factors, ensuring that the choice you make is the best for your deck’s longevity and appearance.
Factors to Consider Before Pressure Washing
1. Type of Wood: Some woods are more delicate and can be easily damaged by high pressure. If your deck is made of softer wood, such as cedar or pine, you might want to opt for a gentler cleaning method.
2. Condition of the Deck: Assess the overall condition of your deck. If there are signs of severe damage, like large cracks or rot, pressure washing might exacerbate these issues.
3. Age of the Deck: Older decks might not withstand the force of pressure washing, especially if they haven’t been regularly maintained.
4. Previous Treatments: Consider the type of stains, paints, or sealants previously used on the deck. Some finishes might be stripped away too aggressively with pressure washing.

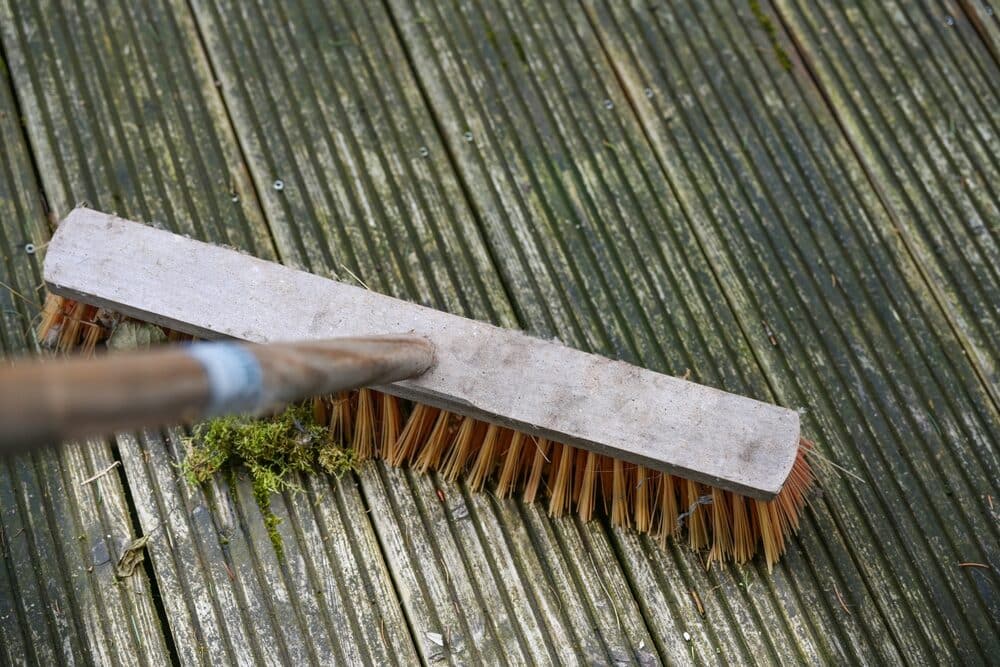
Alternatives to pressure washing
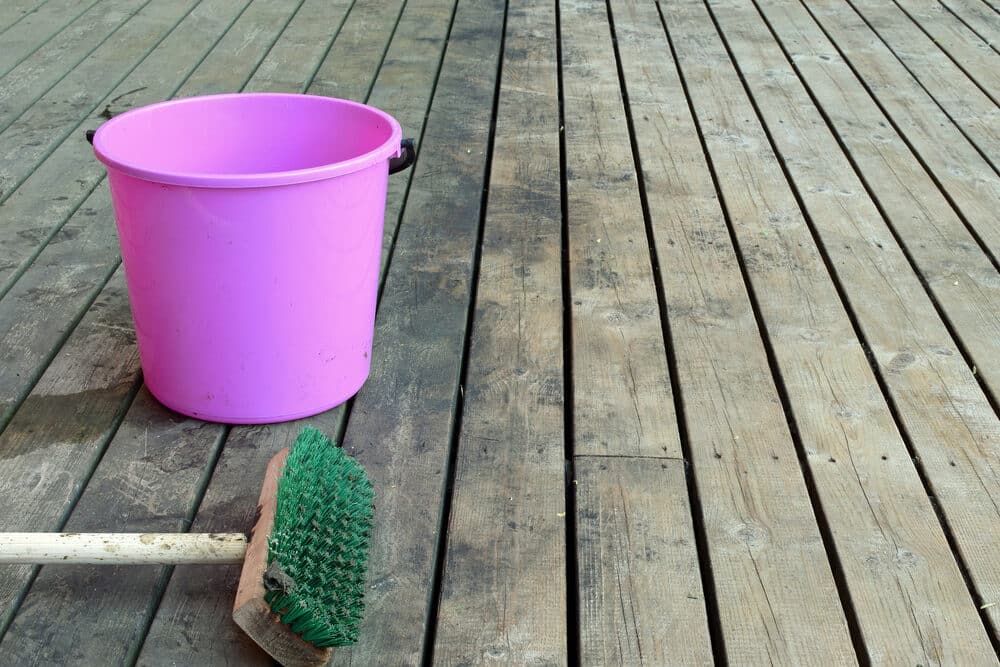
If you decide that pressure washing isn’t suitable for your deck, there are other methods to clean and prepare it for sanding:
1. Manual Cleaning: Use a stiff brush and a deck cleaning solution to manually scrub the surface. This method is more labor-intensive but allows for gentler and more controlled cleaning.
2. Soft Wash Systems: These systems use lower pressure combined with special cleaning solutions to remove dirt and mildew without the risks associated with high-pressure washing.
3. Professional Assessment: Sometimes, it’s best to consult a professional. They can assess your deck’s condition and recommend the most appropriate cleaning method.
Ultimately, the decision to pressure wash should be made after careful consideration of your deck’s specific needs. If you choose to pressure wash, ensure it’s done correctly and safely to avoid damage. If you decide against it, there are still effective ways to prepare your deck for sanding and refinishing. The goal is to choose a method that cleans your deck efficiently while preserving its integrity for years to come.

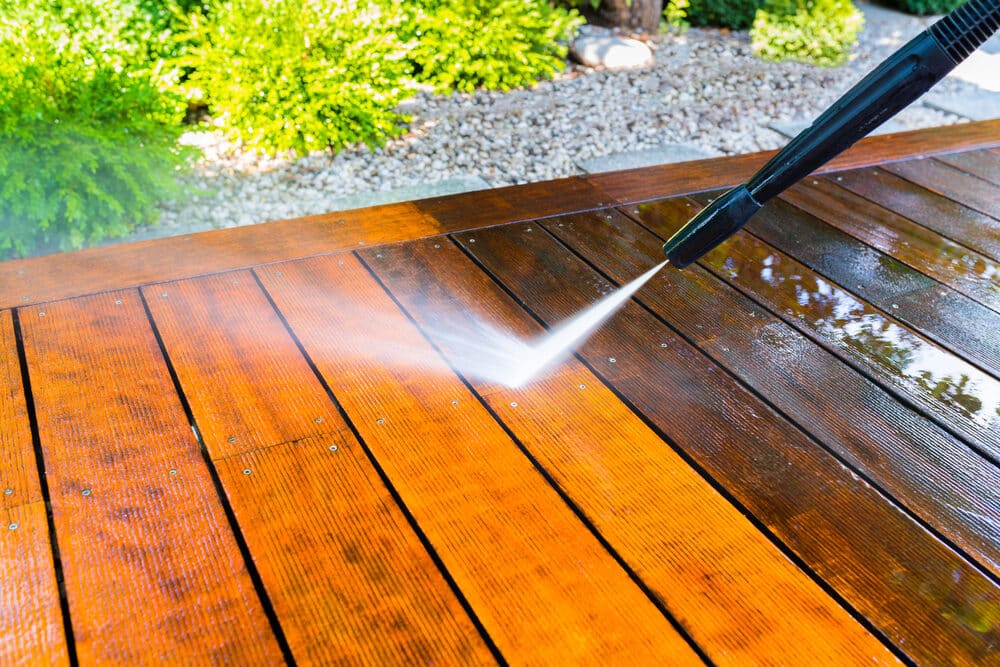
Step-by-Step Guide to Pressure Washing a Deck
Pressure-washing your deck can be a highly effective way to prepare it for sanding and refinishing. Here’s a detailed guide to help you do it safely and efficiently:
1. Preparing Your Deck and the Surrounding Area
Clear the deck: remove furniture, grills, and any decorative items. This ensures you have a clear surface to work on and prevents damage to your belongings.
Protect Surrounding Areas: Cover nearby plants and grass with a tarp or plastic sheeting to protect them from the cleaning solutions and high-pressure water.
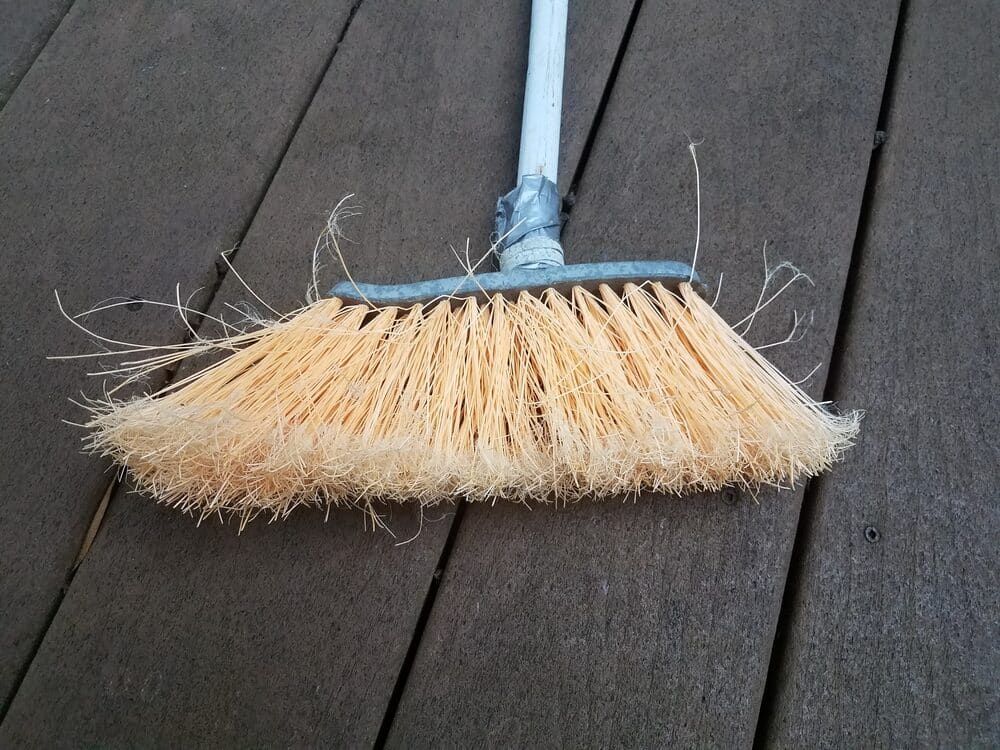
Sweep and inspect: Sweep the deck to remove loose debris. Inspect the surface for any loose nails or boards and secure them as necessary.
2. Choosing the Right Pressure Washer and Settings
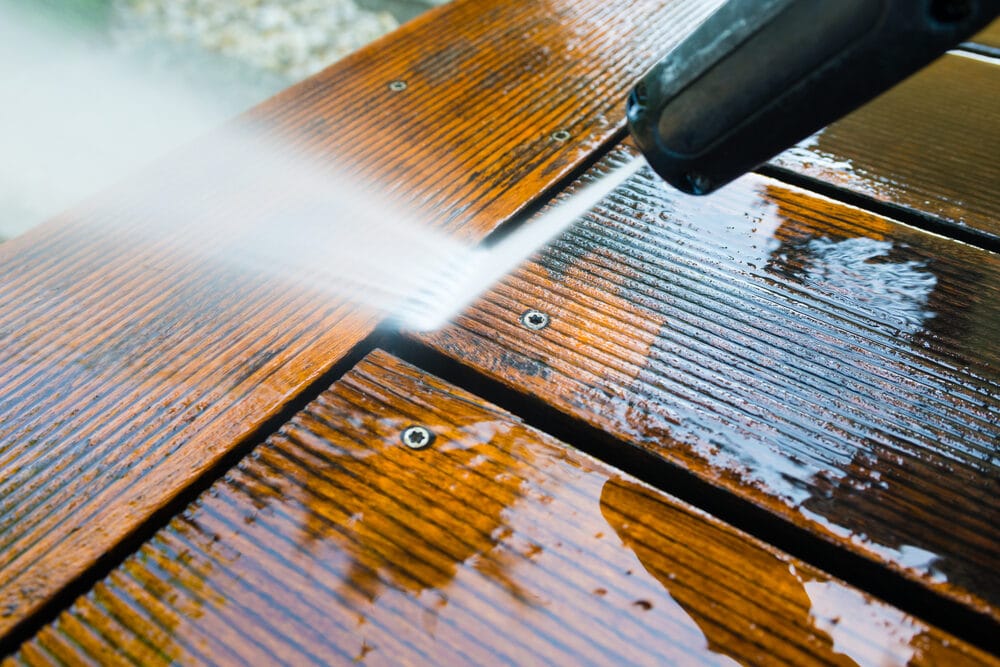
Selecting a Pressure Washer: Use a pressure washer with an adjustable nozzle and pressure settings. A pressure of about 1200–1500 PSI is usually sufficient for most decks, but this can vary based on your deck’s material.
Choosing the Right Nozzle: Use a fan-tip nozzle, as it disperses pressure over a wider area, reducing the risk of damaging the wood.
3. Effective pressure washing techniques
Test a Small Area: Begin by testing the washer on a small, inconspicuous area of your deck. Adjust the pressure and distance until you find a safe, effective setting.
Maintain a Consistent Distance and Angle: Keep the nozzle about 6–8 inches away from the deck surface and maintain a consistent 45-degree angle. This helps in evenly cleaning the surface without causing damage.
Use Smooth, Overlapping Strokes: Move the nozzle in a controlled, sweeping motion. Overlap each stroke slightly to ensure even cleaning and avoid streaking.
Apply a Deck Cleaner (Optional): For a deeper clean, you can apply a deck cleaning solution before washing. Follow the manufacturer’s instructions for application and rinsing.
4. Rinse and dry
Rinse Thoroughly: After pressure washing, rinse the deck with plain water to remove any remaining dirt or cleaning solution.
Allow Adequate Drying Time: Let the deck dry completely before moving on to sanding or refinishing. This usually takes at least 24–48 hours, depending on weather conditions.
Post-Pressure Washing: What’s Next?
After successfully pressure washing your deck, it’s important to follow up with the right steps to ensure the best results for your sanding and refinishing processes. Here’s what you should do next:
1. Inspecting the Deck After Pressure Washing
Assess for Damage: Once the deck is dry, check for any areas that might have been affected by the pressure washing, such as raised fibers, splinters, or weakened spots.
Look for remaining dirt or stains. Ensure that all areas of the deck are clean. Stubborn stains might need additional treatment or spot cleaning.
Check for Moisture Levels: Ensure that the wood is thoroughly dry before proceeding. This can be checked using a moisture meter, with the ideal moisture content typically being below 15%.
2. Addressing any damage or issues
Sanding Raised Fibers: If pressure washing has caused wood fibers to raise, light sanding will be necessary to smooth the surface. This prepares the deck for sealing or staining.
Repairing Damage: Address any minor damage, such as loose boards or protruding nails. For more significant damage, you might need to replace sections of the decking.
Treating Stains: Apply a deck cleaner or stain remover to any remaining stains, following the manufacturer’s instructions.

3. Preparing for Sanding
Choosing the Right Sandpaper: Use a medium-grit sandpaper (like 60–80 grit) for initial sanding. This helps to smooth out any roughness and prepare the wood for finer sanding.
Sanding Techniques: Sand in the direction of the wood grain for the best results. Be thorough but gentle to avoid damaging the wood.
4. Final Cleaning
Sweep and Vacuum: Remove all dust and debris from the sanding process. This ensures a clean surface for applying any treatments or finishes.
Washing (if necessary): In some cases, a final wash with a mild deck cleaner can help remove any remaining dust and prepare the surface for sealing or staining.
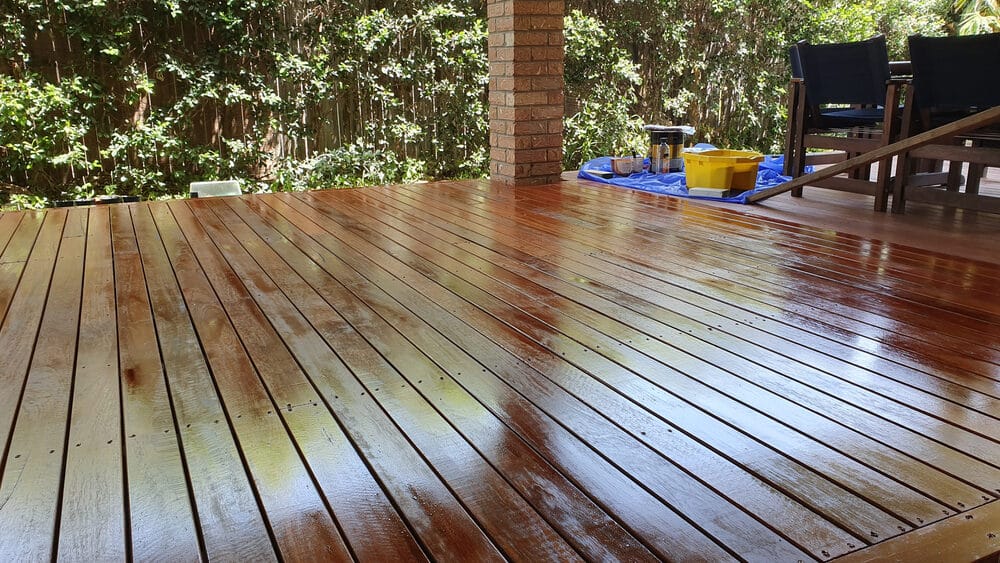
The post-pressure washing phase is crucial in the deck maintenance process. It sets the stage for sanding, sealing, or staining, ensuring that your efforts in cleaning and preparing the deck lead to a beautiful and long-lasting finish. Remember, the key to successful deck refinishing is in the details, so take your time and be thorough in each step.
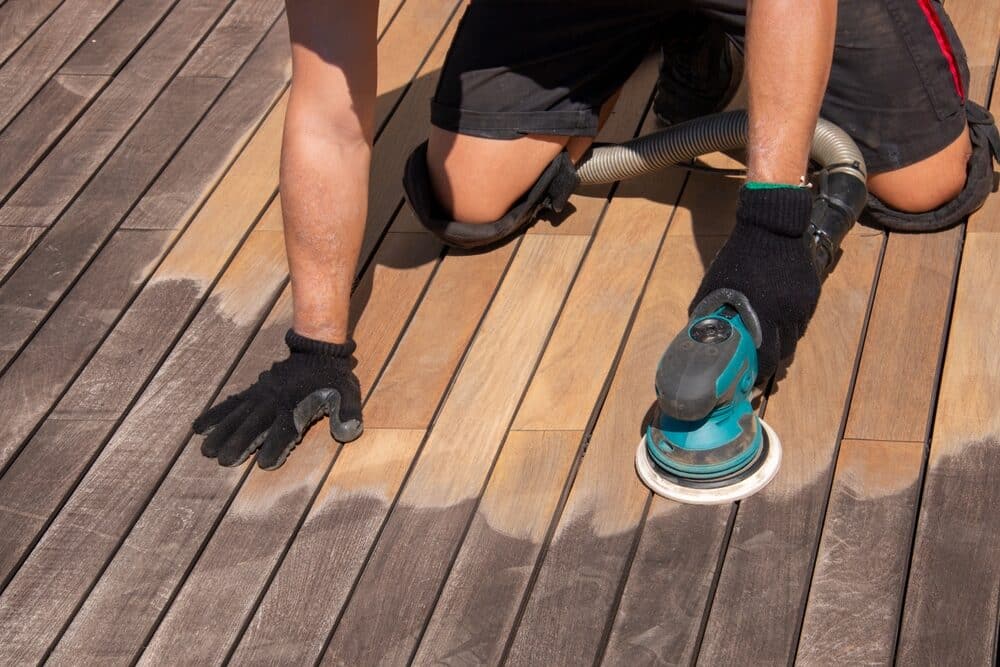
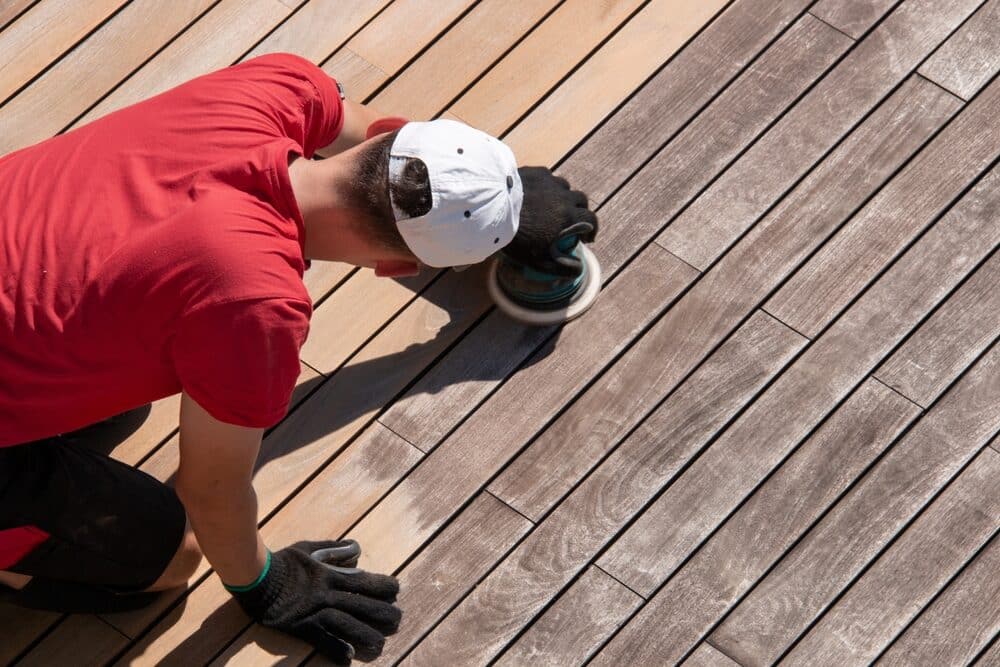
Preparing for Sanding
After your deck has been pressure washed and is completely dry, it’s time to prepare for the sanding process. Proper preparation is key to achieving a smooth, even surface that’s ready for staining or sealing. Here’s how to get your deck ready for this crucial step:
1. Necessary tools and materials
Before you begin, gather all the necessary tools and materials to ensure a smooth sanding process.
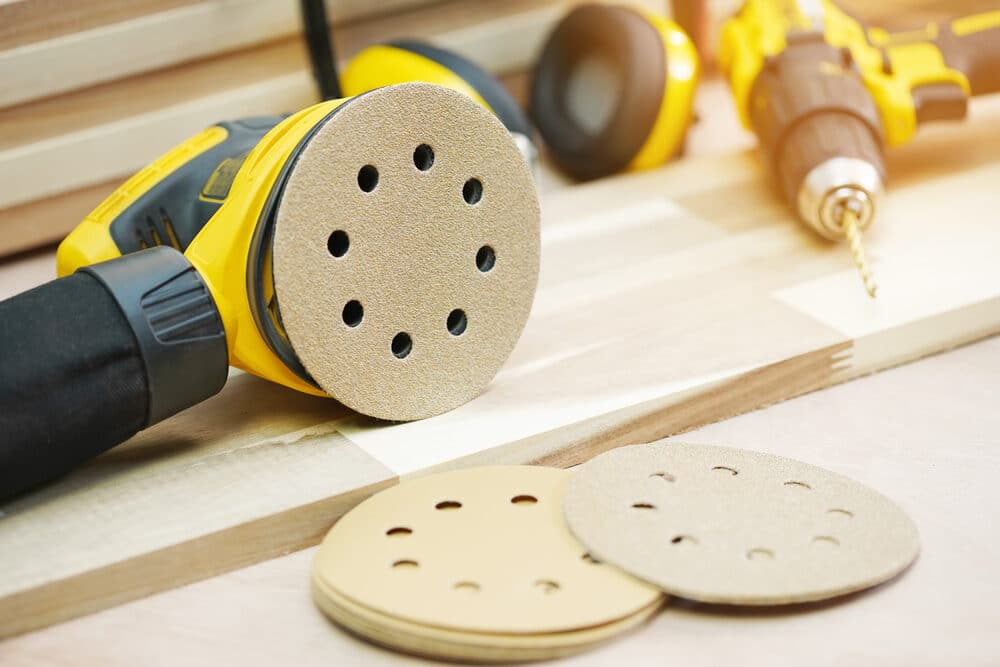
- Sandpaper or Sanding Blocks: Choose the right grit size. Start with a coarser grit (like 60–80 grit) and finish with a finer grit (like 100–120 grit).
- Power Sander (Optional): For larger decks, a power sander can save time and effort. Remember to use it carefully to avoid damaging the wood.
- Safety Gear: Wear protective eyewear, a dust mask, and gloves to protect yourself from wood dust and splinters.
- Broom and Vacuum Cleaner: These are essential for cleaning up wood dust during and after sanding.
2. Tips for Efficient and Safe Sanding
- Inspect the deck: Look for any loose boards, nails, or screws and secure them before you start sanding. This ensures a stable surface and prevents accidents.
- Start with Coarser Grit: Begin with a coarser grit to remove any rough spots, raised grain, or remaining old finish. This step is crucial for smoothing out the surface.
- Sand Along the Grain: Always sand in the direction of the wood grain. This reduces the risk of creating scratches and ensures a more uniform finish.
- Switch to Finer Grit: After the initial sanding, switch to a finer-grit sandpaper for the final smoothing. This prepares the wood for staining or sealing.
- Clean as You Go: Regularly remove sawdust and debris. This not only keeps your working area clean but also allows you to see the progress and quality of your sanding.
3. Final deck cleaning
After sanding, it’s important to thoroughly clean the deck to remove all dust and debris. This step is crucial for a flawless application of stain or sealant.
- Sweep and Vacuum: Use a broom and vacuum to remove all the dust from the deck surface, including gaps between the boards.
- Wiping Down: For a completely dust-free surface, wipe down the deck with a damp cloth or tack cloth.
Proper preparation for sanding is a critical step in deck maintenance. By following these guidelines, you can ensure that your deck is perfectly prepped for the next steps, whether it’s staining, sealing, or painting. A well-prepared deck not only looks better but also lasts longer, providing you with an enjoyable outdoor space for many years to come.
Conclusion
Throughout this comprehensive guide, we’ve explored the critical pre-sanding steps necessary for effectively maintaining and refurbishing your deck. From assessing your deck’s condition to the detailed process of pressure washing and subsequent preparations for sanding, each step plays a vital role in ensuring the longevity and beauty of your outdoor space.
Key Takeaways:
- Assessment is Crucial: Understanding your deck’s current condition and material is essential before undertaking any maintenance steps.
- Pressure Washing Can Be Beneficial: When done correctly, pressure washing is an effective method to clean and prep your deck, but it’s not always necessary or suitable for every type of wood or deck condition.
- Alternatives Exist: For decks where pressure washing might be too harsh, alternative cleaning methods such as manual scrubbing or soft wash systems are available.
- Preparation for Sanding is Key: Properly preparing your deck for sanding, including thorough cleaning and smoothing of the wood surface, will greatly enhance the outcome of the refinishing process.

Final Recommendations:
Whether you choose to pressure wash your deck or opt for a gentler cleaning approach, the goal is always to protect and enhance your deck. Regular maintenance of your deck, includes proper cleaning and refinishing, will extend the life of your deck, making it a safe and enjoyable place for relaxation and entertainment.
Remember, each deck is unique, and what works for one may not be ideal for another. Always consider your deck’s specific needs and circumstances. If in doubt, consulting a professional can provide guidance tailored to your situation.
We hope this guide has been insightful and helpful in your journey to maintaining a beautiful and long-lasting deck. Happy decking!


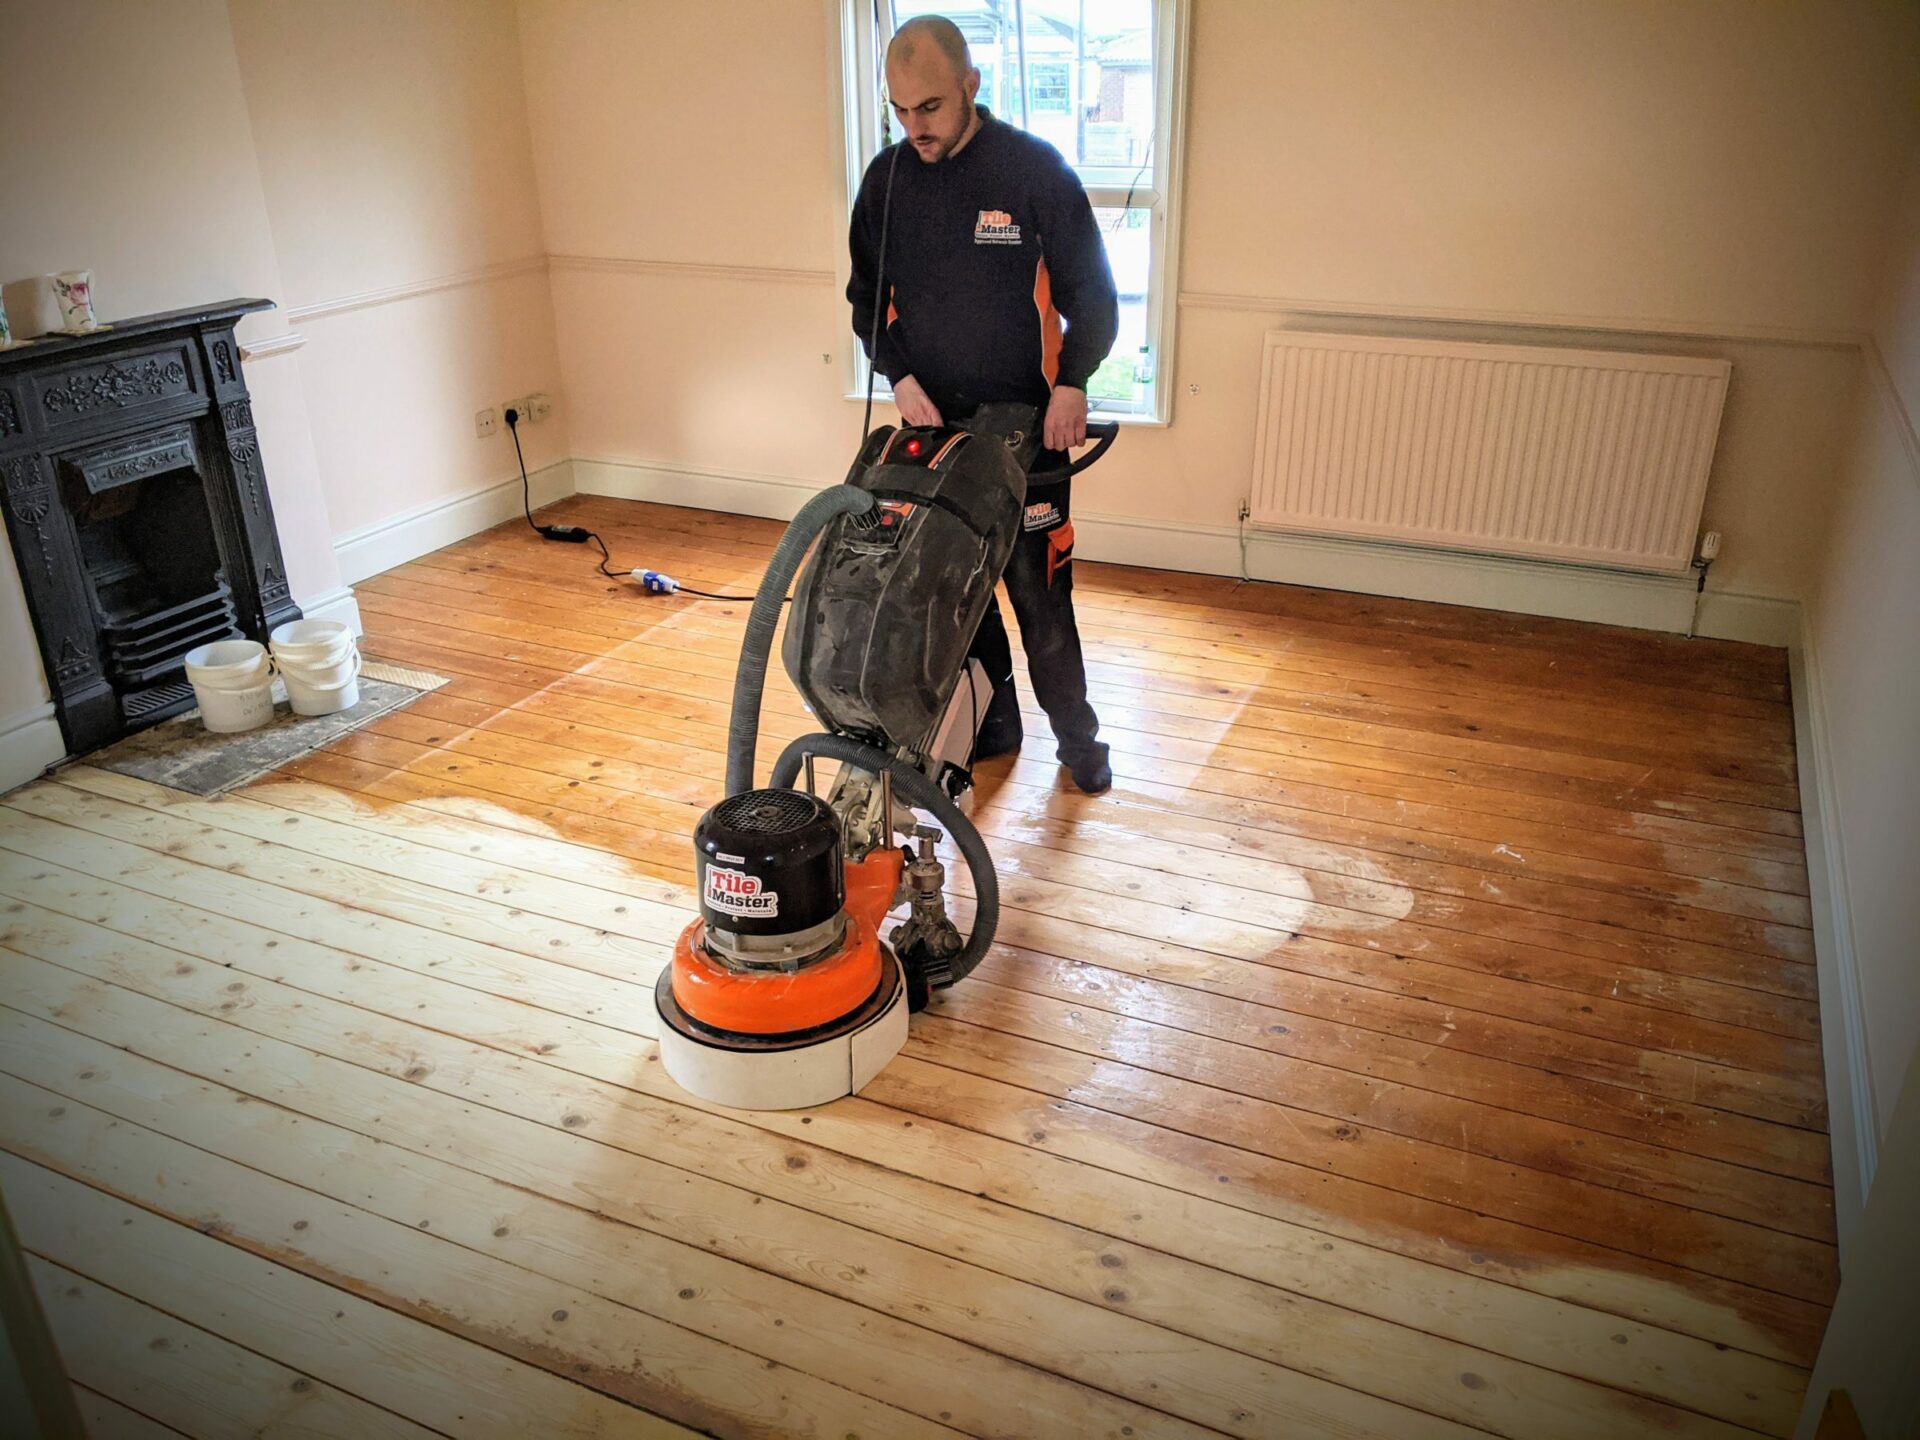
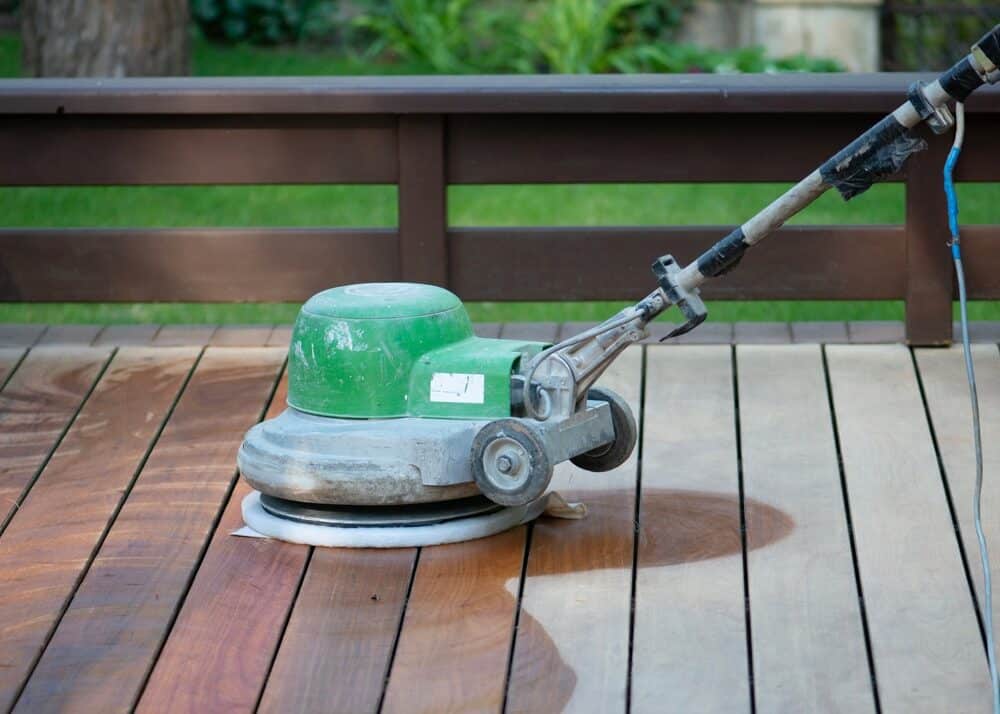
Sanding
We provide virtually dust-free sanding with our continuous belt machinery with mobile extraction units, giving you a safer environment for your family.
Oiling
This organic finish not only adds beauty to your home but also has exceptional water-repellent characteristics, making it easier to clean and maintain.
Waxing
This natural floor finish offers the softest and most mellow appearance – and leaves your floor able to breath.
Buffing
Using soft buffing machines (and hand-polishing where required) will bring a wonderful sheen to your newly-finished floor.
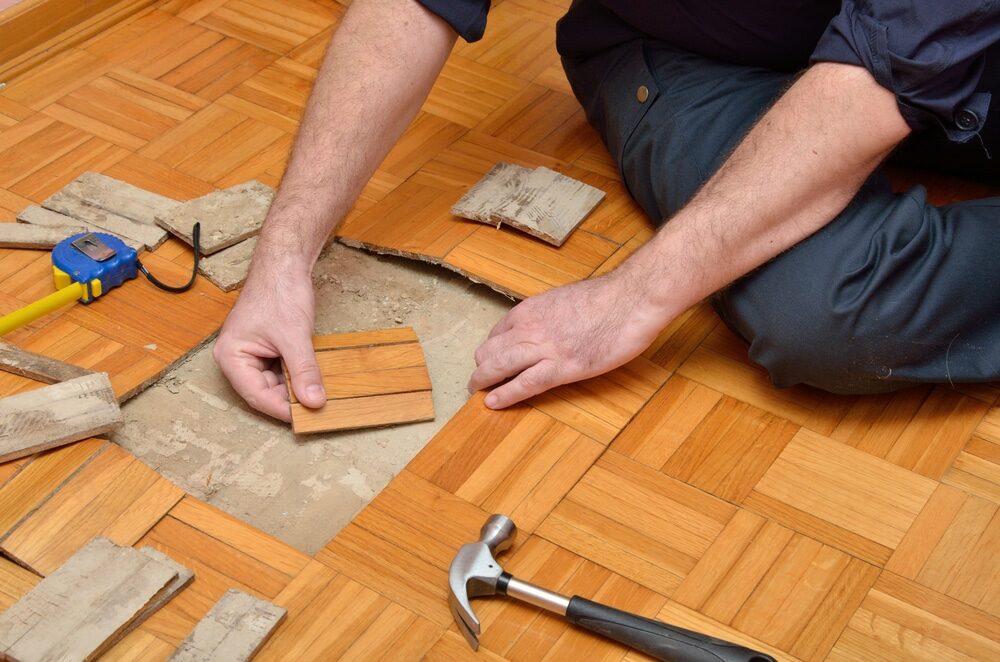
Repairs
We offer a full assessment of your wooden floors to determine what repairs are needed to provide the perfect working surface for the later stages of sanding, staining and sealing.
Restoration
We offer a comprehensive restoration process designed to address floors that are improperly fitted or damaged over time through wear and tear.
Request a fixed price quote for your wood floor restoration now
Simply enter your postcode below to get started.
Services
Wood Floor Sanding Wood Floor Restoration Wood Floor Scratch Repair Squeaky Wood Floor Repair Parquet Floor Sanding Parquet Floor Restoration Commercial Floor Sanding Church Floor Sanding Community Centre Floor Sanding School Floor Sanding Gap Filling Gap Filling with ResinCopyright © Mr Sander®
Privacy & Cookies Terms & Conditions Complaints Procedure Cancellation Rights Sitemap

Get An Instant Price Estimate Before You Go…
Simply enter the rooms you need sanded and we’ll provide you with a price estimate instantly! Try our price calculator now.
Get a Price Estimate NowLocal Floor Sanding Experts
Over 500 5-Star Reviews
Safe, Dust Free Sanding
Operating Since 1994