London:
Nationwide:
25,000+
Floors Restored
27 Years Experience
Wood Flooring Association Certified
Post-Sanding Care: Should You Wash Your Deck After Sanding?
Posted on December 8, 2023
Deck Sanding
After Sanding Your Deck: Is Deck Washing Necessary?
Your deck is an essential outdoor space where you relax, entertain, and soak up the beauty of nature. Over time, exposure to the elements can take a toll on its appearance and structural integrity. To keep your deck looking its best and ensure its longevity, regular maintenance is crucial. One important step in deck maintenance is sanding, which helps remove old finishes, smooth out imperfections, and prepare the surface for a fresh coat of stain or paint.
But what should you do once the deck sanding is complete? Is it necessary to wash your deck after sanding? In this blog post, we will explore the importance of post-sanding care for your deck and whether washing it should be part of your maintenance routine. We’ll discuss the reasons behind this step, when and how to do it properly, and what other alternatives you might consider. By the end of this guide, you’ll have a clear understanding of how to care for your deck after sanding, ensuring it remains a beautiful and functional outdoor space for years to come. Let’s dive in!
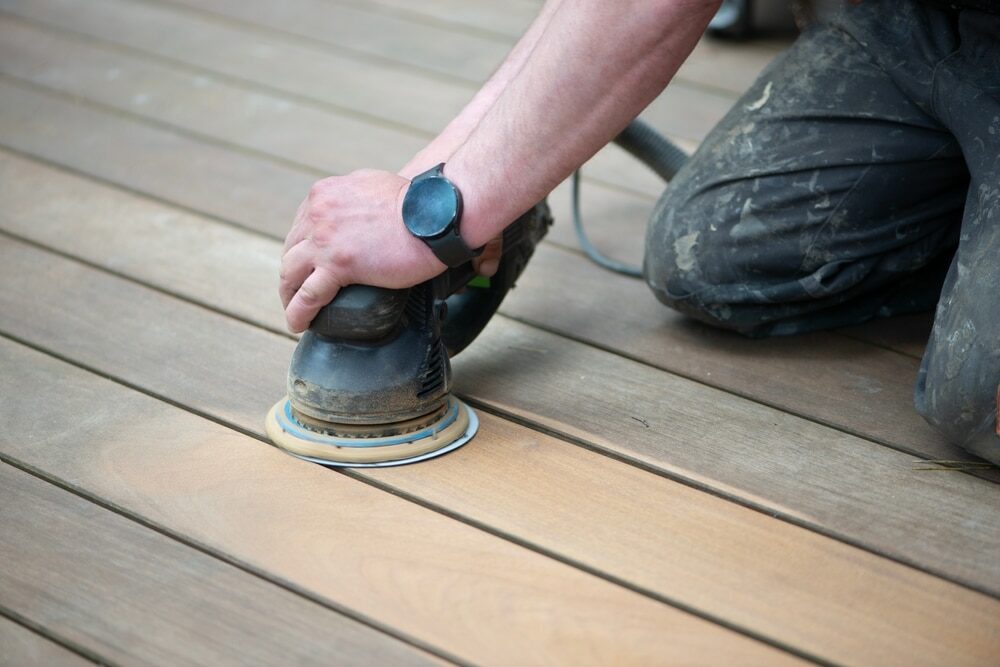
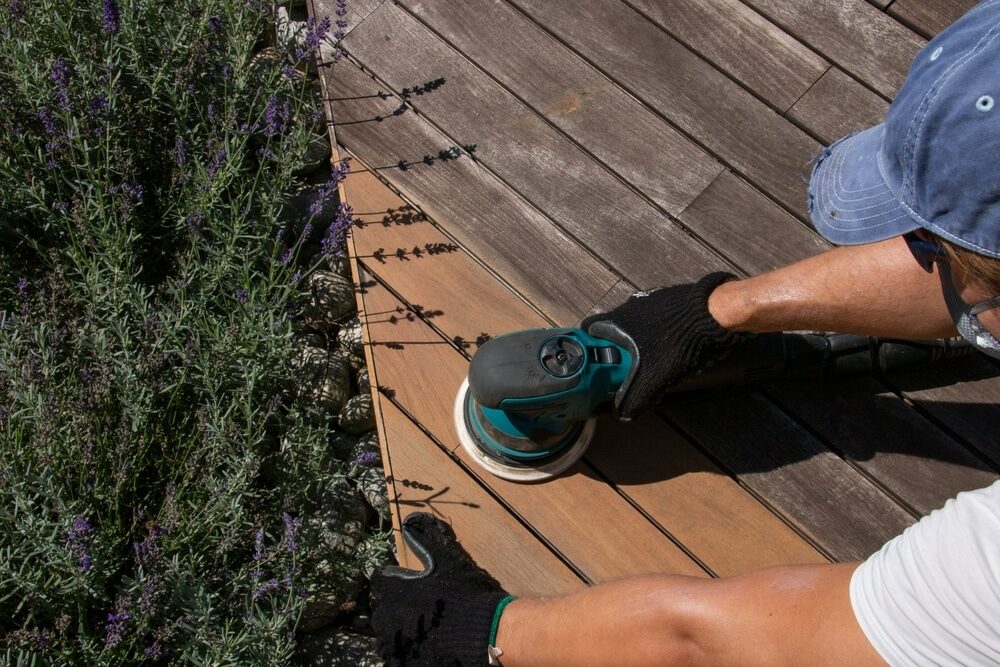
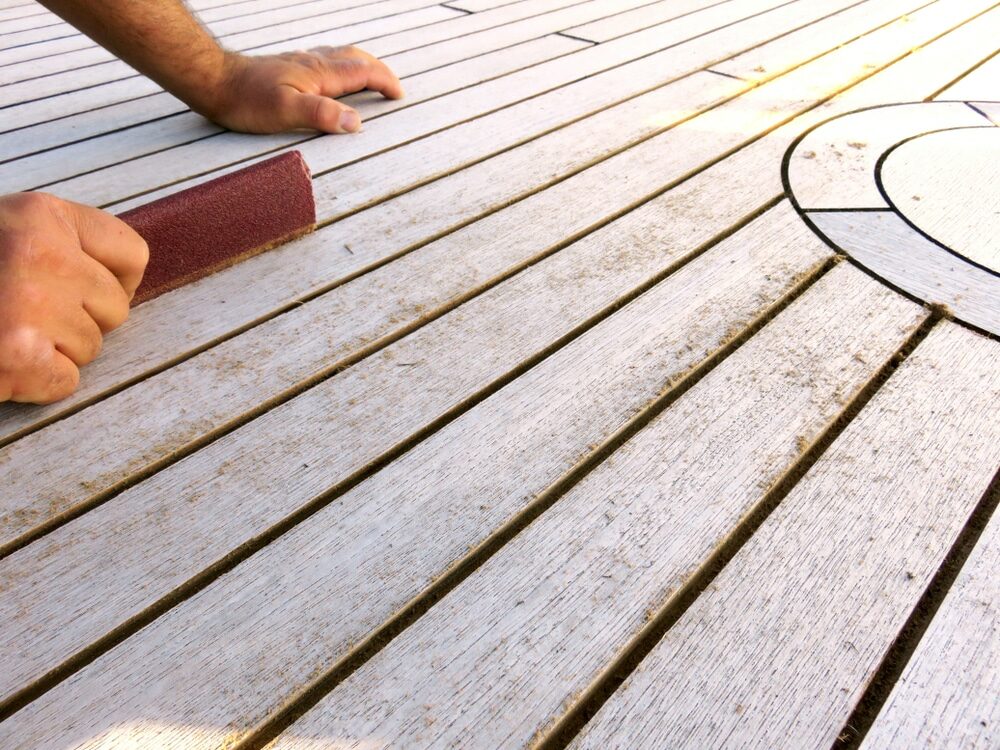
Understanding Deck Sanding:
Before delving into post-sanding care, let’s start by examining the process of deck sanding itself. Deck sanding is a fundamental step in deck maintenance, and it serves several essential purposes:
- Surface Preparation: Over time, your deck’s surface can become weathered, rough, and uneven due to exposure to the sun, rain, and foot traffic. Sanding helps to smooth out these imperfections, creating a clean and even surface for the next finish.
- Old Finish Removal: If your deck has an existing finish, such as paint or stain, sanding is necessary to strip away the old coating. This is crucial because applying a new finish directly over the old one can lead to adhesion issues and an uneven appearance.
- Wood Restoration: Sanding can breathe new life into weathered or aged wood. It removes the gray, weathered layer, exposing fresh, vibrant wood beneath. This not only enhances the deck’s appearance but also prolongs its lifespan.
- Improved Adhesion: A properly sanded deck provides a better surface for the new finish to adhere to. This ensures that the finish bonds effectively with the wood, resulting in a longer-lasting and more durable coating.
- Sanding Grit Selection: Deck sanding typically involves using a range of sandpaper grits, from coarse to fine. The choice of grit depends on the condition of your deck and the level of smoothing required. Coarser grits are used for initial sanding to remove old finishes, while finer grits are used for final smoothing.
Overall, deck sanding is a critical step in the maintenance process that sets the stage for a successful finish. However, the process can generate dust and debris, which leads to the question: Should you wash your deck after sanding? We’ll explore the answer to this question and more in the upcoming sections of this blog post.
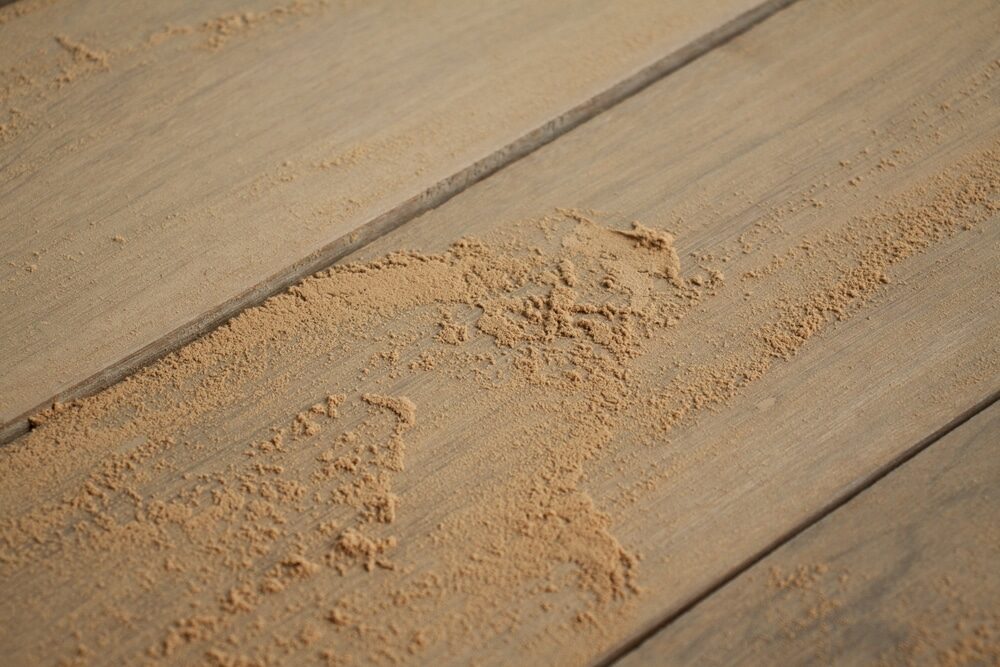
Dust and Residue: Why They Matter
As you engage in the deck sanding process, it’s important to understand why the dust and residue generated during sanding can have a significant impact on your deck’s overall condition and the quality of your finish. Here are some key reasons why dust and residue matter:
- Surface Contamination: Sanding creates fine dust particles that settle on your deck’s surface. If not properly addressed, this dust can mix with your new finish, leading to an uneven and gritty texture. The result is a finish that doesn’t look as smooth and professional as you’d like.
- Adhesion Issues: Dust and residue left on the deck can interfere with the adhesion of your new finish. When the finish is applied over contaminated surfaces, it may not bond securely to the wood, leading to premature peeling, cracking, or flaking of the finish.
- Aesthetic Concerns: The presence of dust and residue can mar the visual appeal of your deck. Even if your deck’s surface is perfectly smooth after sanding, leftover debris can create an unsightly appearance that detracts from the beauty of the finish.
- Longevity of Finish: For your deck finish to last as long as possible and provide adequate protection, it needs a clean, uncontaminated surface to adhere to. Any dust or residue left behind can compromise the durability and lifespan of the finish.
- Professional Results: If you aim to achieve professional-looking results in your deck refinishing project, addressing dust and residue is essential. Professionals take care to ensure a clean, dust-free surface before applying finishes to ensure a flawless outcome.
Now that you understand why dust and residue matter, the next question to explore is whether washing your deck after sanding is the most effective way to remove these contaminants and prepare your deck for the next steps in the refinishing process. We’ll delve into this topic in the following sections of this blog post.
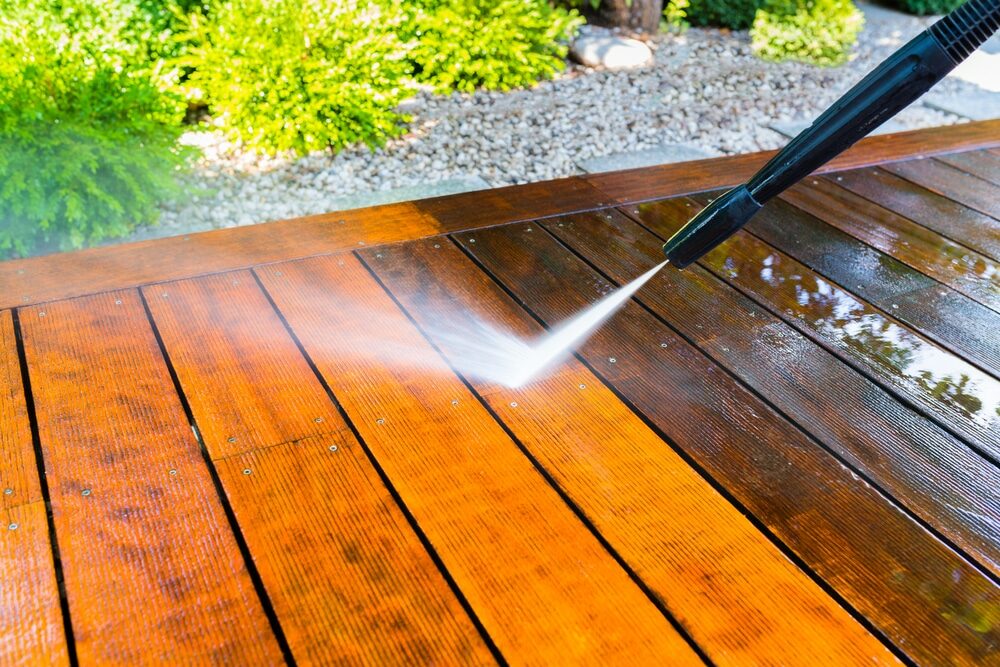
The Case for Washing Your Deck
Now that we’ve discussed the importance of addressing dust and residue on your deck after sanding, let’s make the case for why washing your deck is a crucial step in the post-sanding care process:
- Complete Contaminant Removal: Washing your deck with water and appropriate cleaning agents is one of the most effective ways to completely remove dust, residue, and any other contaminants left on the deck’s surface. This ensures a clean canvas for your new finish.
- Improved Adhesion: A thorough deck wash not only removes debris but also cleans the wood fibers, enhancing the adhesion of your chosen finish. A clean, porous surface allows the finish to penetrate and bond properly with the wood, leading to a more durable and long-lasting result.
- Stain or Paint Compatibility: If you plan to apply a new stain or paint to your deck, washing is especially important. Residue from sanding can interfere with the stain’s or paint’s ability to penetrate the wood, potentially resulting in an uneven or blotchy appearance.
- Preventing Future Issues: Washing your deck can also help prevent potential problems down the road. By eliminating contaminants and ensuring a clean surface, you reduce the risk of finish failure, such as peeling, blistering, or premature wear.
- Visual Appeal: A clean, well-maintained deck simply looks better. Washing your deck not only enhances its longevity but also restores its visual appeal, making it a more inviting outdoor space for relaxation and entertainment.
- Health and safety: Neglecting to remove dust and residue from your deck can pose health and safety risks. Dust particles can become airborne, potentially causing respiratory issues for those in the vicinity. A thorough wash helps mitigate these risks.
- Environmental Considerations: If you’re concerned about the environmental impact, rest assured that washing your deck can be done in an eco-friendly manner. Choose environmentally friendly cleaning agents and use responsible water conservation practices.
In summary, washing your deck after sanding is a vital step in the post-sanding care process. It not only ensures a clean, contaminant-free surface but also improves adhesion, enhances the appearance of your deck, and contributes to the longevity of your finish. In the next sections, we’ll guide you through when and how to wash your deck properly, offering tips for achieving the best results.
When to Wash Your Deck
Determining the right time to wash your deck after sanding is essential to ensuring the best results in your deck refinishing project. Here are some considerations to help you determine when it’s the ideal moment to proceed with the washing step:
- Immediate Post-Sanding: It’s generally recommended to wash your deck immediately after completing the sanding process. This allows you to remove dust and residue while they are still fresh and haven’t settled into the wood’s pores or crevices.
- Weather Conditions: Consider the weather conditions in your area. Ideally, choose a day with mild temperatures and low humidity for deck washing. Avoid washing your deck in extreme heat or direct sunlight, as this can cause the cleaning solution to dry too quickly, potentially leaving streaks or residue.
- Dry Weather: Ensure that the deck is completely dry before washing. If you’ve sanded your deck on a rainy day or if it’s been exposed to moisture, allow it to dry thoroughly before starting the washing process.
- Upcoming Finish Application: Plan your deck washing to align with the timeline for applying the new finish. Washing your deck a day or two before applying the finish allows ample time for the wood to dry and be in an optimal condition for finishing.
- Avoid rushing: Rushing through the post-sanding care process can lead to subpar results. Take the time to sand your deck thoroughly, and then proceed with washing when you can dedicate enough time to the task.
- Inspect for Residue: Before washing, inspect the deck surface for any visible dust or residue left from the sanding process. If you notice areas that need extra attention, consider spot cleaning before proceeding with a full deck wash.
- Consider Cleaning Products: Depending on the condition of your deck and the type of finish you plan to apply, you may choose to use a deck cleaner or a deck brightener in addition to water. These products can help remove stubborn stains and discoloration.
By taking these factors into account, you can determine the most suitable time to wash your deck after sanding. Proper timing ensures that your deck is clean, dry, and ready to receive the new finish, resulting in a beautifully refreshed outdoor space. In the following section, we’ll guide you through the steps of how to wash your deck properly to achieve the best possible results.
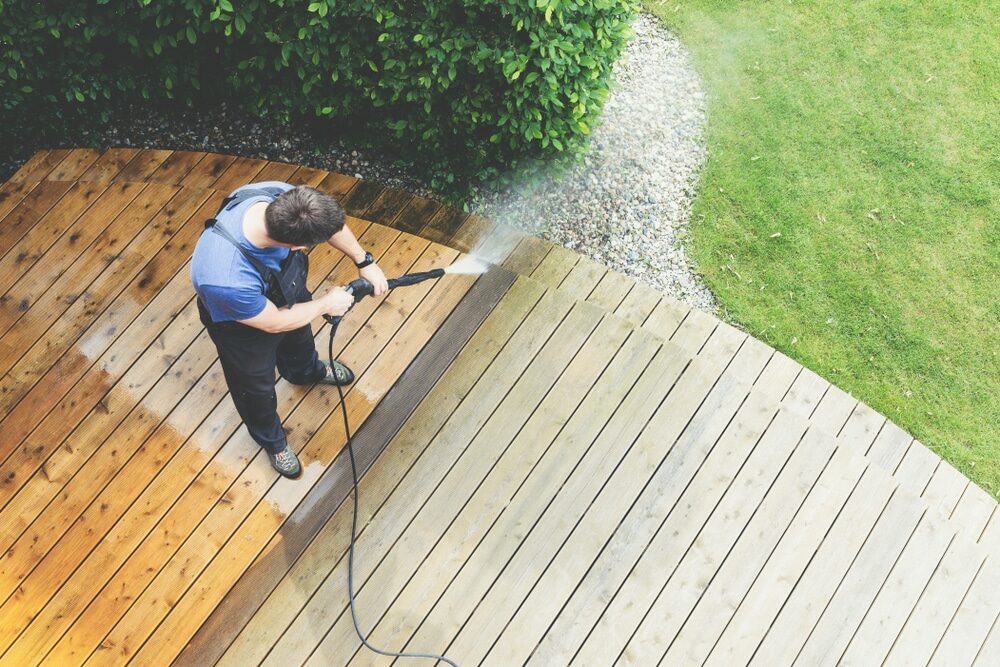
How to Wash Your Deck Properly
Properly washing your deck after deck sanding is a crucial step to ensure the removal of dust, residue, and contaminants, creating an ideal surface for your new finish. Follow these steps to wash your deck effectively:
Materials you’ll need:
- Garden hose with a spray nozzle
- Deck brush or stiff bristle broom
- Deck cleaner or deck brightener (if needed)
- Bucket for mixing cleaning solution (if using a deck cleaner)
- Safety goggles and gloves
- Protective clothing
Step-by-Step Guide:
- Safety Precautions: Put on safety goggles, gloves, and appropriate clothing to protect yourself from cleaning agents and debris.
- Clear the deck: Remove any furniture, plants, or other items from the deck to ensure unobstructed access to the entire surface.
- Sweep the Deck: Start by sweeping the deck with a deck brush or stiff bristle broom. This will help remove loose debris, leaves, and surface dust.
- Prepare the cleaning solution: If you’re using a deck cleaner, follow the manufacturer’s instructions for mixing the solution. Typically, this involves diluting the cleaner with water in a bucket.
- Wet the deck: Use a garden hose with a spray nozzle to wet the entire deck thoroughly. This helps prepare the wood for cleaning and prevents the cleaning solution from drying too quickly.
- Apply the cleaning solution (if necessary): If you’re using a deck cleaner or deck brightener, apply it to the wet deck surface according to the product’s instructions. Typically, this involves spraying or brushing the solution onto the wood and allowing it to sit for a specified time (usually 10-15 minutes) to loosen dirt and stains.
- Scrub the deck: Use a deck brush or stiff bristle broom to scrub the deck surface vigorously. Scrub in the direction of the wood grain to avoid damaging the wood fibers. Pay extra attention to any stained or heavily soiled areas.
- Rinse Thoroughly: Rinse the deck thoroughly with the garden hose. Start at one end of the deck and work your way to the other, ensuring that all cleaning solution, dirt, and debris are washed away.
- Inspect and repeat (if necessary): After rinsing, inspect the deck surface. If you notice any remaining residue or areas that require additional cleaning, repeat the scrubbing and rinsing process.
- Allow to Dry: Give your deck ample time to dry completely. This typically takes at least 24–48 hours, depending on weather conditions. Ensure that the deck is dry before proceeding with the application of your chosen finish.
- Dispose of Cleaning Materials Safely: Dispose of any leftover cleaning solution and rinse water according to local environmental regulations. Be mindful of the impact on your surroundings.
Properly washing your deck not only removes contaminants but also sets the stage for a successful finish application. Take your time during this step, and be thorough in your cleaning efforts to achieve the best results. In the next sections of this blog post, we’ll explore alternative methods for post-sanding cleanup and offer additional tips for maintaining your deck.
Deck cleaning alternatives
While washing your deck with water and a suitable cleaning solution is a highly effective method for post-sanding cleanup, there are alternative approaches you can consider based on your preferences and specific circumstances. Here are some deck cleaning alternatives to explore:
-
Pressure Washing:
Pressure washing is a popular choice for deck cleaning. It uses a high-pressure stream of water to remove dirt, grime, and loose finish. When using a pressure washer, it’s essential to adjust the pressure carefully to avoid damaging the wood fibers. Use a wide fan nozzle and maintain a safe distance from the deck surface.
-
Sanding Dust Collection System:
If you want to minimize dust and debris during the sanding process, consider using a dust collection system. These systems can be attached to your sanding equipment to capture the dust as it’s generated, reducing the cleanup required afterward.
-
Compressed Air Blower:
An air blower or compressor with an air nozzle attachment can be used to blow away dust and residue from your deck’s surface. This method is particularly useful for spot cleaning and removing loose debris.
-
Leaf Blower:
If you don’t have access to an air compressor, a leaf blower with a narrow-nozzle attachment can serve a similar purpose. It can help blow away dust and debris effectively.
-
Tack Cloth:
A tack cloth is a sticky cloth that can be used to pick up fine dust particles and residue from the deck’s surface. While it’s not a comprehensive cleaning method, it’s handy for a final wipe-down before applying the finish.
-
Hand Scrubbing:
For smaller deck areas or localized cleaning needs, hand scrubbing with a deck brush or sponge and a cleaning solution can be a practical option. It allows for precise control and attention to detail.
-
Steam Cleaning:
Steam cleaning is an eco-friendly method that uses high-temperature steam to loosen and remove dirt and stains from the deck’s surface. It’s particularly effective at lifting embedded grime.
-
Chemical Strippers:
In cases where there are stubborn old finishes that are difficult to remove through sanding alone, you can use chemical paint or finish strippers. Follow the manufacturer’s instructions carefully, and wear appropriate protective gear when using these products.
-
Biodegradable Cleaners:
Consider using biodegradable or eco-friendly deck cleaning products if you’re concerned about the environmental impact. These cleaners are formulated to be less harmful to the environment while effectively removing dirt and stains.
When selecting a deck cleaning alternative, assess your deck’s condition, your available tools, and your preferences. Keep in mind that some methods, such as pressure washing or chemical stripping, may require special equipment or expertise, so it’s essential to proceed with caution and follow safety guidelines. Ultimately, the goal is to prepare your deck’s surface for the application of a new finish while maintaining its overall integrity and appearance.
Drying your deck
After you’ve completed the deck cleaning process, it’s crucial to allow your deck to dry thoroughly before moving on to the next steps, such as applying a new finish. Proper drying ensures that your deck is ready for the finish and minimizes the risk of issues like poor adhesion. Here are some tips for drying your deck effectively:
- Check Moisture Levels: Before proceeding with drying, use a moisture meter to assess the moisture content of the wood. Ideally, the wood should have a moisture content of around 12–15% for optimal finish application. If it’s significantly higher, allow more time for drying.
- Weather Considerations: Consider the weather conditions in your area. Drying times can vary based on temperature, humidity, and air circulation. Choose a time when the weather is dry and mild, as excessive moisture in the air can slow down the drying process.
- Remove Excess Water: If there are puddles or standing water on your deck after cleaning, use a squeegee or a mop to remove the excess moisture. Standing water can prolong drying times and hinder the finish’s ability to adhere properly.
- Natural Air Drying: The most common method for drying a deck is to allow it to air dry naturally. This involves exposing the deck to the open air and sunlight. If possible, raise any furniture or objects off the deck surface to promote better airflow.
- Timeframe for Drying: Generally, you should allow your deck to dry for a minimum of 24 to 48 hours after cleaning. However, the actual drying time can vary based on environmental conditions. Check the wood’s moisture content and wait until it reaches the desired level before proceeding.
- Accelerated Drying: If you’re working within a tight timeframe or dealing with persistent moisture, consider using fans or dehumidifiers to speed up the drying process. Make sure the deck is well-ventilated during this process.
- Avoid Direct Sunlight: While sunlight can aid in drying, avoid exposing your deck to intense, direct sunlight for extended periods during the drying process. This can cause the wood to dry too quickly, potentially leading to cracking or checking.
- Repeat Moisture Checks: Periodically recheck the moisture content of the wood as it dries. This will help you ensure that it’s ready for the next steps, such as applying the finish.
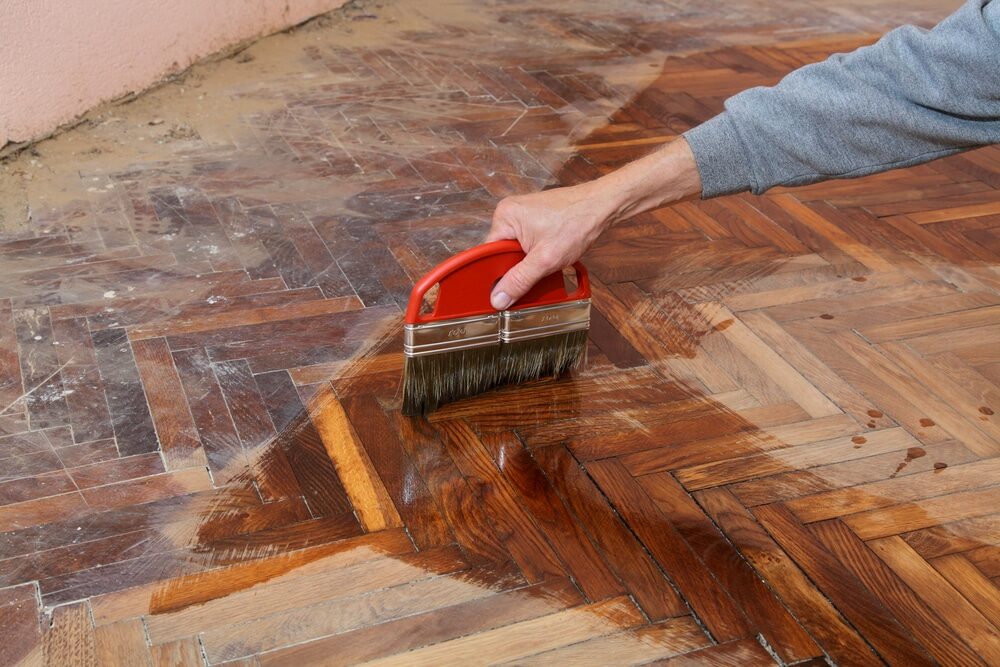
- Prep for Finish Application: Once your deck is thoroughly dry and the moisture content is within the acceptable range, you’re ready to proceed with the application of your chosen finish. Follow the manufacturer’s instructions for the finish, and ensure that the deck is clean and free of any residual dust or debris before starting.
By allowing your deck to dry properly, you set the stage for a successful finish application that will not only protect the wood but also enhance its appearance. Patience in this phase of the process will pay off in the long run, ensuring that your deck remains beautiful and well-maintained for years to come.
Conclusion
In this comprehensive guide, we’ve explored the essential aspects of post-sanding care for your deck, with a specific focus on whether you should wash your deck after sanding. Caring for your deck is crucial for its longevity and aesthetic appeal, and the steps you take after sanding deck play a pivotal role in this process.
By following the recommendations and steps outlined in this guide, you can ensure that your deck remains a beautiful and inviting outdoor space, protected against the elements, and ready to provide years of enjoyment. Regular maintenance, proper care of your deck, and attention to detail are key to the continued health and beauty of your deck.


Sanding
We provide virtually dust-free sanding with our continuous belt machinery with mobile extraction units, giving you a safer environment for your family.
Oiling
This organic finish not only adds beauty to your home but also has exceptional water-repellent characteristics, making it easier to clean and maintain.
Waxing
This natural floor finish offers the softest and most mellow appearance – and leaves your floor able to breath.
Buffing
Using soft buffing machines (and hand-polishing where required) will bring a wonderful sheen to your newly-finished floor.
Repairs
We offer a full assessment of your wooden floors to determine what repairs are needed to provide the perfect working surface for the later stages of sanding, staining and sealing.
Restoration
We offer a comprehensive restoration process designed to address floors that are improperly fitted or damaged over time through wear and tear.
Request a fixed price quote for your wood floor restoration now
Simply enter your postcode below to get started.
Services
Wood Floor Sanding Wood Floor Restoration Wood Floor Scratch Repair Squeaky Wood Floor Repair Parquet Floor Sanding Parquet Floor Restoration Commercial Floor Sanding Church Floor Sanding Community Centre Floor Sanding School Floor Sanding Gap Filling Gap Filling with ResinCopyright © Mr Sander®
Privacy & Cookies Terms & Conditions Complaints Procedure Cancellation Rights Sitemap

Get An Instant Price Estimate Before You Go…
Simply enter the rooms you need sanded and we’ll provide you with a price estimate instantly! Try our price calculator now.
Get a Price Estimate NowLocal Floor Sanding Experts
Over 500 5-Star Reviews
Safe, Dust Free Sanding
Operating Since 1994