London:
Nationwide:
25,000+
Floors Restored
27 Years Experience
Wood Flooring Association Certified
Is Staining an Old Deck Worth It?
Posted on December 21, 2023
Deck Sanding
Is Reviving an Aged Deck Through Staining a Wise Choice?
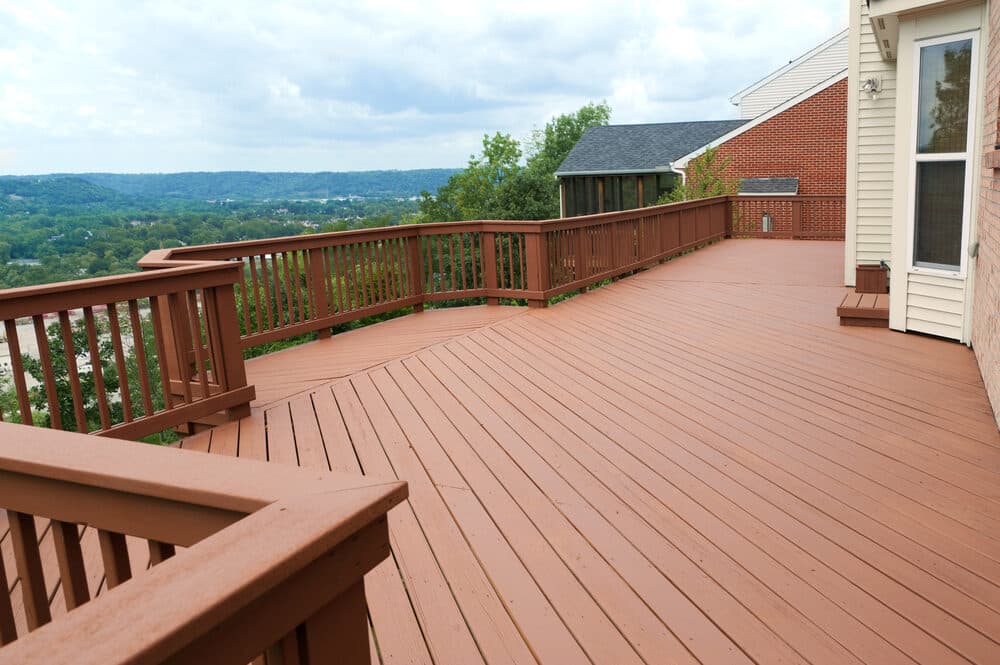
In the world of home improvement, few projects can make as significant a difference as restoring an old deck to its former glory. A well-maintained deck is more than just an extension of your home; it’s a place where memories are made, where you bask in the warmth of the sun, and where you gather with loved ones. But as decks age, they face a host of challenges – from weathering and fading to potential structural issues.
A weathered and aging deck can be a source of pride and joy for homeowners, offering a picturesque spot for outdoor gatherings, relaxation, and cherished moments. However, as time takes its toll, decks can lose their lustre, and signs of wear and tear become increasingly evident. This leaves homeowners with a crucial decision to make: Is staining an old deck worth it?
In this blog post, we will delve into the world of deck maintenance and explore the various factors to consider when deciding whether to undertake the task of staining your aging deck. We’ll discuss the telltale signs that your deck might be in need of attention, the benefits of staining, the types of stains available, and the steps involved in the staining process. Additionally, we’ll provide insights into the cost considerations and help you determine when it might be more prudent to replace your deck instead of staining it.
So, whether you’re a seasoned DIY enthusiast or simply a homeowner looking to revitalise your outdoor space, join us on this journey to discover if staining an old deck is a worthwhile endeavour that can breathe new life into your cherished outdoor retreat.
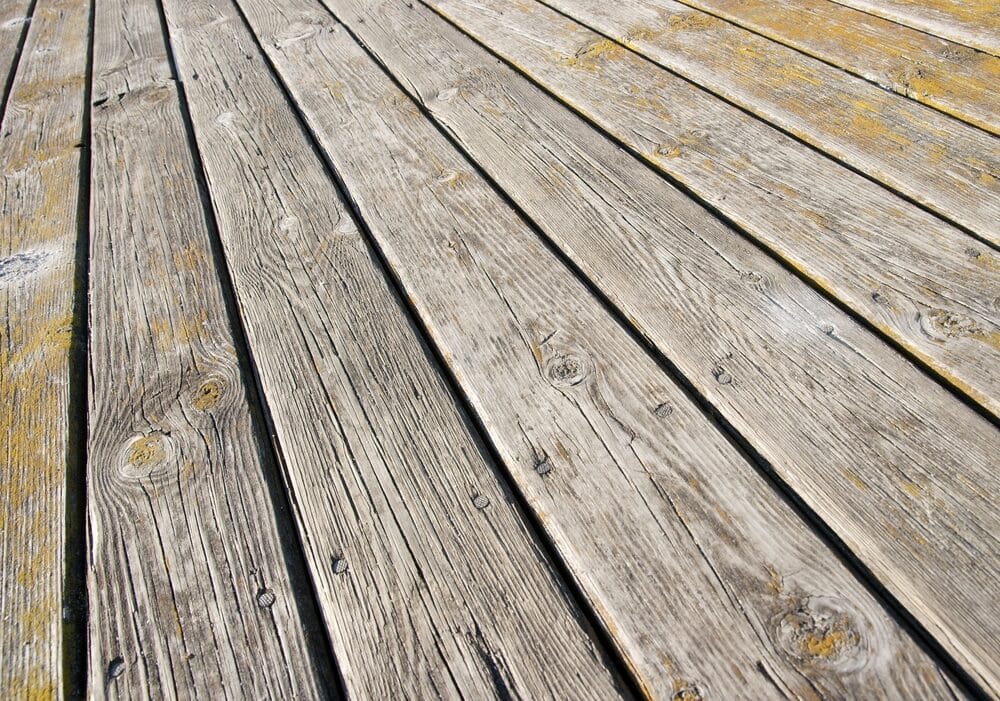
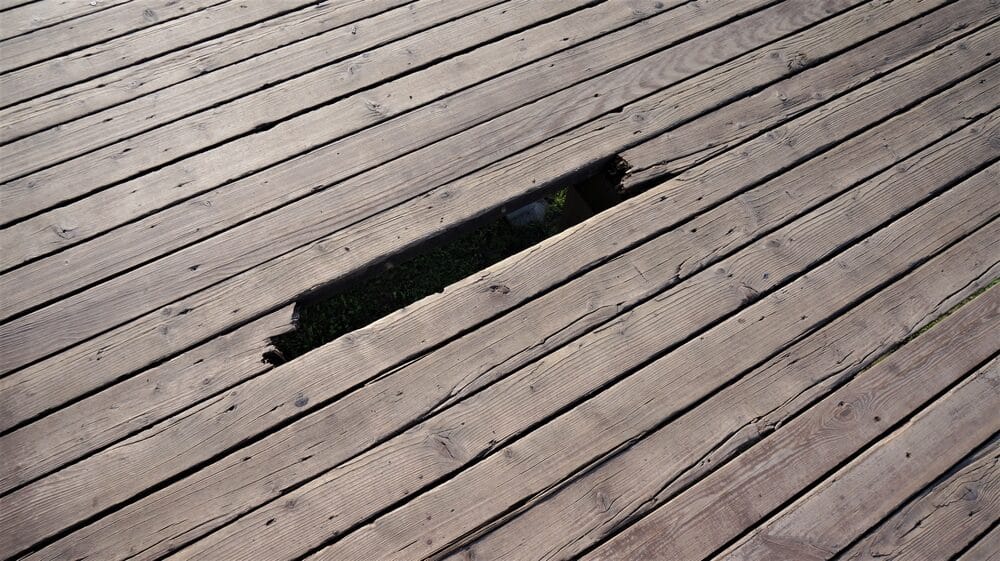
Signs of an Aging Deck
Before diving into the decision of whether to stain your old deck, it’s crucial to recognise the signs that indicate your deck is showing its age. Identifying these issues early can help you determine the extent of maintenance required and whether staining is a viable solution. Here are some common signs of an aging deck:
- Fading Colour: If your deck’s original vibrant colour has faded over time, it’s a sign that the wood’s protective surface may have deteriorated.
- Cracks and Splinters: Visible cracks or splinters on the deck surface not only detract from its appearance but can also pose safety hazards.
- Mould and Mildew: The growth of mould and mildew on your deck, especially in shaded or damp areas, is a sign of moisture penetration and can lead to wood decay.
- Warping and Cupping: Warped or cupped boards can create an uneven and unstable deck surface, making it less enjoyable and potentially dangerous.
- Loose or Missing Fasteners: Loose screws, nails, or missing fasteners can weaken the deck’s structural integrity, requiring immediate attention.
- Rotting Wood: Soft, spongy, or visibly decaying wood is a clear indicator of rot, which can compromise the entire deck’s stability.
- Fading Finish: If your deck’s protective finish is no longer effective, the wood may be vulnerable to moisture and UV damage.
- Stains and discoloration: Stubborn stains and discoloration from spilled liquids, rust, or other sources can make your deck look unsightly.
- Squeaky or Unstable Boards: If walking on your deck results in squeaks or noticeable board movement, it may be a sign of structural issues.
- Nails or Screws Popping Out: Protruding nails or screws can not only be an eyesore but also create tripping hazards.
Benefits of Staining an Old Deck
Staining an old deck can breathe new life into your outdoor space and offer a range of advantages that make it a worthwhile investment. Here are some key benefits of staining an aging deck:
1. Enhanced Aesthetics:
- One of the most immediate and noticeable benefits of staining is the improvement in your deck’s appearance. Stain comes in various colours and finishes, allowing you to choose a look that complements your home and personal style. It can revive the beauty of weathered wood, making your deck look fresh and inviting.
2. Protection Against Weathering:
- Stain provides a protective barrier that shields your deck from the harsh effects of weather, including UV rays, rain, and snow. It helps prevent moisture from seeping into the wood, which can lead to rot, decay, and warping over time.
3. Extended Lifespan:
- Regularly staining your deck can significantly extend its lifespan. The stain’s protective properties slow down the natural aging process of wood, reducing the need for costly repairs or premature replacement.
4. Preservation of Wood:
- Stain penetrates the wood’s surface, sealing it and preventing moisture intrusion. This preservation not only maintains the structural integrity of the deck but also enhances its resistance to insect infestations and fungal growth.
5. UV Protection:
- UV-resistant stains protect the wood from the damaging effects of sunlight. They help prevent the wood from turning grey or silver due to sun exposure and can reduce the risk of splinters caused by sun-damaged wood.
6. Ease of Maintenance:
- Stained decks are easier to clean and maintain compared to untreated wood. Stains create a smooth surface that resists dirt and debris buildup, making regular cleaning a breeze.
7. Cost Savings:
- Staining is a cost-effective alternative to replacing an entire deck. It allows you to address the signs of aging and deterioration without the substantial expense of a complete overhaul.
8. Customisation Options:
- With a wide variety of stain colours and finishes available, you have the flexibility to customise your deck’s appearance to suit your preferences and the overall aesthetic of your outdoor space.
9. Environmental Benefits:
- Many modern deck stains are formulated with environmentally friendly ingredients, making them a more sustainable choice compared to replacing your deck, which would generate more waste.
10. Increased Home Value:
- A well-maintained and visually appealing deck can enhance your home’s curb appeal and potentially increase its market value if you decide to sell your property in the future.
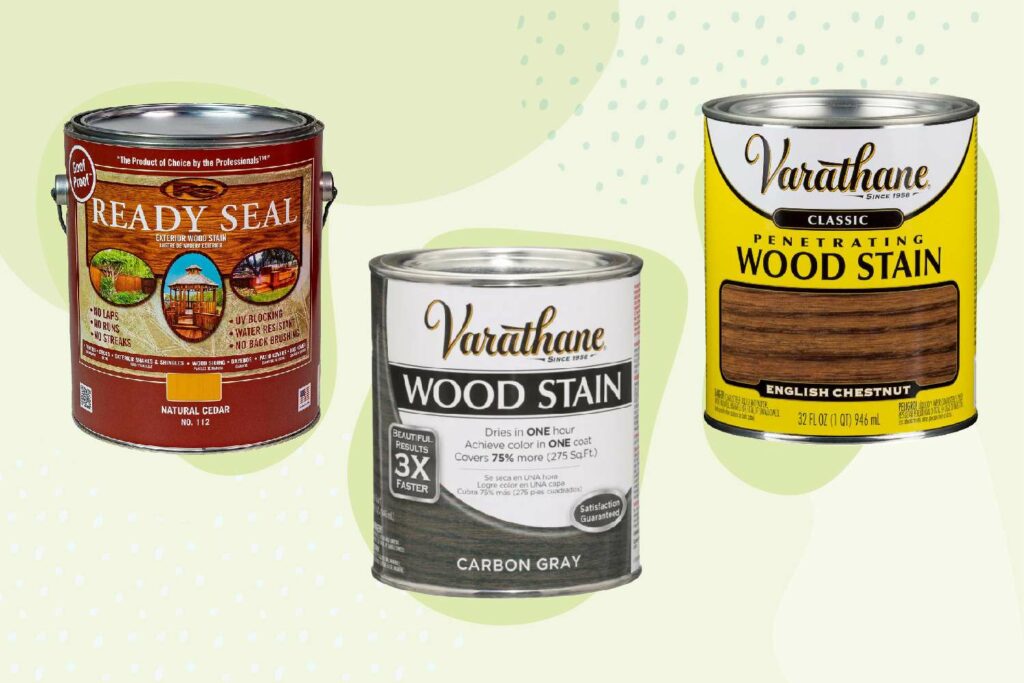
Choosing the Right Stain
Selecting the right stain for your old deck is a crucial step in the deck maintenance process. The choice of stain can impact the final appearance, durability, and maintenance requirements of your deck. Here are the key factors to consider when choosing the right stain:
1. Stain Type:
- Transparent Stains: These stains allow the natural wood grain to show through and are ideal if you want to preserve the wood’s natural beauty while providing some protection.
- Semi-Transparent Stains: These stains offer a balance between colour and wood grain visibility. They provide moderate protection against UV rays and moisture.
- Solid Stains: Solid stains provide the most colour and offer high protection. They are suitable for older decks with significant wear and tear, as they can hide imperfections and give a fresh, uniform look.
2. Colour and finish:
- Consider the colour that complements your home’s exterior and your personal preferences. Many stain brands offer a range of colours to choose from.
- Decide on the finish—whether you want a matte, satin, or glossy appearance. The finish can affect the overall look and maintenance requirements.
3. UV Protection:
- Look for stains with UV-resistant properties to prevent the wood from fading or greying due to sun exposure. UV protection is especially important for decks in sunny climates.
4. Transparency and wood grain:
- Determine how much of the wood grain you want to show through. Transparent and semi-transparent stains allow more grain visibility, while solid stains cover it up.
5. Wood Type:
- The type of wood your deck is made of can influence your stain choice. Some stains are better suited for specific wood species, so check the manufacturer’s recommendations.
6. Climate and weather conditions:
- Consider your local climate. If you live in an area with heavy rainfall or extreme temperature fluctuations, you may need a stain that offers superior moisture protection.
7. Brand and quality:
- Choose a reputable stain brand known for its quality and durability. Reading reviews and seeking recommendations can help you make an informed decision.
8. Application Method:
- Some stains are designed for specific application methods, such as brushing, rolling, or spraying. Ensure the stain you choose aligns with your preferred application technique.
9. Environmental Impact:
- If environmental concerns are a priority for you, look for eco-friendly or low-VOC (volatile organic compound) stains that have a reduced impact on the environment.
10. Budget:
- Determine your budget for the staining project. While higher-quality stains may come with a higher price tag, they often offer better long-term protection.
Preparing your deck for staining
Before you can successfully stain an old deck, it’s crucial to prepare the surface properly. Proper preparation ensures that the stain adheres well and delivers the desired results. Here’s a step-by-step guide on how to prepare your deck for staining:
1. Clear the Deck:
- Remove all furniture, plants, and other items from the deck. Clear the area completely to have unrestricted access to the entire surface.
2. Inspect for Damage:
- Thoroughly inspect the deck for any structural damage, loose boards, or protruding nails or screws. Make any necessary repairs before proceeding.
3. Clean the surface:
- Sweep the deck to remove loose dirt, leaves, and debris.
- Use a pressure washer or a deck cleaner to remove ingrained dirt, mildew, and previous finishes. Follow the manufacturer’s instructions for the cleaning product.
- Scrub stubborn stains or mould spots with a stiff brush.
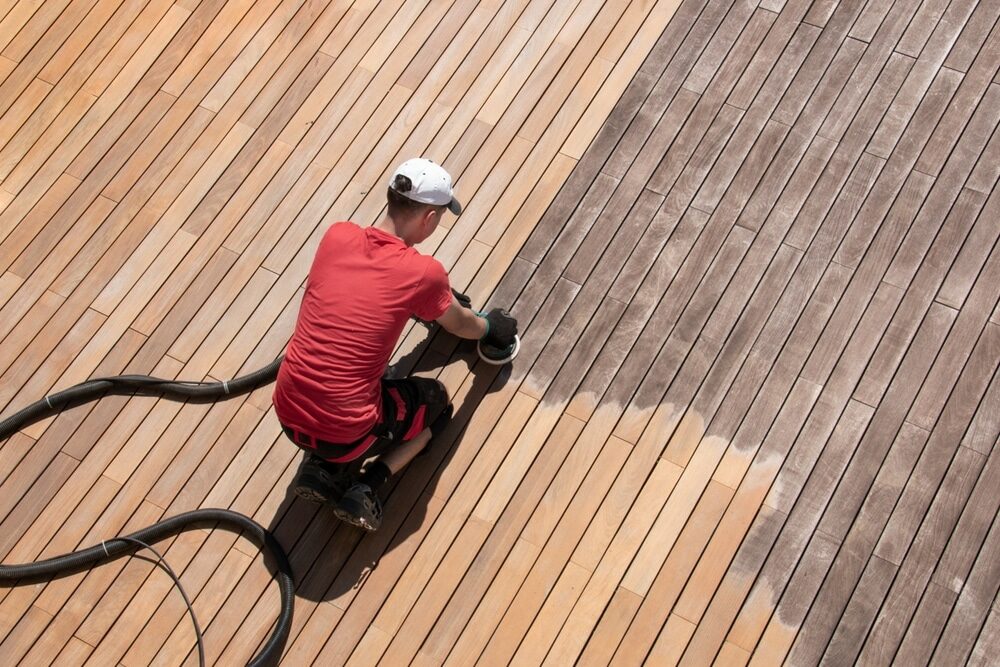
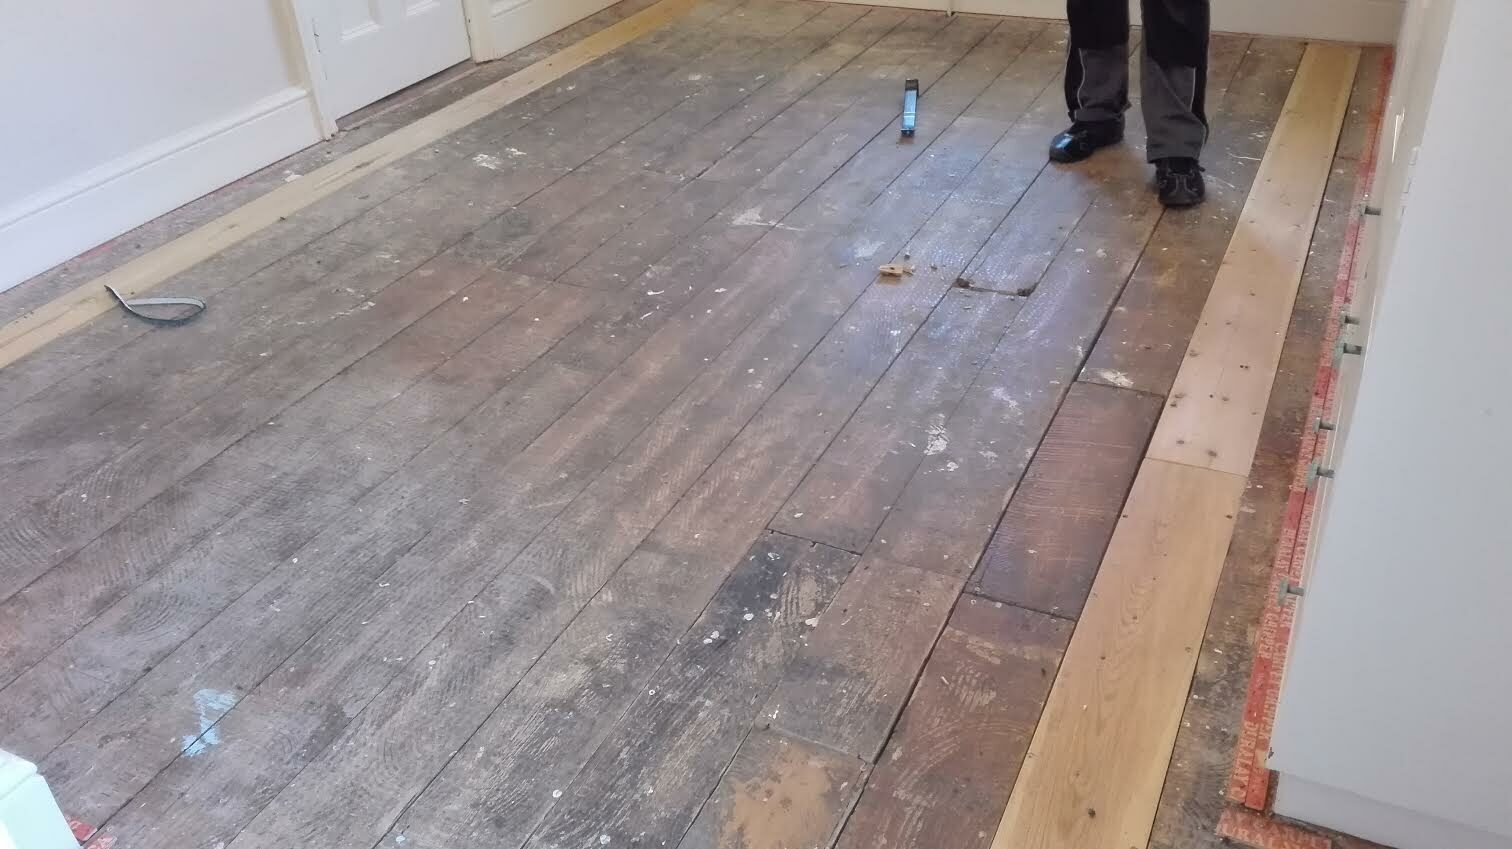
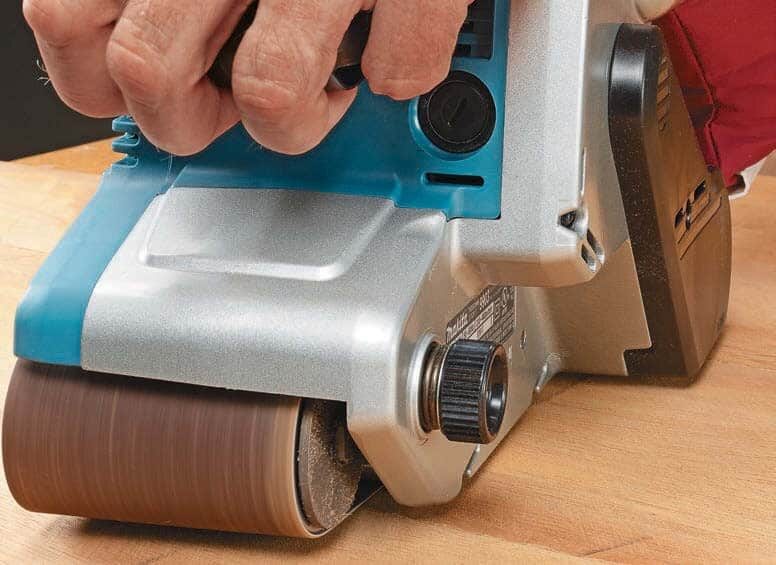
4. Sand the Deck:
- Deck Sanding is essential to smooth out rough areas and open up the wood pores for better stain penetration.
- Use a belt sander or orbital sander with the appropriate grit (usually 80–120 grit) to sand the entire deck surface, including railings and stairs.
- Pay extra attention to areas with splinters, rough patches, or old stain residue.
5. Replace Damaged Boards:
- If you find severely damaged or rotten boards during the inspection, replace them with new ones. Ensure that the replacements match the existing wood in terms of type and dimensions.
6. Repair Screws or Nails:
- Sink any protruding screws or nails below the deck surface to avoid uneven staining and potential safety hazards.
7. Check for Mould and Mildew:
- If mould or mildew persists after cleaning, consider using a mildew remover or a mixture of bleach and water to treat the affected areas. Rinse thoroughly afterward.
8. Allow the Deck to Dry:
- After cleaning and any necessary repairs, allow the deck to dry completely. Depending on the weather and climate, this may take a few days. Ensure that the wood is moisture-free before proceeding with staining.
9. Mask Off Adjacent Areas:
- Use painter’s tape and plastic sheeting to mask off any adjacent areas you don’t want to stain, such as siding, plants, or walkways. This will prevent accidental staining and make the application process neater.
10. Protect Yourself:
- Wear appropriate personal protective equipment, including gloves, safety glasses, and a dust mask, when sanding deck and working with cleaning agents.
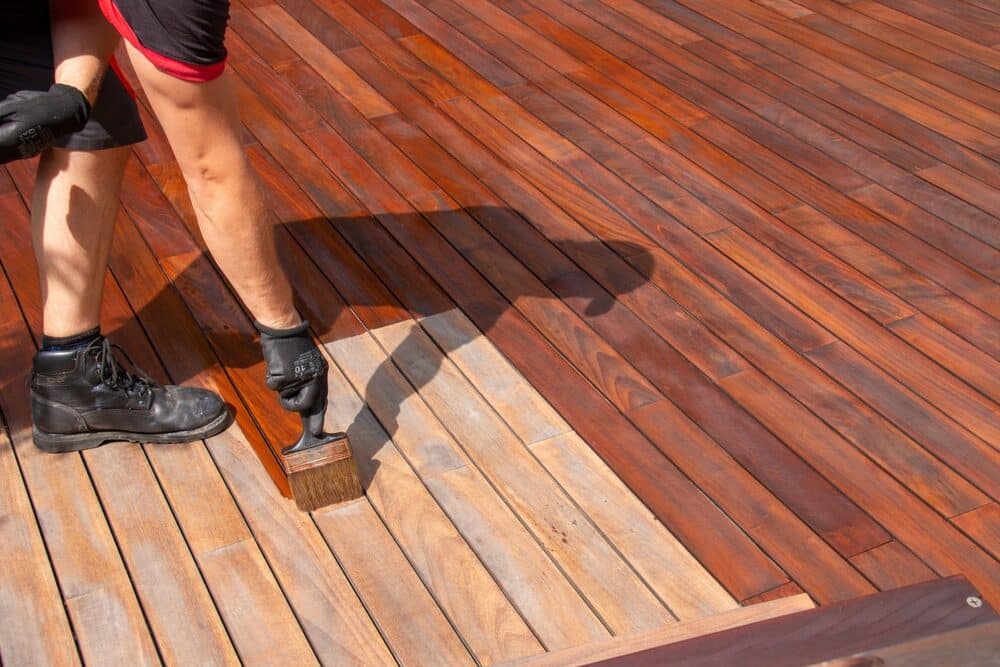
How to stain an old deck
Staining an old deck can transform its appearance and protect it from the elements. Follow these step-by-step instructions to ensure a successful staining process:
Materials you’ll need:
- Deck stain
- Paintbrush, roller, or sprayer (choose an application method based on your preference)
- Paint tray or bucket
- Painter’s tape and plastic sheeting (if needed)
- Drop cloths or plastic sheeting (to protect nearby surfaces)
- Stir stick
- Sandpaper (if required)
- Safety gear (gloves, safety glasses, dust mask)
- Rags or cloth for wiping
- Paint thinner or mineral spirits (for cleanup)
Steps:
1. Choose the Right Weather:
- Pick a day with moderate temperatures and no rain in the forecast. Avoid staining in direct sunlight to prevent the stain from drying too quickly.
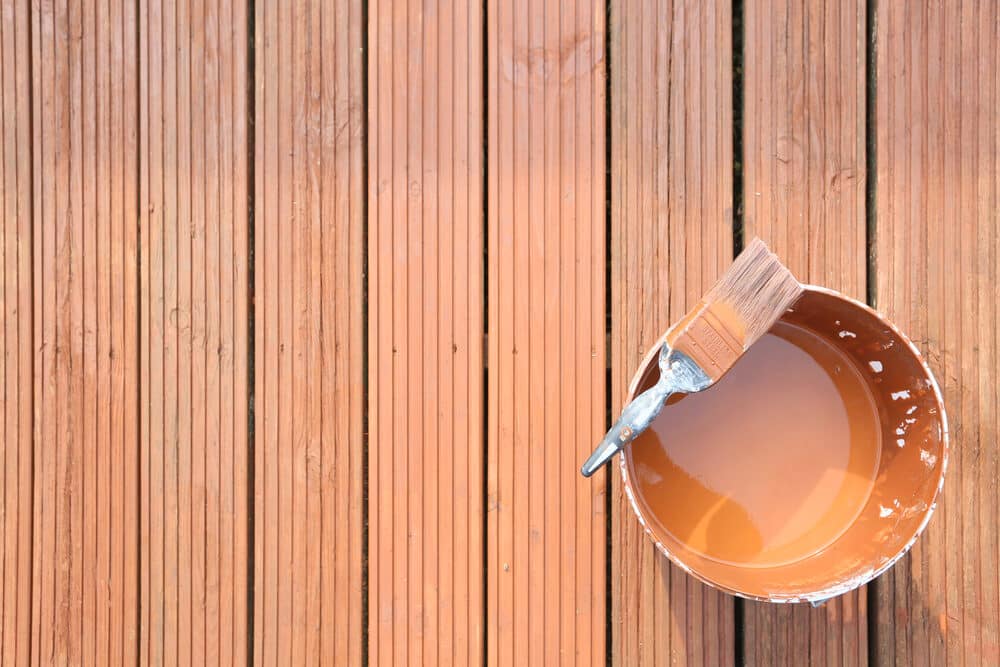
2. Prepare the stain:
- Stir the deck stain thoroughly using a stir stick. Ensure it’s well mixed before starting the application.
3. Test a Small Area:
- Before applying the stain to the entire deck, test it on a small, inconspicuous section to ensure you’re satisfied with the colour and finish.
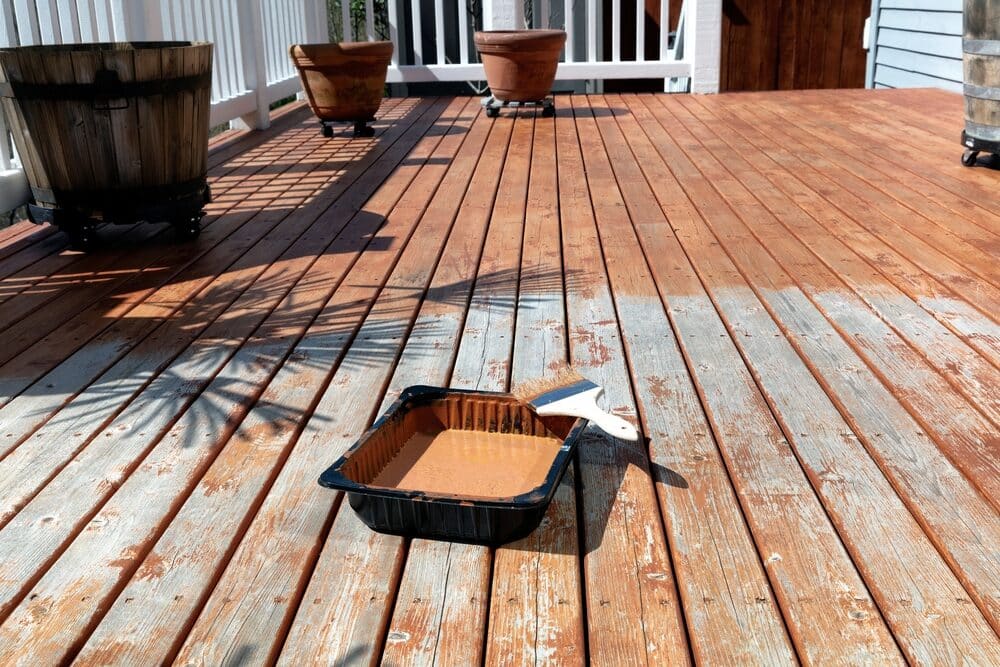
4. Begin Staining:
- If you’re using a brush or roller, start by applying the stain to the deck’s railings and spindles. Work your way from top to bottom.
- If you’re using a sprayer, use a sweeping motion to evenly coat the railings and spindles.
- Be careful to avoid drips or runs, as they can create uneven spots.
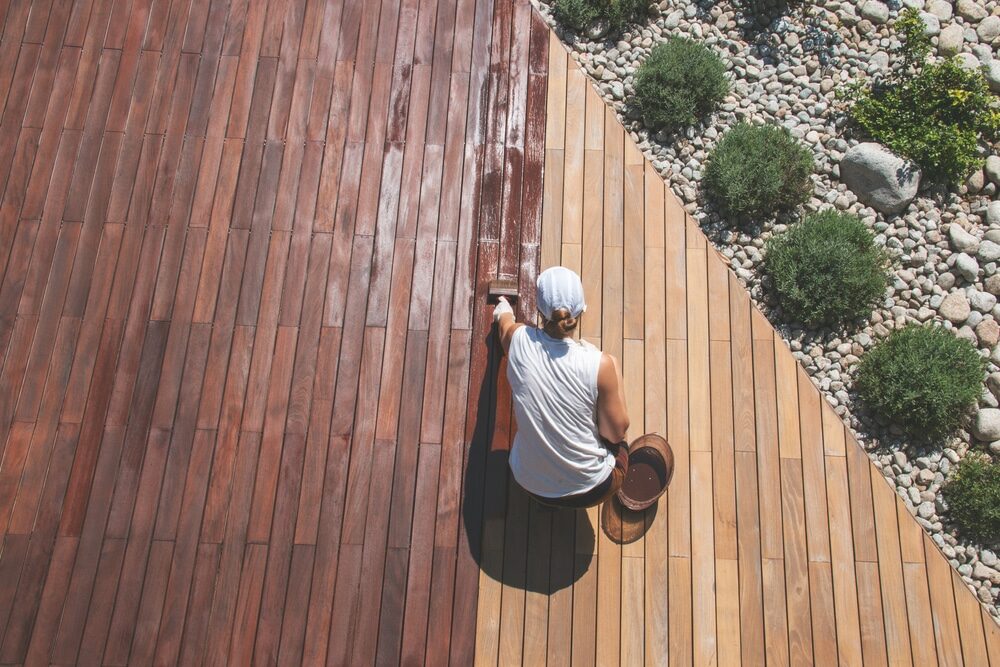
5. Stain the deck surface:
- For horizontal deck boards, work from one end to the other, applying the stain in the direction of the wood grain.
- Maintain a wet edge to prevent lap marks. This means you should overlap your strokes slightly with each pass.
- Work in manageable sections, such as a few boards at a time, to ensure even coverage.
- Pay extra attention to any cracks or crevices, ensuring the stain penetrates these areas.
6. Stain Vertical Surfaces:
- If your deck has vertical surfaces, like support posts or the sides of staircases, apply the stain in the same manner as you did for the railings and spindles.
7. Wipe Off Excess Stain:
- After applying the stain, use a clean cloth or rag to wipe off any excess stain or drips. This helps prevent uneven drying and excess buildup.
8. Allow to Dry:
- Let the first coat of stain dry according to the manufacturer’s recommended drying time. This typically ranges from a few hours to 24 hours, depending on the stain type and weather conditions.
9. Apply Additional Coats:
- For a more durable and uniform finish, consider applying a second coat of stain after the first coat has dried. Follow the same application process.
10.Cleanup:
- Clean your application tools and brushes with paint thinner or mineral spirits according to the manufacturer’s instructions. Dispose of any waste materials properly.
11.Wait for Full Cure:
- Allow the final coat to dry and cure fully, which can take several days to a week. Avoid heavy foot traffic and placing furniture on the deck during this time.
12. Remove masking:
- If you used painter’s tape and plastic sheeting to protect adjacent areas, carefully remove them once the stain is dry.
13. Enjoy Your Newly Stained Deck:
- Once the stain has fully cured, you can move furniture back onto your deck and enjoy its refreshed appearance and extended lifespan.
Maintaining Your Stained Deck
Proper deck maintenance is essential to keep your stained deck looking great and protected from the elements. Here are some guidelines for maintaining your stained deck:
1. Regular Inspections:
- Periodically inspect your deck for any signs of wear, damage, or areas where the stain may be wearing thin. Catching issues early can prevent more significant problems later.
2. Sweep and clean:
- Keep your deck clean by sweeping away dirt, leaves, and debris regularly. This prevents abrasive particles from scratching the stain’s surface.
- For a deeper clean, wash your deck with a mild detergent and water. Use a soft-bristle brush or a deck scrubber to remove dirt, mildew, and stains.
3. Stain Touch-Ups:
- As your deck ages, it’s normal for the stain to fade or wear in high-traffic areas. Touch up these areas with a matching stain to maintain a uniform appearance and protection.
4. Re-Staining:
- The frequency of re-staining depends on various factors, including the type of stain, weather conditions, and foot traffic. Generally, plan to re-stain your deck every 2–5 years to maintain optimal protection.
- Conduct a water droplet test to determine if your deck needs re-staining. If water no longer beads up on the surface but soaks in, it’s time for a new coat of stain.
5. Seal Joints and Gaps:
- Inspect the joints, gaps, and connections between deck boards. Seal any gaps or joints with an appropriate sealant to prevent water from infiltrating the wood.
6. Trim plants and vegetation:
- Keep plants, shrubs, and trees near your deck trimmed to prevent excessive moisture buildup and minimise the risk of mould and mildew growth.
7. Repair and replace:
- Promptly address any structural issues, loose boards, or protruding fasteners. Repair or replace damaged wood as needed to maintain the deck’s integrity.
8. Protect Furniture and Grills:
- Use furniture pads or coasters under heavy objects to prevent scratches and indentations on the deck’s surface.
- Place a protective barrier, such as a grill mat, under grills and other cooking equipment to prevent grease stains and damage.
9. Minimise snow and ice:
- Use caution when shovelling snow or applying ice melt to your deck during the winter. Avoid sharp metal shovels that can scratch the stain. Use plastic shovels or snow blowers instead.
10. Consider a Clear Coat:
- To enhance the durability of your stain and protect it from wear and tear, consider applying a clear coat or sealant over the stain. This adds an extra layer of protection.
11. Regularly trim overhanging branches:
- If you have trees near your deck, trim overhanging branches to reduce the amount of leaves and debris that fall onto the deck.
12. Attend to Stain Discoloration:
- If your stain begins to show signs of discolouration or greying, you can use a deck brightener or cleaner specifically designed to rejuvenate the stain’s colour.
13. Follow manufacturer recommendations:
- Always follow the manufacturer’s recommendations for the stain you used, as different stains may have specific maintenance requirements.
Cost Considerations
Staining an old deck is a cost-effective way to rejuvenate its appearance and extend its lifespan. However, it’s essential to consider the various costs associated with this maintenance project. Here are some cost considerations to keep in mind:
1. Stain and Materials:
- The primary cost of staining a deck is the stain itself. The cost varies depending on the type and brand of stain you choose.
- You may also need brushes, rollers, sprayers, paint trays, painter’s tape, plastic sheeting, drop cloths, and other materials, which can add to the overall cost.
2. Surface Preparation:
- If your deck requires significant cleaning, repairs, or sanding, factor in the cost of equipment or professional services if you choose not to do the work yourself.
3. Labour:
- If you decide to hire a professional to stain your deck, labour costs will be a significant part of your budget. Labour rates vary by location and the complexity of the job.
- DIY staining can save on labour costs but requires your time and effort.
4. Additional Coats:
- Applying multiple coats of stain for better protection and aesthetics may increase the cost, as you’ll need more stain and potentially more labour.
5. Deck size and complexity:
- The size and design of your deck can influence costs. Larger decks require more stain and effort, while complex designs with intricate railings and spindles may be more time-consuming and costly to stain.
6. Quality of stain:
- Higher-quality stains often come with a higher price tag but provide better protection and longevity, potentially reducing long-term maintenance costs.
7. Environmental Considerations:
- If you opt for eco-friendly or low-VOC stains, they may cost slightly more than traditional stains, but they have a reduced environmental impact.
8. Maintenance and repairs:
- While staining can extend your deck’s lifespan, you should budget for ongoing maintenance, such as cleaning and periodic re-staining.
- Be prepared for potential repair costs for damaged or rotted wood, loose boards, or structural issues.
9. Replacement vs. staining:
- Compare the cost of staining with the cost of replacing your deck. In some cases, replacing an old and severely damaged deck may be more cost-effective in the long run.
10. Insurance and Permits:
- Check if your homeowner’s insurance covers deck maintenance or repairs. Additionally, inquire about any required permits or fees for your staining project.
11. DIY vs. Professional:
- Consider the cost savings of doing the staining yourself versus hiring a professional. DIY can save on labour costs, but it requires your time and expertise.
12. Maintenance Schedule:
- Factoring in the frequency of re-staining can help you estimate long-term costs. More frequent re-staining may be required in high-traffic areas or harsh climates.
13. Cleanup and Disposal:
- Account for the cost of disposing of old stain cans, brushes, and any waste materials generated during the staining process.
When to Replace Instead of Staining
While staining can significantly enhance the appearance and lifespan of an old deck, there are situations where replacement may be a more practical and cost-effective choice. Here are some scenarios when it might be advisable to replace your old deck instead of staining it:
1. Structural Damage:
- If your deck has extensive structural issues such as rotting, severe warping, sagging, or weakened support posts, it may be unsafe to use. In such cases, it’s often more sensible to replace the deck entirely rather than attempt costly and potentially insufficient repairs.
2. Extensive Decay:
- When a large portion of your deck’s wood is decayed or has reached the end of its lifespan, staining may not provide a viable solution. Staining extensively decayed wood won’t address the underlying problem and may lead to an unstable surface.
3. Safety Concerns:
- If your deck poses safety hazards due to loose or missing balusters, railings, or unstable stairs, replacement becomes a priority. Safety should always be the top concern, and addressing these issues may require a new deck.
4. Mould or Mildew Infestation:
- If your deck has a severe mould or mildew problem that staining won’t completely resolve, especially if it’s affecting the structural integrity of the wood, replacement might be the best course of action.
5. Age and Lifespan:
- Consider the age of your deck and the expected lifespan of the wood. If your deck is significantly older and showing extensive signs of wear, it may make more financial sense to invest in a new, longer-lasting deck rather than repeatedly staining the old one.
6. Cost of Repairs:
- Evaluate the cost of necessary repairs and maintenance compared to the cost of a replacement. In some cases, the cumulative expense of frequent repairs and staining may exceed the cost of installing a new deck.
7. Desired Upgrades:
- If you’re looking to make substantial changes to your deck’s design, size, or functionality, it may be more practical to start fresh with a new deck that meets your updated requirements.
8. Local Regulations:
- Check local building codes and regulations. In some areas, extensive renovations or repairs to an old deck may require compliance with current building codes, which can be more easily achieved with a new deck.
9. Foundation Issues:
- If the deck’s foundation, such as the footings or piers, is compromised or inadequate for the structure, replacing the deck may be the only way to ensure long-term stability.
10. Personal Preferences:
- Consider your personal preferences and aesthetic goals. If you’re not satisfied with the existing deck’s layout, design, or materials, replacement allows you to start anew with a deck that better suits your vision.
Conclusion
Staining an old deck is a thoughtful and cost-effective approach to revitalising your outdoor living space, enhancing its longevity, and protecting it from the elements. However, the decision to stain or replace your deck should be based on careful consideration of various factors.
In this comprehensive guide, we’ve explored the signs of an ageing deck, the benefits of staining, how to choose the right stain, deck preparation, the staining process, and essential maintenance steps. We’ve also discussed cost considerations and when it might be more prudent to opt for deck replacement.
Ultimately, whether staining an old deck is worth it depends on the deck’s condition, your budget, and your long-term goals. Staining can provide numerous advantages, including improved aesthetics, protection against weathering, and cost savings compared to replacement. Proper maintenance and upkeep can further extend the life and beauty of your stained deck.
However, when structural damage, safety concerns, or the cumulative costs of deck repairs and maintenance become prohibitive, replacement may be the more sensible choice.
In making your decision, it’s essential to assess your specific situation, consult with professionals if needed, and carefully consider your preferences and budget. A well-maintained deck, whether through staining or replacement, can serve as a beautiful and functional outdoor space for years to come, adding value to your home and providing countless moments of enjoyment.


Sanding
We provide virtually dust-free sanding with our continuous belt machinery with mobile extraction units, giving you a safer environment for your family.
Oiling
This organic finish not only adds beauty to your home but also has exceptional water-repellent characteristics, making it easier to clean and maintain.
Waxing
This natural floor finish offers the softest and most mellow appearance – and leaves your floor able to breath.
Buffing
Using soft buffing machines (and hand-polishing where required) will bring a wonderful sheen to your newly-finished floor.
Repairs
We offer a full assessment of your wooden floors to determine what repairs are needed to provide the perfect working surface for the later stages of sanding, staining and sealing.
Restoration
We offer a comprehensive restoration process designed to address floors that are improperly fitted or damaged over time through wear and tear.
Request a fixed price quote for your wood floor restoration now
Simply enter your postcode below to get started.
Services
Wood Floor Sanding Wood Floor Restoration Wood Floor Scratch Repair Squeaky Wood Floor Repair Parquet Floor Sanding Parquet Floor Restoration Commercial Floor Sanding Church Floor Sanding Community Centre Floor Sanding School Floor Sanding Gap Filling Gap Filling with ResinCopyright © Mr Sander®
Privacy & Cookies Terms & Conditions Complaints Procedure Cancellation Rights Sitemap

Get An Instant Price Estimate Before You Go…
Simply enter the rooms you need sanded and we’ll provide you with a price estimate instantly! Try our price calculator now.
Get a Price Estimate NowLocal Floor Sanding Experts
Over 500 5-Star Reviews
Safe, Dust Free Sanding
Operating Since 1994