London:
Nationwide:
25,000+
Floors Restored
27 Years Experience
Wood Flooring Association Certified
The Best Treatments for Aging Wood Decks
Posted on January 4, 2024
Deck Maintenance
Optimal Approaches to Renewing Weathered Wood Decks: A Complete Guide
A well-maintained wood deck is a beautiful addition to any home, providing a perfect space for outdoor gatherings, relaxation, and soaking up the sun. However, as time passes, the effects of weather, moisture, and general wear and tear can take a toll on your deck’s appearance and structural integrity. That’s where proper treatment and maintenance come into play.
Ageing wood decks hold a timeless charm and serve as cherished outdoor retreats. However, the passage of time and exposure to the elements can take a toll on their beauty and structural integrity. If you’re looking to restore the splendour of your aging wood deck and ensure its continued vitality, you’ve come to the right place. In this comprehensive guide, we delve deep into the world of deck treatments, offering insights into cleaning, repairing, refinishing, and protective coatings. Whether you’re a seasoned DIY enthusiast or seeking professional assistance, our guide equips you with the knowledge to transform your deck into a rejuvenated and inviting space.
In this comprehensive guide, we will explore the best treatments for aging wood decks, helping you understand how to revive and protect your outdoor oasis. From assessing the condition of your deck to choosing the right products and techniques for cleaning, repairing, and refinishing, we’ve got you covered. Whether you’re a seasoned DIY enthusiast or considering professional services, this guide will equip you with the knowledge needed to ensure your wood deck looks its best and lasts for years to come. So, let’s embark on this journey to uncover the best ways to breathe new life into your aging wood deck!
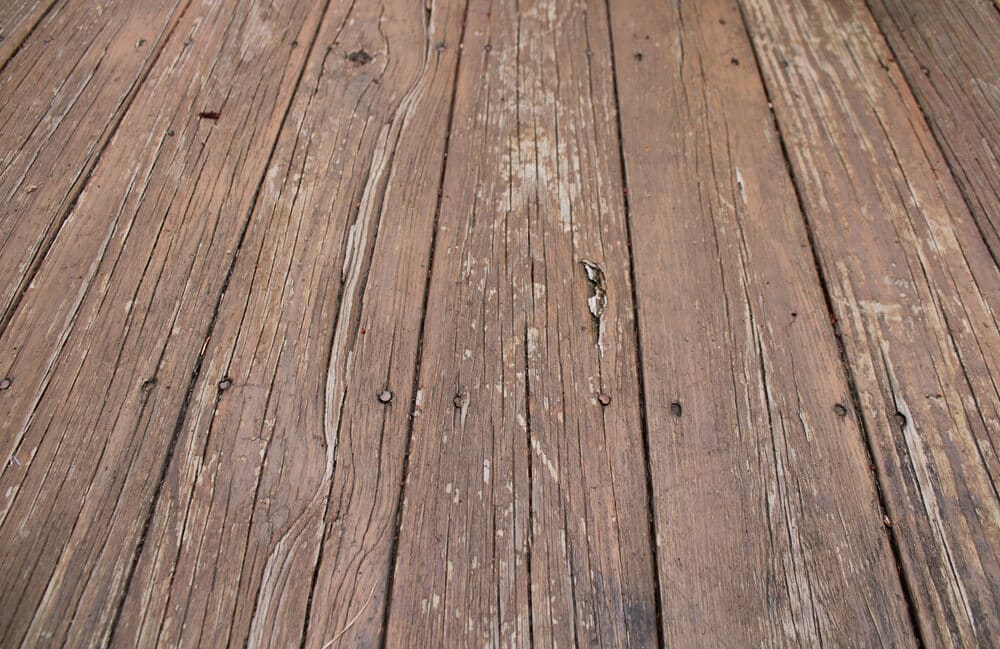
Assessing the Condition of Your Deck
Before embarking on any wood deck treatment project, it’s essential to assess the current condition of your deck thoroughly. This step will help you identify the specific issues that need attention and determine the best course of action. Here’s how to assess your aging wood deck:
Inspect for structural integrity
- Begin by checking the overall stability and structural integrity of your deck. Look for any noticeable sagging, leaning, or wobbling. Pay close attention to support posts, beams, and joists.
Examine the deck surface
- Walk the entire deck surface and inspect for signs of damage or wear. Check for cracked or splintered boards, loose fasteners, and any protruding nails.
Check for rot and decay
- Carefully examine areas of your deck that are most susceptible to moisture, such as near the ground or around planters. Look for signs of wood rot, decay, or soft spots.
Inspect the railing and balusters
- Ensure that the deck railing is secure and free from any loose or damaged balusters. A stable railing is essential for safety.
Look for surface stains and mould
- Check the deck surface for stubborn stains, mildew, or mould growth. These can affect the deck’s appearance and longevity.
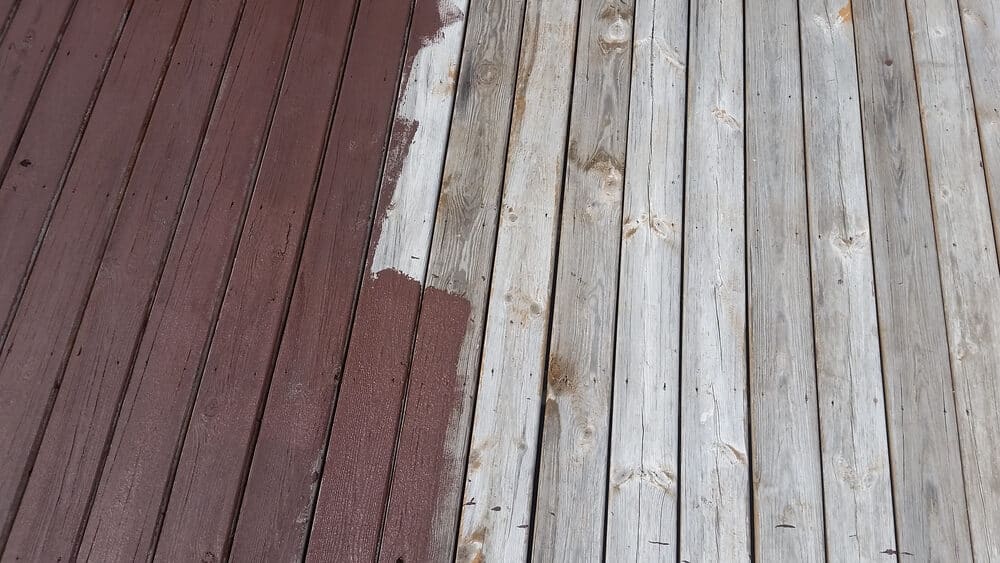
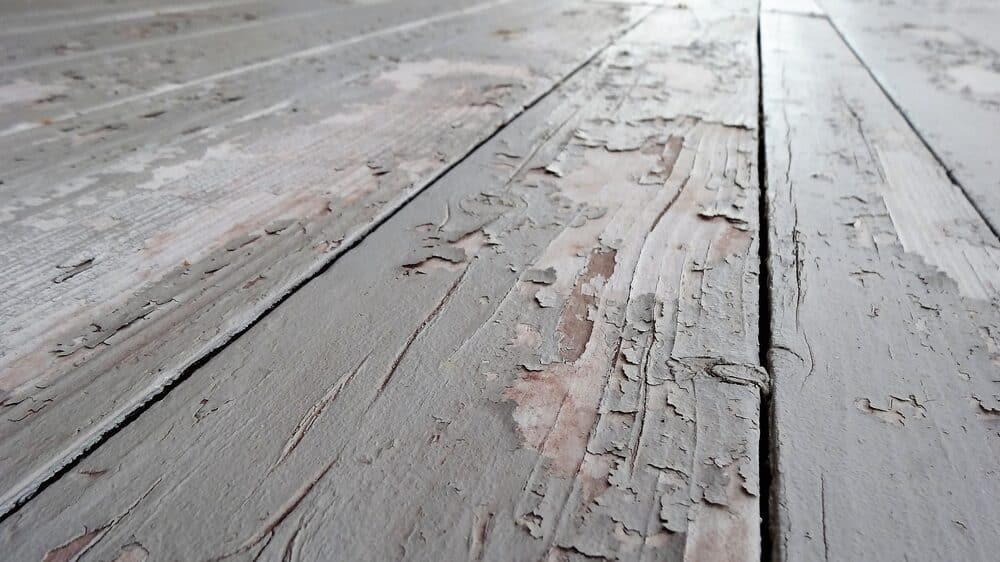
Assess the finish
- Determine the condition of any existing deck finish, such as paint, stain, or sealant. Is it peeling, flaking, or faded? This will influence your refinishing strategy.
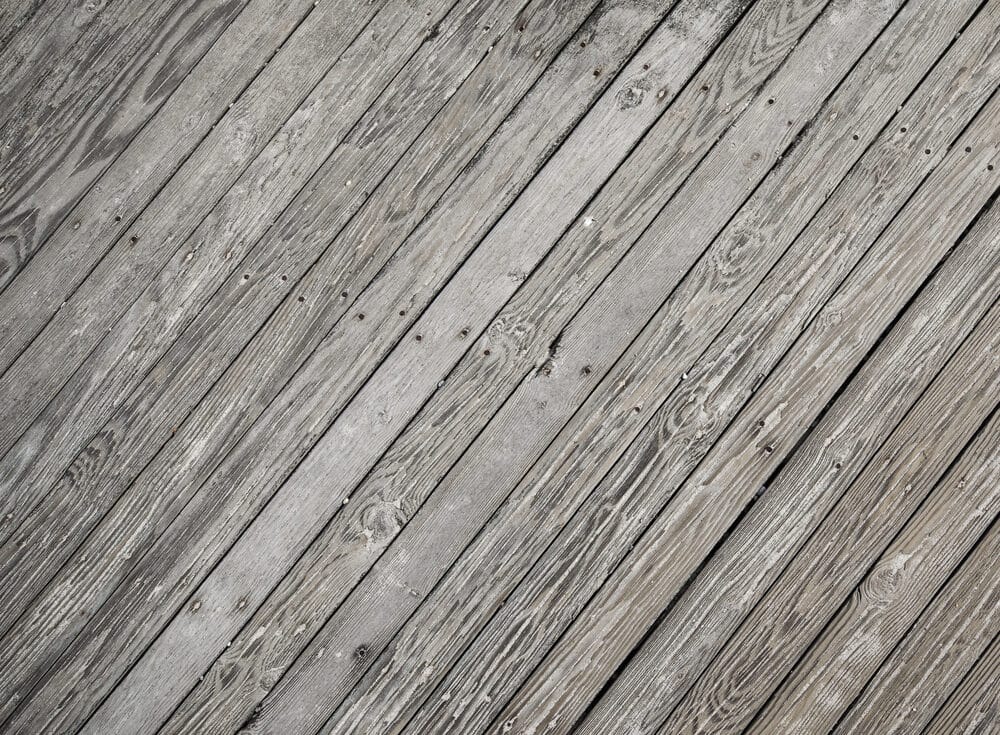
Evaluate the wood type
- Identify the type of wood your deck is made from, as different woods require different treatment approaches. Common options include cedar, redwood, pine, and pressure-treated lumber.
Take note of any hazards
- Be aware of any potential safety hazards, such as loose or protruding nails, splinters, or raised sections of decking.

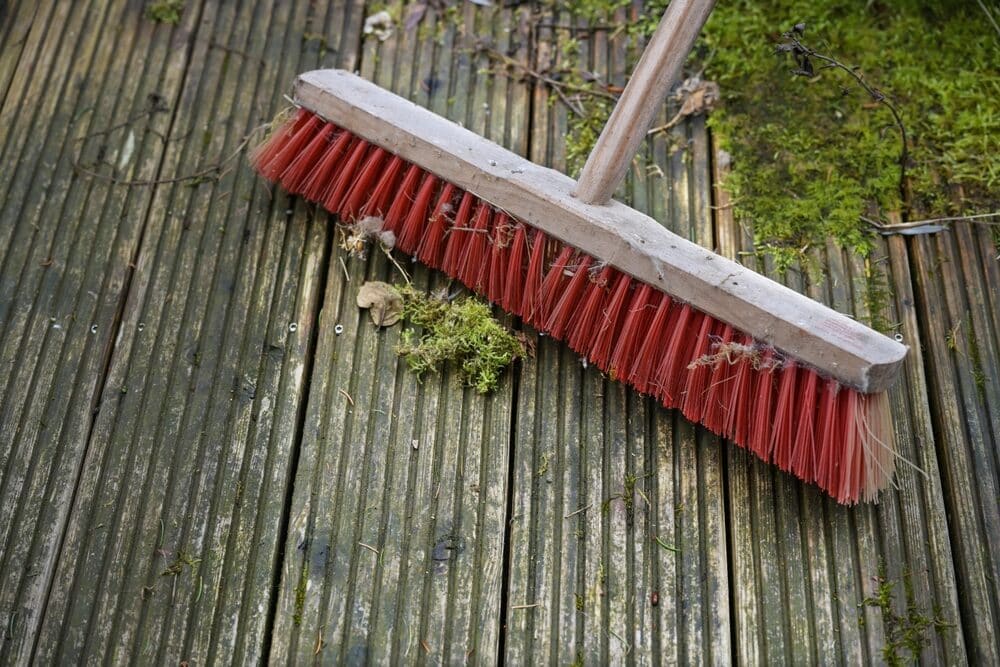
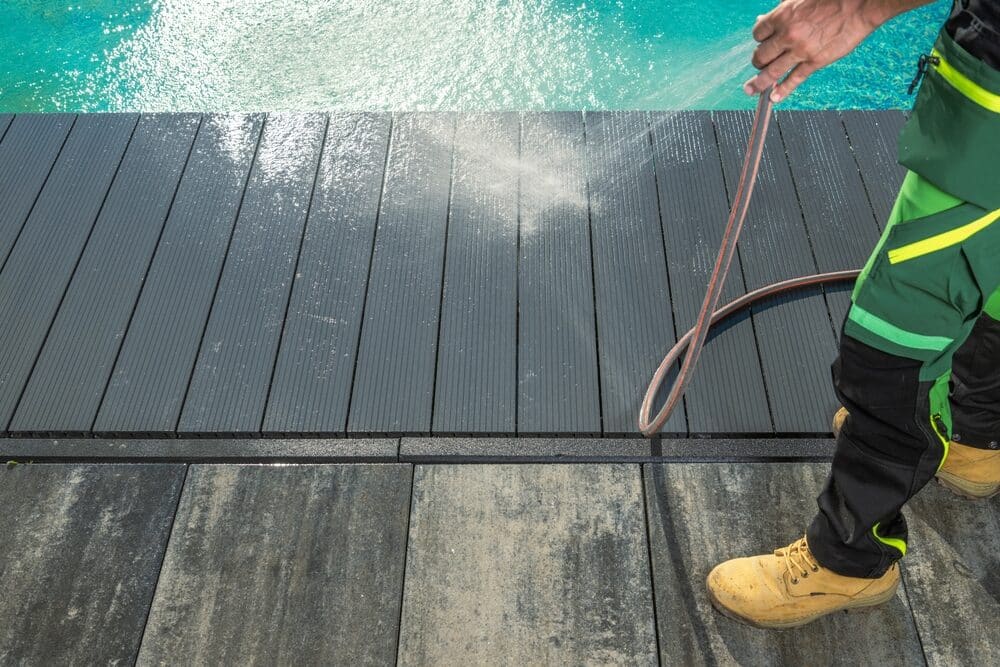
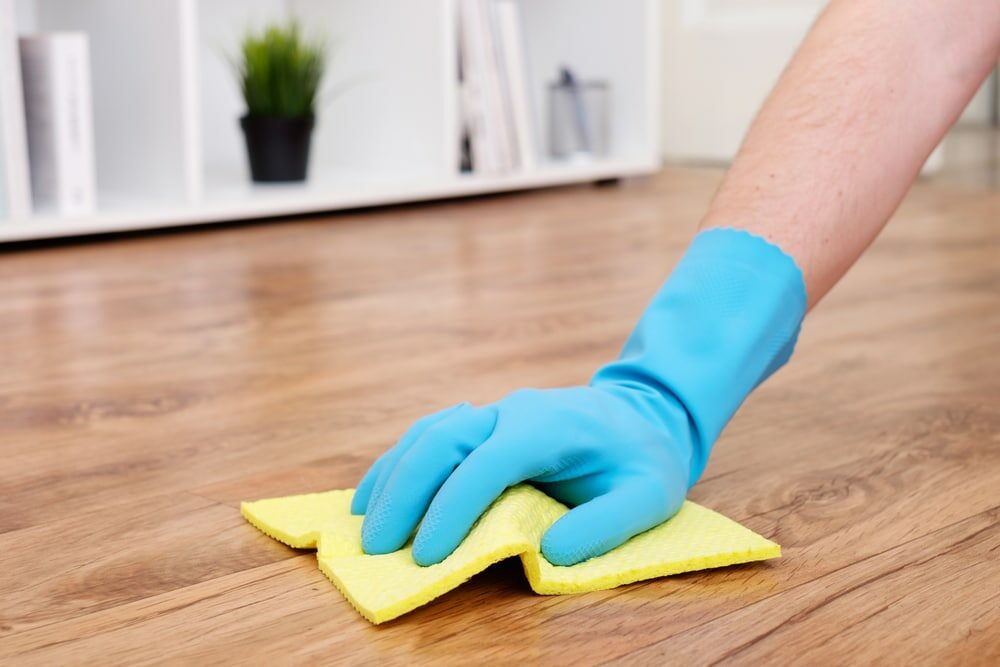
Cleaning your wood deck
Cleaning your wood deck is a crucial step in the maintenance process, as it helps remove dirt, grime, mildew, and any old finish that may be deteriorating. A clean surface not only enhances the deck’s appearance but also ensures that any subsequent treatments adhere properly. Here’s a step-by-step guide on how to clean your wood deck effectively:
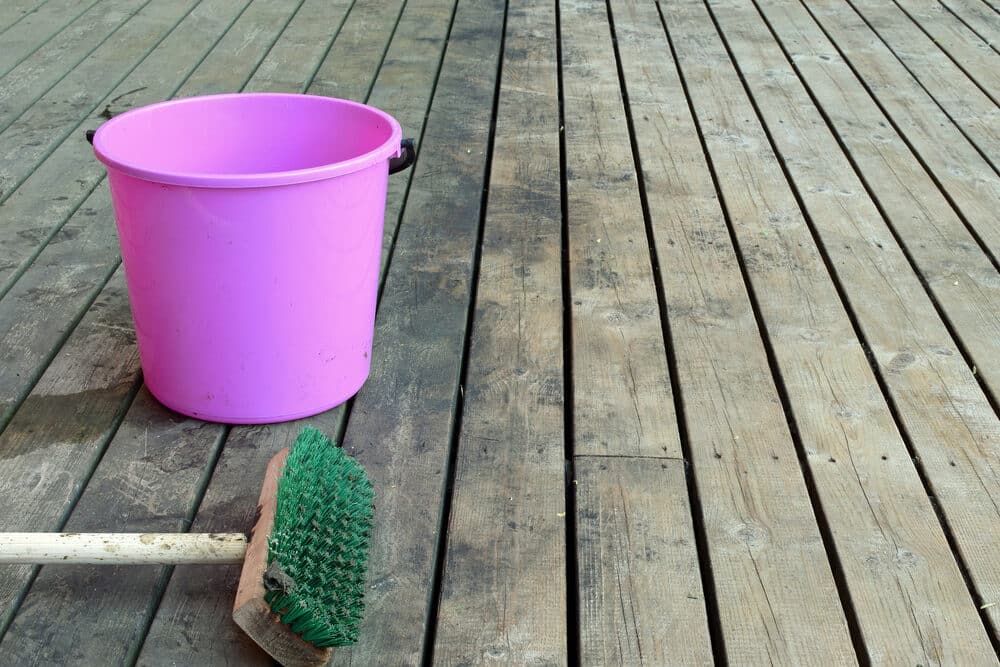
1. Gather your supplies:
- Before starting, gather the necessary cleaning supplies. You’ll need a broom or brush, a garden hose with a spray nozzle, a bucket, mild dish soap or a specialised deck cleaner, a stiff-bristle brush or deck scrubber, safety goggles, and gloves.
2. Clear the deck:
- Remove all furniture, potted plants, and any other items from the deck. This will give you clear access to the entire surface.
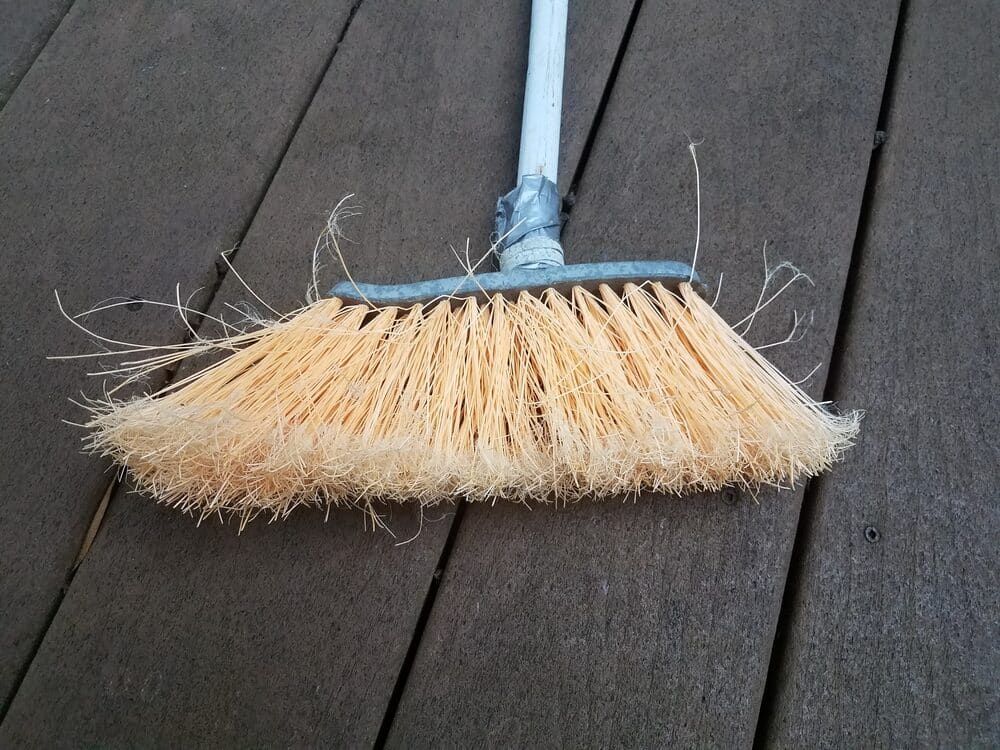
3. Sweep Away Debris:
- Begin by sweeping the deck with a broom or brush to remove loose debris, leaves, and dirt. Pay special attention to the crevices between boards.
4. Prepare the cleaning solution:
- In a bucket, mix your cleaning solution. You can use a mixture of warm water and mild dish soap, or you can opt for a commercial deck cleaner following the manufacturer’s instructions.
5. Apply the cleaning solution:
- Starting at one end of the deck, apply the cleaning solution to a small section using a garden sprayer or a watering can. Ensure the deck surface is evenly wet, but avoid oversaturation.
6. Scrub the deck:
- Use a stiff-bristle brush or a deck scrubber to scrub the wet section vigorously. Pay extra attention to areas with stubborn stains, mould, or mildew. Work in the direction of the wood grain to prevent damage.
7. Rinse Thoroughly:
- After scrubbing, immediately rinse the cleaned section with a garden hose equipped with a high-pressure spray nozzle. Rinse from top to bottom to prevent streaks. Continue this process, section by section, until the entire deck is clean.
8. Inspect for lingering stains:
- Check the deck surface for any remaining stains or spots. If necessary, repeat the cleaning process in these areas.
9. Allow to Dry:
- Allow the deck to dry completely before proceeding with any further treatments or repairs. This may take a day or two, depending on the weather conditions.
10. Dispose of Waste Properly:
- Dispose of any waste materials, such as used cleaning solution or debris, in accordance with local regulations.
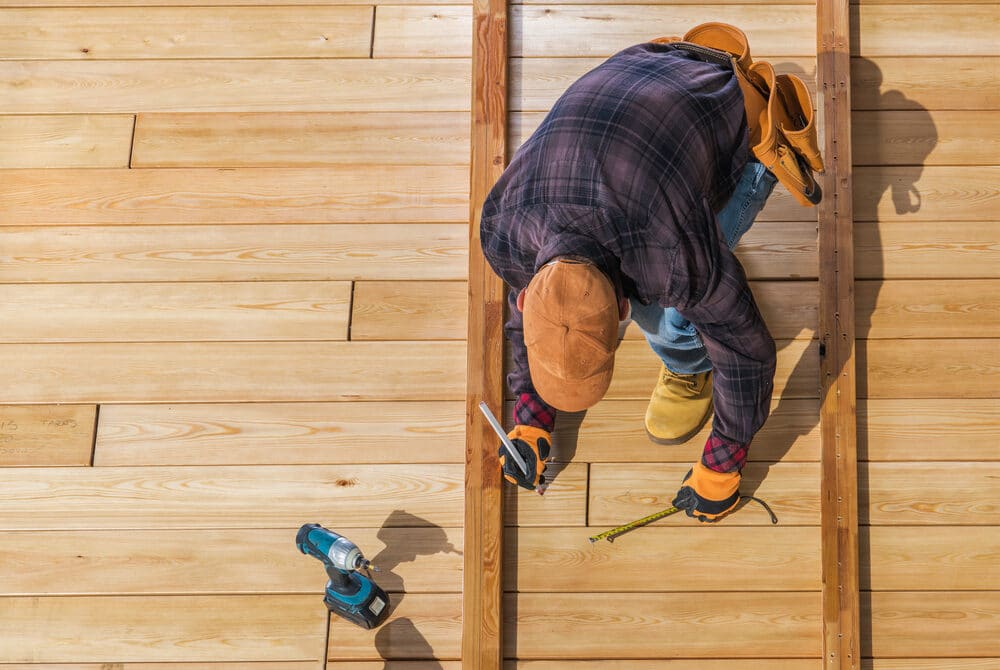
Deck repair and maintenance
Once you’ve assessed the condition of your wood deck and thoroughly cleaned it, it’s time to address any necessary repairs and perform routine maintenance to ensure its longevity. Here are the steps to follow:
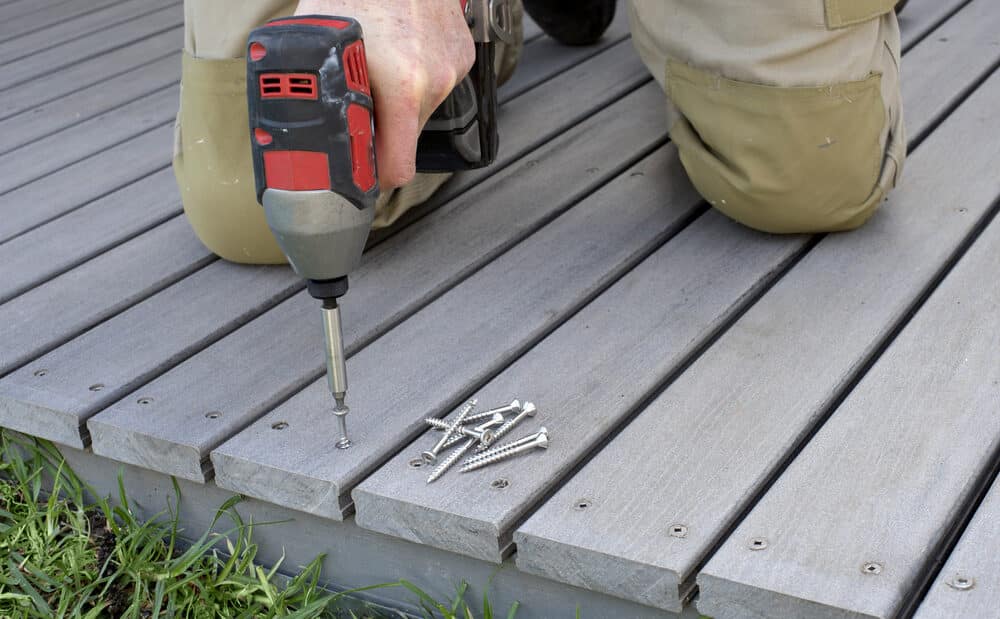
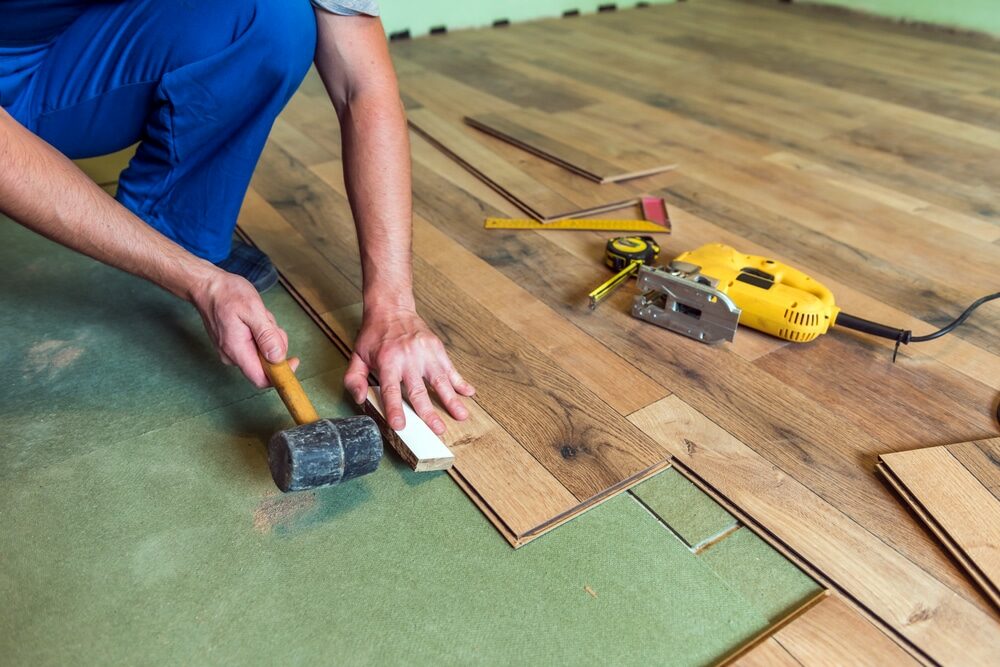
1. Replace damaged or rotten boards
- Begin by identifying and marking any boards that are cracked, splintered, or rotten. Carefully remove these boards using a pry bar or deck screwdriver. Replace them with new boards that match the type and size of the existing ones. Make sure to use corrosion-resistant screws or nails for secure attachment.

2. Tighten loose fasteners and nails
- Inspect the deck’s fasteners, including screws, nails, and bolts. Tighten any that have become loose over time to prevent tripping hazards and maintain structural integrity. Replace any corroded or damaged fasteners.
3. Address structural issues
- Check for structural issues, such as unstable support posts or wobbly railings. Secure or replace any components that are compromised. If you’re uncertain about the structural stability of your deck, consider consulting a professional for an assessment.
4. Sand Rough Areas
- Sand any rough or splintered areas on the deck surface using coarse-grit sandpaper. Sand in the direction of the wood grain to maintain a smooth and even surface.
5. Fill Gaps and Cracks
- Fill any gaps or cracks between boards with a high-quality wood filler. This not only improves the deck’s appearance but also prevents moisture from seeping into the gaps and causing further damage.
6. Check and reinforce the staircase
- If your deck has stairs, inspect them for loose or damaged steps, handrails, and balusters. Reinforce or replace any components that are unstable or unsafe.
7. Examine the deck’s ledger board
- Inspect the ledger board, which attaches the deck to your house. Ensure it is securely fastened, with no signs of water damage or rot. Properly flashing and sealing the ledger board is crucial to preventing water intrusion.
8. Regularly inspect and maintain
- Make it a habit to inspect your deck regularly, especially after severe weather events. Promptly address any issues that arise, as timely maintenance can prevent minor problems from turning into major repairs.
9. Consider deck protection measures
- Depending on your deck’s location and climate, you may want to invest in measures such as installing a canopy or awning to shield it from harsh weather conditions. This can extend the life of your deck and reduce maintenance needs.
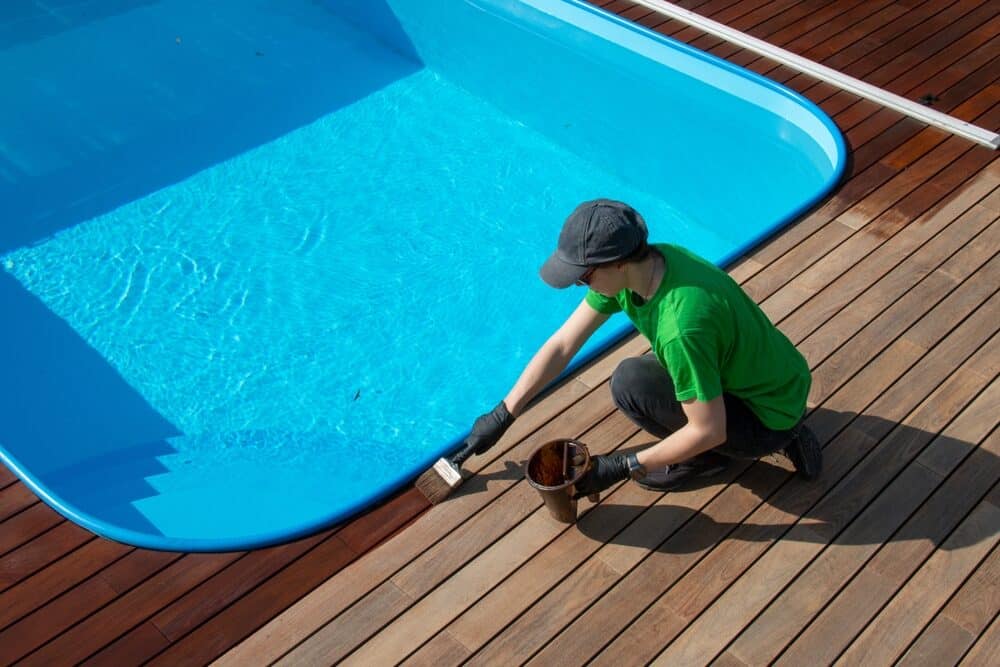
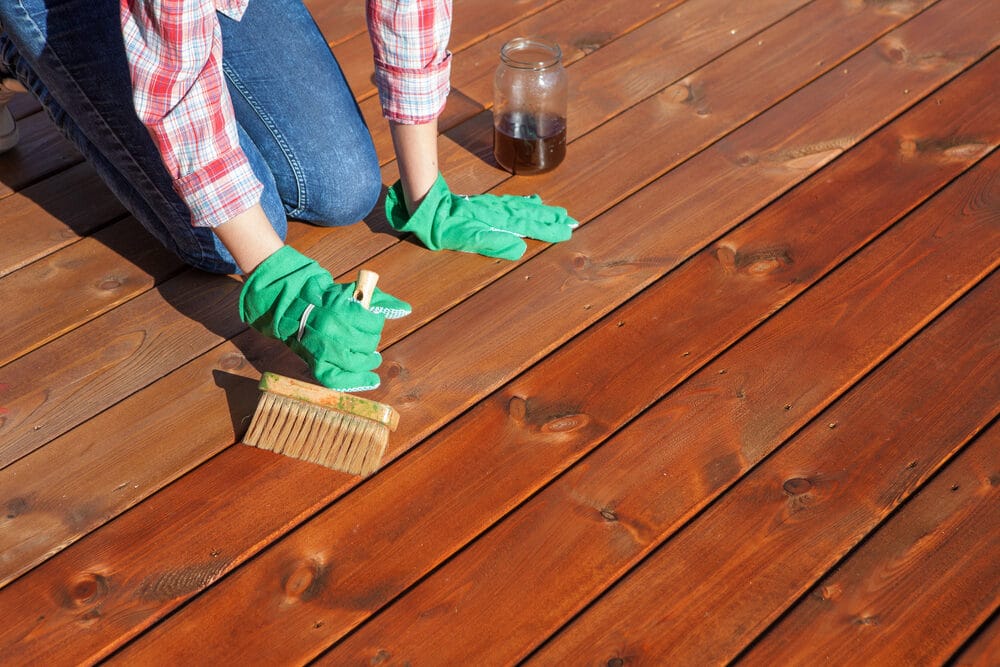
Protective deck coatings
Applying protective deck coatings is a critical step in preserving and enhancing the longevity of your wood deck. These coatings create a barrier against moisture, UV rays, and general wear and tear, helping to maintain the deck’s appearance and structural integrity. Here’s what you need to know about protective deck coatings:
Benefits of Deck Sealers and Stains
Deck sealers and stains are popular choices for protecting wood decks. They offer several advantages:
- Water Repellency: Sealers and stains form a protective layer that repels water, preventing moisture from penetrating the wood and causing rot.
- UV Protection: Many coatings contain UV inhibitors that shield the wood from the harmful effects of sunlight, reducing fading and discoloration.
- Enhanced Beauty: Deck stains come in various colours and finishes, allowing you to enhance the natural beauty of the wood while protecting it.
- Mildew Resistance: Some coatings have mildew-resistant properties, which can be particularly useful in humid climates.
- Longevity: Properly applied sealers and stains can extend the life of your deck by several years.
Types of Deck Coatings Available
There are different types of deck coatings to choose from, including:
- Clear sealers: These provide a transparent, natural look and are ideal for preserving the wood’s appearance.
- Semi-Transparent Stains: Semi-transparent stains add colour while still allowing the wood grain to show through.
- Solid Stains: Solid stains offer more extensive colour coverage and can hide imperfections in the wood. They provide a painted look while still retaining some wood texture.
- Deck Paint: Deck paint completely covers the wood, offering the most protection but hiding the wood grain entirely.
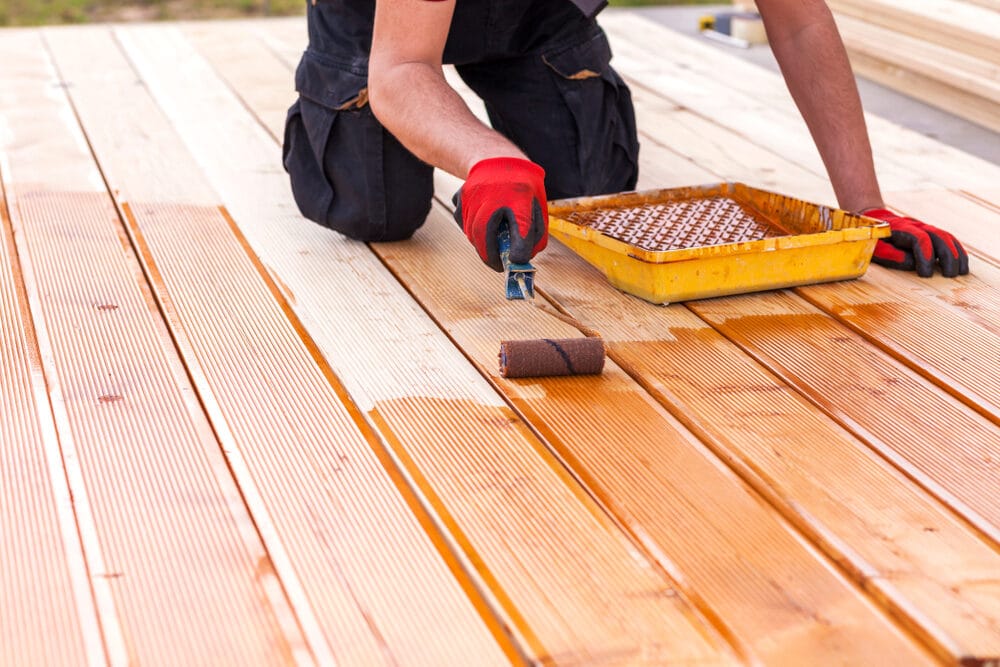
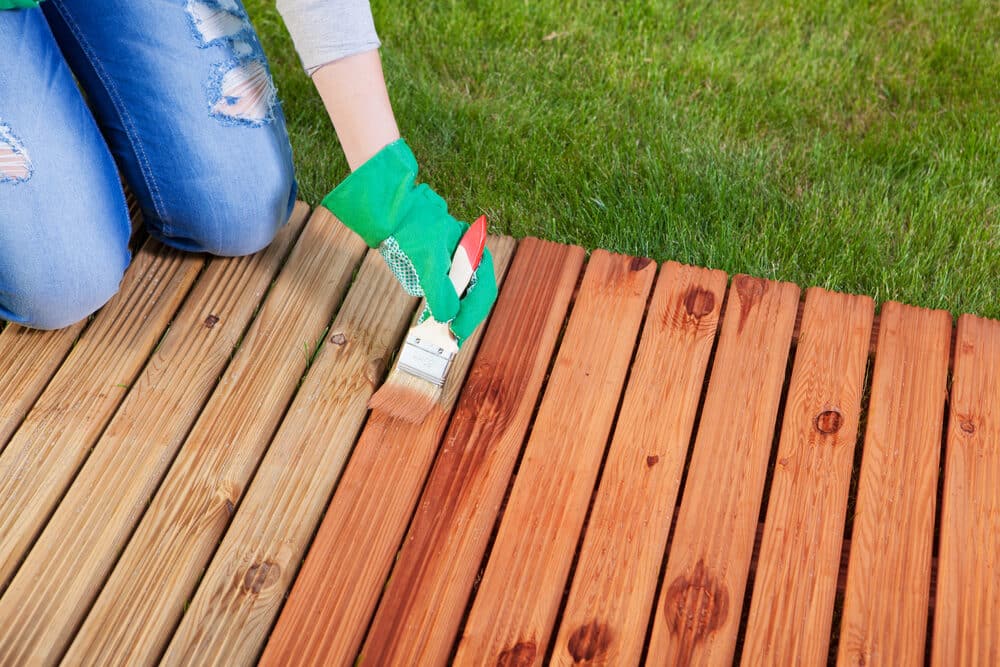
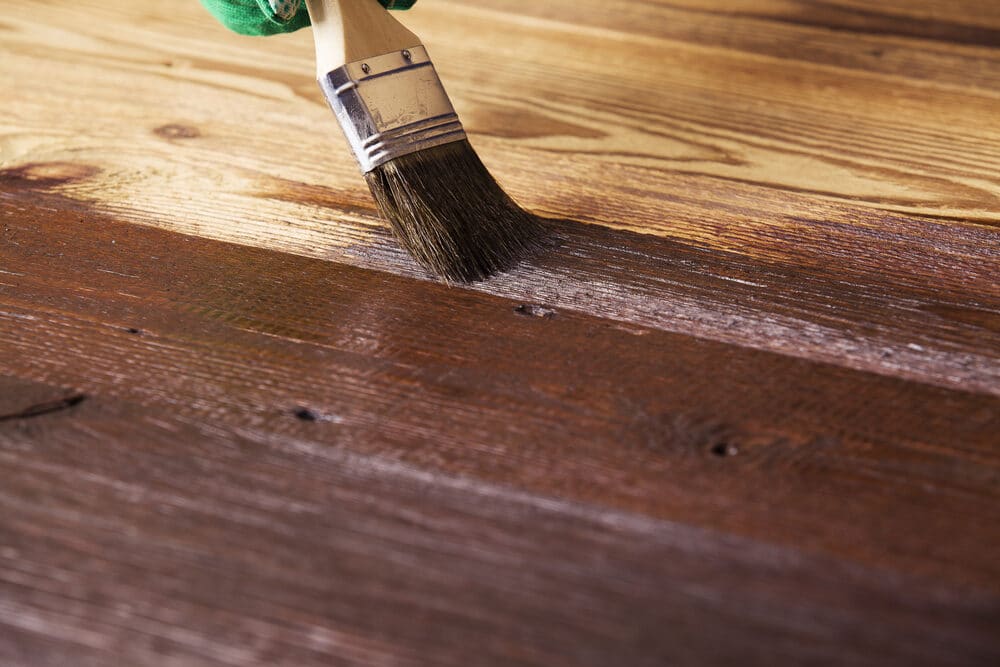
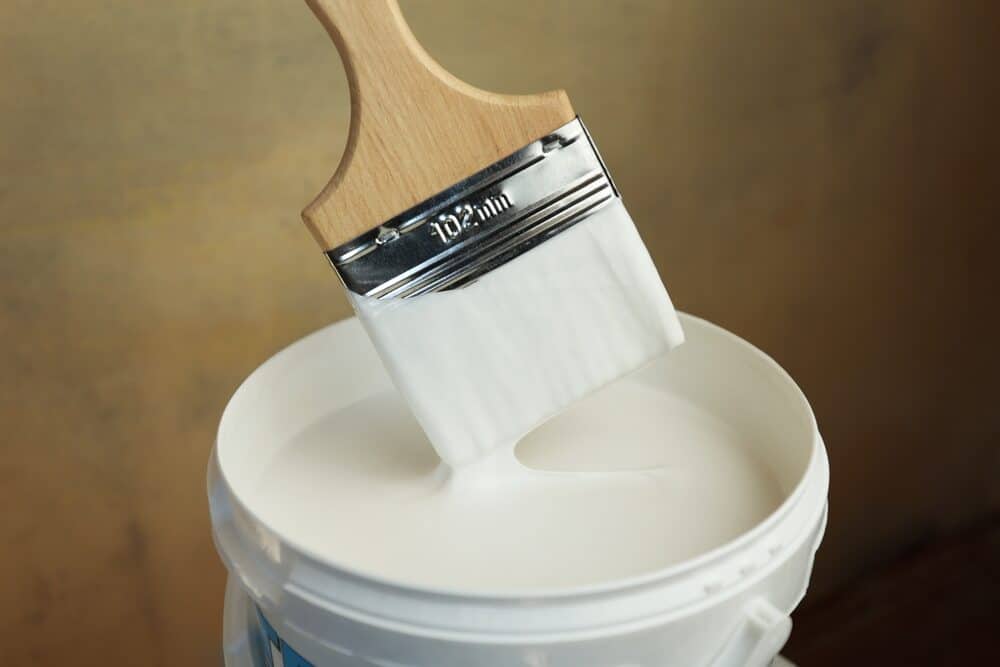
How to Apply Deck Sealers and Stains
Follow these general steps for applying deck sealers and stains:
- Clean the deck thoroughly to ensure a clean surface.
- Choose a day with suitable weather conditions (typically not too hot, cold, or windy).
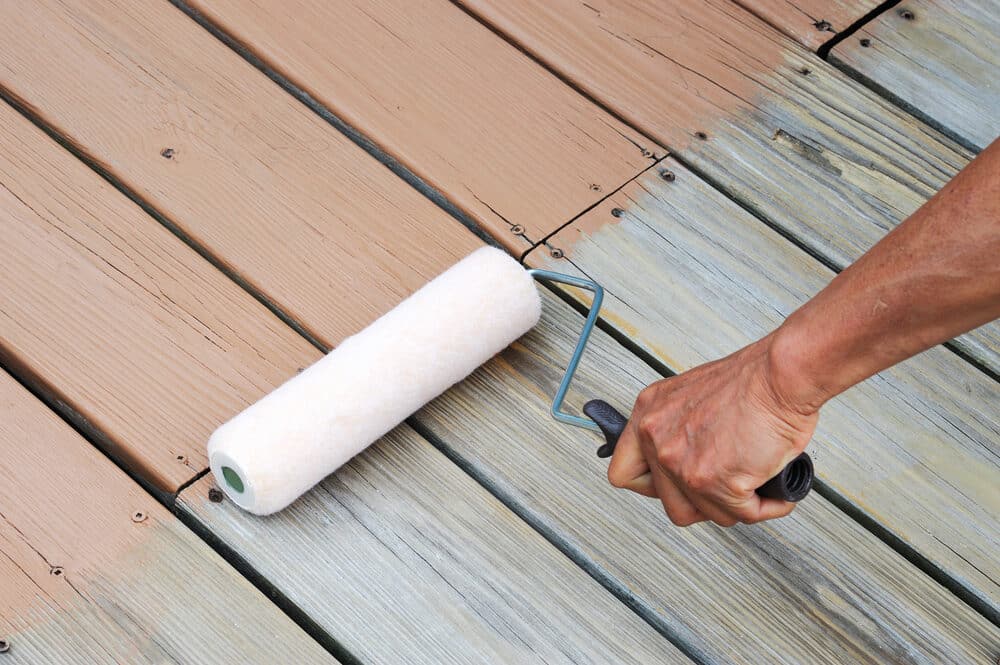
- Apply the sealer or stain using a paint roller, brush, or sprayer, following the manufacturer’s instructions for coverage and drying times.
- Pay attention to details like railings, balusters, and hard-to-reach areas.
- Allow the coating to dry completely between coats if applying multiple layers.
Maintaining Your Coated Deck
To prolong the life of your protective coating, perform regular maintenance.
- Clean the deck as needed to remove dirt and debris.
- Inspect for any areas where the coating may be peeling or wearing thin.
- Touch up or reapply the coating as necessary to maintain its effectiveness.
Choosing the Right Finish
- Consider your aesthetic preferences and the deck’s exposure to sunlight when choosing a finish. Lighter colours may reflect more heat, while darker colours can absorb heat.
Sealing the ends of deck boards
- To prevent moisture from penetrating the end grain of deck boards (which is more susceptible to rot), consider using a specialised end-grain sealer.
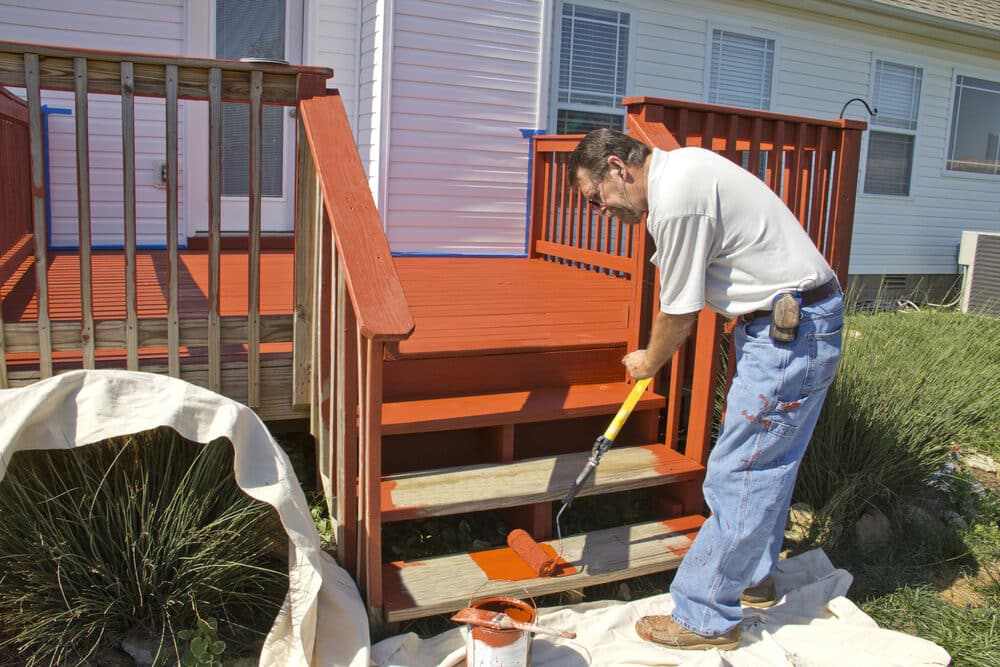
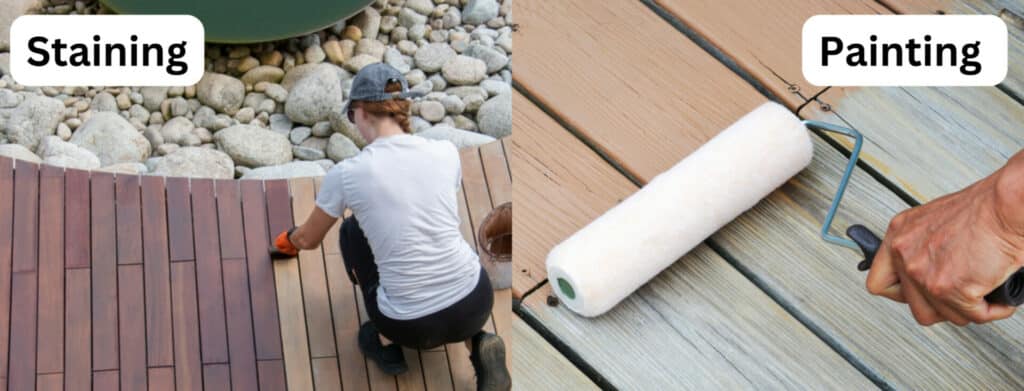
Deck Paint vs. Stain: Which is Better?
Choosing between deck paint and stain depends on your preferences, the condition of your wood deck, and the level of protection and aesthetics you desire. Each option has its advantages and disadvantages.
Deck Paint:
Pros:
- Maximum Protection: Deck paint forms a solid, opaque barrier that provides the highest level of protection against moisture, UV rays, and wear and tear.
- Colour Consistency: Paint provides a uniform, consistent colour and finish, hiding imperfections in the wood.
- Longevity: Painted decks tend to require less frequent maintenance, as they can last for several years without significant fading or peeling.
Cons:
- Hides Wood Grain: Deck paint completely conceals the natural wood grain, giving your deck a more uniform, painted appearance.
- Prone to Peeling: Over time, deck paint can peel or chip, especially in high-traffic areas or areas exposed to harsh weather conditions. Repainting can be a labour-intensive process.
Deck Stain:
Pros:
- Enhances Wood’s Natural Beauty: Stains come in various transparency levels, allowing you to choose a finish that enhances the wood’s natural grain and texture.
- UV Protection: Stains with UV inhibitors protect the wood from sun damage while preserving its appearance.
- Easier Maintenance: When a stained deck requires touch-ups or refinishing, it’s easier to do so without the need for extensive removal or stripping.
Cons:
- Less Protection: Stains provide a lower level of protection compared to paint, especially when it comes to moisture resistance. They may require more frequent reapplications to maintain their effectiveness.
- Variability: Depending on the stain type and transparency level, the final appearance can vary, and some imperfections in the wood may be visible.
Which is better for you?
- Choose paint if:
- Your primary concern is maximum protection and longevity.
- You prefer a uniform, solid colour and don’t mind concealing the wood grain.
- You’re prepared for the occasional need to repaint and perform touch-ups.
- Choose Stain If:
- You want to showcase the natural beauty of the wood and prefer a semi-transparent or transparent finish.
- You’re willing to perform more frequent maintenance, such as re-staining every few years.
- You’re open to variations in wood appearance and don’t mind some imperfections showing through.
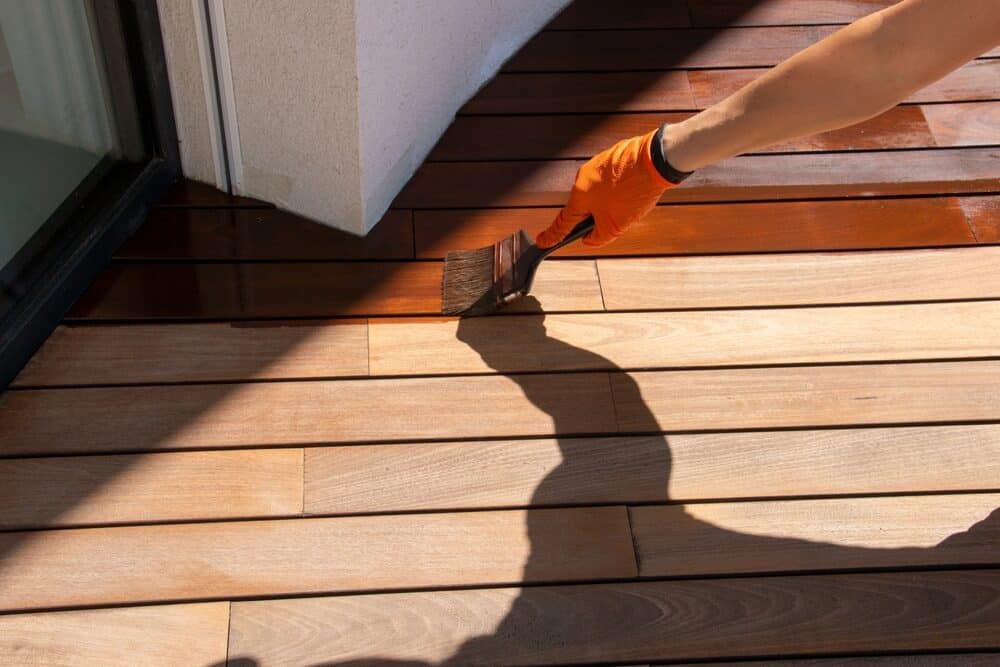
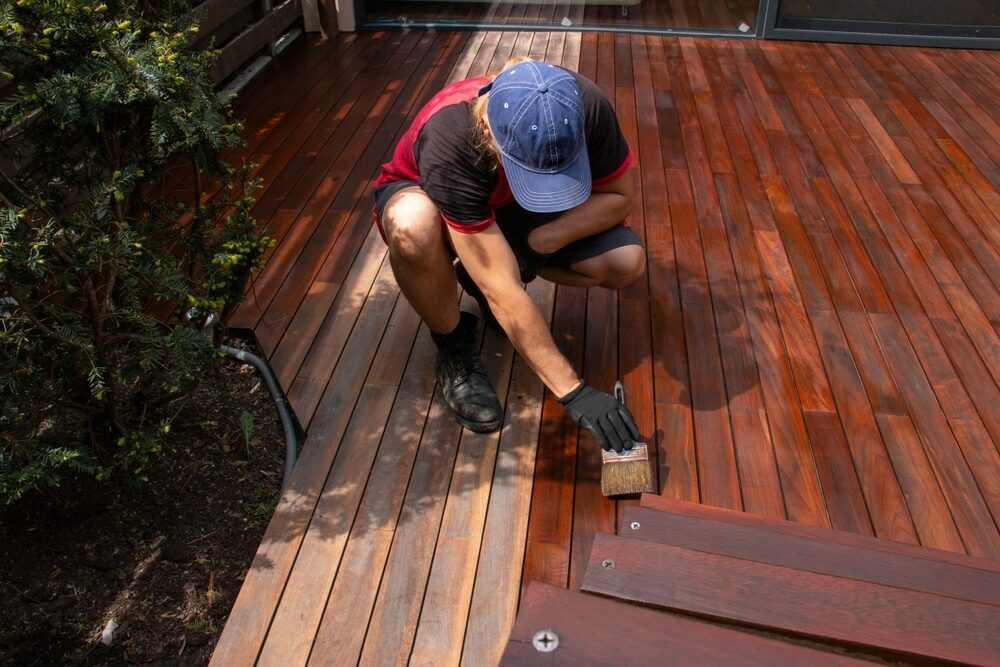
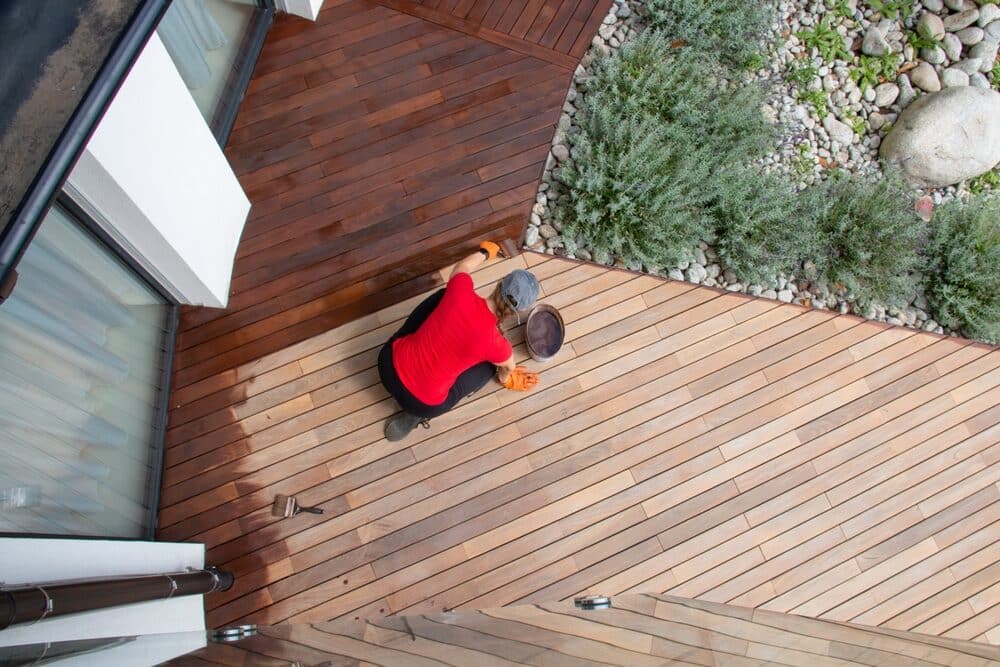
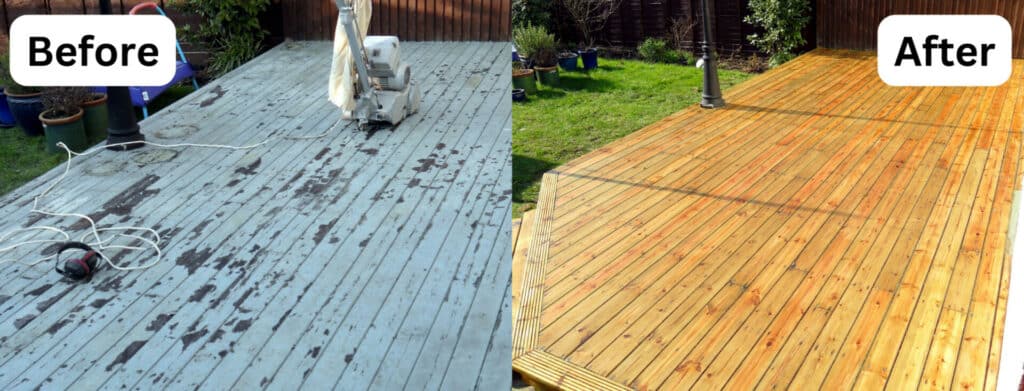
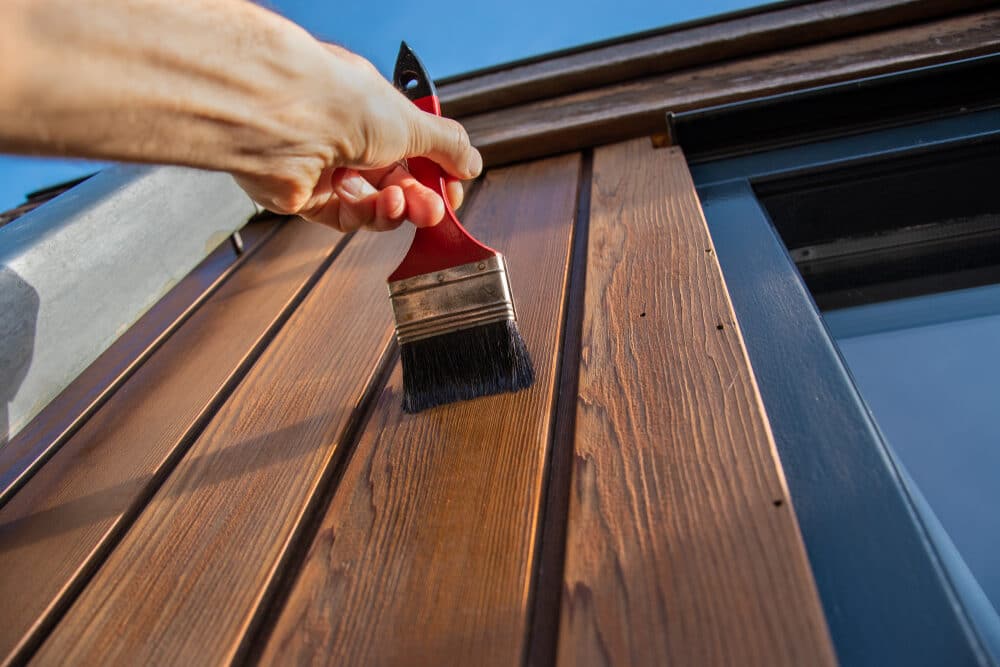
Deck Refinishing: Restoring the Natural Beauty
Refinishing your wood deck is a transformative process that can bring back its natural beauty and extend its lifespan. Whether you choose to apply a fresh coat of stain, sealer, or paint, proper preparation and application are essential. Here’s how to refinish your deck effectively:
Evaluate the current finish
- Determine whether your deck currently has a stain, sealer, or paint finish. If you’re unsure, you can perform a simple water droplet test: sprinkle a few drops of water on the deck’s surface. If the water beads up, there’s likely a finish; if it soaks in, it’s time for refinishing.
Clean the deck thoroughly
- Start by cleaning the deck as previously outlined in the cleaning section of this guide. Remove any remaining debris, mould, mildew, or old finish that may be peeling or deteriorating.
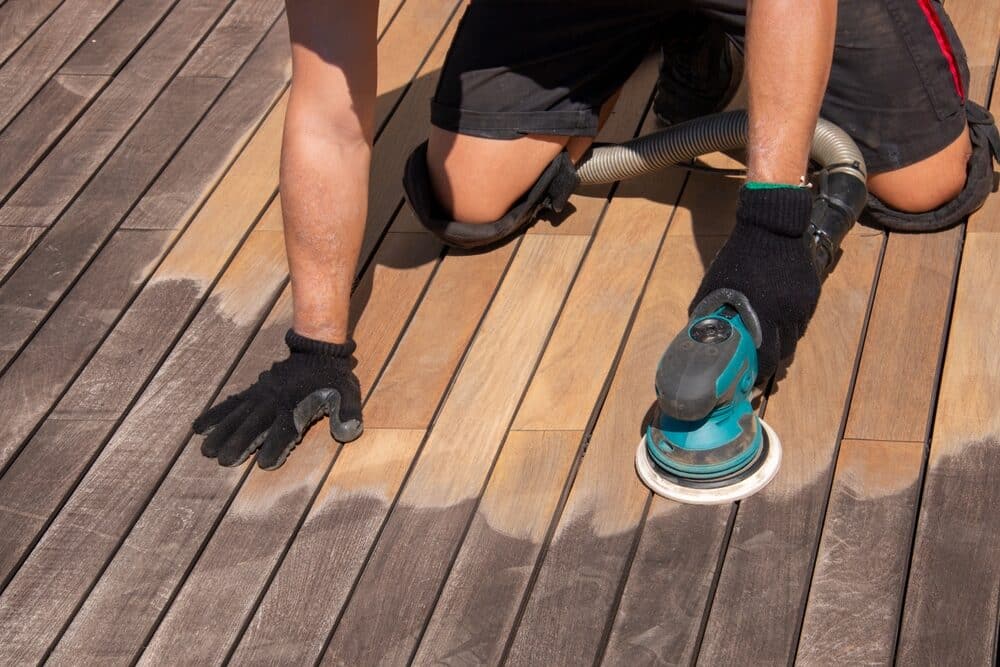
Sand the surface (if necessary)
- If your deck has a solid stain or paint that’s peeling or chipping, you may need to sand the entire surface to remove the old finish. Use a power sander or sandpaper with a coarse grit to smooth the wood.
Choose the refinishing product
- Select a stain, sealer, or paint product that suits your aesthetic preferences and provides the level of protection you desire. Ensure it’s compatible with the type of wood your deck is made from.
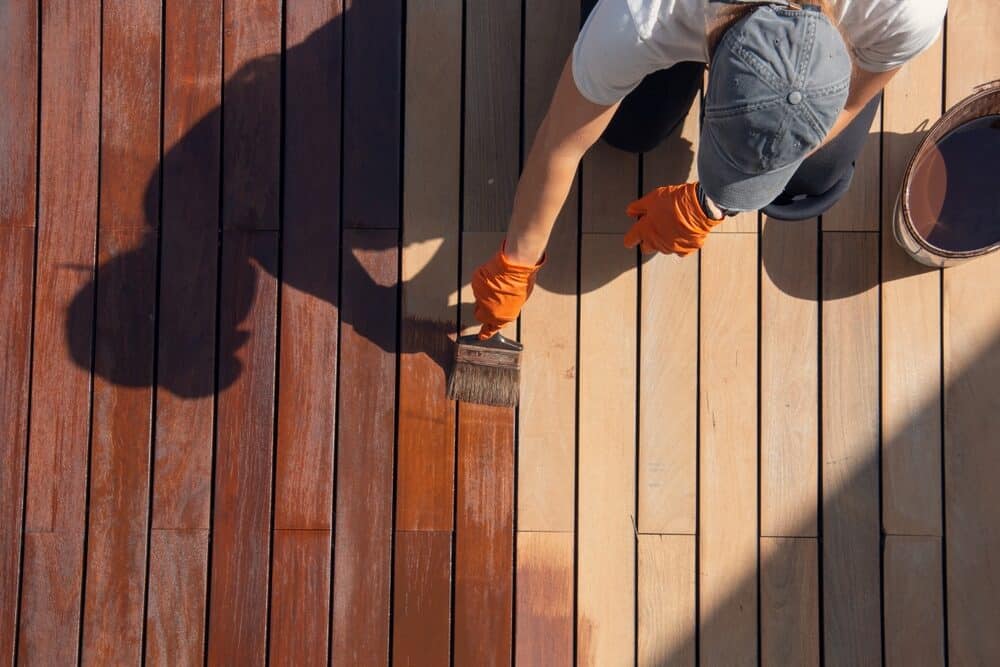
Apply the refinishing product
- Follow the manufacturer’s instructions for the chosen product, whether it’s a stain, sealer, or paint. Use a paint roller, brush, or sprayer, depending on the product and the finish you want to achieve. Pay close attention to coverage and drying times.
Apply multiple coats (if necessary)
- Depending on the product and the desired level of protection, you may need to apply multiple coats. Allow each coat to dry thoroughly before applying the next one.
Protect adjacent areas
- Cover adjacent surfaces, such as siding, plants, and furniture, to prevent overspray or accidental drips from reaching them.
Work in sections
- To maintain a wet edge and achieve a uniform finish, work on your deck in manageable sections. Start at one end and work your way to the other.
Allow for Proper Drying
- Ensure that the refinishing product has ample time to dry between coats and before foot traffic is allowed. Drying times can vary depending on weather conditions.
Inspect and touch up
- After the final coat has dried, inspect the deck for any areas that may need touch-ups or additional refinishing. Address any imperfections promptly.
Regular Maintenance
- To extend the life of your refinished deck, perform regular maintenance. This includes routine cleaning, checking for peeling or fading, and reapplying the finish as needed.
Preventing future damage
Preventing future damage to your wood deck is essential for maintaining its longevity and appearance. Implementing a proactive approach to deck maintenance can save you time and money in the long run. Here are some strategies to prevent future damage:
Regular Inspections
- Make it a habit to inspect your deck regularly, preferably at the beginning and end of each season. Look for signs of wear, damage, loose fasteners, and any areas that may need attention.
Cleaning and maintenance schedule
- Develop a cleaning and maintenance schedule for your deck. Regularly sweep away debris, remove leaves, and clean up spills to prevent staining and mildew growth.
Furniture and Plant Placement
- Be mindful of where you place outdoor furniture, potted plants, and decorative items on your deck. Avoid dragging heavy furniture, as it can scratch the surface. Use furniture pads or coasters to distribute the weight.
Consider deck mats and rugs
- Consider using deck mats or rugs in high-traffic areas to protect the wood surface from excessive wear and tear. These can also help prevent discoloration from direct sunlight.
Trim overhanging branches
- If your deck is located under trees, trim overhanging branches to prevent leaves and debris from falling onto the deck. This reduces the risk of mould and mildew growth.
Proper Drainage
- Ensure that your deck has proper drainage to prevent water from pooling. Make sure that water flows away from the house and deck to minimise moisture-related issues.
Use coasters and tablecloths
- When using outdoor dining tables and chairs, use coasters for drinks and tablecloths to protect the deck from spills and stains.
Apply a Yearly Topcoat
- If you’ve stained or sealed your deck, consider applying a yearly topcoat to maintain the finish’s effectiveness. This can help prevent moisture penetration and UV damage.
Address rust and corrosion
- Regularly check for rust on metal components, such as fasteners, brackets, and railings. Replace any corroded parts promptly to prevent structural issues.
Prompt Repairs
- If you notice any loose boards, nails, or fasteners during your inspections, address them promptly to prevent further damage and safety hazards.
Avoid harmful chemicals
- When cleaning your deck, use mild cleaning solutions and avoid harsh chemicals that can damage the finish or wood. Follow the manufacturer’s recommendations for cleaning products.
Seasonal Maintenance
- Perform seasonal maintenance tasks such as resealing or restaining as needed, especially in regions with extreme weather conditions.
Protect Against Fading
- If your deck is exposed to direct sunlight, consider applying a UV-protective finish to reduce fading and discoloration.
Install gutter guards
- Ensure that your gutters have guards to prevent clogs and water overflow that could lead to moisture-related issues on your deck.
Deck restoration services
While many homeowners prefer to tackle deck maintenance and restoration themselves, some situations may warrant the expertise of professional deck restoration services. These professionals have the knowledge, experience, and equipment to handle complex projects and ensure your deck is restored to its optimal condition. Here’s what you need to know about hiring deck restoration services:
When to Consider Professional Help:
You may want to consider hiring deck restoration services in the following situations:
- Your deck is severely damaged or structurally compromised.
- You lack the time, tools, or expertise to undertake a complex restoration project.
- You want to achieve a high-quality, long-lasting finish or need specialised treatments.
- Safety concerns or code compliance issues require professional assessment and repair.

Choosing a Reputable Deck Restoration Company:
When selecting a deck restoration service, consider the following factors:
- Experience: Look for a company with a proven track record of successfully restoring decks similar to yours.
- References: Ask for references or check online reviews to gauge the satisfaction of past customers.
- Licencing and Insurance: Ensure the company is licenced and carries liability insurance.
- Certifications: Some companies have certifications from industry organisations, which can indicate a commitment to quality.
- Portfolio: Review their portfolio of completed projects to assess the quality of their work.
- Estimates: Obtain multiple estimates and compare them to ensure fair pricing.
- Warranty: Inquire about any warranties or guarantees offered on their work.
Services Offered by Deck Restoration Professionals:
Deck restoration professionals can provide a range of services, including:
- Comprehensive deck assessments and inspections.
- Structural repairs and reinforcement.
- Wood replacement and deck board installation.
- Surface cleaning, stripping, and sanding.
- Application of stains, sealers, or paints.
- Baluster and railing repairs or replacements.
- Custom deck design and modifications.
- Maintenance plans and ongoing care.
The Restoration Process:
Deck restoration services typically follow a structured process that includes:
- Initial assessment and consultation.
- Proposal and estimate.
- Planning and scheduling.
- Surface preparation and repairs.
- Application of the selected finish or coating.
- Final inspection and client approval.
- Ongoing maintenance recommendations.
Cost Considerations:
- The cost of professional deck restoration can vary widely depending on the size of your deck, the extent of the work required, and the type of finish or treatment chosen. Be sure to get detailed cost estimates before proceeding.
Benefits of Professional Deck Restoration:
- Hiring professionals can ensure that your deck is restored to its best possible condition, maximising its lifespan and beauty.
- Professionals have access to high-quality materials and equipment, ensuring a superior finish.
- You can save time and effort while avoiding the risks associated with DIY projects, especially if you lack experience.
Communication and Collaboration:
- Maintain open communication with the restoration team throughout the process. Discuss your goals, preferences, and any concerns you may have.
Aftercare and maintenance:
- After the restoration is complete, ask the professionals for maintenance recommendations to ensure the longevity of your newly restored deck.
Eco-Friendly Deck Treatment Options
If you’re concerned about the environmental impact of traditional deck treatments and want to use eco-friendly alternatives, there are several options available. These environmentally responsible treatments help protect your wood deck while minimising harm to the planet. Here are some eco-friendly deck treatment options to consider:
Water-Based Sealers and Stains:
- Water-based sealers and stains are a more environmentally friendly choice compared to their solvent-based counterparts. They emit fewer volatile organic compounds (VOCs), which can contribute to air pollution. Look for low-VOC or zero-VOC products.
Plant-Based Sealers and Stains:
- Some deck treatments are derived from plant-based materials, such as soy or linseed oil. These natural oils provide UV protection and moisture resistance while being biodegradable and less harmful to the environment.
Milk Paints:
- Milk paint is an eco-friendly alternative to traditional deck paint. It’s made from natural ingredients like milk protein, lime, and earth pigments. Milk paint is biodegradable and safe for the environment.
Recycled and Reclaimed Wood:
- Instead of using new wood for deck repairs or replacements, consider using recycled or reclaimed wood. This reduces the demand for new lumber and helps conserve natural resources.
Composite Decking:
- While not a treatment option per se, choosing composite decking made from recycled materials can be an eco-friendly choice. Composite decks are low-maintenance and often made from recycled plastics and wood fibres.
Bamboo Decking:
- Bamboo is a sustainable alternative to traditional wood decking because it grows rapidly and is highly renewable. Bamboo decking is durable and resistant to pests and rot.

Natural Oils and Waxes:
- Natural oils like tung oil and linseed oil, as well as waxes such as beeswax, can be used to protect and finish wood decks. These options are biodegradable and emit minimal or no VOCs.
Biodegradable Cleaners:
- When cleaning your deck, choose biodegradable, non-toxic cleaning solutions that won’t harm the environment or water sources. Look for products with the EPA’s Safer Choice label.
Reforestation Efforts:
- Support decking companies that participate in reforestation efforts or source wood from sustainably managed forests. Look for certifications like FSC (Forest Stewardship Council) to ensure responsible wood sourcing.
DIY Solutions:
- Consider making your eco-friendly deck treatment solutions at home using natural ingredients like vinegar, baking soda, and plant-based oils. There are many DIY recipes available online.
Proper Disposal:
- Dispose of any waste, such as old coatings or treated wood, in accordance with local regulations or recycling programmes to minimise environmental impact.
Conclusion
In the pursuit of preserving and revitalising ageing wood decks, we’ve explored a wealth of knowledge and strategies. By now, you’re equipped with the tools and insights needed to transform your weathered deck into a welcoming haven once more. Remember, maintenance is not just about appearances; it’s about safeguarding a cherished space for relaxation and gatherings. Whether you choose to clean, repair, refinish, or employ eco-friendly treatments, the care you invest in your deck today will reward you with years of enjoyment. Embrace the journey of rejuvenation and relish in the enduring beauty and functionality of your well-maintained outdoor oasis.
Maintaining and rejuvenating an ageing wood deck is not just about preserving its appearance but also ensuring its long-term functionality and sustainability. By following the right treatments and practices, you can transform your weathered deck into a beautiful outdoor oasis that will provide years of enjoyment.
Remember that deck maintenance is an ongoing commitment, but the effort you put into it will be rewarded with a beautiful and functional outdoor retreat that you, your family, and your guests can savour for years to come. Embrace the journey of revitalising your wood deck, and you’ll reap the benefits of a well-maintained and visually appealing outdoor space.

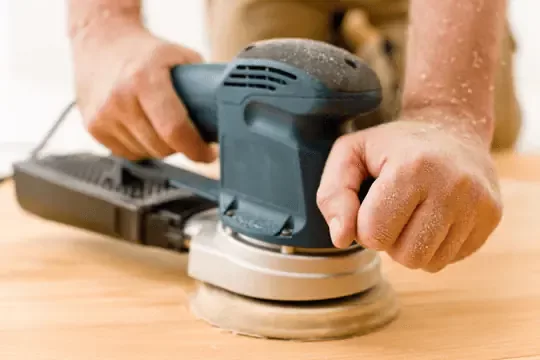
Sanding
We provide virtually dust-free sanding with our continuous belt machinery with mobile extraction units, giving you a safer environment for your family.
Oiling
This organic finish not only adds beauty to your home but also has exceptional water-repellent characteristics, making it easier to clean and maintain.
Waxing
This natural floor finish offers the softest and most mellow appearance – and leaves your floor able to breath.
Buffing
Using soft buffing machines (and hand-polishing where required) will bring a wonderful sheen to your newly-finished floor.
Repairs
We offer a full assessment of your wooden floors to determine what repairs are needed to provide the perfect working surface for the later stages of sanding, staining and sealing.
Restoration
We offer a comprehensive restoration process designed to address floors that are improperly fitted or damaged over time through wear and tear.
Request a fixed price quote for your wood floor restoration now
Simply enter your postcode below to get started.
Services
Wood Floor Sanding Wood Floor Restoration Wood Floor Scratch Repair Squeaky Wood Floor Repair Parquet Floor Sanding Parquet Floor Restoration Commercial Floor Sanding Church Floor Sanding Community Centre Floor Sanding School Floor Sanding Gap Filling Gap Filling with ResinCopyright © Mr Sander®
Privacy & Cookies Terms & Conditions Complaints Procedure Cancellation Rights Sitemap

Get An Instant Price Estimate Before You Go…
Simply enter the rooms you need sanded and we’ll provide you with a price estimate instantly! Try our price calculator now.
Get a Price Estimate NowLocal Floor Sanding Experts
Over 500 5-Star Reviews
Safe, Dust Free Sanding
Operating Since 1994