London:
Nationwide:
25,000+
Floors Restored
27 Years Experience
Wood Flooring Association Certified
What’s What in Sanding? Unraveling the Techniques & Tool of wooden floor Sanding
Posted on April 12, 2023
Blog
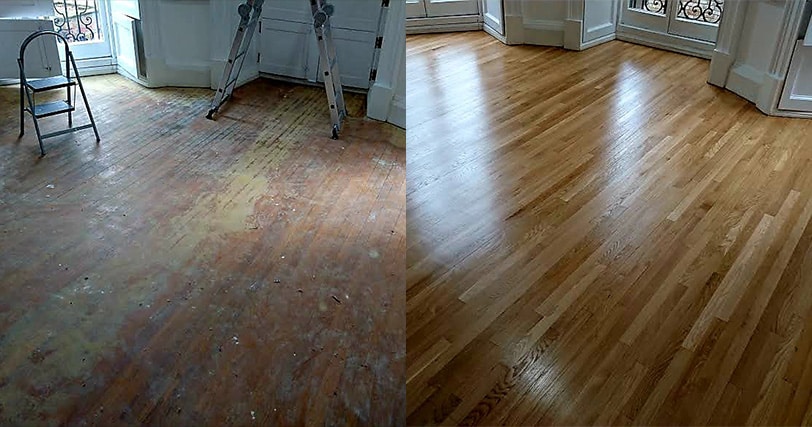
Wooden floors are a popular choice among homeowners for their warmth, durability, and timeless appeal. However, they can suffer from wear and tear over time, leading to a dull and worn appearance. Thankfully, wooden floors can be restored to their original glory with the right sanding techniques and tools. In this comprehensive guide, we will delve into the world of wooden floor sanding, exploring various techniques, tools, and tips to help you achieve a perfect finish.
A. Why sand wooden floors?
Sanding wooden floors is essential for several reasons.- Restoring the beauty and lustre of a worn-out wooden floor
- removing scratches, stains, and other surface imperfections.
- Preparing the floor for refinishing, staining, or sealing
- levelling uneven floorboards and improving the overall appearance.
B. Types of Wooden Floors
There are various types of wooden floors, each with its own unique properties and sanding requirements. The most common types include:- Solid hardwood: Made from a single piece of wood, these floors are durable and long-lasting. They can be sanded multiple times throughout their lifespan.
- Engineered hardwood: Consisting of multiple layers of wood, engineered floors are more stable and less prone to warping. However, they can only be sanded a limited number of times.
C. When to Sand Wooden Floors
Wooden floors should be sanded when:- The floor’s finish is worn, scratched, or damaged.
- There are uneven floorboards or visible gaps between them.
- The floor has never been sanded before, and you want to change the stain color or apply a new finish.
- Sanding Techniques
Types of Sanding
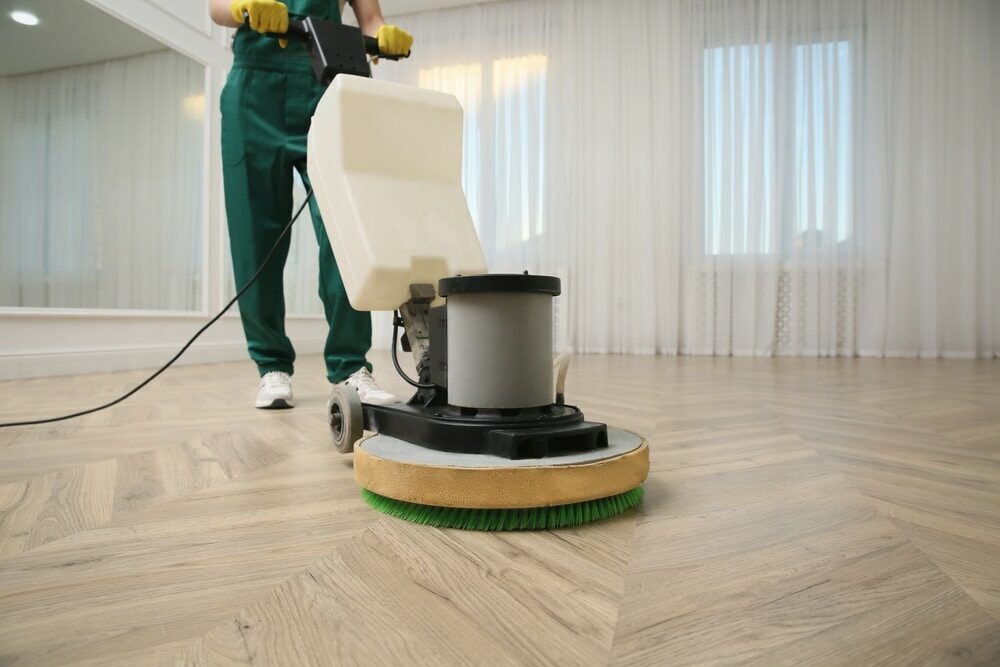
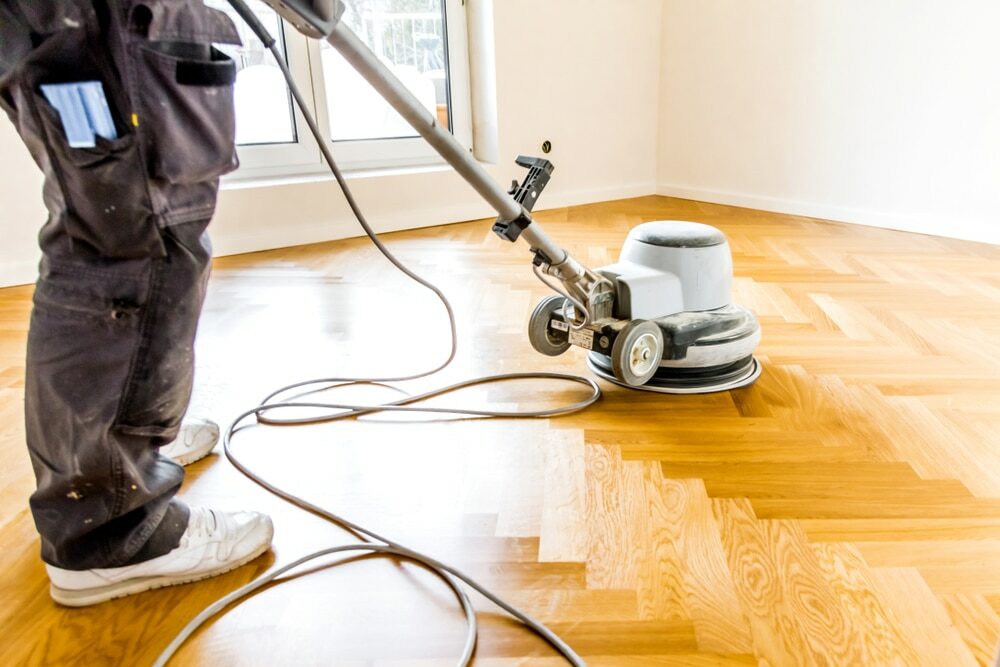
A. Drum Sanding
Drum sanding is a powerful and efficient technique used to remove the existing finish and level uneven floorboards. It involves using a large, heavy-duty sanding machine with a rotating drum covered in sandpaper. The drum sander is pushed or pulled across the floor in a straight line, working with the grain of the wood.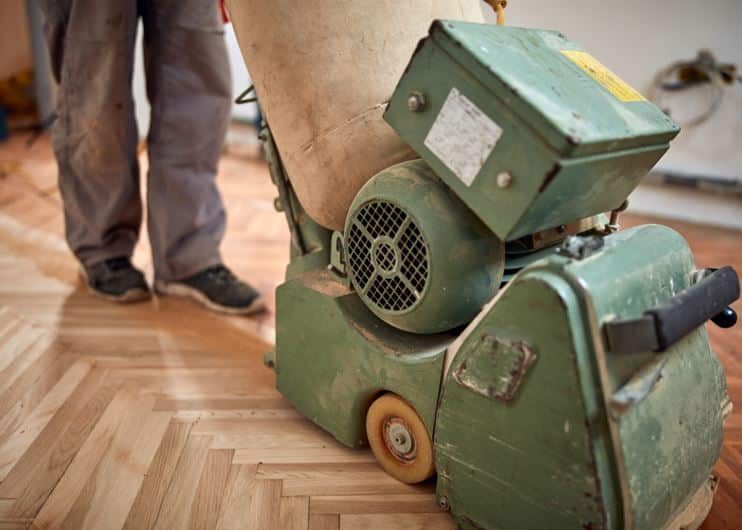
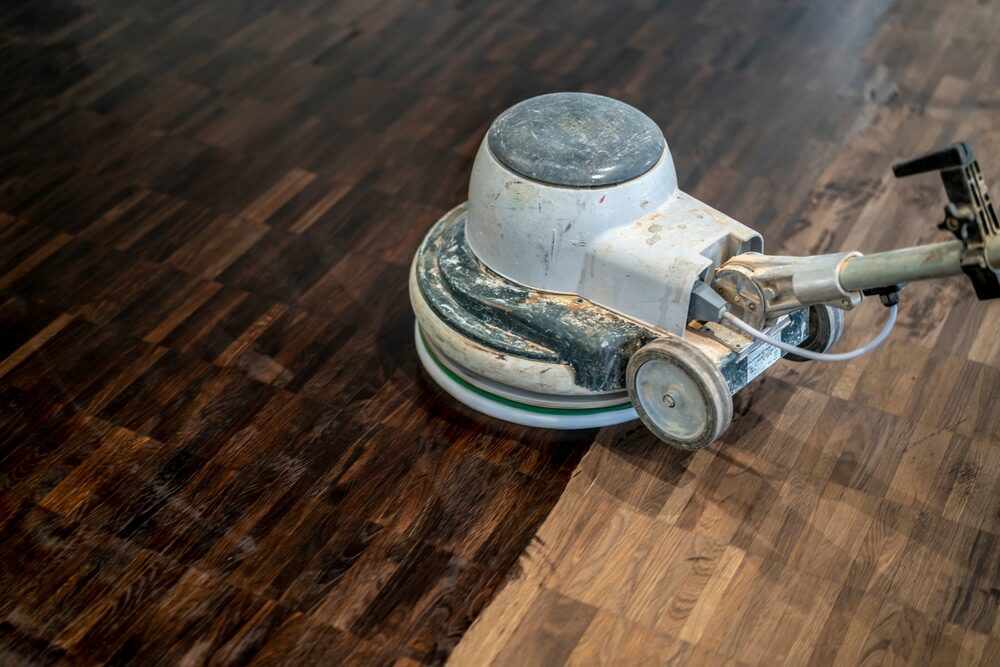
B. Orbital Sanding
Orbital sanding is a gentler technique that uses a sanding machine with a square or rectangular pad that moves in a circular motion. This method is suitable for removing light scratches and scuffs or for sanding between finish coats. Orbital sanders are less aggressive than drum sanders and are less likely to cause damage to the floor.
C. Edger Sanding
Edger sanding is used to sand the edges and corners of a room that cannot be reached with a drum or orbital sander. An edger sander is a small, handheld machine with a circular sanding disc that allows for precise control and maneuverability.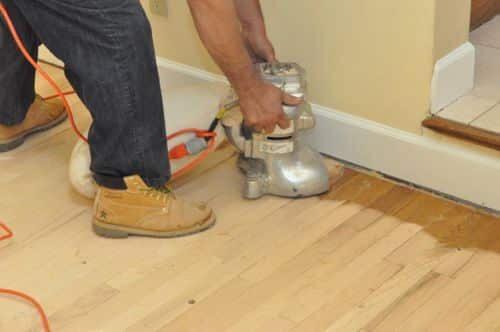
D. Corner Sanding
Corner sanding involves using specialized tools, such as a scraper, detail sander or sanding blocks to reach tight spaces, like corners and areas around door frames or baseboards. This process requires patience and attention to detail to ensure a consistent finish across the entire floor.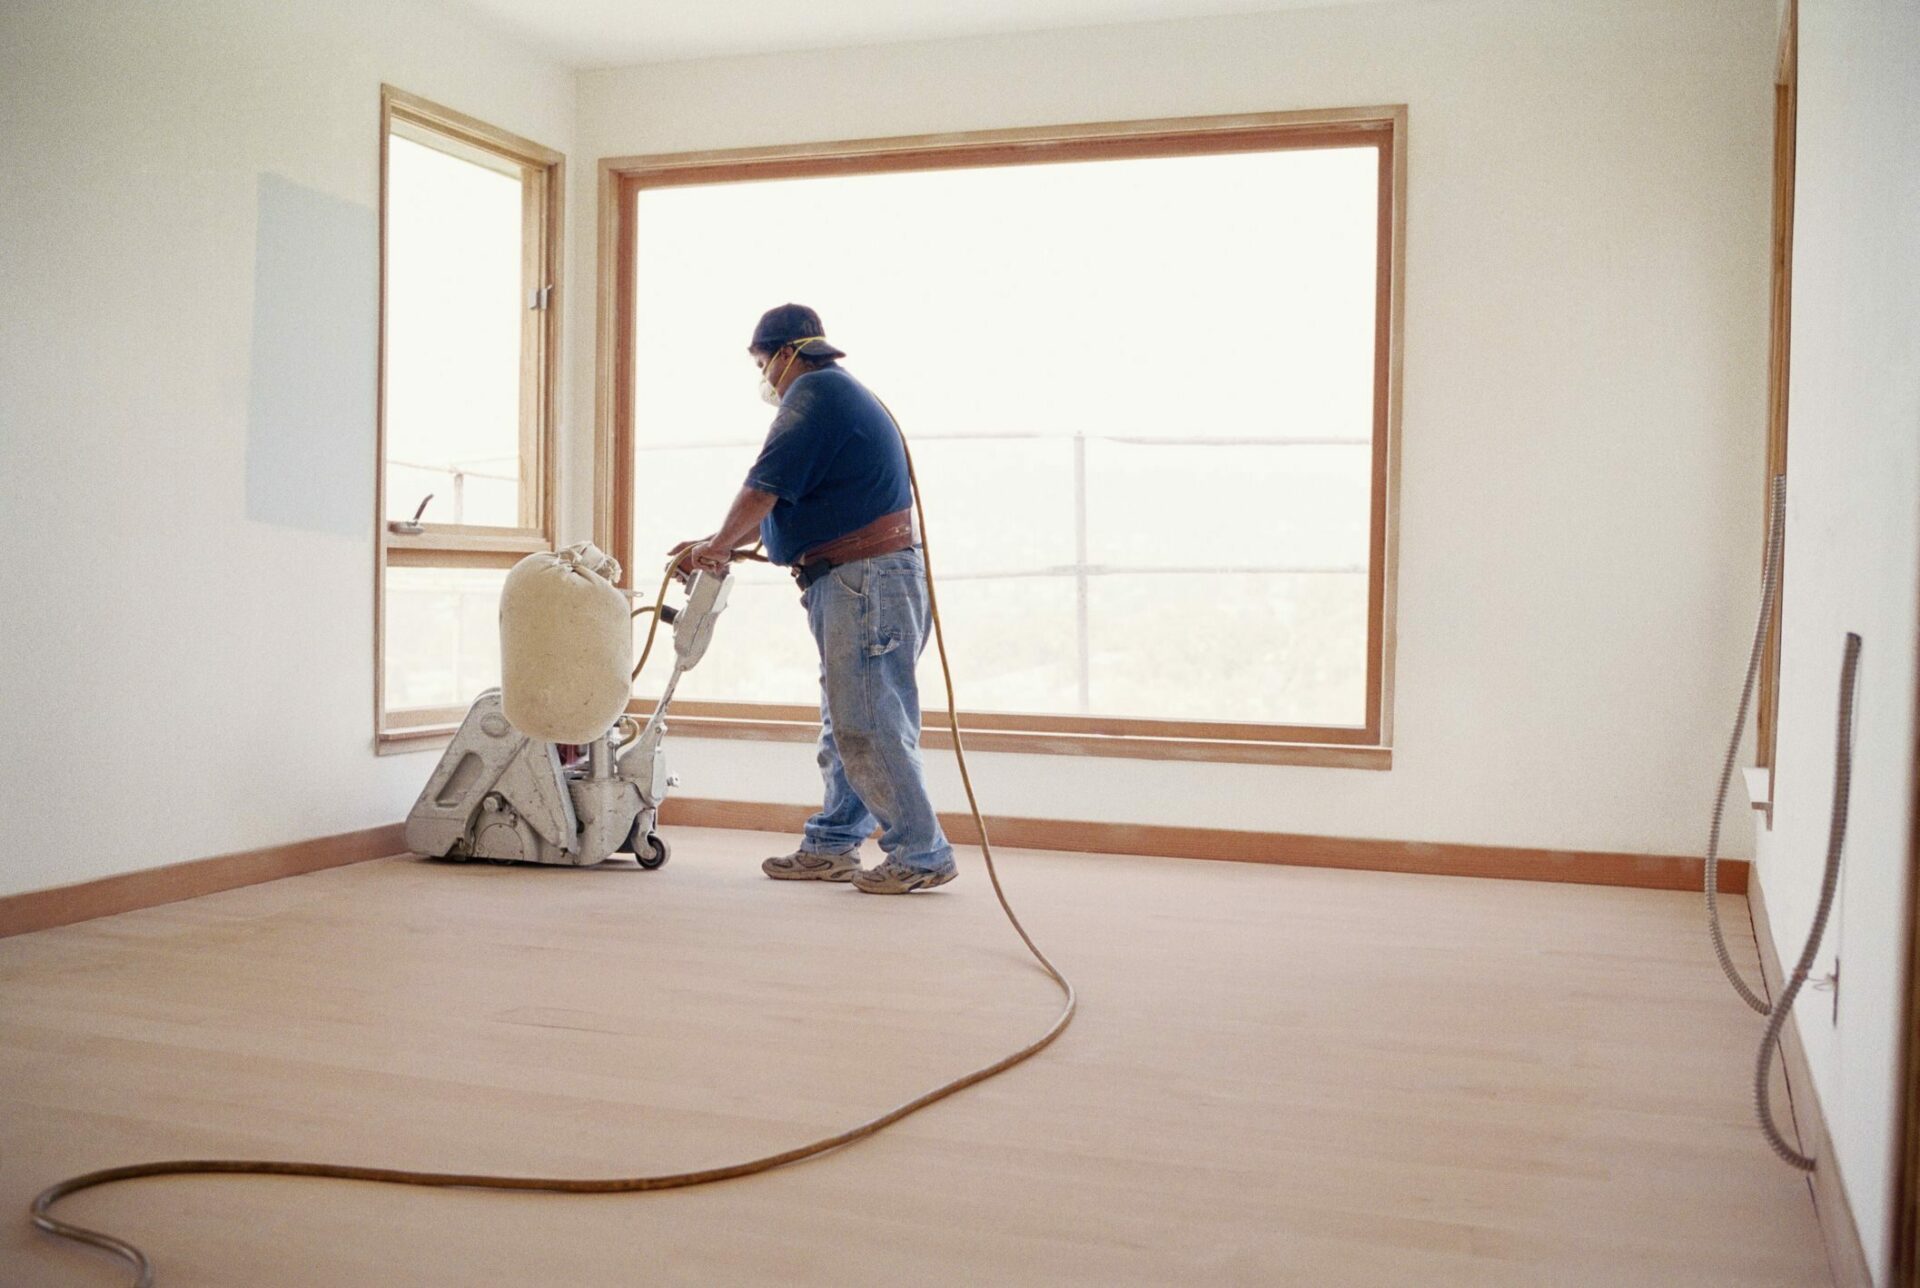
E. Hand sanding
Hand sanding is the manual process of using sandpaper or sanding blocks to smooth the wooden floor. It’s primarily used for delicate work or small touch-ups, like addressing hard-to-reach spots, blending transitions between different sanding techniques, or smoothing out any remaining imperfections.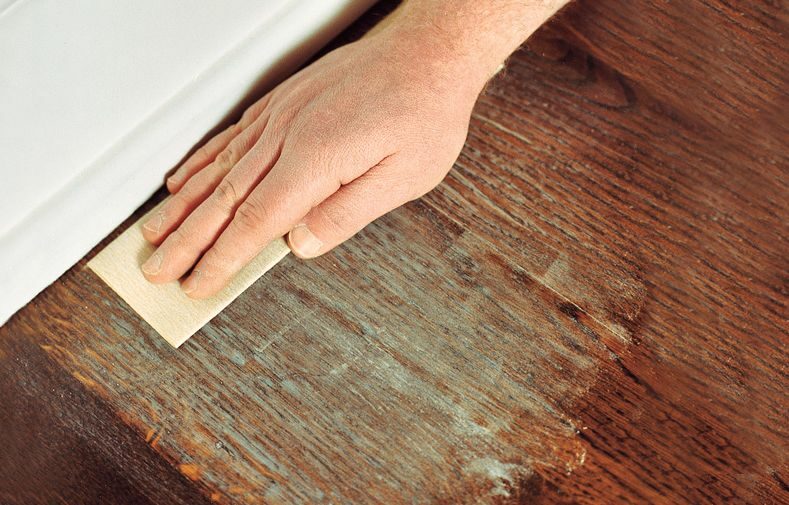
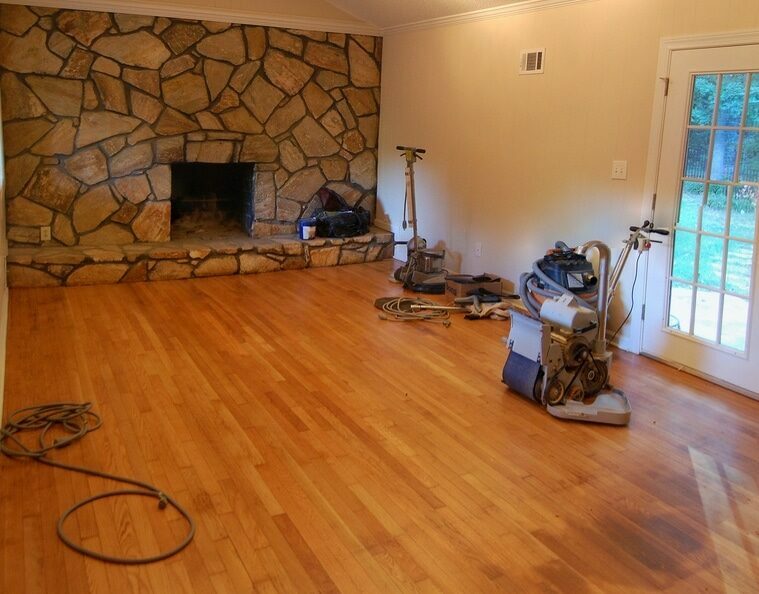
Sanding tools, equipment & Techniques
A. sanding machines
Various sanding machines are available for different stages of the sanding process:- Drum sanders: powerful machines used for aggressive sanding and levelling uneven floorboards.
- Orbital sanders: less aggressive machines suitable for lighter sanding tasks and finishing work.
- Edger sanders are handheld machines designed for sanding edges and corners.
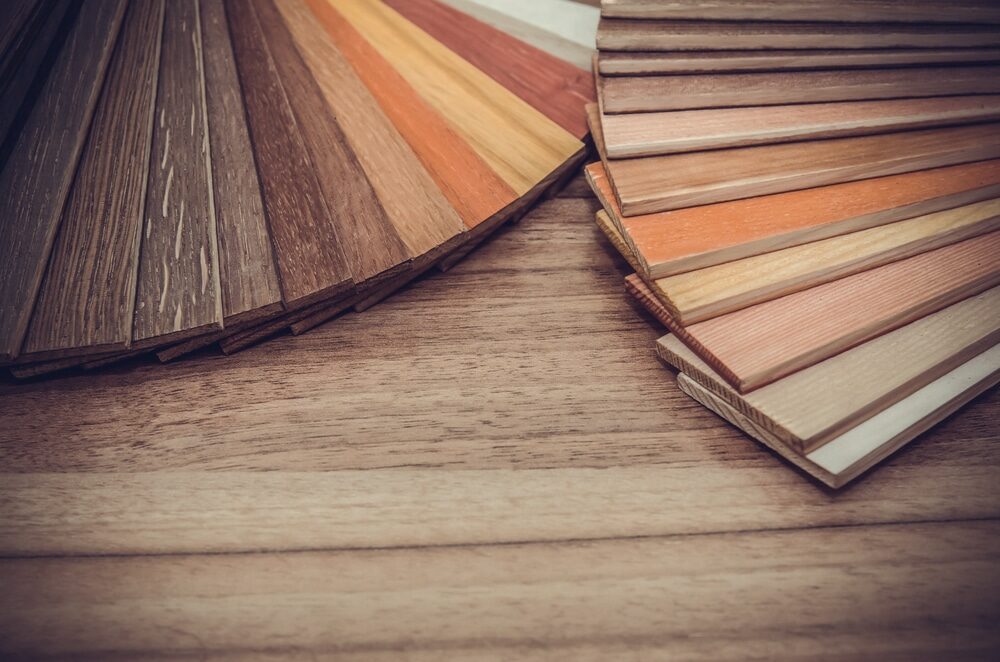
B. sandpaper and abrasives
Selecting the right sandpaper or abrasive is crucial for achieving the desired finish. Sandpapers come in various grit sizes, with lower numbers representing coarser grits and higher numbers indicating finer grits. For wooden floor sanding, a typical grit sequence might include the following:- Coarse (36–40 grit): Used for initial sanding to remove old finishes and level the floor.
- Medium (60–80 grit): Used for smoothing the floor after coarse sanding and removing any remaining imperfections.
- Fine (100–120 grit): Used for final sanding to achieve a smooth finish before applying stains or sealers.
C. Hand Tools
Hand tools like scrapers, detail sanders, and sanding blocks are essential for reaching tight spaces, corners, and detailed areas that cannot be accessed with sanding machines.D. Accessories and Safety Gear
Proper safety gear and accessories are essential for a successful sanding project. These may include:- Dust masks or respirators: These protect against inhaling dust particles during the sanding process.
- Safety goggles shield the eyes from dust and debris.
- Ear protection reduces noise exposure from loud sanding machines.
- Knee pads: They provide cushioning and support while working on the floor.
- Sanding Tips and Tricks
E. Preparing the Floor
Before sanding, it’s essential to prepare the floor by:- removing all furniture, rugs, and other items from the room.
- cleaning the floor thoroughly to remove dirt and debris.
- Inspecting the floor for loose nails or screws and either removing or securing them
- covering vents, doorways, and windows with plastic sheeting to minimise dust spreading.
F. Sanding Sequence
Follow the appropriate sanding sequence to achieve a smooth and consistent finish:- Start with coarse-grit sandpaper to remove old finishes and level the floor.
- Progress to medium-grit sandpaper to smooth the surface and remove any remaining imperfections.
- Finish with fine-grit sandpaper to create a smooth and even surface before applying stains or sealers.
G. Dealing with Imperfections
If you encounter stubborn stains, deep scratches, or other imperfections, consider using a wood filler or spot-sanding these areas with a coarser grit before continuing with the standard sanding sequence.H. Cleaning and Maintenance
After completing the sanding process, clean the floor thoroughly to remove any remaining dust and debris. Regularly maintain your wooden floor by sweeping, vacuuming, and using appropriate cleaning products to prolong its lifespan and maintain its appearance.Some Useful Links:
Conclusion
Wooden floor sanding is an essential process in maintaining the beauty, durability, and longevity of hardwood floors. Through the careful analysis and understanding of various techniques and tools involved, one can effectively transform their wooden floors to their former glory. Techniques such as drum sanding, orbital sanding, and hand sanding cater to different needs and provide the flexibility required to achieve the desired finish. Tools like sanders, edgers, and buffers, along with appropriate abrasives and protective gear, play a crucial role in ensuring a smooth, efficient, and safe process. The mastery of wooden floor sanding not only elevates the aesthetic appeal of any interior space but also adds value to the property, making it a vital skill for homeowners and professionals alike. As we continue to unravel the intricacies of this art, we contribute to the preservation and enhancement of the timeless charm of wooden floors for generations to come.

Sanding
We provide virtually dust-free sanding with our continuous belt machinery with mobile extraction units, giving you a safer environment for your family.
Oiling
This organic finish not only adds beauty to your home but also has exceptional water-repellent characteristics, making it easier to clean and maintain.
Waxing
This natural floor finish offers the softest and most mellow appearance – and leaves your floor able to breath.
Buffing
Using soft buffing machines (and hand-polishing where required) will bring a wonderful sheen to your newly-finished floor.
Repairs
We offer a full assessment of your wooden floors to determine what repairs are needed to provide the perfect working surface for the later stages of sanding, staining and sealing.
Restoration
We offer a comprehensive restoration process designed to address floors that are improperly fitted or damaged over time through wear and tear.
Request a fixed price quote for your wood floor restoration now
Simply enter your postcode below to get started.
Services
Wood Floor Sanding Wood Floor Restoration Wood Floor Scratch Repair Squeaky Wood Floor Repair Parquet Floor Sanding Parquet Floor Restoration Commercial Floor Sanding Church Floor Sanding Community Centre Floor Sanding School Floor Sanding Gap Filling Gap Filling with ResinCopyright © Mr Sander®
Privacy & Cookies Terms & Conditions Complaints Procedure Cancellation Rights Sitemap

Get An Instant Price Estimate Before You Go…
Simply enter the rooms you need sanded and we’ll provide you with a price estimate instantly! Try our price calculator now.
Get a Price Estimate NowLocal Floor Sanding Experts
Over 500 5-Star Reviews
Safe, Dust Free Sanding
Operating Since 1994