London:
Nationwide:
25,000+
Floors Restored
27 Years Experience
Wood Flooring Association Certified
How to Detect the Signs Of Bad Hardwood Floor Installation
Posted on December 8, 2023
Wood Flooring
Identifying Poor Hardwood Floor Installation: Your Complete Guide
Welcome to our comprehensive guide on identifying the telltale signs of a poorly installed hardwood floor. Hardwood floors are a timeless and elegant addition to any home, offering both beauty and value. However, the key to their longevity and aesthetic appeal lies in the quality of the installation. A poor installation can lead to numerous problems, ranging from minor inconveniences to significant structural damage.
In this blog post, we’ll delve into what makes for a good hardwood floor installation and how to spot the red flags of a bad one. Whether you’re a homeowner looking to invest in new flooring or you’re facing issues with your existing hardwood floors, understanding these signs is crucial.
We’ll explore the various aspects of hardwood floor installation, including the types of hardwood floors, the importance of professional expertise, and the long-term consequences of substandard installation. Our goal is to empower you with the knowledge to make informed decisions about your flooring and to ensure the beauty and durability of your hardwood floors for years to come.
Stay tuned as we unfold the key indicators of bad hardwood floor installation and how to address them effectively.
Understanding hardwood floors
In this section, we’ll dive into the basics of hardwood floors, a critical step in recognizing the signs of poor installation. Understanding the types of hardwood floors and their inherent qualities not only aids in selecting the right material but also in detecting installation flaws.
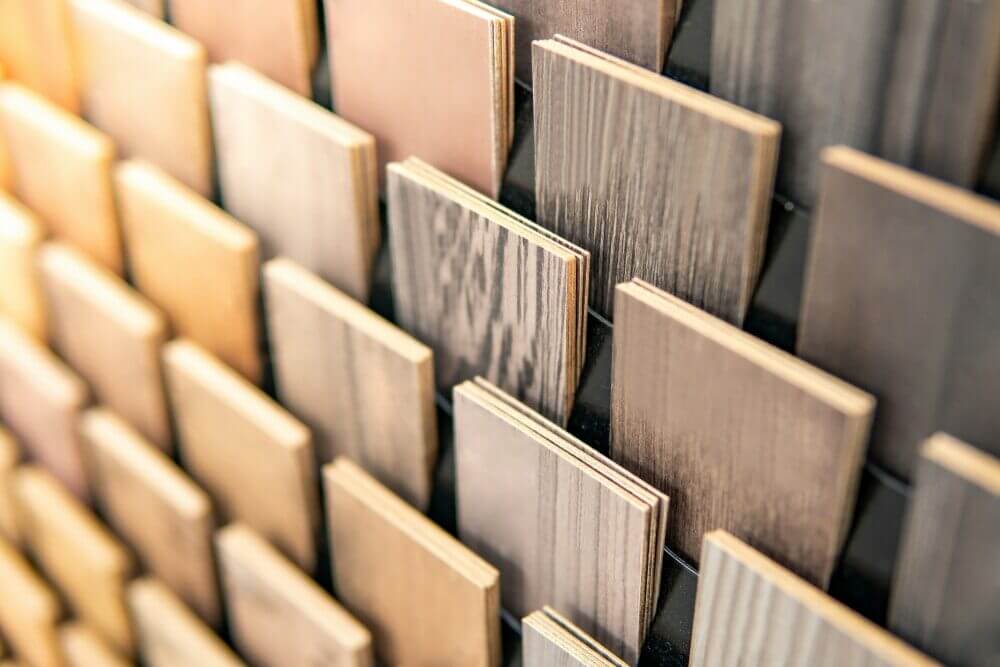
Types of Hardwood Floors
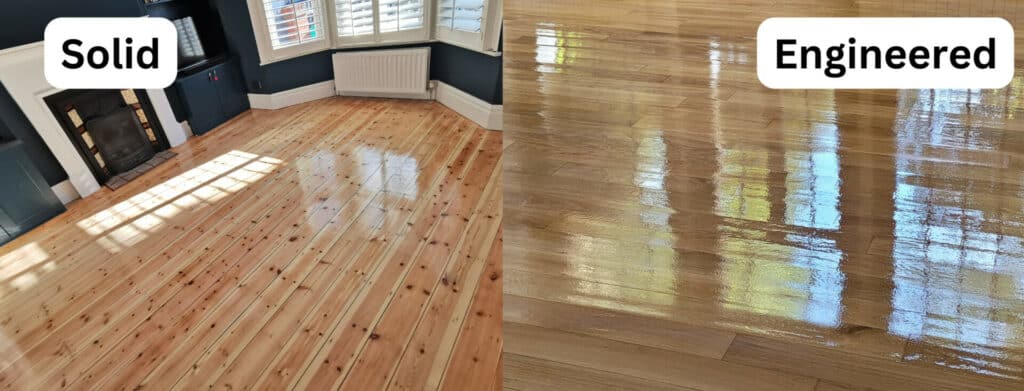
- Solid Hardwood: As the name suggests, these are made from single pieces of wood. They are known for their longevity and can be sanded and refinished multiple times. However, they’re also more susceptible to changes in humidity and temperature.
- Engineered Hardwood: Comprising multiple layers of wood with a top layer of hardwood, engineered floors offer enhanced stability. They are less prone to warping and can be a better choice in areas with fluctuating humidity.
- Pre-finished vs. Site-finished Hardwood: Pre-finished hardwood comes already sanded, stained, and sealed from the factory, ensuring a consistent finish. Site-finished floors, on the other hand, are completed on-site, allowing for more customization but requiring a skilled installer for optimal results.
Characteristics of Quality Hardwood Flooring
- Grain and Color Consistency: High-quality hardwood should have consistent grain patterns and colors. While natural variations are expected, extreme inconsistencies can indicate poor-quality wood.
- Plank Thickness and Width: The thickness of the hardwood planks can impact their durability and how they withstand wear over time. Wider planks are currently popular but require careful installation to avoid issues with expansion and contraction.
- Finish and Coating: The finish of the hardwood floor is crucial for its durability and appearance. Quality flooring should have a uniform and smooth finish without bubbles or imperfections.
Understanding the basics of hardwood floors will provide a solid foundation for identifying improper installation practices. In the following sections, we’ll explore the specific signs to look for in a poorly installed hardwood floor and how to address these issues effectively.
Pre-Installation Signs of Concern
Before the actual installation of hardwood floors begins, there are several pre-installation factors that can signal potential issues down the line. Being aware of these signs can help prevent a poor installation job. Here’s what to look out for:
Assessing the Quality of Materials
- Wood Quality: Inspect the hardwood for any visible defects like deep knots, cracks, or irregular grain patterns. High-quality wood should be mostly free of these flaws.
- Moisture Content: The wood’s moisture content must align with the average humidity of your home. Wood that is too dry or too moist can lead to warping or gaps after installation.
- Plank Consistency: Ensure that the planks are uniform in thickness and width. Variations can cause issues during installation and lead to an uneven floor surface.
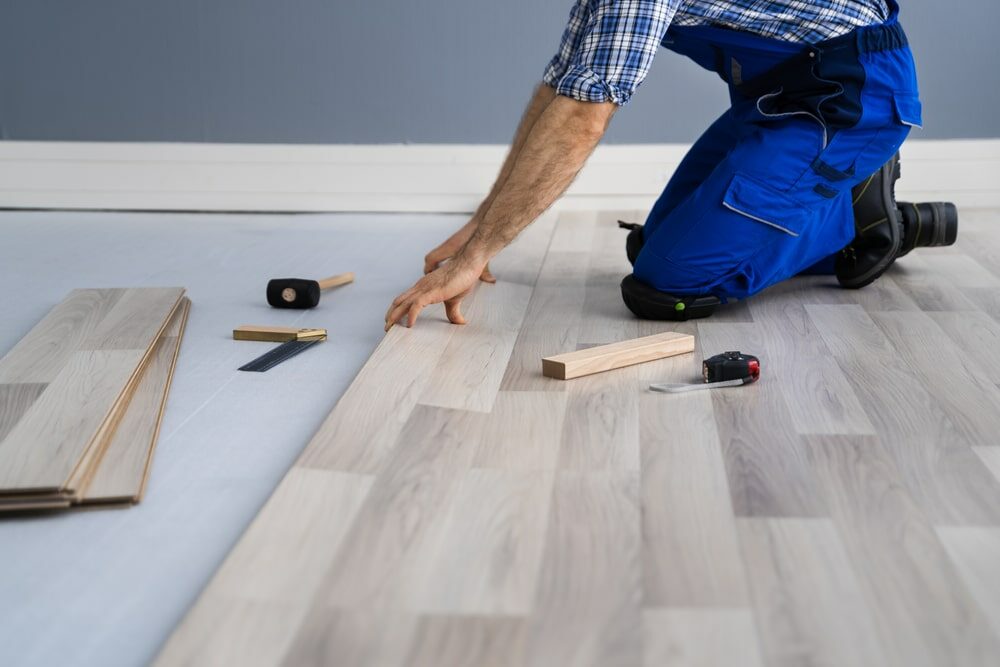
Importance of Professional Expertise
- Installer’s Credentials: Check the installer’s background, including their experience, customer reviews, and portfolio of past work. A reputable installer should have a solid track record and knowledge of different hardwood types.
- Pre-Installation Assessment: A professional installer should conduct a thorough assessment of your space. This includes checking the subfloor condition, humidity levels, and room layout to plan the installation accordingly.
- Communication and Planning: Good installers will discuss the entire process with you, including the type of installation method, time frame, and any preparation needed on your part. Clear communication is key to a successful installation.
By paying attention to these pre-installation factors, you can significantly reduce the risk of encountering issues with your hardwood floor installation. Up next, we’ll look at how to visually inspect your floors for installation flaws.
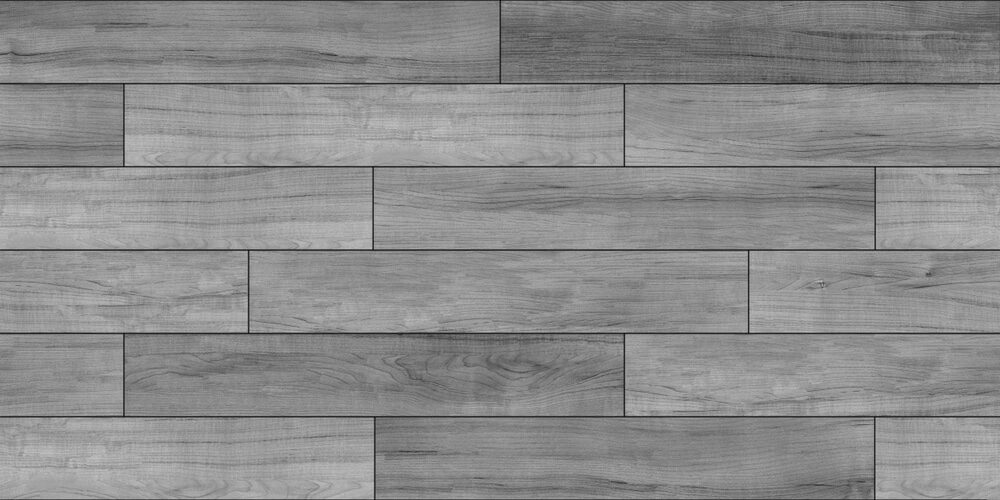
Visual Inspection: Detecting Flaws
After the installation of hardwood floors, a thorough visual inspection is crucial to identify any signs of poor workmanship. Here are the key aspects to focus on:
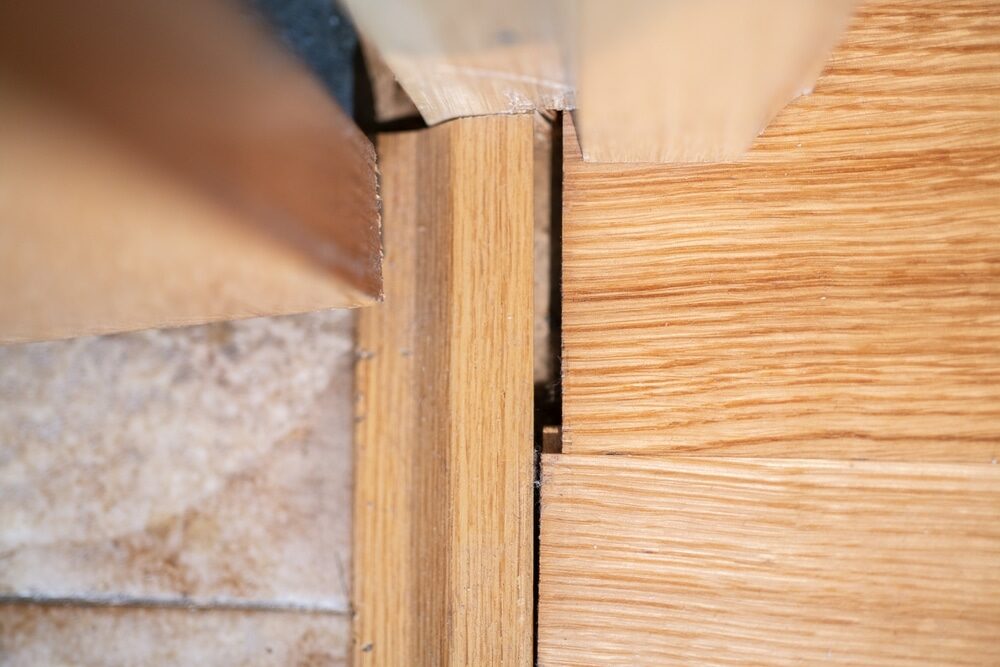
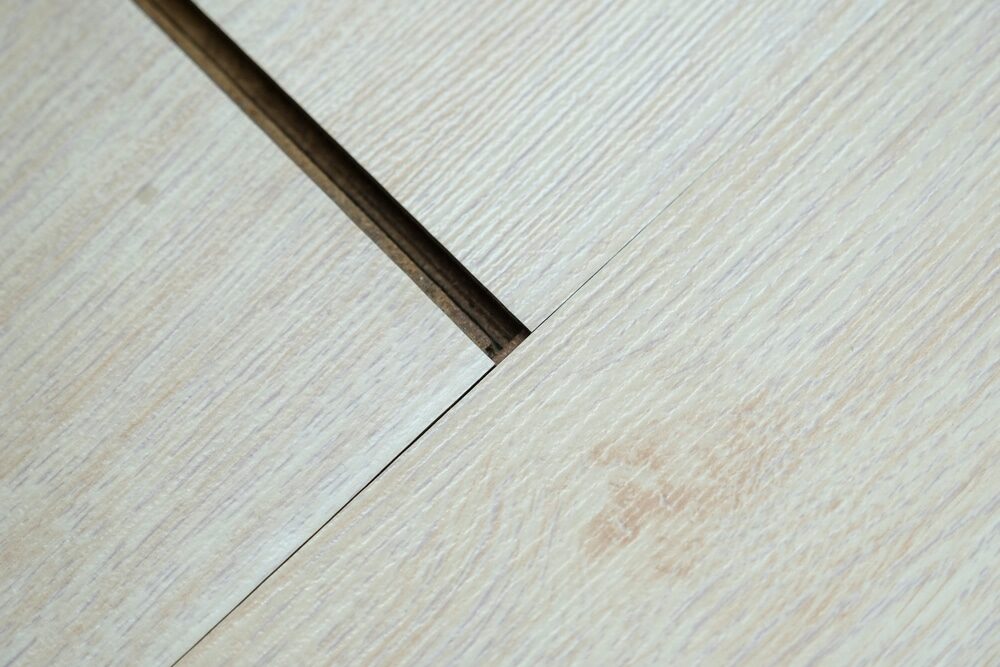
Gaps and cracks in the flooring
- Gapping Between Planks: Small gaps can occur naturally due to changes in humidity, but excessive or uneven gaps may indicate poor installation.
- Cracks or Splits in Wood: Check for any cracks within the planks themselves. These can result from using low-quality wood or improper acclimatization of the wood before installation.
Uneven or warped planks
- Uneven Floor Surface: Feel for and look at the level of the floor. Unevenness can be a sign of an improperly prepared subfloor or an incorrect installation technique.
- Warping or Buckling: Planks that are warped or buckled are often due to moisture issues or not leaving enough space for the wood’s natural expansion.
Inconsistent coloring and finishing
- Color Inconsistency: While some variation is normal, especially in natural wood, stark differences in color across the floor can indicate poor planning in plank arrangement.
- Finish Quality: Look for any bubbles, streaks, or missed spots in the finish. These imperfections can compromise the wood’s protection and overall look.
Visual inspection plays a key role in identifying the quality of hardwood floor installation. Next, we will explore tactile and sound assessments to further detect any installation issues.
Tactile and Sound Assessment
Apart from visual inspection, assessing the feel and sound of your hardwood floors can provide additional insights into the quality of the installation. Here’s what to look for:
Creaking and squeaking sounds
- Identifying Noisy Areas: Walk across the floor and listen for creaking or squeaking sounds. While some noise can be normal, especially on older floors, excessive noise might indicate loose planks or issues with the subfloor.
- Reasons for the Noise: These sounds often occur due to the wood not being properly secured to the subfloor, gaps in the flooring, or the use of incorrect nails or fasteners during installation.
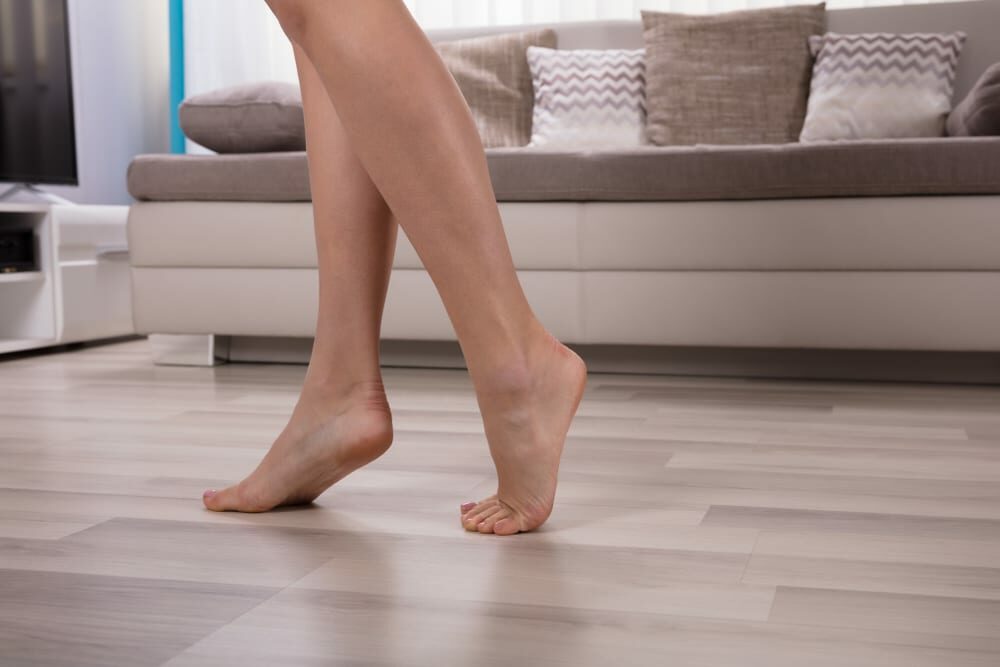
Feeling the bumps and uneven surfaces
- Barefoot Test: Walk barefoot across the floor to feel for any raised edges, dips, or bumps. These can be subtle but are indicative of uneven installation or swelling of the wood.
- Board Alignment: Check how well the planks align with one another. Misalignment can cause ridges or uneven surfaces that are noticeable to the touch.
Additional Tactile Considerations
- Floor Stability: Gently press down on various areas of the floor to test for stability. Movement or shifting can indicate that the planks are not properly fastened.
- Edge Smoothness: Feel the edges where the floor meets walls or other surfaces. Rough or uneven transitions may point to hurried or imprecise installation work.
Tactile and sound assessments are crucial in detecting less obvious signs of poor hardwood floor installation. Next, we’ll delve into understanding the long-term issues that can arise from a subpar installation job.
Long-Term Issues to Watch for
While some signs of poor hardwood floor installation are immediately noticeable, others may develop over time. Being aware of these long-term issues can help in early detection and mitigation.
Signs of Poorly Installed Underlayment
- Moisture Problems: Underlayment issues often lead to moisture buildup, resulting in warping, swelling, or mold growth under the hardwood.
- Acoustic Issues: Improper underlayment can affect the sound insulation properties of the floor, leading to increased noise transmission.
Moisture and humidity damage
- Cupping and crowning: These are warping effects caused by a moisture imbalance in the wood. Cupping occurs when the edges of a plank are higher than the center, while crowning is the opposite.
- Seasonal Changes: Hardwood floors will naturally expand and contract with changes in humidity. Excessive movement may indicate inadequate spacing was left for expansion during installation.
Wear and tear patterns
- Uneven Wear: Look for areas of the floor that are wearing out more quickly than others. This can be due to uneven installation or imbalanced flooring.
- Finish Deterioration: A rapidly deteriorating finish may indicate a substandard application or the use of low-quality finishing products.
Structural Integrity
- Subfloor Damage: Over time, a poorly installed floor can cause damage to the subfloor, which might require extensive repairs.
- Loosening Planks: If planks begin to loosen or lift, it could be due to poor installation techniques or inadequate adhesives.
Being aware of these long-term issues can help you maintain the quality and longevity of your hardwood floors. Next, we will discuss how to seek professional assessment and explore the solutions available for floors that are already showing signs of poor installation.
Professional Assessment and Solutions
When facing signs of bad hardwood floor installation, it’s often wise to seek professional assessment. Here’s how to approach this and explore potential solutions:
When to call a professional
- Persistent Issues: If problems like warping, creaking, or loose planks persist, it’s time to consult a professional.
- After DIY Checks: If your initial inspections indicate potential issues, a professional can confirm the severity and advise on solutions.
Professional Diagnosis and Recommendations
- In-depth Inspection: A flooring expert will conduct a thorough examination, checking for both visible and underlying problems.
- Identifying the Root Cause: They can determine whether issues are due to installation errors, environmental factors, or material defects.
Solutions offered by experts
- Repair or Replace: Depending on the severity, the professional may suggest repairs (like re-securing loose planks) or recommend replacing sections of the flooring.
- Correcting Moisture Issues: Solutions for moisture-related problems could include adjusting the home’s humidity, repairing the underlayment, or replacing affected planks.
- Finishing Touches: If the issue is with the finish, sanding and reapplying a quality finish might be recommended.
Preventative Measures for the Future
- Maintenance Tips: Professionals can provide tips on proper care and maintenance to extend the life of your floors.
- Installation Best Practices: For future installations, they can guide you in choosing the right materials and installation methods suitable for your environment.
By seeking professional help, you can ensure that your hardwood floors are not only aesthetically pleasing but also structurally sound and durable. In our final section, we’ll share some tips and tricks on preventing bad installation to help you make informed decisions for your next flooring project.
Preventing Bad Installations: Tips and Tricks
To ensure the longevity and beauty of your hardwood floors, it’s crucial to prevent bad installation from the outset. Here are some tips and tricks to help you achieve a flawless installation:
Choosing the Right Installer
- Check Credentials and Reviews: Always research and select a reputable installer with proven experience and positive customer reviews.
- Ask for references: Request to see examples of the installer’s previous work and, if possible, speak to past clients.
- Verify Licenses and Insurance: Ensure the installer has the necessary licenses and insurance to protect against any potential damage or accidents.
Pre-Installation Checklist
- Quality of Materials: Inspect the hardwood planks for quality, consistency, and moisture content before installation.
- Room Preparation: Ensure the room is ready for installation, including proper acclimatization of the wood to the room’s humidity and temperature.
- Discuss the installation plan: Have a detailed conversation with the installer about the installation process, timeline, and any specific requirements or concerns you have.
During Installation
- Monitor the Process: While you don’t need to micromanage, periodically checking the progress can help catch any potential issues early.
- Ask Questions: If you notice anything unusual, don’t hesitate to ask the installer for clarification.
Post-Installation
- Final Inspection: Conduct a thorough inspection of the floor once the installation is complete, looking for any signs of poor installation, as discussed earlier.
- Maintenance Guidance: Ask the installer for specific maintenance tips to keep your hardwood floors in top condition.
By following these tips and tricks, you can significantly reduce the risk of bad hardwood floor installation and enjoy the beauty and durability of your floors for years to come.
Conclusion
Detecting and addressing the signs of bad hardwood floor installation is crucial for maintaining the integrity, beauty, and longevity of your flooring. Throughout this blog post, we’ve explored various aspects—from understanding hardwood floors and pre-installation signs of concern to conducting visual, tactile, and sound assessments. We’ve also delved into the long-term issues to watch for and the importance of professional assessment and solutions.
Remember, the key to a successful hardwood floor installation lies in careful planning, selecting the right materials and installers, and being vigilant throughout the installation process. By keeping an eye out for the warning signs discussed and taking proactive steps, you can avoid the pitfalls of a poor installation.
We hope this guide empowers you to make informed decisions about your hardwood flooring, ensuring that it remains a lasting and valuable feature of your home. Whether you’re considering new flooring or dealing with existing installation issues, the insights provided here should serve as a valuable resource in your journey towards perfect hardwood floors.


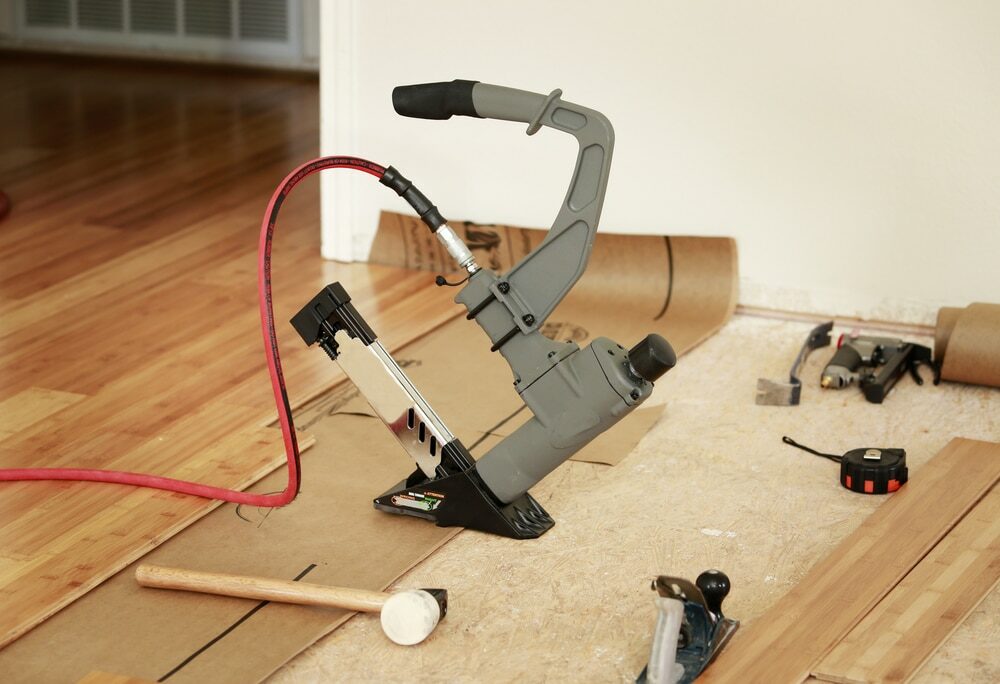
Sanding
We provide virtually dust-free sanding with our continuous belt machinery with mobile extraction units, giving you a safer environment for your family.
Oiling
This organic finish not only adds beauty to your home but also has exceptional water-repellent characteristics, making it easier to clean and maintain.
Waxing
This natural floor finish offers the softest and most mellow appearance – and leaves your floor able to breath.
Buffing
Using soft buffing machines (and hand-polishing where required) will bring a wonderful sheen to your newly-finished floor.
Repairs
We offer a full assessment of your wooden floors to determine what repairs are needed to provide the perfect working surface for the later stages of sanding, staining and sealing.
Restoration
We offer a comprehensive restoration process designed to address floors that are improperly fitted or damaged over time through wear and tear.
Request a fixed price quote for your wood floor restoration now
Simply enter your postcode below to get started.
Services
Wood Floor Sanding Wood Floor Restoration Wood Floor Scratch Repair Squeaky Wood Floor Repair Parquet Floor Sanding Parquet Floor Restoration Commercial Floor Sanding Church Floor Sanding Community Centre Floor Sanding School Floor Sanding Gap Filling Gap Filling with ResinCopyright © Mr Sander®
Privacy & Cookies Terms & Conditions Complaints Procedure Cancellation Rights Sitemap

Get An Instant Price Estimate Before You Go…
Simply enter the rooms you need sanded and we’ll provide you with a price estimate instantly! Try our price calculator now.
Get a Price Estimate NowLocal Floor Sanding Experts
Over 500 5-Star Reviews
Safe, Dust Free Sanding
Operating Since 1994