London:
Nationwide:
25,000+
Floors Restored
27 Years Experience
Wood Flooring Association Certified
How to Remove Old Oil from Your Deck
Posted on December 7, 2023
Wood Floor Sanding and Oiling
Removing Old Oil Stains from Your Deck: A Comprehensive Guide
Welcome to our comprehensive guide on “How to Remove Old Oil from Your Deck.” Maintaining a deck is a crucial aspect of home care, especially when dealing with the challenging task of removing old oil. A well-maintained deck not only enhances the beauty of your outdoor space but also prolongs the life of the wood. Over time, however, decks treated with oil finishes can accumulate dirt and grime and start to look worn. The buildup of old, oxidised oil can also lead to issues like mould growth and wood rot, jeopardising both the appearance and integrity of your deck.
In this guide, we will walk you through the entire process of removing old oil from your deck, a task that might seem daunting at first. Whether your deck is a recent addition to your home or a longstanding structure that has weathered many seasons, removing old oil and reapplying a fresh coat is essential for preserving its condition and aesthetic appeal.
We’ll cover everything from understanding your deck’s material to the tools and safety measures needed for the job. Our step-by-step instructions will ensure that you can tackle this project with confidence, regardless of your prior experience. So, let’s get started and bring new life to your old deck!
Understanding Your Deck
Before embarking on the journey of removing old oil from your deck, it’s crucial to understand the type of deck you have and how it interacts with oil-based treatments. Decks are made from a variety of materials, each with unique characteristics and maintenance needs. In this section, we’ll delve into different decking materials and how old oil affects them, setting the stage for effective and safe oil removal.
1. Types of Decking Materials
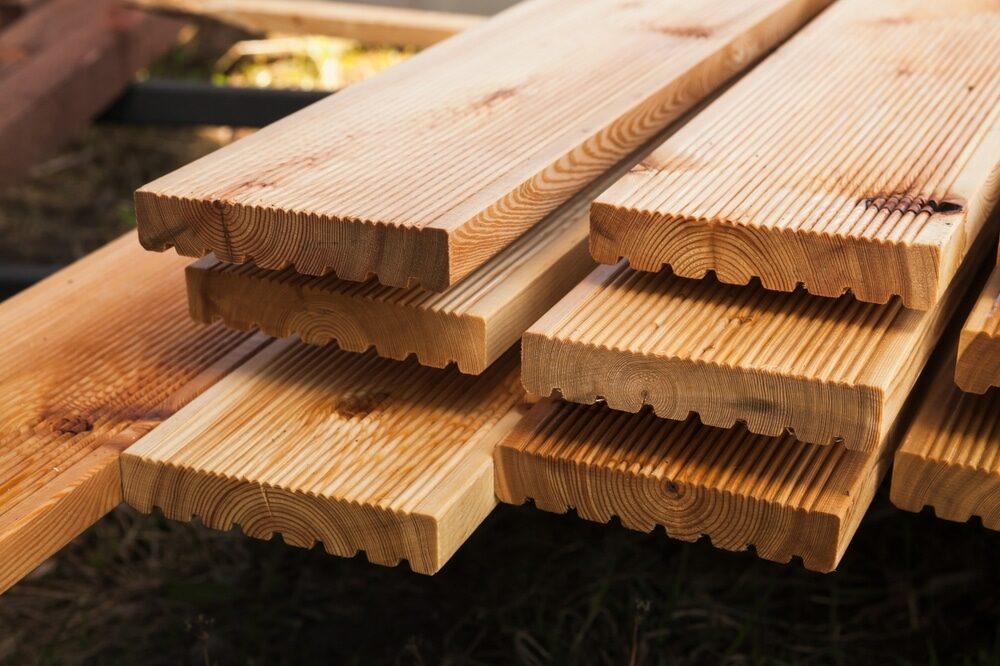
- Wooden Decks: The most common material, wood decks are often treated with oil-based finishes for protection. Popular wood types include pine, cedar, and redwood. Each wood type reacts differently to oil, with variations in absorption and weathering.
- Composite Decks: Made from a blend of wood fibres and plastic, composite decks are known for their durability and low maintenance. However, they may still require oil treatment, depending on the specific product and exposure.
- Tropical Hardwoods: Exotic woods like Ipe and Teak are incredibly dense and naturally resistant to rot and decay. These woods have unique oiling needs and may require specialised products.
2. How Old Oil Affects Different Types of Decks
- Penetration and Weathering: Understand how oil penetrates different wood types and how it weathers over time. Sunlight, rain, and temperature changes can all impact how oil ages on your deck.
- Common Problems: Learn about issues such as flaking, discoloration, and mould growth that can arise from old oil on your deck. These problems not only affect the deck’s appearance but can also contribute to structural weaknesses.
3. Recognising Signs of Ageing Oil
- Visual Inspection: Identifying signs like fading, cracking, or peeling to determine if your deck needs re-oiling.
- Touch Test: feeling the wood’s texture to assess the condition of the oil. A dry or rough texture often indicates that it’s time for a fresh coat.
4. The Importance of Regular Maintenance
- Discuss why regular cleaning and re-oiling are vital for extending the life of your deck, regardless of the material.
- Highlight the benefits of maintaining the oil finish, such as improved appearance, increased longevity, and enhanced protection against the elements.
Tools and Materials Needed
Removing old oil from your deck is a process that requires the right tools and materials. Having everything you need on hand before you begin will make the job smoother and more efficient. Here’s a comprehensive list of what you’ll need:
1. Safety Gear
- Protective Gloves: To safeguard your hands from chemicals and splinters.
- Safety Goggles: To protect your eyes from splashes and debris.
- Respirator or Mask: Essential if you’re using chemical strippers or sanding, to avoid inhaling fumes and dust.
- Protective Clothing: long sleeves and pants to protect your skin.
2. Cleaning and Stripping Tools
- Stiff Bristle Brush: For scrubbing the deck surface.
- Pressure washer (optional): for an efficient and thorough cleaning, especially for large decks.
- Paint scraper: to remove peeling oil and debris.
- Sandpaper/Sanding Machine: For smoothing the wood after stripping.
3. Chemicals and strippers
- Deck Cleaner: A specialised cleaner to prepare the deck for stripping.
- Oil Stripper: Choose a product suitable for the type of oil and wood you are working with. There are both chemical and eco-friendly options available.
- Neutralising Solution: To balance the pH of the wood after using a stripper.
4. Application Tools
- Paintbrushes and rollers: for applying the stripper and later, the new oil.
- Paint Tray: If using a roller, this will be necessary for holding the stripper or oil.
5. Miscellaneous Supplies
- Plastic sheeting: to protect surrounding areas from chemicals.
- Rags and Sponges: For cleanup and application of neutralizers or cleaners.
- Bucket: for mixing solutions or holding cleaning tools.
- Hose or water supply: essential for rinsing the deck.
6. Post-Cleaning Supplies
- Deck Oil or Sealer: For re-treating the deck after cleaning and stripping.
- Applicators for Oil/Sealer: Depending on the product, this could be brushes, rollers, or pads.
Safety First
When undertaking a project like removing old oil from your deck, prioritizing safety is paramount. The process involves using chemicals and tools that can be harmful if not handled correctly. Here are essential safety tips and precautions to ensure that your deck maintenance is carried out safely and effectively:
1. Personal Protective Equipment (PPE)
- Gloves: Wear durable gloves to protect your hands from harsh chemicals, splinters, and rough surfaces.
- Eye Protection: Safety goggles are a must to prevent any splashes of chemicals or debris from injuring your eyes.
- Respiratory Protection: Use a respirator or a face mask, especially when sanding or applying chemical strippers, to avoid inhaling harmful dust and fumes.
- Protective Clothing: Wear long-sleeved shirts and long pants to shield your skin from chemicals and wood splinters.
2. Handling Chemicals Safely
- Read Labels: Before using any chemicals, such as deck cleaners or strippers, read the manufacturer’s instructions and safety warnings.
- Proper Ventilation: Ensure good airflow if working in a semi-enclosed area to avoid inhalation of toxic fumes.
- Safe Storage: Keep chemicals in their original containers with labels intact, and store them out of reach of children and pets.
3. Using Tools Safely
- Tool Inspection: Check tools for any damage before use. Ensure that electric tools are properly grounded, and cords are not frayed.
- Proper Use: Use tools for their intended purpose and follow the manufacturer’s instructions for safe operation.
- Avoiding Trips and Falls: Keep the work area clear of tools, cords, and debris to prevent accidents.
4. Environmental Considerations
- Contain Runoff: Use plastic sheeting to protect plants and prevent chemicals from entering water sources.
- Waste Disposal: Dispose of used chemicals and materials according to local regulations to minimise environmental impact.
5. General Safety Tips
- Stay Hydrated: Keep water close by, especially when working in hot weather.
- Take Breaks: Regular breaks help prevent fatigue, which can lead to accidents.
- First Aid Kit: Keep a first aid kit nearby for minor injuries.

Preparation Steps
Proper preparation is key to successfully removing old oil from your deck. By taking the time to prepare your deck and workspace, you ensure a smoother, safer, and more effective oil removal process. Here are the essential steps to prepare for this project:
1. Clearing the Deck
- Remove Furniture and Decor: Clear all furniture, grills, planters, and any other items from the deck. This ensures you have unobstructed access to the entire surface.
- Sweep and Clean: Sweep the deck thoroughly to remove loose dirt, leaves, and debris. This helps in assessing the condition of the deck and ensures that the cleaning and stripping agents work more effectively.
2. Initial Cleaning
- Washing the Deck: Use a garden hose or a pressure washer on a low setting to wash the deck surface. This step removes surface dirt and grime, making the stripping process more efficient.
- Applying Deck Cleaner: For a more thorough clean, apply a deck cleaning solution according to the manufacturer’s instructions. This helps in removing embedded dirt and prepping the wood for the oil stripping process.
3. Assessment and Repairs
- Inspect the Deck: Look for any signs of damage such as splintered boards, loose nails, or rotting wood. These issues should be addressed before proceeding with the oil removal.
- Make Necessary Repairs: Replace damaged boards, hammer in protruding nails, and sand down splinters. Ensuring the deck is in good repair before stripping the old oil can prevent further damage and improve the end result.
4. Protecting surrounding areas
- Cover Sensitive Areas: Use drop cloths or plastic sheeting to protect surrounding landscaping, siding, and any nearby surfaces that might be damaged by the stripping agents.
- Securing the Work Area: If needed, set up barriers to keep pets and children away from the work area, especially when using chemicals.
5. Gathering tools and materials
- Prepare Your Supplies: Organize all the tools and materials you’ll need for the job (as listed in the “Tools and Materials Needed” section) so they are readily accessible.
- Safety Gear: Have all your personal protective equipment ready and wear it throughout the preparation and oil removal process.

Choosing the Right Oil Stripping Method
Selecting the appropriate method to strip old oil from your deck is crucial for both the effectiveness of the process and the health of your deck. There are several approaches you can take, each with its own set of pros and cons. Understanding these methods will help you make an informed decision that best suits your deck’s condition and your personal preferences.
1. Chemical Strippers
- Description: Chemical strippers are formulated to break down the old oil, making it easier to remove from the deck’s surface. They are available in various strengths and formulations, some being more environmentally friendly than others.
- Pros:
- Highly effective at removing tough, old oil finishes.
- Faster acting than natural methods.
- Cons:
- Can be harsh on the wood if not used correctly.
- requires careful handling and disposal due to toxic ingredients.
- Best for: Decks with heavily weathered or thick layers of oil that natural methods can’t remove.
2. Natural/Organic Strippers
- Description: These are less aggressive than chemical strippers and are made from natural, biodegradable ingredients. They are a good choice for those looking for an environmentally friendly option.
- Pros:
- safer for the environment and the user.
- There is less risk of damaging the wood.
- Cons:
- may require more time and effort to effectively remove old oil.
- might not be as effective on heavily weathered decks.
- Best for: decks with a lighter oil finish or for those who prefer eco-friendly solutions.
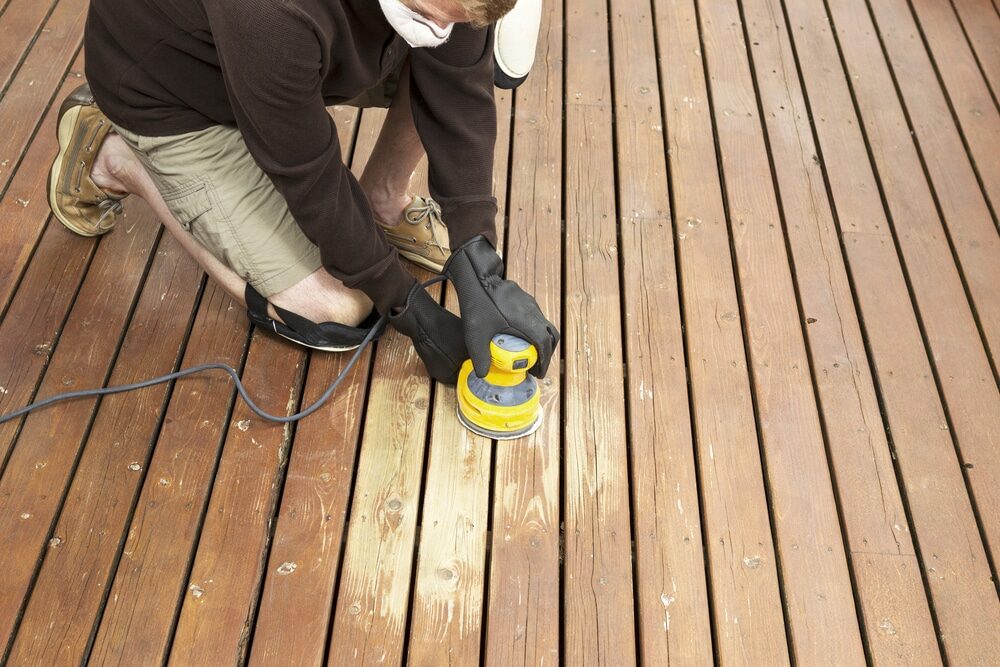
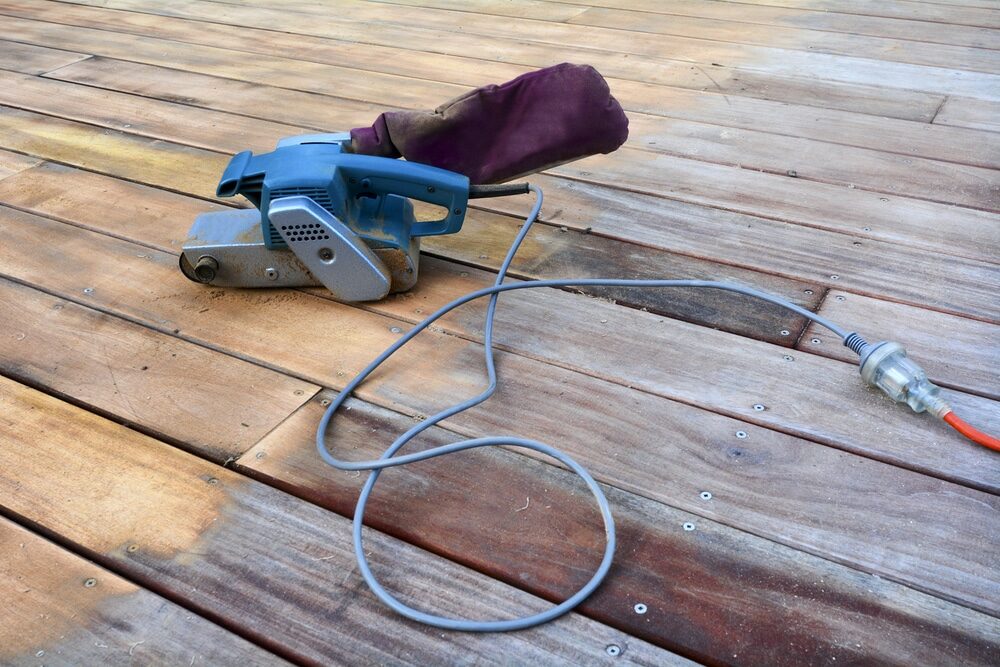
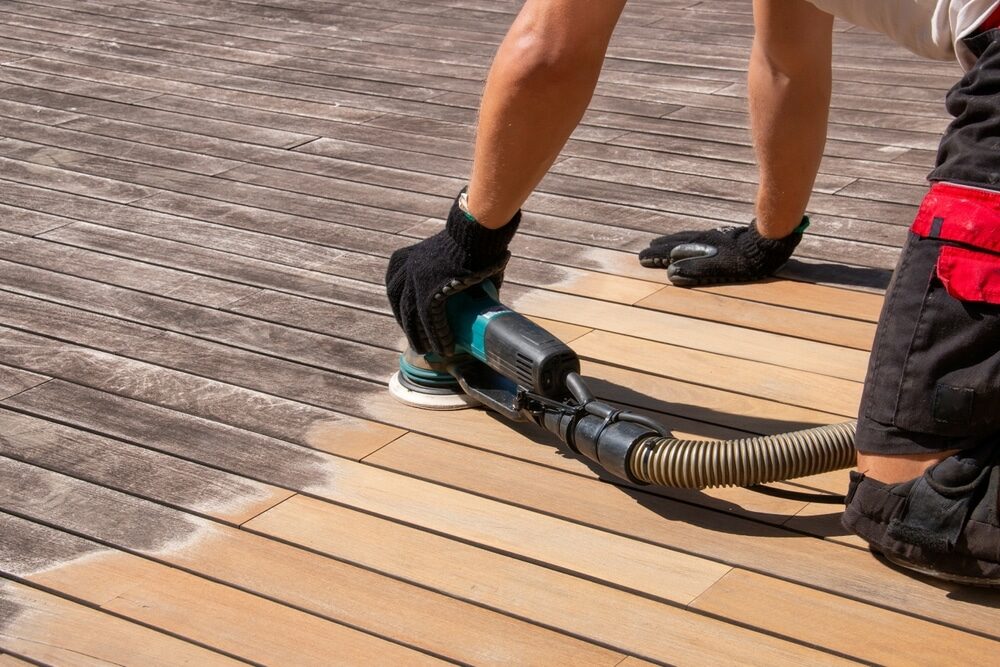
3. Sanding
- Description: Sanding the deck is a physical method of removing the old oil finish. This can be done manually with sandpaper or with a power sander for larger areas.
- Pros:
- completely removes the old finish, providing a fresh surface for re-oiling.
- There are no chemicals involved, making it an environmentally friendly option.
- Cons:
- labour-intensive, especially for large decks.
- It can be difficult to evenly sand the entire surface, leading to potential inconsistencies.
- Best for: smaller decks or areas where chemical strippers cannot be used.
4. Heat Guns
- Description: A heat gun can be used to soften the old oil finish, making it easier to scrape off.
- Pros:
- effective at loosening old oil and paint without chemicals.
- precise control over the area being treated.
- Cons:
- There is a risk of burning the wood if it is not used carefully.
- labour-intensive and time-consuming.
- Best for: spot treatments or for those who prefer a non-chemical method.
Applying the oil stripper
Once you have chosen the right oil stripper for your deck, the next step is to apply it correctly. This is a critical part of the process, as proper application ensures effective removal of old oil and prepares the deck for a new finish. Here’s a step-by-step guide to applying the oil stripper:
1. Read the manufacturer’s instructions.
- Before starting, carefully read the instructions provided with the oil stripper. This will give you specific guidance on application methods, safety precautions, and waiting times.
2. Prepare the Deck
- Ensure the deck is clean, dry, and free of debris. If you have just washed it, wait until it’s completely dry.
3. Safety Precautions
- Put on your safety gear, including gloves, goggles, and a respirator or mask, to protect yourself from harmful fumes and splashes.
4. Test a Small Area
- Apply the stripper to a small, inconspicuous area of your deck to test its effectiveness and to ensure it doesn’t damage the wood.
5. Apply the stripper.
- Using a paintbrush, roller, or sprayer (as recommended by the product), evenly apply the stripper to the deck. Work in sections if your deck is large.
- Ensure you cover all areas, but avoid over-application, which can lead to unnecessary waste and potential wood damage.
6. Allow time to work.
- Let the stripper sit on the deck for the time specified in the instructions. This allows it to penetrate and lift the old oil.
- Avoid letting the stripper dry out on the deck. If necessary, apply a little more stripper to keep the area moist.
7. Scrubbing (if necessary)
- For some strippers, a bit of scrubbing with a stiff bristle brush can help loosen the oil finish.
8. Check the progress.
- After the recommended time, use a scraper or brush to test if the old oil is lifting. It should come off easily. If not, you may need to leave the stripper on a bit longer, but always within the recommended time limits.
9. Neutralising the Stripper
- After removing the old oil, it’s often necessary to neutralise the chemical action of the stripper. This can usually be done with a neutralising solution or clean water, depending on the product used.
10. Rinse Thoroughly
- Rinse the deck thoroughly with a garden hose or pressure washer (on a gentle setting) to remove all traces of the stripper and lifted oil.
11. Dry the deck.
- Allow the deck to dry completely before any further treatment, like sanding or re-oiling. This could take a day or two, depending on the weather conditions.
Scrubbing and removing old oil
After applying the oil stripper to your deck, the next crucial step is to scrub and remove the old oil. This stage requires a balance of thoroughness and care to avoid damaging the wood. Here’s how to effectively scrub and remove the old oil from your deck:
1. Assessing the Stripper’s Effectiveness
- After the stripper has had enough time to work (as per the product’s instructions), check a small area to see if the old oil is lifting off easily. The old finish should be visibly softened or bubbling up.
2. Start Scrubbing
- Using a stiff bristle brush, start scrubbing the deck. The goal is to loosen the old oil and finish that the stripper has softened.
- Scrub in the direction of the wood grain to avoid damaging the deck boards. This also helps to lift the oil more effectively from the wood pores.
3. Use a paint scraper.
- For tougher spots where the old oil isn’t lifting easily, gently use a paint scraper. Be careful not to gouge the wood. Again, work in the direction of the grain.
4. Pay Attention to Tough Spots
- Focus on areas where the old oil is more stubborn. These might need extra scrubbing or a second application of the stripper.
5. Rinse the deck
- Once you have scrubbed the entire deck and the old oil is loosened, rinse the deck thoroughly. You can use a garden hose or a pressure washer set on a low setting.
- Ensure you rinse off all the stripped material and any remaining stripper, as leftover residue can interfere with the new finish.
6. Neutralising the wood
- Depending on the stripper used, you might need to apply a neutralising solution to balance the wood’s pH and stop the chemical action of the stripper. This step is crucial for the health of the wood and the effectiveness of the new finish.
- Follow the manufacturer’s instructions for the correct application and rinsing of the neutralizer.
7. Inspect the deck.
- After the deck has dried, inspect it to ensure all the old oil has been removed. Look for any spots that might have been missed and address them as needed.
8. Let the deck dry.
- Allow the deck to dry completely before moving on to the next steps, such as sanding or reapplying a new finish. The drying time can vary depending on weather conditions, but it typically takes at least 24 hours.
Rinsing and neutralising
After scrubbing and removing the old oil from your deck, the next essential steps are rinsing and neutralizing. These steps are critical to ensuring that all residues of the stripper and old oil are completely removed and the wood is prepared for re-treatment. Here’s how to effectively rinse and neutralise your deck:
1. Thorough Rinsing
- Use Plenty of Water: Rinse the deck thoroughly with a garden hose or a pressure washer on a low setting. Make sure to wash away all traces of the stripper and loosened oil.
- Cover all areas: Pay special attention to corners and crevices where residues might accumulate. A thorough rinse is crucial for a clean, receptive surface for the new finish.
- Check for Residues: After rinsing, inspect the deck for any remaining stripper or oil residue. If you find any, a further scrub and rinse might be necessary.
2. Neutralising the wood
- Importance of Neutralisation: Many strippers are alkaline and can raise the pH of the wood, which can interfere with the new finish. Neutralising helps to balance the pH and stop the chemical action of the stripper.
- Selecting a Neutralizer: Use a product specifically designed for neutralising the type of stripper you used. Common neutralizers include oxalic acid or a mild vinegar and water solution.
- Applying the Neutralizer: Apply the neutralizer according to the manufacturer’s instructions. This usually involves spreading it evenly over the deck surface and allowing it to sit for a specified period of time.
3. Final Rinse
- Rinse After Neutralising: After the neutralizer has had time to work, rinse the deck again thoroughly. This step removes any remaining neutralizer and prepares the wood for drying and re-oiling.
- Inspect the Deck Again: Make a final inspection to ensure all chemicals have been rinsed away. Any remaining residues can affect the look and longevity of your new finish.
4. Drying the deck
- Allow Sufficient Drying Time: Before applying any new finish, it’s essential that the deck is completely dry. This typically takes at least 24–48 hours, depending on weather conditions.
- Check the Moisture Level: If possible, use a wood moisture metre to check the moisture content of the deck. The ideal moisture level will depend on the type of finish you plan to apply.
Post-Cleaning Deck Care
After you have successfully stripped, scrubbed, rinsed, and neutralised your deck, it’s crucial to follow through with proper post-cleaning care. This stage is vital for ensuring the longevity and aesthetics of your deck and preparing it for re-oiling or sealing. Here’s how to proceed with post-cleaning deck care:
1. Drying the deck
- Allow Complete Drying: Before any further treatments, such as sanding or re-oiling, the deck needs to be completely dry. Depending on the weather and wood type, this can take 24-48 hours.
- Check Moisture Content: Using a wood moisture metre can be helpful to ensure the wood is dry enough for the next steps. Ideally, the moisture content should be below 15%.
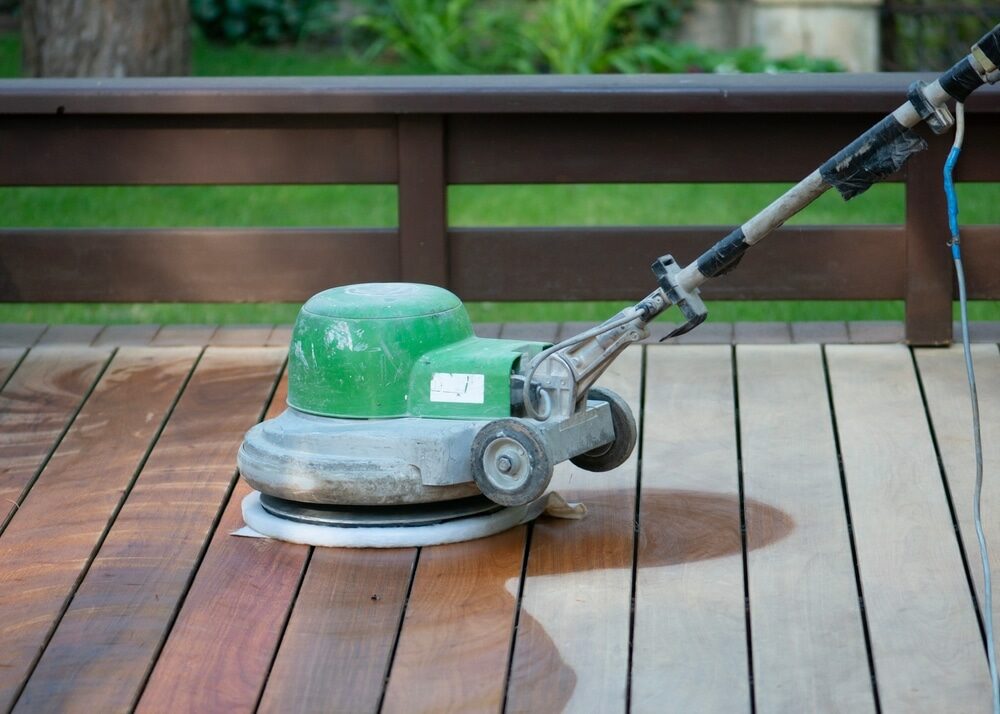
2. Sanding the deck
- Smooth the Surface: After the deck is dry, sanding is often necessary to smooth out any rough spots, splinters, or raised grain caused by the stripping process.
- Use the Right Grit: Start with a coarser-grit sandpaper and finish with a finer-grit sandpaper for a smooth surface. For most decks, starting with 60 grit and finishing with 80–100 grit is sufficient.
- Sand in the direction of the grain: This helps to avoid scratches and ensures a more uniform finish.
- Dust Removal: After sanding, thoroughly sweep or use a leaf blower to remove all dust from the deck. You can also wipe the surface with a damp cloth.
3. Inspection and Repairs
- Inspect the deck: Look for any signs of damage or areas that might need repair, such as loose boards or protruding nails. Make the necessary repairs before moving on to re-oiling or sealing.
- Check for Rot: Pay special attention to areas that are prone to moisture, as these are more likely to develop rot.
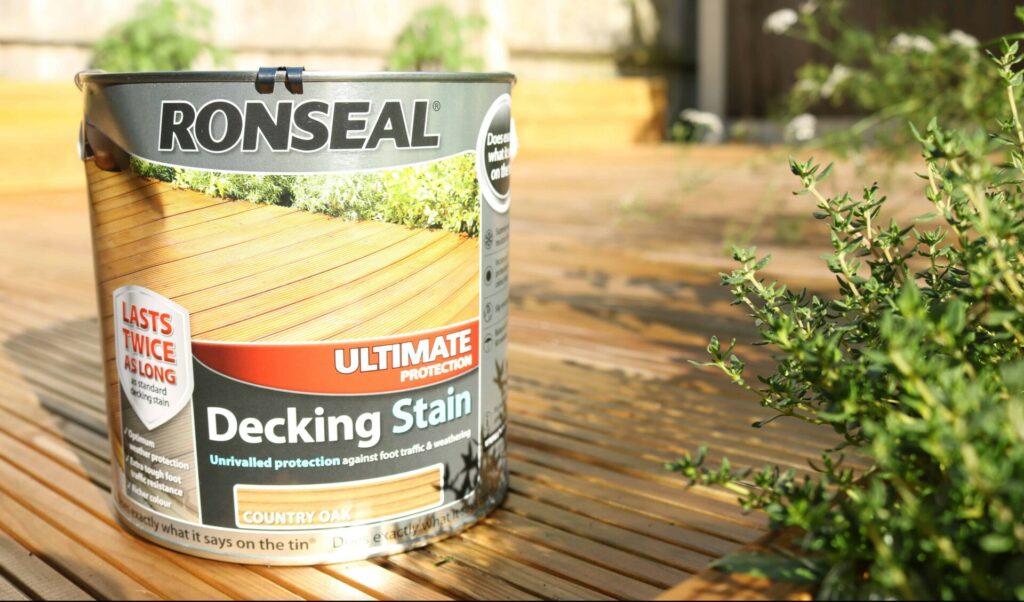
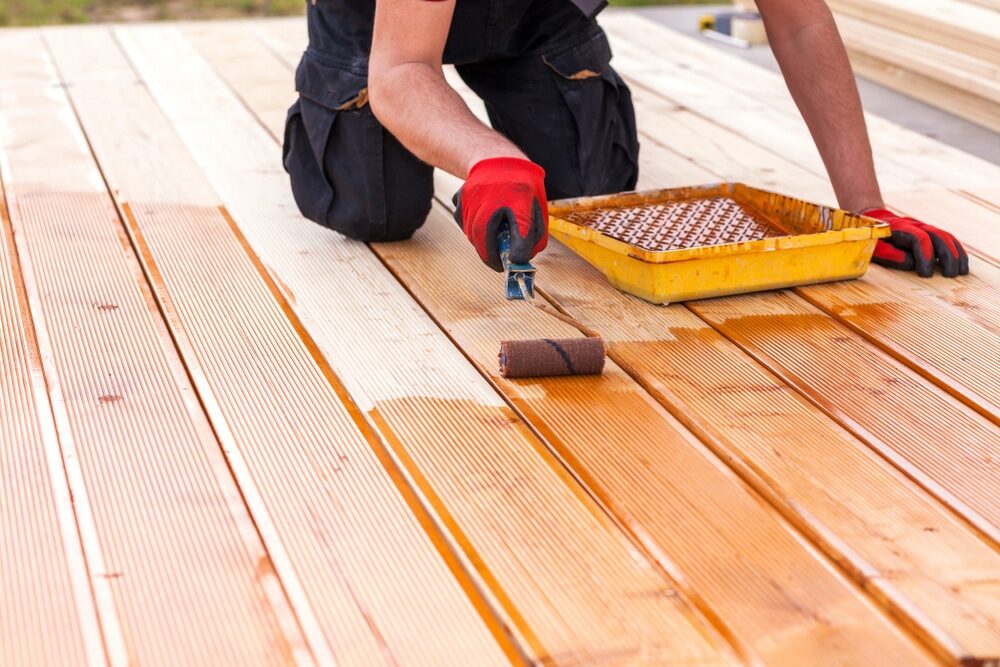
4. Applying a New Finish
- Choose the right product: Select a deck oil or sealer that is appropriate for your deck’s wood type and climate conditions.
- Test the product: Apply the new finish to a small, inconspicuous area to ensure it gives the desired appearance and adheres properly to the wood.
- Apply according to the instructions: Follow the manufacturer’s instructions for application. This usually involves applying a thin, even coat using a brush, roller, or sprayer.
5. Regular Maintenance
- Clean Regularly: Regular cleaning helps prevent the buildup of dirt and grime, which can shorten the life of your deck finish.
- Reapply Finish as Needed: Depending on your deck’s exposure to elements and foot traffic, reapply finish every 1–3 years.
- Inspect Annually: An annual inspection can help catch and address any issues early, preventing more significant problems down the line.
Maintenance tips and tricks
Regular maintenance is crucial for keeping your deck in prime condition and extending its lifespan. Here are some essential tips and tricks to help you maintain your deck effectively:
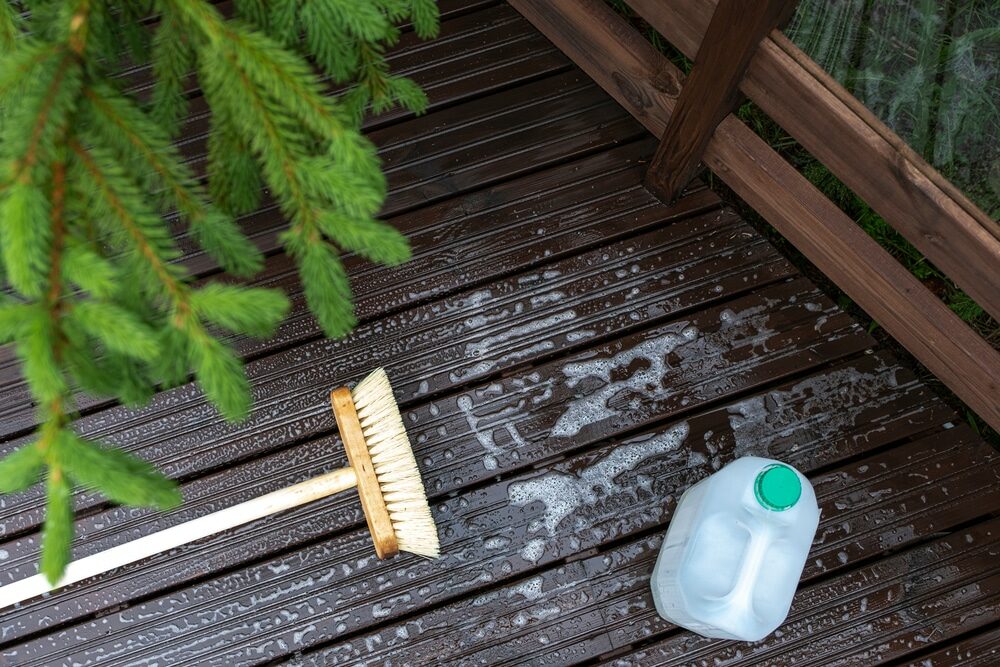
1. Regular Cleaning
- Sweep Regularly: Regularly sweep your deck to remove leaves, dirt, and debris. This prevents buildup and reduces the risk of mould and mildew growth.
- Mild Cleaning Solution: Use a mild deck cleaning solution and a soft brush or broom to clean the surface. Avoid harsh chemicals that can strip the oil and damage the wood.
2. Immediate stain removal
- Act Quickly on Spills: Clean up spills immediately, especially from oily or acidic substances, to prevent staining.
- Gentle Cleaning Agents: Use gentle cleaners specifically designed for deck wood to treat stains.
3. Inspect and repair
- Annual Inspection: Conduct a thorough inspection of your deck at least once a year. Look for loose boards, protruding nails, signs of rot, or other damage.
- Make Timely Repairs: Address any issues like replacing damaged boards, hammering in loose nails, or sanding rough spots as soon as possible.
4. Protect against Moisture
- Proper Drainage: Ensure your deck has proper drainage and isn’t collecting water, which can lead to wood rot and decay.
- Sealant Reapplication: Reapply a water-repellent sealant every few years to protect the wood from moisture.
5. Prevent sun damage
- UV Protection: If your deck is exposed to a lot of sunlight, use a finish with UV inhibitors to prevent fading and sun damage.
- Shade Solutions: Consider adding a pergola, awning, or shade sail to reduce direct sunlight exposure.
6. Avoid heavy loads.
- Distribute Weight Evenly: Avoid placing heavy objects on your deck for extended periods. If necessary, use area rugs or furniture pads to distribute the weight evenly.
7. Winter Care
- Remove Snow and Ice: Gently remove snow and ice to prevent water damage and reduce the risk of slipping.
- Avoid Harsh Chemicals: Use calcium chloride or rock salt sparingly to melt ice, and rinse off in the spring, as these can be harsh on wood surfaces.
8. Mind the Gap
- Maintain Proper Spacing: Ensure that there is adequate spacing between deck boards to allow for water runoff and air circulation.
9. Regular Re-oiling/Sealing
- Re-oil or seal as needed: Depending on the weather conditions and usage, reapply oil or sealant every 1–3 years to maintain the deck’s protective layer.
10. Furniture Care
- Protective Pads: Use protective pads under furniture legs to prevent scratches.
- Move Furniture Periodically: Change the position of furniture and planters occasionally to avoid discoloration and moisture buildup.
Conclusion
Maintaining your deck is an essential aspect of home care, particularly when it comes to the task of removing old oil and reapplying a fresh coat. Throughout this guide, “How to Remove Old Oil from Your Deck,” we’ve explored a comprehensive process, starting from understanding your deck’s specific needs to the final touches of regular maintenance.
In conclusion, restoring and maintaining a deck is a rewarding process that not only enhances the aesthetic appeal of your outdoor space but also adds to the longevity and durability of your deck. By following the steps outlined in this guide, you can tackle the project of removing old oil and re-oiling your deck with confidence, ensuring that your outdoor space remains a beautiful and enjoyable part of your home for years to come.

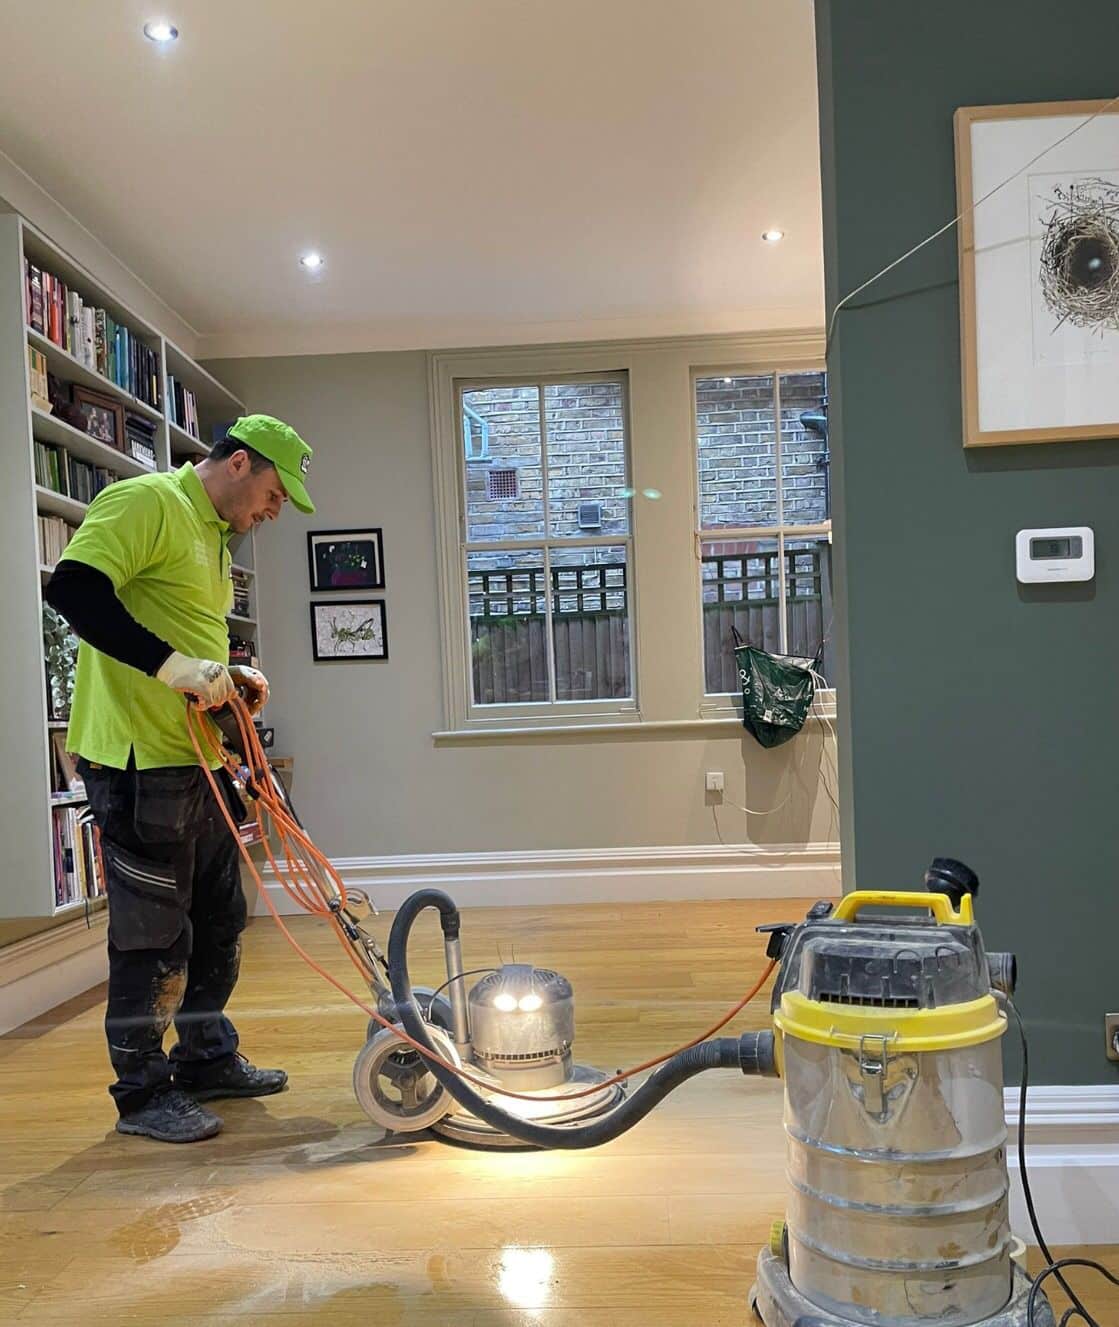
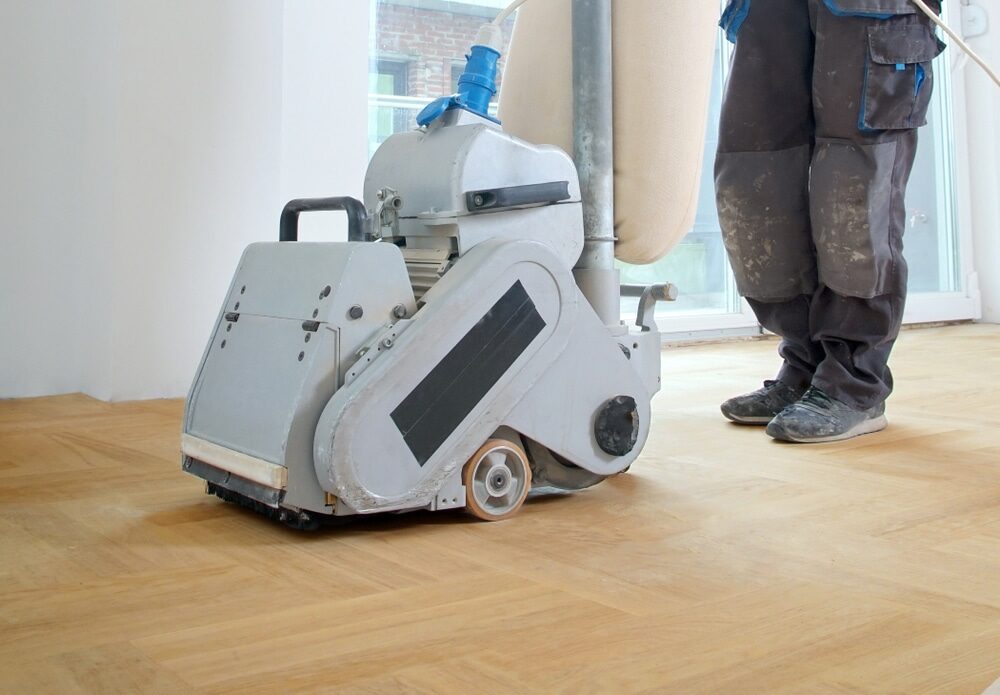
Sanding
We provide virtually dust-free sanding with our continuous belt machinery with mobile extraction units, giving you a safer environment for your family.
Oiling
This organic finish not only adds beauty to your home but also has exceptional water-repellent characteristics, making it easier to clean and maintain.
Waxing
This natural floor finish offers the softest and most mellow appearance – and leaves your floor able to breath.
Buffing
Using soft buffing machines (and hand-polishing where required) will bring a wonderful sheen to your newly-finished floor.
Repairs
We offer a full assessment of your wooden floors to determine what repairs are needed to provide the perfect working surface for the later stages of sanding, staining and sealing.
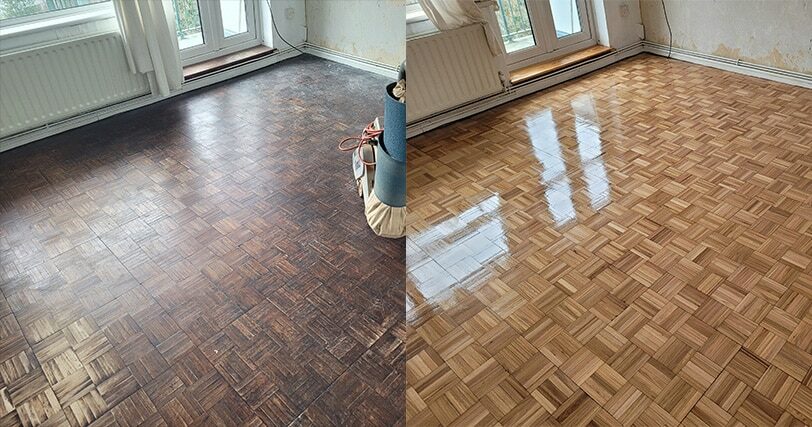
Restoration
We offer a comprehensive restoration process designed to address floors that are improperly fitted or damaged over time through wear and tear.
Request a fixed price quote for your wood floor restoration now
Simply enter your postcode below to get started.
Services
Wood Floor Sanding Wood Floor Restoration Wood Floor Scratch Repair Squeaky Wood Floor Repair Parquet Floor Sanding Parquet Floor Restoration Commercial Floor Sanding Church Floor Sanding Community Centre Floor Sanding School Floor Sanding Gap Filling Gap Filling with ResinCopyright © Mr Sander®
Privacy & Cookies Terms & Conditions Complaints Procedure Cancellation Rights Sitemap

Get An Instant Price Estimate Before You Go…
Simply enter the rooms you need sanded and we’ll provide you with a price estimate instantly! Try our price calculator now.
Get a Price Estimate NowLocal Floor Sanding Experts
Over 500 5-Star Reviews
Safe, Dust Free Sanding
Operating Since 1994