London:
Nationwide:
25,000+
Floors Restored
27 Years Experience
Wood Flooring Association Certified
Is Oiling an Old Kitchen Worktop Worth It?
Posted on December 28, 2023
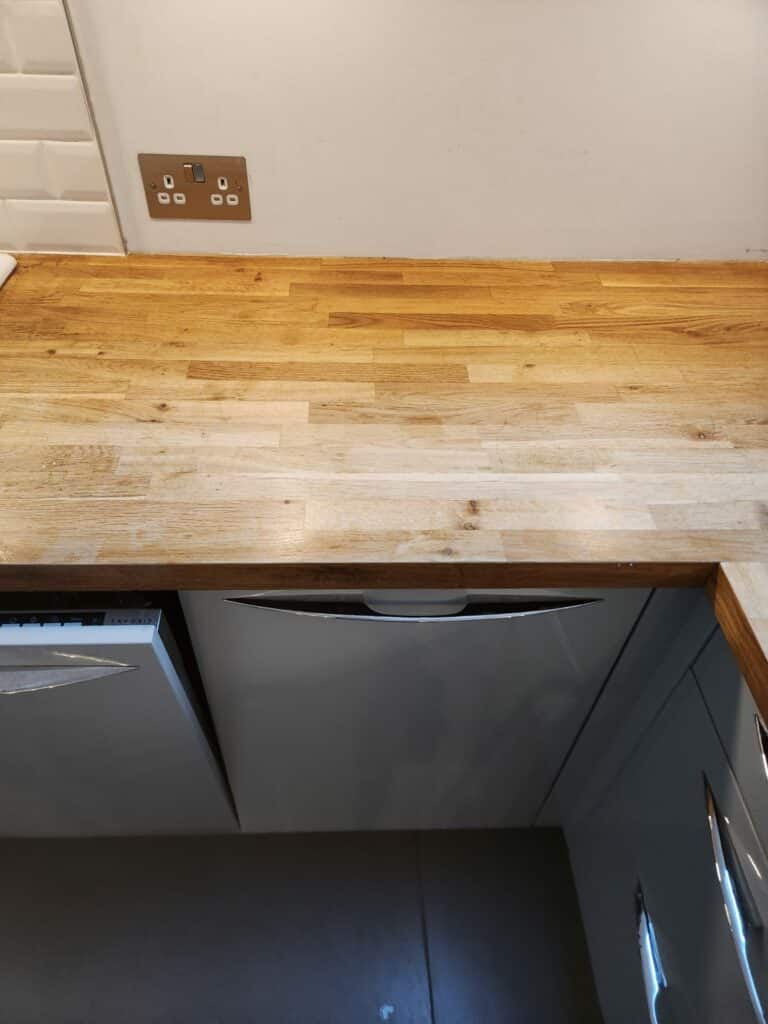
Kitchen Worktop Oiling
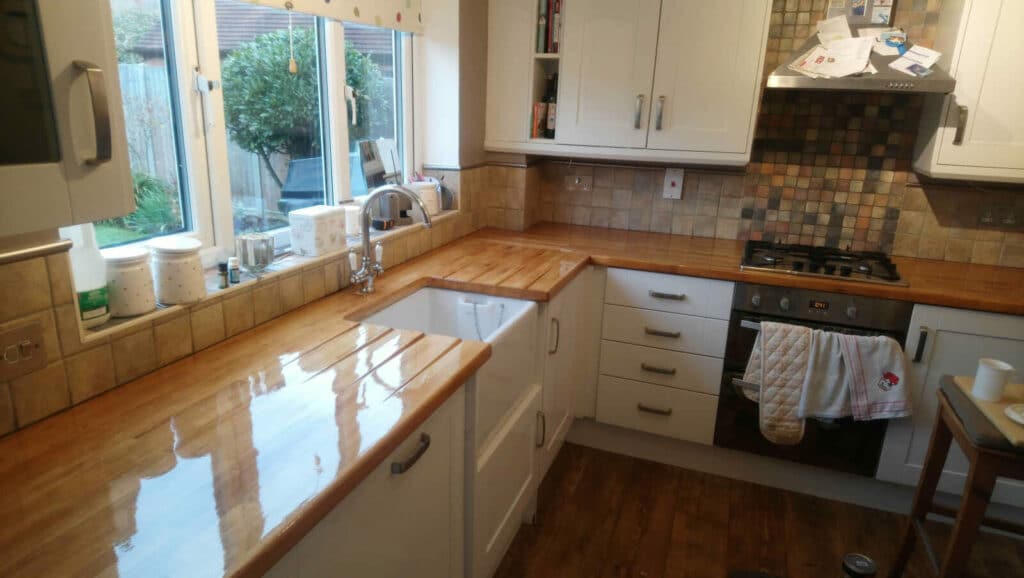
Is It Beneficial to Oil an Aging Kitchen Worktop?
Welcome to our comprehensive guide on maintaining one of the most crucial elements of your kitchen—the worktop. Over time, kitchen worktops, especially those made of wood, can lose their lustre and durability. This often leads homeowners to wonder: Is oiling an old kitchen worktop worth it?
In this blog post, we’ll delve deep into the world of kitchen worktop maintenance, focusing specifically on the process of oiling. Whether you’re a seasoned DIY enthusiast or a beginner looking to extend the life of your kitchen surface, this post is tailored to provide valuable insights.
We’ll start by understanding the nature of different materials used in kitchen worktops and how they age over time. This foundation will help us appreciate why oiling can be a crucial step in preserving the beauty and functionality of your worktop. From selecting the right type of oil to a step-by-step guide on the oiling kitchen worktop process, we aim to cover all the aspects you need to know.
But it’s not just about the how-to; we’ll also explore the cost-benefit analysis of oiling an old kitchen worktop. Is it more cost-effective than a replacement? Does it truly extend the lifespan of your worktop? We’ll answer these questions and more, backed by case studies and success stories.
So, whether you’re looking to rejuvenate an aged worktop or considering the best ways to maintain a relatively new one, join us as we explore the ins and outs of oiling a kitchen worktop. Let’s get started!
Understanding kitchen worktops
When it comes to kitchen design, the worktop is not only a central element in terms of aesthetics but also plays a pivotal role in the functionality of this space. To understand the importance of oiling and maintaining kitchen worktops, it’s crucial to first comprehend the various types of materials used and how they interact with the environment of a busy kitchen.
Materials Used in Kitchen Worktops
- Wood: Classic and timeless, wooden worktops bring warmth and character to a kitchen. Popular choices include oak, walnut, and beech. Wood is naturally porous and requires regular maintenance to prevent water damage and staining.
- Laminate: A budget-friendly option, laminate worktops are made from a plastic overlay on a particleboard or MDF base. They come in various designs, including those that mimic wood or stone.
- Granite: Known for its durability and luxury appeal, granite is a natural stone that withstands heat and scratches well but can be prone to staining if not sealed properly.
- Quartz: Engineered from natural quartz and resin, these worktops are hardwearing and available in a wide range of colours and patterns.
- Stainless Steel: Favoured in professional kitchens for its hygienic and heat-resistant properties, stainless steel can scratch and dent but is incredibly durable.
Ageing Process of Different Materials
- Wood: Over time, wood can dry out, crack, or warp, especially around areas exposed to water. It may also darken or change colour due to sunlight exposure.
- Laminate: The top layer can peel or chip, and once the underlying board is exposed, it’s susceptible to water damage.
- Granite and Quartz: These stones may lose their polish over time and can suffer from chips or cracks if impacted heavily.
- Stainless steel: While it doesn’t age like other materials, scratches and dents can accumulate, adding to the worktop’s ‘patina’.
Impact of Kitchen Activities
- Daily kitchen activities like chopping, spilling, and exposure to heat and moisture constantly challenge the durability and appearance of worktops. Each material responds differently to these elements, with some requiring more care and maintenance than others.
Understanding these materials and their ageing processes is key to recognising the value of proper maintenance, including oiling where applicable. Oiling, predominantly relevant for wooden worktops, plays a significant role in preserving their beauty and extending their lifespan. As we proceed, we’ll delve into the specific benefits of oiling your kitchen worktop and how it can be a game-changer in the upkeep of your kitchen’s centrepiece.
Benefits of Oiling Your Worktop
Oiling a kitchen worktop, particularly if it’s made of wood, is a crucial aspect of its maintenance. This process not only rejuvenates the appearance of the worktop but also offers several practical benefits that extend its lifespan and functionality. Here, we explore the key advantages of regularly oiling your kitchen worktop:
Preservation of wood
- Moisture Barrier: Oiling forms a protective barrier on the wood’s surface, reducing its porosity and making it less prone to absorbing water and other liquids. This is especially important in a kitchen where exposure to moisture is frequent.
- Prevents Drying and Cracking: Regular oiling keeps the wood nourished, preventing it from becoming dry and brittle, which can lead to cracks and splits over time.
Enhanced Appearance
- Richer Colour and Grain Definition: Oil penetrates the wood, enhancing its natural colour and bringing out the beauty of the grain. This can significantly improve the aesthetic appeal of your kitchen.
- Uniform Finish: Applying oil to a wooden worktop helps to even out any discoloration or wear marks, creating a more uniform and pleasing appearance.
Increased Durability and Longevity
- Resistance to Wear and Tear: A well-oiled worktop is more resilient to the daily wear and tear of kitchen use, including scratches and impacts.
- Longevity: By protecting the wood and maintaining its integrity, oiling can significantly extend the lifespan of your worktop, delaying the need for costly replacements.
Hygienic Surface
- Natural Antibacterial Properties: Certain oils, like linseed or tung oil, have natural antibacterial properties, making the worktop a more hygienic surface for food preparation.
- Easier to Clean: An oiled surface is easier to clean and maintain, as spills and stains can be wiped away more effectively.
Environmental and health benefits
- Eco-friendly Option: Many oils used for worktops are natural and environmentally friendly, offering a non-toxic alternative to synthetic sealers and finishes.
- Safe for Food Preparation: Since many of these oils are natural, they are safe for surfaces where food is prepared, unlike some chemical sealants.
Cost-Effective Maintenance
- Affordable Upkeep: Oiling is a relatively inexpensive way to maintain your worktop compared to other treatments or the cost of replacing the entire worktop.
- DIY Friendly: The oiling process can be easily done as a DIY project, saving on professional service costs.
Oiling a kitchen worktop, especially wood, is a valuable practice that enhances its aesthetic appeal, ensures its durability, and maintains a hygienic surface for food preparation. It’s an essential, cost-effective step in preserving the heart of your kitchen.
When to Oil Your Kitchen Worktop
Knowing when to oil your kitchen worktop is key to maintaining its beauty and longevity. This section outlines the signs to look for and the recommended schedule for oiling, especially for wooden worktops.
Initial Oiling After Installation
- New Worktops: Newly installed wooden worktops should be oiled immediately before use. This helps to establish a protective layer from the start.
- Frequency: Initially, oil the worktop several times in the first few weeks. This ‘feeding’ period is crucial for building up a strong protective layer.
Regular Maintenance Oiling
- Frequency: After the initial period, oil your wooden worktop every three to six months. The exact frequency depends on the usage and the type of wood.
- Seasonal Changes: Consider oiling with the change of seasons. Wood can expand or contract with humidity and temperature changes, and regular oiling can help mitigate these effects.
Signs That Your Worktop Needs Oiling
- Appearance of Dryness: If the wood looks dry or faded, it’s a clear indication that it needs oiling. The colour often becomes lighter or dull.
- Water Absorption Test: Drop a small amount of water onto the surface. If it beads up, the seal is still effective. If the wood absorbs the water, it’s time to re-oil.
- Visible Wear and Tear: Scratches, stains, or any other visible damage can be signs that the protective oil layer is wearing thin.
After heavy use or cleaning
- Post-Cleaning: After a deep clean, or if you’ve used harsh chemicals, re-oiling can help restore the wood’s natural defences.
- After Intensive Use: If your worktop has seen more action than usual, such as during holiday seasons or special occasions, it might need an extra coat of oil.
Environmental Considerations
- Humid Environments: In areas with high humidity, more frequent oiling may be necessary to prevent the wood from swelling or warping.
- Dry Climates: Conversely, in dry climates, oiling can prevent cracking and splitting due to a lack of moisture.
Manufacturer’s Recommendations
- Follow Guidelines: Always check and follow the manufacturer’s recommendations for your specific worktop, as different woods and finishes may have unique requirements.
Oiling your kitchen worktop at the right time not only enhances its appearance but also plays a crucial role in its preservation and functionality. Regular maintenance, combined with a keen eye for the signs of wear, ensures that your worktop remains a cherished feature of your kitchen for years to come.
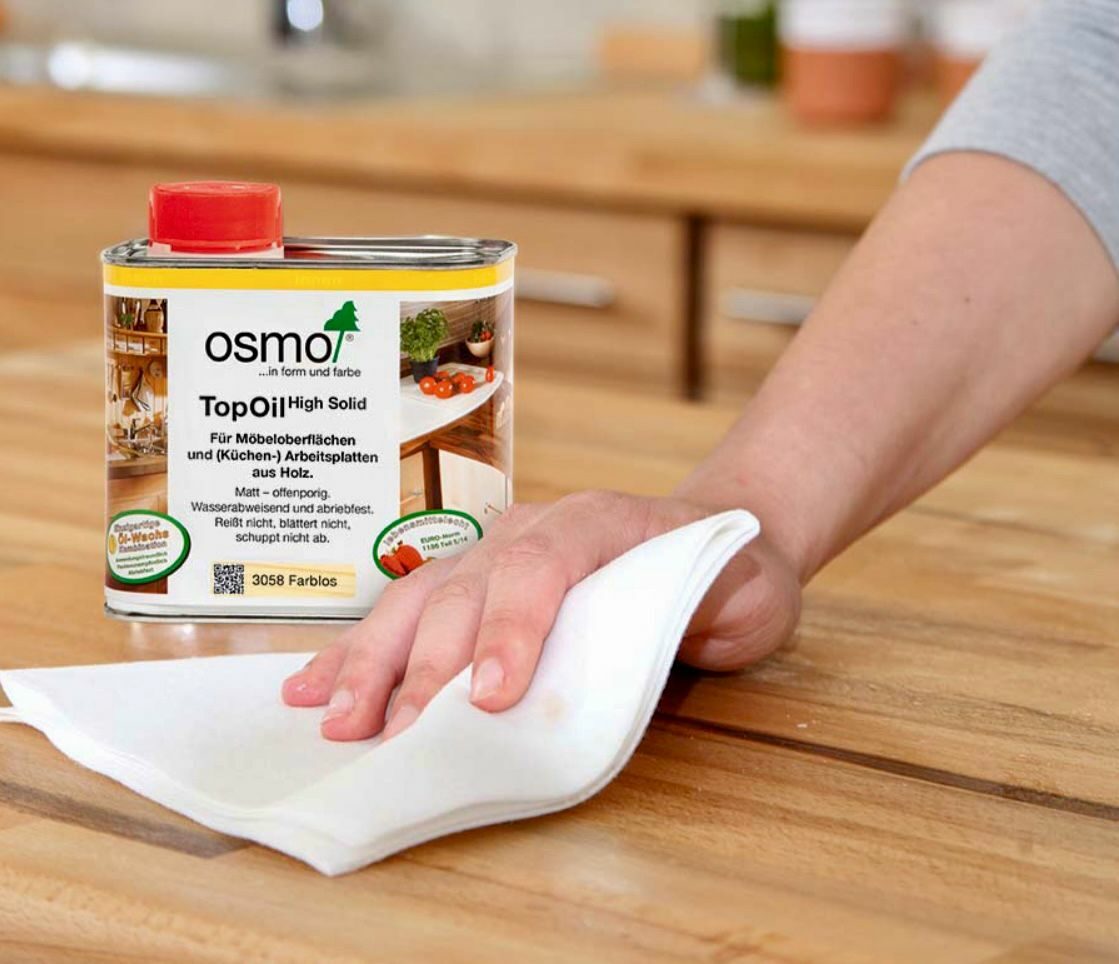
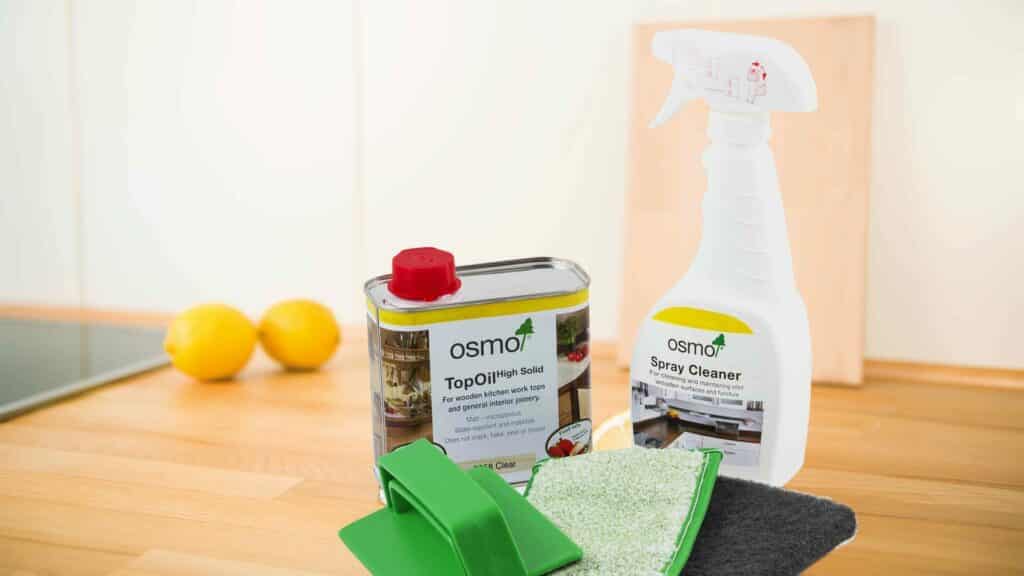
Choosing the Right Oil for Your Kitchen Worktop
Selecting the appropriate oil for your kitchen worktop is critical to ensuring its effectiveness in protection and maintenance. Various types of oils offer different finishes and levels of protection, and it’s important to choose one that suits your specific type of worktop and your personal preferences. Here’s a guide to help you make the right choice:
Types of Oils Suitable for Worktops
- Mineral Oil: A popular choice for kitchen worktops, mineral oil is food-safe, clear, and doesn’t go rancid. It’s ideal for worktops used for food preparation but requires frequent reapplication.
- Tung Oil: Derived from the seeds of the tung tree, this oil provides a tough, water-resistant finish. It’s a bit more durable than mineral oil and is also food-safe once cured.
- Linseed Oil: Often used for its protective qualities, linseed oil creates a durable and water-resistant surface. However, it takes longer to dry and can darken the wood over time.
- Danish Oil: A mixture of oils and varnish, Danish oil offers a durable, water-resistant finish while keeping the natural look of the wood. It’s not always food-safe, so check the product specifics.
- Teak Oil: Ideal for dense woods, teak oil penetrates deeply and is great for protection against moisture and UV rays.
Pros and Cons of Different Oils
- Mineral Oil: Pros: non-toxic, easy to apply, inexpensive. Cons: requires frequent reapplication and provides less protection.
- Tung Oil: Pros: natural, durable, and water-resistant. Cons: Slow drying time can be expensive.
- Linseed Oil: Pros: Good protection; natural. Cons: slow drying, potential for darkening wood; some forms can be toxic before drying.
- Danish Oil: Pros: Durable, easy to apply. Cons: Not always food-safe; longer drying time.
- Teak Oil: Pros: Excellent for hard woods; UV protection. Cons: Not suitable for all wood types; can be expensive.
Considerations for Food Safety
- If the worktop is used for direct food preparation, ensure the oil is food-safe. Mineral and tung oils are generally good options in this regard.
Aesthetics and Finish
- Different oils can alter the appearance of the wood. Consider if you want to preserve the natural colour, darken it, or achieve a certain sheen.
Environmental and health considerations
- Opt for natural, low-VOC (volatile organic compounds) oils if indoor air quality and environmental impact are concerns.
Ease of Application and Maintenance
- Some oils are easier to apply and maintain than others. Consider how much time and effort you are willing to invest in the application process.
Compatibility with Your Worktop Material
- Ensure the oil is suitable for the specific type of wood or material on your worktop. Some oils may not be appropriate for all wood types.
In conclusion, choosing the right oil for your kitchen worktop involves balancing factors like food safety, durability, aesthetics, and ease of maintenance. Always read the product labels and consider your specific needs and the characteristics of your worktop to make an informed decision.
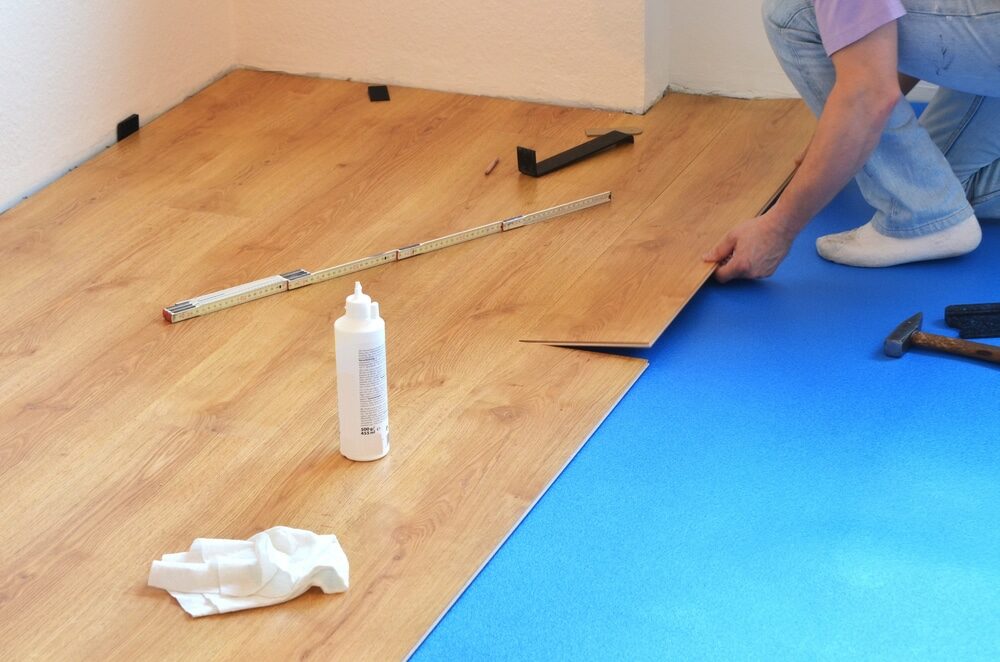
Step-by-Step Guide to Oiling Your Kitchen Worktop
Oiling your kitchen worktop is a straightforward process that can significantly enhance its longevity and appearance. Here’s a detailed guide to help you oil your worktop effectively:
Preparation
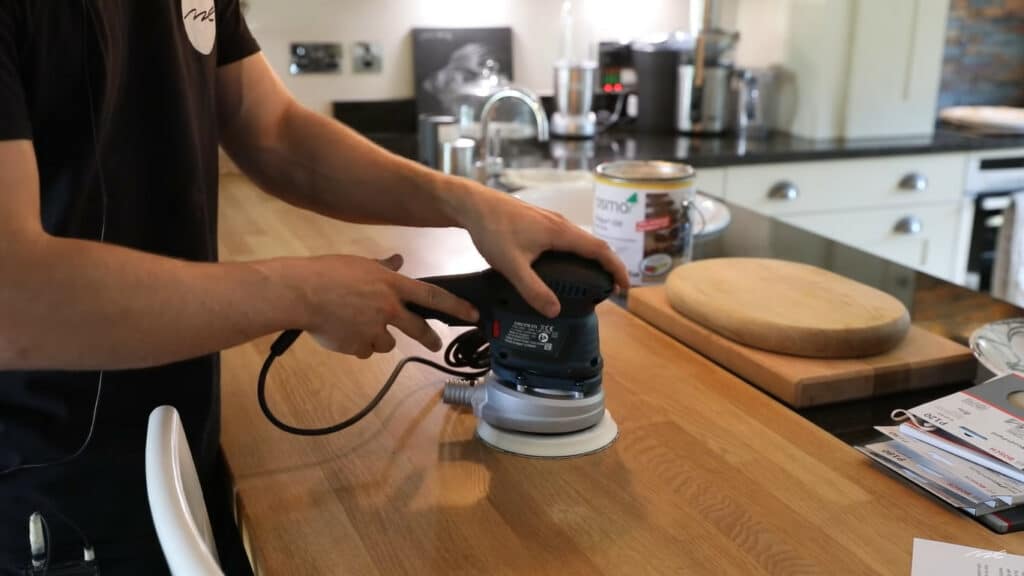
- Clean the Worktop: Start by thoroughly cleaning the surface. Use a mild detergent and warm water to remove any dirt, grime, or stains. Dry it completely.
- Sand the surface (if necessary): If your worktop is particularly worn or has minor scratches, lightly sand the surface with fine-grit sandpaper. This will help the oil to penetrate more evenly.
- Remove Dust: After sanding, wipe down the surface with a damp cloth to remove any dust, and then dry it completely.
Choosing Your Oil
- Based on the earlier section, select an oil that is appropriate for your worktop material and your usage needs.
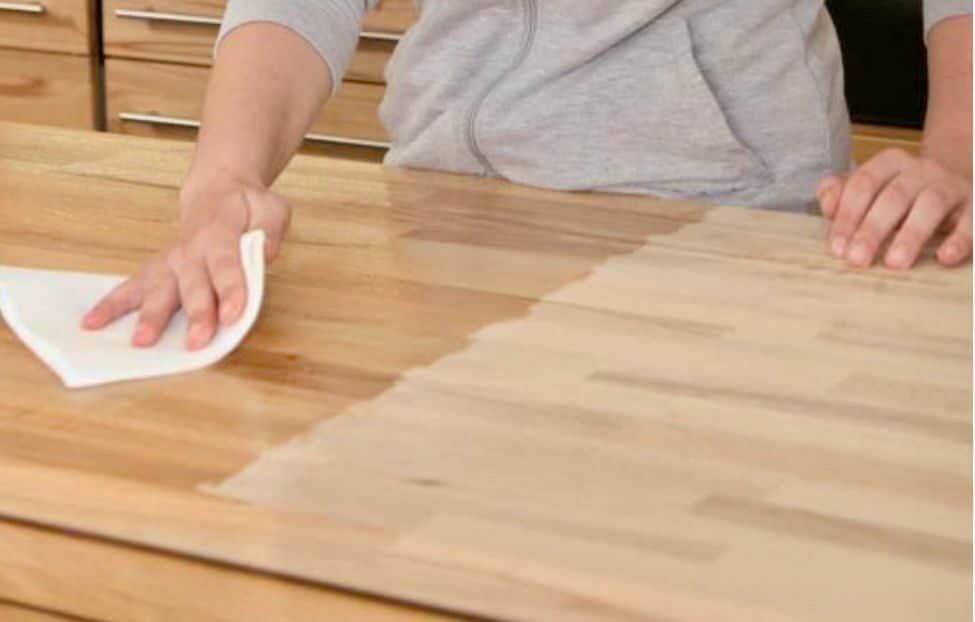
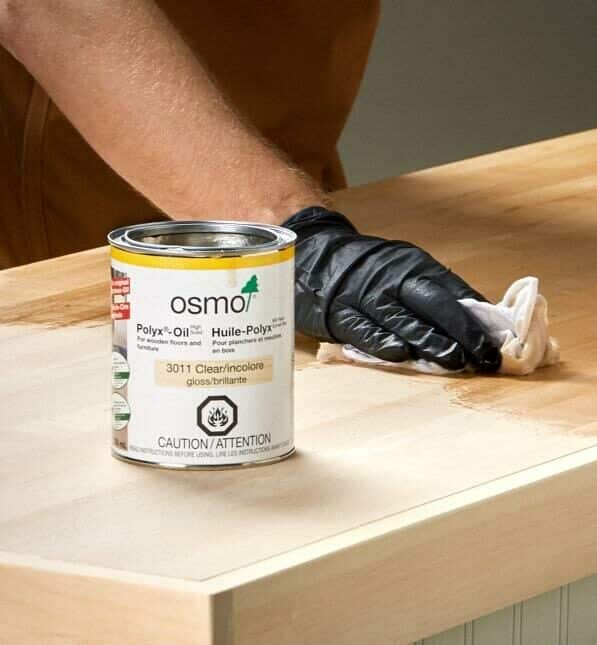
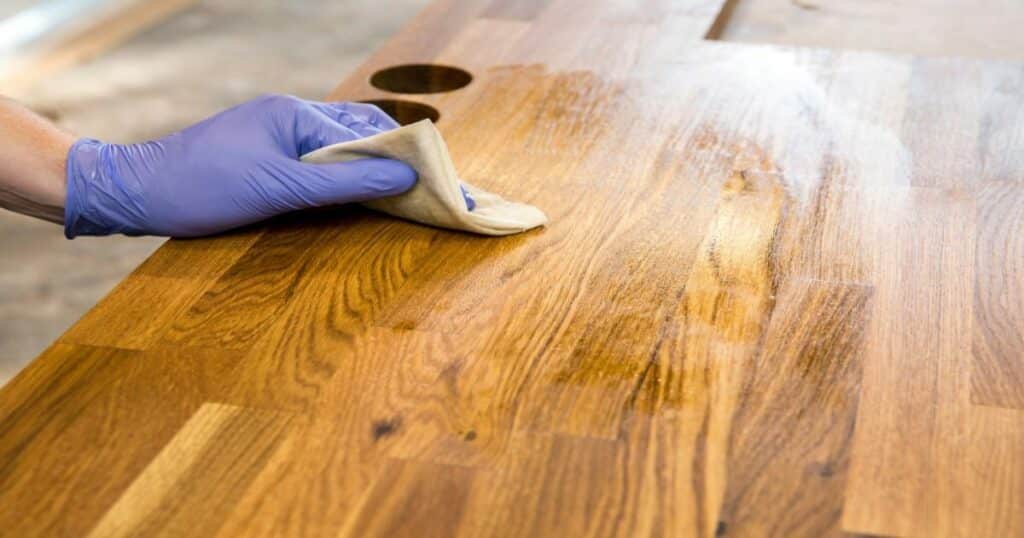
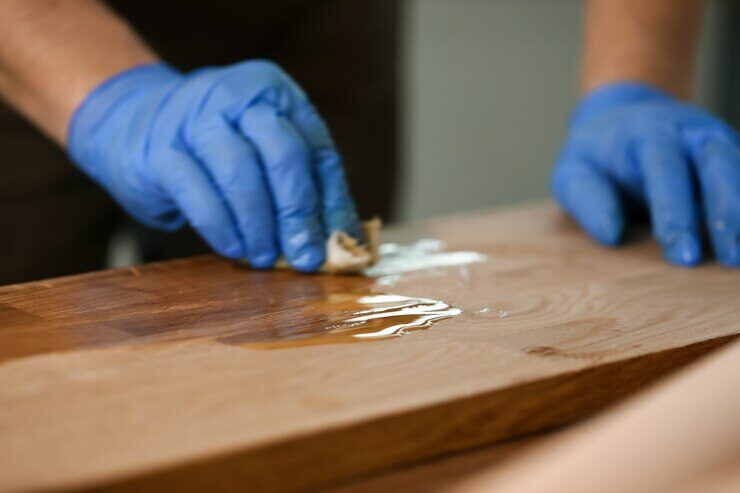
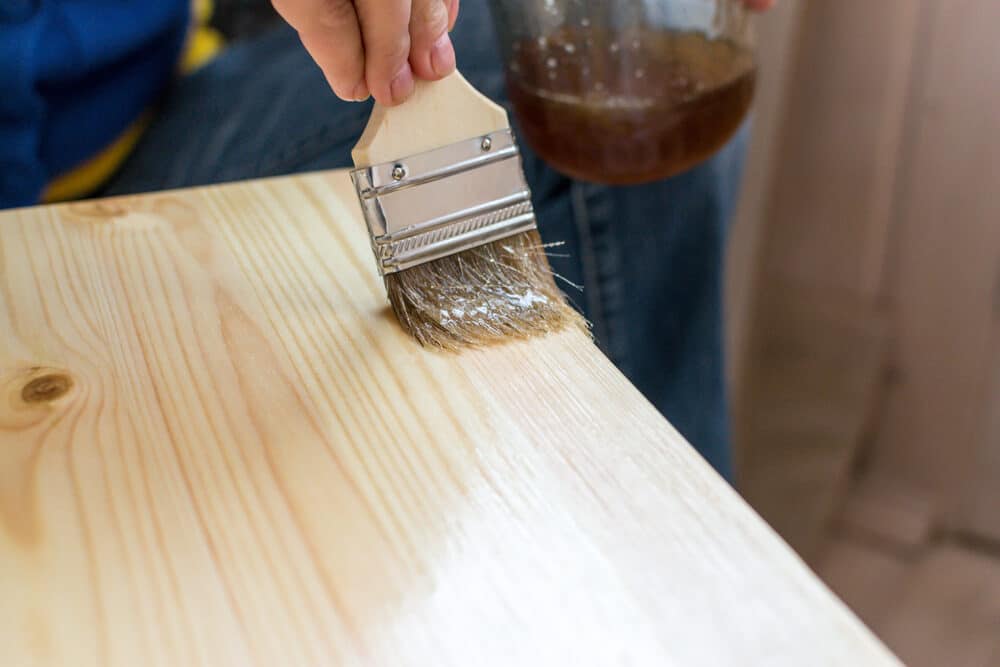
Application of Oil
- Apply the First Coat: Using a clean, lint-free cloth or a brush, apply a generous layer of oil evenly across the surface. Ensure you cover the entire area, including edges and corners.
- Let It Soak: Allow the oil to soak into the wood for at least 15–30 minutes. The time may vary depending on the type of oil and the wood.
- Wipe Off Excess Oil: After the soaking period, use a clean cloth to wipe off any excess oil. This prevents sticky residue from forming on the surface.
Drying Time
- Allow the worktop to dry completely. Drying times can vary significantly depending on the type of oil used, ranging from a few hours to overnight.
Applying additional coats
- For best results, apply at least 2-3 coats of oil, especially if it’s the first time you’re oiling the worktop or if the wood is particularly dry.
- Repeat the application and drying process for each coat, allowing sufficient drying time in between.
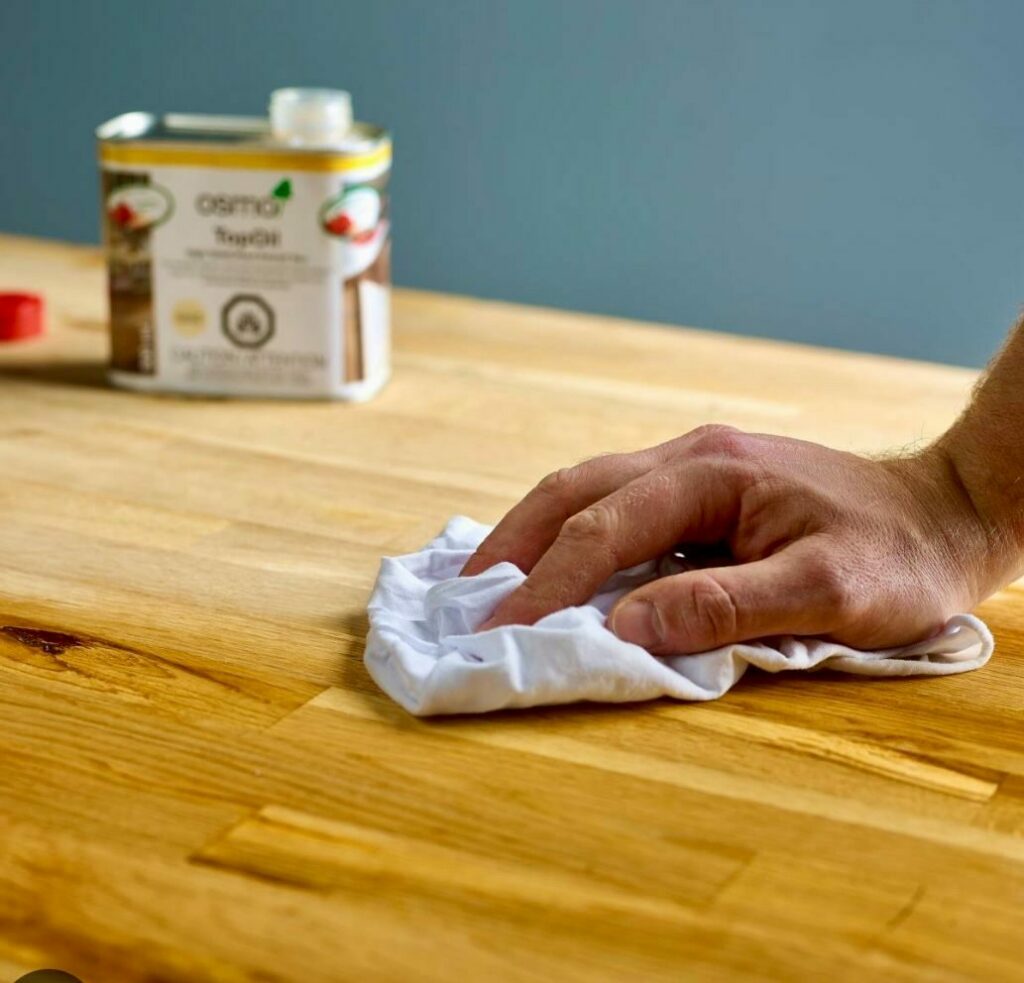
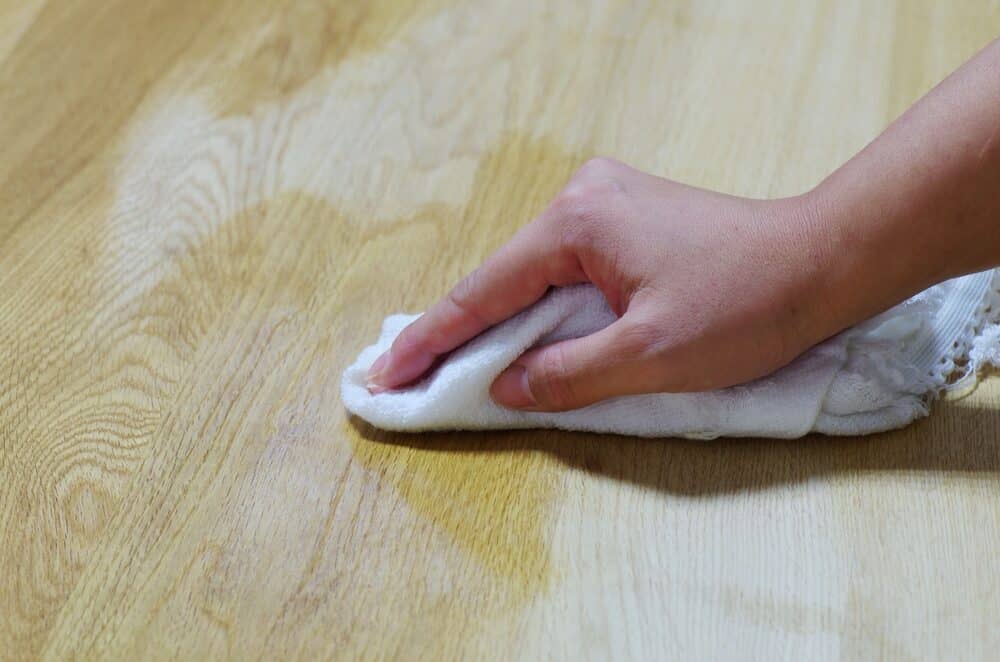
Final Wipe and Polish
- Once the final coat is dry, give the worktop a final wipe with a clean cloth to remove any residue and to polish the surface.
Curing Time
- Allow the worktop to cure fully before using it. Curing can take anywhere from a few days to a week. Avoid placing anything heavy or wet on the surface during this time.
Regular Maintenance
- To maintain the worktop, reapply oil every few months or as needed, following the same process.
Tips for success
- Always test the oil on a small, inconspicuous area first to check for any adverse reactions.
- Ensure good ventilation in your kitchen during the oiling and drying process.
- Use gloves to protect your hands from the oil.
By following these steps, you can effectively oil your kitchen worktop, ensuring it remains protected, functional, and beautiful.

Conclusion
Maintaining your kitchen worktop is essential to ensuring its longevity, functionality, and aesthetic appeal. The decision of whether to oil your worktop or explore alternative treatments ultimately depends on your specific needs, preferences, and the type of worktop material you have.
Oiling your kitchen worktop, especially if it’s made of wood, offers numerous benefits. It forms a protective barrier, enhances the wood’s natural beauty, and extends its lifespan. Regular oiling can be a cost-effective way to preserve your worktop, preventing the need for expensive replacements.
However, there are alternative treatments to consider, such as varnishing, waxing, sealing, laminating, or using cover materials like glass or stainless steel. These options offer different levels of protection, aesthetics, and maintenance requirements, allowing you to tailor your choice to your kitchen’s unique demands.
In the end, the key is to strike a balance between your budget, the desired level of protection, and the appearance you want to achieve. Whichever method you choose, regular maintenance and attention to detail are crucial in ensuring the continued beauty and functionality of your kitchen worktop.
Remember that the choice you make today will have a lasting impact on the heart of your kitchen, so consider your options carefully and enjoy the benefits of a well-maintained worktop for years to come.

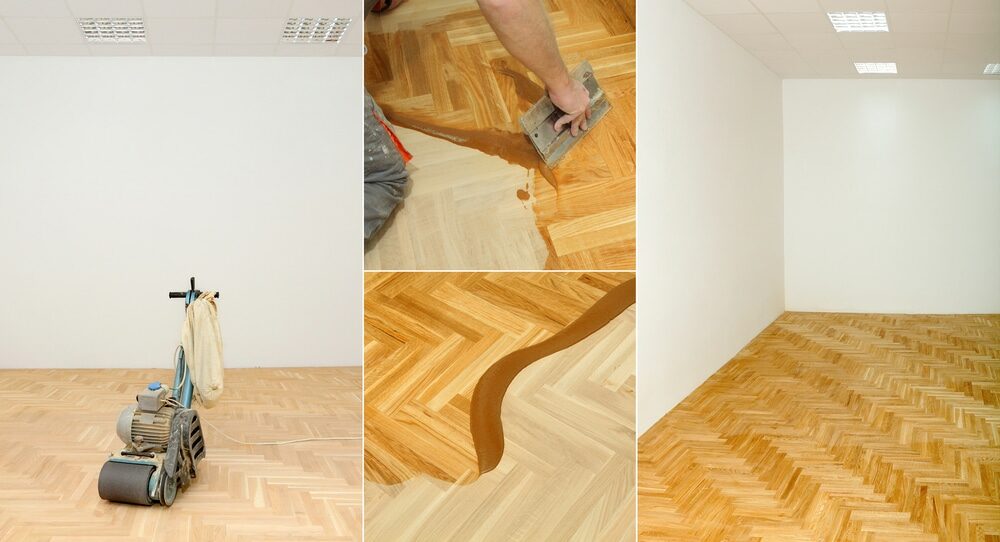
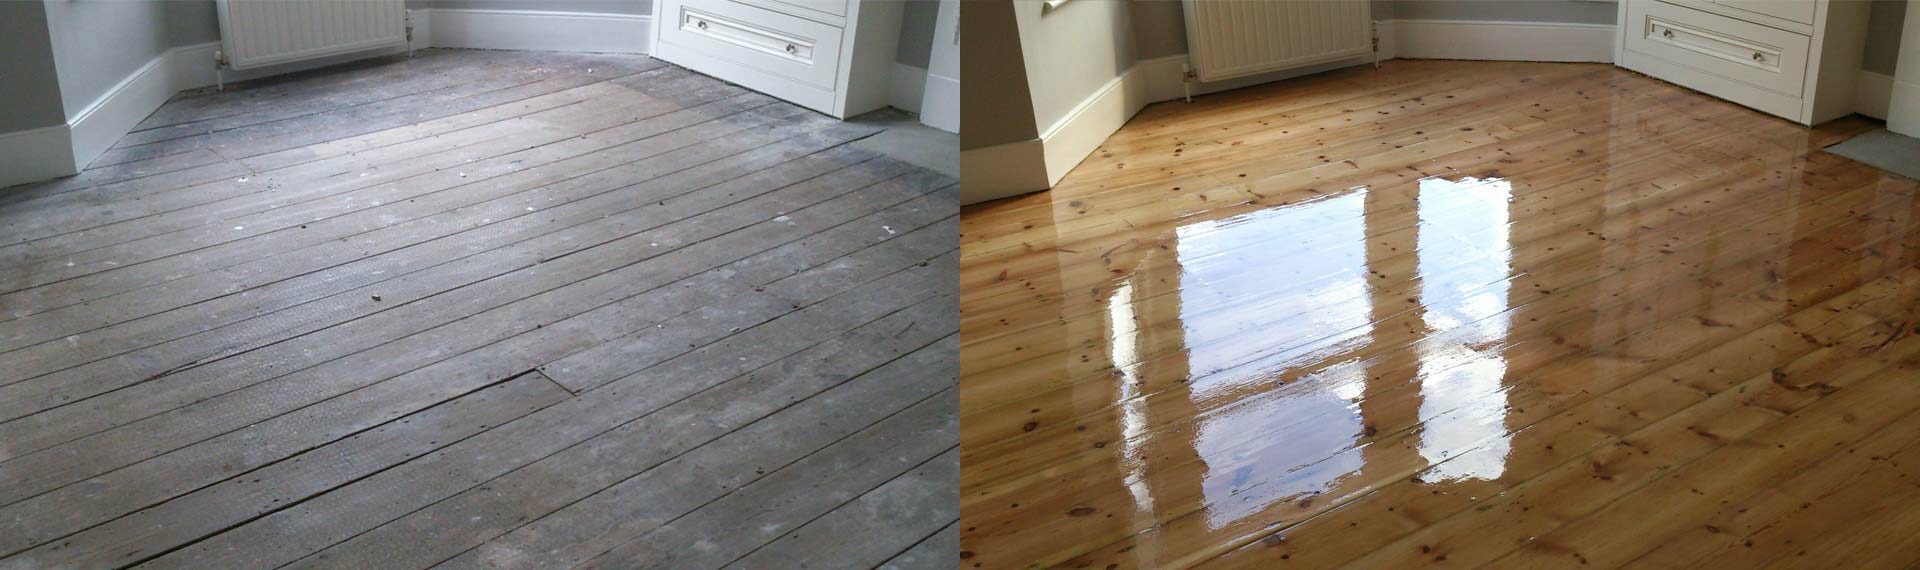
Sanding
We provide virtually dust-free sanding with our continuous belt machinery with mobile extraction units, giving you a safer environment for your family.
Oiling
This organic finish not only adds beauty to your home but also has exceptional water-repellent characteristics, making it easier to clean and maintain.
Waxing
This natural floor finish offers the softest and most mellow appearance – and leaves your floor able to breath.
Buffing
Using soft buffing machines (and hand-polishing where required) will bring a wonderful sheen to your newly-finished floor.
Repairs
We offer a full assessment of your wooden floors to determine what repairs are needed to provide the perfect working surface for the later stages of sanding, staining and sealing.
Restoration
We offer a comprehensive restoration process designed to address floors that are improperly fitted or damaged over time through wear and tear.
Request a fixed price quote for your wood floor restoration now
Simply enter your postcode below to get started.
Services
Wood Floor Sanding Wood Floor Restoration Wood Floor Scratch Repair Squeaky Wood Floor Repair Parquet Floor Sanding Parquet Floor Restoration Commercial Floor Sanding Church Floor Sanding Community Centre Floor Sanding School Floor Sanding Gap Filling Gap Filling with ResinCopyright © Mr Sander®
Privacy & Cookies Terms & Conditions Complaints Procedure Cancellation Rights Sitemap

Get An Instant Price Estimate Before You Go…
Simply enter the rooms you need sanded and we’ll provide you with a price estimate instantly! Try our price calculator now.
Get a Price Estimate NowLocal Floor Sanding Experts
Over 500 5-Star Reviews
Safe, Dust Free Sanding
Operating Since 1994