London:
Nationwide:
25,000+
Floors Restored
27 Years Experience
Wood Flooring Association Certified
The Role of Hand Sanding in Floor Maintenance
Posted on January 11, 2024
Floor sanding techniques
The Art and Craft of Hand Sanding for Floor Maintenance
In the realm of floor maintenance, the significance of hand sanding is often understated, yet it remains an indispensable technique, especially in the preservation and care of wooden floors. This time-honoured method, deeply rooted in tradition, offers a unique blend of craftsmanship and attention to detail, setting it apart from modern mechanised approaches.
The allure of wooden floors lies in their natural beauty and the sense of warmth they bring to any space. However, maintaining this charm requires more than just regular cleaning. Over time, wood floors are subject to wear and tear, losing their lustre and smooth texture. This is where hand sanding comes into play, revitalising the wood and bringing it back to its original glory.
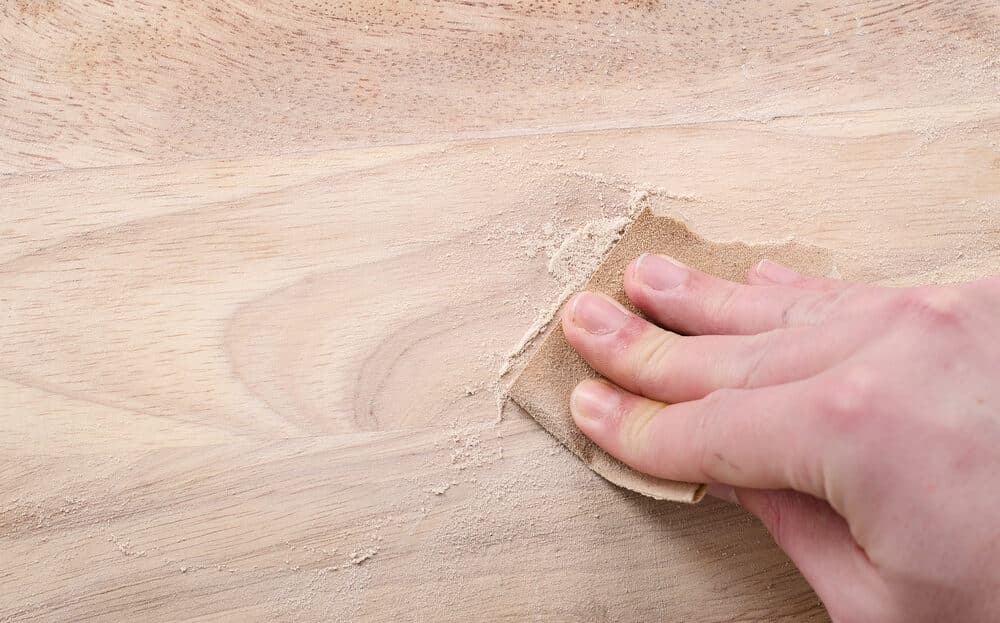
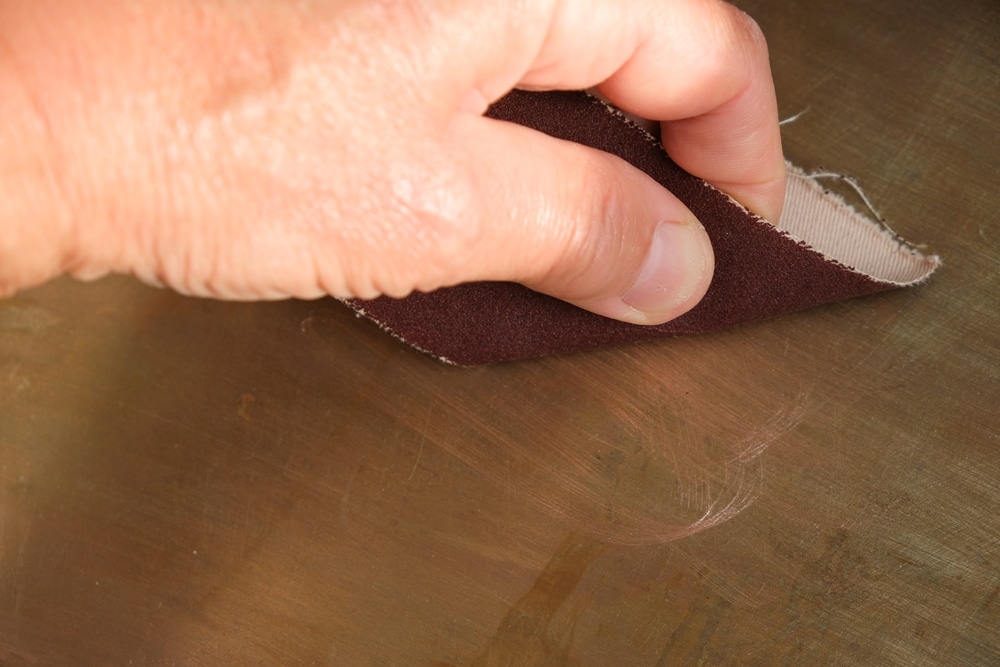
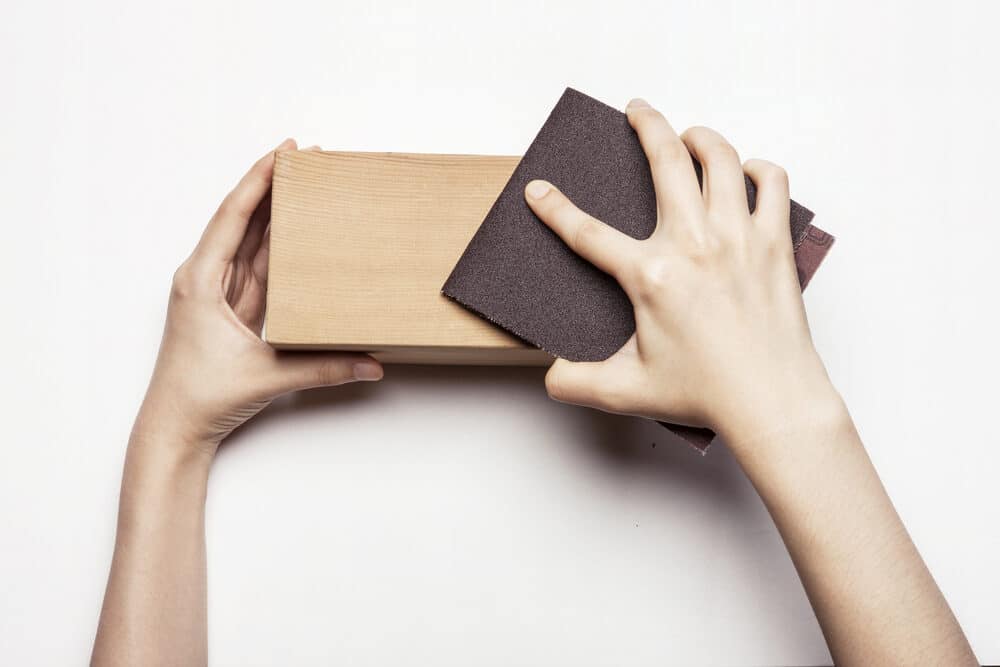
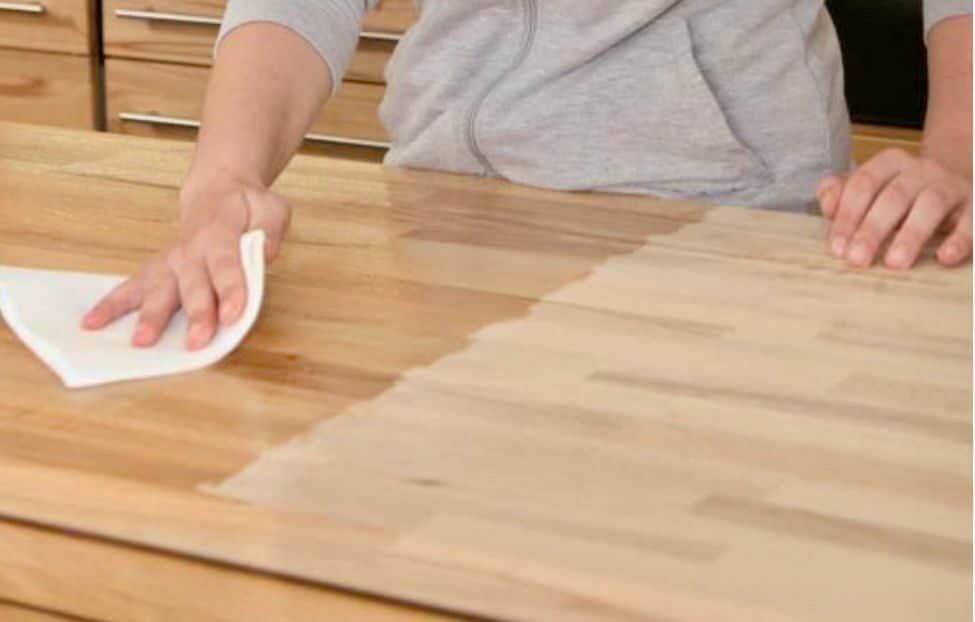
Hand sanding, as opposed to machine sanding, involves manually abrading the floor surface with various grades of sandpaper. This method allows for a level of precision and care that machines often cannot match, especially in delicate areas and intricate patterns. It’s a process that demands patience, skill, and a deep understanding of the wood’s nature.
This technique is not only about restoring the floor’s appearance but also about preserving its integrity and prolonging its lifespan. In the following sections, we will delve into the art of hand sanding, compare it with machine sanding, and provide a step-by-step guide to executing this task with finesse. Additionally, we will discuss the post-sanding care necessary to protect and maintain your wooden floor.
Hand sanding is more than just a maintenance task; it’s a testament to the enduring value of manual craftsmanship in an increasingly automated world. By embracing this traditional method, we honour the timelessness of wooden floors and ensure they continue to enhance our spaces for years to come.
The Art of Hand Sanding
In the world of floor maintenance, hand sanding is akin to an art form, a testament to the enduring value of craftsmanship in an age where technology often reigns supreme. This section delves into the traditional techniques, tools, and materials that define the art of hand sanding, illuminating the skill and care involved in this timeless practice.
Traditional Techniques
Hand-sanding, steeped in history, is a method passed down through generations of craftsmen. Unlike machine sanding, it requires a more intimate knowledge of the wood’s nature, its grains, and its unique characteristics. This understanding is crucial, as it guides the sanding process, ensuring that the wood is treated with respect and care, enhancing its natural beauty without causing damage.
The process involves using sandpaper of varying grits, starting with a coarser grade to remove the old finish and any imperfections, and gradually moving to finer grits for a smooth, polished finish. The key lies in the technique: a gentle, circular motion that follows the grain of the wood, avoiding cross-grain sanding that can leave unsightly scratches.
Tools and materials
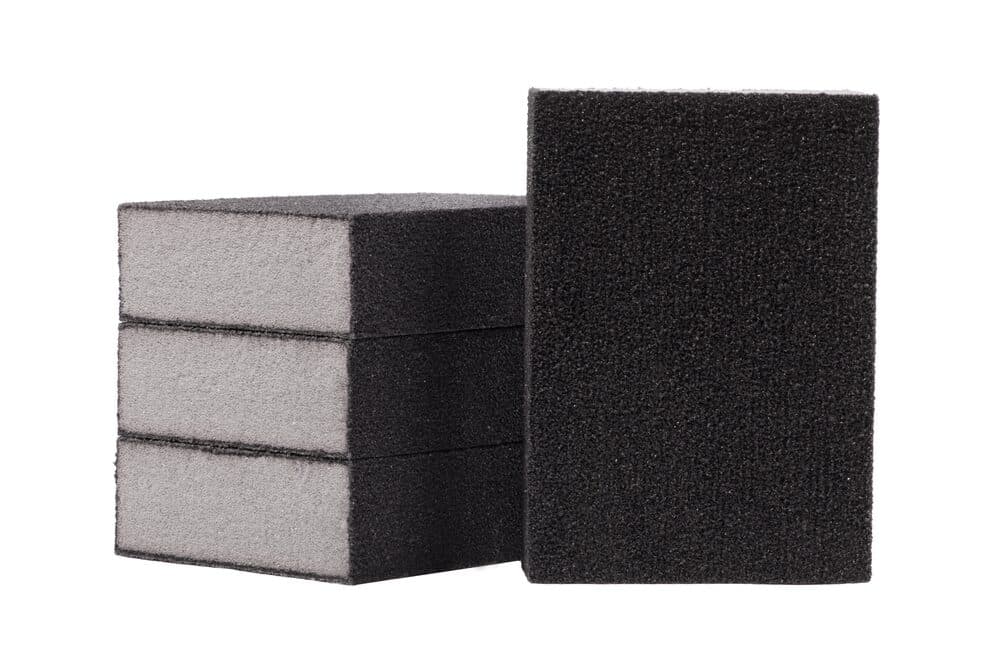
While the tools required for hand sanding are relatively simple, their selection is vital for achieving the desired finish. The basic toolkit includes:
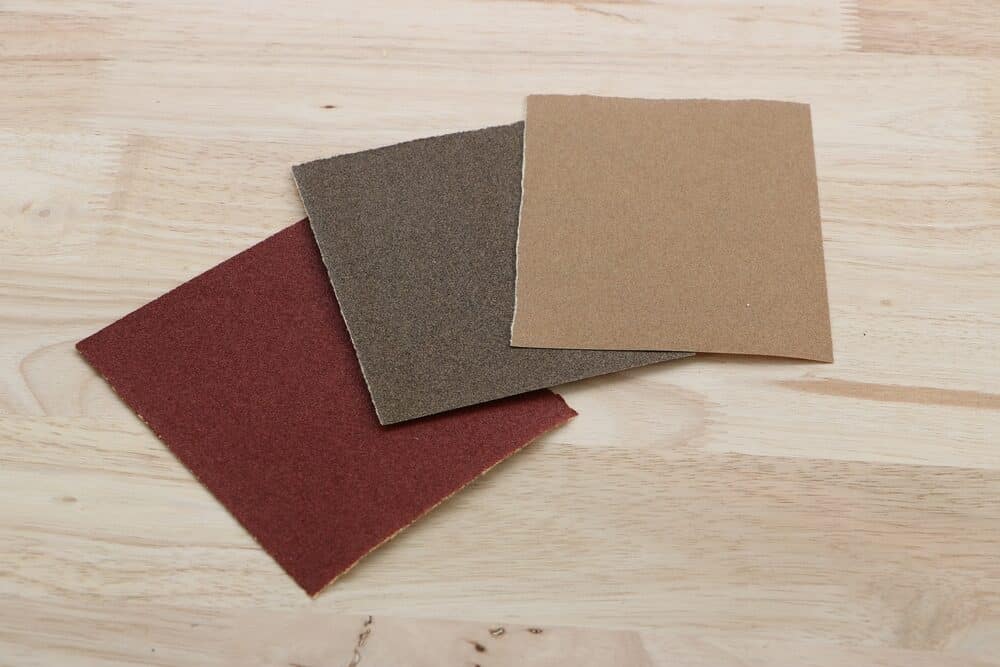
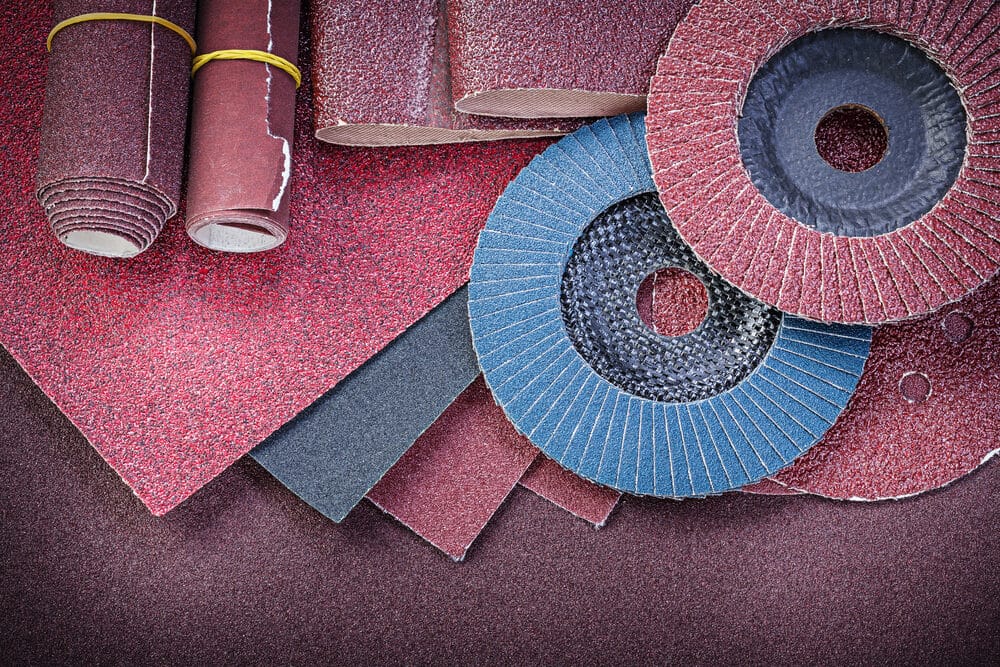
Sandpaper:
A range of sandpaper grits, typically starting from around 60 grit for the initial rough sanding, moving up to 120 or 150 grit for intermediate sanding, and finishing with 220 grit or higher for a smooth finish.
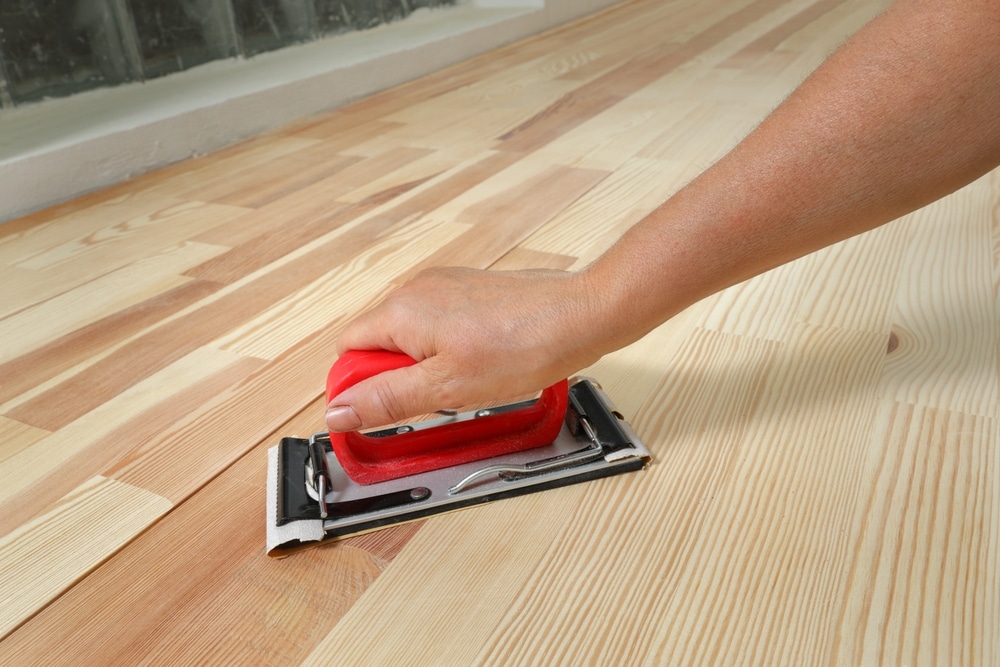
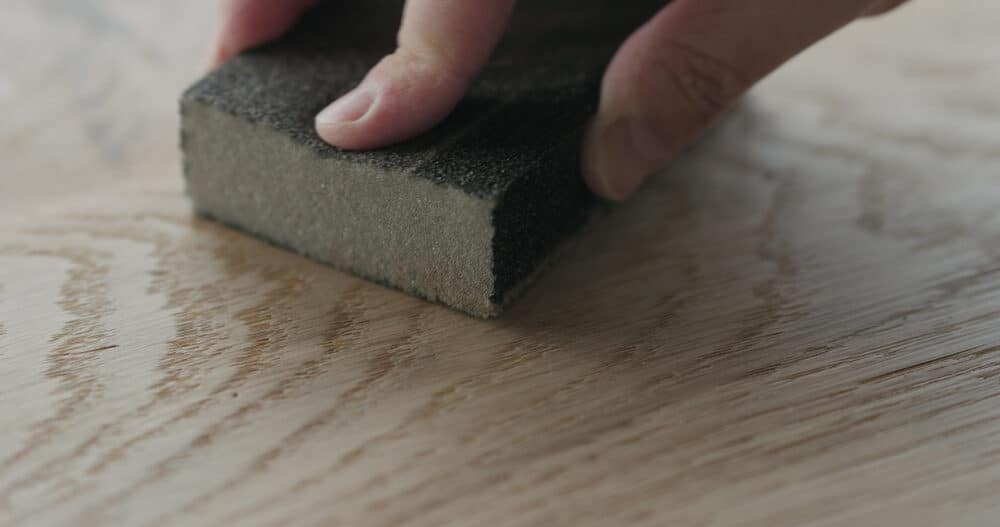
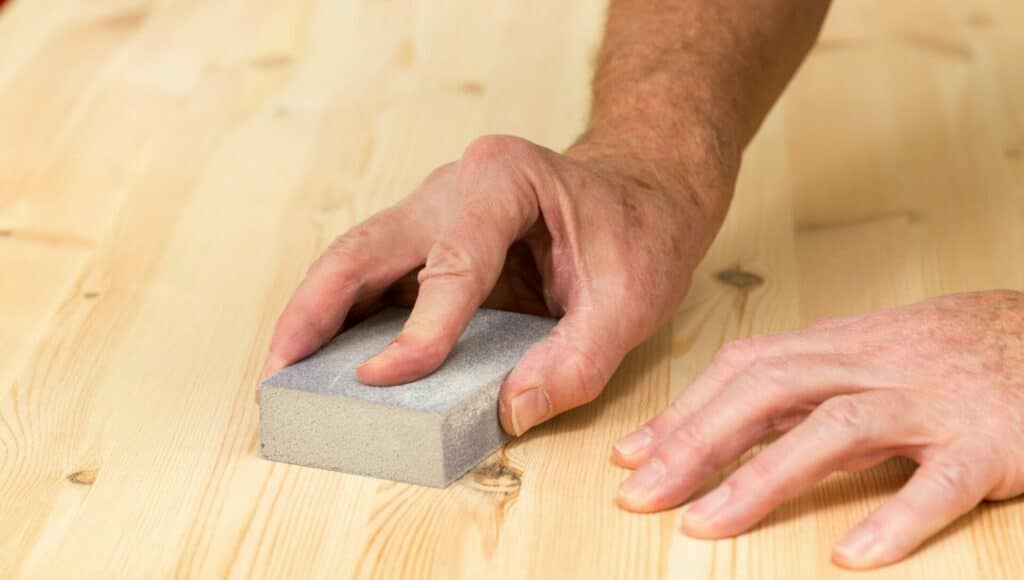
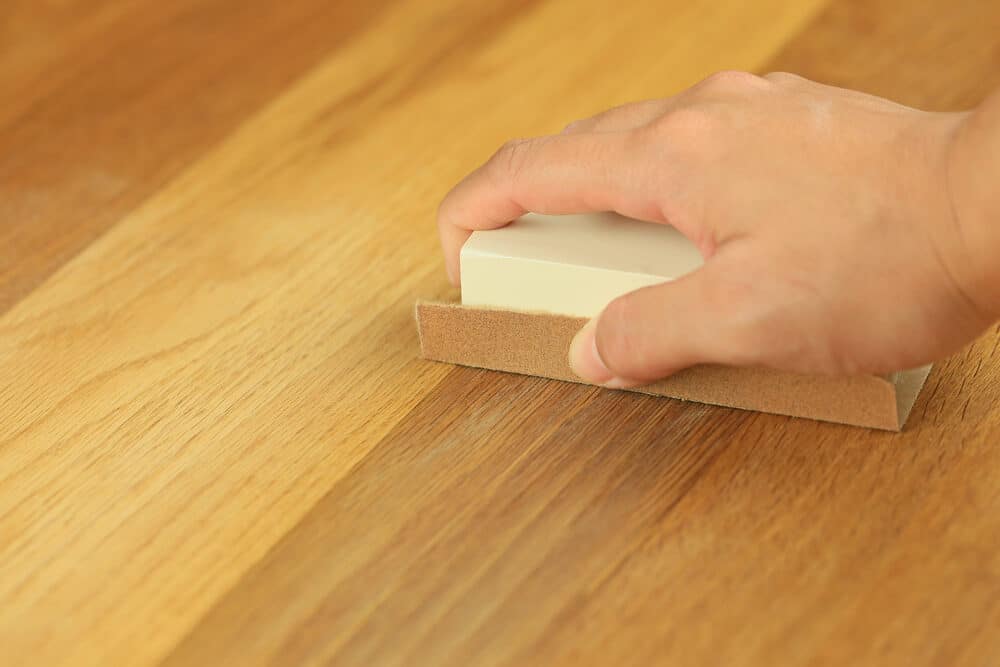
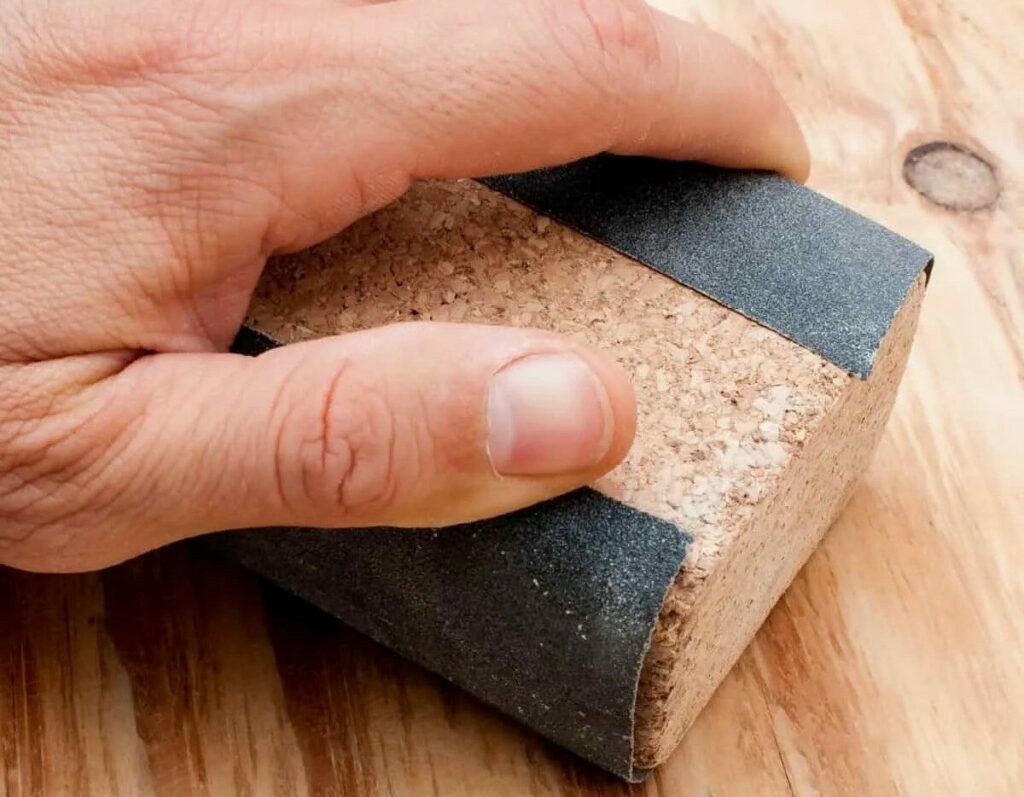
Sanding Block:
A sanding block, which can be either purchased or made from a piece of scrap wood, is essential. It provides an even pressure distribution across the sandpaper, ensuring a uniform sanding process.
Dust masks and protective gear:
Dust masks and protective gear are essential for personal safety, especially when working with older finishes that might contain harmful substances.

The choice of sandpaper and tools may vary depending on the specific type of wood and the condition of the floor. Hardwoods, for instance, might require different grits compared to softer woods.
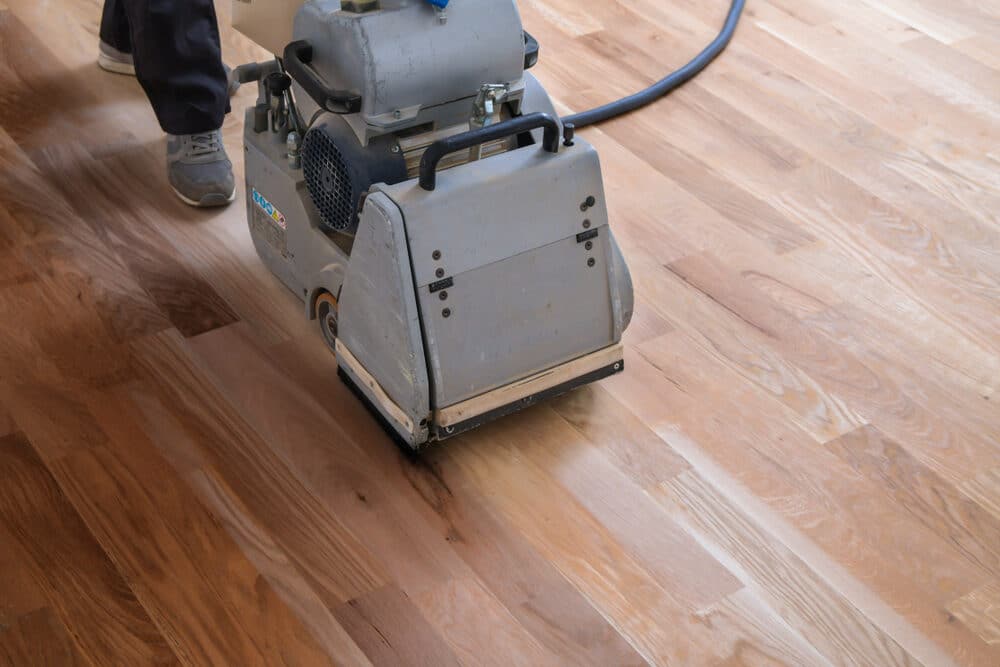
Comparing Hand Sanding to Machine Sanding
The debate between hand sanding and machine sanding in floor maintenance is as much about tradition versus modernity as it is about precision versus efficiency. This section explores the differences between these two methods, highlighting their respective advantages and ideal applications.

Precision and finish quality
Hand Sanding:
The hallmark of hand sanding is its precision. This method allows for a meticulous approach, especially useful when working with delicate areas or intricate designs. The control it offers ensures that the sanding is even and consistent, leading to a superior finish quality. Hand sanding excels at preserving the wood’s integrity, minimising the risk of over-sanding or damaging the surface.
Machine Sanding:
Machine sanding, on the other hand, is lauded for its efficiency and uniformity over large areas. Modern sanding machines are designed to cover extensive surfaces quickly and with considerable consistency. However, they may lack the finesse that hand sanding provides, especially in corners, edges, and intricate patterns.
Situations Where Hand Sanding Excels
Hand sanding is particularly advantageous in certain scenarios:
- Working with Antique or Delicate Floors: Older floors or those with intricate patterns often require the gentle touch of hand sanding to preserve their character and detail.
- Small or Difficult-to-Reach Areas: Hand sanding is ideal for tight spaces where machines cannot reach or could potentially cause damage.
- Fine Finishing Touches: After machine sanding, hand sanding can be used for the final touches, smoothing out any minor imperfections left by the machines.
- Restoration Projects: In restoration work, where preserving the original material is crucial, hand sanding offers the control needed to respect the floor’s history.
While machine sanding is undoubtedly quicker and more suited for larger, straightforward projects, hand sanding remains unparalleled in scenarios that demand a high level of detail and care. Understanding the strengths and limitations of each method is key to deciding the best approach for a particular floor maintenance project.
Step-by-Step Guide to Hand Sanding
Hand-sanding a wooden floor is a meticulous process that requires patience and attention to detail. This guide outlines the key steps to achieve a beautifully restored floor through hand sanding.
Preparation
- Clear the area. Remove furniture and any other items from the room. Ensure the floor is free of nails or other protrusions that might damage the sandpaper.
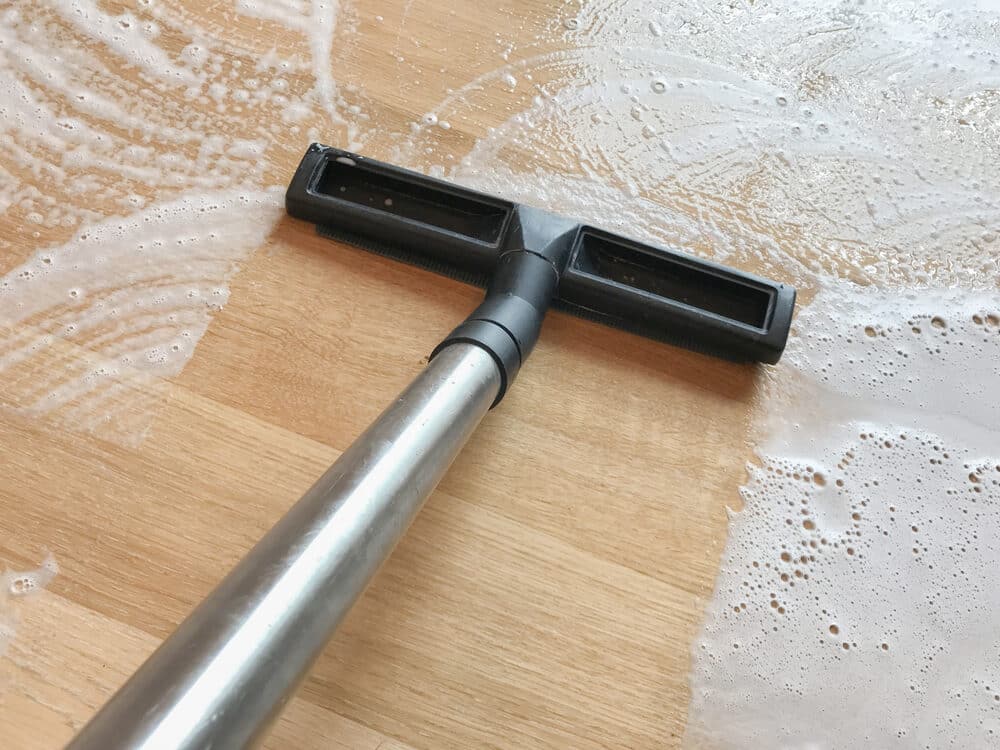
- Clean the Floor: Sweep and then mop the floor to remove dust and debris. Let it dry completely before proceeding.
- Gather Materials: Assemble all necessary tools and materials, including a variety of sandpaper grits, a sanding block, a dust mask, and protective eyewear.
- Inspect the floor: Look for any damaged areas that might need special attention or repair before sanding.
The sanding process
- Start with Coarse Grit Sandpaper: Begin with a lower grit (around 60) to remove the old finish and smooth out major imperfections. Sand in the direction of the wood grain, not against it.
- Use a Sanding Block: Attach the sandpaper to a sanding block for even pressure distribution. This prevents uneven sanding and minimises hand fatigue.
- Gradually Move to Finer Grits: After the initial pass, switch to a medium grit (around 120 to 150) to further smooth the surface. Finish with a fine grit (220 or higher) for a polished look.
- Focus on Details: Pay special attention to edges, corners, and intricate patterns, where hand sanding can really make a difference.
- Regularly Clean the Surface: Frequently remove the dust and debris to see the progress and ensure an even sanding.
Finishing Touches
- Final Inspection: Once the entire floor is sanded, inspect it thoroughly for any missed spots or rough areas.
- Clean the Floor Again: Thoroughly clean the floor to remove all sanding dust. A tack cloth can be helpful in picking up fine particles.
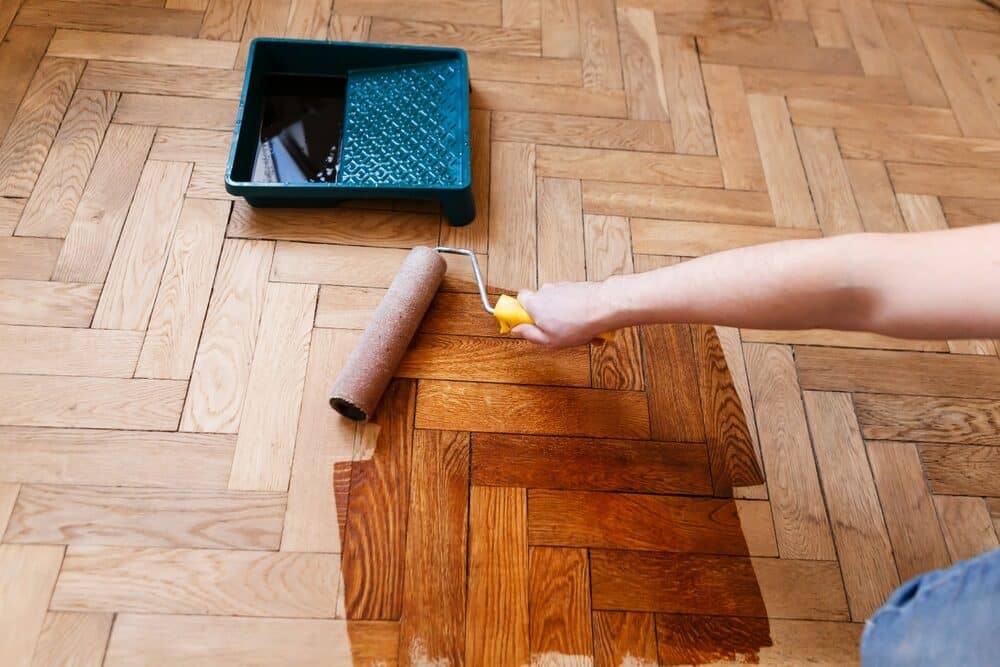
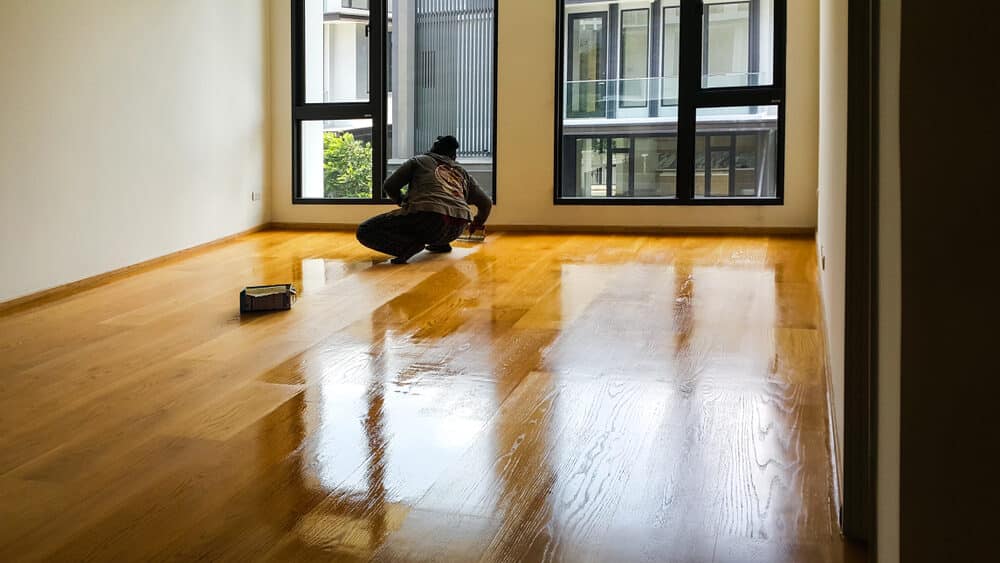
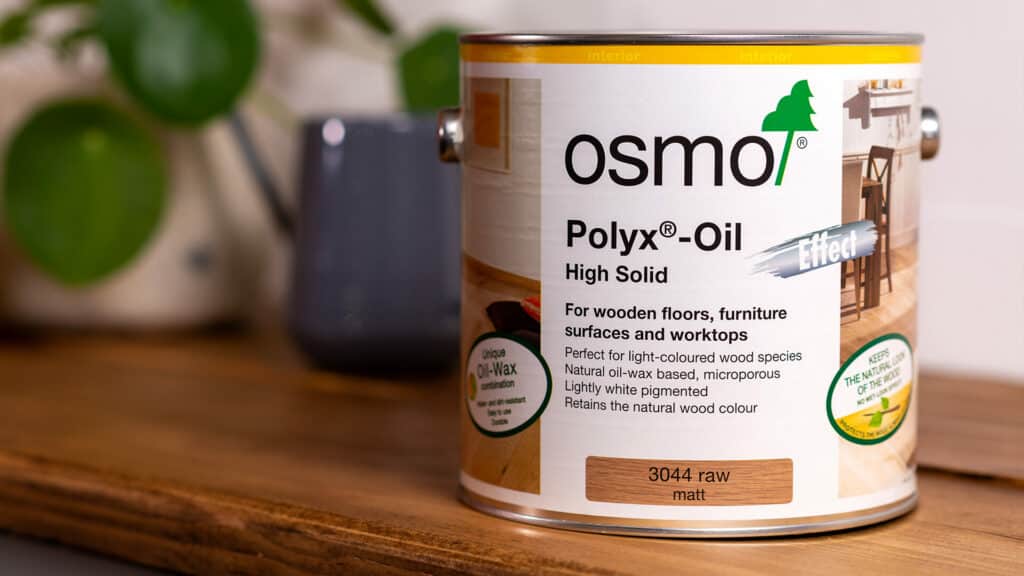
- Apply Finish: Depending on the desired outcome, apply a suitable finish to protect the wood and enhance its natural beauty. This could be varnish, oil, or wax.
- Allow Proper Drying Time: Follow the manufacturer’s instructions for drying times between coats and before replacing furniture.
Maintenance and care Post-Sanding
After the meticulous process of hand sanding, the next critical step is to ensure the longevity and beauty of your wooden floor through proper maintenance and care. This section provides essential tips and practices to keep your floor in pristine condition post-sanding.
Protecting Your Floor
- Apply a Protective Finish: After sanding, it’s crucial to apply a suitable finish, such as varnish, oil, or wax, to protect the wood from wear, tear, and moisture. The choice of finish depends on the type of wood and the desired aesthetic.
- Use Furniture Pads: Place felt pads under furniture legs to prevent scratches and dents on your newly sanded floor.
- Avoid Water Damage: Wipe up spills immediately to prevent water from seeping into the wood. Avoid using wet mops and steam cleaners.
- Control Sunlight Exposure: Continuous exposure to sunlight can fade wood. Use curtains or blinds to minimise direct sunlight, especially during peak hours.
Routine care tips
- Regular Cleaning: Sweep, dust, or vacuum the floor regularly to remove dirt and grit that can scratch the surface. Use a soft-bristle broom or a vacuum with a hardwood floor attachment.
- Use Appropriate Cleaning Products: When cleaning, use products specifically designed for hardwood floors. Avoid harsh chemicals that can damage the finish.
- Reapply Finish as Needed: Over time, the finish can wear off, especially in high-traffic areas. Reapplying the finish can restore the floor’s protection and appearance.
- Avoid High Heels and Sharp Objects: High heels and sharp objects can leave dents and scratches on wooden floors. Encourage removing shoes or using protective mats in high-traffic areas.
- Monitor Humidity Levels: Extreme changes in humidity can cause wood to expand and contract, leading to warping or gaps. Use humidifiers or dehumidifiers to maintain a consistent indoor humidity level.
- Rugs and Mats: Use rugs or mats in high-traffic areas to reduce wear. Ensure they are non-slip and have a breathable backing.
Environmental Considerations
In the context of hand sanding and floor maintenance, it’s essential to consider the environmental impact and embrace practices that are eco-friendly. This section discusses sustainable approaches and materials that can be incorporated into your hand sanding process, reducing the ecological footprint while maintaining high-quality results.
Eco-Friendly Practices in Sanding
- Minimise Dust and Waste: Hand sanding produces less airborne dust compared to machine sanding, which is better for indoor air quality. Ensure proper disposal of sandpaper and dust. Consider using a dust containment system if one is available.
- Use Sustainable Sandpaper: Opt for sandpaper made from recycled materials or with eco-friendly certifications. Some sandpapers use natural abrasives and biodegradable backings.
- Choose Low-VOC Finishes: Select finishes that have low-volatile organic compounds (VOCs). These products emit fewer harmful chemicals into the air, making them safer for both the environment and your health.
- Salvage and Reuse Wood: Whenever possible, salvage and reuse old wood. This not only preserves the character of the wood but also reduces the demand for new timber.
Sustainable Materials
- Eco-Friendly Finishes: Look for natural oil finishes or water-based varnishes that have a lower environmental impact than traditional polyurethane finishes.
- Recycled or Certified Wood: If replacing any parts of the floor, consider using recycled wood or wood from sustainably managed forests (look for FSC or similar certifications).
- Natural Cleaning Products: Use environmentally friendly cleaning products for regular maintenance. These products are biodegradable and free from harsh chemicals.
By incorporating these environmental considerations into your hand sanding and floor maintenance routine, you not only contribute to the preservation of your wooden floors but also play a part in protecting the broader environment. It’s about making responsible choices that align with a sustainable future, ensuring that the beauty we appreciate in our homes does not come at an unnecessary cost to our planet.
Conclusion
As we conclude, it’s important to remember that hand sanding, while laborious, offers an unmatched level of precision and care, especially suited for antique floors, delicate areas, and intricate designs. The decision between hand sanding and machine sanding ultimately hinges on the specific requirements of your floor and the desired outcome.
Furthermore, the post-sanding maintenance and environmental considerations highlighted in this guide underscore the importance of sustainable practices in preserving both our cherished wooden floors and the environment.
In embracing the art of hand sanding, we not only ensure the longevity and beauty of our wooden floors but also connect with a rich heritage of craftsmanship. It’s a choice that resonates with care, quality, and sustainability, echoing the ethos of a more thoughtful and considered approach to both life and work.


Sanding
We provide virtually dust-free sanding with our continuous belt machinery with mobile extraction units, giving you a safer environment for your family.
Oiling
This organic finish not only adds beauty to your home but also has exceptional water-repellent characteristics, making it easier to clean and maintain.
Waxing
This natural floor finish offers the softest and most mellow appearance – and leaves your floor able to breath.
Buffing
Using soft buffing machines (and hand-polishing where required) will bring a wonderful sheen to your newly-finished floor.
Repairs
We offer a full assessment of your wooden floors to determine what repairs are needed to provide the perfect working surface for the later stages of sanding, staining and sealing.
Restoration
We offer a comprehensive restoration process designed to address floors that are improperly fitted or damaged over time through wear and tear.
Request a fixed price quote for your wood floor restoration now
Simply enter your postcode below to get started.
Services
Wood Floor Sanding Wood Floor Restoration Wood Floor Scratch Repair Squeaky Wood Floor Repair Parquet Floor Sanding Parquet Floor Restoration Commercial Floor Sanding Church Floor Sanding Community Centre Floor Sanding School Floor Sanding Gap Filling Gap Filling with ResinCopyright © Mr Sander®
Privacy & Cookies Terms & Conditions Complaints Procedure Cancellation Rights Sitemap

Get An Instant Price Estimate Before You Go…
Simply enter the rooms you need sanded and we’ll provide you with a price estimate instantly! Try our price calculator now.
Get a Price Estimate NowLocal Floor Sanding Experts
Over 500 5-Star Reviews
Safe, Dust Free Sanding
Operating Since 1994