London:
Nationwide:
25,000+
Floors Restored
27 Years Experience
Wood Flooring Association Certified
The Importance of Screening in Floor Sanding Techniques
Posted on January 16, 2024
Floor sanding techniques
Unveiling the Role of Screening in Floor Sanding Practices
Welcome to the fascinating world of floor sanding, a crucial aspect of floor restoration and maintenance. This introductory section is designed to provide you with a solid foundation for understanding the basics of floor sanding, focusing on its significance and the role screening plays in this process.
Understanding the Basics of Floor Sanding
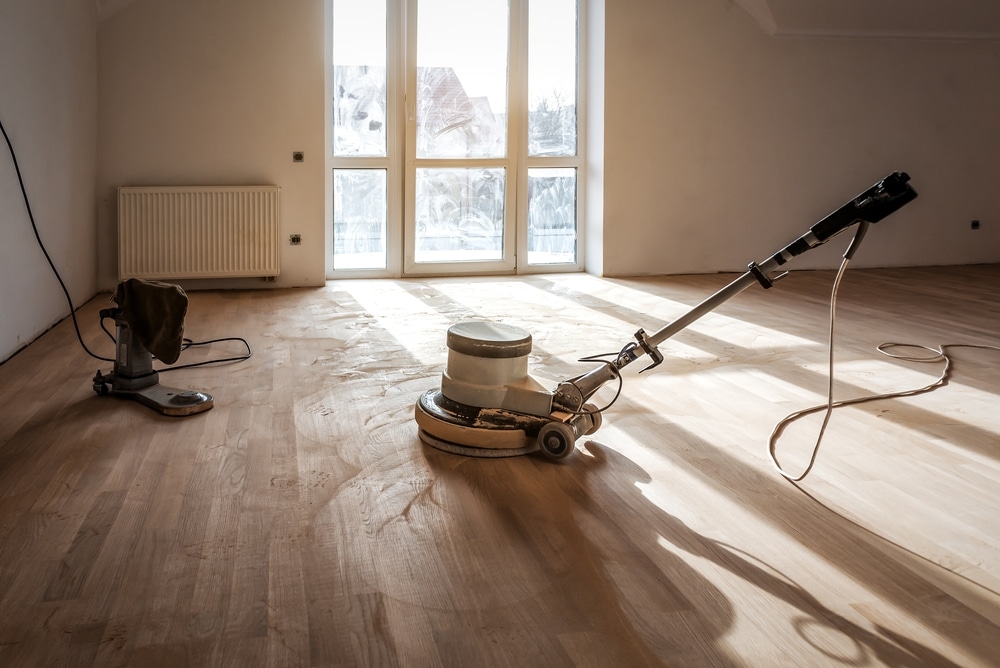
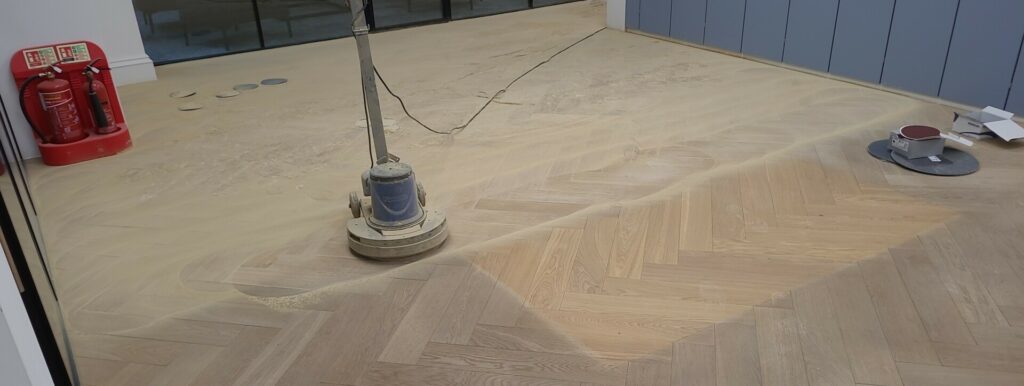
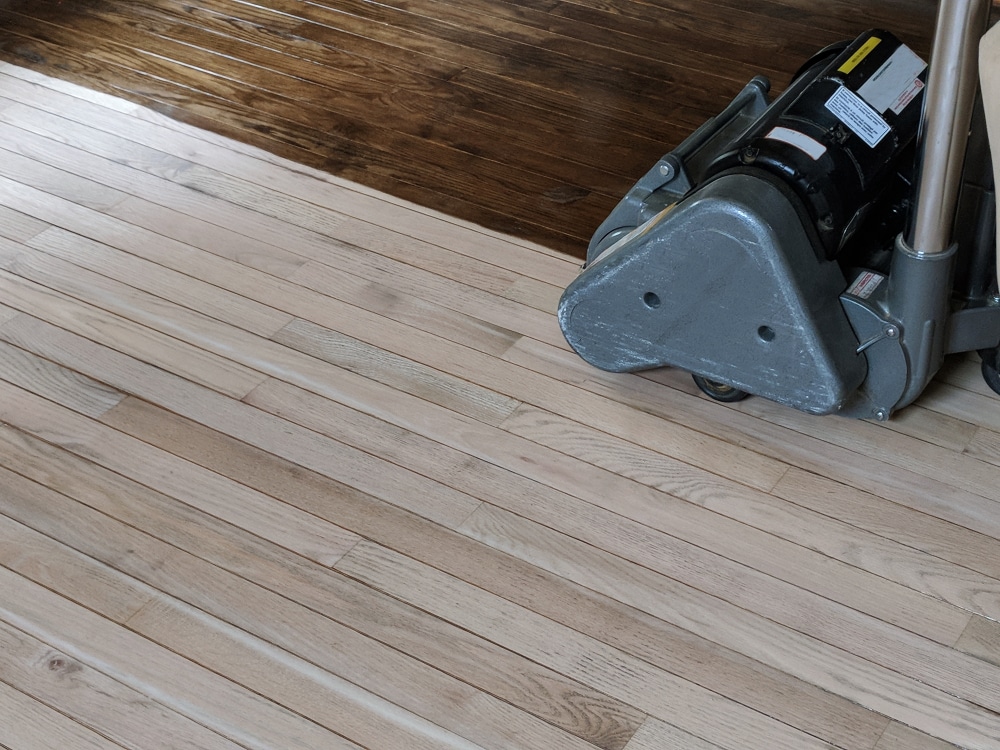
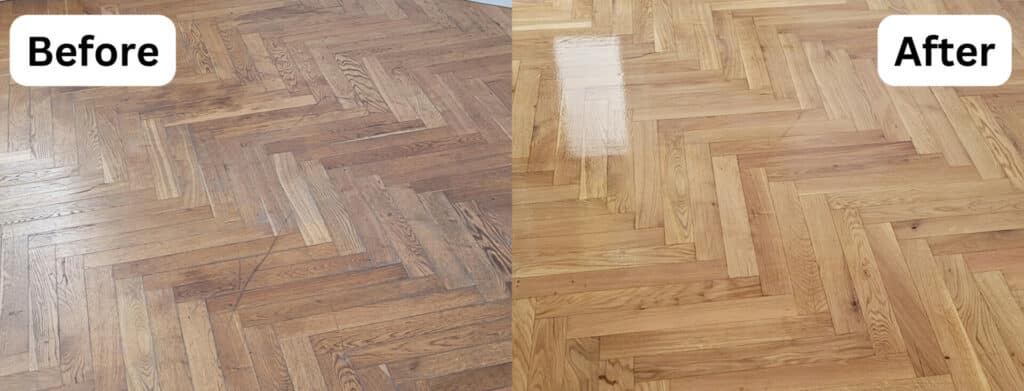
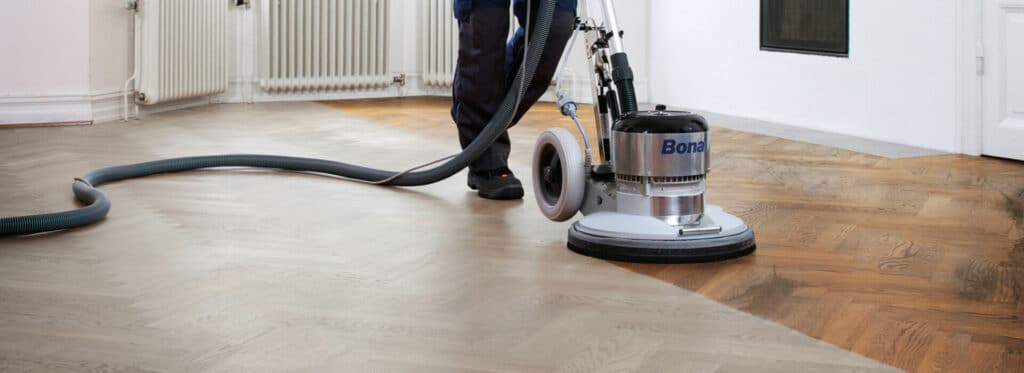
Wood floor sanding is a process used to restore wooden floors to their original glory. Over time, wooden floors can lose their lustre and become scratched, dented, or stained. Sanding removes the top layer of wood, revealing a fresh, new surface beneath. This process not only enhances the appearance of the floor but also provides a smooth, even surface for further treatments like staining or sealing.
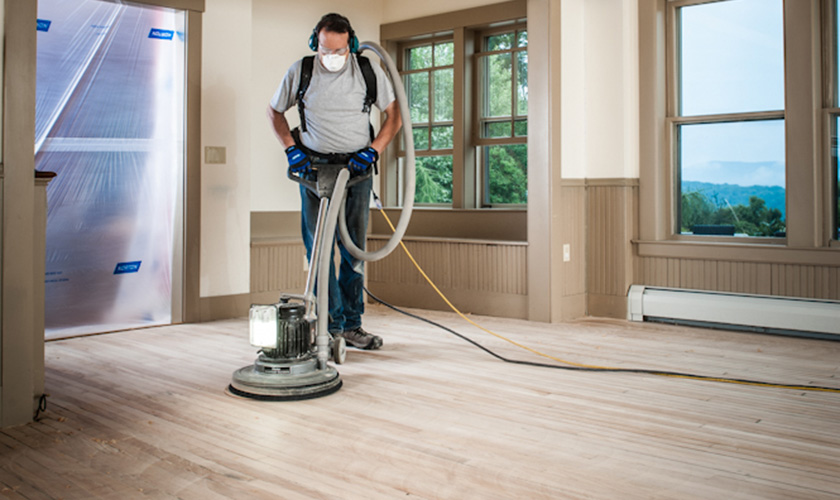
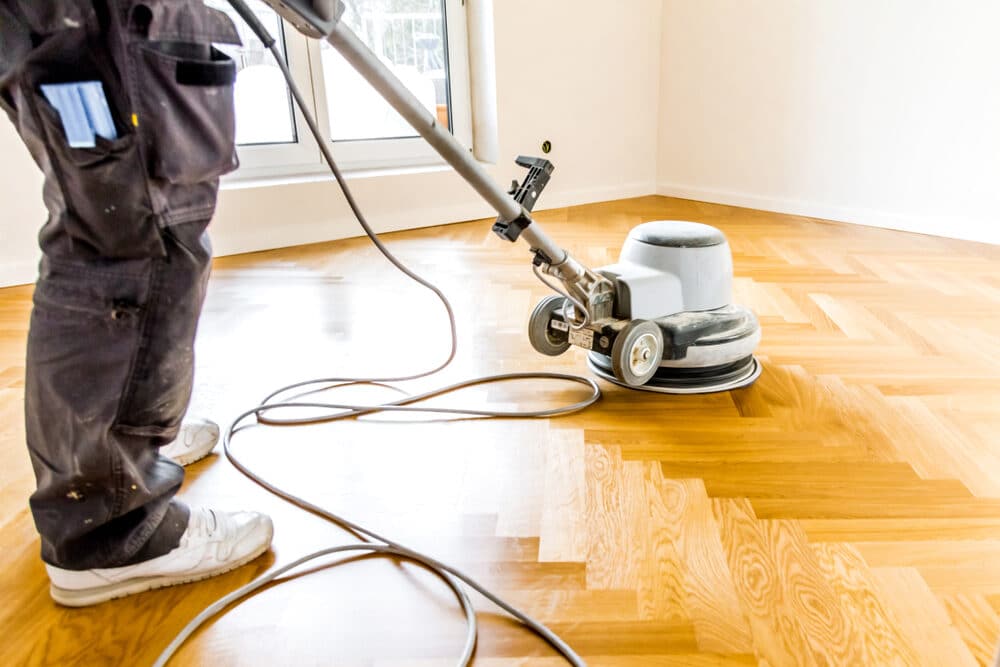
The sanding process typically involves the use of specialised equipment, such as belt sanders, orbital sanders, or drum sanders. Each tool has its own strengths and is suitable for different stages of the sanding process or types of wood flooring. The choice of equipment and sandpaper grit is essential to achieving the desired finish without damaging the floor.
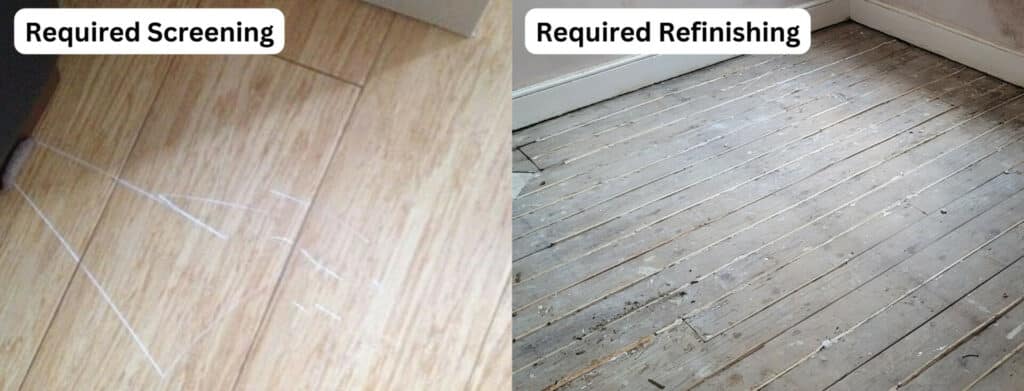
The role of screening in floor sanding
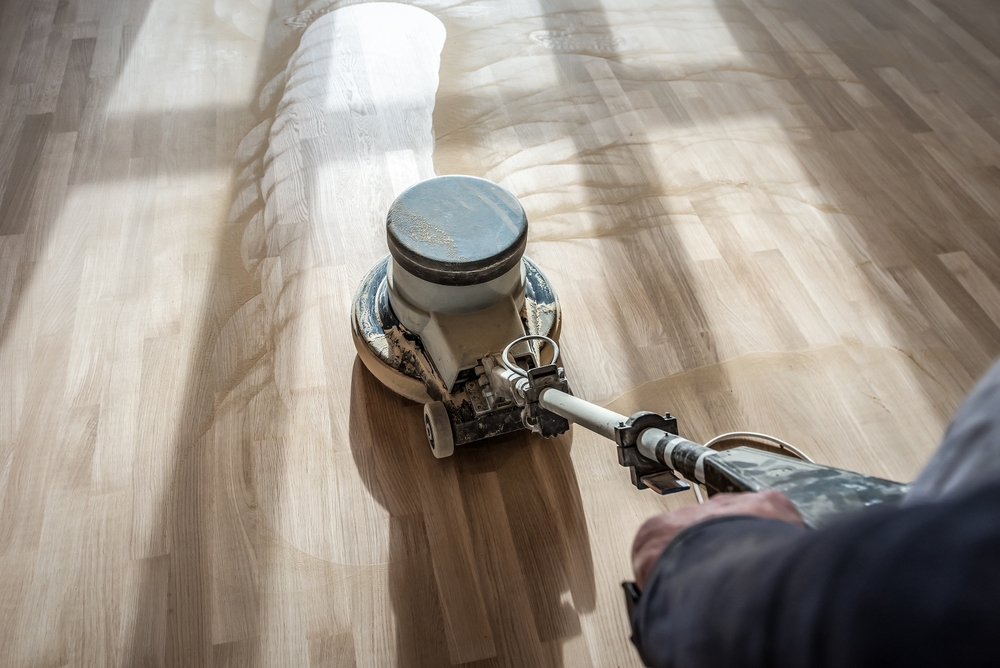
Floor Screening is a less aggressive form of sanding that’s often used as an intermediary or final step in the floor sanding process. Unlike traditional sanding, which removes a significant layer of wood, screening lightly abrades the surface. This technique is particularly useful for smoothing out minor imperfections and preparing the floor for a new coat of finish.
Screening can be an ideal choice for floors that don’t require deep sanding but need refreshing. It’s also a key step when refinishing floors, as it allows the new finish to adhere properly to the existing surface. By using a fine-grade screen, you can achieve a smooth finish that enhances the natural beauty of the wood without the risk of over-sanding.
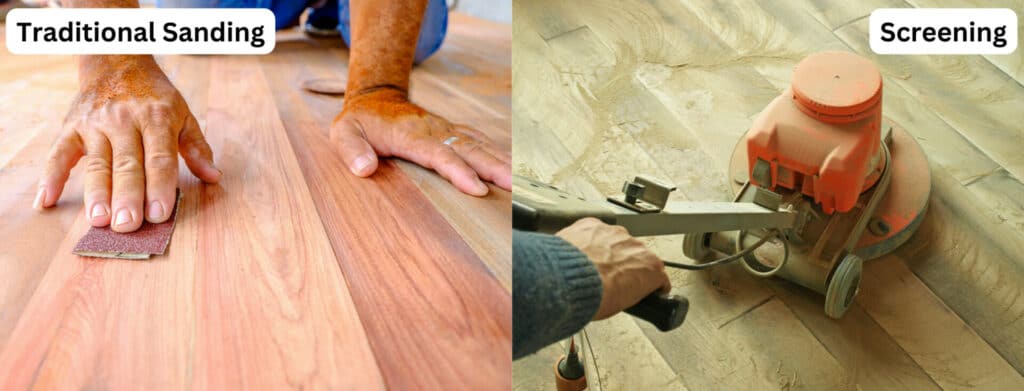
Screening vs. Traditional Sanding Methods
In the realm of floor restoration, both screening and traditional sanding play pivotal roles, but they serve different purposes and yield distinct outcomes. This section delves into the key differences and advantages of each method, helping you decide when to use screening over traditional sanding for your flooring projects.
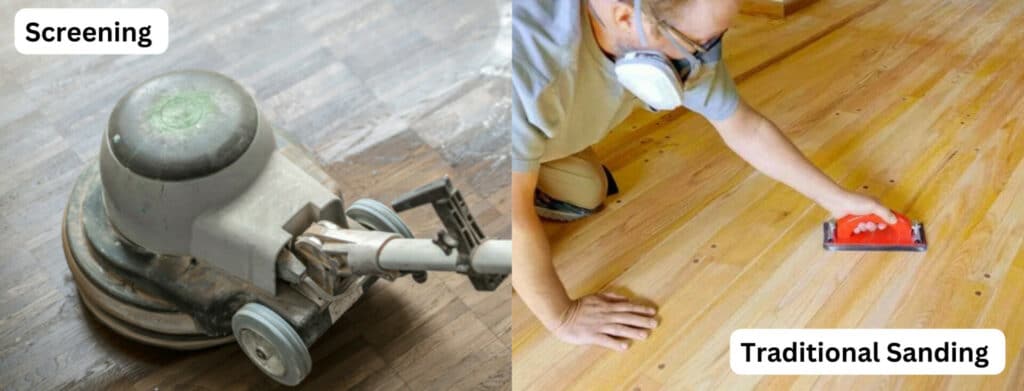
Key Differences and Advantages
Process and Aggressiveness:
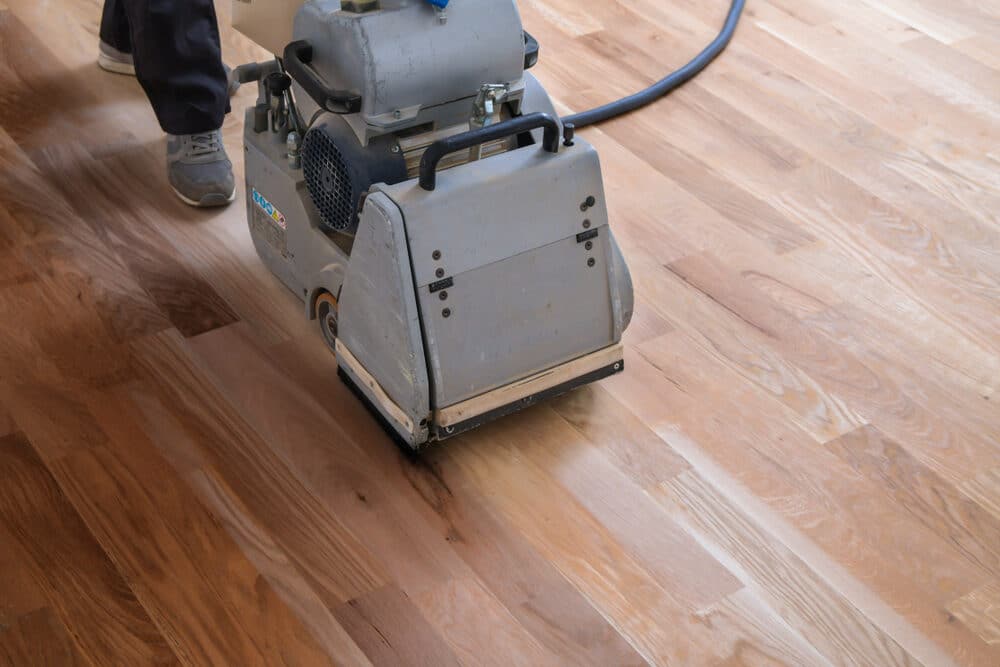
- Traditional Sanding: This method involves removing the top layer of the wood floor using coarse to medium-grit sandpaper. It’s an aggressive technique aimed at eradicating deep scratches, stains, and significant wear and tear. Traditional sanding is the go-to choice for floors that have been severely damaged or haven’t been treated for many years.
- Screening: Conversely, screening is a gentler process. It uses a fine abrasive screen rather than sandpaper. This method is ideal for buffing or lightly abrading the surface of the wood, primarily used to prep the floor for a new finish or to refresh the existing finish without altering the wood’s integrity significantly.
Purpose and suitability:
Traditional Sanding:
It’s best suited for comprehensive floor restoration where the wood requires extensive repair or a complete refinishing. Traditional sanding can effectively remove old finishes, deep scratches, and other significant floor damage.
Screening:
Screening is particularly beneficial for floors that are in relatively good condition but need a touch-up. It’s ideal for routine maintenance, especially when the goal is to apply a new coat of varnish or sealant. Screening can also be used as an intermediate step in a full sanding process to ensure a smoother base for finishing.
When to Use Screening Over Traditional Sanding
- Condition of the Floor: If the floor has minor imperfections or an old finish that needs to be refreshed, screening is preferable. It’s less invasive and preserves more of the wood’s character and history.
- Type of Finish Desired: For floors that need a new coat of polyurethane or similar sealants, screening provides the necessary surface texture for the new finish to adhere properly.
- Frequency of Maintenance: In environments where floors are regularly maintained and do not undergo extreme wear and tear, screening can be a more frequent and less disruptive maintenance technique.
- Time and Cost: Screening is generally a quicker and less labour-intensive process compared to traditional sanding. It’s also less disruptive to the living space, as it produces less dust and noise.
The Process of Screening in Floor Sanding
Screening in floor sanding is a delicate procedure that involves buffing the floor’s surface to prepare it for finishing or to renew its appearance. This section will guide you through the tools and materials required and provide a step-by-step approach to effectively screening your wooden floor.
Tools and Materials Required
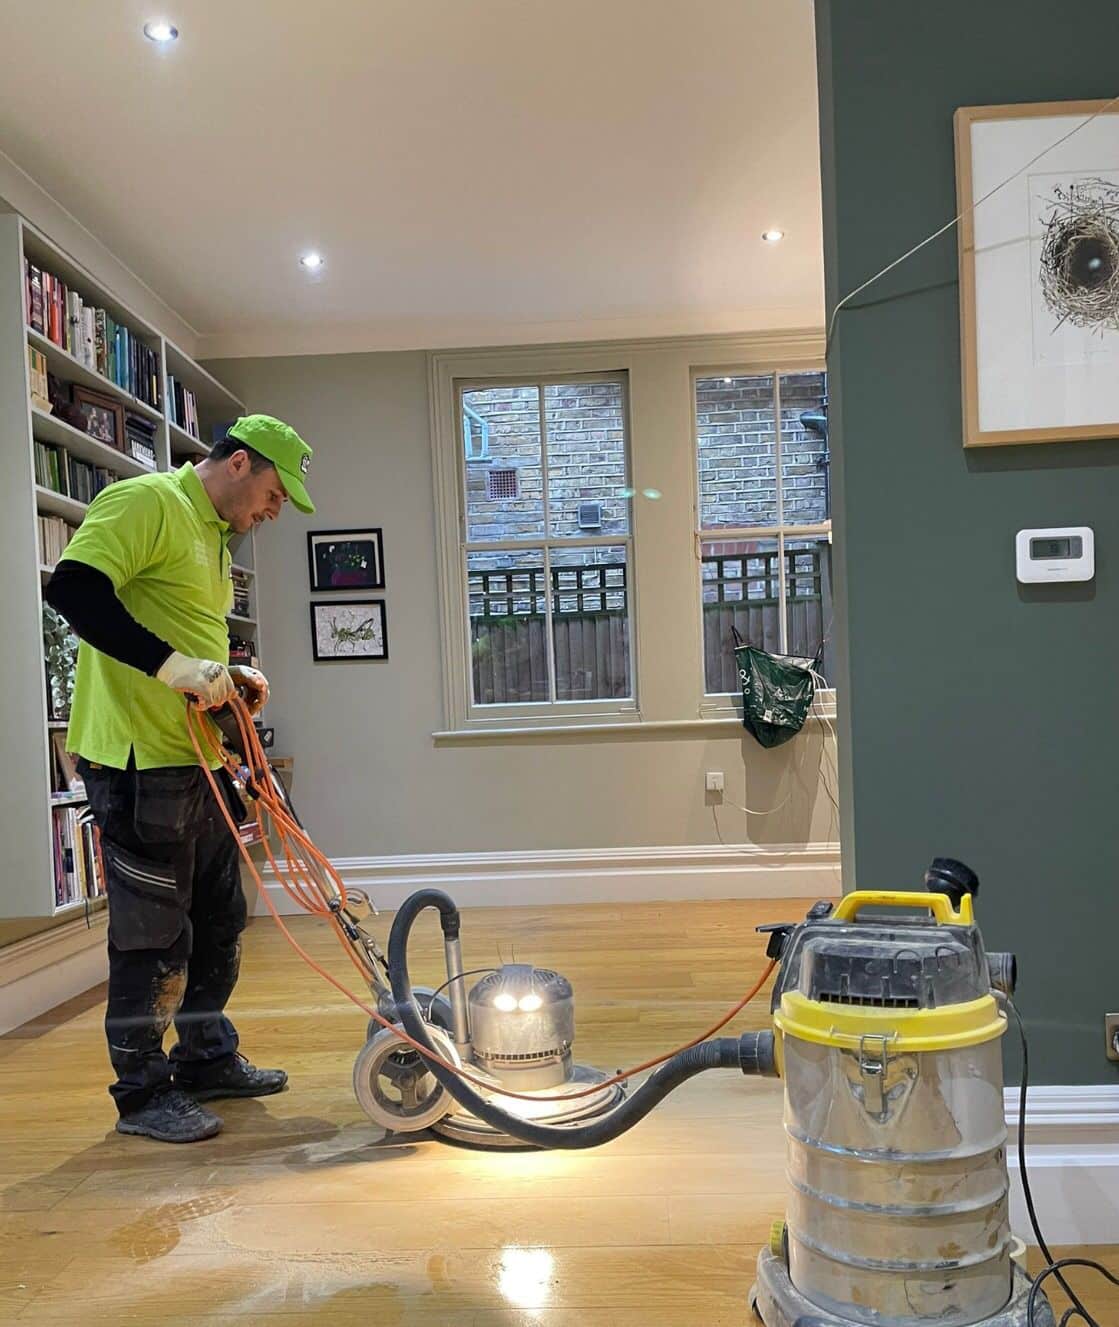
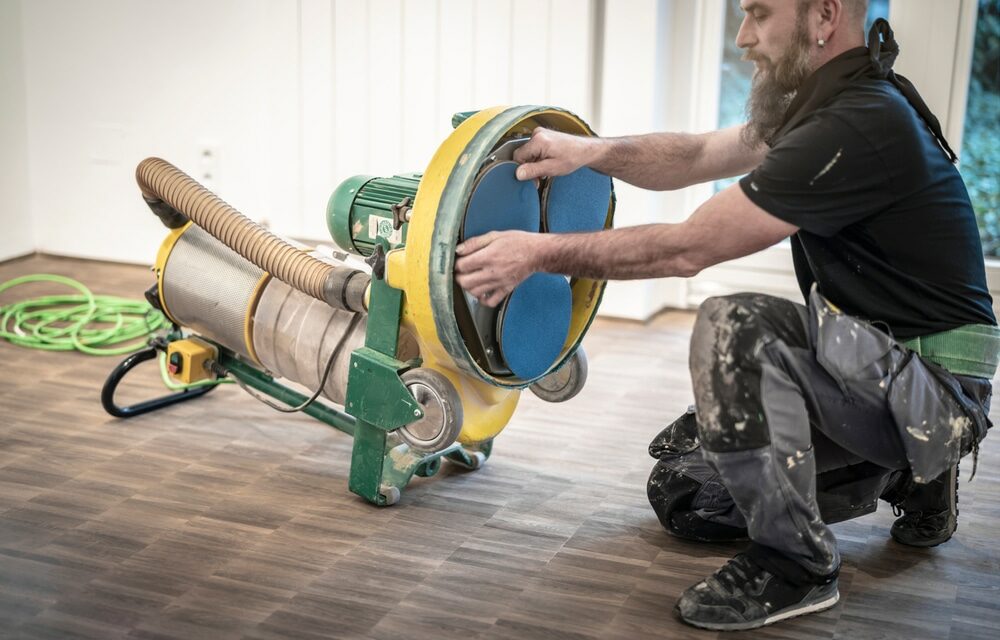
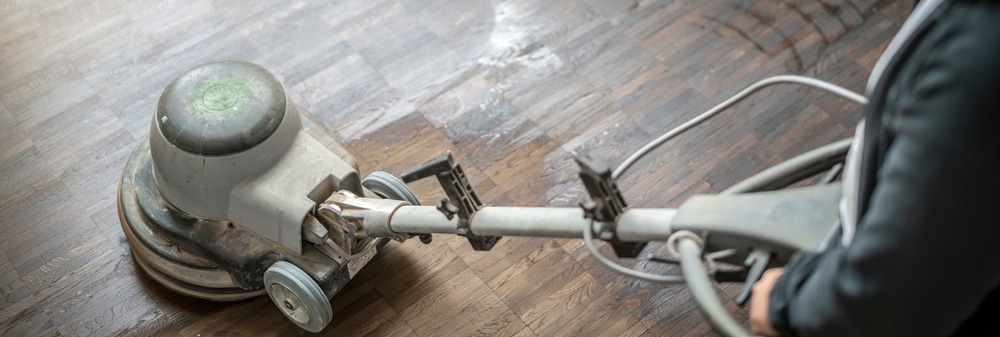
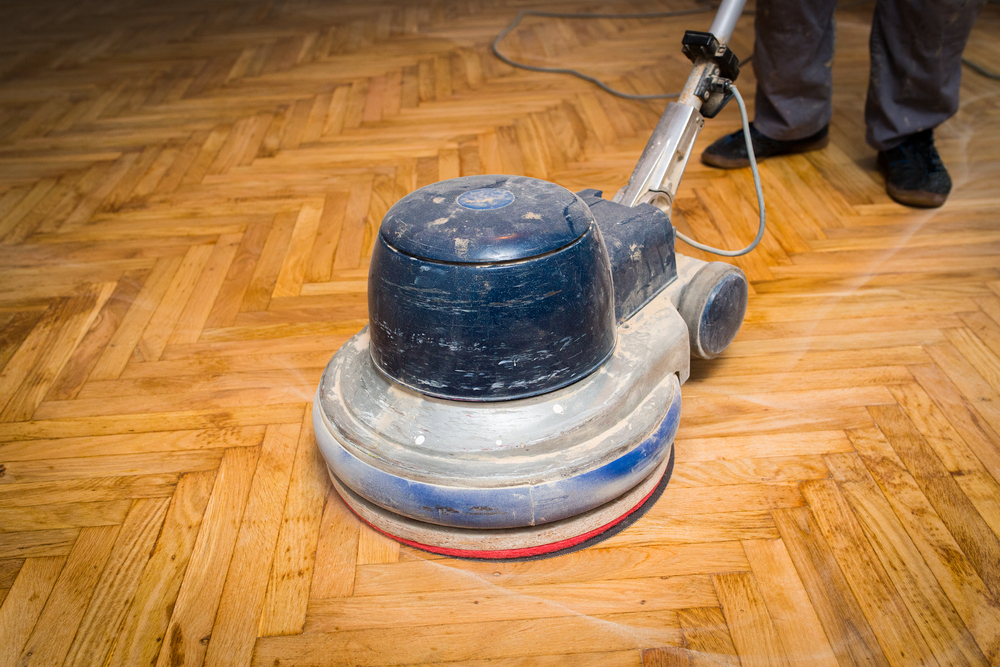
- Floor Buffer: A key tool for screening, the floor buffer spins a circular screening pad or disc at high speeds to gently abrade the floor’s surface.
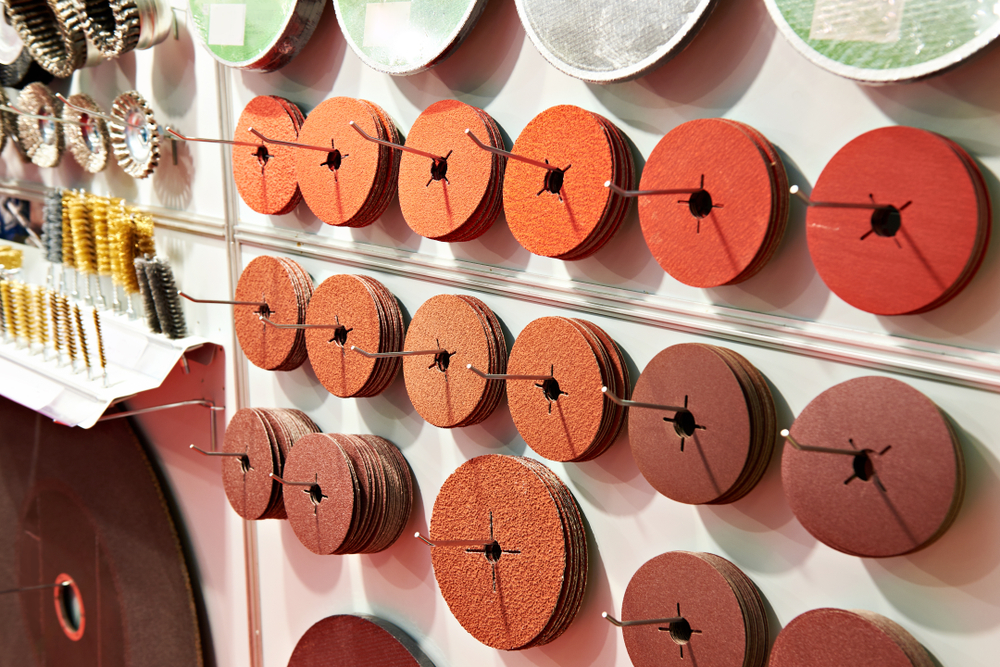
- Screening Discs: These are fine-grit screens, usually ranging from 100 to 150 grit. The grit choice depends on the condition of your floor and the type of finish you plan to apply.
- Dust masks and safety Goggles are essential for personal protection against dust and debris.
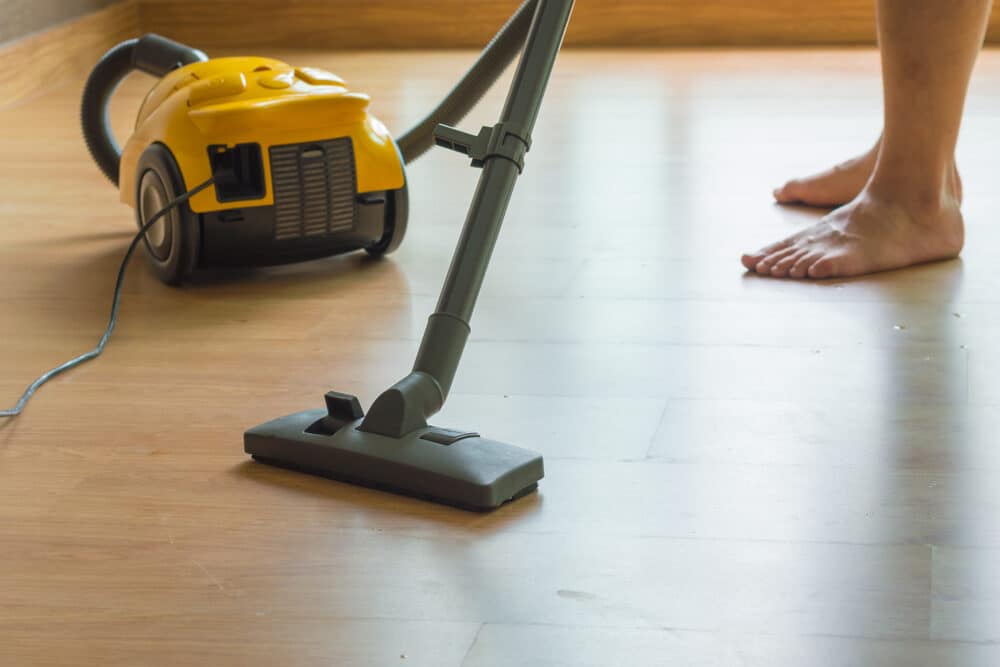
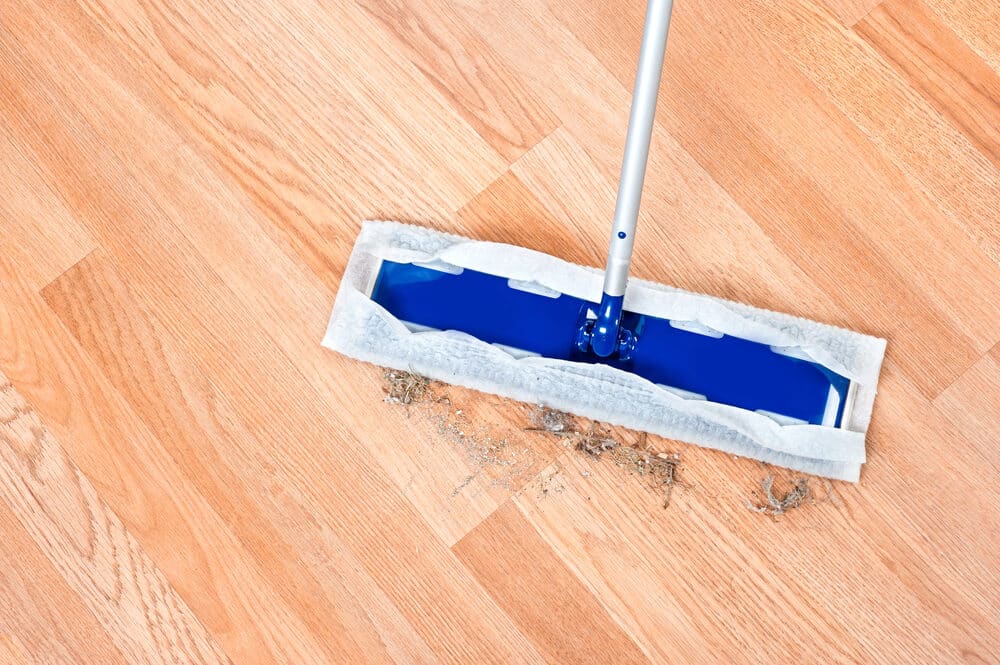
- Vacuum Cleaner: To remove dust after screening.
- Microfiber Cloth or Tack Cloth: For picking up residual dust.
- Hammer and Nail Set: To sink any protruding nails in the floor.
- Ear Protection: Screening machines can be loud, so ear protection is advised.

A Step-by-Step-by-Stepo Effective Screening
Preparation:
- Clear the room of furniture and any other items.
- Use a hammer and nail set to ensure all nails are flush with the floor to prevent tearing the screen.
- Vacuum the floor thoroughly to remove dust and debris.
Safety Measures:
- Put on your dust mask,
- Wear safety goggles
- And Wear ear protection.

Attaching the screening disc:
- Attach the screening disc to the floor buffer. Ensure it’s centred to avoid uneven abrasion.
Screening the floor:
- Start the floor buffer and begin screening the floor. Move in smooth, even motions, going along the grain of the wood.
- Overlap your passes slightly to ensure complete coverage.
- Avoid pressing down too hard or staying in one spot, as this can damage the wood.
Dust Removal:
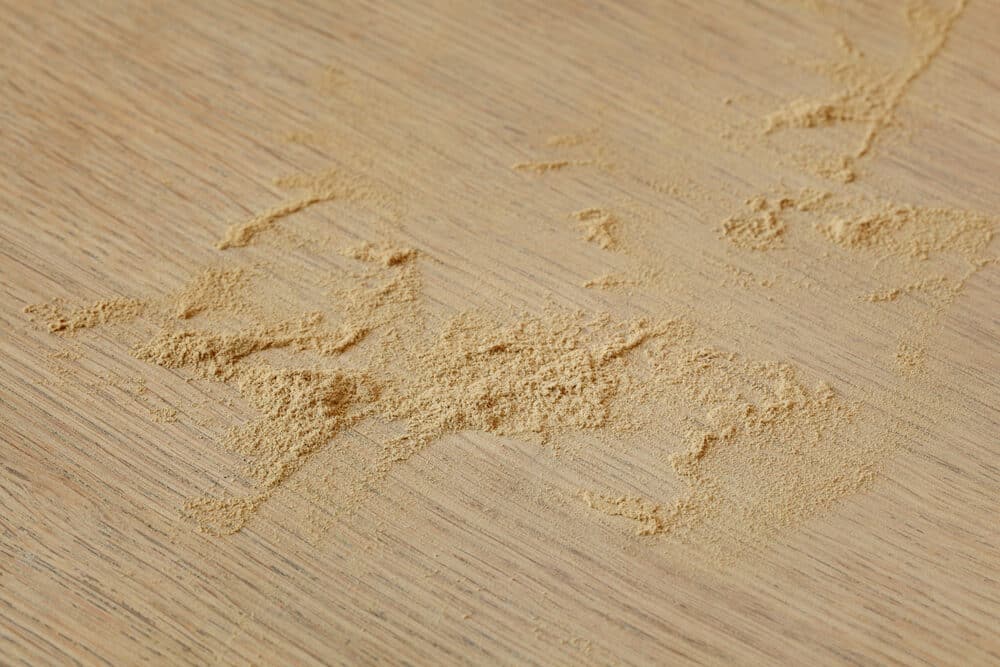
- After screening, thoroughly vacuum the floor to remove all dust.
- Follow up with a microfiber cloth or tack cloth to pick up any lingering dust particles.
Inspection and touch-ups:
- Inspect the floor for any missed spots or uneven areas.
- Perform touch-up screenings as needed.

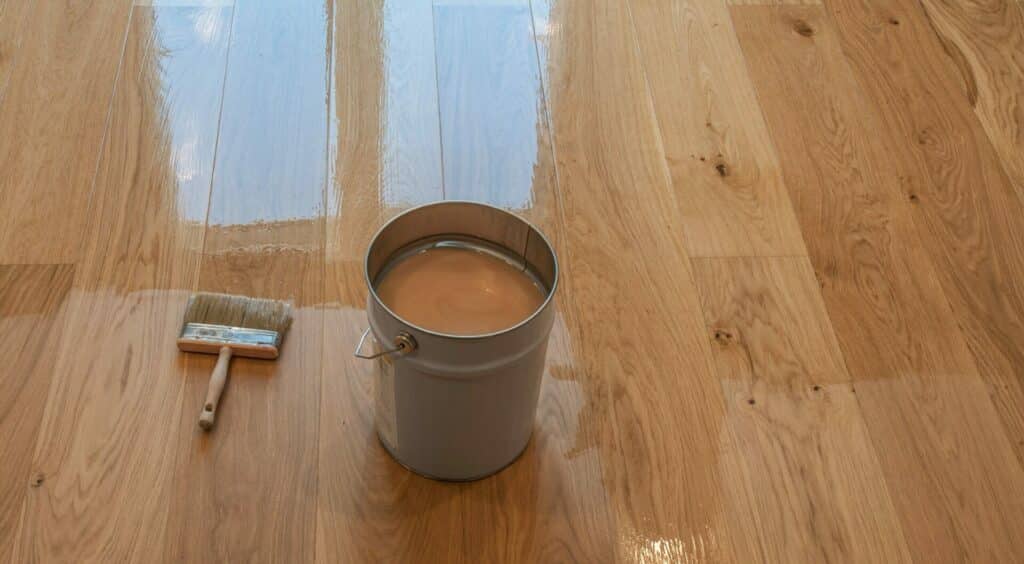
Preparing for finishing:
- Once satisfied with the screening, the floor is ready for the next step, whether it’s applying a new finish or simply enjoying the refreshed look.
Benefits of Screening in Floor Sanding
Screening is a vital technique in the maintenance and restoration of wooden floors. While it’s a less aggressive method than full-scale sanding, it offers several significant benefits that make it an essential part of floor care. Here’s an overview of the key advantages of incorporating screening into your floor sanding process.
Improved Smoothness and Finish Quality:
- Screening smooths out the floor surface, removing minor imperfections such as shallow scratches, scuffs, and marks. This process creates an even, uniform base that is essential for the application of finishes like varnish or sealants. The result is a more refined and aesthetically pleasing finish that enhances the natural beauty of the wood.
Enhanced Durability of Floors:
- Regular screening can significantly extend the life of your wooden floors. By removing only the top layer of the finish and not the wood itself, screening minimises the wear on the floor. This is particularly beneficial for preserving the integrity of old or thin floors that cannot withstand aggressive sanding.
- The process also allows for the application of fresh finishing layers, which protect the wood from damage, spills, and wear, thereby prolonging the floor’s lifespan.
Reduction in Dust and Debris:
- Compared to traditional sanding methods, screening generates significantly less dust. This is a considerable advantage in terms of cleanliness and air quality, making the process more suitable for homes and environments where excessive dust can be a health concern or a nuisance.
- The reduced dust production also makes the cleanup process quicker and easier, minimising the disruption to your home or workplace.
Cost-Effective Maintenance:
- Screening is a cost-effective method for maintaining the appearance and condition of your floors. Since it is less labour-intensive and requires less equipment than full-sanding, it can be done at a lower cost.
- Regular screening can also delay the need for more extensive and expensive restoration processes, such as complete sanding and refinishing.

Flexibility and Convenience:
- Screening is a relatively quick process compared to traditional sanding and refinishing. It can often be completed in a shorter time frame, meaning less downtime for your space.
- The technique is also less disruptive and noisy, making it a more convenient option for busy households or commercial spaces.
Environmental Consideration:
- By removing only a minimal amount of finish, screening is a more environmentally friendly option. It reduces waste and preserves the natural resource, which is particularly important in the case of rare or exotic wood floors.
Common Mistakes to Avoid in Screening
Screening is a crucial step in the floor-sanding process, but it requires careful attention to detail to avoid common pitfalls. Here’s a list of typical mistakes to be aware of and how to avoid them, ensuring a successful and efficient screening process.
Using the Wrong Grit Screen:
- One of the most common errors is selecting a screen that’s either too coarse or too fine for the job. Using a screen that’s too coarse can lead to uneven abrasion and damage the wood, while a screen that’s too fine might not be effective enough to prepare the surface for refinishing. Always choose the appropriate grit based on the condition of your floor and the desired outcome.
Overlooking Floor Imperfections:
- Failing to address protruding nails, deep scratches, or other significant floor damage before screening can result in ineffective screening and potential damage to the screening equipment. Ensure the floor is properly prepped, including sinking any raised nails and filling any significant scratches or gaps.
Inadequate Overlap of Passes:
- Not overlapping passes sufficiently can lead to uneven screening, resulting in a patchy finish. It’s important to slightly overlap each pass with the buffer to ensure complete and consistent coverage of the floor.
Excessive Pressure on the Buffer:
- Applying too much pressure to the floor buffer can cause uneven wear and damage to the floor. Let the weight of the machine do the work, guiding it gently across the floor without forcing it down.
Ignoring Dust Removal:
- Skipping thorough dust removal after screening can lead to a flawed finish when applying the new coat. Vacuum up all the dust after screening and wipe the floor with a tack cloth to remove any residual particles.
Rushing the Process:
- Rushing through the screening process often leads to mistakes and poor-quality results. Take your time to move the buffer evenly and steadily across the floor, ensuring all areas are adequately screened.
Neglecting Equipment Maintenance:
- Using a buffer with worn-out or damaged pads can lead to inefficient screening and potential floor damage. Regularly check and maintain your equipment to ensure it operates effectively.
Not Testing the Technique:
- If you’re new to screening, not practicing or testing the technique on a small, inconspicuous area can lead to errors on a larger scale. Always do a test run to get a feel for the process and to ensure the chosen grit is appropriate.
Failing to Seal or Finish After Screening:
- Skipping the sealing or finishing step after screening exposes the wood to damage and wear. Ensure that a proper sealant or finish is applied after screening to protect the floor and enhance its appearance.
Lack of Safety Precautions:
- Neglecting personal safety measures, such as not wearing a dust mask or safety goggles, can lead to health hazards. Always prioritize safety when performing any kind of floor work.

Conclusion
In summary, the process of floor sanding, and particularly the technique of screening, plays a pivotal role in the maintenance and restoration of wooden floors. Through this blog post, we’ve explored various aspects of floor sanding, emphasizing the importance of screening as a less aggressive yet highly effective method for preparing floors for finishing or refreshing their existing finish.
Floor screening offers a multitude of benefits over traditional sanding methods. It ensures a smoother finish, enhances the durability of the floor, and is a more environmentally friendly approach due to its minimalistic nature. Moreover, screening is a cost-effective and time-efficient method, making it an ideal choice for routine floor maintenance.
However, as with any skilled technique, there are pitfalls to avoid. Common mistakes, such as using the wrong grit screen, overlooking floor imperfections, or failing to remove dust adequately, can impact the quality of the outcome. Awareness and avoidance of these errors are crucial for achieving the best results.
In conclusion, whether you are a professional floor restorer or a DIY enthusiast, understanding the nuances of screening in floor sanding is essential. It’s a skill that, when executed properly, can significantly enhance the appearance and longevity of wooden floors, adding value and beauty to any space. As we move forward in the world of floor restoration, techniques like screening continue to stand out for their efficiency and effectiveness, ensuring that the charm and character of wooden floors are preserved for generations to come.
Remember, a well-maintained wooden floor is not just a part of your home; it’s a piece of history under your feet, telling its own unique story. By embracing the right techniques in floor sanding and screening, you contribute to preserving this narrative in its most beautiful form.

Get more floor restoration advice…

Sanding
We provide virtually dust-free sanding with our continuous belt machinery with mobile extraction units, giving you a safer environment for your family.
Oiling
This organic finish not only adds beauty to your home but also has exceptional water-repellent characteristics, making it easier to clean and maintain.
Waxing
This natural floor finish offers the softest and most mellow appearance – and leaves your floor able to breath.
Buffing
Using soft buffing machines (and hand-polishing where required) will bring a wonderful sheen to your newly-finished floor.
Repairs
We offer a full assessment of your wooden floors to determine what repairs are needed to provide the perfect working surface for the later stages of sanding, staining and sealing.
Restoration
We offer a comprehensive restoration process designed to address floors that are improperly fitted or damaged over time through wear and tear.
Request a fixed price quote for your wood floor restoration now
Simply enter your postcode below to get started.
Services
Wood Floor Sanding Wood Floor Restoration Wood Floor Scratch Repair Squeaky Wood Floor Repair Parquet Floor Sanding Parquet Floor Restoration Commercial Floor Sanding Church Floor Sanding Community Centre Floor Sanding School Floor Sanding Gap Filling Gap Filling with ResinCopyright © Mr Sander®
Privacy & Cookies Terms & Conditions Complaints Procedure Cancellation Rights Sitemap

Get An Instant Price Estimate Before You Go…
Simply enter the rooms you need sanded and we’ll provide you with a price estimate instantly! Try our price calculator now.
Get a Price Estimate NowLocal Floor Sanding Experts
Over 500 5-Star Reviews
Safe, Dust Free Sanding
Operating Since 1994