London:
Nationwide:
25,000+
Floors Restored
27 Years Experience
Wood Flooring Association Certified
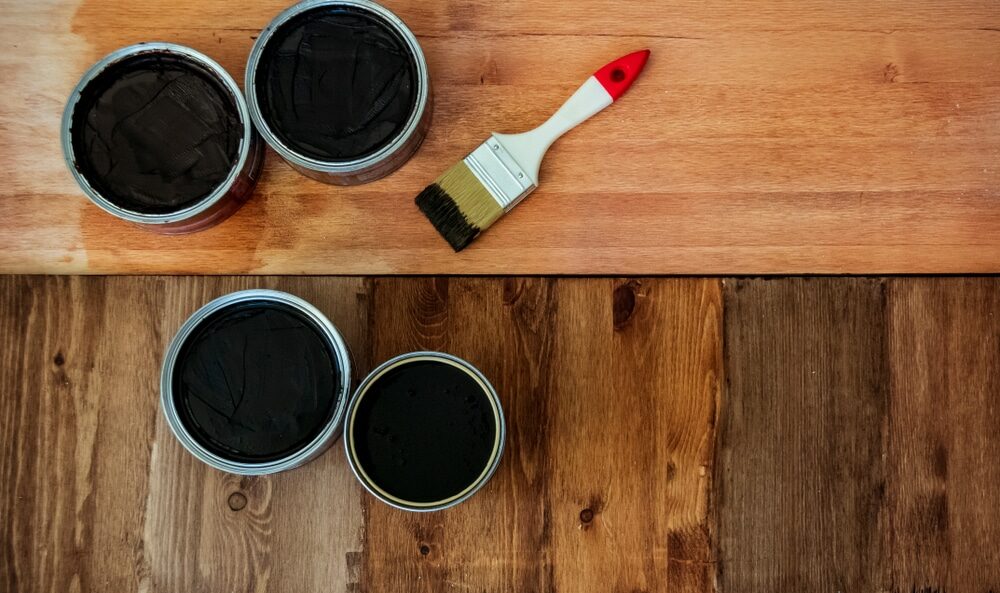
Do You Need to Strip Your Deck Before Restaining?
Posted on January 8, 2024
Deck Maintenance
Is Deck Stripping Necessary Before Restaining?
Decks are more than just wooden extensions of your home; they are outdoor sanctuaries, places where you can unwind, entertain, and enjoy the beauty of nature. However, to keep your deck in prime condition, maintenance of your deck is key. Over time, exposure to the elements can take a toll on the wood, causing it to fade, crack, and lose its luster. This is where restaining comes into play, rejuvenating your deck’s appearance and protecting it from further damage.
But before you rush into restaining, an important question looms: Do you need to strip your deck before applying a fresh coat of stain? In this comprehensive guide, we will explore the ins and outs of deck maintenance, the reasons behind stripping, and when you can skip this step. By the end, you’ll have the knowledge to make an informed decision and ensure your deck remains a beautiful and inviting outdoor retreat.
Understanding the Current State of Your Deck
Before diving into the decision of whether or not to strip your deck before restaining, it’s crucial to start with a thorough evaluation of your deck’s current condition. Your deck’s health and appearance will largely dictate the steps you need to take to restore it effectively. Here’s what you need to consider:
1. Assessing the Condition of Your Deck’s Finish:
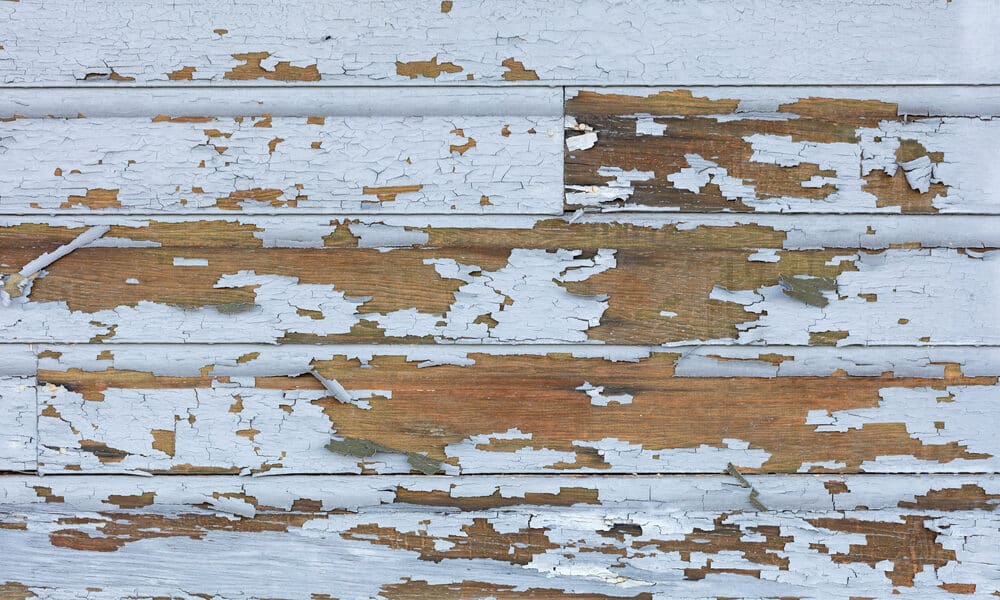
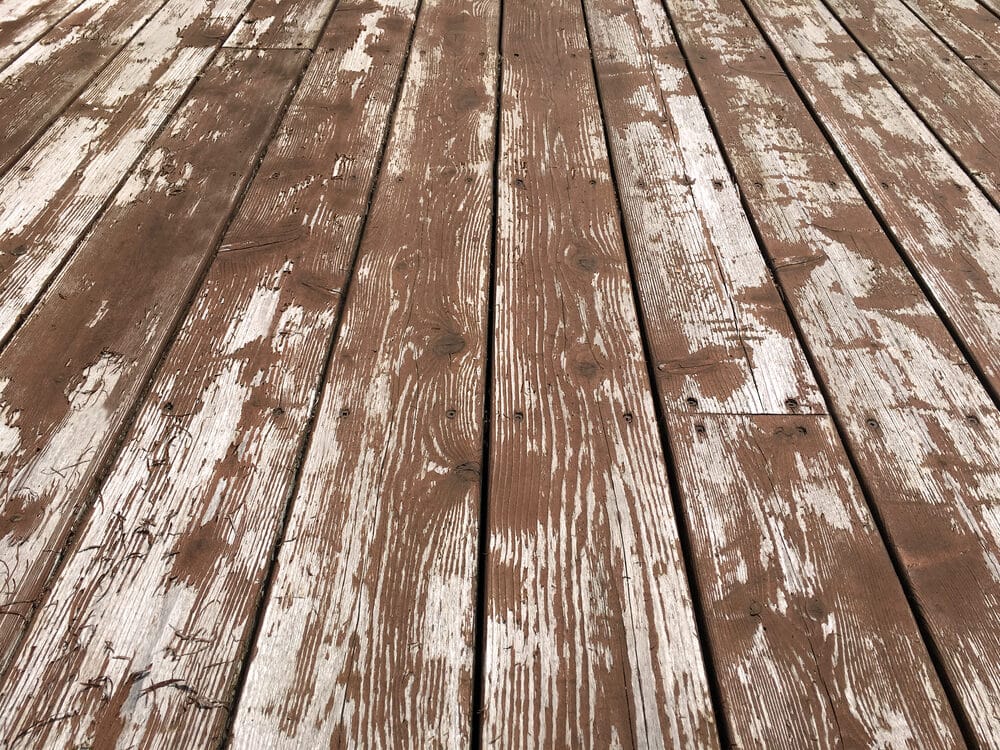
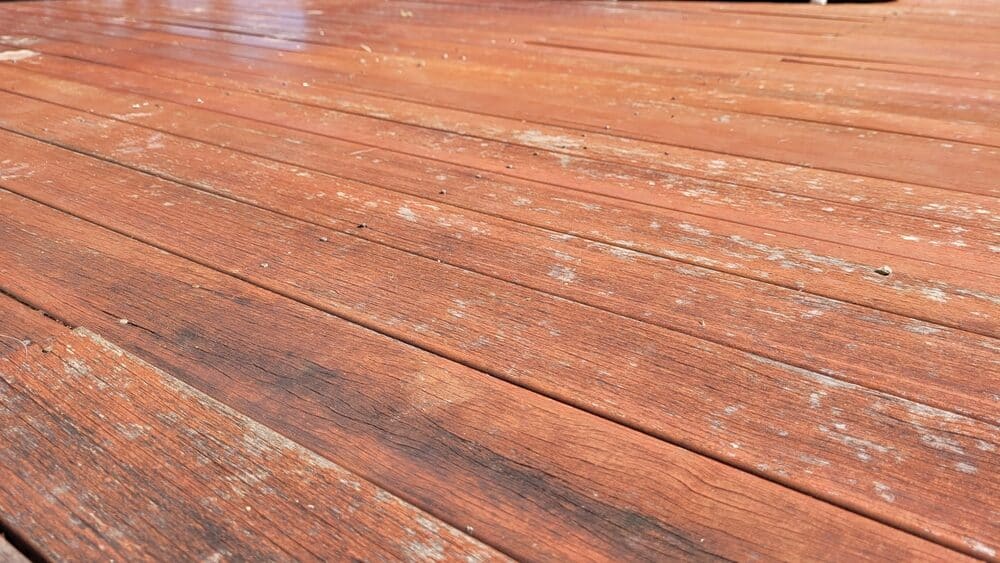
Begin by closely examining the existing finish on your deck. Look for signs of wear and tear, such as peeling, cracking, or flaking. These issues can indicate that your deck’s current finish is failing and needs attention.
2. Identifying Signs of Wear and Damage:
Beyond the finish, inspect the wood itself. Check for any visible signs of damage, including rot, splintering, or warping. Pay special attention to areas that are exposed to direct sunlight or prone to moisture, as they are more likely to show wear.
3. Checking for Mold and Mildew:
Look for the presence of mold or mildew on the deck’s surface. These growths can not only mar the appearance but also compromise the structural integrity of the wood. Proper treatment may be necessary to address this issue.
4. Evaluating Previous Stain or Coating:
Determine whether your deck has been stained or coated before, and if so, with what type of product. Different coatings may require different approaches when it comes to preparation and restoration.
By taking the time to assess your deck’s current state, you’ll gain valuable insights into whether stripping is necessary as well as the overall condition of your deck’s wood and finish. Armed with this knowledge, you can make a more informed decision on how to proceed with your deck restoration project.
Reasons to Strip Your Deck Before Restaining
Stripping your deck before applying a fresh coat of stain can significantly impact the outcome of your restoration project. While it may seem like an additional step, there are several compelling reasons why stripping is often recommended:
1. Remove Old Finish:
Over time, the existing finish on your deck can become worn, cracked, or discolored. Stripping allows you to completely remove the old finish, creating a clean canvas for the new stain. This ensures better adhesion and a more uniform appearance.
2. Enhance Stain Penetration:
Stripping opens up the wood’s pores by removing the previous finish, allowing the new stain to penetrate deeper. This results in a longer-lasting and more vibrant finish that can better withstand the elements.
3. Address Uneven or Patchy Staining:
If your deck has experienced uneven wear or staining in the past, stripping can help level the playing field. It removes any remnants of the old stain, providing a consistent surface for the new application.
4. Prevent Future Peeling or Flaking:
Staining over an old, failing finish can lead to premature peeling or flaking of the new stain. Stripping eliminates this risk by ensuring a strong bond between the wood and the fresh stain.
5. Correct Previous Mistakes:
If you’ve used the wrong type of stain or coating in the past, stripping can rectify the mistake. It allows you to start anew with the correct product for your deck’s specific needs.
6. Improve Longevity:
Stripping, followed by proper staining and sealing, can significantly extend the lifespan of your deck. By investing time in the stripping process, you’re investing in the long-term durability and beauty of your outdoor space.
7. Enhance Aesthetic Results:
Ultimately, a stripped deck serves as a blank canvas for your desired stain color and finish. This results in a more aesthetically pleasing and professional-looking outcome.
While stripping may require additional effort and time, the benefits it offers in terms of improved adhesion, longevity, and appearance make it a valuable step in the deck restoration process, especially when your deck’s existing finish is in poor condition.
Situations Where Stripping May Not Be Required
While stripping your deck before restaining is often recommended for optimal results, there are situations where you may be able to skip this step without compromising the quality of your deck restoration project. Here are some scenarios where stripping may not be required:
1. Recently Stained Deck:
If your deck was stained within the last year or two and the finish is still in good condition, you may not need to strip it. In such cases, a thorough cleaning, sanding, and a fresh coat of stain may be sufficient to revitalize the appearance.
2. Minimal Wear and Tear:
Decks that have seen minimal wear and are not exposed to harsh weather conditions may not require stripping. If the wood surface is in good shape and the old stain is still intact, a light sanding and cleaning may be enough before applying a new coat of stain.
3. Same Stain Type:
When you plan to use the same type of stain or coating that is currently on your deck and the previous application is still intact, you can often proceed with a maintenance coat without stripping. This is known as a “refresh” or “maintenance coat” and helps extend the life of the existing finish.
4. Touch-Up or Spot Treatment:
If there are only specific areas of your deck that require attention, such as minor stains or damage, you can opt for spot treatments instead of stripping the entire deck. This can save time and effort while addressing localized issues.
5. Using a Deck Overcoating Product:
Some specialized deck overcoating products are designed to be applied over existing finishes, even if they are weathered. These products are formulated to adhere well to old coatings, making stripping unnecessary in certain cases.
6. Preference for a Weathered Look:
If you prefer a weathered or rustic look for your deck, you may choose not to strip the old finish. Simply clean the surface and apply a clear sealer or weathered stain to maintain the desired appearance.
7. Time Constraints:
Stripping a deck can be a labor-intensive process, and you may have time constraints or other limitations. In such cases, you can opt for a less intensive approach, like thorough cleaning and sanding, to prepare the surface for a new coat of stain.
While skipping the stripping step can be appropriate in these situations, it’s essential to assess your deck’s specific condition and your goals for the restoration project. If you have any doubts about whether stripping is necessary, consulting with a professional or seeking expert advice can help you make an informed decision.
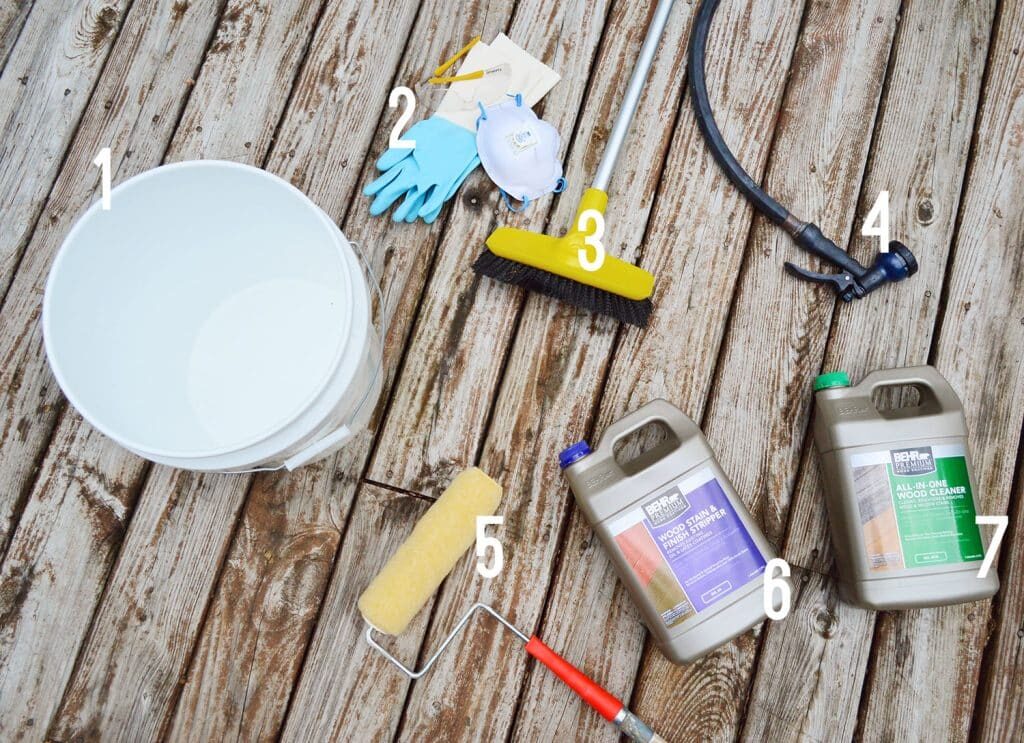
Materials and Tools Needed for Stripping
Before you begin the process of stripping your deck, it’s essential to gather all the necessary materials and tools to ensure a smooth and effective operation. Here’s a list of what you’ll need:
Materials:
Deck Stripper or Stain Remover,Safety Gear, Safety glasses, Rubber gloves, Respirator or mask, Plastic Sheeting or Tarps, Scrub Brushes, Paint Scraper or Putty Knife, Buckets, Pressure Washer or Hose and Deck Cleaner.
Tools:
Extension Cord, Sanding Equipment, Safety Step Ladder, Bucket or Garden Sprayer, Drop Cloths, Disposable Rags or Towels, Trash Bags, Protective Clothing, Stir Stick and Goggles.
Ensure that you have all these materials and tools ready before you start the deck stripping process. Following the manufacturer’s instructions for the deck stripper is crucial to ensuring a successful and safe stripping operation.
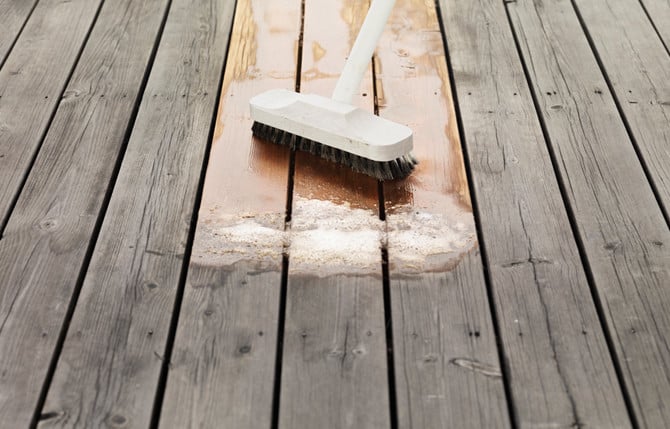
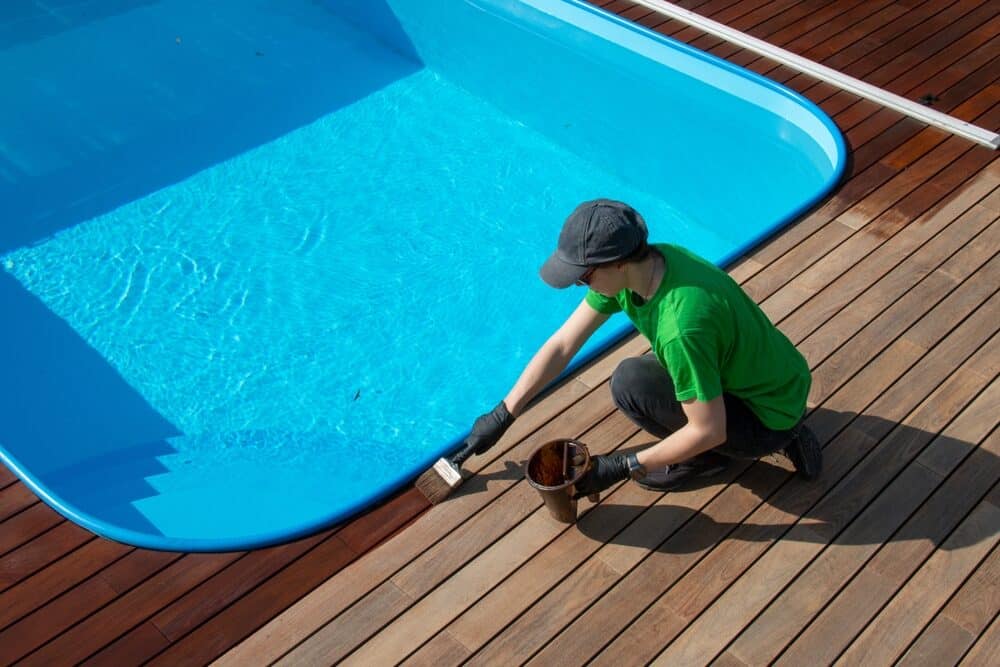
Steps to Strip Your Deck
Stripping your deck is a crucial step in the deck restoration process, as it prepares the surface for a fresh coat of stain. Here’s a step-by-step guide on how to strip your deck effectively:
Step 1: Gather materials and safety gear.
- Assemble all the materials and tools listed in the previous section.
- Put on safety gear, including safety glasses, rubber gloves, and a respirator or mask, to protect yourself from fumes and chemicals.

Step 2: Prepare the deck
- Sweep or brush the deck to remove loose debris, leaves, and dirt.
- Cover nearby plants, shrubs, and surfaces with plastic sheeting or tarps to protect them from the stripper and debris.
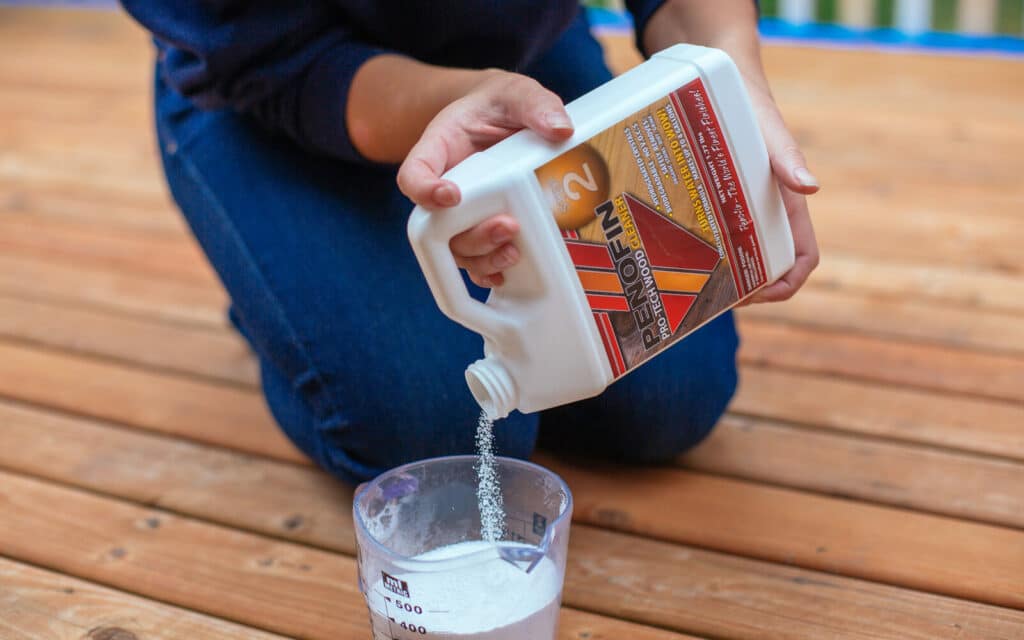
Step 3: Mix the deck stripper
- Follow the manufacturer’s instructions on the deck stripper container to prepare the solution. Some strippers come in concentrated form and need to be mixed with water.
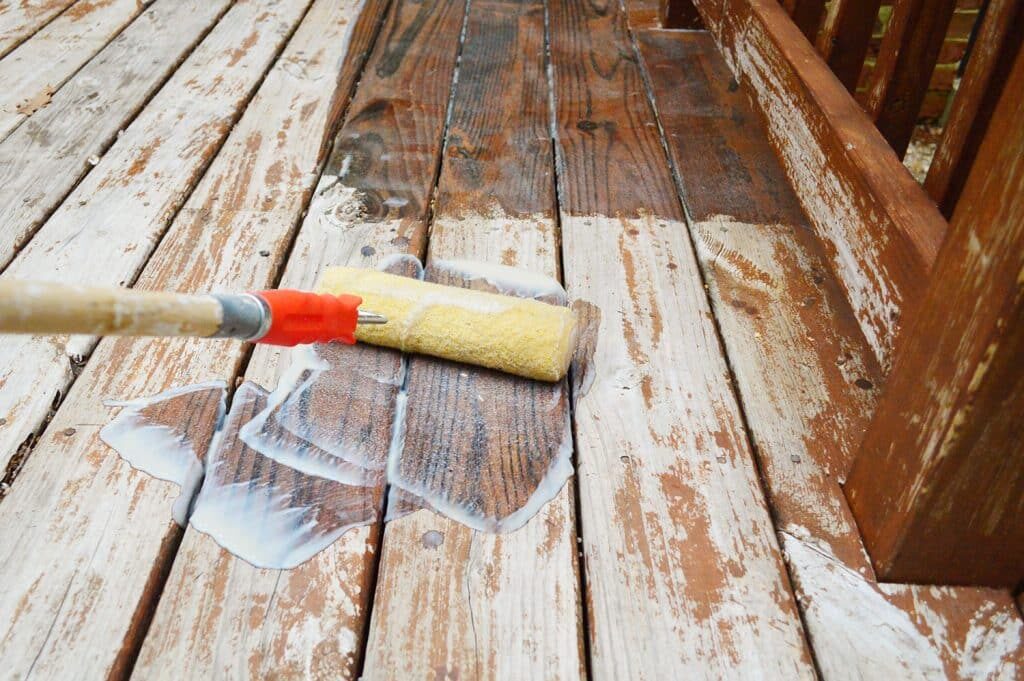
Step 4: Apply the stripper.
- Using a paintbrush, roller, or garden sprayer, apply the deck stripper evenly to a manageable section of your deck.
- Work in one section at a time to prevent the stripper from drying before you have a chance to scrub it.
Step 5: Allow Dwell Time
- Let the stripper sit on the deck for the recommended dwell time specified on the product label. This usually ranges from 15 to 30 minutes, but can vary depending on the brand.
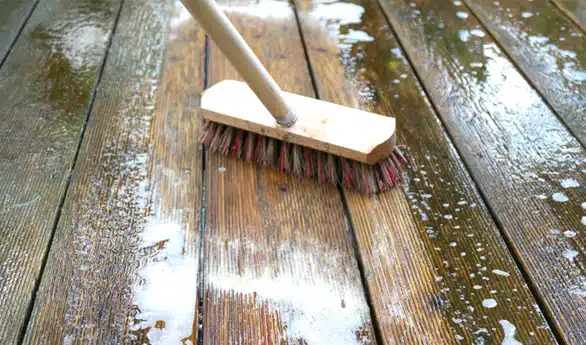
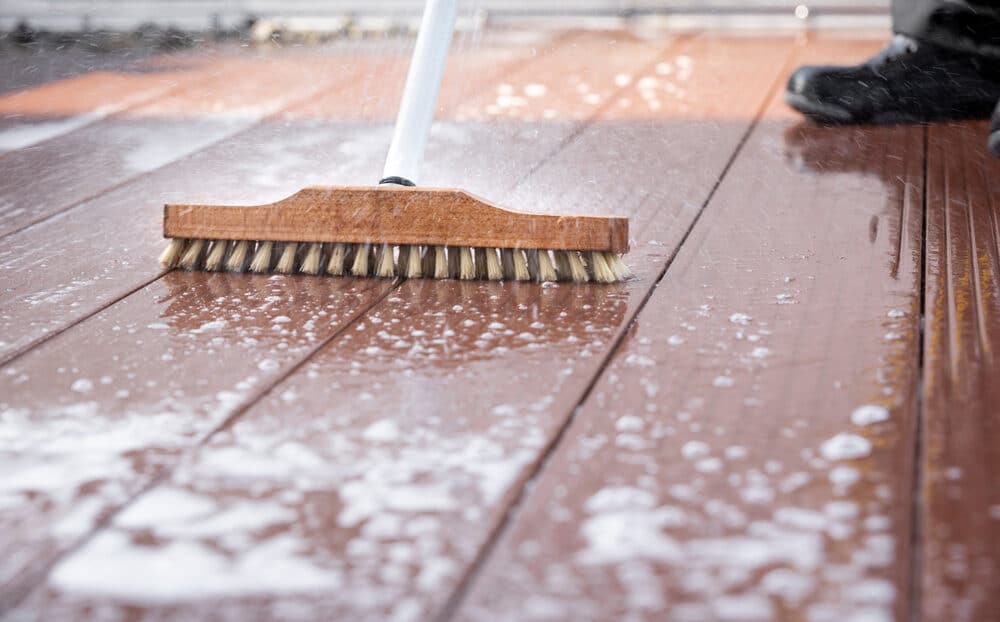
Step 6: Scrub the Deck
- Use a stiff-bristle scrub brush, deck scrubber, or a power washer with a low-pressure nozzle to scrub the deck’s surface.
- Scrub in the direction of the wood grain to avoid damaging the wood fibers.
- Pay special attention to areas with an old finish, stains, or discoloration.
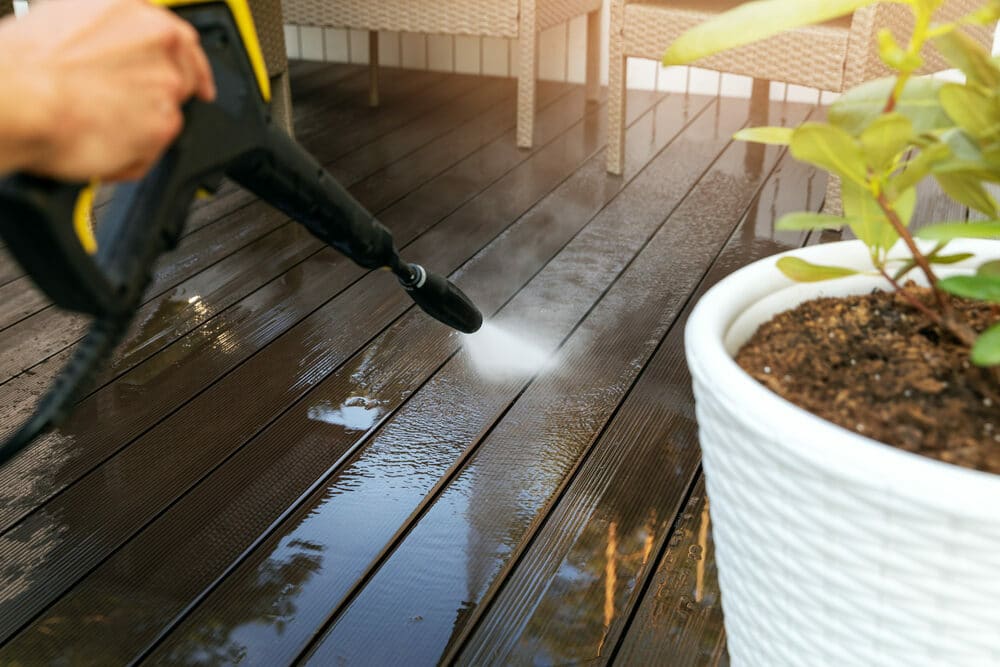
Step 7: Rinse off the stripper.
- Rinse the deck thoroughly using a pressure washer or a garden hose with a high-pressure nozzle. Start from the highest point and work your way down to prevent streaks.
- Ensure that all stripper residue is removed, leaving the wood clean and free from chemicals.
Step 8: Repeat as Needed
- Depending on the condition of your deck and the effectiveness of the stripper, you may need to repeat the stripping process for stubborn areas or heavy coatings.
Step 9: Allow the deck to dry.
- Let the deck dry completely. This may take a day or more, depending on the weather conditions.
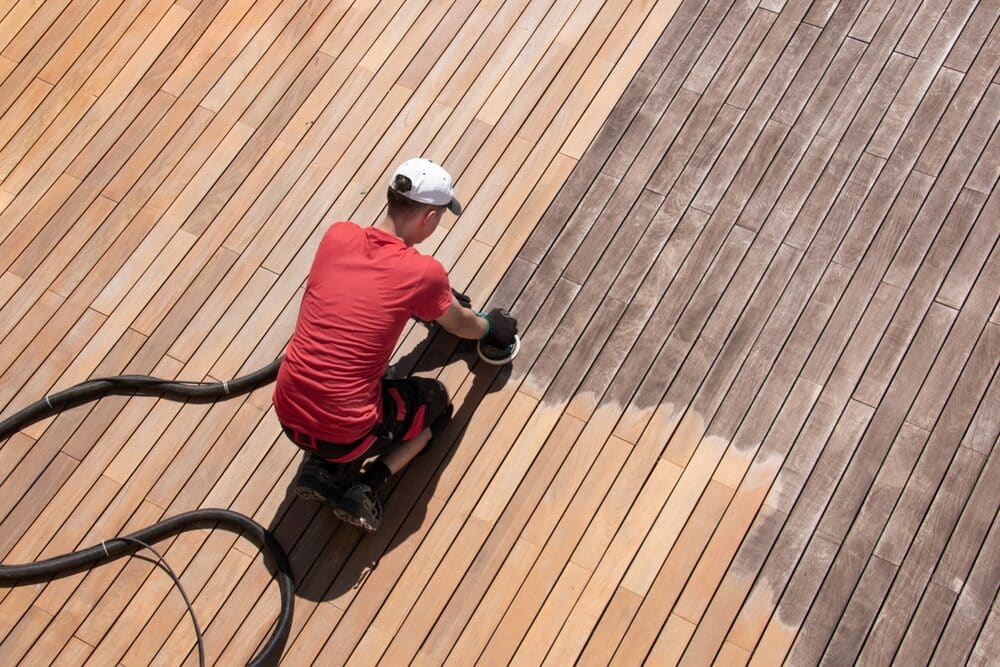
Step 10: Sand if Necessary
- After the deck is dry, inspect the surface for any rough spots, splinters, or remaining old finish.
- Use sandpaper, sanding blocks, or a power sander to smooth the wood surface as needed.
Step 11: Clean up
- Dispose of any used materials, such as old rags, brushes, and waste, in trash bags.
- Remove the plastic sheeting or tarps from surrounding areas and dispose of them properly.
Step 12: Proceed with staining
- With your deck now stripped and prepared, you can proceed with staining or sealing it according to your chosen product’s instructions.
Remember that safety is paramount when working with deck strippers and chemicals. Follow all safety precautions outlined on the product label, and ensure adequate ventilation during the stripping process. Additionally, consider the weather conditions, as it’s best to tackle this project on a dry, non-windy day to minimize potential complications.
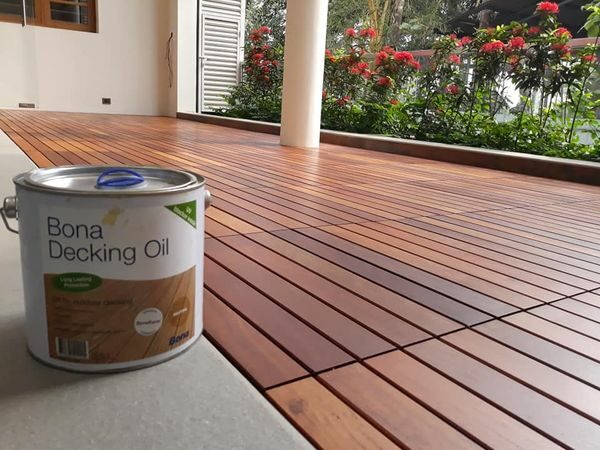
Choosing the Right Stain for Your Deck
Selecting the right stain for your deck is a critical decision, as it not only affects the appearance but also the durability and maintenance requirements of your outdoor space. Here’s how to choose the right stain for your deck:
Step 1: Consider Your Deck Type and Wood Species
Identify the type of wood your deck is made of (e.g., cedar, redwood, pressure-treated pine, or exotic hardwoods). The wood species can influence your stain choice due to variations in grain, color, and natural oils.
Step 2: Determine Your Stain Type
Stains are typically available in three main types: transparent, semi-transparent, and solid or opaque stains. Consider the following factors when deciding on the type:
Transparent Stain: Shows the wood’s natural grain and color while providing minimal UV protection. Ideal for new or well-maintained wood.
Semi-Transparent Stain: Offers moderate UV protection and color enhancement while still allowing the wood’s grain to show through. Suitable for older wood with some imperfections.
Solid or opaque stain: Provides maximum UV protection and conceals most imperfections. Often used for heavily weathered or previously painted decks.
Step 3: Choose a stain color
Pick a stain color that complements your home’s exterior and outdoor surroundings. Consider the existing color scheme, landscaping, and personal preferences. Many stains come in a variety of shades to suit your style.

Step 4: Assess UV Protection and Durability
Check the stain’s UV protection rating, as this will determine how well it shields your deck from the sun’s harmful rays. Look for a stain with a high UV protection rating if your deck gets a lot of sun exposure.
Consider the stain’s durability and resistance to weather, foot traffic, and moisture. Read product labels and reviews to ensure it can withstand your specific climate conditions.
Step 5: Review Maintenance Requirements
Different stains have varying deck maintenance requirements. Some may require reapplication every 1–2 years, while others can last longer. Assess how often you are willing to maintain your deck and choose a stain that aligns with your maintenance schedule.
Step 6: Test Samples
Before committing to a particular stain, obtain samples or small cans of the product in your chosen color and type. Apply these samples to a small, inconspicuous area of your deck to see how the stain looks in your specific environment and lighting conditions.
Step 7: Consult professionals
If you’re unsure about the best stain choice for your deck, consider consulting with a professional painter or a deck staining expert. They can provide valuable insights and recommendations based on your deck’s unique characteristics.

Step 8: Budget Considerations
Stains vary in price, with some premium products costing more than others. Determine your budget for the project and select a stain that offers the best balance between quality and affordability.
Step 9: Purchase and prepare
Once you’ve made your decision, purchase the stain and ensure you have the necessary tools and equipment for application, including brushes, rollers, and drop cloths.
Choosing the right stain for your deck is essential for achieving the desired look and protection. By carefully considering your deck’s wood type, stain type, color, UV protection, durability, and maintenance requirements, you’ll be well-prepared to make an informed choice that enhances both the beauty and longevity of your outdoor space.
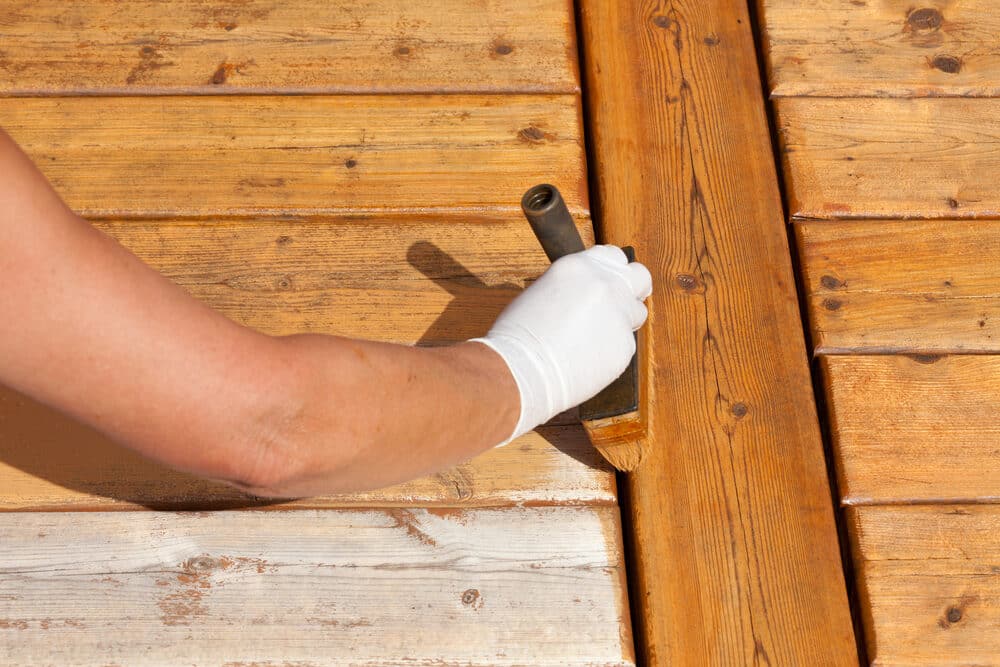
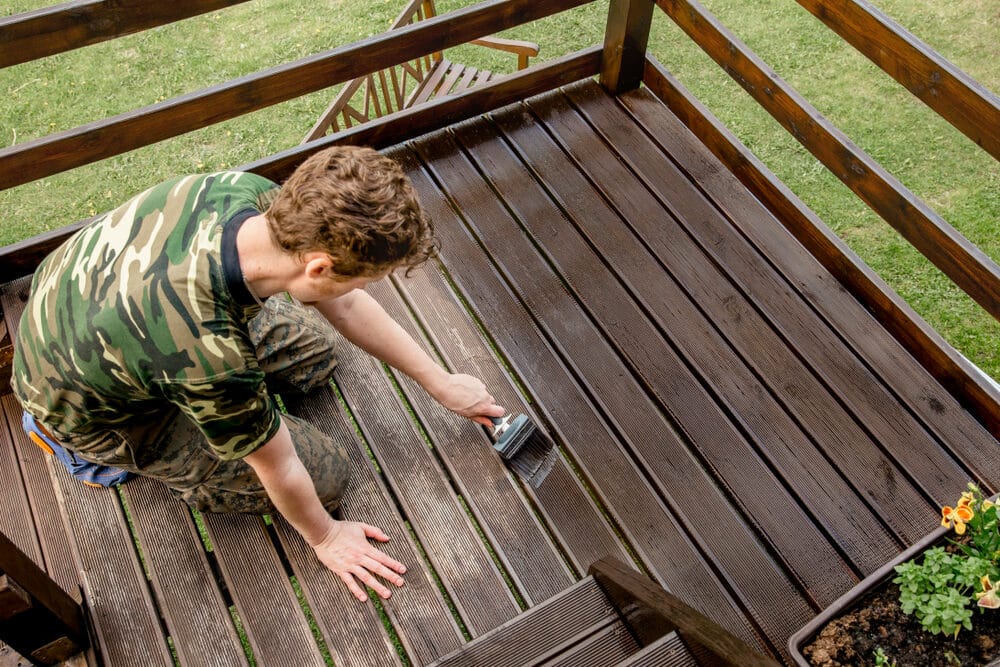
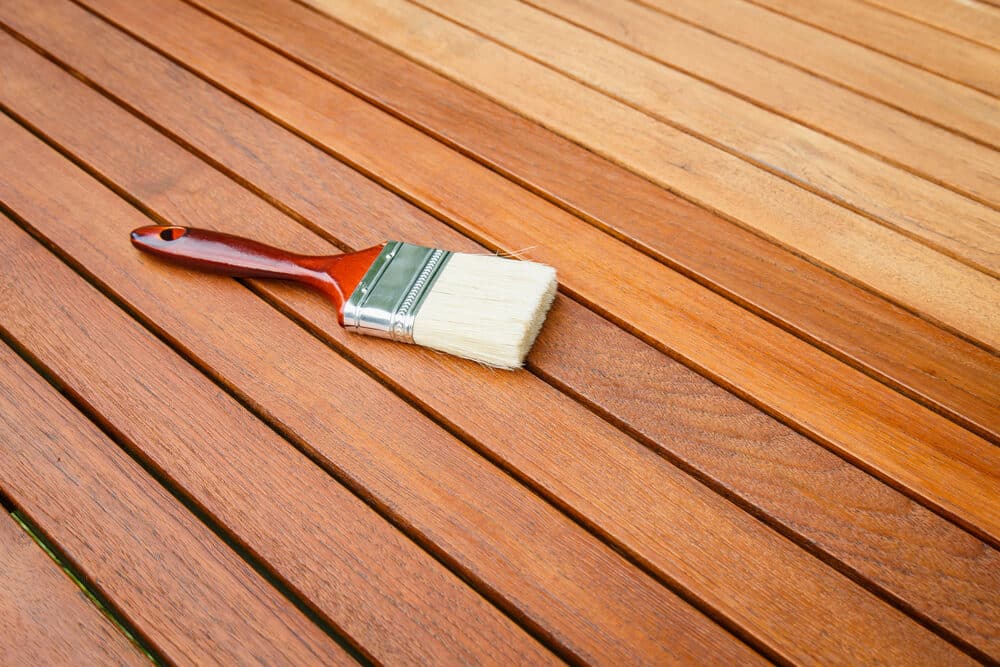
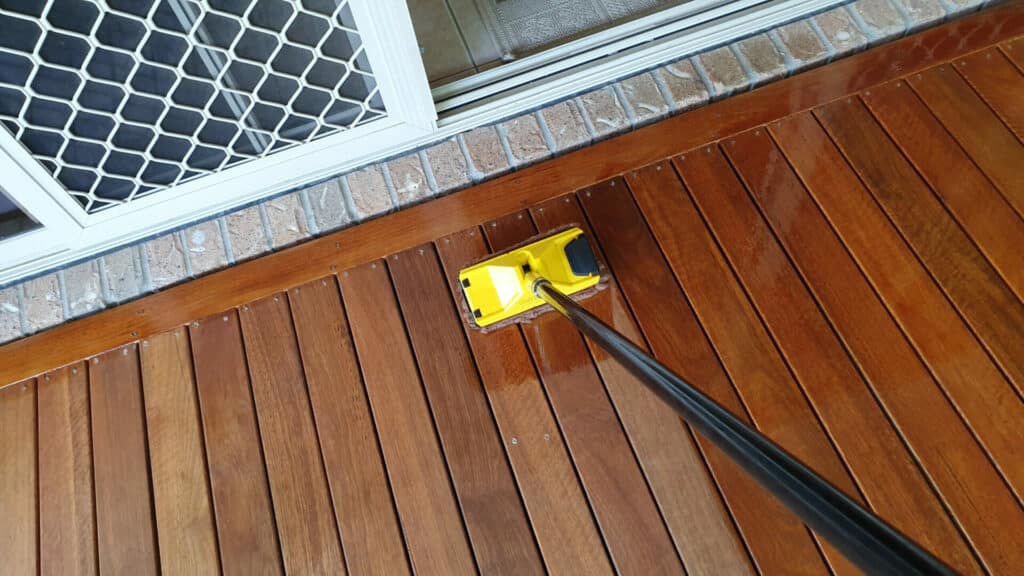
Applying the deck stain
Now that you’ve chosen the right stain for your deck, it’s time to apply it to achieve a beautiful and protected outdoor space. Here are the steps to effectively apply deck stain:
Step 1: Check weather conditions
Choose a day with ideal weather conditions for staining, preferably a dry day with temperatures between 50°F and 90°F (10°C to 32°C). Avoid staining in direct sunlight or extreme heat, as it can cause the stain to dry too quickly and lead to uneven application.
Step 2: Prepare Your Deck
Ensure that your deck surface is clean, dry, and free from debris or dust, following the cleaning and prepping steps mentioned earlier in this guide.
Step 3: Protect Surrounding Areas
Cover nearby plants, shrubs, and surfaces with plastic sheeting or tarps to shield them from accidental staining.
Step 4: Stir the stain.
Thoroughly mix the deck stain in its container using a stir stick. This ensures an even distribution of pigments and additives within the stain.
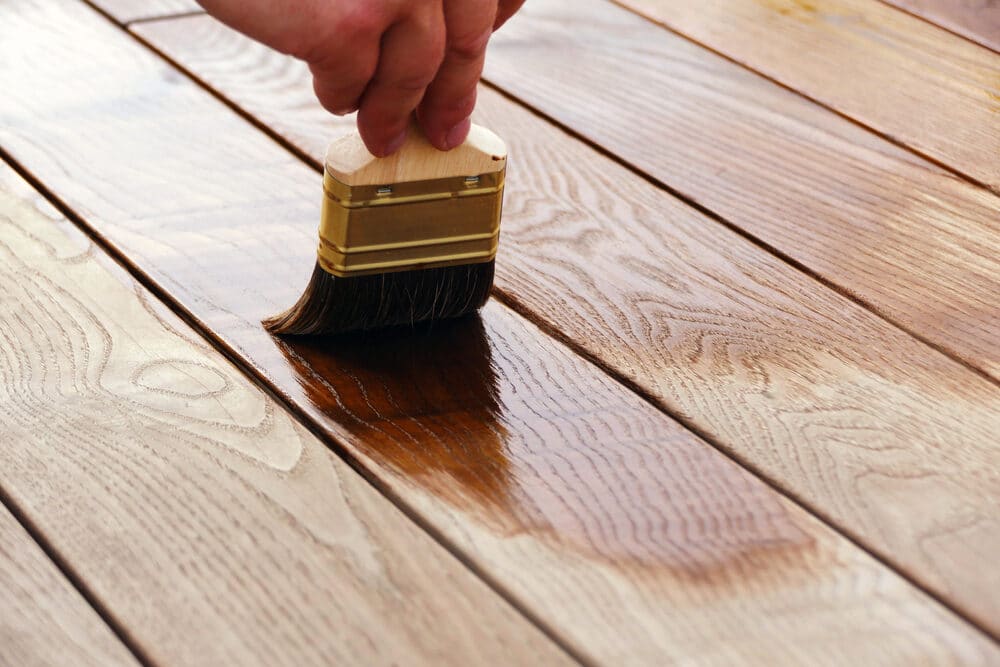
Step 5: Apply the stain
Choose your preferred method for applying the stain.
Brush: Use a high-quality nylon or natural bristle brush for precision and control. This method is ideal for railings, spindles, and small areas.
Roller: A paint roller with a long nap is suitable for larger deck surfaces. Roll on the stain evenly in long, overlapping strokes.
Sprayer: For a faster application, you can use an airless paint sprayer. However, this method may require more skill to avoid overspray, and you may need to back-brush or roll afterward for even coverage.
Step 6: Work in Small Sections
To maintain a wet edge and prevent lap marks, work on small sections of your deck. Start at one end and progress to the other, working with the grain of the wood.
Step 7: Apply even coats
Apply the first coat of stain evenly, making sure to saturate the wood without overloading it. Pay extra attention to any cracks, knots, or end grains, as they may absorb more stain.
For a more vibrant or darker color, consider applying a second coat after the first one has dried according to the manufacturer’s instructions. Ensure the first coat is completely dry before proceeding.
Step 8: Back-brush or roll
If you’re using a sprayer, it’s a good practice to back-brush or roll the stain into the wood immediately after spraying. This helps work the stain into the wood fibers and ensures an even finish.
Step 9: Wipe Excess Stain
After applying the stain, check for any excess or drips. Use a clean cloth to wipe away any pooling or dripping to prevent uneven drying and streaks.
Step 10: Allow Drying Time
Allow the stain to dry for the time recommended on the product label. Drying times can vary depending on the stain type, weather conditions, and humidity levels.
Step 11: Perform a Second Coat (if needed).
If a second coat is desired for a deeper color or enhanced protection, follow the same application process after the first coat has dried completely.
Step 12: Clean up
Clean your brushes, rollers, and any staining equipment immediately with the appropriate cleaning agent specified by the stain manufacturer.
Step 13: Dispose of Waste
Dispose of any used stain cans, rags, and other waste materials responsibly, following local disposal guidelines.
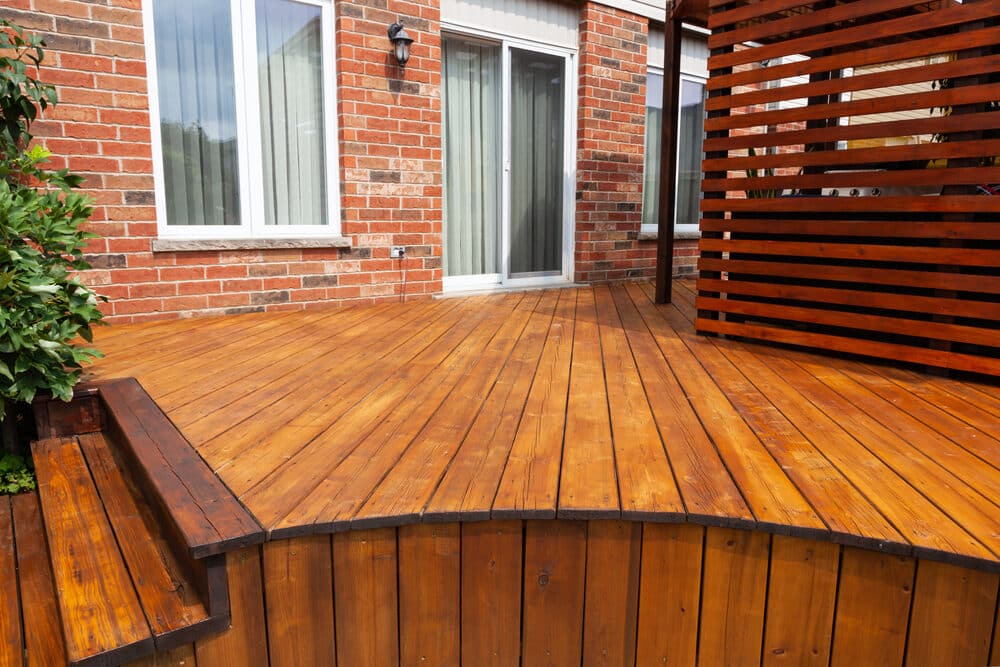
By following these steps and applying your chosen deck stain carefully and methodically, you can enhance the appearance of your deck while providing long-lasting protection against the elements. Proper application is key to achieving a beautiful and durable finish.

Conclusion
Maintaining a beautiful and durable deck requires careful consideration, proper planning, and ongoing care. Whether you’re looking to restore your existing deck or install a new one, understanding the importance of maintenance and the steps involved is essential for preserving its appeal and longevity.
A well-maintained deck not only adds value to your home but also provides a welcoming outdoor space for relaxation and entertainment. By following the guidance provided in this guide, you can enjoy the benefits of a beautiful and long-lasting deck for years to come.
Remember that each deck is unique, and its maintenance requirements may vary. Regular attention, preventive care, and timely repairs will help you make the most of your outdoor investment, ensuring that your deck remains a cherished part of your home.

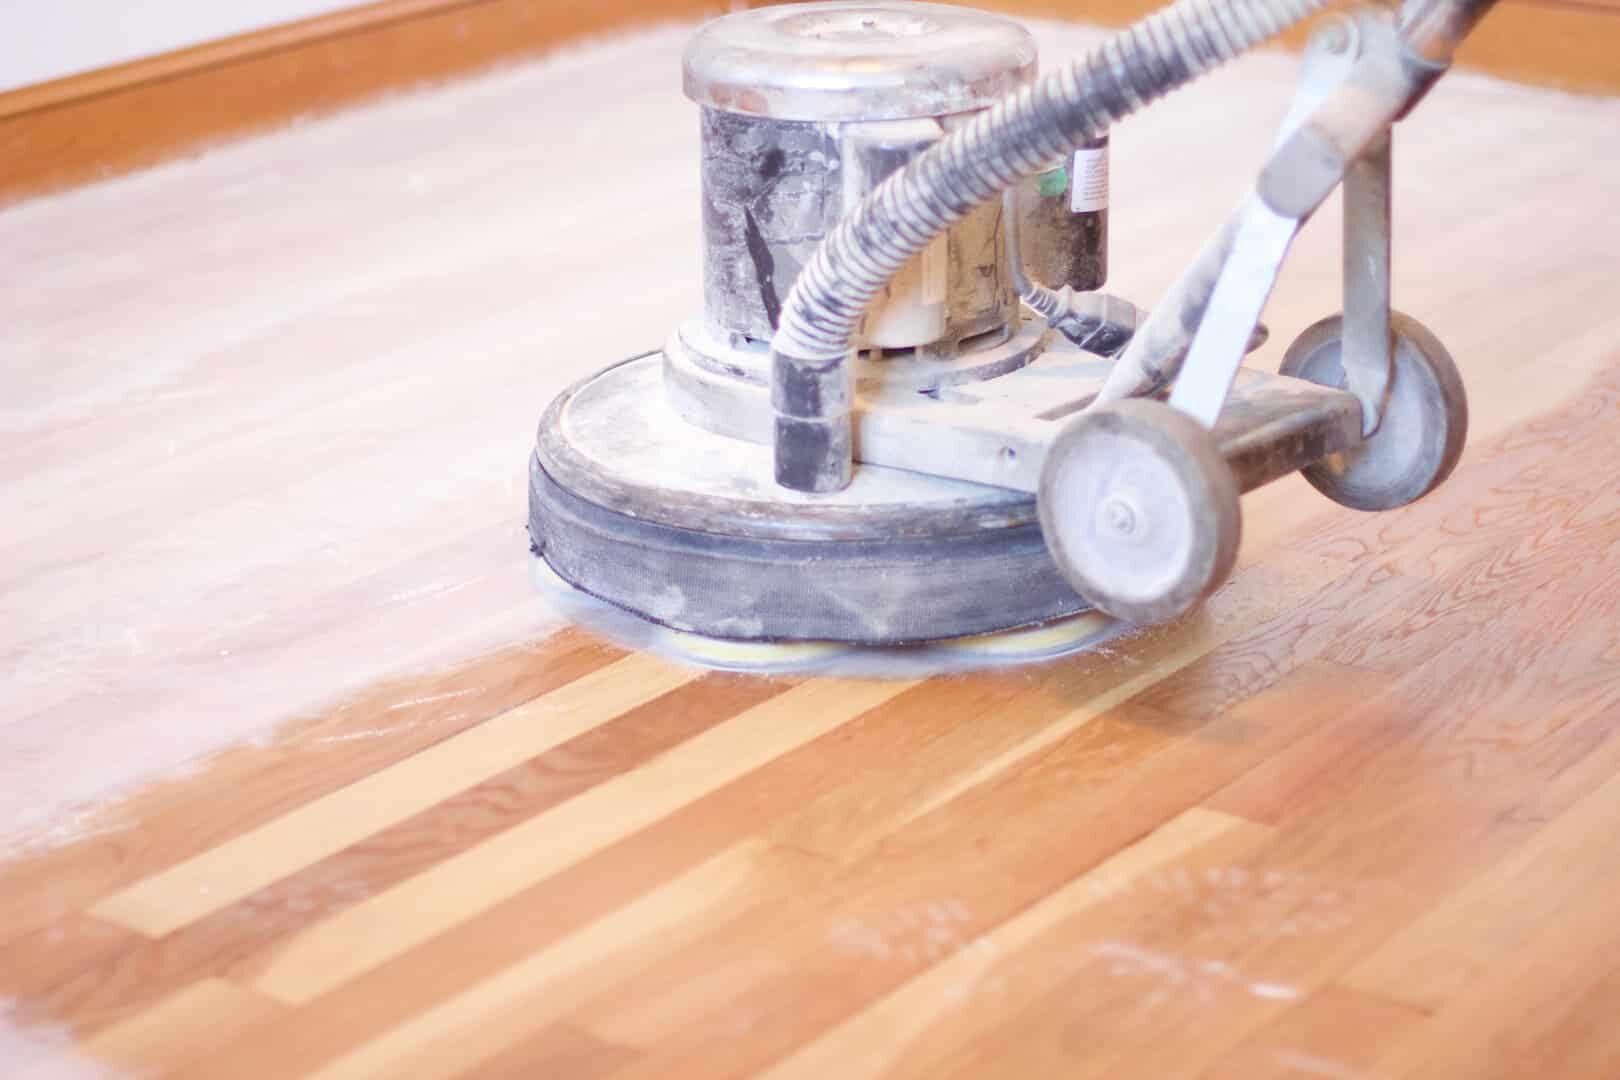
Sanding
We provide virtually dust-free sanding with our continuous belt machinery with mobile extraction units, giving you a safer environment for your family.
Oiling
This organic finish not only adds beauty to your home but also has exceptional water-repellent characteristics, making it easier to clean and maintain.
Waxing
This natural floor finish offers the softest and most mellow appearance – and leaves your floor able to breath.
Buffing
Using soft buffing machines (and hand-polishing where required) will bring a wonderful sheen to your newly-finished floor.
Repairs
We offer a full assessment of your wooden floors to determine what repairs are needed to provide the perfect working surface for the later stages of sanding, staining and sealing.
Restoration
We offer a comprehensive restoration process designed to address floors that are improperly fitted or damaged over time through wear and tear.
Request a fixed price quote for your wood floor restoration now
Simply enter your postcode below to get started.
Services
Wood Floor Sanding Wood Floor Restoration Wood Floor Scratch Repair Squeaky Wood Floor Repair Parquet Floor Sanding Parquet Floor Restoration Commercial Floor Sanding Church Floor Sanding Community Centre Floor Sanding School Floor Sanding Gap Filling Gap Filling with ResinCopyright © Mr Sander®
Privacy & Cookies Terms & Conditions Complaints Procedure Cancellation Rights Sitemap

Get An Instant Price Estimate Before You Go…
Simply enter the rooms you need sanded and we’ll provide you with a price estimate instantly! Try our price calculator now.
Get a Price Estimate NowLocal Floor Sanding Experts
Over 500 5-Star Reviews
Safe, Dust Free Sanding
Operating Since 1994