London:
Nationwide:
25,000+
Floors Restored
27 Years Experience
Wood Flooring Association Certified
The Benefits of Dry Screening for Hardwood Floors
Posted on January 17, 2024
Floor sanding techniques
Unlocking the Advantages of Dry Screening for Hardwood Floors
Welcome to our comprehensive guide on the benefits of dry screening for hardwood floors. Hardwood floors are a timeless choice for many homeowners, offering both beauty and durability. However, maintaining and refinishing these floors is crucial to preserving their elegance and longevity. One key technique in the refinishing process is ‘dry screening’, a method less talked about but highly effective in floor maintenance.
In this blog post, we’ll delve into what dry screening is and why it’s an indispensable step in hardwood floor refinishing. Unlike traditional methods, dry screening offers a unique approach to preparing your floors for their final finish. It’s not just about smoothing the surface; it’s about creating the perfect base for varnishes and sealants, ensuring a flawless, long-lasting finish.
Whether you’re a DIY enthusiast, a professional in the flooring industry, or simply a homeowner curious about the best ways to maintain your hardwood floors, this post will provide valuable insights. We’ll explore how dry screening compares to other methods like wet sanding, discuss its benefits, including improved adhesion and a smoother finish, and offer practical advice for those looking to undertake this process.
Stay tuned as we uncover the secrets of dry screening and why it could be the game-changer your hardwood floors need.
The Basics of Dry Screening
In this section, we delve into the fundamentals of dry screening, a crucial step in the hardwood floor refinishing process. Understanding what dry screening is and how it works is key to appreciating its value in floor maintenance and restoration.
Definition and Process
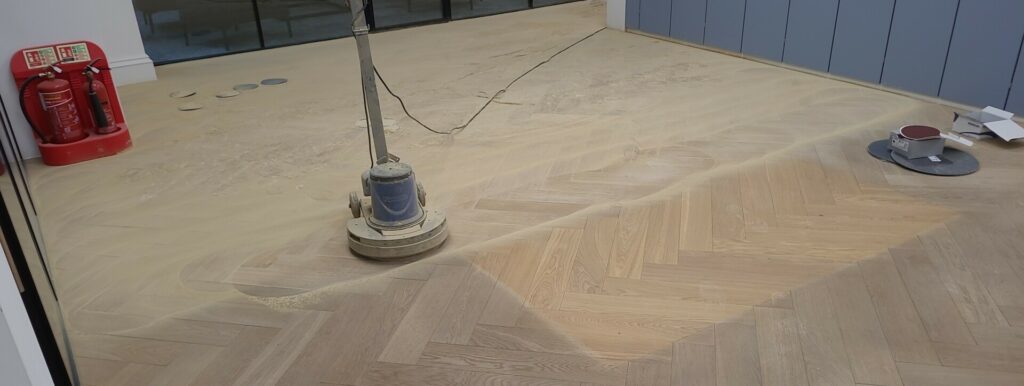
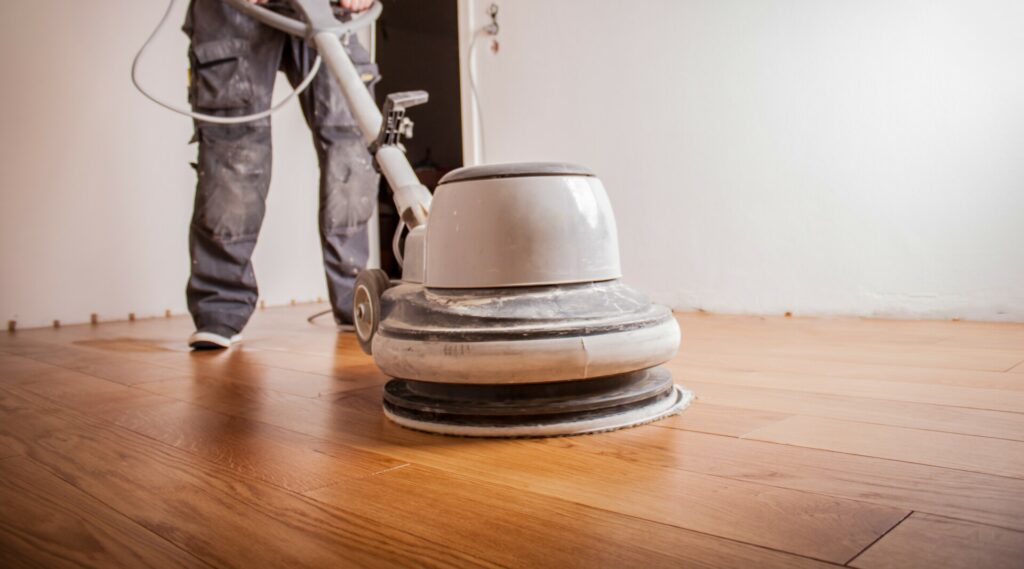
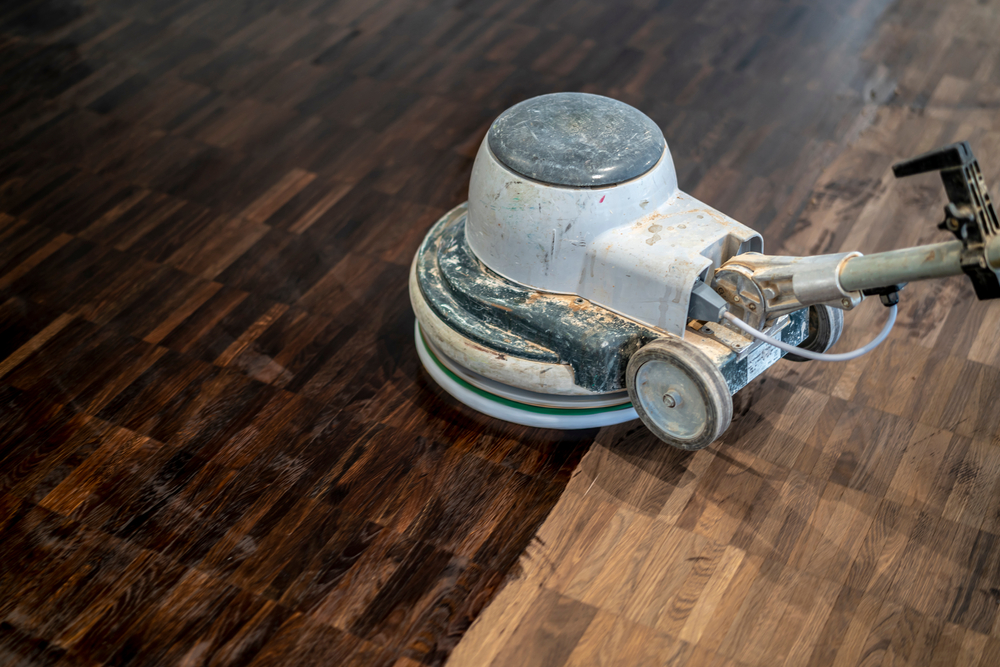
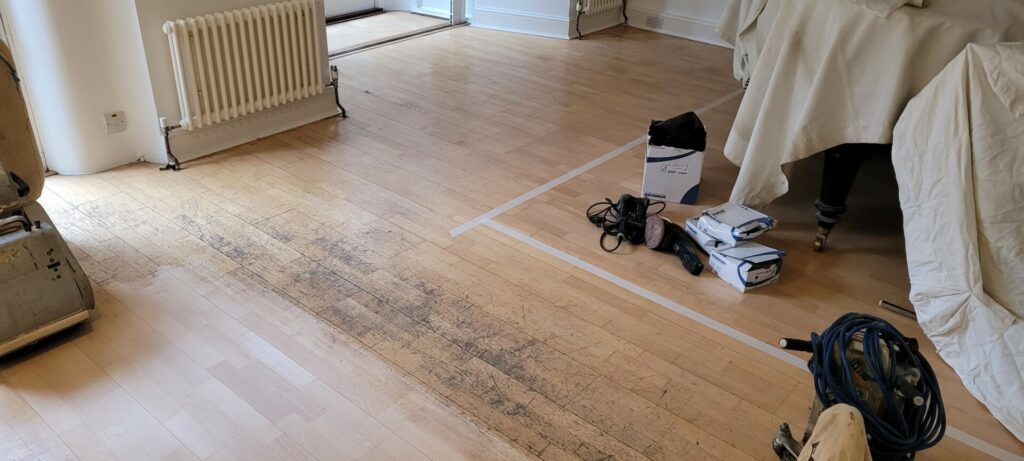
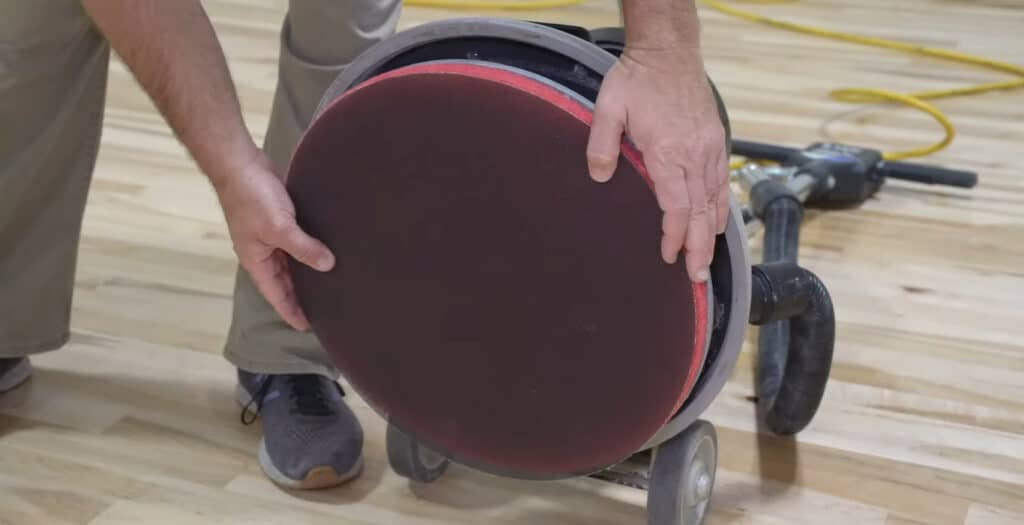
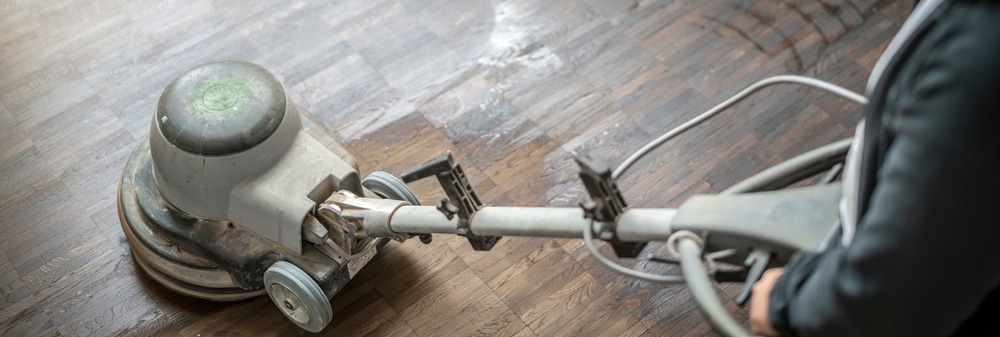
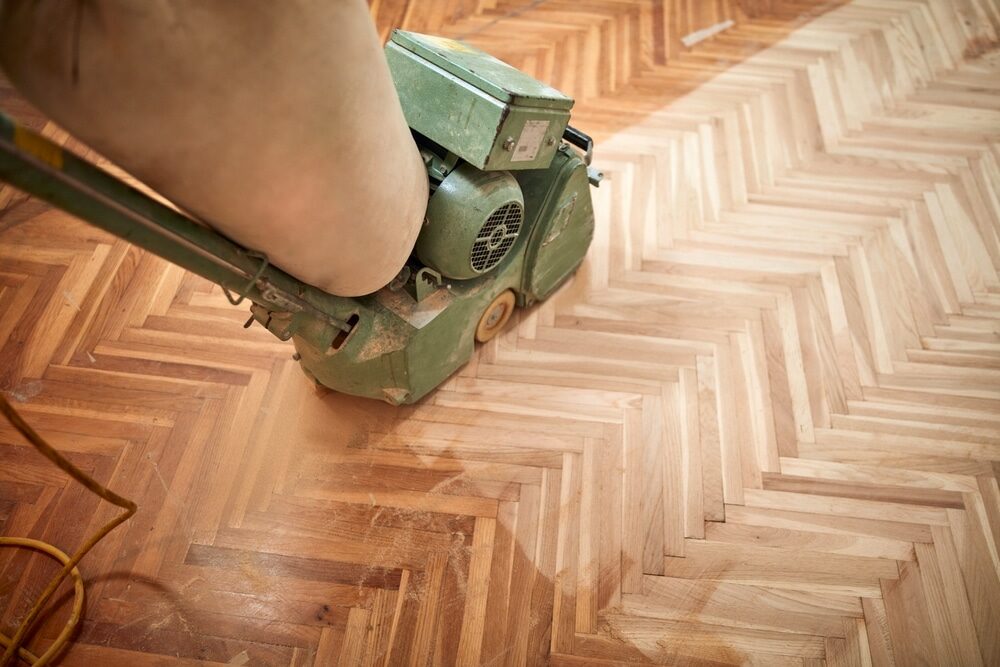
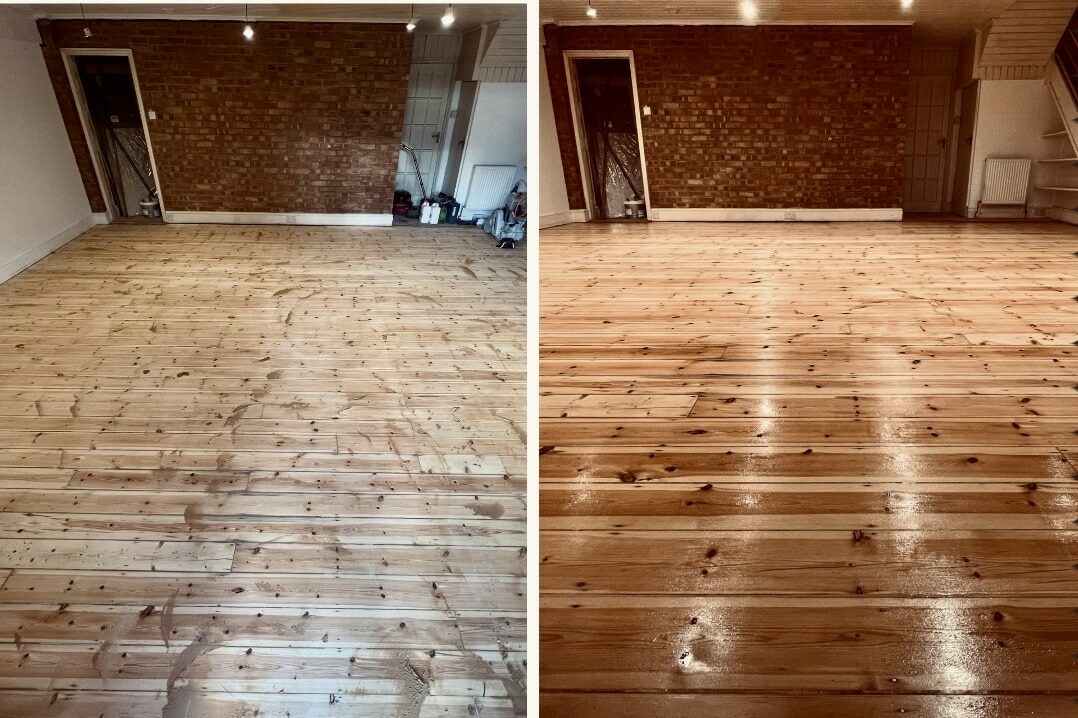
Dry screening, often referred to as ‘screening and recoating’, is a method used to prepare a hardwood floor for a new coat of finish. This technique involves using a floor buffer with a fine-grit screening disc to lightly abrade the surface of the existing finish. Unlike sanding, which removes the old finish down to the bare wood, dry screening scuffs up the surface just enough to promote the adhesion of a new coat of finish.
Tools and materials needed
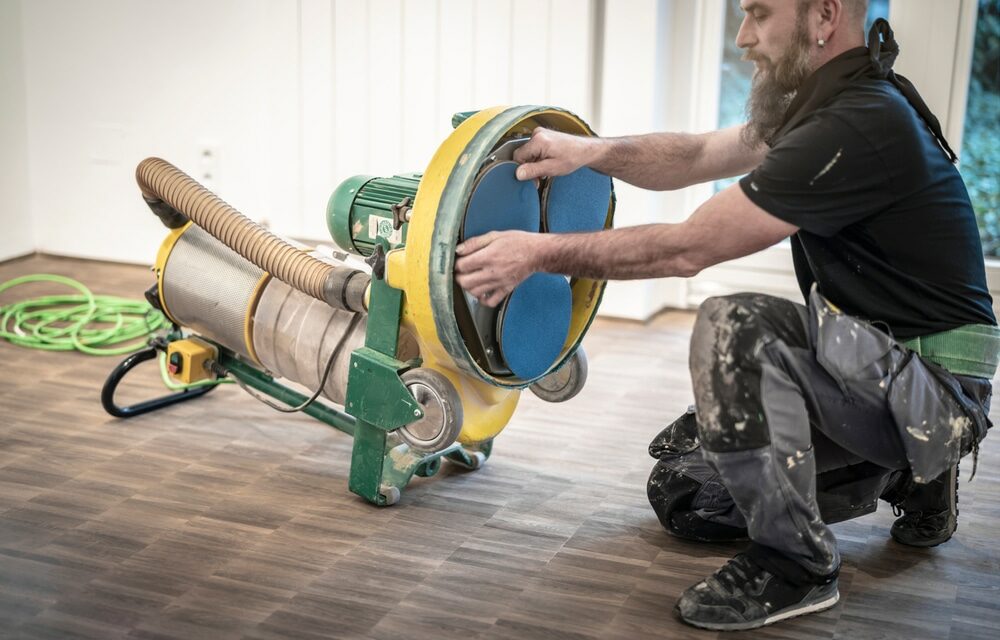
To perform dry screening, several tools and materials are required. The primary tool is a floor buffer, which can be rented from most hardware stores. Along with the buffer, you’ll need a series of screening discs, typically ranging from 120 to 150 grit. It’s essential to choose the right grit to avoid damaging the floor’s surface. Additional materials include a vacuum cleaner for dust removal, a tack cloth for final cleaning, and the finishing product of your choice.
By understanding these basics, you’re better equipped to appreciate the subsequent sections, where we’ll explore the numerous benefits of dry screening, how it compares to other methods, and provide a detailed guide on how to perform this process effectively.
Benefits of Dry Screening for Hardwood Floors
Dry screening is a valuable technique in the maintenance and restoration of hardwood floors. This section highlights the key benefits of using dry screening, explaining why it’s a preferred method for both professionals and DIY enthusiasts.
Improved Adhesion for Top Coats
- Dry screening lightly abrades the surface of the existing finish, creating an ideal texture for new finish layers to adhere to. This is crucial for ensuring the longevity and durability of the top coat, preventing peeling and flaking over time.
Smoother finish and appearance
- The process smooths out minor imperfections and evens out the existing finish. This results in a more uniform surface, which, when recoated, offers a smoother and more aesthetically pleasing final appearance.
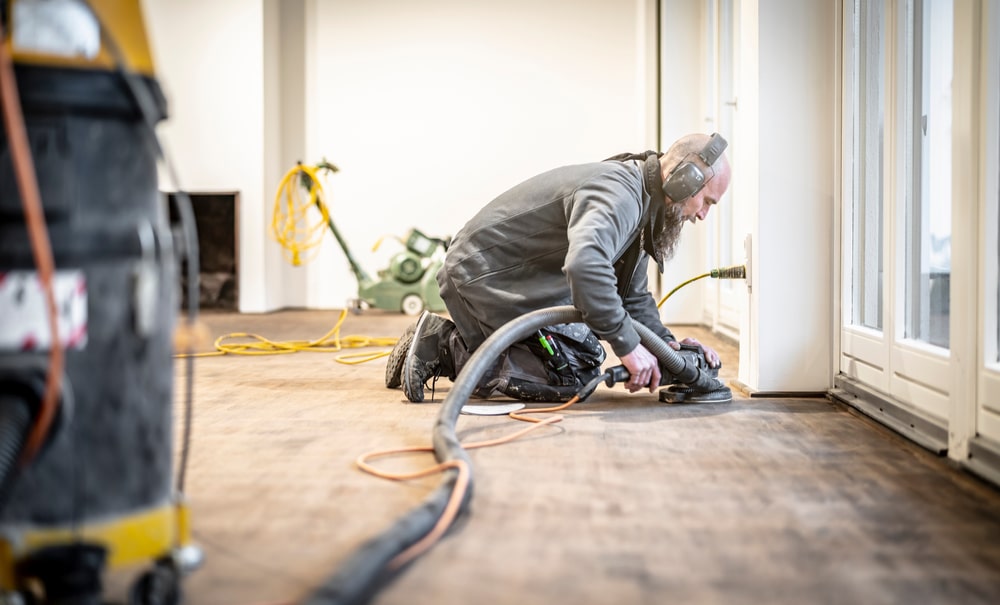
Reduced Dust and Cleanup
- Compared to traditional sanding methods, dry screening generates significantly less dust. This not only makes the cleanup process easier but is also beneficial for maintaining better air quality in your home during the refinishing process.
Time and Cost Efficiency
- Dry screening is a faster process than complete sanding and refinishing. Since it does not involve removing the existing finish entirely, it saves time. Additionally, the reduced need for extensive cleanup and quicker turnaround time make it a more cost-effective option for floor maintenance.
Extends the Life of Hardwood Floors
- Regular maintenance through dry screening can significantly extend the life of hardwood floors. By periodically removing wear and tear and applying a fresh top coat, floors are better protected and can maintain their beauty for many years.
Environmentally Friendly
- Since dry screening removes less material than full-scale sanding and uses fewer chemicals, it is a more environmentally friendly option. It reduces waste and minimises the release of potentially harmful substances into the environment.

Comparing Dry Screening to Other Methods
When it comes to refinishing hardwood floors, various methods can be employed, each with its own set of advantages and disadvantages. In this section, we compare dry screening to other popular methods, highlighting the differences and helping you determine the best approach for your flooring needs.
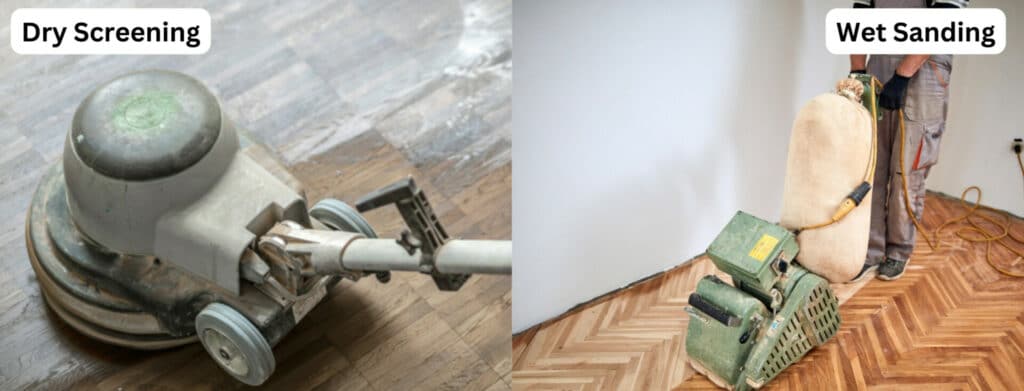
Dry screening vs. wet sanding
- Wet Sanding: This method involves using water or a liquid abrasive to reduce dust. While it’s effective in minimising airborne particles, it can be messier and more time-consuming due to the added drying time. Wet sanding is more aggressive and suitable for floors with deeper damage or those needing a complete refinish.
- Dry Screening: Contrarily, dry screening is less invasive and ideal for floors that are generally in good condition but need a refresh. It’s quicker and cleaner, focusing on preparing the existing finish for a new top coat rather than removing it entirely.
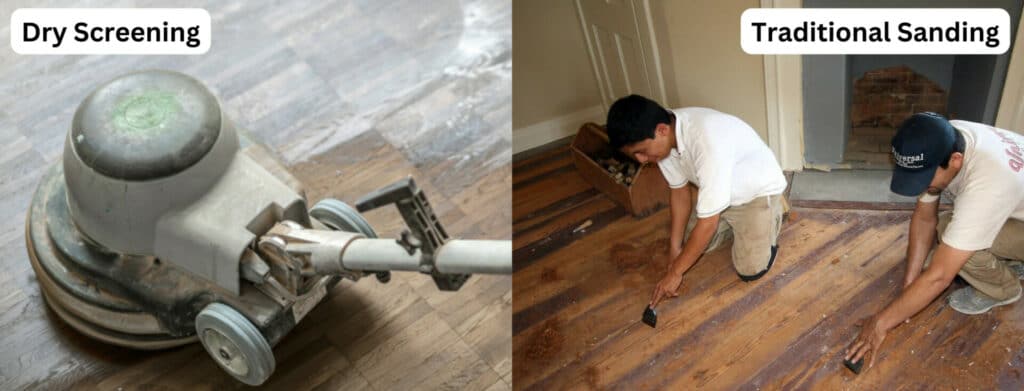
Dry Screening vs. Traditional Sanding
- Traditional Sanding: Traditional sanding involves stripping the floor down to the bare wood, removing all the existing finish. It’s a comprehensive approach best suited for floors with significant damage, deep scratches, or when changing the colour of the wood stain.
- Dry Screening: In comparison, dry screening is a surface-level process. It’s best for floors that don’t have deep damage and are not undergoing a colour change. This method is more about maintenance and less about complete restoration.
The Impact on Indoor Air Quality
- Traditional sanding methods, especially when not using dust containment systems, can significantly deteriorate indoor air quality due to the high volume of dust produced. Dry screening, with its minimal dust generation, is a preferable option for maintaining a healthier indoor environment during the refinishing process.
Skill and Equipment Requirements
- Traditional sanding often requires professional expertise due to the complexity and risks involved in handling heavy-duty sanding equipment. Dry screening, on the other hand, is more accessible for DIY enthusiasts as it involves less aggressive equipment and techniques.
Cost Implications
- Traditional sanding and refinishing are typically more expensive, considering the labour, time, and materials involved. Dry screening offers a cost-effective alternative for those looking to refresh their floors without the full expense of a complete refinishing project.

Step-by-Step Guide to Dry Screening
Dry-screening hardwood floors can rejuvenate their appearance and extend their lifespan. Here’s a comprehensive, step-by-step guide to help you through the process:
Preparation
- Clear the Room: Remove all furniture and other items from the room.
- Clean the Floor: Thoroughly clean the floor to remove dust, dirt, and debris. Use a vacuum and a damp mop to ensure the floor is spotless.
Safety Measures
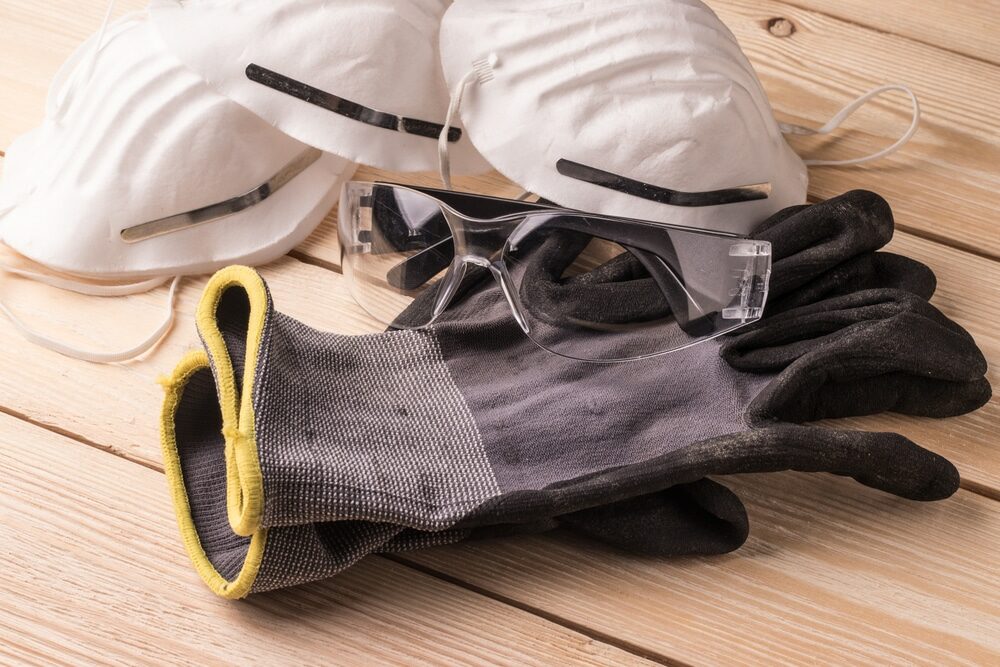
- Wear protective gear: Use safety glasses, a dust mask, and ear protection to safeguard against dust and noise.
Choosing the Right Equipment
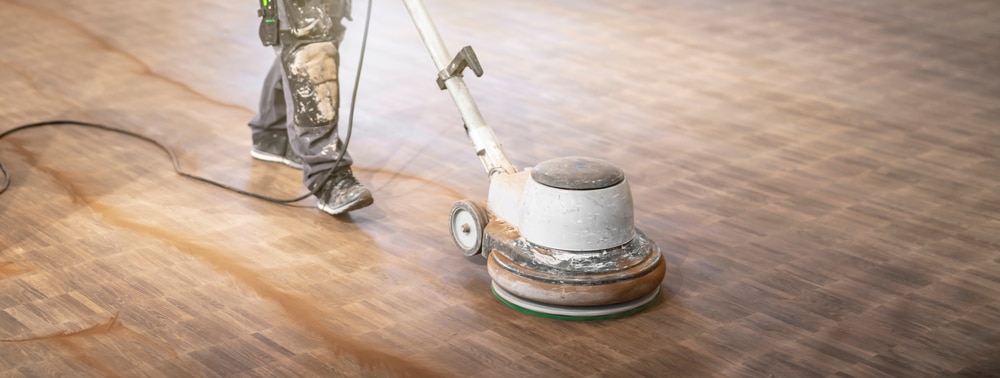
- Select a Floor Buffer: Rent or purchase a floor buffer with the appropriate horsepower for your floor size.
- Select Screening Discs: Choose fine-grit screening discs, typically between 120 and 150 grit, for best results.
Dry Screening Process
- Attach the Screening Disc: Securely attach the screening disc to the buffer.
- Start Buffing: Turn on the buffer and gently guide it across the floor. Move in smooth, even patterns, overlapping each pass slightly. Cover the entire floor surface, paying special attention to the edges and corners.
Inspect and touch-up
- Inspect the Floor: After screening, check for any missed spots or uneven areas.
- Hand Sand Corners and Edges: Use a hand sander or sanding block to reach areas where the buffer couldn’t.
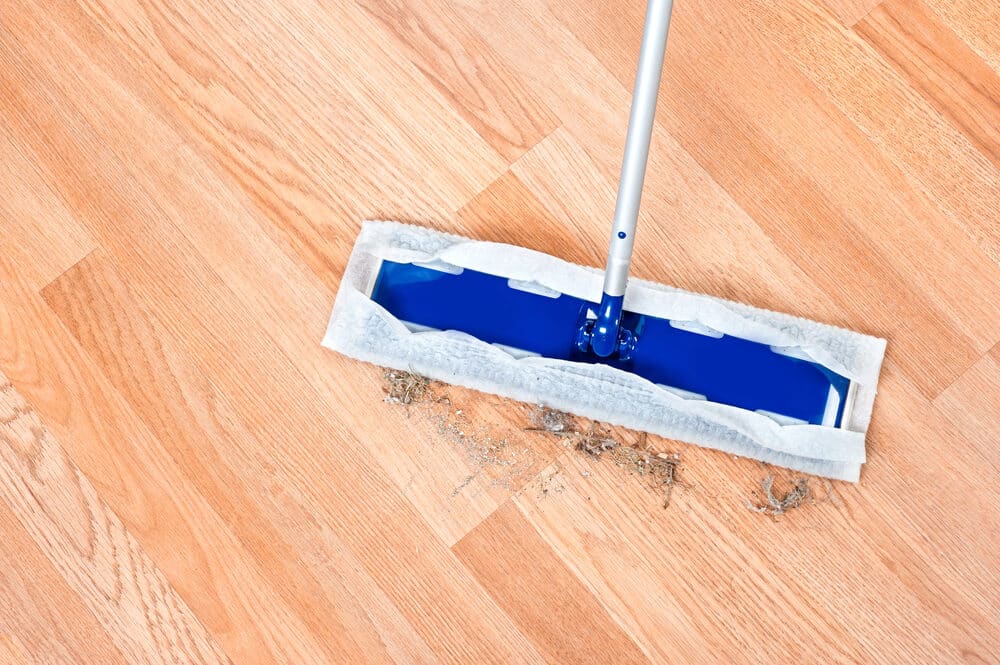
Clean-Up
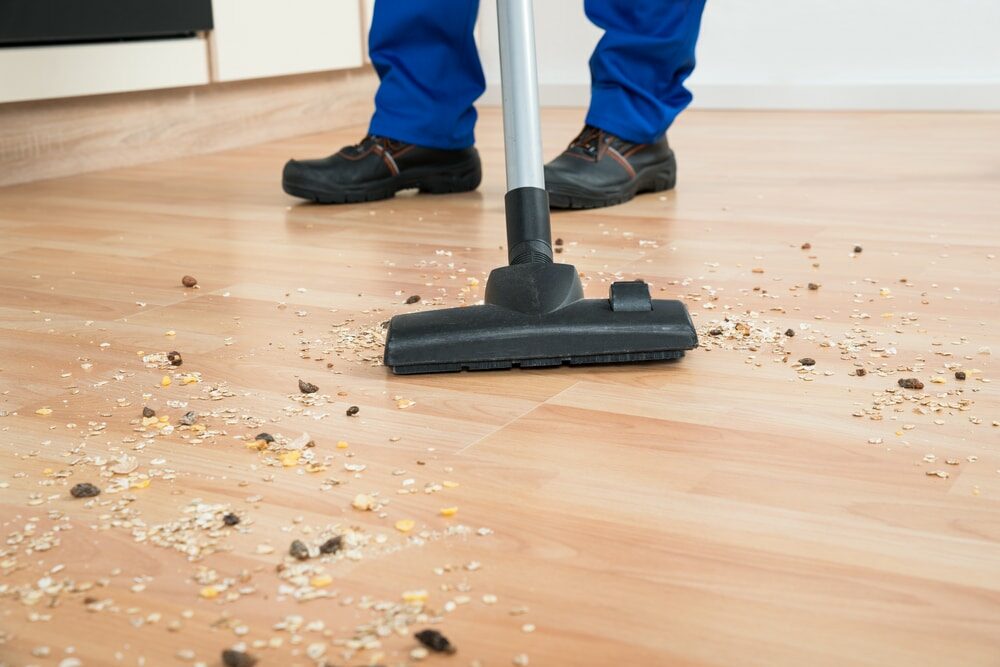
- Vacuum Dust: Thoroughly vacuum the floor to remove all the dust created during screening.
- Tack Cloth Clean-up: Go over the floor with a tack cloth to pick up any remaining fine particles.
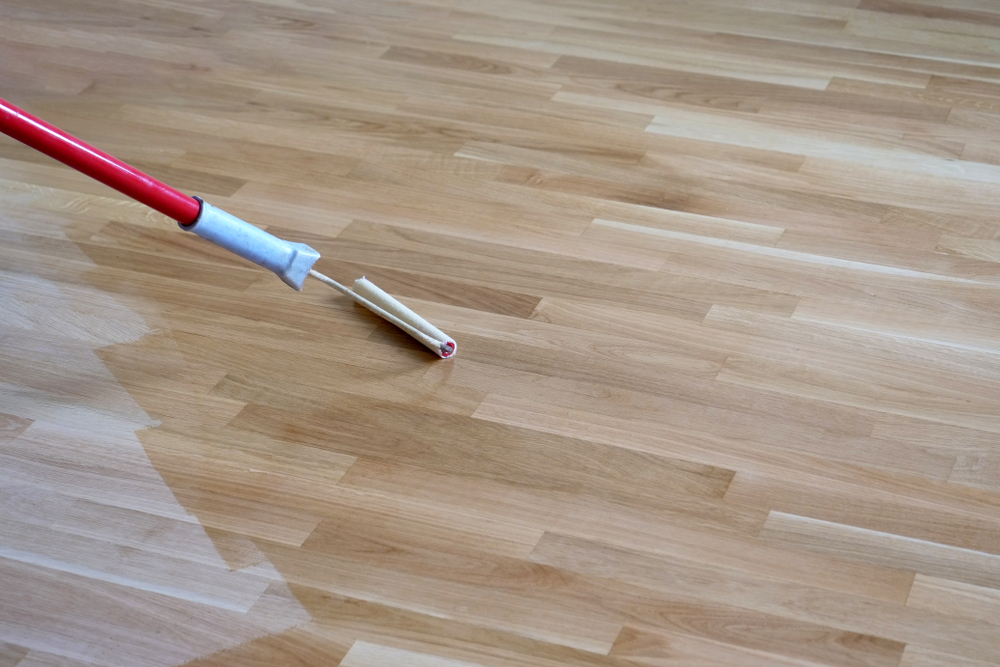
Applying the Finish
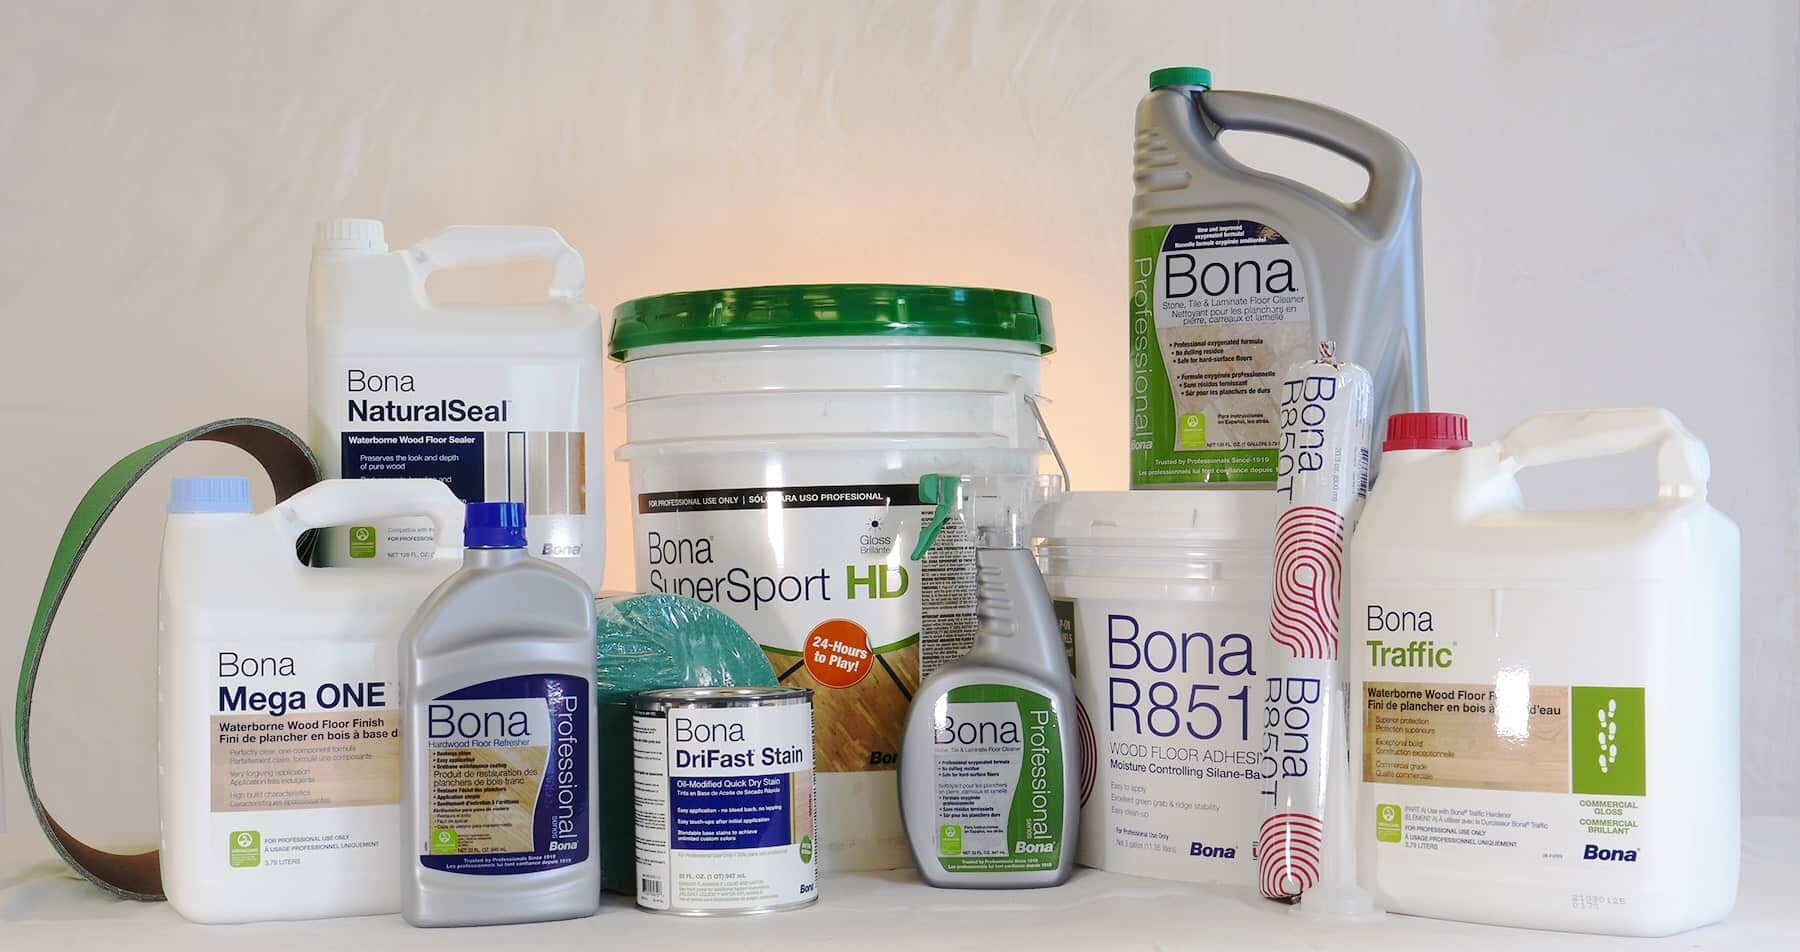
- Choose the Right Finish: Select a high-quality wood floor finish that is compatible with your floor type.
- Apply the Finish: Following the manufacturer’s instructions, apply the finish evenly across the floor. Use a roller or brush, as recommended.

Drying and curing
- Allow to Dry: Let the finish dry as per the recommended time, usually 24 hours.
- Curing: To ensure that the finish fully cures, avoid using the floor heavily for the duration of that time.
Post-Application Care
- Furniture Replacement: Wait at least 48 hours before replacing furniture.
- Ongoing Maintenance: Follow regular cleaning protocols to maintain the floor’s appearance.

This step-by-step guide should help you effectively dry screen your hardwood floors, ensuring a refreshed look and extended floor life. Remember, while this can be a DIY project, seeking professional advice or assistance is advisable if you’re unsure about any step.
Best Practices for Dry Screening Hardwood Floors
In this section, we’ll provide valuable tips and best practices to ensure a successful and efficient dry screening process for your hardwood floors. These recommendations will help you achieve the best results while maintaining the integrity of your flooring.
Choose the right grit
- Select the appropriate grit for your screening discs. Finer grits (120 to 150) are suitable for routine maintenance, while coarser grits are better for floors with deeper damage.
Inspect and prepare the floor
- Thoroughly inspect the floor for protruding nails or staples, and fix any loose boards or damaged areas before screening.
Proper buffer technique
- Maintain a consistent speed and pressure when using the floor buffer to avoid uneven results. Keep the buffer moving at all times to prevent over-sanding in one spot.
Overlap Strokes
- Overlap each pass of the buffer slightly to ensure even abrasion across the entire floor surface.
Address Corners and Edges
- Use a hand sander or sanding block to reach corners and edges that the buffer can’t access. Ensure these areas are properly screened.
Minimise Dust
- Consider using a buffer equipped with a dust containment system to further reduce airborne dust during the screening process.
Use quality finishing products
- Invest in high-quality wood floor finishes that are compatible with your hardwood species. Consult with a professional if you’re unsure about the best finish for your floor.
Follow the manufacturer’s instructions
- Always follow the manufacturer’s instructions for both screening discs and finishing products to achieve the desired results.
Apply thin, even coats
- When applying the finish, aim for thin, even coats. Avoid excessive application, as it can lead to drying issues and an uneven finish.
Allow adequate drying time
- Be patient, and allow the finish to dry completely between coats. Rushing this step can compromise the final result.
Protect the floor
- Use furniture pads or protective covers on furniture legs to prevent scratches and dents on the newly finished floor.
Regular Maintenance
- Implement a routine cleaning and maintenance schedule to keep your hardwood floors looking their best. Dry screening can be a part of your regular floor care routine to extend their lifespan.
Conclusion
In wrapping up our discussion on “The Benefits of Dry Screening for Hardwood Floors,” we have traversed through the crucial aspects of this effective and efficient technique. From understanding its basics to exploring its numerous benefits and comparing it with other methods, we’ve seen how dry screening stands out as a superior choice for maintaining and revitalising hardwood floors.
The key takeaways from our exploration include the understanding that dry screening offers an excellent balance of efficacy and gentleness, making it ideal for floors that require a refresh without the need for a complete overhaul. Its ability to improve adhesion for top coats, ensure a smoother finish, and minimise dust and cleanup efforts, not to mention its time and cost efficiency, make it a highly recommended choice for homeowners and professionals alike.
Furthermore, the step-by-step guide provided aims to equip you with the knowledge to undertake this process, whether as a DIY project or with professional assistance. By following these guidelines, you can extend the life of your hardwood floors, enhance their appearance, and ensure their durability for years to come.
In conclusion, dry screening is more than just a maintenance technique; it’s a smart investment in the longevity and beauty of your hardwood floors. Whether you’re a seasoned DIY enthusiast or considering this method for the first time, the advantages of dry screening are clear and compelling. It’s a testament to the fact that sometimes the best care for your floors involves gentle, yet effective, techniques that preserve their natural charm and character.
Remember, while dry screening is a powerful tool in wood floor maintenance, the specific needs of your floors might vary. Always consider the condition of your hardwood floors and seek professional advice if necessary to ensure the best care and outcomes.


Sanding
We provide virtually dust-free sanding with our continuous belt machinery with mobile extraction units, giving you a safer environment for your family.
Oiling
This organic finish not only adds beauty to your home but also has exceptional water-repellent characteristics, making it easier to clean and maintain.
Waxing
This natural floor finish offers the softest and most mellow appearance – and leaves your floor able to breath.
Buffing
Using soft buffing machines (and hand-polishing where required) will bring a wonderful sheen to your newly-finished floor.
Repairs
We offer a full assessment of your wooden floors to determine what repairs are needed to provide the perfect working surface for the later stages of sanding, staining and sealing.
Restoration
We offer a comprehensive restoration process designed to address floors that are improperly fitted or damaged over time through wear and tear.
Request a fixed price quote for your wood floor restoration now
Simply enter your postcode below to get started.
Services
Wood Floor Sanding Wood Floor Restoration Wood Floor Scratch Repair Squeaky Wood Floor Repair Parquet Floor Sanding Parquet Floor Restoration Commercial Floor Sanding Church Floor Sanding Community Centre Floor Sanding School Floor Sanding Gap Filling Gap Filling with ResinCopyright © Mr Sander®
Privacy & Cookies Terms & Conditions Complaints Procedure Cancellation Rights Sitemap

Get An Instant Price Estimate Before You Go…
Simply enter the rooms you need sanded and we’ll provide you with a price estimate instantly! Try our price calculator now.
Get a Price Estimate NowLocal Floor Sanding Experts
Over 500 5-Star Reviews
Safe, Dust Free Sanding
Operating Since 1994