London:
Nationwide:
25,000+
Floors Restored
27 Years Experience
Wood Flooring Association Certified
The Basics of Buffing for Floor Sanding
Posted on September 25, 2023
Buffing
The Comprehensive Guide to Buffing in Floor Sanding
Flooring, an essential component of any structure, often bears the brunt of everyday use. Over time, this wear and tear can lead to scuffs, scratches, and a loss of shine. To breathe life back into tired-looking floors, the process of floor sanding and buffing becomes indispensable. This guide, “The Basics of Buffing for Floor Sanding,” dives deep into the art and science of buffing, offering a beginner-friendly introduction to the tools, techniques, and best practices. By the end, you’ll not only understand the importance of buffing in the floor sanding process but will also be equipped with the knowledge to achieve smooth and glossy finishes.
The journey from a dull, worn-out floor to a polished masterpiece isn’t a straight path—it requires meticulous care, the right equipment, and a touch of finesse. One essential step in this transformation is buffing. Yet, for many, buffing remains a cloudy topic, laden with jargon and complexities. “The Basics of Buffing for Floor Sanding” seeks to clear the fog, providing a foundational understanding of buffing’s role in floor refinishing. Whether you’re a DIY enthusiast aiming to revive your home’s floors or just curious about the process, this guide is your starting point.

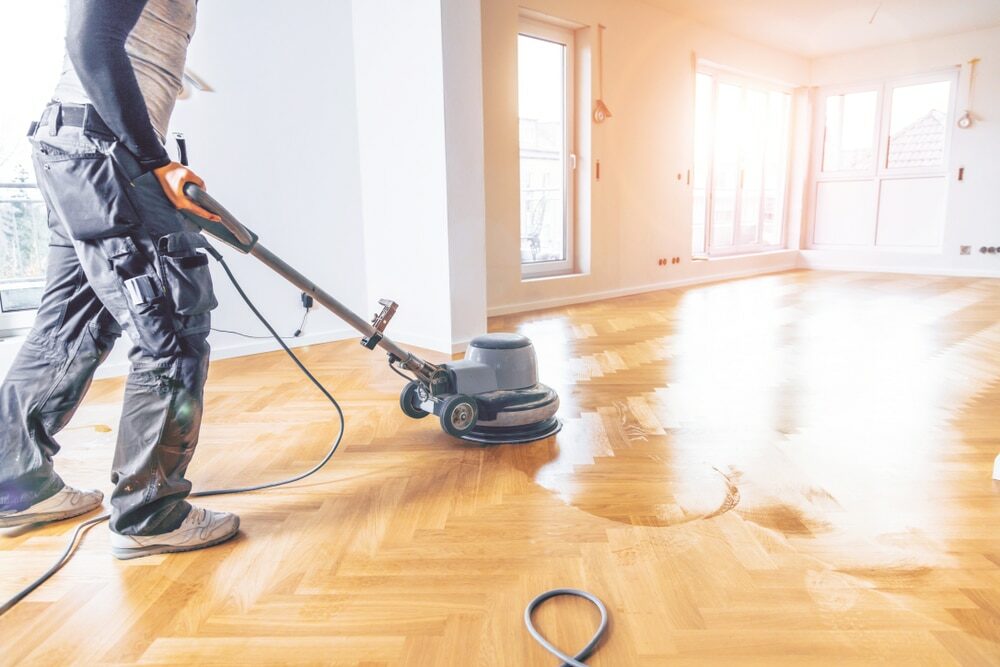
What is wood floor buffing?
Definition: Buffing is the process of polishing a floor to smooth out any imperfections and give it a glossy, reflective finish. It’s a vital step in floor refinishing, particularly for wooden floors, which can show signs of wear and tear over time.
Purpose: While sanding removes the old finish and smoothes the surface, buffing ensures an even finish, prepares the floor for the final sealant, and enhances the wood’s natural beauty.
Equipment needed for wood floor buffing
Certainly! Buffing wood floors requires a range of equipment, both for the actual buffing process and for the preparation and finishing stages. Here’s a list of the essential equipment needed for wood floor buffing:
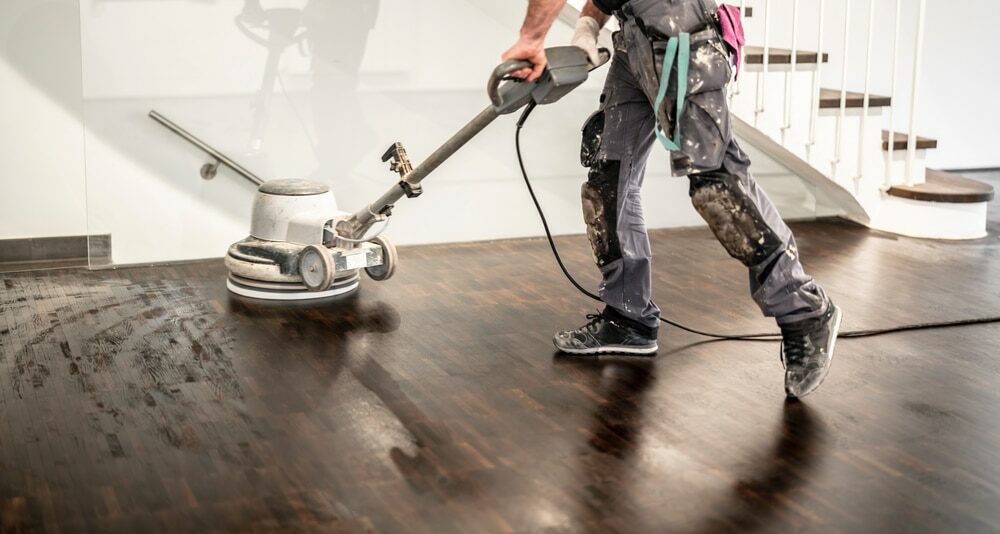
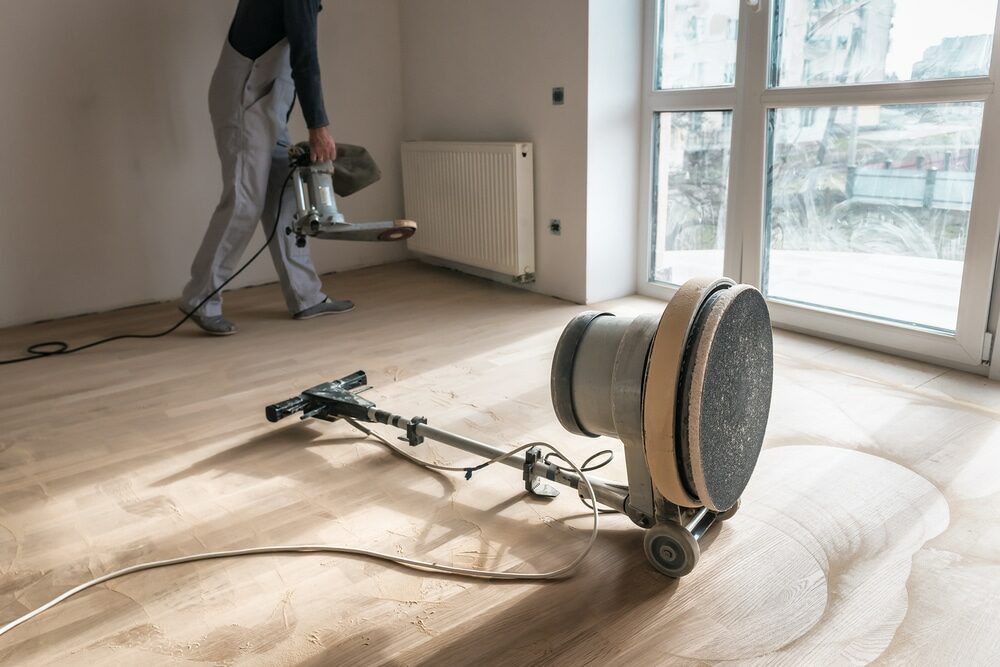
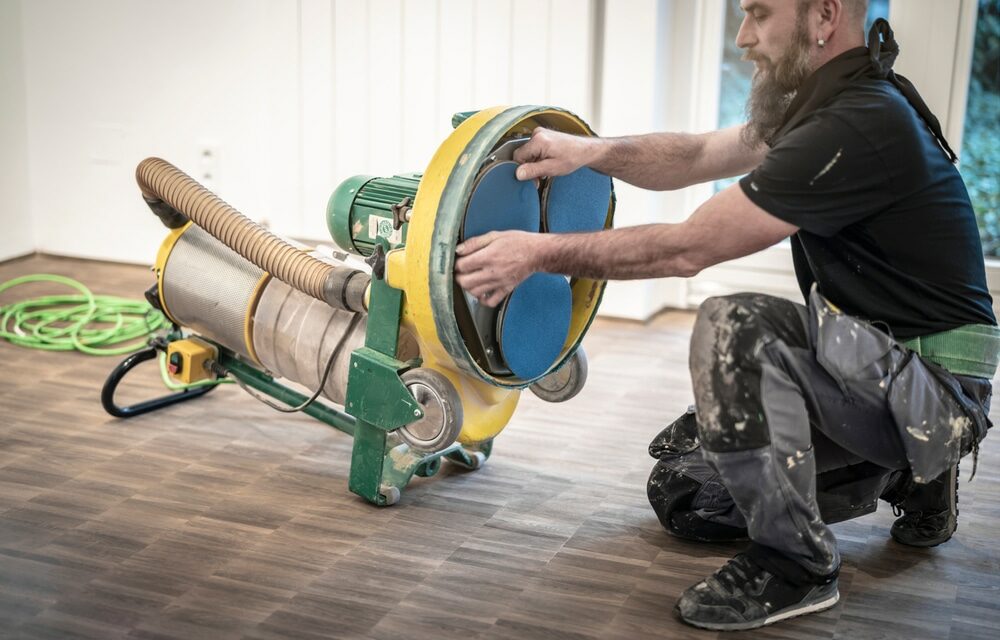
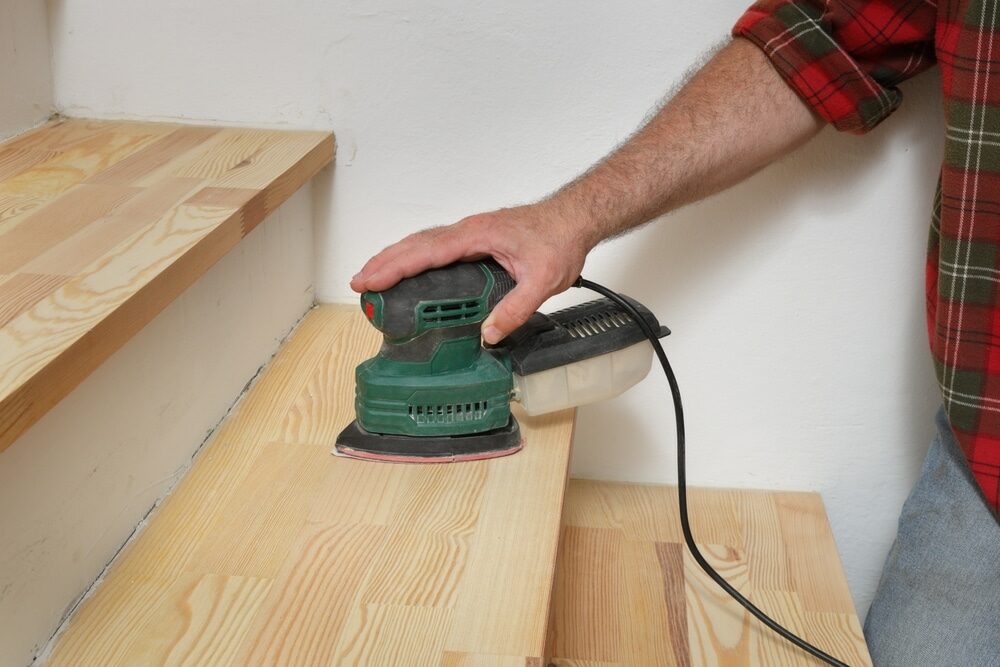
- Floor Buffer: This is the primary machine used for buffing. It’s a large, motorised machine with a rotating base designed to hold buffing pads or screens. Floor buffers come in different sizes, typically ranging from 13 to 20 inches in diameter, depending on the size of the area you’re working on and your specific needs.
- Buffing Pads and Screens:
- Buffing Pads: These are typically circular, thick pads made of synthetic materials or natural fibres, and they’re used for polishing the floor.
- Buffing Screens: These are abrasive screens that come in various grits. They’re used to abrade the floor’s surface gently to remove minor scratches and prepare it for a new coat of finish.
- Vacuum or Dust Mop:
- Used for cleaning the floor before and after buffing to ensure that it’s free from dust and debris. This step is crucial to achieving a smooth, clean finish.
- Protective Gear:
- Safety Goggles: Protect your eyes from dust and debris.
- Ear Protection: The buffer can be loud, so ear protection like earmuffs or earplugs is recommended.
- Dust Mask or Respirator: Protects against inhaling dust or fumes, especially if you’re also applying a finish or sealant.
- Extension Cord: A heavy-duty, grounded extension cord that’s suitable for the power requirements of the floor buffer. This gives you more mobility as you work across the floor.
- Cleaning Solutions: Depending on the condition of your floor, you might need a wood floor cleaner to clean the floor before buffing it thoroughly.
- Applicators: If you’re planning to reseal or refinish the floor after buffing, you’ll need:
- Lambswool or Synthetic Applicators: For applying polyurethane or other finishes.
- Brushes: for edges or detailed work.
- Paint Trays: For holding and easily accessing the finish.
- Tack Cloth: This is a sticky cloth used to pick up and remove the fine dust left after buffing, ensuring a clean surface before applying a finish.
- Painter’s Tape: Useful for marking off areas or protecting baseboards and trimming from potential damage or finish staining.
- Knee Pads: If you need to work on your knees for edge work or detailed tasks, these can offer comfort and protection.
Having the right equipment on hand ensures that the buffing process goes smoothly and that the finished result is a beautifully restored wood floor. Before starting, always ensure that all equipment is in good working order and that you’re familiar with its operation to ensure safety and effectiveness.

The Wood Floor Buffing Process: Step-by-Step
Buffing a wood floor is a systematic process that requires attention to detail to achieve optimal results. Here’s a step-by-step breakdown of the wood floor buffing process:
1. Preparation:
- Clear the Area: Remove all furniture, rugs, and other items from the floor.
- Clean the Floor: Use a vacuum or a dust mop to remove loose dust, dirt, and debris. For deeper cleaning, use a wood floor cleaner and allow the floor to dry completely.
- Inspect the Floor: Check for protruding nails, loose boards, or other issues that might damage the buffer or the floor during the buffing process. Address these issues before proceeding.
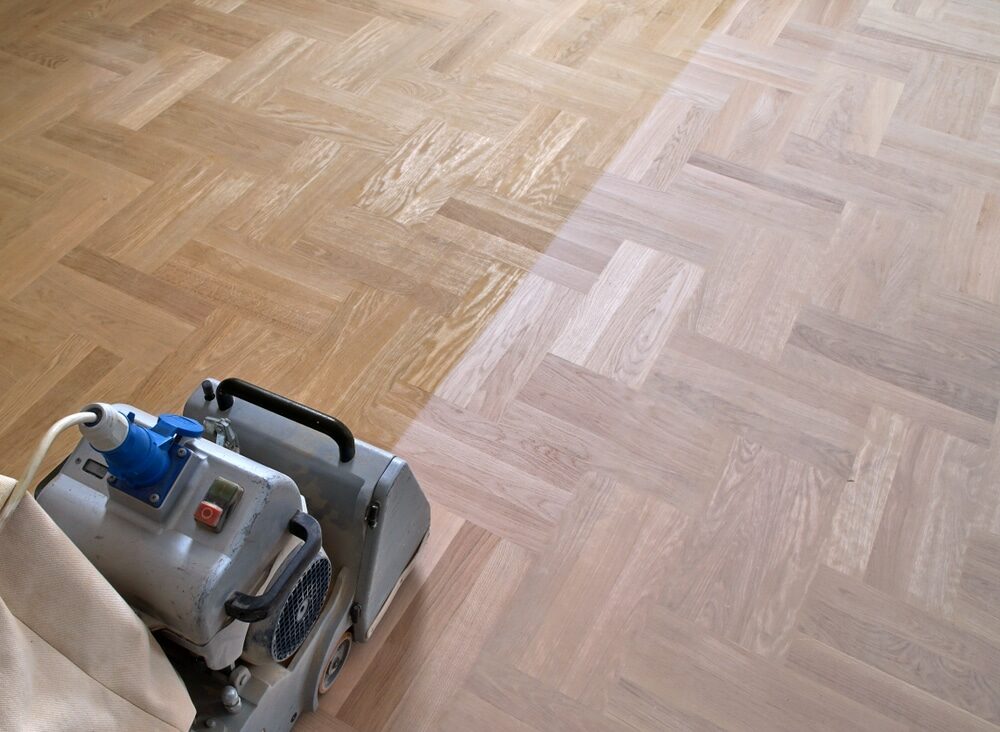
2. Choose the Right Buffing Screen or Pad:
- Depending on the condition of your floor and the desired result, choose the appropriate grit. A coarser grit (e.g., 60–80 grit) can be used for floors with more significant scratches or when preparing for a new coat of finish. A finer grit (e.g., 120–150 grit) is suitable for general polishing.
3. Attach the buffing screen or pad to the buffer.
- Centre the screen or pad on the buffer’s base and ensure it’s securely attached.
4. Begin buffing:
- Turn on the buffer and slowly guide it across the floor. Move in a straight line, overlapping each pass slightly to ensure uniform treatment. Always keep the buffer moving to avoid creating depressions or uneven spots.
- For corners and edges that the buffer can’t reach, hand-sand or use a smaller edging machine if available.
5. Check Your Work:
- Periodically turn off the buffer and inspect the floor. Look for areas that might need more attention or spots you may have missed.
6. Clean the floor:
- Once buffing is complete, thoroughly vacuum or dust mop the floor to remove all the dust produced during the buffing process.
- Wipe the floor with a tack cloth to pick up any remaining fine dust particles.
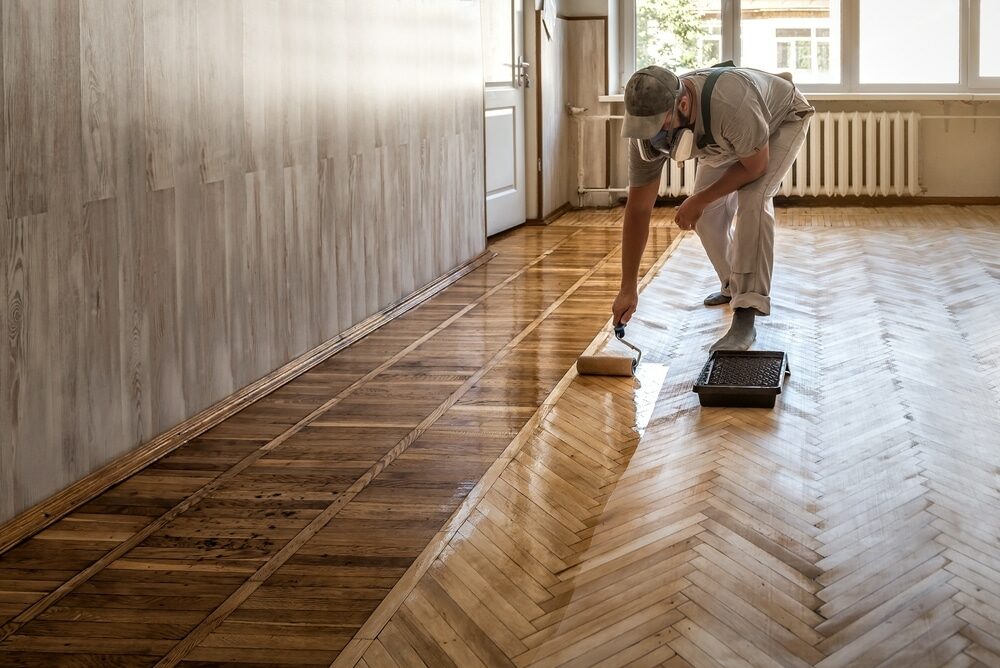
7. Apply finish or sealant (if desired):
- If you’re resealing or refinishing the floor after buffing, ensure the floor is entirely free from dust and debris.
- Apply the chosen finish or sealant following the manufacturer’s instructions, using applicators like lambswool pads or brushes.
- Allow the finish to dry for the recommended time before using the floor. This may range from a few hours to several days, depending on the product.
8. Post-Buffing Care:
- Once everything is dry, cautiously move the furniture back into place. It’s advisable to use felt pads under furniture legs to prevent scratches.
- For best results, avoid heavy foot traffic and placing heavy items on the floor until the finish is completely cured, which can take up to a week or more, depending on the product.
Tips for Effective Wood Floor Buffing
Buffing wood floors can transform a worn-out-looking surface into a rejuvenated, shiny masterpiece. For the most effective results, consider the following tips:
- Understand Your Floor: Before you begin, understand the type and finish of your wood floor. Different woods and finishes may react differently to buffing.
- Start Clean: Always ensure that the floor is thoroughly cleaned before you start buffing. Sweep, vacuum, or use a dust mop to get rid of any dirt, grit, or debris. These particles can scratch the wood if they get caught under the buffer.
- Choose the Right Grit: Buffing screens come in different grits. Start with a finer grit and only move to a coarser one if necessary. Remember, the goal is to polish and lightly abrade the surface, not to remove significant amounts of wood or finish.
- Test a Small Area First, before buffing the entire floor, test a small, inconspicuous area to ensure you’re getting the desired result. This will give you a feel for how the buffer operates and how your floor reacts.
- Move the Buffer Consistently: Move the buffer in a smooth, side-to-side motion, overlapping each pass slightly. This ensures a consistent finish without creating swirl marks.
- Keep the Buffer Moving: Never let the buffer sit in one place when it’s turned on. Doing so can damage that particular spot on the floor.
- Check Your Progress: Periodically turn off the buffer and check your progress. Look for any missed spots, swirl marks, or areas that might need additional attention.
- Dust After Buffing: After you’ve finished buffing the entire area, go over the floor with a tack cloth, dust mop, or vacuum to remove the fine dust generated from the process.
- Protect Your Health: Always wear protective gear, including safety goggles, ear protection, and a dust mask or respirator. This will protect you from dust, debris, and potential chemicals if you’re applying a finish afterward.
- Prepare for Finishing: If you plan to apply a new coat of finish after buffing, ensure the floor is perfectly clean. Any residual dust can create imperfections in the final finish.
- Maintain Your Equipment: Clean buffing pads and screens after use. Regularly check the buffer for any signs of wear or malfunction. Well-maintained equipment will give better results and last longer.
- Be patient. Especially if you’re new to the process, take your time. Rushing can lead to mistakes or uneven results. Remember, the goal is a beautifully restored floor.
- Stay educated: wood floor finishes and technologies evolve. Stay updated with the latest techniques, equipment, and finishes for the best results.
Common Mistakes to Avoid While Wood Floor Buffing
Avoiding common mistakes during the wood floor buffing process is crucial for achieving a desirable finish. Here are some of the most common errors and how to sidestep them:
- Skipping the Cleaning Step: Not thoroughly cleaning the floor before buffing can result in dirt and debris getting caught under the buffer. This can scratch or damage the wood. Always sweep, vacuum, or use a dust mop to ensure the floor is clean before starting.
- Using the Wrong Grit: Starting with a grit that’s too coarse can damage the wood or remove too much of the existing finish. It’s better to start with a finer grit and switch to a coarser one only if necessary.
- Not Testing a Small Area: Jumping in without testing can lead to undesirable results. Always test a small, inconspicuous area first to see how the wood reacts to the buffing process.
- Moving Too Fast: Rushing the buffing process or moving the buffer too quickly can result in uneven finishes, missed spots, or swirl marks. Maintain a steady, consistent pace.
- Letting the Buffer Sit Idle: Leaving a running buffer stationary in one spot, even for a few seconds, can damage that floor area. Always keep the buffer moving when it’s turned on.
- Not Checking Your Progress: Failing to check your work periodically can lead to areas being over-buffed or missed entirely. Take breaks, turn off the machine, and inspect the floor for consistency.
- Using a worn-out pad or screen: A worn-out buffing pad or screen can lead to inconsistent results. Change them out as needed for optimal performance.
- Improper Edge Work: Neglecting to buff edges or corners properly can make these areas look different from the rest of the floor. If the buffer can’t reach them, take care to buff these areas by hand or with appropriate tools.
- Not Wearing Proper Safety Gear: Skipping safety goggles, ear protection, or a dust mask can lead to injury or health risks. Always wear appropriate protective gear.
- Failing to Dust After Buffing: Fine dust remains on the floor even after buffing. If a finish is applied without cleaning it up, it can get trapped, resulting in a rough and unattractive finish.
- Not Following the Manufacturer’s Instructions: Every buffer and finished product can have specific instructions. Not following them can lead to poor results or even damage the floor.
- Buffing Too Often: While buffing is less aggressive than sanding, doing it too frequently can still wear down the wood and finish over time. Buff only when necessary to restore lustre or prepare for a new finish.
- Not Preparing the Room: Failing to remove furniture, cover vents, or protect baseboards can lead to damage or an uneven buffing process.
Conclusion
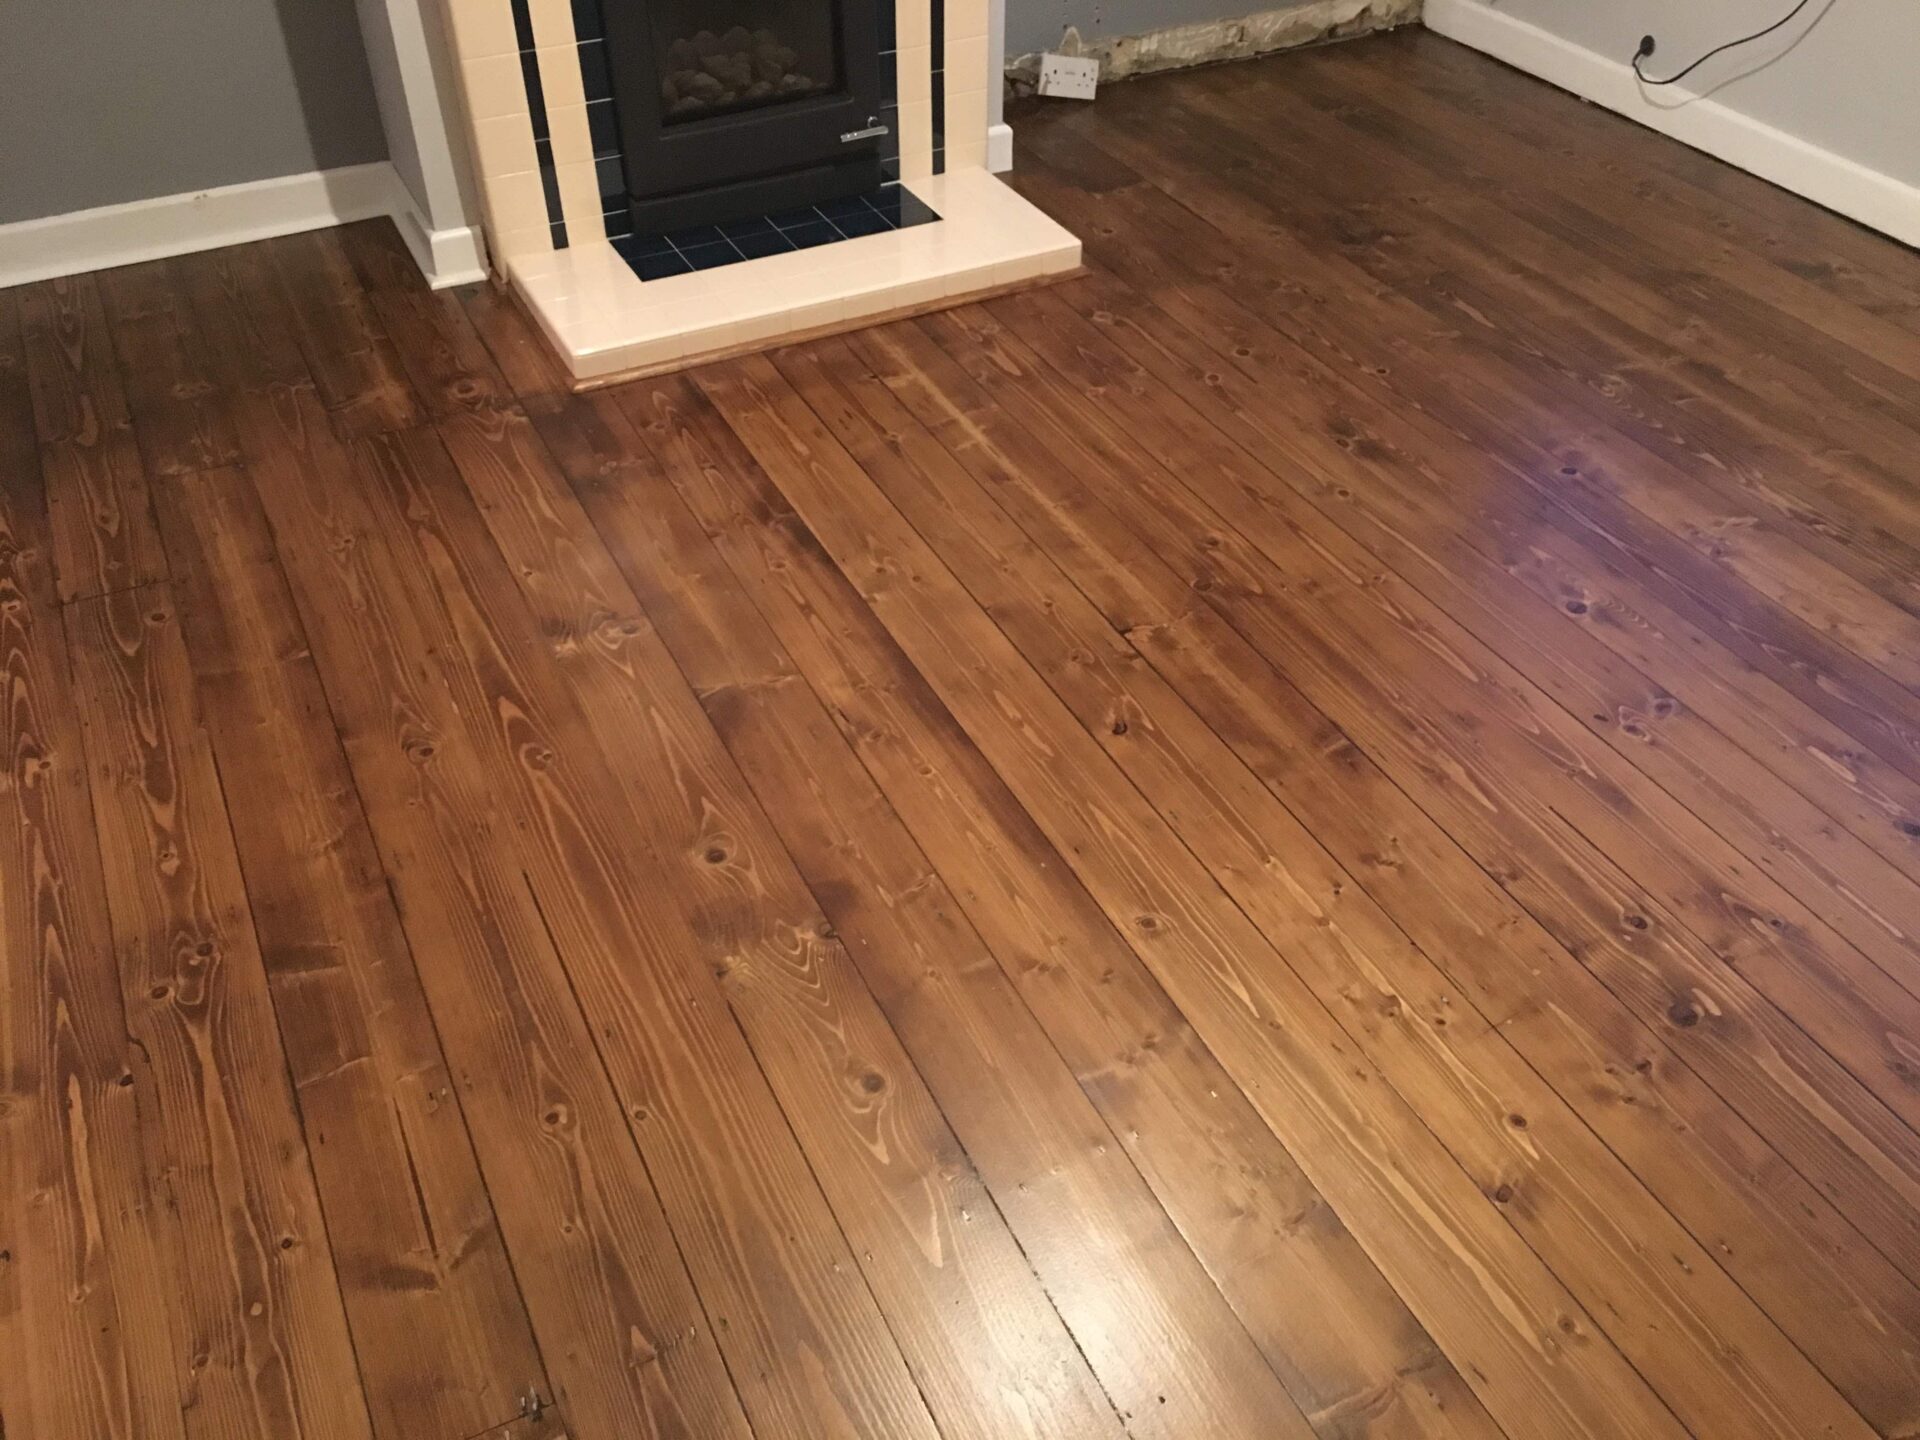
Buffing, while a single step in the floor sanding process, plays a critical role in achieving that mirror-like finish we all desire for our wooden floors. With the right equipment, techniques, and patience, even beginners can master the art of buffing. Remember, as with any skill, practice makes perfect. So, equip yourself with the knowledge, and soon, you’ll be achieving floors that are not just functional but also artistically finished.
Some Useful Links:
- Stairs Sanding & Refinishing
- Floor Sanding Services
- School Floor Sanding
- Wood Floor Restorations
- Wood Floor Repairs
- Wood Floor Polishing
More from our Blog:
How to Repair Damaged Floors with Belt Sanding
Step-by-Step Guide to Belt Sanding Your Floors
Innovative Techniques for Using Belt Sanders in Floor Refinishing
How to Achieve a Perfectly Flat Surface with Belt Sanding for Floor Refinishing
Common Belt Sanding Tools and Accessories for Floor Refinishing
The Role of Belt Sanding in Achieving a Professional Finish on Your Floors
Belt Sanding vs. Drum Sanding for Floor Refinishing

Sanding
We provide virtually dust-free sanding with our continuous belt machinery with mobile extraction units, giving you a safer environment for your family.
Oiling
This organic finish not only adds beauty to your home but also has exceptional water-repellent characteristics, making it easier to clean and maintain.
Waxing
This natural floor finish offers the softest and most mellow appearance – and leaves your floor able to breath.
Buffing
Using soft buffing machines (and hand-polishing where required) will bring a wonderful sheen to your newly-finished floor.
Repairs
We offer a full assessment of your wooden floors to determine what repairs are needed to provide the perfect working surface for the later stages of sanding, staining and sealing.
Restoration
We offer a comprehensive restoration process designed to address floors that are improperly fitted or damaged over time through wear and tear.
Request a fixed price quote for your wood floor restoration now
Simply enter your postcode below to get started.
Services
Wood Floor Sanding Wood Floor Restoration Wood Floor Scratch Repair Squeaky Wood Floor Repair Parquet Floor Sanding Parquet Floor Restoration Commercial Floor Sanding Church Floor Sanding Community Centre Floor Sanding School Floor Sanding Gap Filling Gap Filling with ResinCopyright © Mr Sander®
Privacy & Cookies Terms & Conditions Complaints Procedure Cancellation Rights Sitemap

Get An Instant Price Estimate Before You Go…
Simply enter the rooms you need sanded and we’ll provide you with a price estimate instantly! Try our price calculator now.
Get a Price Estimate NowLocal Floor Sanding Experts
Over 500 5-Star Reviews
Safe, Dust Free Sanding
Operating Since 1994