London:
Nationwide:
25,000+
Floors Restored
27 Years Experience
Wood Flooring Association Certified
Quick Tips for Sanding Your Deck
Posted on December 8, 2023
Deck Sanding
Essential Deck Sanding Tips for Quick and Effective Results
A well-maintained deck can be a wonderful addition to any home, offering a space for relaxation, entertainment, and enjoying the outdoors. However, exposure to the elements can take its toll over time, leaving your deck weathered and worn. This is where the importance of sanding your deck comes into play.
In this comprehensive guide, we will explore the essential tips and techniques for sanding your deck effectively. Whether you’re a seasoned DIY enthusiast or a first-time deck owner, understanding the process of sanding can make a significant difference in restoring your deck’s beauty and extending its lifespan.
We’ll cover everything from safety precautions to selecting the right tools, preparing your deck, mastering sanding techniques, dealing with stains, achieving a smooth finish, and maintaining your deck’s pristine condition. By the end of this blog post, you’ll be equipped with the knowledge and confidence to tackle your deck sanding project with ease.
So, let’s roll up our sleeves and dive into the world of deck restoration. Get ready to transform your weathered deck into a stunning outdoor space you can be proud of!
Safety Precautions
Before you embark on your deck sanding project, it’s crucial to prioritize safety. Sanding involves the use of power tools and exposure to potential hazards, so taking the necessary precautions is paramount. Here are some key safety measures to keep in mind:
1. Protective Gear:
- Ensure you have the appropriate safety gear, including:
- Safety goggles or glasses to shield your eyes from flying debris.
- Ear protection, such as earmuffs or earplugs, to reduce noise from power sanders.
- A dust mask or respirator to prevent inhaling harmful dust particles.
- Sturdy work gloves to protect your hands from splinters and abrasions.
- Long-sleeved clothing and closed-toe shoes to safeguard your skin and feet.
2. Environmental Considerations:
- Choose a day with favorable weather conditions. Avoid sanding on windy days to prevent dust from spreading.
- Protect nearby plants, furniture, and surfaces by covering them with plastic sheeting or drop cloths.
- Be mindful of the environment; if your deck has old paint or finish, check for lead-based products and follow proper disposal regulations.
3. Power Tool Safety:
- If using a power sander, ensure it is in good working condition with a secure power cord.
- Familiarize yourself with the sander’s operation and follow the manufacturer’s instructions.
- Keep the power cord away from the sanding area to prevent accidental entanglement.
4. Electrical Safety:
- If you need to use extension cords, make sure they are suitable for outdoor use and in good condition.
- Keep cords off the deck’s surface to avoid tripping hazards.
5. First Aid Kit:
Have a basic first aid kit nearby, including bandages, antiseptic wipes, and any necessary medications in case of minor injuries.
6. Fire Safety:
Be cautious when discarding sanding dust and debris, as it can be flammable. Store it in a safe container and dispose of it properly.
7. Bystander Safety:
If others are present, make sure they stay clear of the sanding area and wear safety gear if they are assisting.
By taking these safety precautions seriously, you can minimize the risks associated with deck sanding and ensure a safe and successful project. Remember, your well-being is of utmost importance, so don’t overlook safety measures at any stage of the process.

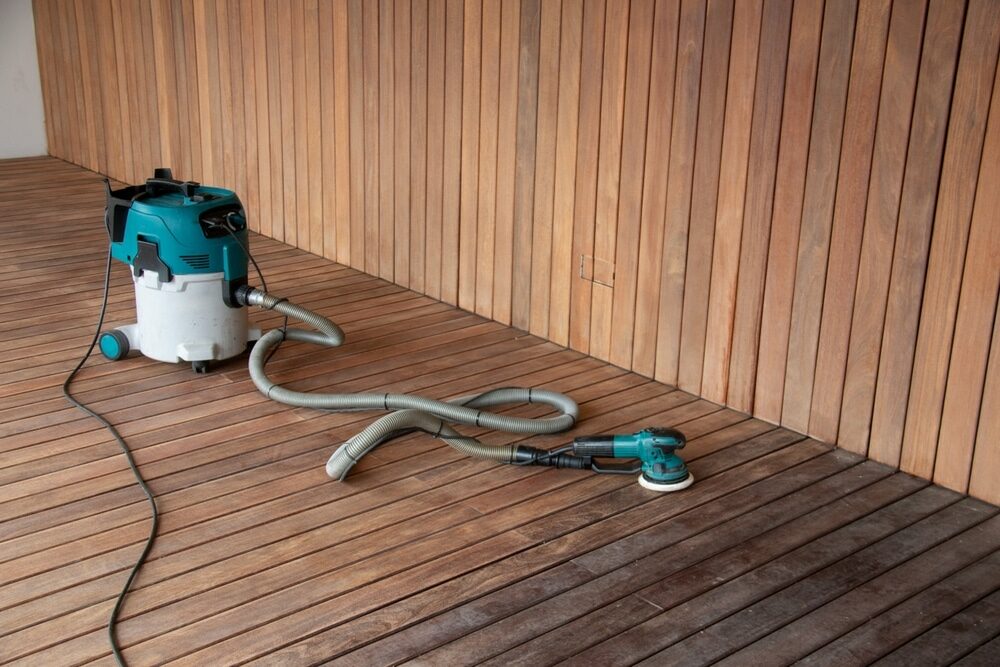
Gathering the Right Tools
To achieve a professional-looking finish when sanding your deck, it’s essential to gather the right tools and equipment. Here’s a list of items you’ll need:
Sander, Sandpaper, Palm Sander (optional), Extension Cord, Sanding Blocks, Paint Scraper, Sanding Screen (optional), Deck Cleaning Solution, Broom and Dustpan, Shop Vacuum, Safety Gear, Drop Cloths or Plastic Sheeting, Nail Set and Hammer, Deck Stain or Sealant, Stain Applicator or Brush, Stir Stick and Paint Tray.
Before starting your project, double-check that all your tools are in good working order and that you have an adequate supply of sandpaper. Having the right tools at your disposal will make the sanding process more efficient and help you achieve the desired results for your deck.
Preparing Your Deck
Before you start sanding your deck, it’s crucial to prepare the surface properly. Proper preparation will not only lead to a better sanding outcome but also help protect your deck and extend its lifespan. Here’s how to prepare your deck:
- Clear the Deck: Remove all furniture, potted plants, and any other objects from the deck. This will give you a clear and unobstructed work area.
- Inspect Nails and Screws: Carefully check for any protruding nails or screws. Use a nail set and hammer to sink them below the surface. This prevents damage to your sandpaper and ensures an even sanding surface.
- Cleaning and Washing:
- Sweep Thoroughly: Use a broom to remove leaves, dirt, and loose debris from the deck’s surface.
- Pressure Wash (Optional): If your deck is heavily soiled or has mold or mildew, consider pressure washing. Use a deck cleaner or wood brightener according to the manufacturer’s instructions. Be cautious not to damage the wood by using too much pressure.
- Allow Deck to Dry: If you’ve pressure washed, allow the deck to dry completely. This may take a day or two, depending on the weather conditions.
- Replace Any Damaged Boards: Inspect the deck boards for rot or significant damage. Replace any boards that are beyond repair to ensure a stable and safe deck.
- Fill Cracks and Holes (Optional): If your deck has small cracks or holes, you can use a wood filler to fill them in. Allow the filler to dry completely before sanding.
- Remove Mold and Mildew (Optional): If you notice mold or mildew stains after cleaning, use a mold and mildew remover to treat the affected areas. Rinse thoroughly and allow the deck to dry again.
- Protect Nearby Areas: Cover any nearby plants, surfaces, or items that you want to protect from dust and debris during the sanding process. Use plastic sheeting or drop cloths for this purpose.
Properly preparing your deck is a crucial step in achieving a smooth and even finish during the sanding process. It also ensures that any stains, dirt, or damage are addressed before you start sanding, resulting in a cleaner and more effective restoration of your deck’s appearance.
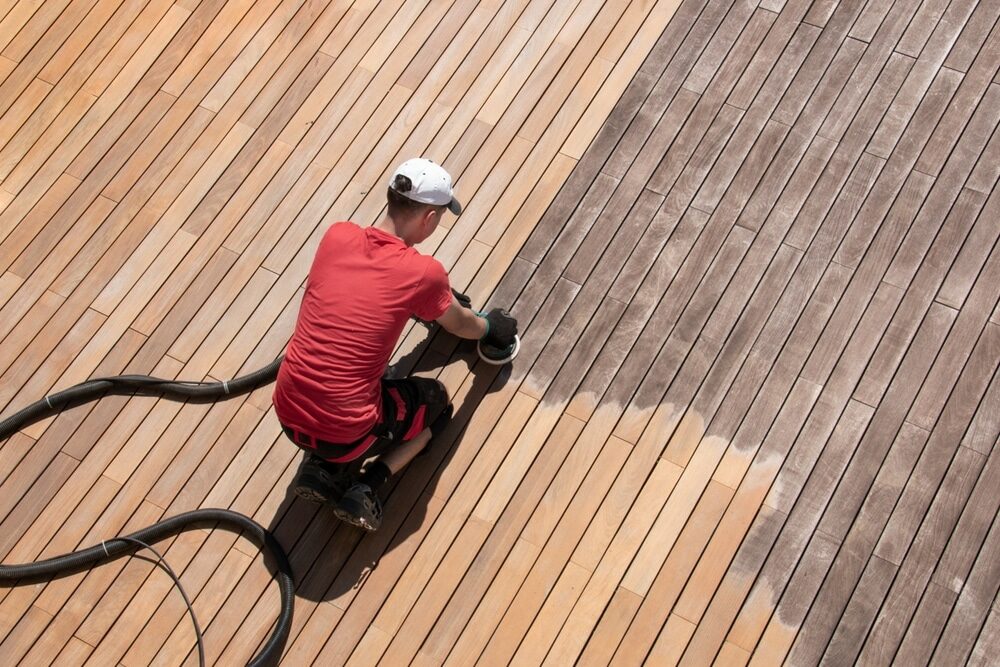
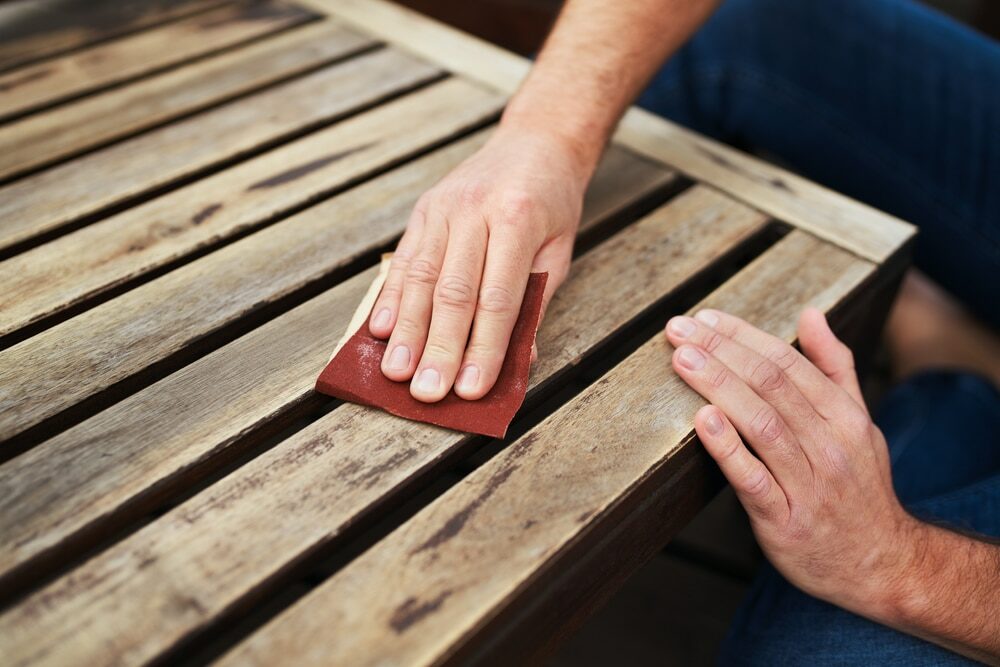
Sanding Techniques
Sanding your deck effectively requires the right techniques to achieve a smooth and even finish. Here are some essential sanding techniques to follow:
1. Start with Coarse Grit:
Begin with coarse grit sandpaper (around 60-80 grit) to remove any old finish, rough spots, or imperfections on the deck’s surface. Sand in the direction of the wood grain to avoid cross-grain scratches.
2. Work Methodically:
Divide your deck into manageable sections and work one section at a time. Start at one end and move systematically to the other. Overlapping your passes slightly ensures consistent sanding.
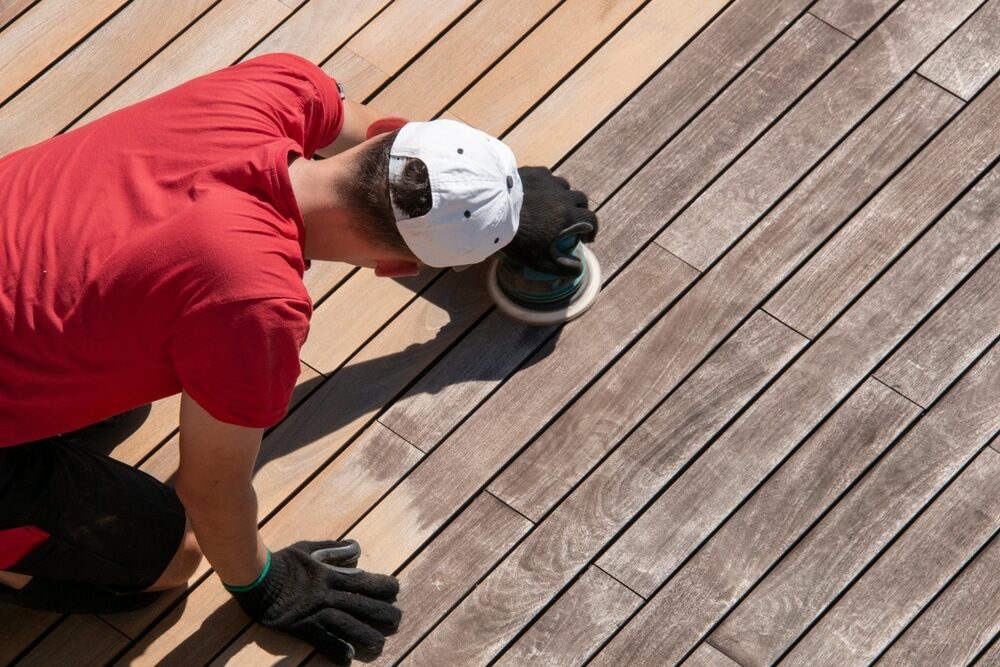
3. Use a Steady Hand:
When using a power sander, maintain a firm grip but don’t apply excessive pressure. Allow the sander to do the work. Apply even pressure, and avoid tilting the sander, which can lead to uneven sanding.
4. Sanding Patterns:
To achieve the best results, use the following sanding patterns:
- For the main deck area, sand parallel to the deck boards (with the grain).
- For railings and vertical surfaces, sand in a vertical direction (with the grain).
- For edges and corners, switch to a handheld sander or sanding block and sand parallel to the grain.
5. Keep the Sander Moving:
Never let the sander sit in one spot for too long, as this can result in gouges or uneven areas. Please keep it in constant motion to ensure a uniform finish.
6. Change Sandpaper Grit Gradually:
As you progress through the sanding process, switch to finer grits (e.g., 100-150 grit) for general smoothing and a final pass with even finer grits (e.g., 180-220 grit) for a polished finish. Gradually transitioning between grits ensures a smoother surface.
7. Inspect Your Progress:
Periodically stop and inspect the sanded area. Look for any remaining imperfections, spots, or raised grain. Address these by going over them with the appropriate grit sandpaper until the surface is uniform.
8. Edge Sanding:
Sand the edges of the deck boards and any railings or posts. Be careful not to round the edges too much; you want to maintain a crisp edge.
9. Clean Sanding Dust:
Use a shop vacuum to clean up sanding dust frequently. Keeping the work area clean allows you to see your progress and ensures a more accurate finish.
10. Final Pass:
After reaching your desired smoothness, perform a final pass with the finest grit sandpaper to create a silky-smooth surface. This step is crucial if you plan to apply a finish to your deck.
11. Hand Sanding for Detail:
For intricate or hard-to-reach areas, switch to hand sanding with sanding blocks or sheets. This ensures that every part of your deck is properly smoothed.
By following these sanding techniques and taking your time to work systematically, you’ll achieve a beautifully sanded deck that’s ready for the next steps in the restoration process. A well-sanded surface will also make applying finishes like stains or sealants more effective and long-lasting.
Dealing with Stains and Discoloration
Over time, your deck may accumulate various stains and discolorations, which can be unsightly and affect the overall appearance of the wood. Before proceeding with the sanding process, it’s essential to address these issues. Here’s how to deal with stains and discoloration on your deck:
1. Identify the Stains:
- Water Stains: These are often light, cloudy marks caused by rain or moisture. They may disappear after sanding, but if they persist, they can be minimized by sanding and refinishing the entire deck.
- Mold and Mildew Stains: These appear as black or green spots and are a common issue in damp environments. Use a mold and mildew remover to treat the affected areas before sanding.
- Rust Stains: Caused by metal objects left on the deck, rust stains can be challenging to remove. You may need a rust remover product specifically designed for wood surfaces.
- Tannin Stains: These reddish-brown stains are often caused by leaves or other organic materials. Sanding usually helps fade them, but in severe cases, you may need to use a wood bleach or stain remover.
2. Pre-Treat Stains (if necessary):
- Apply the appropriate stain remover or treatment following the manufacturer’s instructions.
- Allow the treatment to sit for the recommended duration, ensuring it penetrates the wood’s surface.
3. Sand Stained Areas Carefully:
- After pre-treatment, sand the stained areas gently using the appropriate grit sandpaper. Start with a coarser grit if the stain is stubborn, and gradually switch to finer grits.
- Be cautious not to over-sand the stained area, as this can result in uneven patches on the deck.
4. Inspect and Repeat (if needed):
After sanding, inspect the stained areas to see if the stains have been adequately addressed. If not, repeat the pre-treatment and sanding process as necessary until the stains are minimized or removed.
5. Overall Sanding:
Once you’ve dealt with specific stains or discolorations, continue with the general sanding process for the entire deck surface, as outlined in the previous section.
6. Final Cleaning:
After deck sanding, use a shop vacuum and a damp cloth to remove sanding dust and ensure the deck is clean and ready for the next steps in the restoration process.
Dealing with stains and discolorations before sanding your deck is essential for achieving a uniform and attractive finish. By identifying the types of stains you’re facing and using the appropriate treatments, you can effectively minimize or eliminate these blemishes, leaving your deck refreshed and revitalized.
Smooth Finish Tips
Achieving a smooth finish when sanding your deck is essential for both aesthetics and longevity. Here are some tips to help you attain that beautifully smooth surface:
- Choose the Right Sandpaper Grit
- Sanding Direction
- Even Pressure
- Inspect Your Progress
- Avoid Over-Sanding
- Edge and Corner Sanding
- Final Pass
- Clean Sanding Dust
- Between Coats
- Test for Smoothness
- Proper Lighting
- Take Your Time
By following these smooth finish tips and taking your time during the sanding process, you’ll be well on your way to transforming your deck into a surface that not only looks great but also feels smooth and inviting underfoot. A smooth finish not only enhances the appearance of your deck but also prolongs the life of any finishes you apply.
Cleaning Up After Sanding
After you’ve completed the sanding deck process, it’s essential to perform a thorough cleanup to remove all dust and debris. Proper cleanup ensures a clean surface for finishing and prevents dust from spreading to other areas. Here’s how to clean up after sanding your deck:
1. Shop Vacuum: Use a shop vacuum with a fine dust filter attachment to vacuum up the majority of the sanding dust. Focus on the deck surface, edges, corners, and any nearby surfaces that may have collected dust.
2. Tack Cloth: After vacuuming, use a tack cloth (a sticky, lint-free cloth) to wipe down the entire sanded surface. The tack cloth will pick up any remaining fine dust particles that the vacuum might have missed.
3. Rinse the Deck: If your deck is outside, you can lightly hose it down to remove any lingering dust. However, be cautious not to soak the wood excessively, as it needs to dry thoroughly before applying any finishes.
4. Dispose of Waste Properly: Empty the shop vacuum’s dustbin into a plastic bag, seal it tightly, and dispose of it according to your local waste disposal regulations. Sanding dust may contain harmful materials, so proper disposal is crucial.
5. Clean the Work Area: Remove any plastic sheeting or drop cloths used to protect nearby areas and surfaces. Shake them out and fold them for storage or disposal.
6. Inspect and Maintain Equipment: Clean and maintain your sanding equipment, such as power sanders and hand tools, according to the manufacturer’s instructions. Store them in a dry and safe place for future use.
7. Personal Cleanup: If you’ve worn protective gear, such as gloves, a dust mask, or safety goggles, clean and store them properly. Wash your hands and face to remove any dust particles that may have settled.
8. Final Inspection: Take a final look at your deck to ensure it’s free from dust and debris. A clean surface is essential for a successful finish application.
Remember that proper cleanup is not only for aesthetics but also for the longevity of your deck. Dust and debris left on the surface can interfere with the adhesion of finishes like stains or sealant, leading to an uneven or ineffective result. Taking the time to clean up thoroughly will pay off in the quality and durability of your deck’s finish.
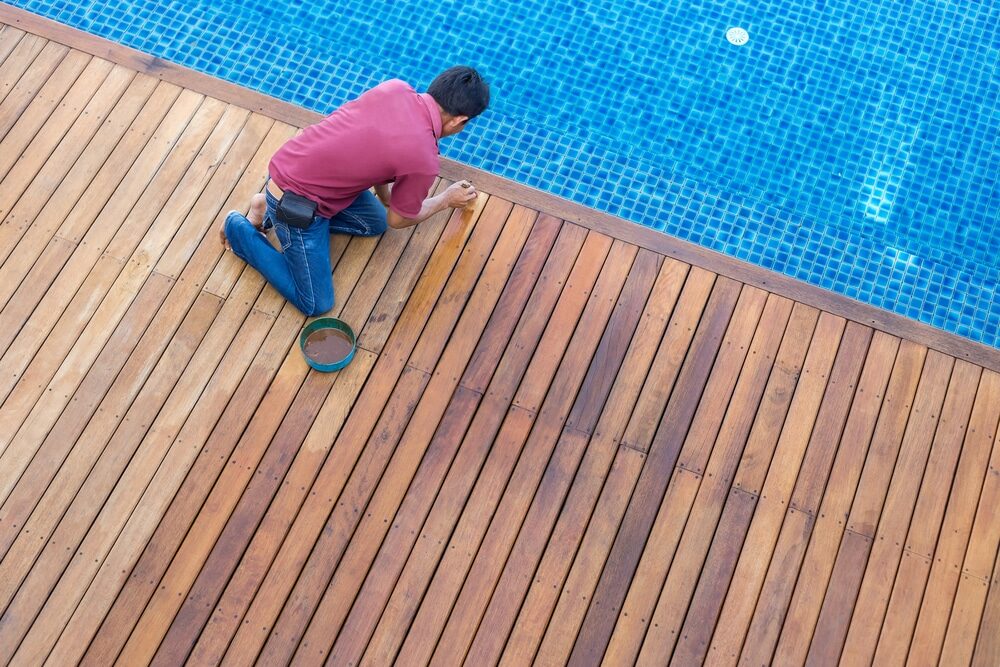
Applying a Finish
Once you’ve sanded and cleaned your deck, the next step is to apply a finish, such as a stain or sealant. This step is crucial for protecting the wood and enhancing the deck’s appearance. Here’s how to apply a finish to your deck:
1. Select the Right Finish:
- Stain: If you want to enhance the natural beauty of the wood and add color, choose a deck stain. Stains come in various opacities, from clear to solid colors.
- Sealant: A clear deck sealant or wood preservative is ideal if you want to protect the wood without altering its color. Sealants provide UV protection and water resistance.
2. Check the Weather:
Choose a day with favorable weather conditions for applying the finish. Ideally, it should be dry, with no rain in the forecast for at least 24-48 hours after application.
3. Prepare Your Tools and Materials:
- Depending on your chosen finish, you may need brushes, rollers, or a sprayer for application.
- Stir the finish thoroughly before starting to ensure an even application.
- Have a paint tray or bucket for pouring the finish if using a brush or roller.
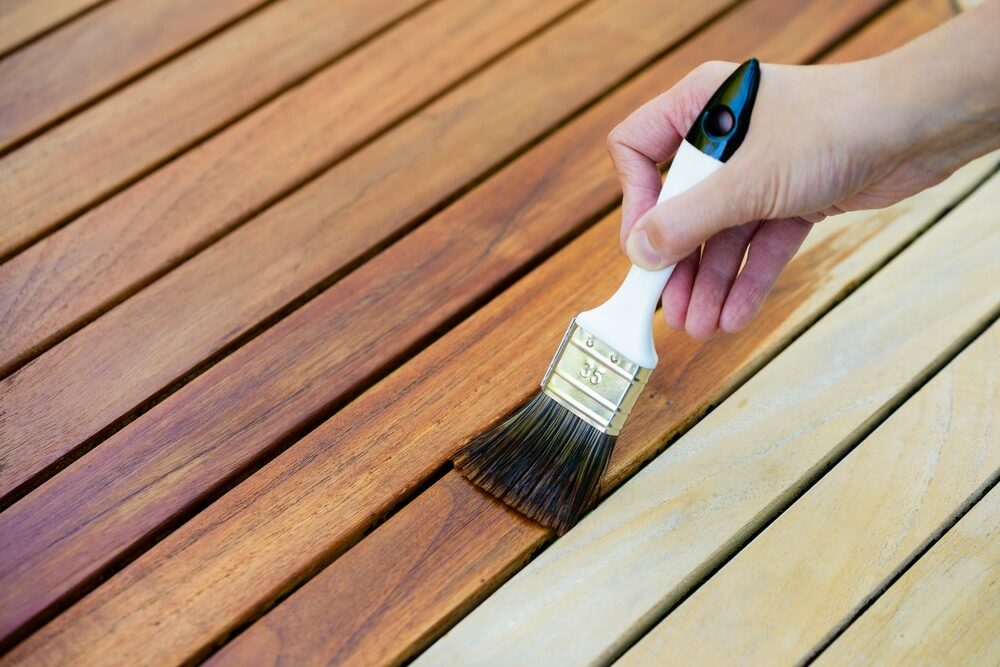
4. Apply Finish Carefully:
- Start by applying the finish to the deck’s perimeter, railings, and other vertical surfaces using a brush or roller.
- Work your way from one end of the deck to the other, applying the finish along the length of the deck boards.
- Apply even, thin coats to avoid drips and unevenness. Overlap each pass slightly to ensure consistent coverage.
- If using a sprayer, follow the manufacturer’s instructions for even application and coverage.
5. Work in Sections:
Divide the deck into manageable sections and complete one section at a time to ensure a wet edge and avoid lap marks.
6. Be Mindful of Drying Time:
Allow the first coat to dry according to the manufacturer’s instructions, which can vary depending on the product and weather conditions. Typically, it takes several hours to dry.
7. Apply Additional Coats (if needed):
Depending on the type of finish and the level of protection you desire, you may need to apply multiple coats. Follow the same application process for each coat, allowing proper drying time between coats.
8. Finish Horizontal Surfaces:
After the vertical surfaces are complete, apply the finish to the main deck surface, working in the direction of the wood grain.
9. Allow for Complete Drying:
It’s essential to allow the finish to dry thoroughly before using the deck. This can take anywhere from 24 hours to several days, depending on the product and environmental conditions.
10. Clean-Up Tools:
Clean your brushes, rollers, sprayer, and any other tools you used for application immediately after use, following the manufacturer’s recommendations for the specific finish.
11. Enjoy Your Newly Finished Deck:
Once the finish is completely dry, you can move furniture back onto the deck and enjoy your refreshed outdoor space.
Regularly maintaining your deck’s finish by reapplying as needed will help protect the wood from the elements and keep it looking its best for years to come. Be sure to follow the manufacturer’s instructions on the finished product for the best results.
Conclusion
Congratulations! You’ve successfully learned the ins and outs of sanding and maintaining your deck to transform it into a beautiful and long-lasting outdoor space. With the knowledge and tips shared in this guide, you can now take on your deck restoration project with confidence.
By following these steps and tips, you’ve transformed your weathered deck into a welcoming outdoor oasis. Remember that deck maintenance is an ongoing process, so continue to care for your deck to enjoy it for years to come. Now, step out onto your beautifully sanded and finished deck and relish the results of your hard work. Enjoy your outdoor space to the fullest!


Sanding
We provide virtually dust-free sanding with our continuous belt machinery with mobile extraction units, giving you a safer environment for your family.
Oiling
This organic finish not only adds beauty to your home but also has exceptional water-repellent characteristics, making it easier to clean and maintain.
Waxing
This natural floor finish offers the softest and most mellow appearance – and leaves your floor able to breath.
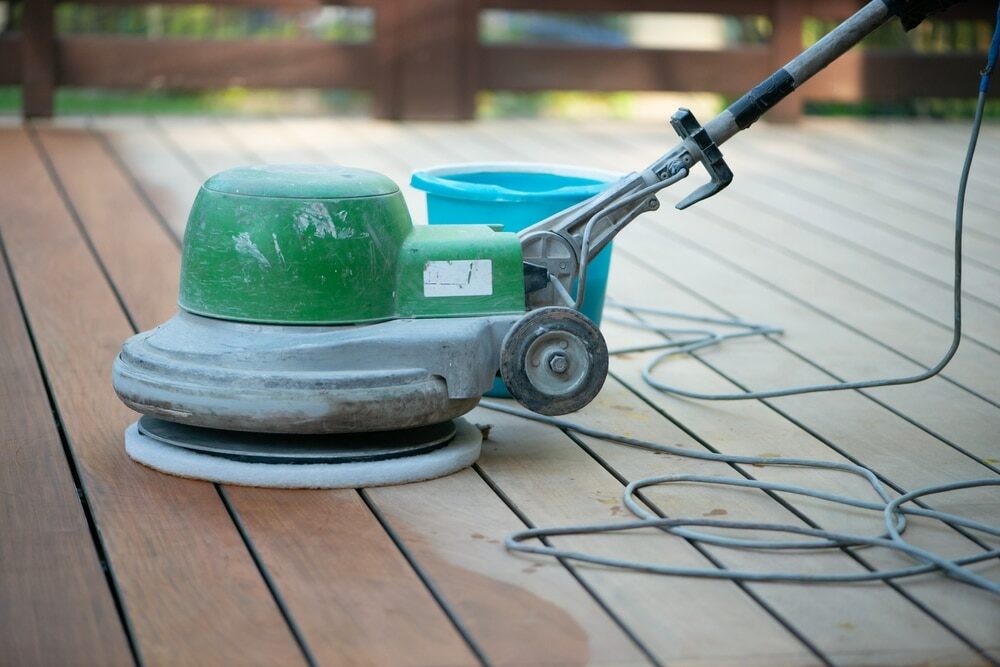
Buffing
Using soft buffing machines (and hand-polishing where required) will bring a wonderful sheen to your newly-finished floor.
Repairs
We offer a full assessment of your wooden floors to determine what repairs are needed to provide the perfect working surface for the later stages of sanding, staining and sealing.
Restoration
We offer a comprehensive restoration process designed to address floors that are improperly fitted or damaged over time through wear and tear.
Request a fixed price quote for your wood floor restoration now
Simply enter your postcode below to get started.
Services
Wood Floor Sanding Wood Floor Restoration Wood Floor Scratch Repair Squeaky Wood Floor Repair Parquet Floor Sanding Parquet Floor Restoration Commercial Floor Sanding Church Floor Sanding Community Centre Floor Sanding School Floor Sanding Gap Filling Gap Filling with ResinCopyright © Mr Sander®
Privacy & Cookies Terms & Conditions Complaints Procedure Cancellation Rights Sitemap

Get An Instant Price Estimate Before You Go…
Simply enter the rooms you need sanded and we’ll provide you with a price estimate instantly! Try our price calculator now.
Get a Price Estimate NowLocal Floor Sanding Experts
Over 500 5-Star Reviews
Safe, Dust Free Sanding
Operating Since 1994