London:
Nationwide:
25,000+
Floors Restored
27 Years Experience
Wood Flooring Association Certified
Top Ten Things You May Not Know About Dust Free Floor Sanding
Posted on April 23, 2023
Blog
The Comprehensive Guide to Achieving Flawless, Dust-Free Wooden Floor Sanding
Wooden floors are a timeless and beautiful addition to any home or commercial space. Over time, though, they require maintenance to keep them looking their best. One essential part of this maintenance is sanding. Traditional floor sanding techniques can create a lot of dust, which is not only messy but also harmful to your health. Fortunately, dust-free wooden floor sanding methods have emerged to minimise these issues. In this comprehensive guide, we’ll explore the benefits of dust-free sanding, how to choose the right equipment, and the best practises for achieving a flawless finish on your wooden floors.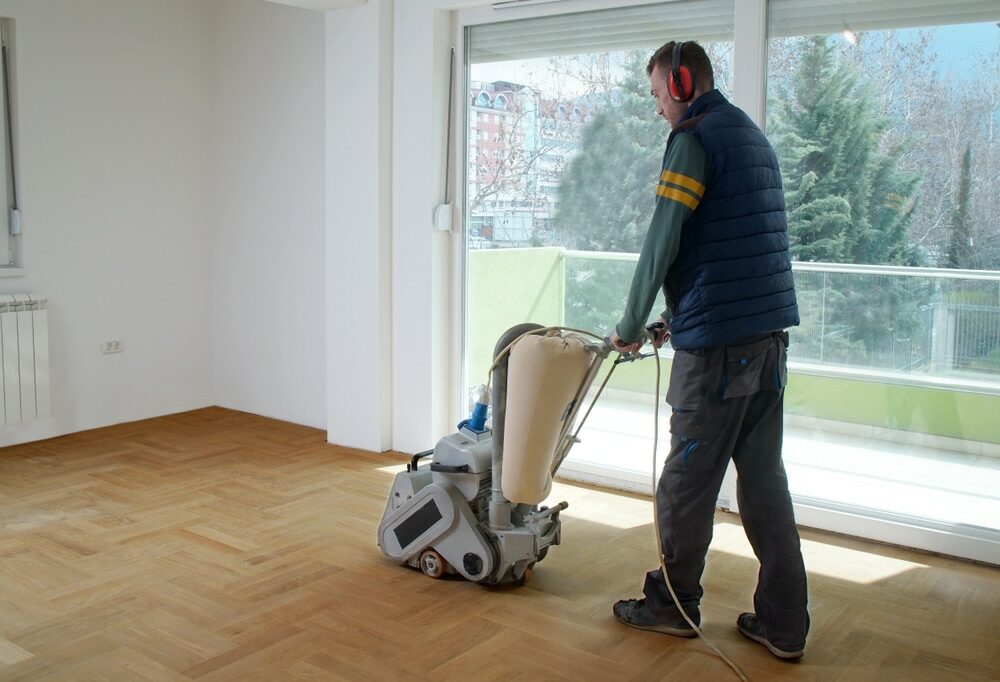
Section 1: The Importance of Dust-Free Wooden Floor Sanding
1.1 Health Benefits
Traditional floor sanding can generate a considerable amount of dust, which can be harmful to your respiratory system. This is particularly concerning for those with asthma or other respiratory issues. Dust-free sanding methods help to eliminate these concerns by minimising the amount of airborne dust produced during the process.1.2 Environmental Advantages
Dust-free sanding is a more environmentally friendly option compared to traditional methods. The equipment used in dust-free sanding has a built-in vacuum system that collects and contains the dust, preventing it from spreading into the environment.1.3 Cleaner Workspace
The dust produced during traditional sanding can settle on furniture, fixtures, and surfaces throughout your home or workplace, requiring extensive clean-up. Dust-free sanding reduces this mess, saving time and effort in post-sanding clean-up.1.4 Better Results
Dust-free sanding provides a cleaner, more precise finish to your wooden floors. With less dust on the surface, you’ll have better visibility while working and can more easily identify any areas that need further attention.
Section 2: Choosing the Right Equipment for Dust-Free Wooden Floor Sanding
2.1 Dust-Free Sanders
Selecting the right sander is crucial for achieving the best results in dust-free wooden floor sanding. Look for a sander with a built-in vacuum system, which will effectively collect and contain dust as you work. Some popular dust-free sanders include the Bona FlexiSand, the Lagler Trio, and the Clarke American Sanders.2.2 Sanding Discs
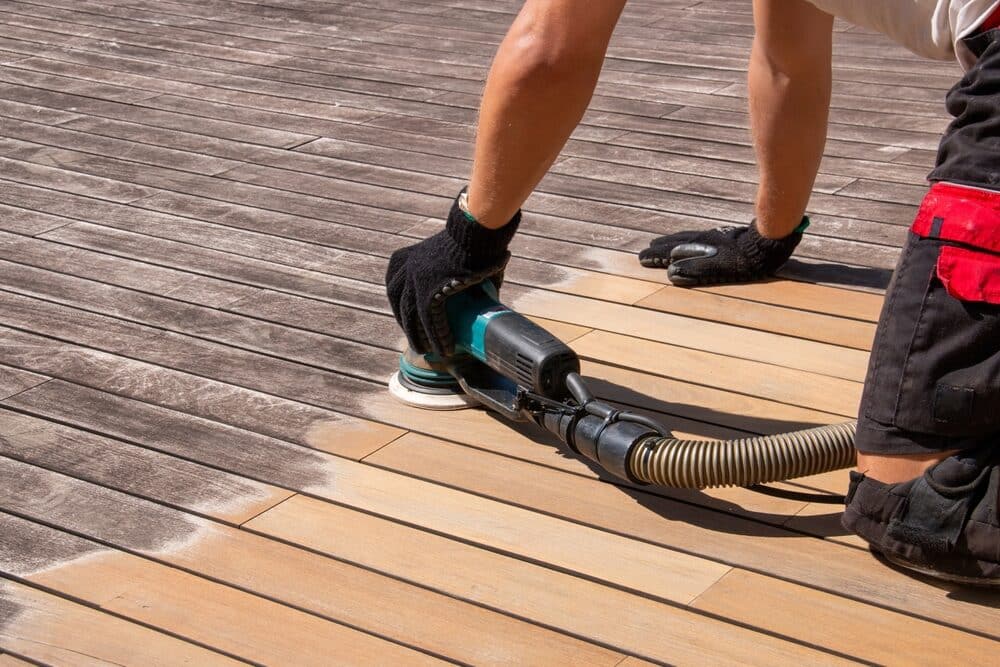
It’s important to choose the right sanding discs to achieve the desired finish. Grits range from coarse to fine, with lower numbers representing coarser grits and higher numbers representing finer grits. Start with a coarse grit to remove old finishes and imperfections, then progress to finer grits to smooth and polish the surface.2.3 Edge Sanders
Edge sanders are designed to sand areas close to walls and corners that are difficult to reach with a larger floor sander. Look for an edge sander with a dust extraction system for a cleaner working environment.2.4 Protective Gear
When sanding your wooden floors, always wear proper protective gear, including safety goggles, gloves, and a dust mask or respirator. This will help protect you from any residual dust and debris.
Section 3: Preparing for Dust-Free Wooden Floor Sanding
3.1 Clearing the Space
Before you begin sanding, remove all furniture, rugs, and other items from the room. This will make it easier to manoeuvre the sander and prevent any damage to your belongings.3.2 Repairing Damaged Areas
Inspect your wooden floor for any damaged areas, such as dents, gouges, or loose boards. Repair these issues before sanding to ensure a smooth, even finish.3.3 Cleaning the Floor
Sweep or vacuum the floor thoroughly to remove any dust, dirt, and debris. This will help to prevent scratches and imperfections in the final result and ensure better adhesion of any finishing products applied after sanding.3.4 Acclimating the Floor
Allow your wooden floor to acclimatise to the room’s temperature and humidity for at least 48 hours before sanding. This will help prevent any warping or cupping that may occur due to sudden changes in environmental conditions.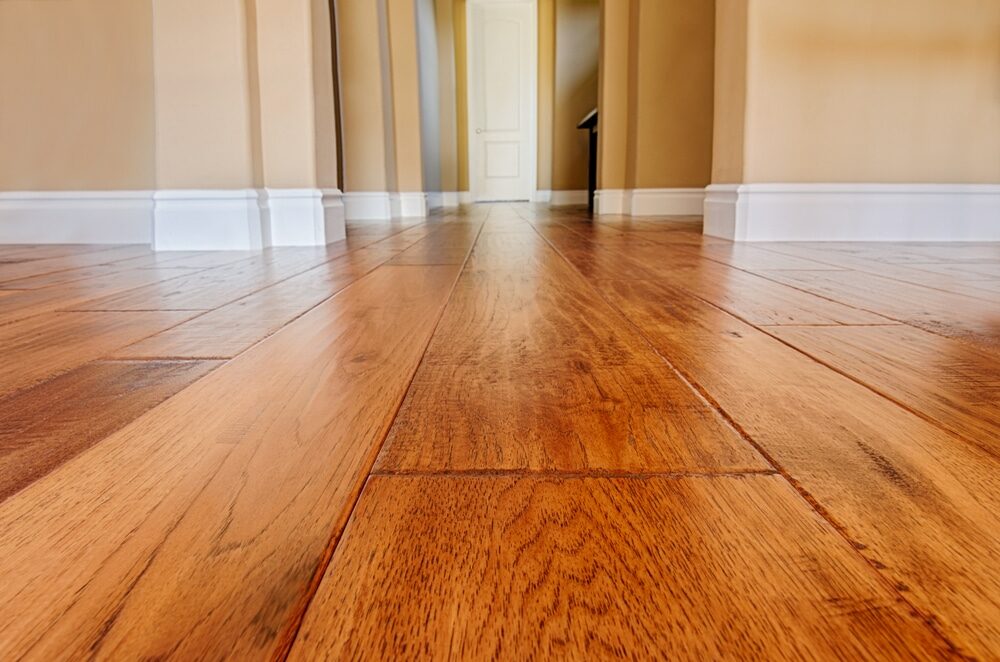
Section 4: The Dust-Free Wooden Floor Sanding Process
4.1 Starting with Coarse Grit
Begin sanding your wooden floor using a coarse-grit sanding disc (typically 36 or 40 grit) on your dust-free sander. This will help to remove old finishes, deep scratches, and other imperfections. Work in the direction of the wood grain and maintain a steady pace to avoid creating any uneven spots or gouges.4.2 Progressing to Medium Grit
After completing the initial pass with coarse grit, switch to a medium-grit disc (typically 60 or 80 grit). This will help smooth out any rough patches and further refine the surface. Be sure to overlap your sanding passes slightly to ensure a consistent finish.4.3 Finishing with Fine Grit
For the final sanding pass, use a fine-grit disc (typically 100 or 120 grit) to achieve a smooth, polished surface. Pay close attention to the appearance of the wood as you work, and be prepared to make additional passes in any areas that require further attention.4.4 Sanding the Edges
Use your edge sander with a dust extraction system to sand the areas near walls and corners that were inaccessible with the larger floor sander. Start with a coarse-grit disc and progress to finer grits, following the same process as with the main floor.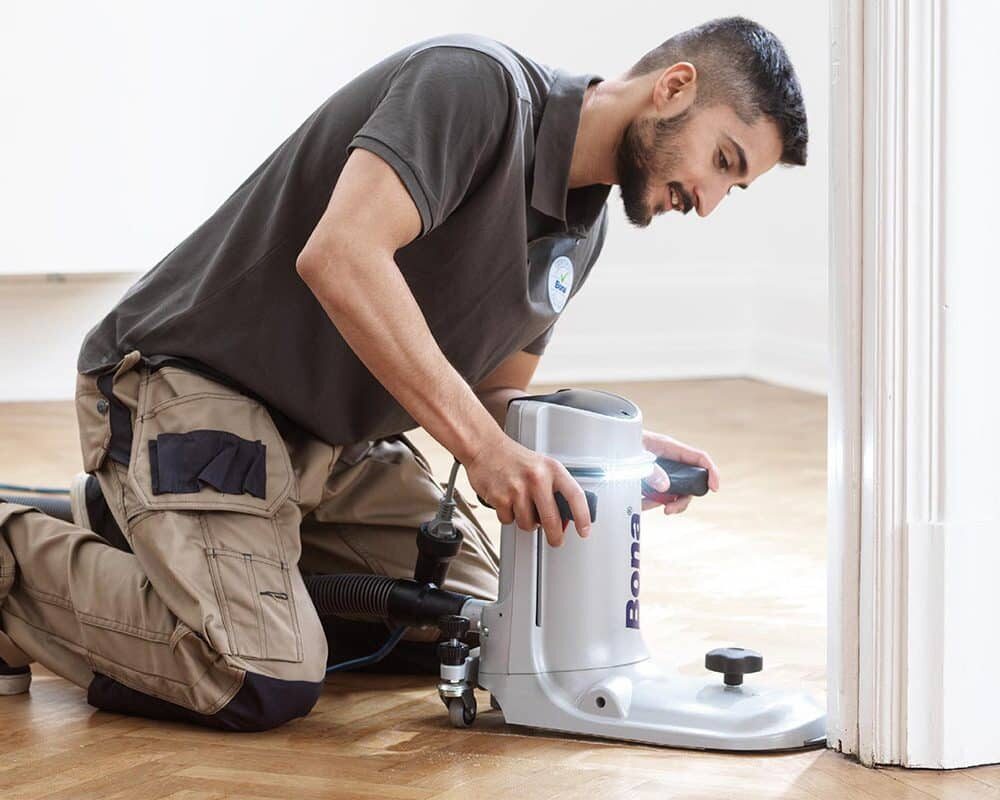
4.5 Vacuuming and Tack Cloth
After completing the sanding process, vacuum the floor thoroughly to remove any remaining dust and debris. Follow up with a tack cloth to pick up any residual fine particles that the vacuum may have missed. This step is crucial for ensuring a clean, dust-free surface before applying any finishes.
Section 5: Applying Finishes to Your Sanded Wooden Floor
5.1 Choosing the Right Finish
Select a finish that is appropriate for your wooden floor and desired appearance. Options include water-based polyurethane, oil-based polyurethane, and natural oil finishes. Each type of finish has its own advantages and drawbacks, so research and choose the one that best suits your needs.5.2 Applying the Finish
Follow the manufacturer’s instructions for applying your chosen finish. Typically, this will involve applying multiple coats with a designated drying time between each coat. Use a high-quality applicator, such as a lambswool or synthetic pad, for a smooth, even application.5.3 Buffing and Final Coats
Between coats, it may be necessary to buff the floor lightly using a fine-grit sanding screen or pad to ensure proper adhesion of subsequent coats. Vacuum and use a tack cloth to remove any dust generated during buffing. Apply the final coat of finish and allow it to dry completely before moving furniture or walking on the floor.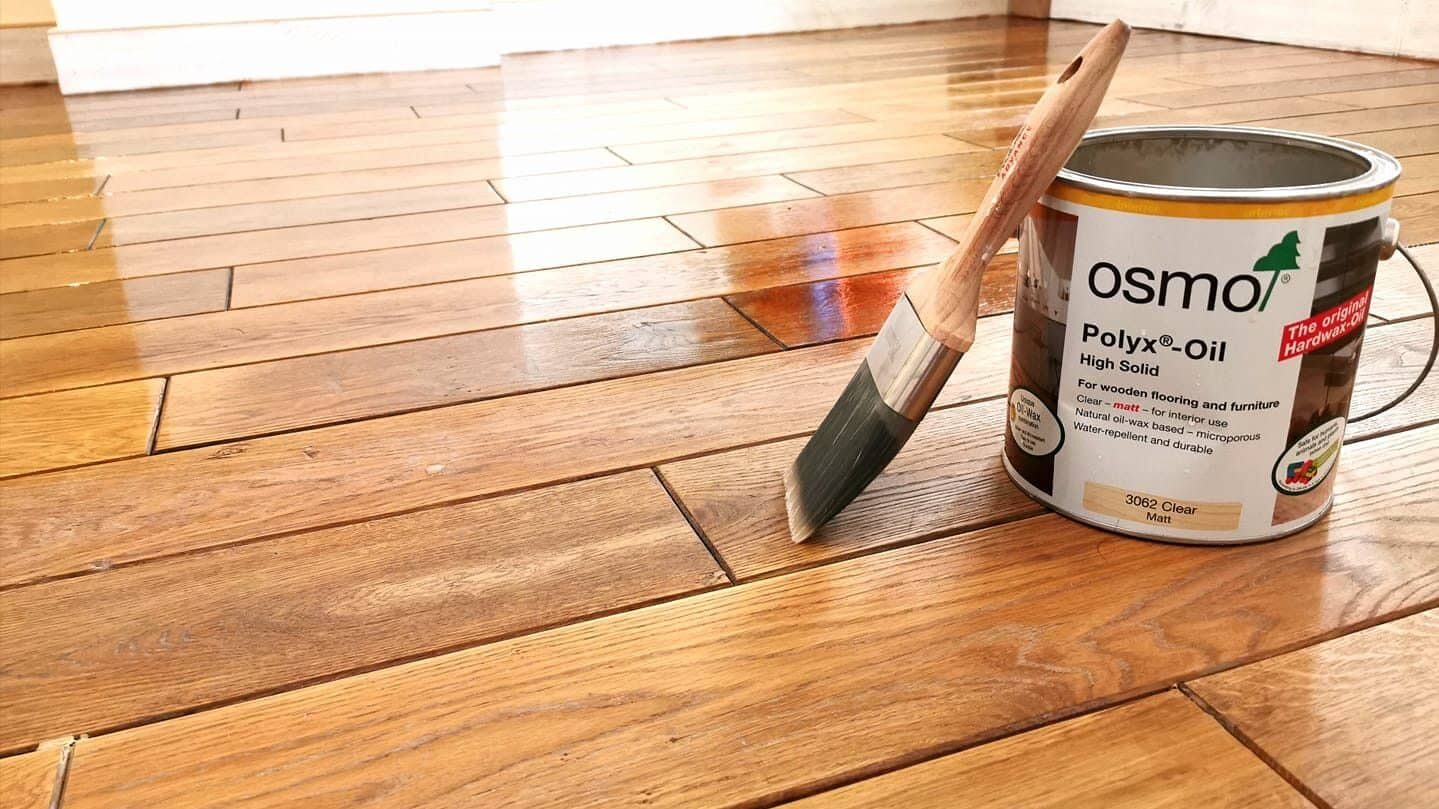
Some Useful Links:
Conclusion
Dust-free wooden floor sanding is a healthier, cleaner, and more efficient method for refinishing your wooden floors. By choosing the right equipment, preparing your space, and following the proper sanding and finishing techniques, you can achieve a beautiful, professional result with minimal dust and disruption.More from our Blog:
Sanding Wooden Floors – Increase the Value of Your Home What are the Wood Floor Renovation Techniques? How to Care for Your Wooden Floors after the Sanding and Sealing?
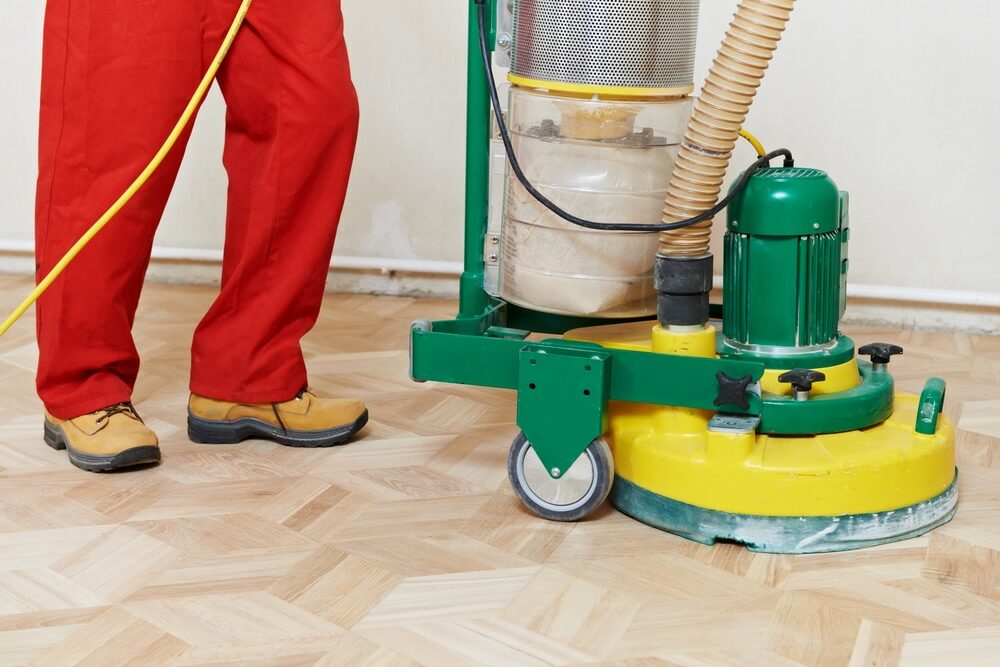

Sanding
We provide virtually dust-free sanding with our continuous belt machinery with mobile extraction units, giving you a safer environment for your family.
Oiling
This organic finish not only adds beauty to your home but also has exceptional water-repellent characteristics, making it easier to clean and maintain.
Waxing
This natural floor finish offers the softest and most mellow appearance – and leaves your floor able to breath.
Buffing
Using soft buffing machines (and hand-polishing where required) will bring a wonderful sheen to your newly-finished floor.
Repairs
We offer a full assessment of your wooden floors to determine what repairs are needed to provide the perfect working surface for the later stages of sanding, staining and sealing.
Restoration
We offer a comprehensive restoration process designed to address floors that are improperly fitted or damaged over time through wear and tear.
Request a fixed price quote for your wood floor restoration now
Simply enter your postcode below to get started.
Services
Wood Floor Sanding Wood Floor Restoration Wood Floor Scratch Repair Squeaky Wood Floor Repair Parquet Floor Sanding Parquet Floor Restoration Commercial Floor Sanding Church Floor Sanding Community Centre Floor Sanding School Floor Sanding Gap Filling Gap Filling with ResinCopyright © Mr Sander®
Privacy & Cookies Terms & Conditions Complaints Procedure Cancellation Rights Sitemap

Get An Instant Price Estimate Before You Go…
Simply enter the rooms you need sanded and we’ll provide you with a price estimate instantly! Try our price calculator now.
Get a Price Estimate NowLocal Floor Sanding Experts
Over 500 5-Star Reviews
Safe, Dust Free Sanding
Operating Since 1994