London:
Nationwide:


25,000+
Floors Restored

27 Years Experience

Wood Flooring Association Certified
Avoid Common Mistakes When Sanding Hardwood Floors
Posted on June 14, 2023
Floor Sanding Services Blogs
Sanding Hardwood Floors – What Not to Do!
Sanding hardwood floors can be a daunting task. While there are many guides and tips available on what to do, knowing what not to do is equally important. In this comprehensive guide, we’ll highlight common mistakes to avoid when sanding your hardwood floors.Introduction
Sanding hardwood floors is an integral part of floor refinishing, aiming to remove old finishes, stains, and minor surface damages. However, if not done correctly, sanding can cause more harm than good.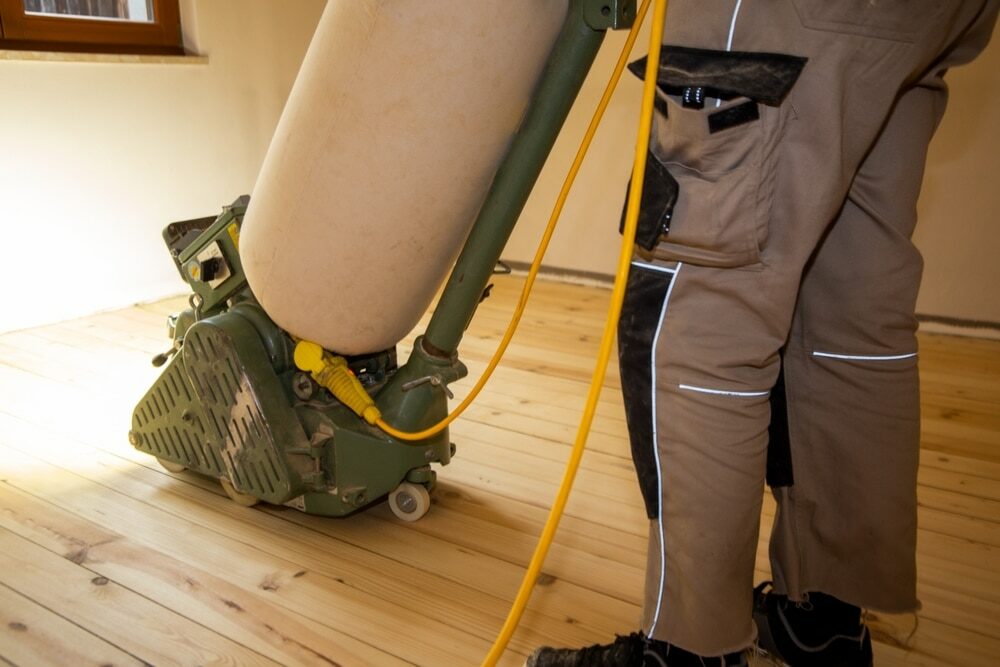
Understanding the Common Mistakes
Before we delve into the details, let’s understand the common mistakes made during the sanding process. These can range from insufficient preparation to improper handling of the equipment.Mistake 1: Not preparing the room properly
The sanding process creates a significant amount of dust. If the room is not properly prepared, this dust can spread throughout your home and cause significant cleanup work. What Not to Do: Do not skip the preparation phase. What to do instead: Remove all furniture and rugs from the room. Cover all doors, windows, vents, and outlets with plastic sheeting and painters’ tape.Mistake 2: Not Using the Right Tools or Equipment
Not using the right tools or equipment can lead to inefficient sanding or even damage to your floors. What Not to Do: Do not use a hand sander for large jobs, and do not use a drum sander without proper training. What to Do Instead: For large jobs, rent a drum or orbital sander from your local hardware store. If you’ve never used a drum sander before, consider hiring a professional or opting for an orbital sander, which is less aggressive and easier to control.Mistake 3: Not Using the Right Sandpaper Grit
Using the wrong sandpaper grit can result in either an insufficiently sanded floor or a floor that’s been sanded too aggressively. What Not to Do: Do not start with fine-grit sandpaper, and do not use excessively coarse sandpaper unless necessary. What to Do Instead: Start with medium-grit sandpaper to remove the old finish. Then, progressively use finer grits to smooth the floor.Mistake 4: Sanding Against the Grain
Sanding against the grain can cause scratches and damage to your floor that are difficult to remove. What not to do: Do not sand against the grain of the wood. What to do instead: Always sand in the direction of the wood grain. This will result in a smoother finish and fewer visible scratches.Mistake 5: not taking breaks
Sanding is a physically demanding task. Not taking breaks can lead to fatigue, which can result in mistakes. What not to do: Do not try to sand an entire room in one go. What to do instead: Take regular breaks. This will not only make the job easier but also ensure that you’re always working with a clear head.Mistake 6: Not Cleaning Up Properly
Dust left behind after sanding can mix with the finish and result in a rough, unattractive floor. What Not to Do: Do not skip the cleanup phase, and do not apply the finish without thoroughly cleaning the floor. What to Do Instead: After sanding, vacuum the floor and then mop with a damp (not wet) mop to pick up any remaining dust.Conclusion
Sanding Hardwood Floors is a task that requires care and attention. Avoiding these common mistakes can make the difference between a floor that looks fresh and new and one that needs further repair work. Remember, the key to successful sanding lies not only in what you do but also in what you don’t do. Happy sanding!Some Useful Links:
- Floor Sanding Services
- School Floor Sanding
- Wood Floor Restorations
- Wood Floor Repairs
- Wood Floor Polishing
More from our Blog:
Using a Drum Floor Sander – Why and How? | Mr Sander® Re-finishing & Screening Your Wooden Floor: A Complete DIY Guide How to Sand Hardwood Floors in 10 Easy Steps Reviving Victorian Elegance: Floorboard Sanding in West London Homes The Rise of Carpet Tiles: A Popular Choice for Modern Flooring The Biggest Wood Flooring Trends Revealed: Creating Timeless Interiors
Get more floor restoration advice…



Sanding
We provide virtually dust-free sanding with our continuous belt machinery with mobile extraction units, giving you a safer environment for your family.

Oiling
This organic finish not only adds beauty to your home but also has exceptional water-repellent characteristics, making it easier to clean and maintain.

Waxing
This natural floor finish offers the softest and most mellow appearance – and leaves your floor able to breath.

Buffing
Using soft buffing machines (and hand-polishing where required) will bring a wonderful sheen to your newly-finished floor.

Repairs
We offer a full assessment of your wooden floors to determine what repairs are needed to provide the perfect working surface for the later stages of sanding, staining and sealing.

Restoration
We offer a comprehensive restoration process designed to address floors that are improperly fitted or damaged over time through wear and tear.
Request a fixed price quote for your wood floor restoration now
Simply enter your postcode below to get started.






Services
Wood Floor Sanding Wood Floor Restoration Wood Floor Scratch Repair Squeaky Wood Floor Repair Parquet Floor Sanding Parquet Floor Restoration Commercial Floor Sanding Church Floor Sanding Community Centre Floor Sanding School Floor Sanding Gap Filling Gap Filling with ResinCopyright © Mr Sander®
Privacy & Cookies Terms & Conditions Complaints Procedure Cancellation Rights Sitemap

Get An Instant Price Estimate Before You Go…
Simply enter the rooms you need sanded and we’ll provide you with a price estimate instantly! Try our price calculator now.
Get a Price Estimate NowLocal Floor Sanding Experts
Over 500 5-Star Reviews
Safe, Dust Free Sanding
Operating Since 1994