London:
Nationwide:
25,000+
Floors Restored
27 Years Experience
Wood Flooring Association Certified
Choosing the Best: A Guide to Wood Floor Varnish for a Stunning Finish
Posted on December 7, 2023
Wood Floor Sealing & Varnishing Articles
Crafting Excellence: Way to Achieve a Stunning Finish with Wood Floor Varnish!
This blog post is dedicated to helping homeowners, DIY enthusiasts, and professionals alike make informed decisions when it comes to selecting the perfect varnish for wood floors. Wood Floor Varnishing not only protects your floors but also enhances their natural beauty, making this choice a crucial part of home maintenance and interior design.
Wood floors are a timeless choice for many homes, offering durability and a warm aesthetic appeal. However, their beauty and longevity largely depend on the type of finish applied. Varnish, in this regard, is more than just a protective layer; it’s a crucial element that defines the final appearance and resilience of your wood flooring. With the market flooded with various types of Wood Floor varnishes, each promising exceptional results, making the right choice can be overwhelming.
In this guide, we will explore the different types of wood floor varnishes available, delve into their unique properties, and discuss how they affect the look and lifespan of your floors. We’ll also provide practical advice on factors to consider before making your selection, including durability, aesthetics, application techniques, and environmental considerations.
Whether you’re refurbishing an old floor or finishing a new one, understanding the nuances of wood floor varnish will ensure that you achieve a stunning finish that lasts for years. So, let’s dive in and explore how to select the best varnish for your wood floors, ensuring they remain a cherished and striking feature of your home.

Understanding Wood Floor Varnish
When it comes to enhancing and protecting wood floors, varnish plays a pivotal role. But what exactly is wood floor varnish, and why is it so important? This section will delve into the essentials of wood floor varnish, helping you understand its purpose, types, and the impact it has on your flooring.
Definition and Purpose of Varnish:
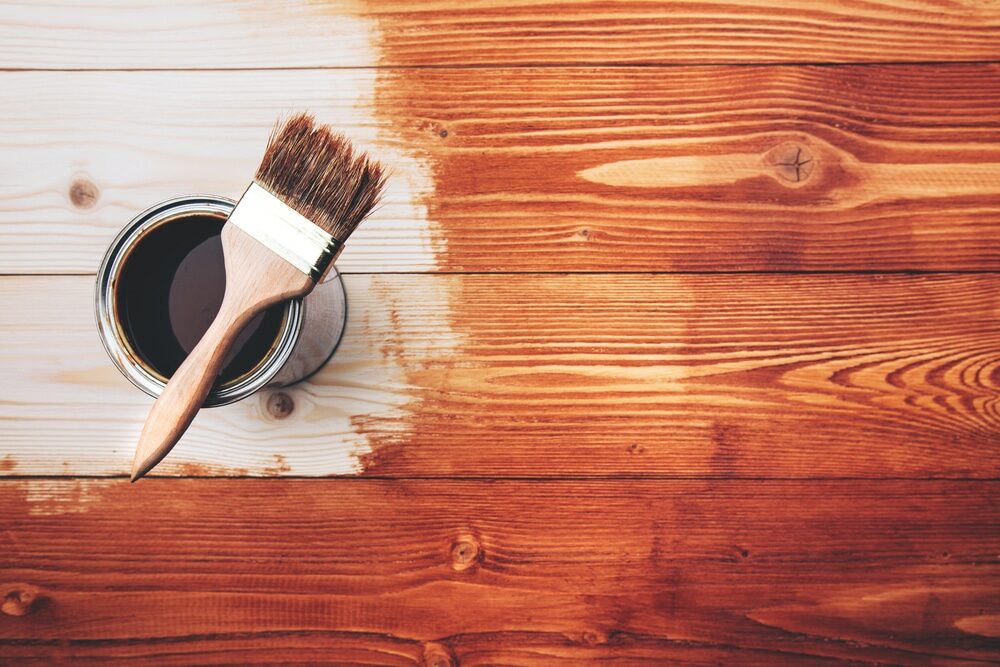
Varnish is a transparent, hard protective finish or film primarily used in wood finishing. Unlike stains, which penetrate the wood, varnishes form a protective coating on the surface. This coating serves multiple purposes: it protects the wood from damage due to wear and tear, moisture, and environmental factors; enhances the wood’s natural color and grain; and can also add a desired aesthetic finish, be it glossy, satin, or matte.
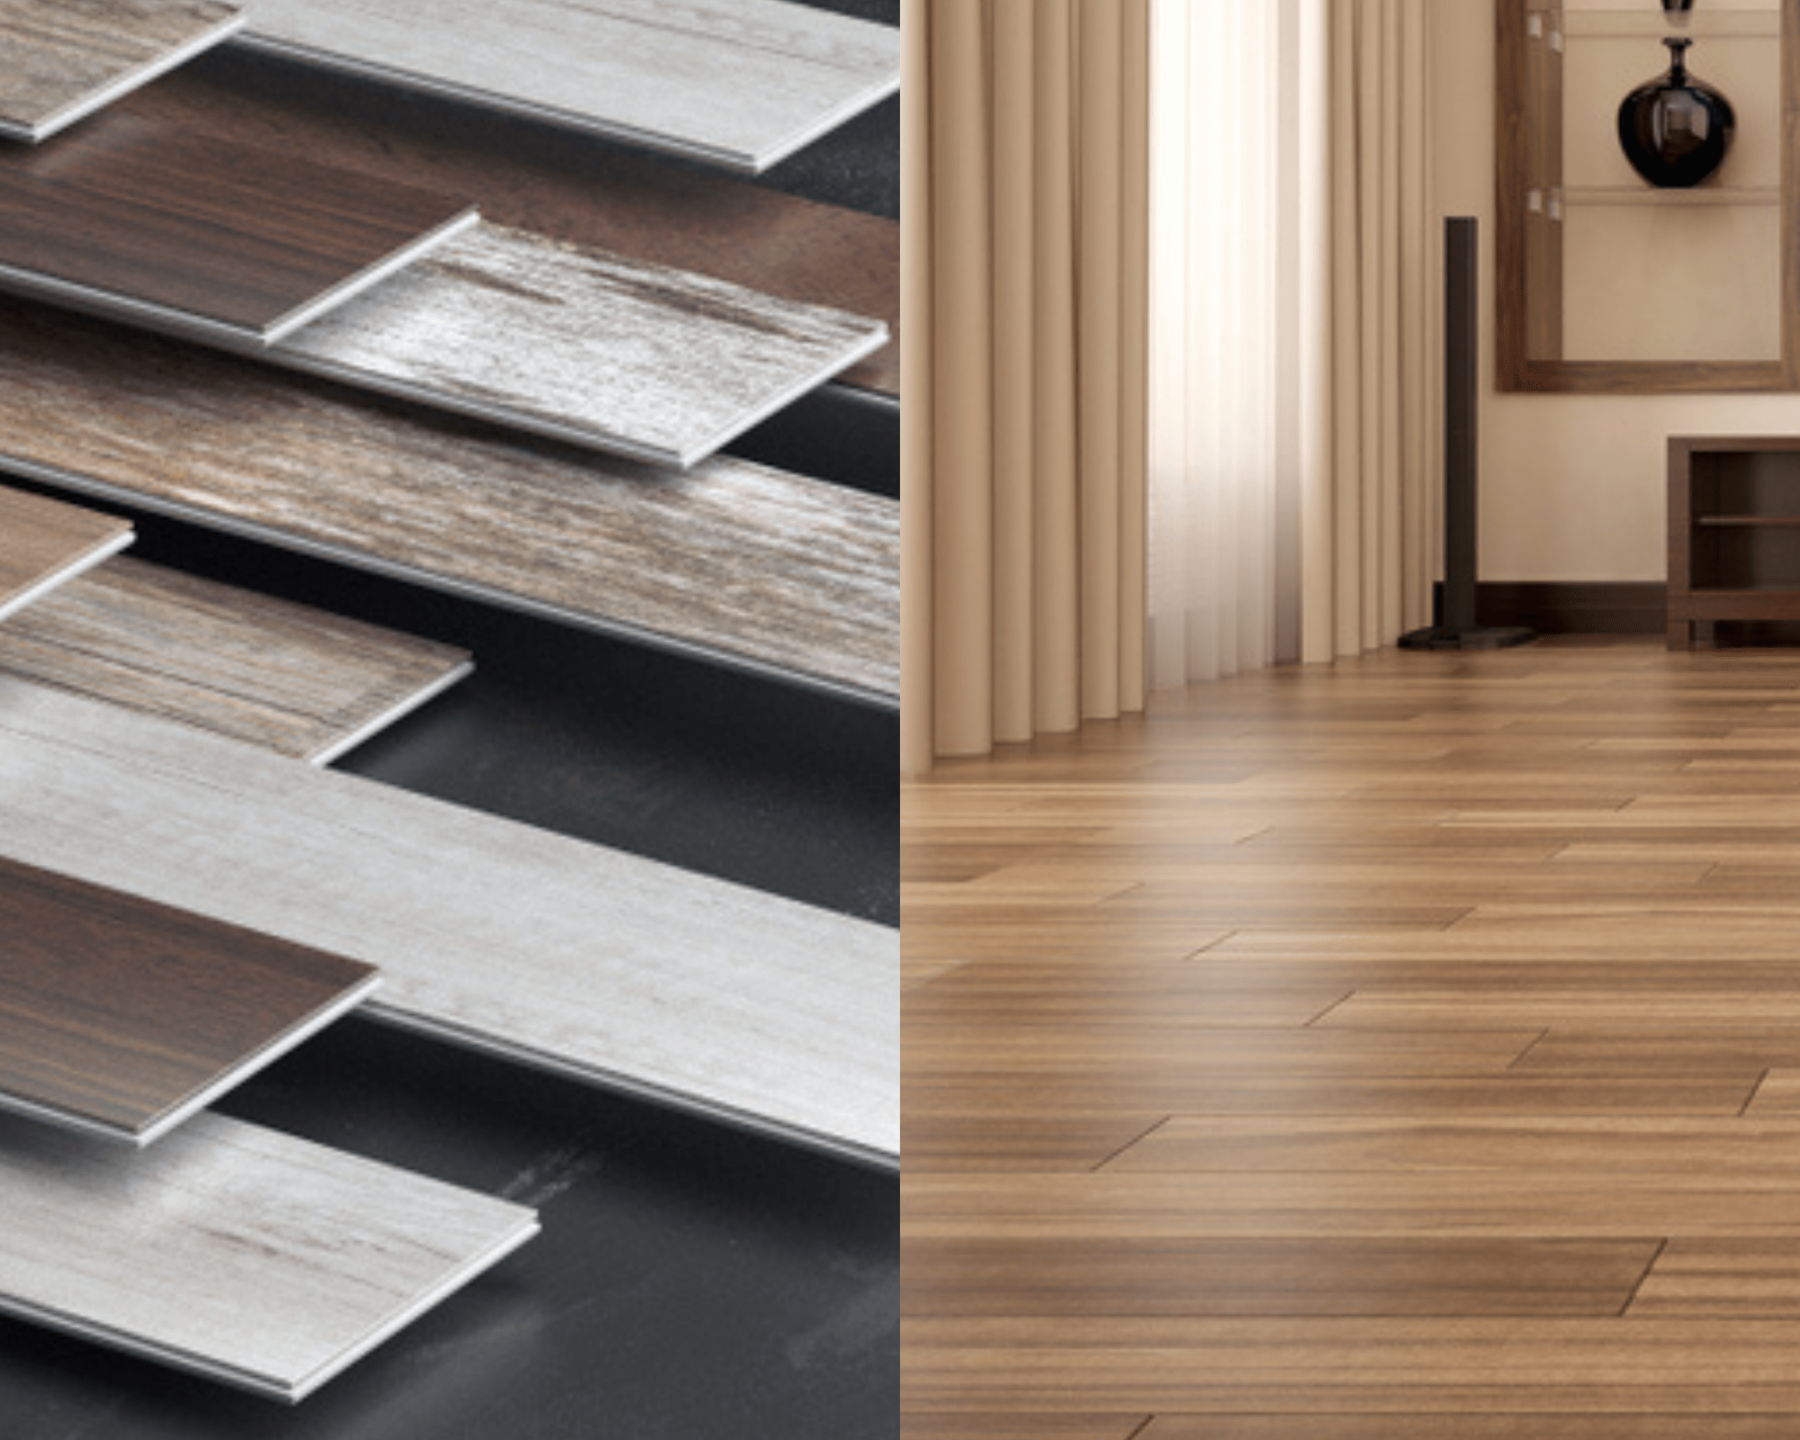
Types of Wood Floor Varnish:
There are several types of varnishes available, each with unique characteristics and benefits.
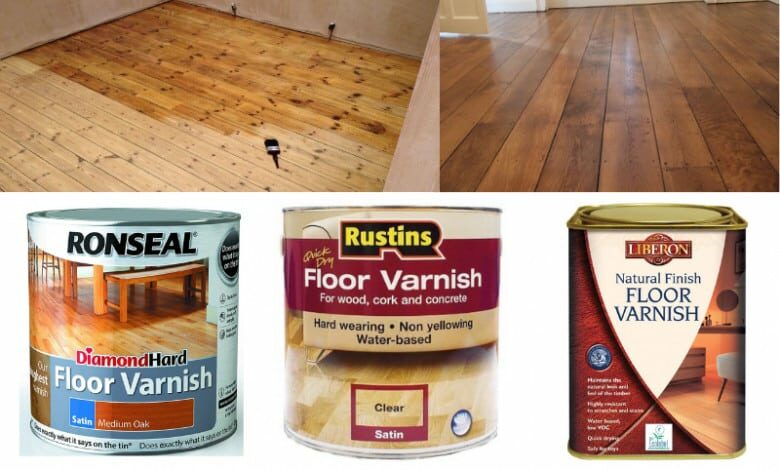
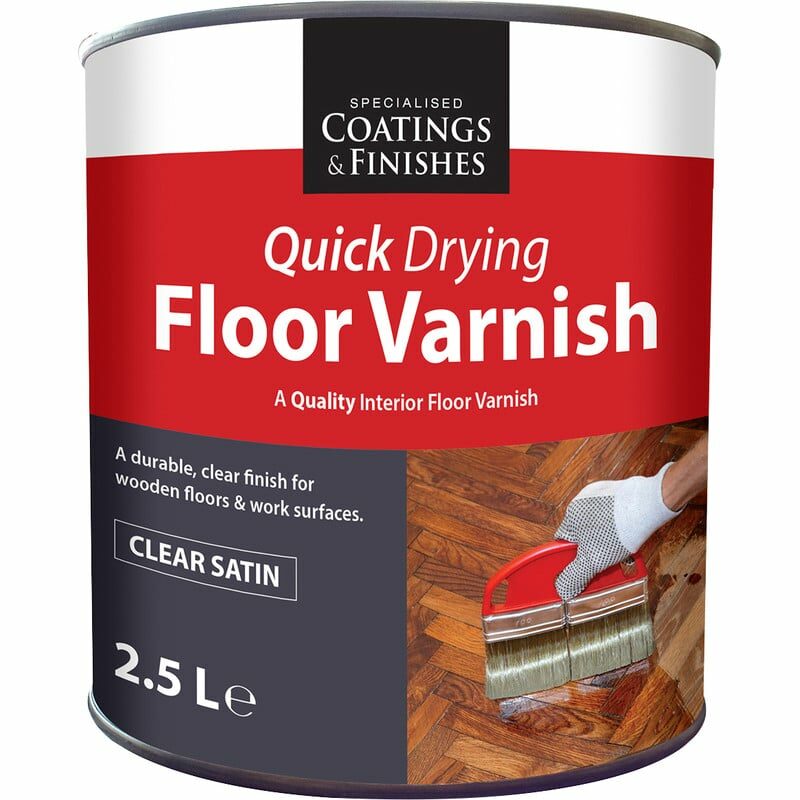
- Water-Based Varnishes: Known for their low odor and quick drying times, water-based varnishes are a popular choice for indoor applications. They are less toxic, easy to clean up, and tend to retain the wood’s natural color. However, they might not be as durable as other types.
- Oil-Based Varnishes: Traditional oil-based varnishes are favored for their durability and rich, deep finish. They are excellent for high-traffic areas but take longer to dry and have a strong odor. Over time, they can also impart a yellowish hue to the wood.
- Polyurethane Varnishes: These are a subset of oil-based varnishes but can also be water-based. Polyurethane varnishes are known for their superior durability and resistance to scratches, making them ideal for floors that endure heavy use. However, they can be more challenging to apply evenly.
Each type of varnish comes with its pros and cons, and the best choice depends on your specific needs, the usage of the space, and your aesthetic preferences. By understanding the various types of wood floor varnishes and their distinct properties, you can make a more informed decision that aligns with your flooring goals.
In the following sections, we will explore how to choose the right varnish for your wood floors, taking into account factors like durability, finish, and environmental impact.
Factors to Consider When Choosing Varnish
Selecting the right varnish for your wood floors is not just a matter of personal taste; it involves considering various factors that influence the performance and appearance of the finish. This section outlines key considerations to help you make an informed decision when choosing a varnish for your wood floors.
-
Durability and longevity:
- Traffic and Usage: Consider the amount of foot traffic and wear the floor will endure. High-traffic areas like hallways and living rooms may require a more durable varnish.
- Scratch and Stain Resistance: Some varnishes offer better protection against scratches and stains, which is crucial for maintaining the floor’s appearance over time.
-
Aesthetic Appeal and Finish Types:
- Color and Sheen: Varnishes can affect the color and sheen of your floor. Water-based varnishes tend to keep the wood’s natural color, while oil-based varnishes can deepen the color and provide a richer hue.
- Finish Options: Choose from glossy, satin, or matte finishes. Glossy finishes reflect more light and highlight the wood’s features, while matte finishes offer a more subdued, contemporary look.
-
Application and Drying Time:
- Ease of Application: Some varnishes are easier to apply than others. Water-based varnishes, for instance, are more user-friendly and dry faster.
- Drying and Curing Time: Consider how long the varnish takes to dry and cure fully. Quick-drying options can be convenient but may require more coats for adequate protection.
-
Environmental Factors and VOCs (Volatile Organic Compounds):
- Health and Safety: Low-VOC or VOC-free varnishes are better for indoor air quality and are safer for the environment.
- Odor: If you’re sensitive to smells or working in a poorly ventilated area, a low-odor varnish might be necessary.
-
Cost and Budget Considerations:
- While it’s tempting to choose the least expensive option, investing in a high-quality varnish can save money in the long run by reducing the need for frequent touch-ups and reapplications.
-
Compatibility with Your Wood Type:
- Different woods react differently to varnishes. Ensure the varnish you choose is suitable for the type of wood on your floor.
By carefully considering these factors, you can choose a varnish that not only looks great but also provides the protection and longevity your wood floors need. In the next sections, we’ll discuss how to prepare your floors for varnishing and the best techniques for application.
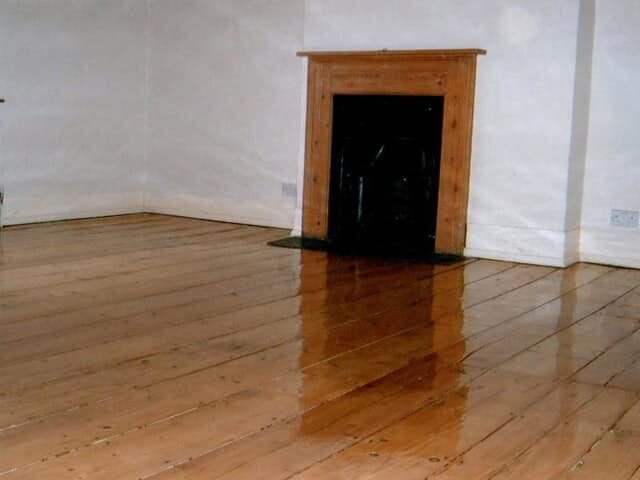
Preparation for varnishing
Proper preparation is key to ensuring a successful varnish application on your wood floors. A well-prepared surface not only enhances the adhesion of the varnish but also contributes to a smoother, more professional finish. Here’s how to get your wood floors ready for varnishing:
Gather the necessary tools and materials:
- Sandpaper (various grits)
- Vacuum cleaner or broom
- Tack cloth or damp rag
- Painter’s tape
- Paintbrush, roller, or pad applicator
- Varnish (selected based on earlier considerations)
- Protective gear (gloves, mask, goggles)
Cleaning the floor:
Begin by thoroughly cleaning the floor. Remove all dust, dirt, and debris using a vacuum cleaner or broom.
Pay special attention to corners and crevices where dust might accumulate.
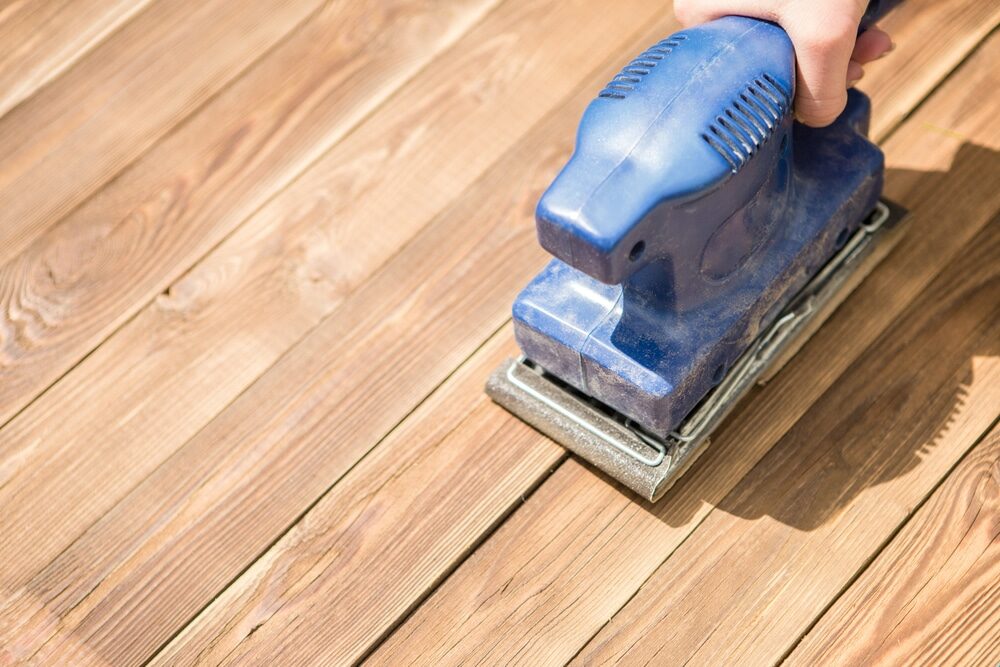
Sanding the Surface:
Sand the floor, starting with coarser-grit sandpaper and gradually moving to finer grits. This process smooths the surface and removes any old finish.
For existing varnished floors, sand lightly to create a rough surface for the new varnish to adhere to.
Dust Removal:
After sanding, it’s essential to remove all the dust. Use a vacuum cleaner, followed by a tack cloth or a slightly damp rag, to pick up any residual dust.
Repairing Imperfections:
Fill in any cracks, gaps, or imperfections in the wood with a suitable wood filler. Ensure it’s fully dry before proceeding.
Masking and Protecting Areas:
Use painter’s tape to protect baseboards, walls, and any adjacent areas not being varnished.
Priming (if necessary):
Depending on the type of varnish and the condition of your wood, a primer may be required. Check the manufacturer’s recommendations.
Final Check:
Before applying the varnish, do a final check to ensure the surface is clean, dry, and free of dust and debris.
With your wood floors prepared, you’re now ready to move on to the application of the varnish. The following section will guide you through the varnishing process, providing tips for achieving the best results.
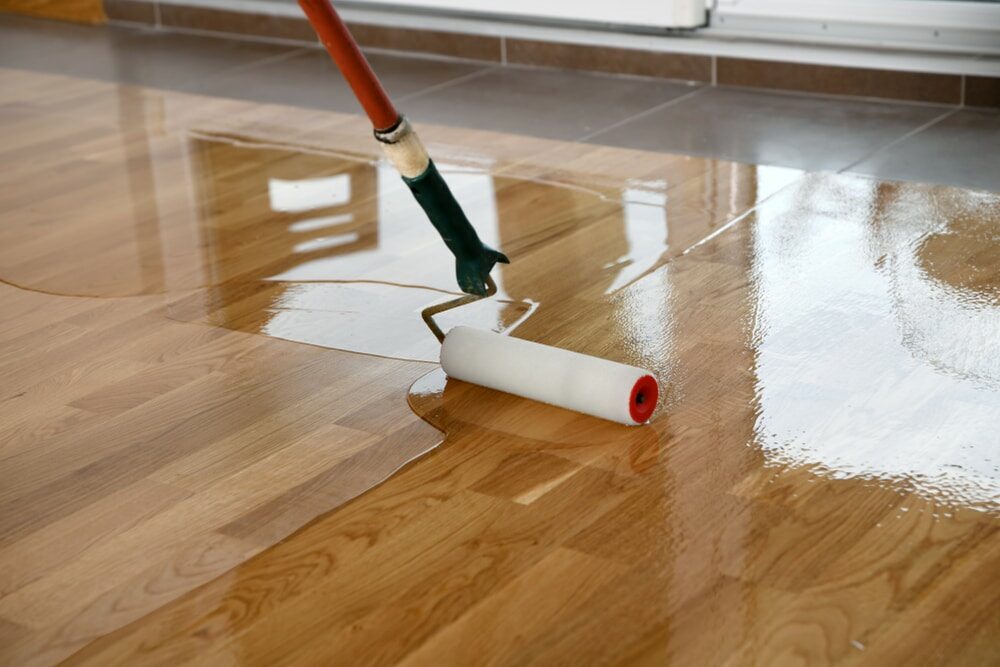
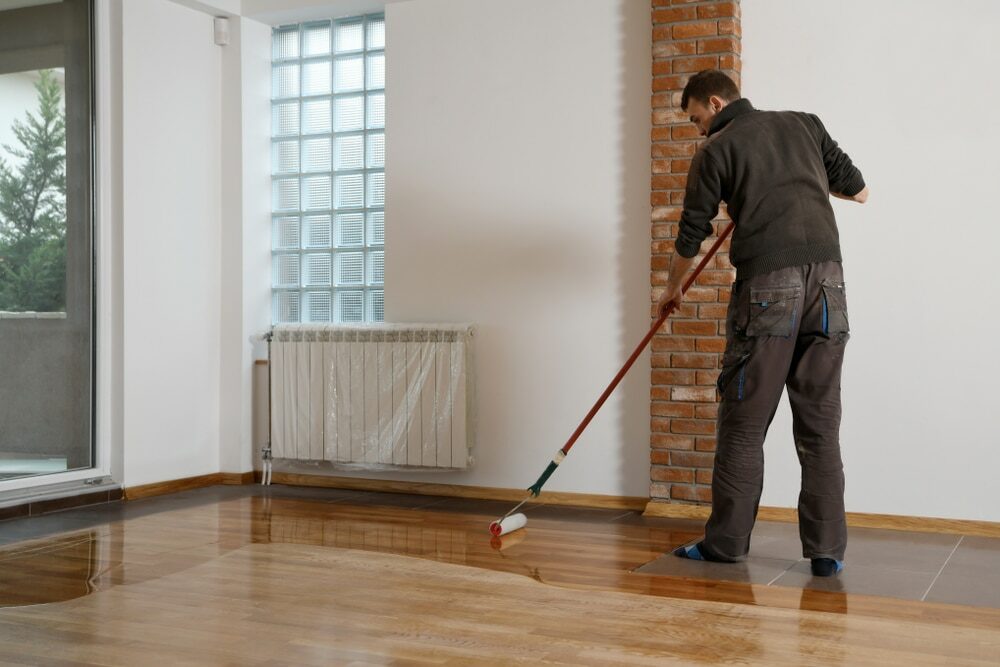
Application Techniques
Applying varnish to your wood floors is a process that requires attention to detail and technique to achieve a flawless finish. This section provides a step-by-step guide and helpful tips for a smooth and even application of varnish.
-
Selecting the Right Applicator:
- Choose an applicator suitable for your varnish type. Brushes are ideal for oil-based varnishes, while rollers or pad applicators work well for water-based varnishes.
-
Mixing the Varnish:
- Stir the varnish thoroughly, but gently, to avoid creating bubbles. Do not shake the can, as this can introduce air bubbles into the varnish.
-
Applying the First Coat:
- Start in the corner furthest from the door and work your way back. Apply the varnish in the direction of the wood grain.
- Use long, even strokes and maintain a wet edge to avoid lap marks.
- For a smooth finish, avoid overloading the applicator with varnish.
-
Drying and re-coating:
- Allow the first coat to dry as per the manufacturer’s instructions. Drying times can vary depending on the type of varnish and environmental conditions.
- Once dry, lightly sand the surface with fine-grit sandpaper to ensure a smooth base for the next coat. Remove dust with a tack cloth.
-
Applying Subsequent Coats:
- Apply additional coats following the same technique. Typically, two to three coats are sufficient, but this can vary depending on the product and desired finish.
- Ensure each coat is completely dry before applying the next one.
-
Tips for a Smooth Finish:
- Maintain a consistent speed and pressure while applying the varnish.
- In high-traffic areas, consider applying an extra coat for added durability.
- Avoid working in extreme temperatures or high humidity, as these conditions can affect the drying time and finish.
-
Final Touches:
- Once the final coat is dry, inspect the floor for any missed spots or imperfections.
- If necessary, apply a light final coat to ensure an even and smooth finish.
-
Curing Time:
- Allow the varnish to fully cure before moving furniture back into the room. Check the manufacturer’s recommendations for curing times, which can vary from a few days to a week.
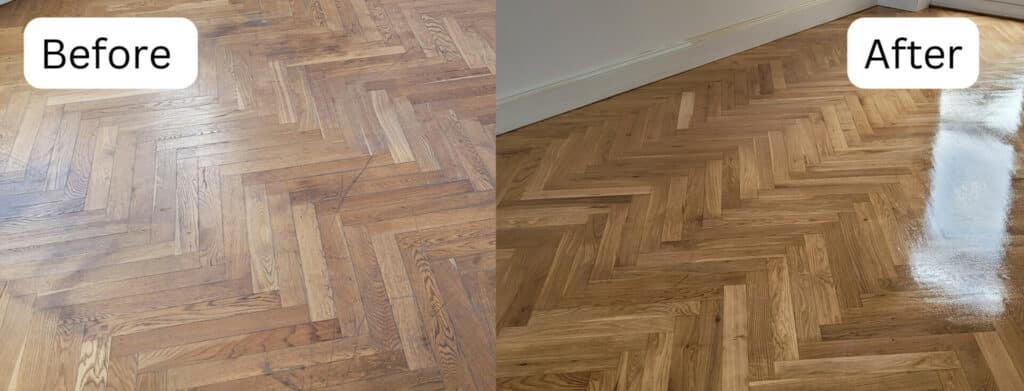
By following these application techniques, you can achieve a stunning and durable finish on your wood floors. Proper application ensures not only a visually appealing result but also a protective layer that extends the life of your flooring.
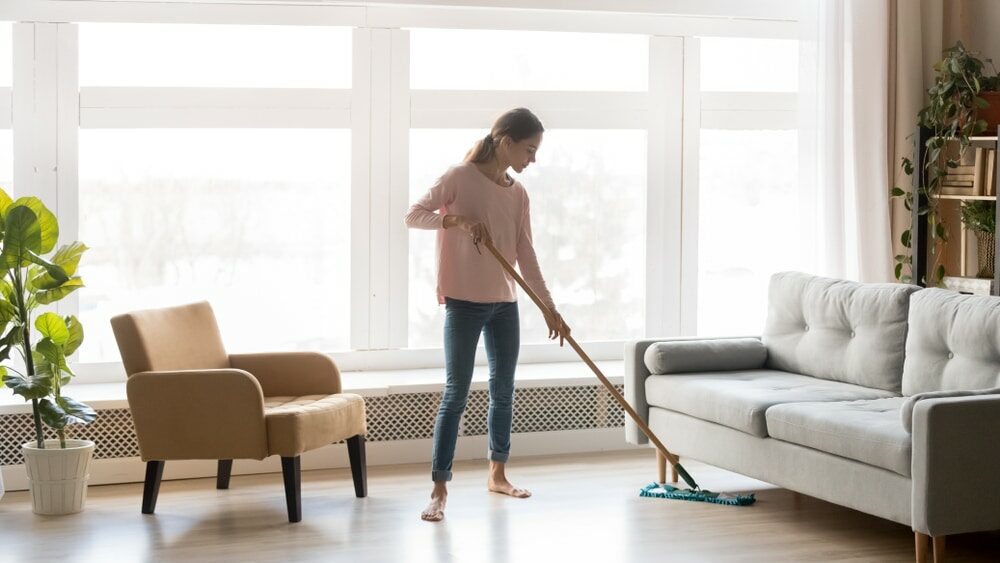
Maintenance and care
After investing time and effort in varnishing your wood floors, maintaining them properly is crucial to preserving their beauty and prolonging their lifespan. This section provides tips on how to care for and maintain your varnished wood floors.
-
Regular Cleaning:
- Sweep or vacuum regularly to remove dirt and grit that can scratch the varnish.
- Use a dry microfiber mop or a slightly damp mop for cleaning. Avoid excessive water, as it can damage the varnish.
-
Spill Management:
- Clean up spills immediately to prevent staining or damaging the varnish.
- Use a soft, absorbent cloth to blot spills gently.
-
Avoiding Scratches and Damage
- Place protective pads under furniture legs to prevent scratches.
- Avoid dragging furniture across the floor.
- Consider using area rugs in high-traffic areas to reduce wear.
-
Preventing sun damage:
- Use curtains or blinds to protect the floors from prolonged exposure to direct sunlight, which can cause the varnish and wood to discolor.
-
Periodic deep cleaning:
- Use a wood floor cleaner specifically designed for varnished floors. Follow the manufacturer’s instructions.
- Test any cleaning product on an inconspicuous area first to ensure it does not damage the varnish.
-
Recoating as needed:
- Over time, high-traffic areas may show wear. Recoating these areas can refresh the floor’s appearance.
- Before recoating, clean the floor thoroughly and lightly sand the surface for better adhesion.
-
Professional Maintenance:
- For significant scratches or damage, consider hiring a professional to sand and refinish the floor.
-
Avoiding Harsh Chemicals:
- Stay away from harsh cleaning agents, as they can strip the varnish and damage the wood.
-
Humidity Control:
- Maintain a stable indoor humidity level to prevent the wood from swelling or contracting, which can cause cracks.
By following these maintenance and care tips, your varnished wood floors will continue to look beautiful and last for many years. Regular care not only enhances their appearance but also protects your investment.
Common Mistakes to Avoid
Achieving a stunning finish with wood floor varnish can be a rewarding DIY project, but it’s also easy to make mistakes that can compromise the final result. This section highlights common pitfalls to avoid during the varnishing process, ensuring a successful and beautiful finish.
-
Skipping Proper Floor Preparation:
- Failing to thoroughly clean, sand, and prepare the wood surface can lead to a poor-quality finish. Always invest time in prep work.
-
Not Testing the Varnish First:
- Apply the varnish to a small, inconspicuous area first to check for color and finish compatibility. This helps avoid unwanted surprises.
-
Applying Too Thick a Coat:
- Thick coats of varnish can result in an uneven finish and longer drying times. It’s better to apply multiple thin coats.
-
Ignoring Drying Times:
- Rushing between coats without allowing adequate drying time can lead to a tacky finish. Follow the manufacturer’s recommended drying times.
-
Working in inappropriate conditions:
- Varnishing in extreme temperatures or high humidity can adversely affect drying and the final finish. Work in suitable conditions.
-
Using the Wrong Tools:
- Using the wrong type of brush or applicator can leave streaks or bubbles. Use the tools recommended for the type of varnish you’ve chosen.
-
Neglecting edge work:
- Inconsistent application along edges can lead to visible lines. Pay attention to edges and corners for a uniform finish.
-
Forgetting to Stir the Varnish
- Failing to stir the varnish properly can result in an uneven color and finish. Stir gently to avoid creating bubbles.
-
Not Protecting Adjacent Areas:
- Failure to use painter’s tape or drop cloths can lead to accidental spills or splatters on walls or trim.
-
Overlooking Ventilation:
- Working in a poorly ventilated area not only affects drying times but can also be hazardous to your health. Ensure proper ventilation.
-
Ignoring the Manufacturer’s Instructions:
- Each varnish type has specific application instructions. Not following these can lead to a subpar finish.
By avoiding these common mistakes, you can ensure a smoother varnishing process and a more professional-looking finish. Remember, patience and attention to detail are key to achieving the best results.
DIY vs. Professional Application
Deciding whether to varnish your wood floors yourself or hire a professional is an important choice. Each option has its benefits and drawbacks, and the right decision depends on various factors, including your skills, budget, and the complexity of the project. This section explores the pros and cons of DIY vs. professional varnishing.
DIY Application:
Pros:
- Cost-effective: DIY is generally more budget-friendly than hiring a professional.
- Satisfaction: There’s a sense of accomplishment and personalization in completing a home project yourself.
- Control: You have complete control over the materials, timeline, and techniques used.
Cons:
- Skill Level: Varnishing requires a certain level of skill to achieve a professional look. Without experience, you might encounter issues like streaks, bubbles, or uneven coverage.
- Time-consuming: It can be a time-consuming process, especially if you are new to it.
- Equipment: You might need to purchase or rent specific tools, which can add to the cost.
Professional Application:
Pros:
- Expertise: Professionals have the skills and experience to ensure a high-quality finish.
- Efficiency: A professional can complete the job faster and with potentially fewer errors.
- Convenience: Hiring a professional means less stress and hassle for you.
Cons:
- Cost: Professional services are more expensive than DIY.
- Less Control: You have less control over the process and materials used.
- Scheduling: You’ll need to work around the professional’s schedule, which might not align with yours.
Making the decision:
- Assess Your Skill Level: If you have experience with similar projects and are comfortable with the process, DIY might be a viable option.
- Consider the project size and complexity. For large or complex projects, or if the floor requires significant repair, a professional might be better suited.
- Budget: Weigh the costs of DIY (materials, tools, and time) against the cost of professional services.
- Quality Expectations: If you’re seeking a flawless finish and aren’t confident in your abilities, consider hiring a professional.
Ultimately, the decision to DIY or hire a professional for varnishing your wood floors should be based on an honest assessment of your skills, the specific demands of the project, and your budget.
Conclusion
We’ve navigated through the essentials of selecting, preparing, applying, and maintaining wood floor varnish. From understanding the different types of varnishes to mastering the application technique, this guide aims to empower you with the knowledge and confidence to either tackle this project yourself or make an informed decision when hiring a professional.
Selecting the right varnish is pivotal in not only protecting your wood floors but also in enhancing their natural beauty. We covered the factors to consider—such as durability, aesthetic appeal, and environmental impact—to help you make a choice that suits your specific needs and preferences. Preparation is key, and we discussed the importance of cleaning, sanding, and repairing your floors for a flawless application.
The application process, while demanding precision and patience, can be a rewarding DIY project. However, for those who prefer a professional touch, we outlined the advantages and disadvantages of hiring a professional. Finally, we emphasized the significance of regular maintenance to protect your investment and keep your floors looking stunning for years to come.
Whether you decide to do it yourself or hire a professional, remember that each step in the process of varnishing your wood floors contributes to the final outcome. By avoiding common mistakes and adhering to best practices, you can achieve a finish that not only looks fantastic but also withstands the test of time.
Thank you for following along with this guide. We hope it serves as a valuable resource, helping you to bring out the best in your wood floors and ensuring they remain a cherished and striking feature of your home for many years.

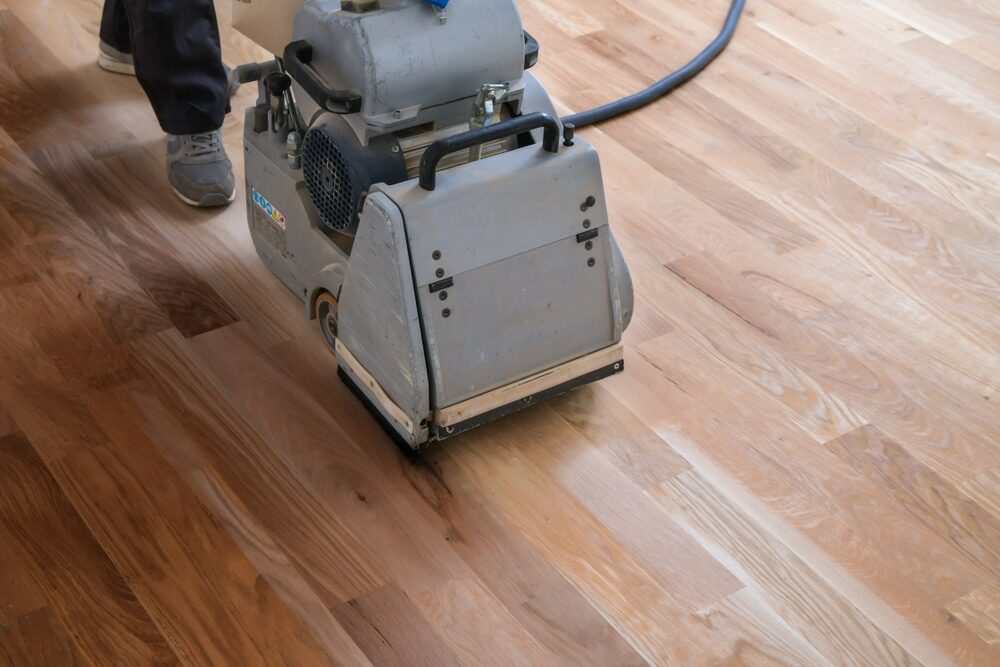
Sanding
We provide virtually dust-free sanding with our continuous belt machinery with mobile extraction units, giving you a safer environment for your family.
Oiling
This organic finish not only adds beauty to your home but also has exceptional water-repellent characteristics, making it easier to clean and maintain.
Waxing
This natural floor finish offers the softest and most mellow appearance – and leaves your floor able to breath.
Buffing
Using soft buffing machines (and hand-polishing where required) will bring a wonderful sheen to your newly-finished floor.
Repairs
We offer a full assessment of your wooden floors to determine what repairs are needed to provide the perfect working surface for the later stages of sanding, staining and sealing.
Restoration
We offer a comprehensive restoration process designed to address floors that are improperly fitted or damaged over time through wear and tear.
Request a fixed price quote for your wood floor restoration now
Simply enter your postcode below to get started.
Services
Wood Floor Sanding Wood Floor Restoration Wood Floor Scratch Repair Squeaky Wood Floor Repair Parquet Floor Sanding Parquet Floor Restoration Commercial Floor Sanding Church Floor Sanding Community Centre Floor Sanding School Floor Sanding Gap Filling Gap Filling with ResinCopyright © Mr Sander®
Privacy & Cookies Terms & Conditions Complaints Procedure Cancellation Rights Sitemap

Get An Instant Price Estimate Before You Go…
Simply enter the rooms you need sanded and we’ll provide you with a price estimate instantly! Try our price calculator now.
Get a Price Estimate NowLocal Floor Sanding Experts
Over 500 5-Star Reviews
Safe, Dust Free Sanding
Operating Since 1994