London:
Nationwide:
25,000+
Floors Restored
27 Years Experience
Wood Flooring Association Certified
Parquet Flooring Installation: Essential Steps and Tips
Posted on June 17, 2023
Articles
Parquet Flooring: Unraveling the Installation Process
With its intricate design and elegant aesthetic, parquet flooring has stood the test of time as a stylish and attractive flooring option. However, it’s not just the appearance that matters, but the installation. Installing parquet flooring can be challenging, but with the right knowledge and tools, it can be a satisfying DIY project. Let’s dive into the key considerations and steps for parquet flooring installation.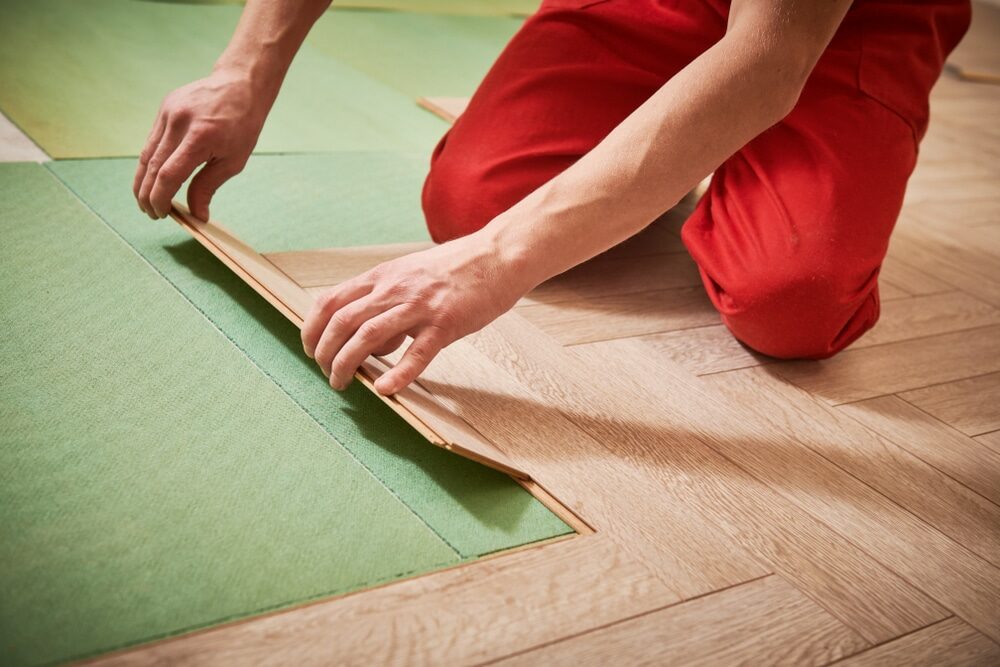
1. Introduction to Parquet Flooring
Parquet flooring, a timeless style dating back to the 16th century, is characterized by geometric patterns using small wooden blocks or strips. With its artistry and intricate details, it has been a classic choice for homeowners wanting to add a unique design element to their interiors.2. Why install parquet flooring?
Before tackling the installation, let’s consider why parquet flooring is worth the effort.Stunning Aesthetic Appeal
Parquet flooring’s unique design brings an unmatched aesthetic appeal to your home, showcasing a distinctive and intricate pattern that can range from simple to complex, depending on your preference.Durability
Parquet flooring is durable, often lasting for several decades when correctly installed and maintained, ensuring your floor’s longevity and return on investment.Versatility
The versatility of parquet flooring is another standout feature. The availability of different wood types and stains means you can customize your floor to perfectly fit your decor.
3. Key Considerations Before Installation
Choosing the right wood
When selecting the type of wood for your parquet flooring, consider factors such as durability, color, grain pattern, and, of course, your budget. Popular options include oak, maple, and walnut.Room Conditions
Before installation, evaluate the room conditions. The room should be dry, and the temperature and humidity level should be consistent with normal living conditions.Subfloor Preparation
The subfloor needs to be level and clean. Any old flooring should be removed, and the subfloor may need to be leveled to ensure a successful installation.4. Parquet Flooring Installation Steps
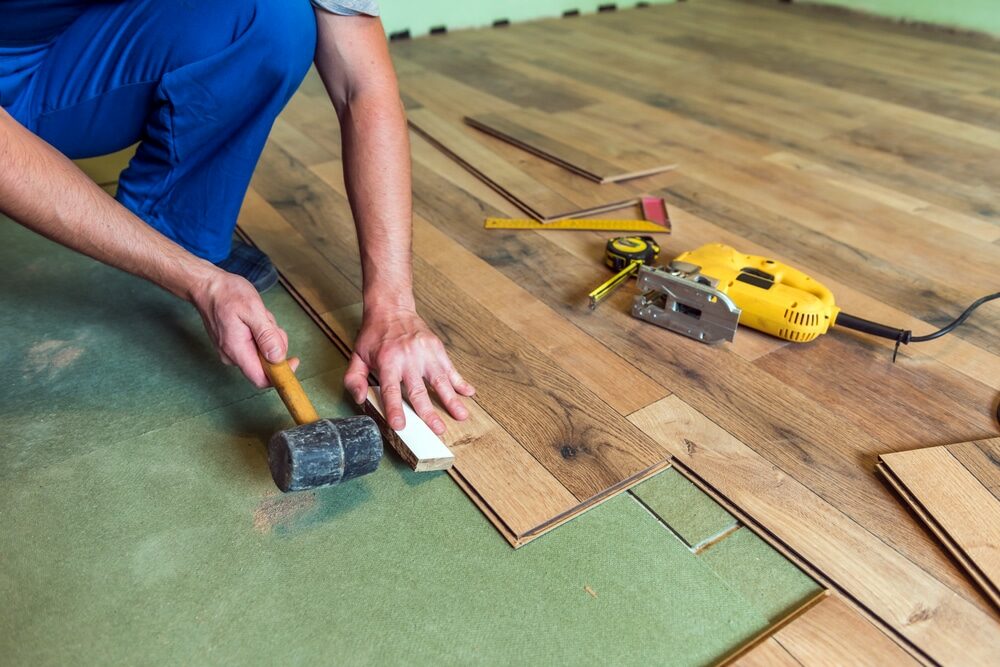
Layout Planning
Layout planning is essential. Start by finding the center of your room and laying out your tiles from there to check the fit. Remember, it’s better to have cut tiles at the edges than in the center of the room.Applying Adhesive
Once your layout is planned, apply adhesive to a small section of the floor. You should start in the center and work your way out. Follow the instructions on your adhesive for the best results.Placing the parquet tiles
Start placing the tiles in the center of the room, following the pattern you’ve chosen. Press each tile firmly into the adhesive.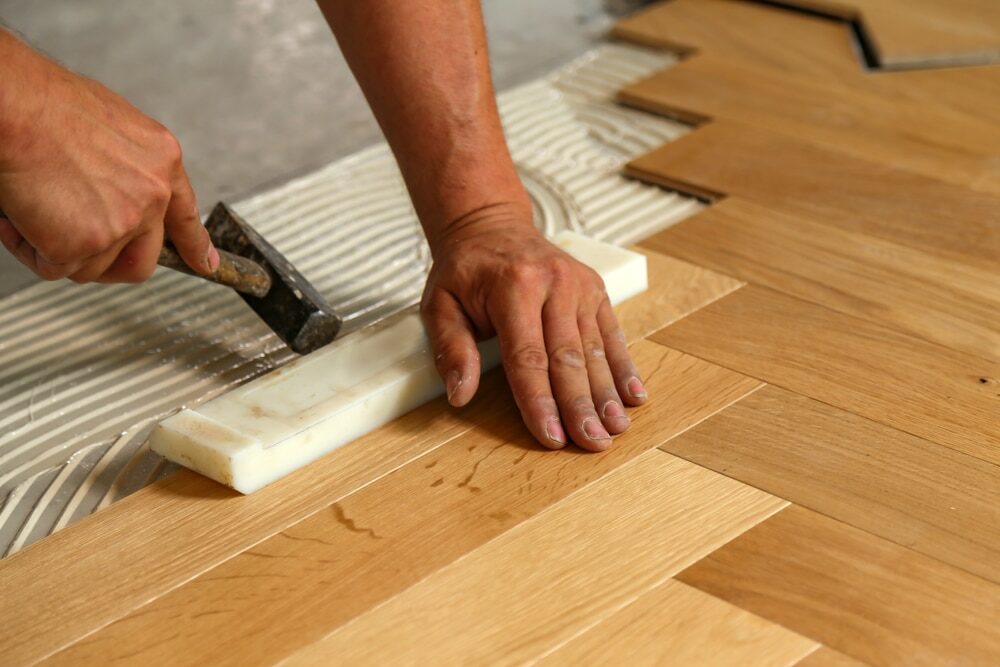
Rolling the Floor
Once all the tiles are in place, roll the floor with a floor roller. This will ensure the tiles are firmly bonded to the subfloor.Filling the gaps
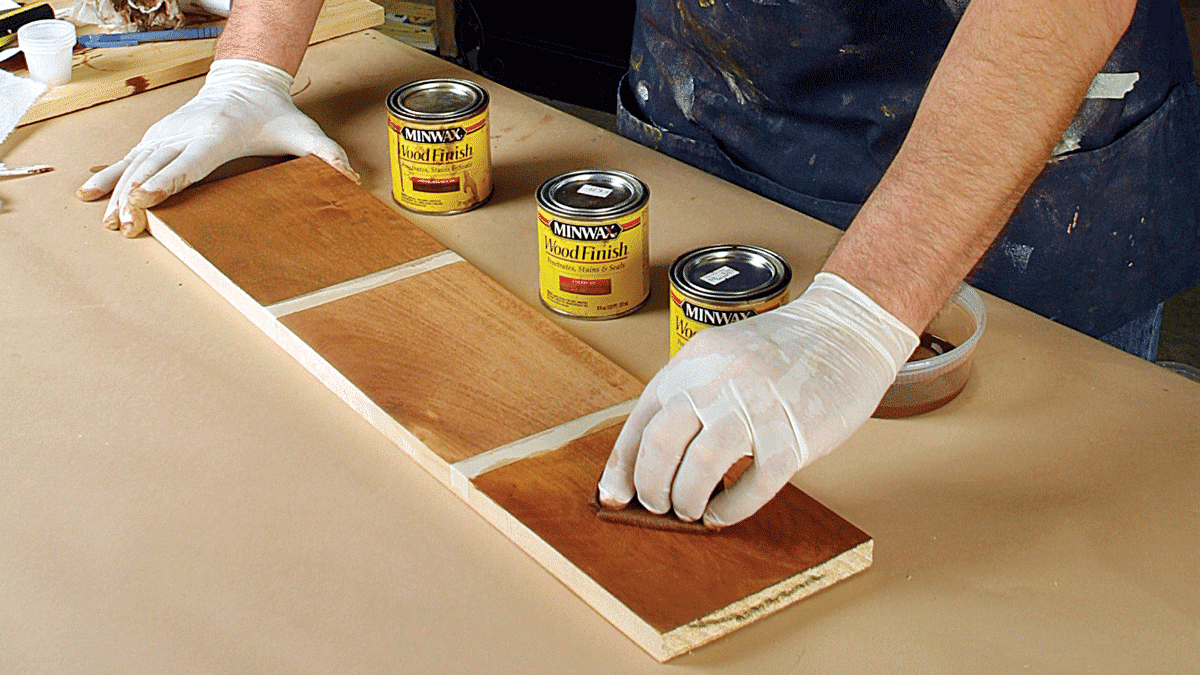
After the adhesive has dried, fill the gaps between the tiles with wood filler. Wipe off any excess with a damp cloth.Sanding and finishing
The final step is to sand the floor to achieve a smooth surface and then apply a finish for protection and shine.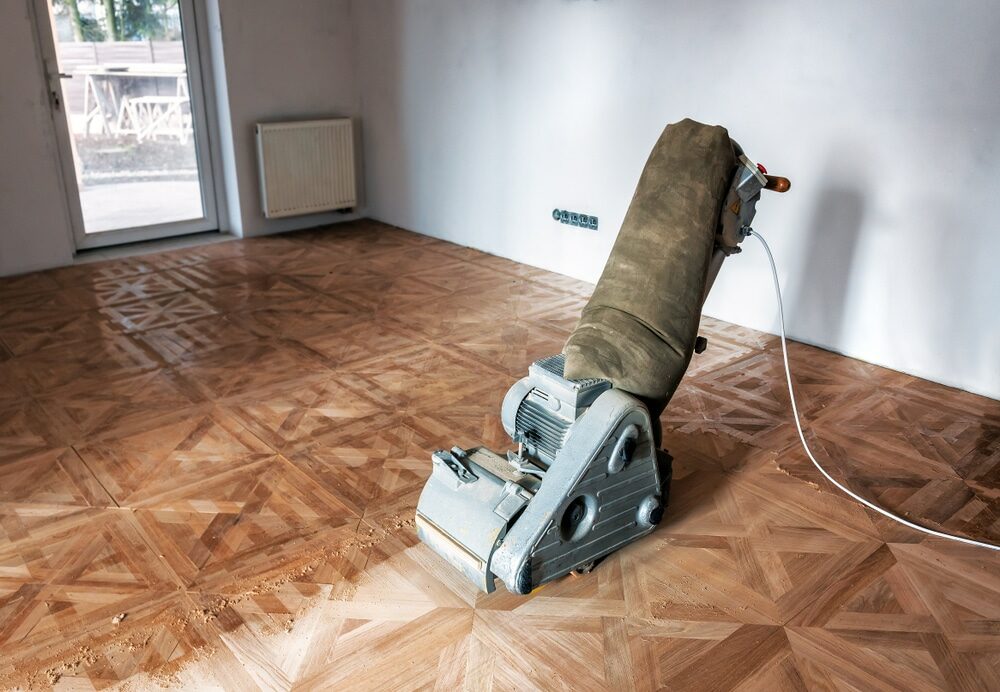
Conclusion
Parquet flooring offers stunning aesthetic appeal, durability, and versatility. However, its beauty is truly realized with the correct installation. By carefully selecting the right wood, preparing the subfloor, planning your layout, and carefully placing and finishing your tiles, you can install a parquet floor that will be admired for many years to come. It’s not just a flooring choice; it’s a labor of love that yields a unique, beautiful result.Some Useful Links:
- Floor Sanding Services
- School Floor Sanding
- Wood Floor Restorations
- Wood Floor Repairs
- Wood Floor Polishing
More from our Blog:
Hardwood Flooring: The Key to Easy Maintenance and Durability The Benefits of Dustless Wood Floor Sanding: Health and Aesthetic Advantages Hardwood Flooring Issues: Unraveling the Concept of Stability Essential Guide to Protecting High Traffic Areas of Hardwood Floors Discovering and Restoring Hidden Parquet Floors Under Your Carpet

Sanding
We provide virtually dust-free sanding with our continuous belt machinery with mobile extraction units, giving you a safer environment for your family.
Oiling
This organic finish not only adds beauty to your home but also has exceptional water-repellent characteristics, making it easier to clean and maintain.
Waxing
This natural floor finish offers the softest and most mellow appearance – and leaves your floor able to breath.
Buffing
Using soft buffing machines (and hand-polishing where required) will bring a wonderful sheen to your newly-finished floor.
Repairs
We offer a full assessment of your wooden floors to determine what repairs are needed to provide the perfect working surface for the later stages of sanding, staining and sealing.
Restoration
We offer a comprehensive restoration process designed to address floors that are improperly fitted or damaged over time through wear and tear.
Request a fixed price quote for your wood floor restoration now
Simply enter your postcode below to get started.
Services
Wood Floor Sanding Wood Floor Restoration Wood Floor Scratch Repair Squeaky Wood Floor Repair Parquet Floor Sanding Parquet Floor Restoration Commercial Floor Sanding Church Floor Sanding Community Centre Floor Sanding School Floor Sanding Gap Filling Gap Filling with ResinCopyright © Mr Sander®
Privacy & Cookies Terms & Conditions Complaints Procedure Cancellation Rights Sitemap

Get An Instant Price Estimate Before You Go…
Simply enter the rooms you need sanded and we’ll provide you with a price estimate instantly! Try our price calculator now.
Get a Price Estimate NowLocal Floor Sanding Experts
Over 500 5-Star Reviews
Safe, Dust Free Sanding
Operating Since 1994