London:
Nationwide:
25,000+
Floors Restored
27 Years Experience
Wood Flooring Association Certified
Can Sanding Remove Paint from Your Deck?
Posted on December 8, 2023
Wood Floor Sanding
Assessing the Effectiveness of Sanding in Removing Deck Paint
Welcome to our in-depth exploration of whether sanding can effectively remove paint from your deck. This is a question many homeowners grapple with as they consider the best methods for rejuvenating their outdoor living spaces. Understanding the role of sanding in deck maintenance, especially in the context of paint removal, is crucial for achieving desirable results without compromising the integrity of your deck.
Sanding is a fundamental process in deck maintenance, primarily used for smoothing surfaces, preparing for repainting or staining, and, in some cases, removing old finishes like paint. It involves using abrasive materials to wear away the top layers of the deck’s surface, revealing a fresh layer beneath. But when it comes to removing paint, sanding is not just about abrasion; it’s about precision and care.
Removing paint from a deck can be a challenging task. It often requires a combination of techniques, including sanding, to achieve a clean, prepared surface for a new finish. However, the effectiveness of sanding in paint removal depends on various factors, such as the type of paint, the condition of the wood, and the tools available.
In this blog post, we will delve into the specifics of using sanding as a method for removing paint from decks. We’ll explore how sanding works on painted surfaces, its limitations, and the best practices to follow. Additionally, we’ll compare sanding with other paint removal methods to give you a comprehensive understanding of your options.
Whether you’re a DIY enthusiast looking to tackle deck maintenance yourself or simply seeking knowledge before hiring professionals, this guide aims to equip you with the necessary insights to make informed decisions about your deck’s care. Let’s dive into the world of deck maintenance and discover the potential of sanding to remove paint from your deck.
The Basics of Sanding
Sanding is a critical process in deck maintenance, especially when it comes to tasks like removing paint. It involves using abrasive materials to strip off the top layers of a surface, which can include old paint, stains, or varnish. Understanding the basics of sanding is essential for anyone looking to refurbish their deck.
What is sanding?
- Definition: Sanding is the process of using abrasive materials, usually sandpaper or a sanding machine, to smooth or remove layers from a surface. In deck maintenance, it’s primarily used to smooth rough spots, remove old finishes, and prepare the surface for new paint or stain.
- The Sanding Process: It involves moving the abrasive material (sandpaper) back and forth across the wood’s surface. This action gradually wears down the surface layer, including any old paint or finish.
Tools and materials needed for sanding a painted deck
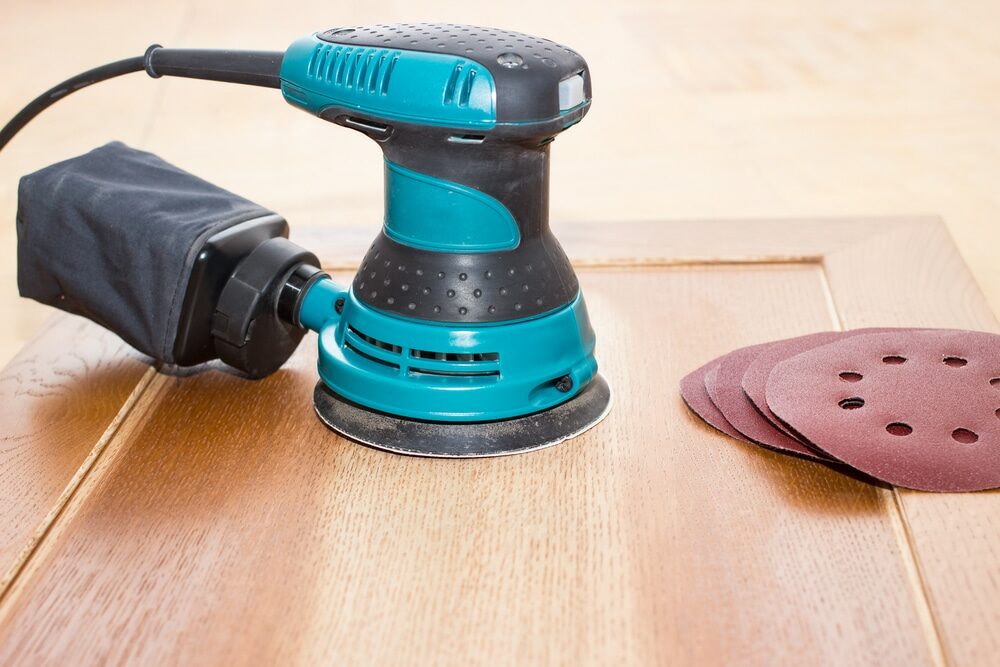
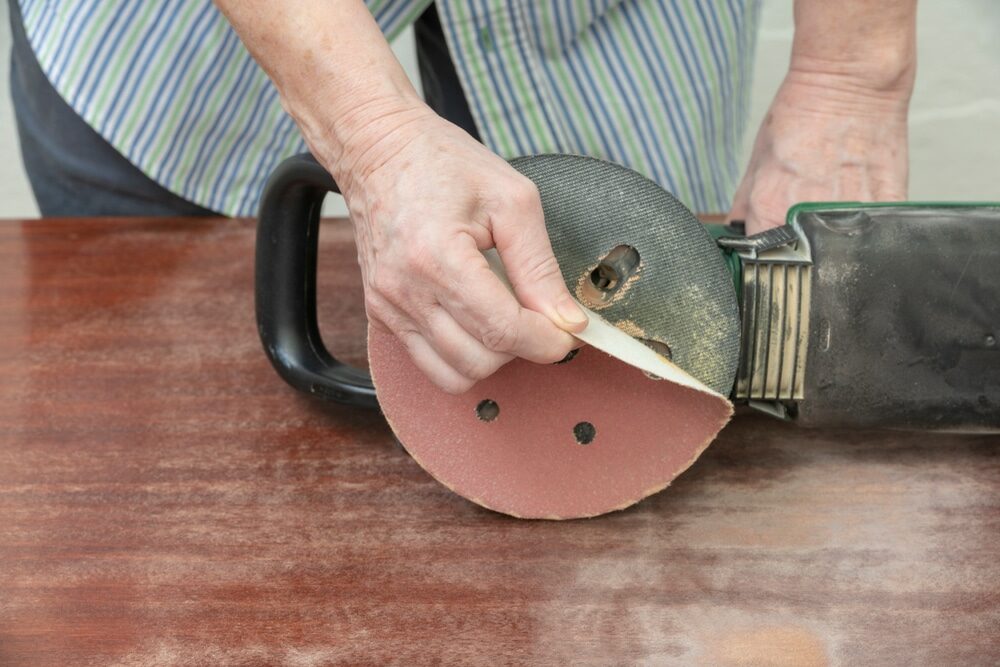
- Sandpaper is available in various grits, which refer to the coarseness of the abrasive particles. Lower grit numbers (like 40–60) are coarser and more effective for removing thick layers of paint, while higher grit numbers (like 100–120) are finer and used for smoothing the surface after the initial paint removal.
- Sanding Tools:
- Manual sanding tools, such as sanding blocks or hand-held sandpaper, are used for smaller areas or detailed work.
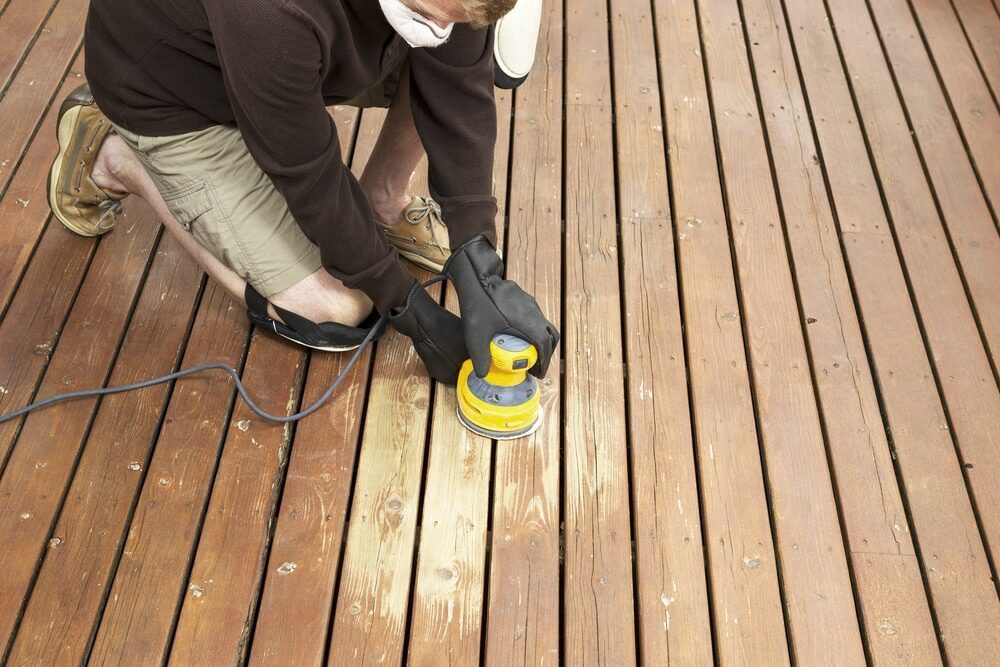
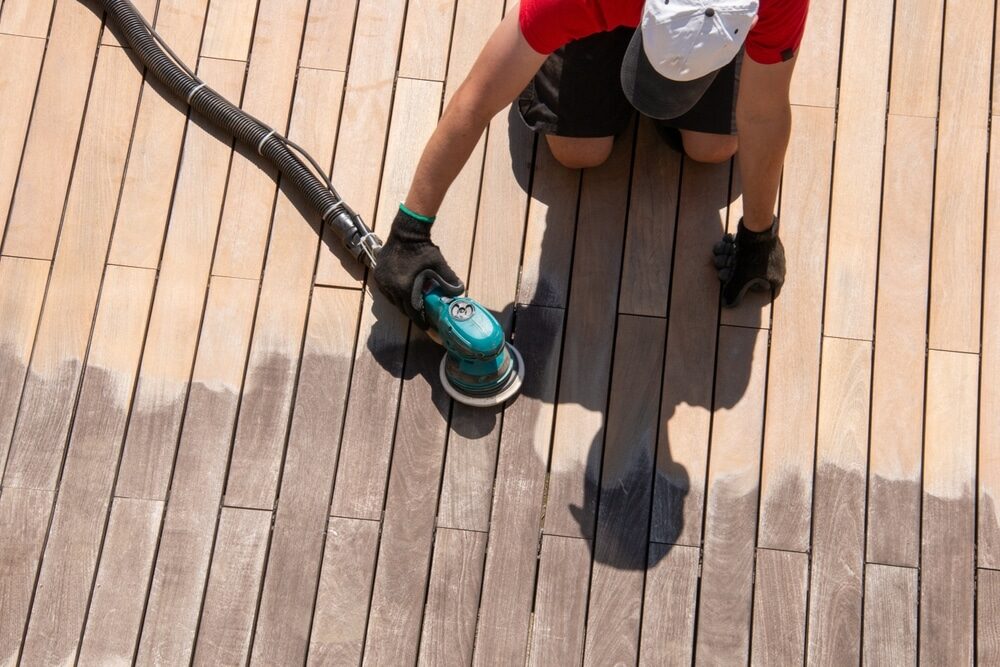
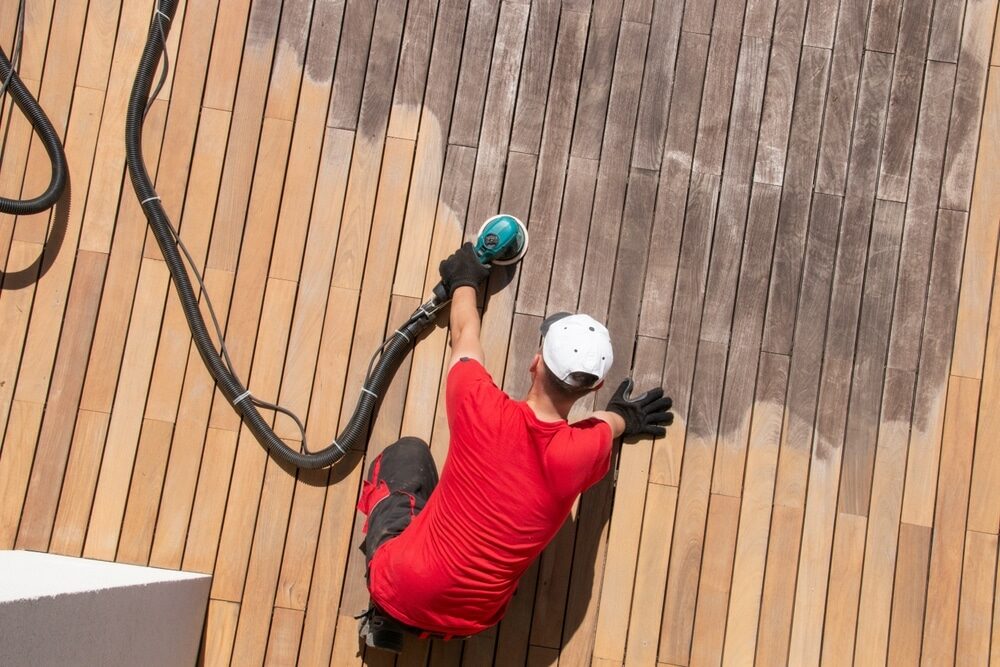
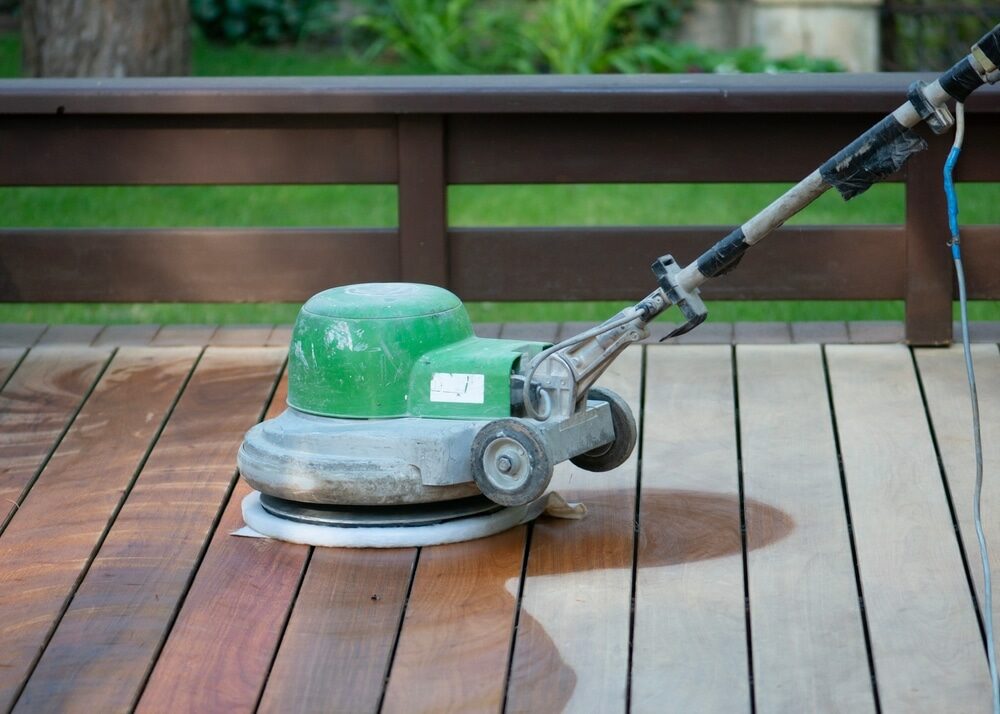
- Power sanders, like orbital sanders or belt sanders, are efficient for larger deck areas. They save time and effort but require some skill to operate without damaging the wood.
- Safety Equipment:
- Safety Goggles: To protect your eyes from dust and debris.
- Dust masks or respirators are essential to avoid inhaling dust particles.
- Gloves: To protect your hands from splinters and abrasions.
Preparation for Sanding
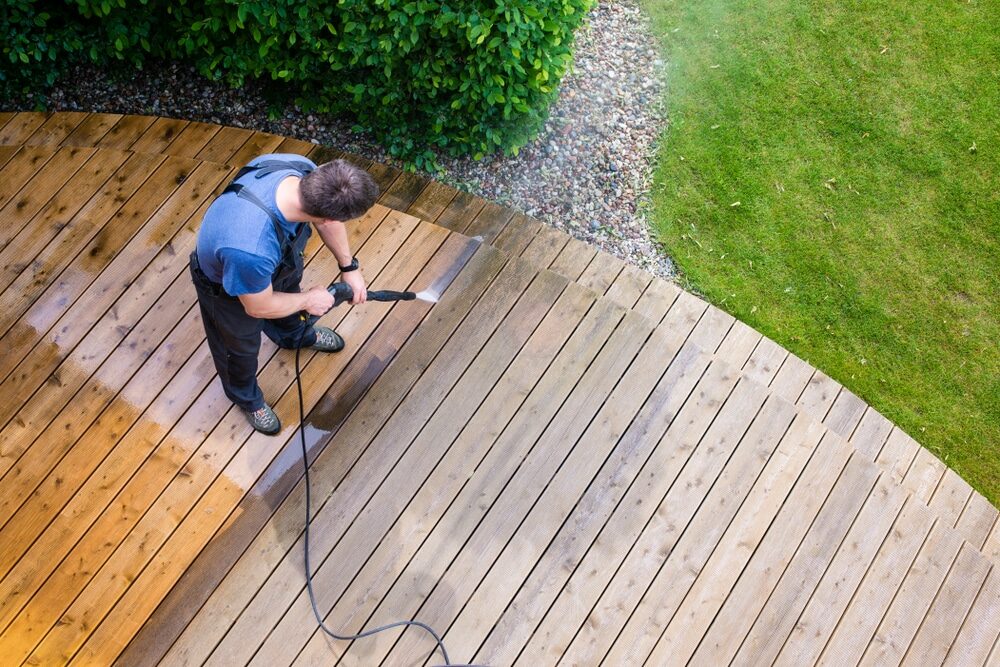
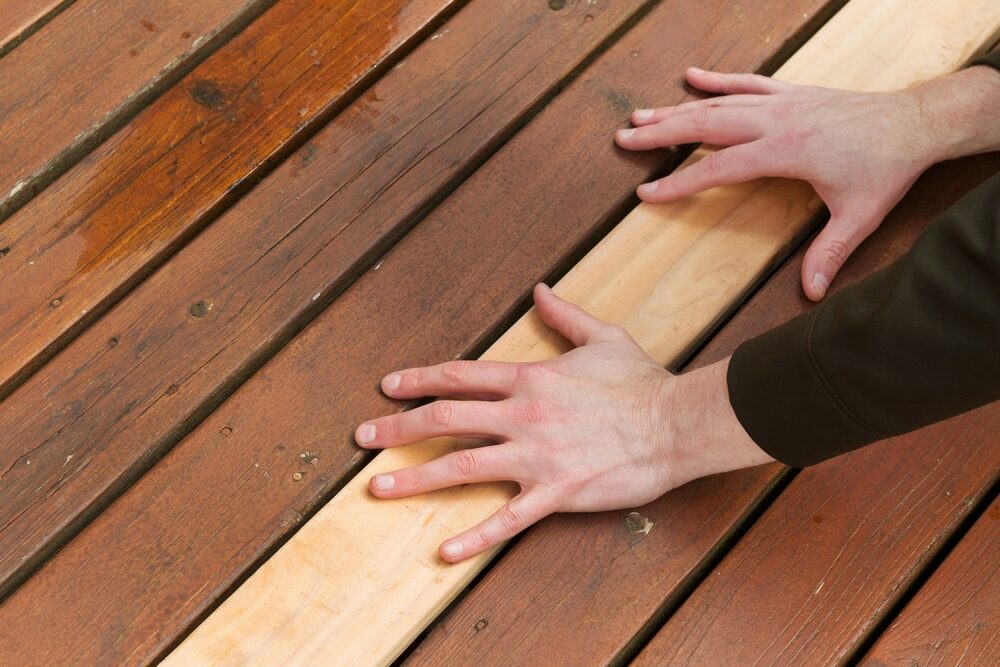
- Deck Cleaning: Before sanding, clean the deck thoroughly to remove dirt, debris, and loose paint. This can be done using a deck cleaner or a pressure washer set on a gentle setting.
- Repair and prep work: Fix any loose boards or nails. Fill in cracks or splits with wood filler to ensure a smooth sanding surface.
- Choosing the Right Grit: Start with a coarser grit for removing paint, and finish with a finer grit for a smooth surface ready for repainting or staining.
Can sanding effectively remove paint?
A common question among homeowners is whether sanding can effectively remove paint from a deck. The answer is nuanced and depends on several factors, including the type of paint, the condition of the wood, and the sanding method used. In this section, we’ll explore how sanding works on painted surfaces and its limitations.
How Sanding Works on Painted Surfaces
- Physical Abrasion: Sanding removes paint through physical abrasion. The abrasive particles on the sandpaper wear away the paint layer, revealing the wood beneath.
- Type of Paint: The effectiveness of sanding can depend on the type of paint used on the deck. For instance, sanding can be more effective on older, brittle paint compared to newer, more elastic types.
- Depth of Paint Layers: Multiple layers of paint might require more effort to remove through sanding, as each layer needs to be abraded away.
Limitations and Considerations
- Time and effort: Sanding can be time-consuming and labour-intensive, especially for large decks or decks with multiple layers of paint.
- Risk of Wood Damage: Over-sanding can damage the wood, leading to an uneven surface or even weakening the structural integrity of the deck.
- Dust Production: Sanding produces a significant amount of dust, which can be a health hazard if not properly managed.
- Not Always Comprehensive: In some cases, sanding alone may not completely remove all paint, especially from crevices or intricate woodwork.
Effectiveness of Sanding for Different Scenarios
- Light Paint Removal: For decks with a thin layer of paint, sanding can be quite effective and relatively straightforward.
- Heavy-duty Removal: In cases of thick, multi-layered paint, sanding might need to be combined with other methods, like chemical strippers, for complete removal.
- Refinishing Preparation: Even if sanding does not remove all the paint, it can still be effective in preparing the surface for a new coat of paint or stain.
The process of sanding to remove paint
Removing paint from your deck through sanding is a process that requires patience, precision, and the right approach. Here’s a detailed step-by-step guide on how to effectively use sanding for paint removal.
1. Preparation
- Clean the Deck: Start by cleaning your deck thoroughly. Remove any dirt, debris, or loose paint flakes. A pressure washer on a gentle setting can be effective, but ensure the wood is completely dry before sanding.
- Repair Damages: Fix any loose boards or protruding nails. Fill in the cracks with wood filler and let it dry.
2. Safety First
- Wear protective gear: Always use safety goggles, a dust mask, and gloves. Sanding can produce a significant amount of dust and debris.
3. Choosing the Right Sandpaper
- Start with Coarser Grit: Begin with a coarser grit sandpaper (like 60–80 grit) for the initial removal of the paint.
- Switch to Finer Grit: Once the majority of the paint is removed, switch to a finer grit sandpaper (around 120–150) to smooth the surface.
4. Sanding the deck
- Manual Sanding: For small areas or corners, use a sanding block or hand-held sandpaper. This allows for more control and precision.
- Using Power Sanders: For larger areas, a power sander like an orbital or belt sander can save time. Move the sander evenly across the surface to avoid gouging the wood.
- Following the Grain: Always sand in the direction of the wood grain to prevent scratches and achieve a smoother finish.
5. Dust Management
- Regular Cleanup: Frequently clean the dust off the deck during the sanding process. This can be done with a brush, broom, or vacuum designed for wood dust.
6. Final Touches
- Finishing with Fine Grit: After removing the paint, do a final sand with a finer grit for a smooth finish.
- Final Cleanup: Ensure all dust and debris are cleared from the deck before moving on to any refinishing.
Tips for Effective Sanding
- Even Pressure: Apply consistent pressure while sanding. Avoid pressing too hard or lingering in one spot with a power sander.
- Check Progress Regularly: Periodically check your progress to ensure you’re not over-sanding or missing any spots.
- Change Sandpaper as Needed: Replace sandpaper when it becomes clogged or worn out to maintain effectiveness.
Pros and Cons of Sanding for Paint Removal
Sanding can be a viable method for removing paint from decks, but like any technique, it has its strengths and limitations. Understanding these can help you decide if sanding is the right approach for your deck maintenance project.
Advantages of Sanding
- Effectiveness on Rough Surfaces: Sanding is particularly effective on rough or weathered surfaces, where it can remove flaking paint and smooth out the wood.
- No Chemicals Required: Unlike some paint removal methods, sanding doesn’t require harsh chemicals, making it a more environmentally friendly option.
- Preparation for New Finishes: Sanding not only removes paint but also prepares the wood surface for refinishing, ensuring better adhesion and a smoother finish for new paint or stain.
- Control and Precision: Manual sanding offers a high degree of control, allowing for precise removal of paint, especially in delicate areas or around intricate designs.
- Immediate Visual Feedback: As you sand, you can immediately see the results of your work, allowing for adjustments as needed.
Potential Drawbacks and Risks
- Labour-Intensive: Sanding, especially manual sanding, can be physically demanding and time-consuming, particularly for large decks or multiple layers of paint.
- Dust Production: Sanding produces a significant amount of dust, which can be a health hazard if not properly managed and can also be messy.
- Risk of Damaging the Wood: If not done carefully, sanding can lead to over-sanding, which thins and weakens the wood, or it can create uneven surfaces.
- Not Always Completely Effective: Sanding might not be effective for removing all types of paint, especially very elastic or deep-set paints.
- Regular Tool Maintenance: When using power sanders, there’s a need for regular maintenance of the tools, including changing sandpaper and checking for wear and tear.
- Potential for Noise Pollution: Power sanding can be quite noisy, which might be a consideration in residential areas or shared spaces.
Alternative Methods for Removing Paint from Decks
While sanding is a common method for removing paint from decks, it’s not the only option. Depending on the condition of your deck, the type of paint used, and your personal preferences, you might find one of these alternative methods more suitable.
1. Chemical Strippers
- Function: Chemical strippers dissolve or soften the paint, making it easier to scrape off.
- Types: There are various types of strippers, including caustic (alkaline-based), solvent-based, and bio-based (eco-friendly) options.
- Application: Apply the stripper according to the manufacturer’s instructions, wait for the prescribed time, and then scrape off the paint.
- Pros and Cons: Chemical strippers can be effective on tough or multiple layers of paint, but they require careful handling and proper disposal due to their toxic nature.
2. Pressure Washing
- Function: High-pressure water jets can remove loose and flaking paint.
- Considerations: Use a lower pressure setting to avoid damaging the wood. Pressure washing is more effective when combined with other methods, like scraping or sanding.
- Pros and Cons: Pressure washing is fast and efficient for large areas but may not remove all paint, especially if it is well-adhered.
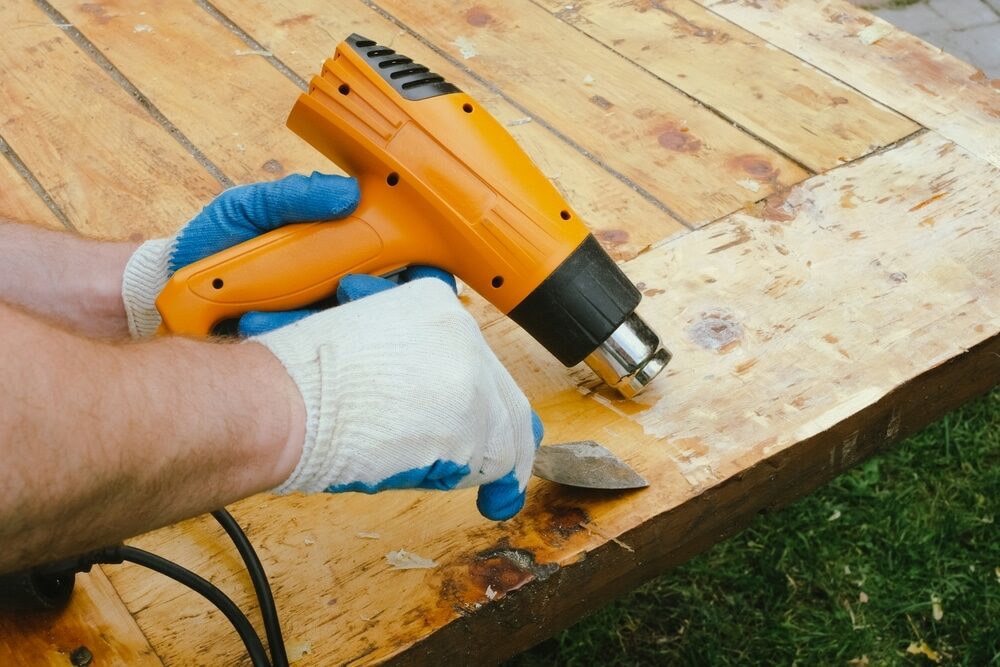
3. Heat Guns
- Function: Heat guns soften the paint, allowing it to be scraped off easily.
- Usage: Aim the heat gun at the painted area, moving it steadily to avoid scorching the wood. Once the paint bubbles, scrape it off.
- Pros and Cons: Heat guns work well for thick layers of paint, but they require caution to prevent burns and fire hazards.
4. Infrared Paint Removers
- Function: These devices use infrared heat to loosen paint without producing open flames.
- Application: Hold the device over the painted area until the paint softens, then scrape it off.
- Pros and Cons: Infrared removers are safer than heat guns and less likely to damage the wood, but they can be expensive and slower than other methods.
5. Scraping
- Function: Manual scraping can be effective, especially after softening the paint with another method.
- Tools: Use a paint scraper or a putty knife.
- Pros and Cons: Scraping is labour-intensive but offers good control and is inexpensive.
6. Rotary Sanders and Grinders
- Function: These power tools can remove paint quickly, especially from flat surfaces.
- Usage: Attach a suitable grinding or sanding disc and move the tool over the painted surface.
- Pros and Cons: Rotary tools are fast but can easily damage the wood if not used carefully.
7. Eco-Friendly Paint Removers
- Function: These are less toxic alternatives to traditional chemical strippers.
- Pros and Cons: They are safer for the environment and the user but might be less effective on tough paint or require longer application times.
Each method has its advantages and limitations, and the best choice depends on the specific conditions of your deck and your personal preferences for safety, environmental impact, and ease of use. In the next section, we’ll discuss how to prepare your deck for repainting or restaining after the paint has been removed.
Preparing Your Deck for Repainting or Restaining
After successfully removing paint from your deck, the next crucial step is to prepare the surface for repainting or restaining. Proper preparation is key to ensuring that the new finish adheres well and lasts a long time. Here’s how to prepare your deck for this next phase.
1. Thorough Cleaning
- Remove Residue: After paint removal, there might be residue left on the deck. Clean the deck thoroughly to remove any leftover paint flakes, dust, or debris.
- Use a Deck Cleaner: Apply a deck cleaner to remove any mildew, stains, or remaining grime. This step is crucial for ensuring a clean surface that will hold the new finish well.

2. Sanding the Surface
- Smooth Sanding: Even after paint removal, some rough spots or raised wood fibres may remain. Lightly sand the entire deck with fine-grit sandpaper to achieve a smooth, even surface.
- Focus on Consistency: Ensure that the surface is uniformly smooth. Pay special attention to corners and edges.
3. Repairing Damages
- Inspect for Damage: Check for any damage, such as cracks, splinters, or loose boards, that might have been revealed or caused during the paint removal process.
- Make Necessary Repairs: Replace damaged boards, hammer in protruding nails, and fill in cracks with a suitable wood filler.
4. Application of Wood Brightener
- Restore Wood pH: After cleaning and sanding, the wood’s pH balance might be disrupted, especially if chemical strippers or cleaners were used. Apply a wood brightener to neutralise the surface and prepare it for staining or painting.
5. Ensuring Complete Dryness
- Allow drying time: Before applying any paint or stain, ensure the deck is completely dry. Moisture in the wood can prevent proper adhesion and affect the finish.
6. Testing the Surface
- Water Drop Test: To check if the deck is ready for staining or painting, sprinkle a few water drops on the wood. If the water beads up, the wood isn’t ready. If it absorbs the water, you can proceed with the finishing process.
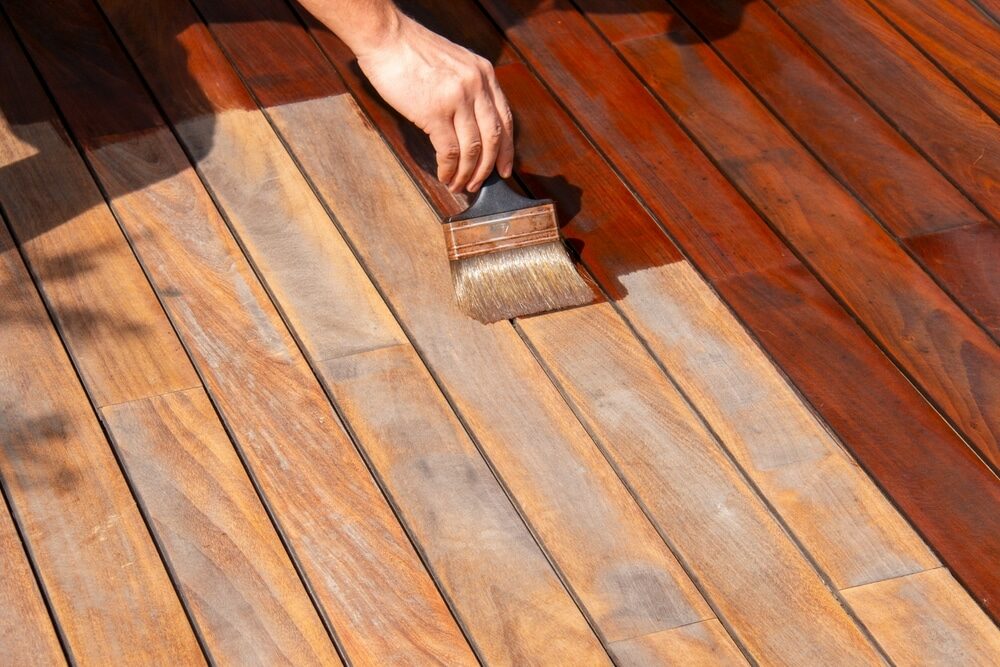
7. Choosing the Right Finish
- Select Appropriate Paint or Stain: Choose a finish that is suitable for your deck’s wood type and your climatic conditions. Consider factors like UV resistance, moisture protection, and aesthetic preferences.
8. Application of Finish
- Apply Evenly: When applying paint or stain, use a brush, roller, or sprayer to ensure even coverage. Follow the manufacturer’s instructions for the best results.
- Multiple Coats: Depending on the product and desired appearance, you may need to apply multiple coats. Allow sufficient drying time between coats.
Safety Tips and Best Practices
Deck maintenance, especially processes involving paint removal and the application of new finishes, requires careful attention to safety and best practices. Here are essential tips to ensure your safety and the success of your deck maintenance project.
1. Personal Protective Equipment (PPE)
- Eye Protection: Always wear safety goggles or glasses to protect your eyes from dust, debris, and chemical splashes.
- Respiratory Protection: Use a dust mask or respirator, especially while sanding or using chemical strippers, to avoid inhaling harmful particles.
- Skin Protection: Wear gloves to protect your hands from splinters, abrasions, and chemicals. Long sleeves and pants can also provide added protection.
2. Proper Ventilation
- Outdoor Airflow: When using chemical strippers or applying finishes, ensure the area is well-ventilated. Outdoor deck work typically provides sufficient airflow, but be mindful of wind direction to avoid inhaling fumes.
3. Safe Handling of Chemicals
- Read Instructions: Always read and follow the manufacturer’s instructions and warnings on any chemical products used.
- Spill Management: Be prepared to handle spills safely. Keep a spill kit handy, including absorbent materials and a containment strategy.
4. Equipment Safety
- Tool Maintenance: Regularly inspect and maintain power tools and equipment. Ensure that all parts are in good working condition.
- Proper Use of Tools: Use each tool according to its intended purpose. Be familiar with the operation of power tools, especially sanders and pressure washers, to avoid accidents.
5. Fire Safety
- Avoid Open Flames: When using flammable substances like certain strippers or finishes, keep them away from open flames or sparks.
- Proper Disposal: Dispose of rags and waste materials safely. Some products (like oils and solvents) can spontaneously combust if not handled properly.
6. Ergonomic Practices
- Mind Your Posture: Use ergonomic practices to avoid strain or injury. Take breaks and avoid repetitive motions for extended periods.
- Lifting Techniques: Use proper lifting techniques when moving heavy items, like deck furniture or large tools, to prevent back injuries.
7. Environmental Considerations
- Eco-Friendly Products: Whenever possible, choose environmentally friendly products for cleaning, stripping, and finishing.
- Waste Disposal: Dispose of any hazardous waste, like used chemicals and paint, at designated disposal facilities.
8. Planning and Organisation
- Work in Stages: Break down the project into manageable stages. Plan each phase, from preparation to clean-up, to ensure a smooth process.
- Be Weather Aware: Choose the right weather conditions for your maintenance tasks, avoiding extremely hot, cold, or wet days.
Conclusion
As we wrap up our exploration of whether sanding can effectively remove paint from your deck, it’s clear that while sanding is a viable option, it’s just one of several methods available. Each method, including sanding, chemical stripping, and pressure washing, has its own set of advantages and limitations. The key to a successful deck maintenance project lies in choosing the method that best suits your deck’s condition, your personal capabilities, and your safety considerations.
Your deck is an extension of your home, a place for relaxation and enjoyment. Maintaining it requires effort, but the rewards—a beautiful, safe, and long-lasting deck—are well worth it. Whether you choose to sand, strip, wash, or use a combination of methods, the key is to do so thoughtfully and safely, always keeping the long-term health of your deck in mind.
In conclusion, removing paint from your deck and preparing it for a new finish is a task that can be accomplished through various methods, each with its own merits. By considering your specific situation and following the outlined safety and best practices, you can ensure that your deck remains a cherished part of your outdoor living space for years to come.

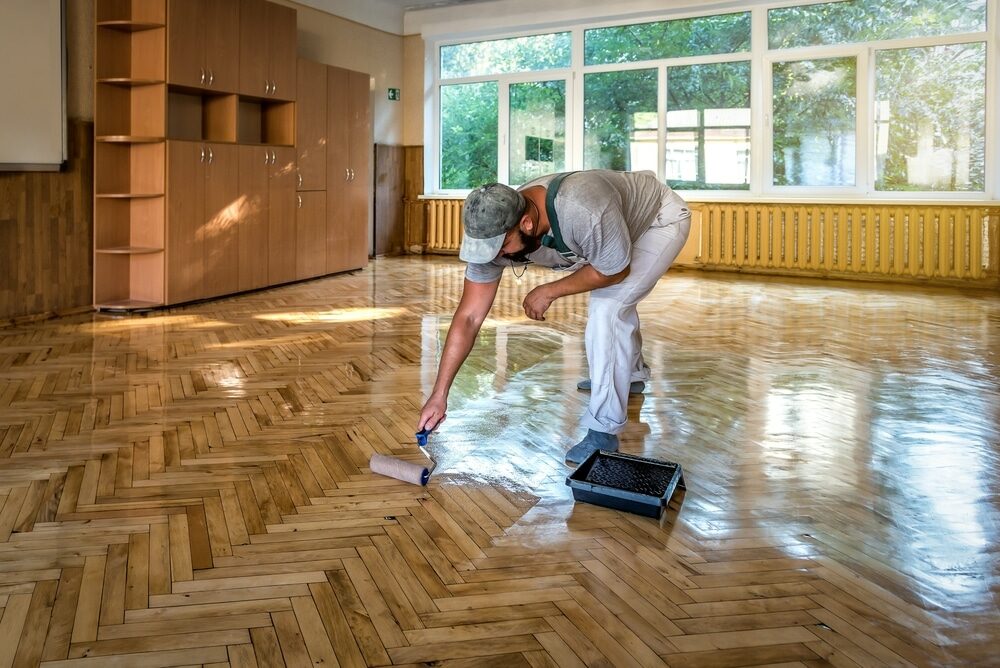
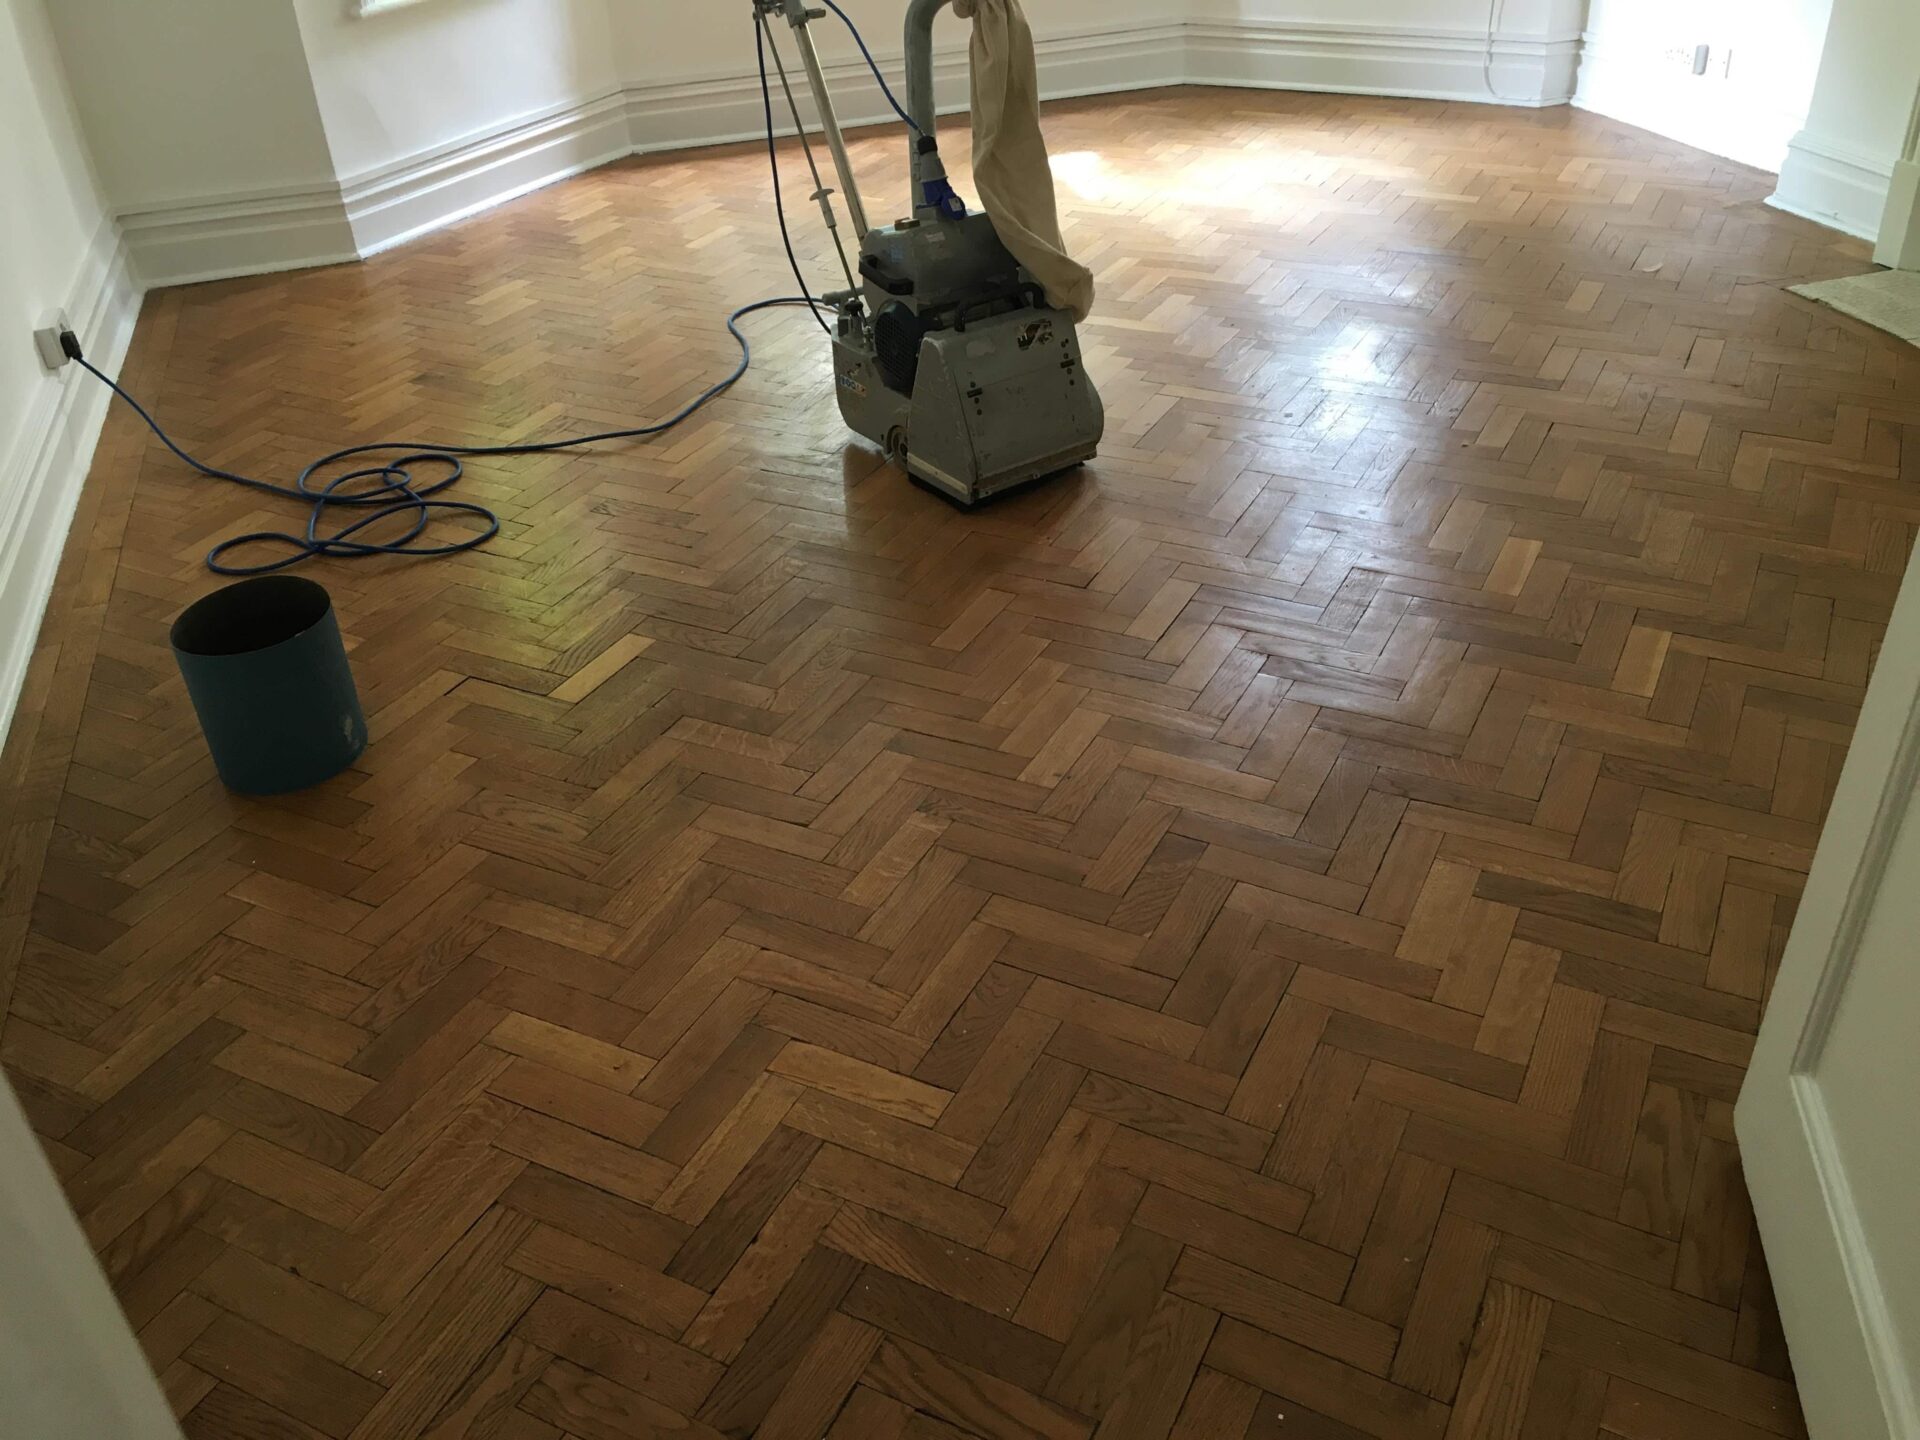
Sanding
We provide virtually dust-free sanding with our continuous belt machinery with mobile extraction units, giving you a safer environment for your family.
Oiling
This organic finish not only adds beauty to your home but also has exceptional water-repellent characteristics, making it easier to clean and maintain.
Waxing
This natural floor finish offers the softest and most mellow appearance – and leaves your floor able to breath.
Buffing
Using soft buffing machines (and hand-polishing where required) will bring a wonderful sheen to your newly-finished floor.
Repairs
We offer a full assessment of your wooden floors to determine what repairs are needed to provide the perfect working surface for the later stages of sanding, staining and sealing.
Restoration
We offer a comprehensive restoration process designed to address floors that are improperly fitted or damaged over time through wear and tear.
Request a fixed price quote for your wood floor restoration now
Simply enter your postcode below to get started.
Services
Wood Floor Sanding Wood Floor Restoration Wood Floor Scratch Repair Squeaky Wood Floor Repair Parquet Floor Sanding Parquet Floor Restoration Commercial Floor Sanding Church Floor Sanding Community Centre Floor Sanding School Floor Sanding Gap Filling Gap Filling with ResinCopyright © Mr Sander®
Privacy & Cookies Terms & Conditions Complaints Procedure Cancellation Rights Sitemap

Get An Instant Price Estimate Before You Go…
Simply enter the rooms you need sanded and we’ll provide you with a price estimate instantly! Try our price calculator now.
Get a Price Estimate NowLocal Floor Sanding Experts
Over 500 5-Star Reviews
Safe, Dust Free Sanding
Operating Since 1994