London:
Nationwide:
25,000+
Floors Restored
27 Years Experience
Wood Flooring Association Certified
Restore and Refinish Parquet Flooring: Revive Your Old Charm With Mr Sander®
Posted on May 28, 2023
News
A Comprehensive Guide on Restoring and Refinishing Parquet Flooring
Parquet flooring, with its geometric mosaic of wooden pieces, offers a timeless, classic appeal that never goes out of style. Despite its durability, like any other flooring, it can lose its luster over time. However, restoring and refinishing your parquet flooring can bring it back to its former glory, reviving the elegance of the unique wood pattern that has graced homes for centuries. Let’s delve into a step-by-step guide on how to restore and refinish your parquet flooring.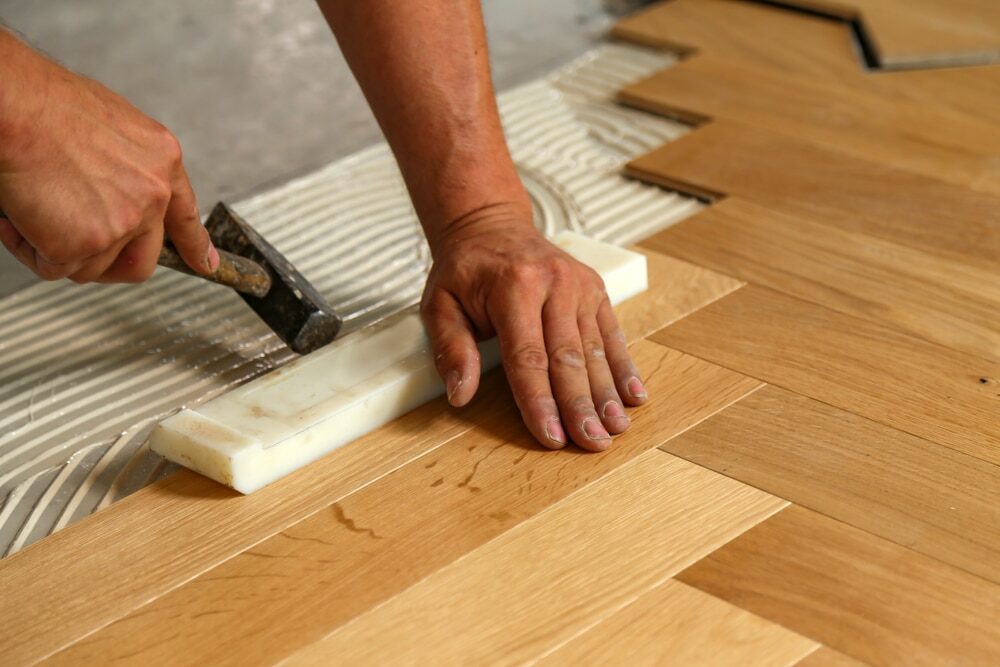
Assessment and preparation
First, it’s crucial to assess the condition of your parquet floor to determine the degree of work required. Check for loose or damaged blocks, worn patches, and any deep scratches or stains. Next, remove any furniture and rugs from the room. Use a dust mask, safety glasses, and knee pads for protection during the refinishing process. Cover doorways and vents with plastic sheets to prevent dust from spreading throughout your home.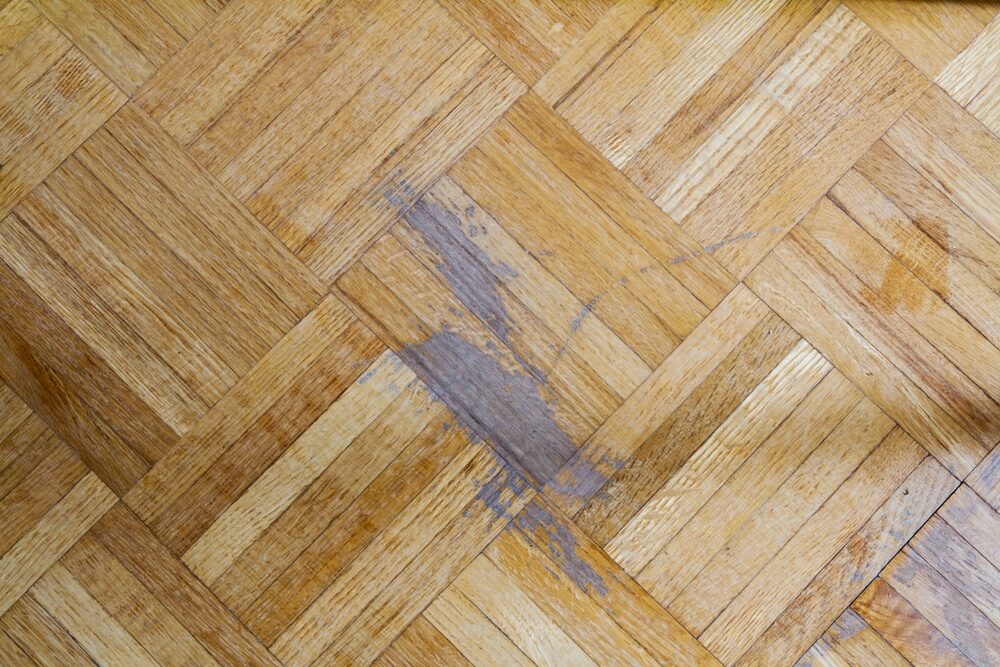
Repairing and replacing
If your floor is in severe disrepair, it might need more than just sanding and refinishing. Look for loose blocks, cracks, and deep gouges. You can repair minor cracks with wood filler, but for bigger damages, you might have to replace the affected blocks. To replace a block, carefully pry it out without damaging adjacent pieces, clean the area, apply adhesive, and install a new block. Let it dry thoroughly before you proceed.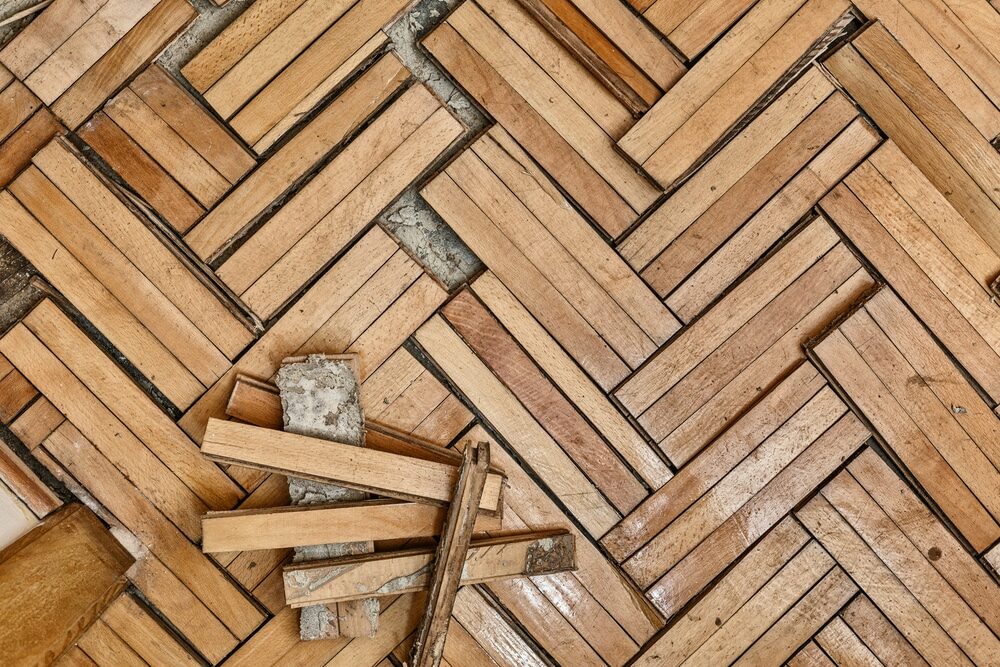
Cleaning
The next step is to clean the parquet floor. You can start by vacuuming or sweeping to remove dust and dirt. Then, use a wood floor cleaner and a soft cloth or sponge to clean the floor. Rinse with clean water and let the floor dry. Do not over-wet the floor, as this can damage the wood.Sanding
Now comes the crucial stage: sanding. Rent or purchase a drum or orbital sander, and start with coarse-grit sandpaper to remove the old finish and any surface imperfections. Always sand along the grain of the wood, not against it. Note that corners or other tricky areas may need to be sanded by hand. After the initial sanding, vacuum or sweep up the dust. Next, use medium-grit sandpaper to smooth the floor. Sweep or vacuum again. Finally, finish with fine-grit sandpaper to ensure a smooth, even surface. Clean up the dust one more time.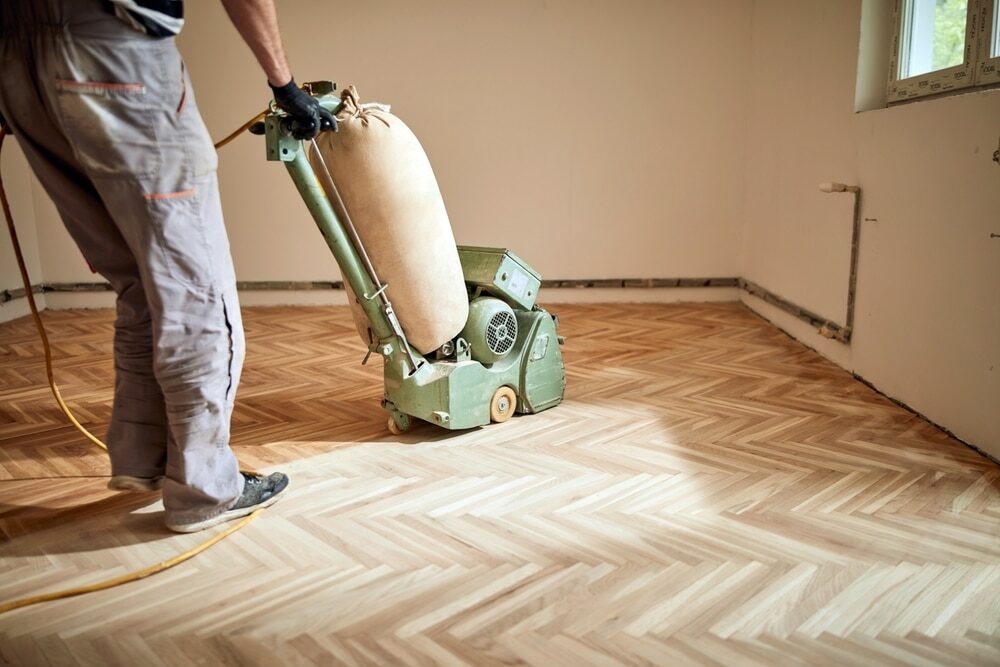
Staining
Staining is optional and depends on your aesthetic preferences. If you prefer the natural color of the wood, you can skip this step. If you do wish to change the color of your parquet flooring, use a wood stain. Apply the stain with a rag or brush, working in sections and wiping off any excess stain. Make sure to follow the wood grain. Let the stain dry completely before moving on.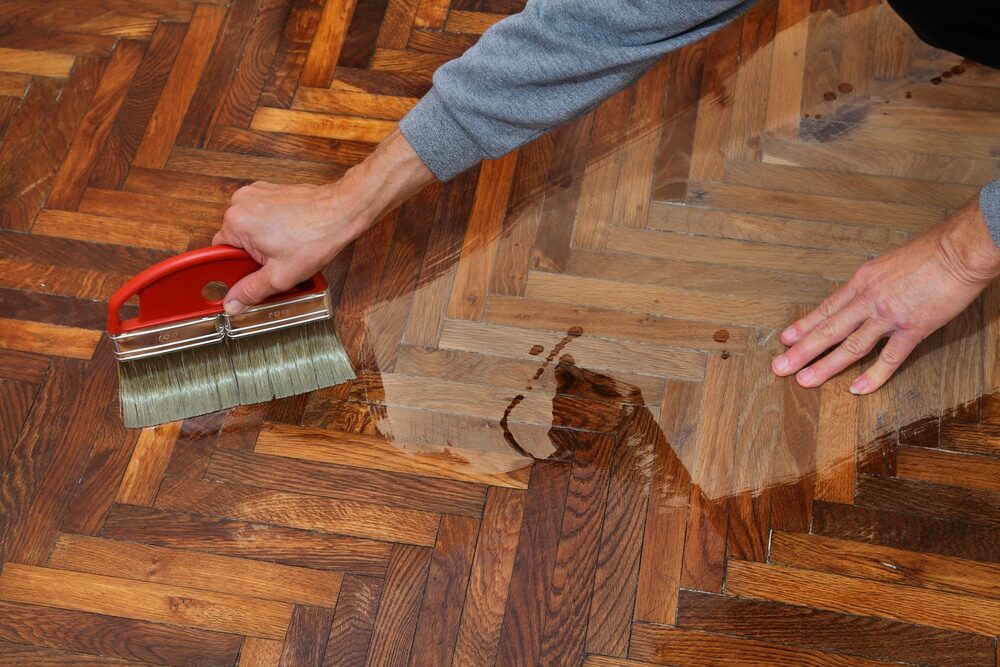
Finishing
Apply a thin layer of polyurethane finish using a high-quality brush or a lamb’s wool roller. Make sure to keep the room well ventilated. Let the first coat dry thoroughly, then lightly sand the floor with fine-grit sandpaper to ensure an even finish. Clean up the dust, then apply a second coat. Two coats are typically sufficient, but for high-traffic areas, you might consider a third coat.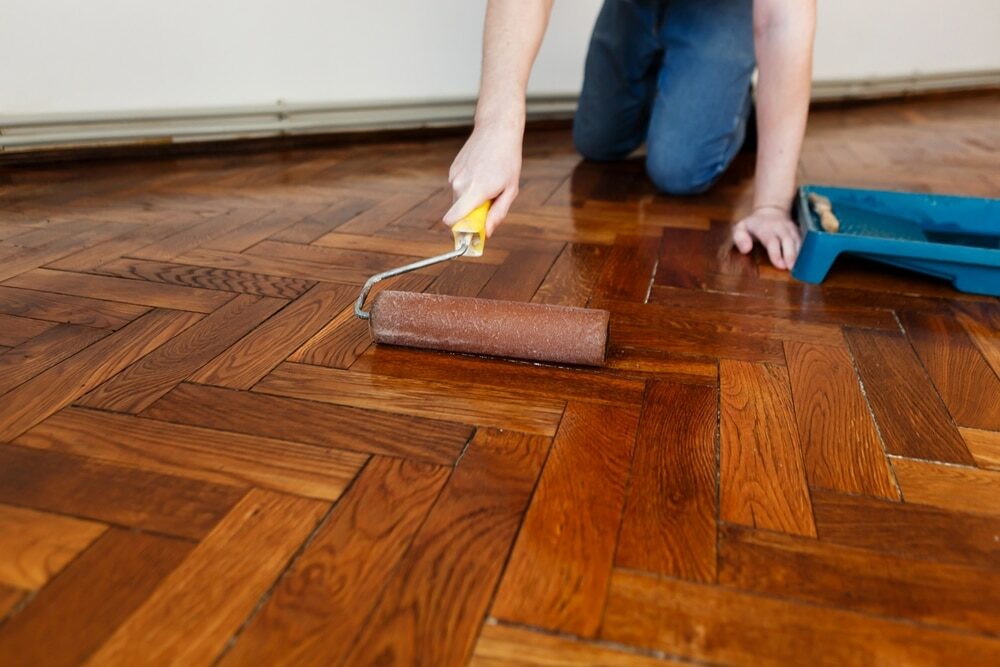
Care and Maintenance
After the floor has dried completely (which can take several days), you can move your furniture back into the room. Use felt pads under furniture legs to prevent scratches. Keep your floor clean and free of grit and dust to maintain its new shine. Wipe up spills immediately to avoid stains.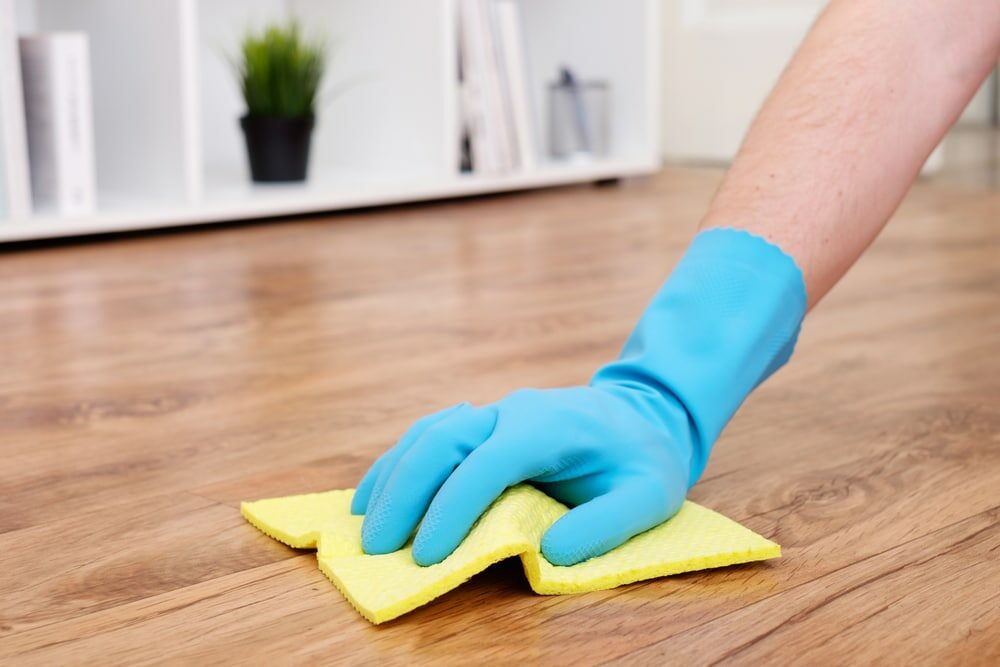
Conclusion
Restoring and refinishing your parquet flooring is a labor of love that can entirely transform the look of your space. With a little effort, you can renew your parquet flooring, adding value and beauty to your home. This project is not just about aesthetics; it’s about bringing new life to the well-trodden paths of your home.Some Useful Links:
- Floor Sanding Services
- School Floor Sanding
- Wood Floor Restorations
- Wood Floor Repairs
- Wood Floor Polishing
More from our Blog:
Unveiling the Beauty of Your Wood Floor in Your London Home | Mr Sander® Winter Care for Wood Flooring: Top DIY Scratch & Scrape Solutions Repair Solid Wood Flooring: DIY Guide for Success | Mr Sander® Keep Wood Floors Looking Good with Mr Sander® Revitalize Your Wood Floors in Preparation for Winter | Mr Sander® Why Wood Flooring is Essential for Every Home

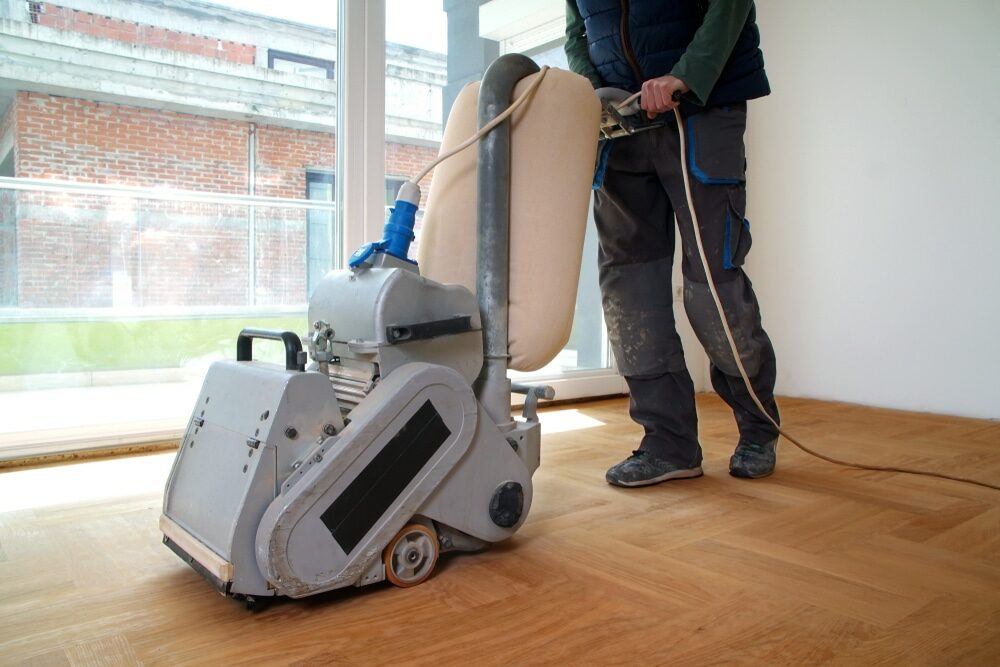

Sanding
We provide virtually dust-free sanding with our continuous belt machinery with mobile extraction units, giving you a safer environment for your family.
Oiling
This organic finish not only adds beauty to your home but also has exceptional water-repellent characteristics, making it easier to clean and maintain.
Waxing
This natural floor finish offers the softest and most mellow appearance – and leaves your floor able to breath.
Buffing
Using soft buffing machines (and hand-polishing where required) will bring a wonderful sheen to your newly-finished floor.
Repairs
We offer a full assessment of your wooden floors to determine what repairs are needed to provide the perfect working surface for the later stages of sanding, staining and sealing.
Restoration
We offer a comprehensive restoration process designed to address floors that are improperly fitted or damaged over time through wear and tear.
Request a fixed price quote for your wood floor restoration now
Simply enter your postcode below to get started.
Services
Wood Floor Sanding Wood Floor Restoration Wood Floor Scratch Repair Squeaky Wood Floor Repair Parquet Floor Sanding Parquet Floor Restoration Commercial Floor Sanding Church Floor Sanding Community Centre Floor Sanding School Floor Sanding Gap Filling Gap Filling with ResinCopyright © Mr Sander®
Privacy & Cookies Terms & Conditions Complaints Procedure Cancellation Rights Sitemap

Get An Instant Price Estimate Before You Go…
Simply enter the rooms you need sanded and we’ll provide you with a price estimate instantly! Try our price calculator now.
Get a Price Estimate NowLocal Floor Sanding Experts
Over 500 5-Star Reviews
Safe, Dust Free Sanding
Operating Since 1994