London:
Nationwide:
25,000+
Floors Restored
27 Years Experience
Wood Flooring Association Certified
Sanding or Stripping: What’s Best for Your Kitchen Worktop?
Posted on January 8, 2024
Kitchen Worktop sanding
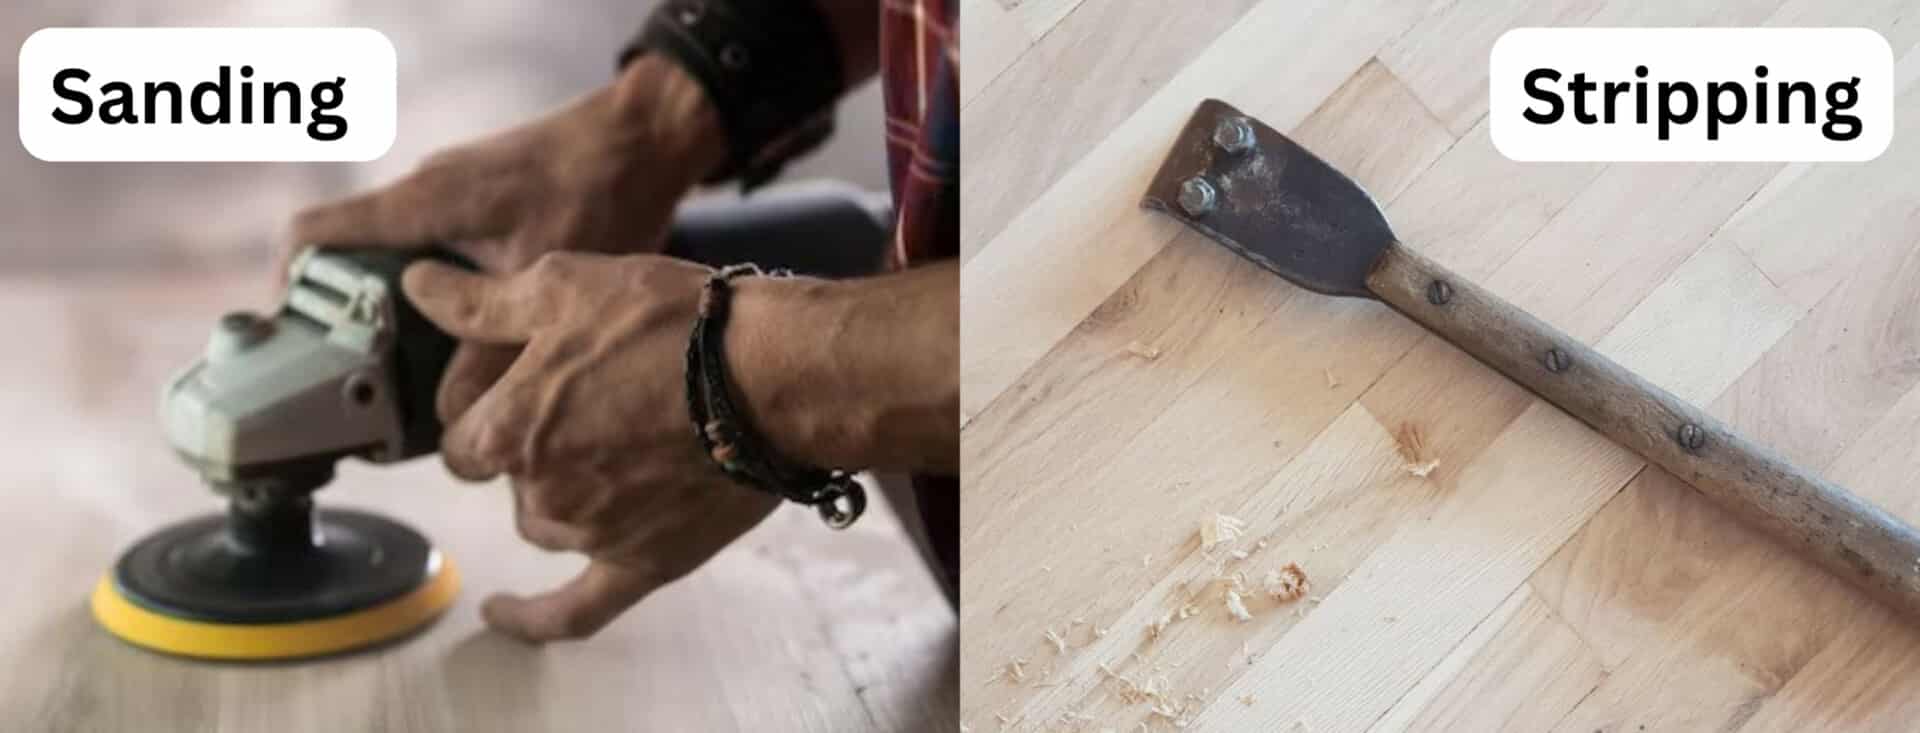
Reviving Your Kitchen Worktop: Sanding vs. Stripping – Which Is the Better Choice?
The kitchen is often referred to as the heart of the home, where culinary creations come to life and cherished memories are made. At the centre of this culinary haven lies your kitchen worktop, a surface that endures the daily grind of chopping, slicing, and meal preparation. Over time, the wear and tear on your worktop may become more pronounced, leaving you with a choice to make: should you sand your kitchen worktop or strip it bare?
In this comprehensive guide, we will delve into the world of kitchen worktop maintenance and restoration, exploring the age-old question: sanding or stripping? Which method is best suited to reviving the beauty and functionality of your kitchen worktop?
Before we dive into the intricacies of sanding and stripping, it’s essential to understand the unique characteristics of your kitchen worktop and the factors that influence your decision. Whether you have a wooden, laminate, or stone worktop, the right approach can make all the difference in rejuvenating its appearance and durability.
So, if you’re grappling with the decision of whether to sand or strip your kitchen worktop, keep reading. By the end of this article, you’ll be equipped with the knowledge to make an informed choice and breathe new life into your kitchen’s centerpiece. Let’s begin our journey to discover what’s best for your kitchen worktop: sanding or stripping?
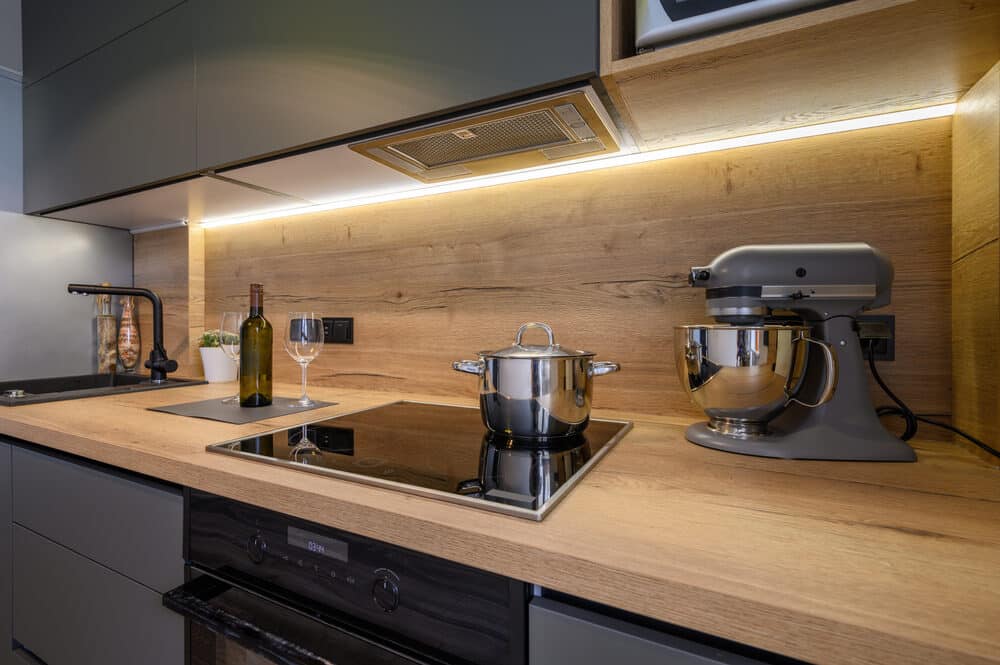
Understanding Your Kitchen Worktop
Your kitchen worktop is more than just a functional surface; it’s a design element that plays a crucial role in the overall aesthetics of your kitchen. To determine whether sanding kitchen worktop or stripping is the right solution for your worktop, you must first understand the material it’s made of and assess its current condition.

Different Types of Kitchen Worktop Materials
Kitchen worktops come in various materials, each with its own characteristics and maintenance requirements.
- Wood: Wooden worktops offer a warm and natural appeal. They can be made from hardwoods like oak, maple, or cherry, or softer woods like pine. Wooden worktops require specific care due to their susceptibility to moisture and scratches.
- Laminate: Laminate worktops are affordable and come in a wide range of designs. They are relatively easy to clean but may suffer from surface damage over time.
- Granite or Stone: Natural stone worktops, such as granite or marble, provide a luxurious and durable option. They are resistant to heat and scratches but may require periodic sealing.
- Quartz: Engineered quartz worktops combine the durability of stone with low maintenance. They are non-porous, resistant to stains, and available in various colours and patterns.
Assessing the Current Condition of Your Worktop
Before deciding whether to sand or strip your kitchen worktop, conduct a thorough assessment of its current condition.
- Surface Damage: Examine the worktop for scratches, stains, or dents. Note the extent of the damage and whether it is localised or widespread.
- Finish and Sealant: Determine the type of finish or sealant on your worktop. If it’s worn, cracked, or discoloured, it may be time for maintenance.
- Water Damage: Look for signs of water damage, such as warping or discoloration, especially if you have a wooden worktop.
- Overall Appearance: Consider whether the worktop’s appearance aligns with your desired kitchen aesthetics. Faded or outdated surfaces may benefit from restoration.
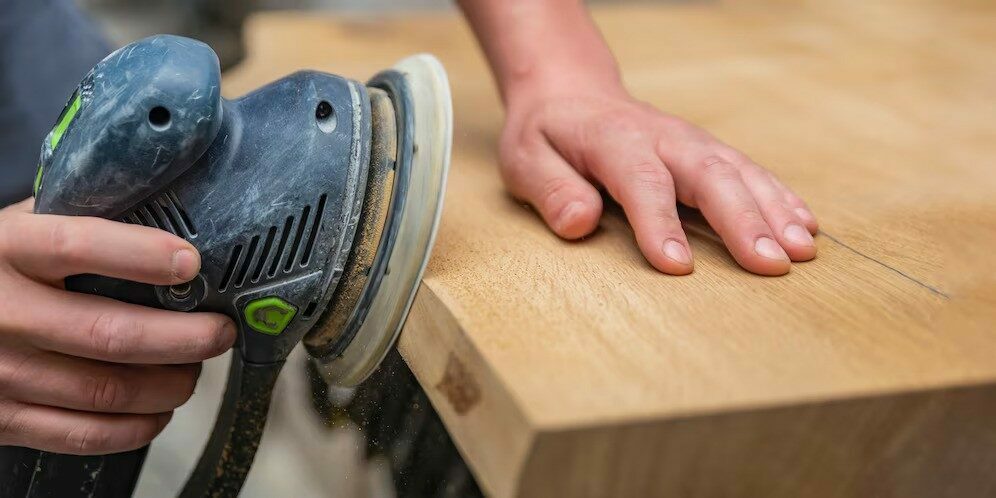
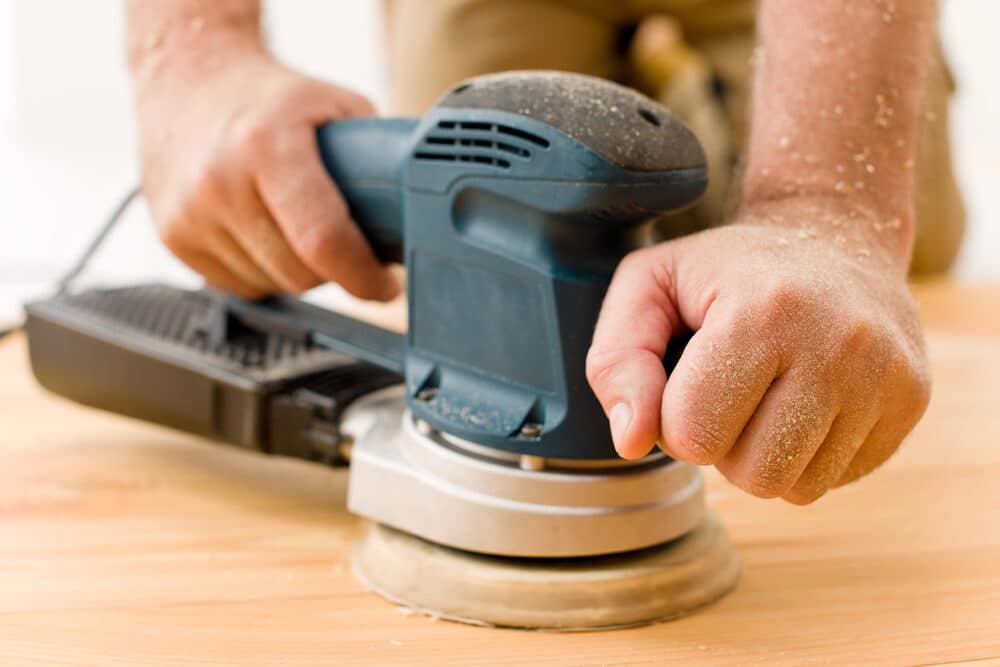
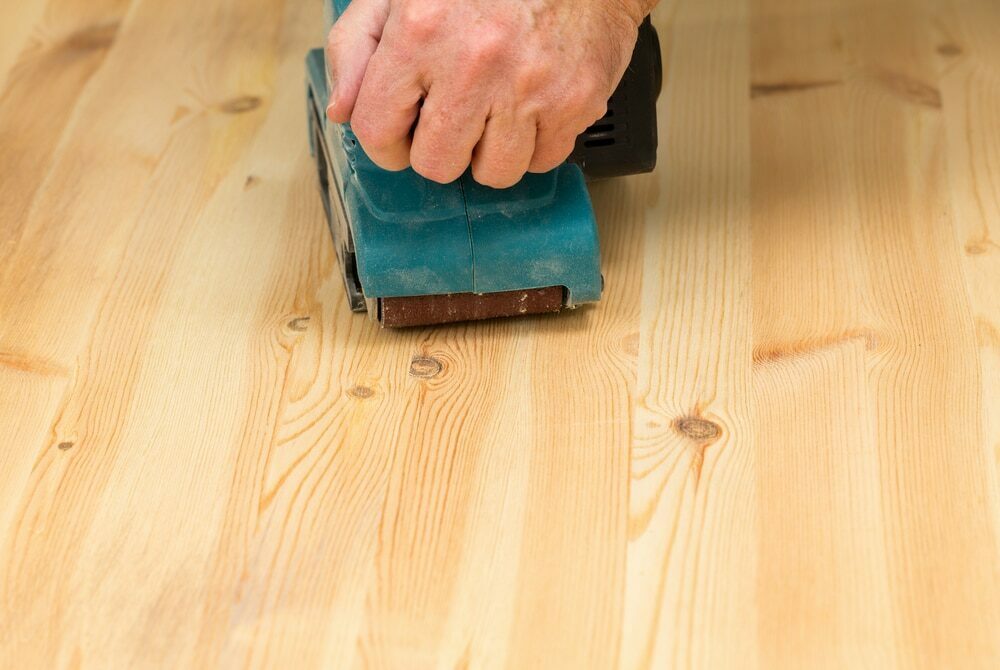
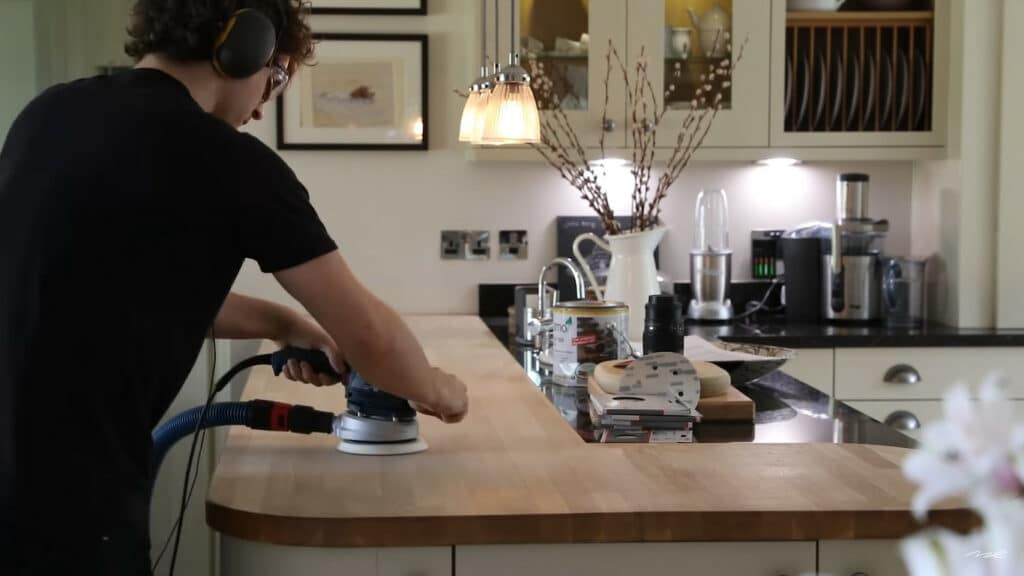
Sanding Your Kitchen Worktop
Kitchen Worktop Sanding is a popular method for rejuvenating kitchen worktops, especially those made of wood. It involves the removal of the existing finish, the smoothing of the surface, and the application of a new finish. Sanding can breathe new life into your worktop and restore its natural beauty. Here’s a step-by-step guide to sanding your kitchen worktop:
1. Gather your tools and materials:
Before you begin sanding your kitchen worktop, ensure you have the necessary tools and materials.
- Sandpaper of various grits (from coarse to fine)
- Sanding block or electric sander
- Safety goggles and a dust mask
- Painter’s tape or masking tape
- Wood filler (if needed)
- A vacuum cleaner or dust collector
- Finishing materials (varnish, oil, or sealant)
- Paintbrush or foam applicator
- Clean, lint-free cloths
2. Prepare the work area:
Clear your kitchen worktop of all items and cover nearby surfaces and appliances with drop cloths or plastic sheeting to protect them from dust and debris.
3. Safety First:
Put on your safety goggles and dust mask to protect your eyes and lungs from the dust generated during sanding.
4. Start with coarse-grit sandpaper:
Begin sanding with coarse-grit sandpaper (typically 80 or 100 grit) to remove the existing finish and any deep scratches or imperfections. Sand in the direction of the wood grain for an even result. Be patient and thorough, ensuring you cover the entire surface.
5. Progress to Finer Grits:
Gradually progress to finer-grit sandpaper (120, 150, and 220 grit) as you work your way towards a smoother surface. Each successive grit will help to refine the finish and remove the scratches left by the previous grit.
6. Repair any damage:
Inspect the worktop for any gouges or holes. Use wood filler to fill in these imperfections, following the manufacturer’s instructions. Once the filler is dry, sand it smooth with the rest of the worktop.
7. Remove Dust:
After sanding with each grit, use a vacuum cleaner or dust collector to remove the dust from the surface and surrounding area. Cleanliness is crucial for a flawless finish.
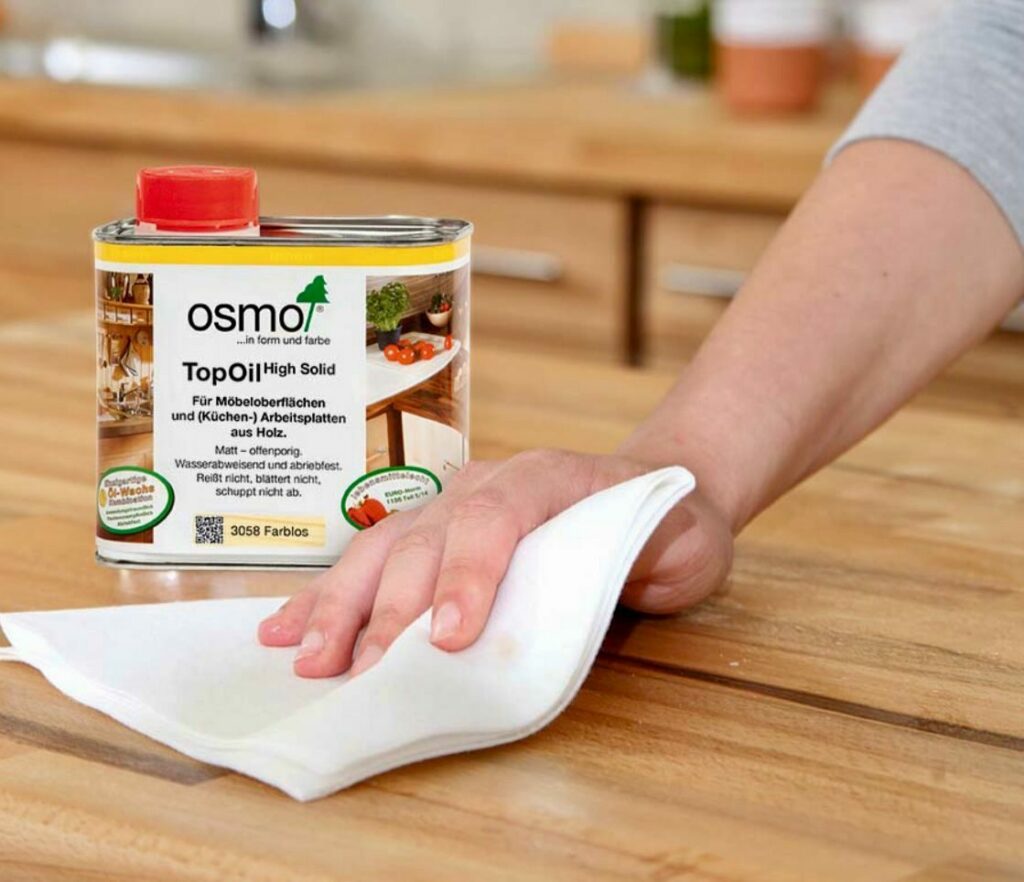
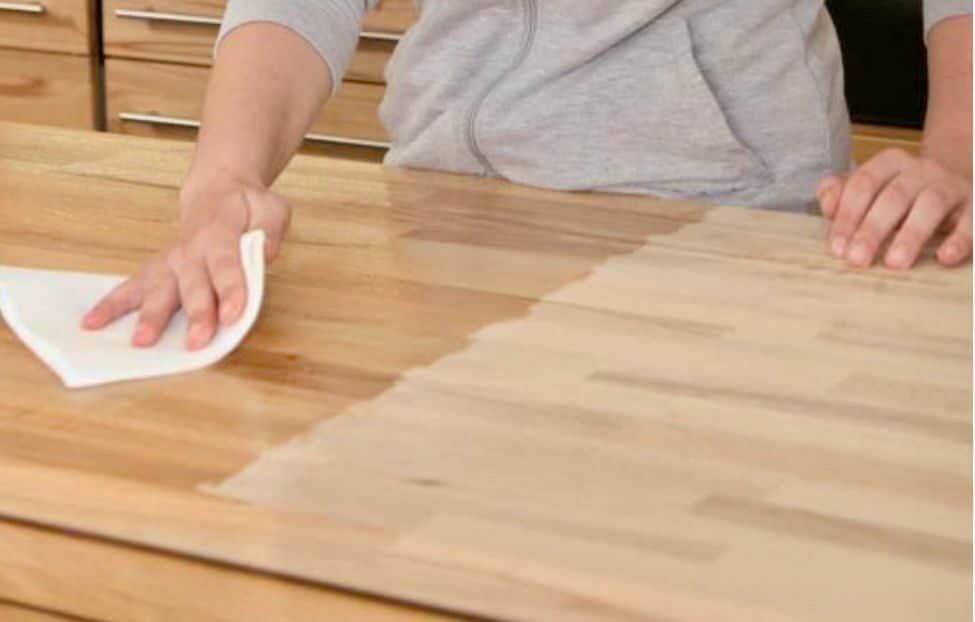
8. Apply the finish:
Once you’re satisfied with the smoothness of the worktop, it’s time to apply the finish of your choice. You can opt for varnish, oil, or a specialised worktop sealant. Follow the manufacturer’s instructions for application and drying times. Apply multiple coats if necessary for added protection.
9. Let it dry:
Allow the finish to dry completely before using your kitchen worktop. This may take several hours to a day, depending on the product you’ve chosen.
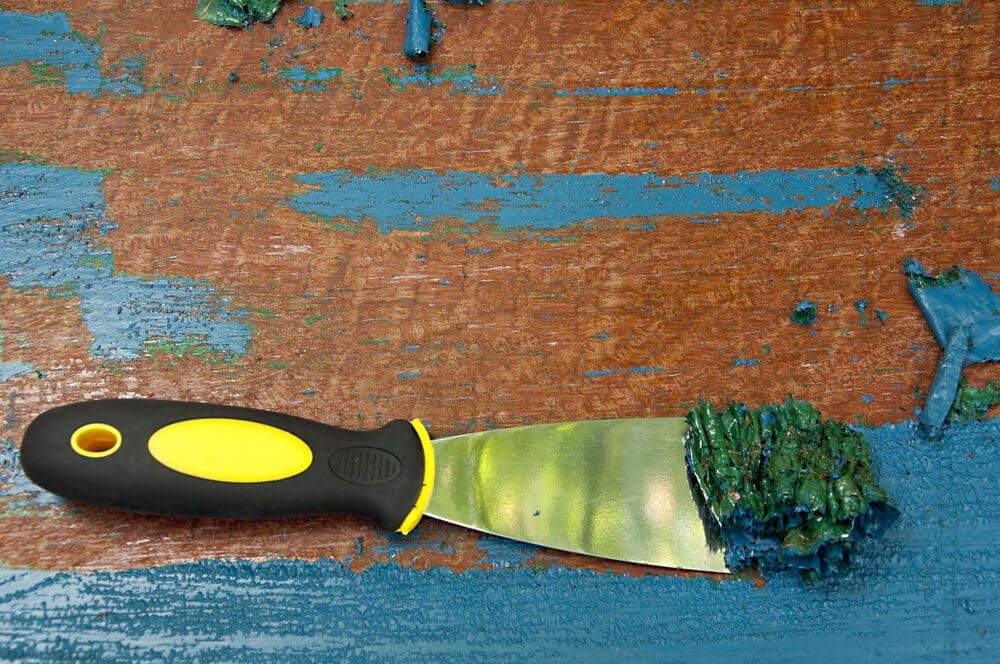
Stripping Your Kitchen Worktop
Stripping your kitchen worktop is an alternative method to rejuvenate its appearance, particularly if it has multiple layers of old finishes or if you prefer a fresh start. Stripping involves the complete removal of the existing finish, revealing the bare surface beneath. This method is suitable for various worktop materials, including wood and laminate. Here’s a step-by-step guide to stripping your kitchen worktop:
1. Gather your tools and materials:
Before you begin the stripping process, make sure you have the necessary tools and materials ready.
- Paint stripper or finish remover suitable for your worktop material
- Paintbrush or chemical-resistant applicator
- Plastic scraper or putty knife
- Safety goggles and gloves
- Drop cloths or plastic sheeting
- A well-ventilated workspace or proper respiratory protection
- Clean, lint-free cloths
- Sandpaper (various grits)
- Wood filler (if needed)
2. Prepare the work area:
Clear your kitchen worktop and the surrounding area of all items, and cover nearby surfaces with drop cloths or plastic sheeting to protect them from any drips or spills.
3. Safety Precautions:
Put on safety goggles and gloves, and if you’re working in a poorly ventilated area, use respiratory protection to avoid inhaling fumes.
4. Apply the finish remover:
Follow the manufacturer’s instructions for the paint stripper or finish remover you’ve chosen. Apply it evenly to the worktop’s surface using a paintbrush or applicator. Be sure to work in small sections to ensure thorough coverage.
5. Wait for the chemical reaction:
Allow the finish remover to sit on the surface for the recommended time specified on the product label. This time will vary depending on the product and the number of layers to be removed. The finish will typically bubble and loosen during this process.
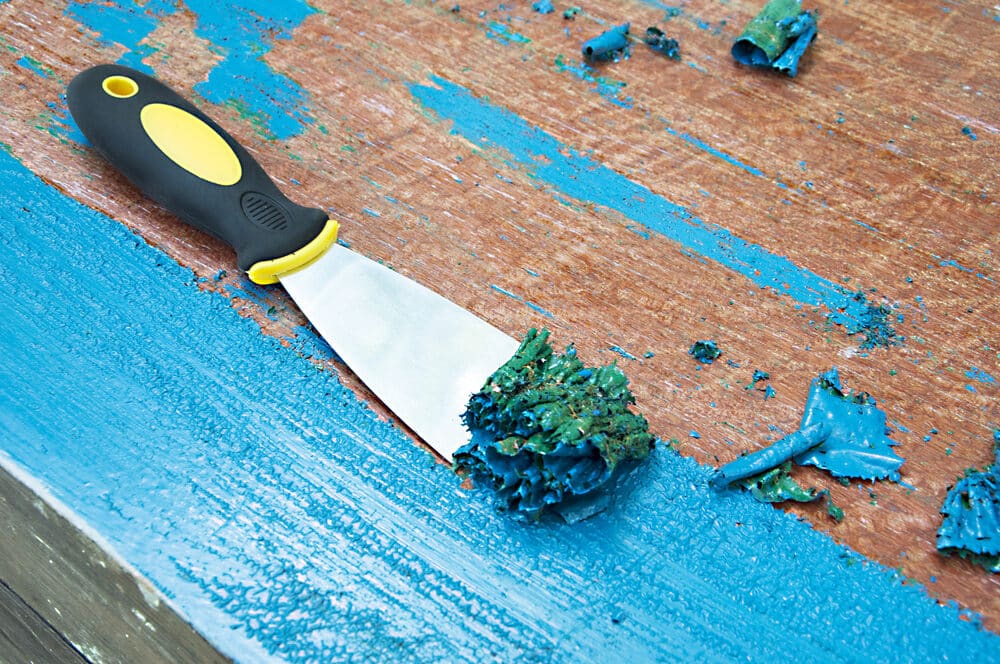
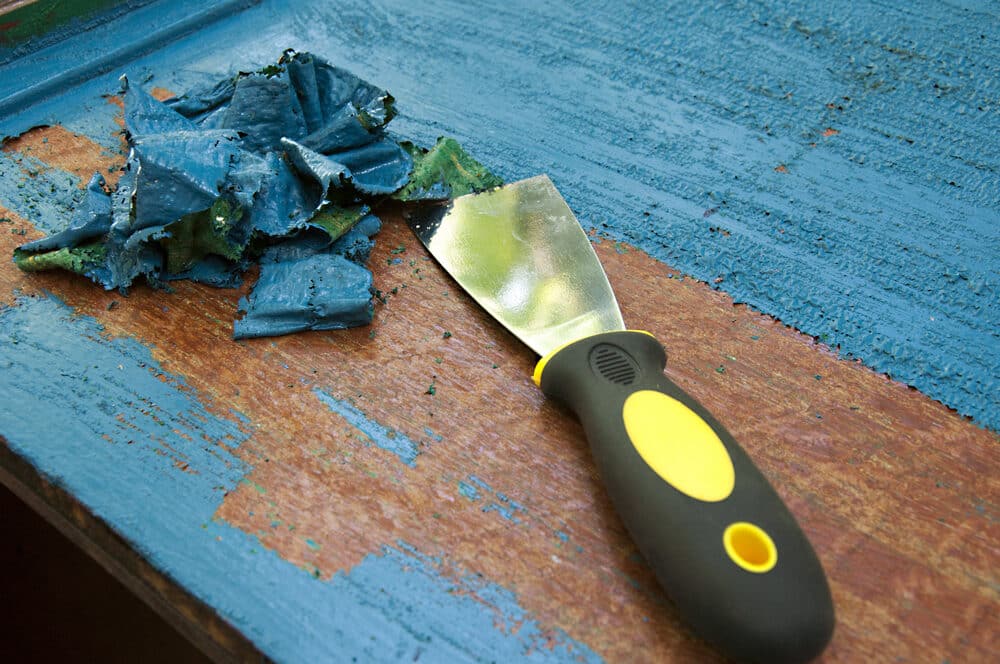
6. Scrape away the old finish:
Using a plastic scraper or putty knife, gently scrape away the softened finish. Be careful not to gouge or damage the worktop surface. If there are multiple layers of finish, you may need to repeat this step.
7. Clean the surface:
Wipe down the stripped surface with a clean, lint-free cloth and a suitable cleaning solution to remove any remaining residue from the finish remover.

8. Sand the surface:
To achieve a smooth and uniform surface, sand the stripped worktop using sandpaper with gradually finer grits (starting with 120 or 150 grit and progressing to 220 grit). Sand in the direction of the grain for an even finish.
9. Repair any damage:
Inspect the worktop for any imperfections or damage. If needed, use wood filler to fill in any gaps or holes, following the manufacturer’s instructions.
10. Apply the new finish:
Choose a suitable finish for your worktop material, such as varnish, oil, or a specialised sealant. Follow the manufacturer’s instructions for application and drying times. Apply multiple coats if necessary for added protection.
11. Allow it to dry:
Let the new finish dry completely before using your kitchen worktop. Drying times can vary, so be patient and avoid using the surface until it’s fully cured.
Pros and Cons of Sanding Your Kitchen Worktop
Sanding your kitchen worktop is a widely used method for restoring its appearance and functionality. However, like any home improvement project, it comes with its own set of advantages and disadvantages. Let’s explore the pros and cons of sanding:
Pros of Sanding:
- Restores the Original Appearance: Sanding effectively removes old finishes, scratches, and imperfections, bringing your worktop back to its original beauty.
- Preserves the Wood Grain: For wooden worktops, sanding allows you to retain and highlight the natural wood grain, enhancing its aesthetic appeal.
- Customisable Finish: Sanding allows you to choose from various finishes, such as varnish or oil, giving you control over the final look of your worktop.
- Cost-effective: Sanding can be a cost-effective solution compared to completely replacing a damaged worktop.
- DIY-Friendly: Sanding can be done as a DIY project, saving you labour costs if you’re comfortable with home improvement tasks.
- Quick Drying: Depending on the finish used, the drying time for sanded worktops can be relatively quick, allowing you to use your kitchen sooner.
Cons of Sanding:
- Limited Effectiveness: Sanding may not be suitable for severely damaged worktops with deep gouges or water damage.
- Labour-Intensive: Sanding can be physically demanding, especially for larger worktops, and may require patience and time.
- Dust and Mess: The sanding process generates a significant amount of dust, which can be messy and require thorough cleanup.
- Chemical Sensitivity: Some individuals may be sensitive to the chemicals used in certain finishes or sealants.
- Not Ideal for All Materials: While effective for wood, sanding may not be the best choice for non-wooden worktop materials like laminate or stone.
- Potential for Mistakes: Inexperienced individuals may make mistakes during the sanding process, affecting the final result.
Pros and Cons of Stripping Your Kitchen Worktop
Stripping your kitchen worktop can be a significant decision, and it’s important to consider the pros and cons before proceeding.
Pros:
- Fresh Look: Stripping an old worktop can revitalize your kitchen’s appearance. It can reveal the original beauty of the material, be it wood, stone, or another type.
- Customization: Once stripped, you have the option to refinish the worktop in a color or finish that better suits your current kitchen décor or personal taste.
- Damage Removal: Stripping can remove stains, burns, and scratches that have accumulated over time, giving your worktop a new, clean surface.
- Increased Lifespan: Properly maintaining and occasionally stripping and refinishing a worktop can extend its lifespan, delaying the need for a costly replacement.
Cons:
- Time and Effort: Stripping a worktop is often a time-consuming and labor-intensive process. It requires proper technique to avoid damaging the surface.
- Cost: If you’re hiring a professional to strip and refinish the worktop, the cost can be significant, depending on the size and material of the worktop.
- Potential Damage: Improper stripping techniques or materials can damage the worktop. Some surfaces, like certain stones or composites, might not respond well to stripping.
- Temporary Loss of Use: During the stripping and refinishing process, you might lose the use of your kitchen for a period, which can be inconvenient.
Before deciding, it’s a good idea to research the specific type of worktop you have and consider whether you have the necessary skills to do the job yourself or if you need to hire a professional.
Making the decision
Now that you’ve explored the pros and cons of both sanding and stripping as methods for rejuvenating your kitchen worktop, it’s time to make an informed decision. The choice between these two techniques depends on several key factors:
1. Worktop Material:
- For wooden worktops, sanding is often the preferred choice, as it allows you to preserve and highlight the natural wood grain.
- For laminate or non-wooden worktops, stripping may be a more suitable option.
2. Worktop Condition:
- Assess the extent of damage and wear on your worktop. Sanding is effective for moderate surface damage and scratches, while stripping is better for removing multiple layers of old finish.
3. DIY Skills:
- Consider your level of DIY expertise. Sanding is generally more DIY-friendly, but it still requires patience and attention to detail. Stripping can be more challenging and may benefit from professional expertise.
4. Desired Finish:
- Think about the finish you want for your worktop. Sanding allows you to choose from various finishes, like varnish or oil, giving you control over the final appearance.
- Stripping provides a fresh start and lets you apply a new finish of your choice.
5. Time and Budget:
- Consider your available time and budget. Sanding can be a cost-effective solution, while stripping may require more investment, especially if you hire a professional.
6. Severity of Damage:
- Evaluate the severity of the damage to your worktop. If the damage is extensive, stripping may be the only viable option to achieve a satisfactory result.
7. Personal Preferences:
- Your personal preferences and design goals should also play a role. Consider the overall look you want to achieve in your kitchen and how each method aligns with your vision.
Once you’ve carefully weighed these factors, you can make a well-informed decision. In some cases, a combination of both methods may also be suitable.
Maintenance and care
After revitalising your kitchen worktop through sanding or stripping, it’s crucial to implement a regular maintenance and care routine to ensure its longevity and continued beauty. Proper maintenance of kitchen worktop can extend the life of your worktop and protect it from common wear and tear. Here are some essential maintenance and care tips:

Regular Cleaning:
- Clean your worktop regularly with a soft, damp cloth or sponge and a mild, non-abrasive cleaning solution. Avoid harsh chemicals that can damage the finish.
Avoid excessive moisture:
- Wipe up spills and excess moisture promptly to prevent water damage, especially on wooden worktops. Prolonged exposure to moisture can lead to warping and discoloration.
Use cutting boards:
- Always use cutting boards when chopping or slicing to protect the work surface from scratches and knife marks.
Use trivets and hot pads:
- Protect your worktop from heat damage by using trivets or hot pads under hot pots, pans, and dishes. Direct contact with hot cookware can cause burns or discoloration.
Avoid heavy impacts:
- Be mindful of heavy objects that could dent or crack your worktop. Use caution when placing or moving heavy appliances or cookware.
Regularly check and refinish:
- Periodically assess the condition of your worktop. Depending on the type of finish used, you may need to reapply it to maintain protection and enhance appearance.
Reseal as Needed:
- If you have a stone worktop like granite, reseal it according to the manufacturer’s recommendations to maintain its resistance to stains and moisture.
Repair Damage Promptly:
- Address any scratches, chips, or minor damage promptly. Sand and refinish wooden worktops as needed, or consult a professional for repairs if necessary.
Follow the manufacturer’s instructions:
- Always follow the manufacturer’s guidelines for care and maintenance, as specific materials and finishes may have unique requirements.
Preventing Future Damage:
- Consider using cutting boards, placemats, and coasters to protect your worktop from daily wear. Encourage family members and guests to treat the worktop with care.

Conclusion
Your kitchen worktop serves as both a functional surface and a design element, making it an essential component of your culinary haven. Over time, wear and tear can diminish its beauty and functionality, prompting the need for restoration. In this guide, we explored two popular methods for rejuvenating your kitchen worktop: sanding and stripping. Each method offers unique benefits and considerations, helping you make an informed decision tailored to your specific needs.
Ultimately, the decision between kitchen worktop sanding and stripping hinges on factors such as your worktop’s material, condition, DIY skills, desired finish, budget, and personal preferences. Careful consideration of these factors will guide you towards the method that best suits your needs and goals.
Once your kitchen worktop is restored to its former glory, remember the importance of regular maintenance and care. Simple practices like regular cleaning, avoiding excessive moisture, and using protective measures can extend the life and beauty of your worktop, reducing the need for future restoration projects.
In the end, whether you choose to sand or strip your kitchen worktop, the goal remains the same: to enhance the aesthetics and functionality of your kitchen space. With the right approach and ongoing care, your worktop will continue to be the heart of your home, where culinary creations flourish and cherished memories are made.
So, take the time to assess your worktop, weigh your options, and embark on the journey to revitalise your kitchen worktop. By doing so, you’ll not only transform your kitchen but also create a welcoming environment where family and friends can gather, cook, and share moments together for years to come. Your kitchen worktop is more than just a surface; it’s the foundation of countless memories and delicious meals, and it deserves to shine.

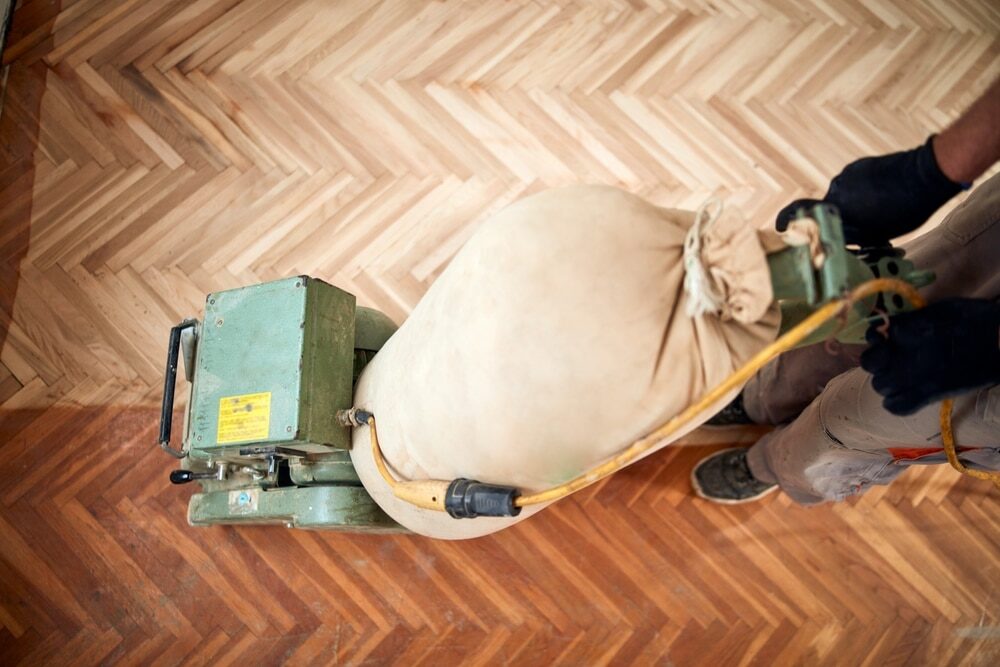
Sanding
We provide virtually dust-free sanding with our continuous belt machinery with mobile extraction units, giving you a safer environment for your family.
Oiling
This organic finish not only adds beauty to your home but also has exceptional water-repellent characteristics, making it easier to clean and maintain.
Waxing
This natural floor finish offers the softest and most mellow appearance – and leaves your floor able to breath.
Buffing
Using soft buffing machines (and hand-polishing where required) will bring a wonderful sheen to your newly-finished floor.
Repairs
We offer a full assessment of your wooden floors to determine what repairs are needed to provide the perfect working surface for the later stages of sanding, staining and sealing.
Restoration
We offer a comprehensive restoration process designed to address floors that are improperly fitted or damaged over time through wear and tear.
Request a fixed price quote for your wood floor restoration now
Simply enter your postcode below to get started.
Services
Wood Floor Sanding Wood Floor Restoration Wood Floor Scratch Repair Squeaky Wood Floor Repair Parquet Floor Sanding Parquet Floor Restoration Commercial Floor Sanding Church Floor Sanding Community Centre Floor Sanding School Floor Sanding Gap Filling Gap Filling with ResinCopyright © Mr Sander®
Privacy & Cookies Terms & Conditions Complaints Procedure Cancellation Rights Sitemap

Get An Instant Price Estimate Before You Go…
Simply enter the rooms you need sanded and we’ll provide you with a price estimate instantly! Try our price calculator now.
Get a Price Estimate NowLocal Floor Sanding Experts
Over 500 5-Star Reviews
Safe, Dust Free Sanding
Operating Since 1994