London:
Nationwide:
25,000+
Floors Restored
27 Years Experience
Wood Flooring Association Certified
Quick Tips for Sanding Your Kitchen Worktop
Posted on December 26, 2023
Kitchen Worktop sanding
Mastering the Art of Sanding Your Kitchen Worktop
Welcome to our comprehensive guide to sanding your kitchen worktop! A well-sanded kitchen worktop not only enhances the aesthetics of your kitchen but also extends the life and functionality of one of the most used surfaces in your home. Whether you’re looking to revive an old worktop or want to refine a new one, this guide is designed to help you through the process with ease and confidence.
Kitchen Worktop Sanding can seem daunting, especially if you’re new to DIY projects. But with the right tools, techniques, and a bit of patience, it can transform your kitchen worktop from worn and tired to sleek and stylish. In this blog post, we’ll walk you through the essentials of sanding, from the preparation stage to the finishing touches. You’ll learn about the types of sandpaper, the best sanding techniques for a flawless finish, and how to tackle common challenges that might arise during the process.
Our aim is to provide you with practical, easy-to-follow advice that will make your sanding project a success. Whether you’re a seasoned DIY enthusiast or a beginner, these tips will help you achieve professional-quality results. So let’s get started and turn your kitchen worktop into a masterpiece of craftsmanship and beauty!

Materials and Tools Needed for Sanding Your Kitchen Worktop
Sanding your kitchen worktop requires some specific tools and materials to ensure a smooth, effective process. Here’s a comprehensive list of what you’ll need:
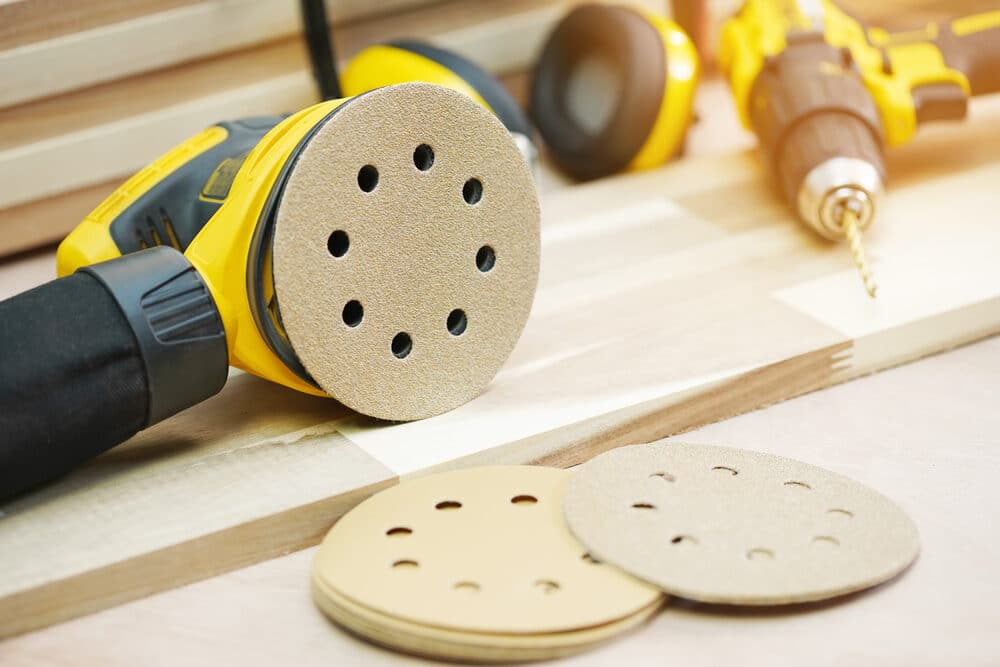
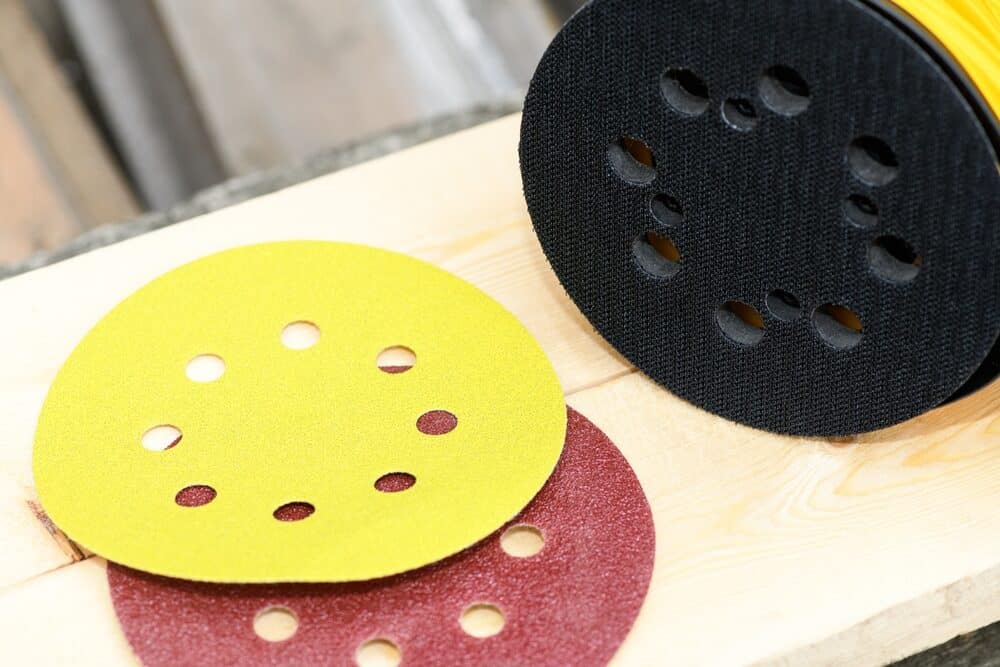
1. Sandpaper:
- Coarse grit (around 40–60 grit) for initial sanding
- Medium Grit (80–120 grit) for intermediate sanding
- Fine grit (150–220 grit) for final smoothing
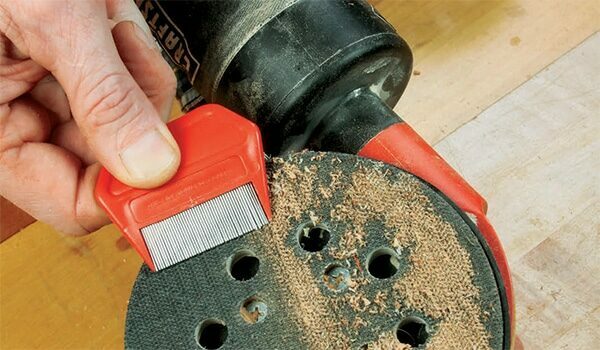
2. Sanding Tools:
- Handheld Sanding Block for Manual Sanding
- Orbital Sander (optional but recommended for larger surfaces)
3. Safety Gear:
- Safety glasses to protect your eyes from dust
- Dust mask or respirator to avoid inhaling fine particles
- Ear protection if using power sanders
4. Cleaning Supplies:
- Vacuum Cleaner with a Brush Attachment
- Tack cloth or a damp rag for wiping down dust.
5. Worktop Preparation Materials:
- Painter’s tape for protecting areas around the worktop
- Plastic sheeting or drop cloths to cover nearby areas and floors
6. Measuring and Marking Tools:
- Ruler or tape measure for precise measurements
- Pencil or chalk for marking areas needing extra attention
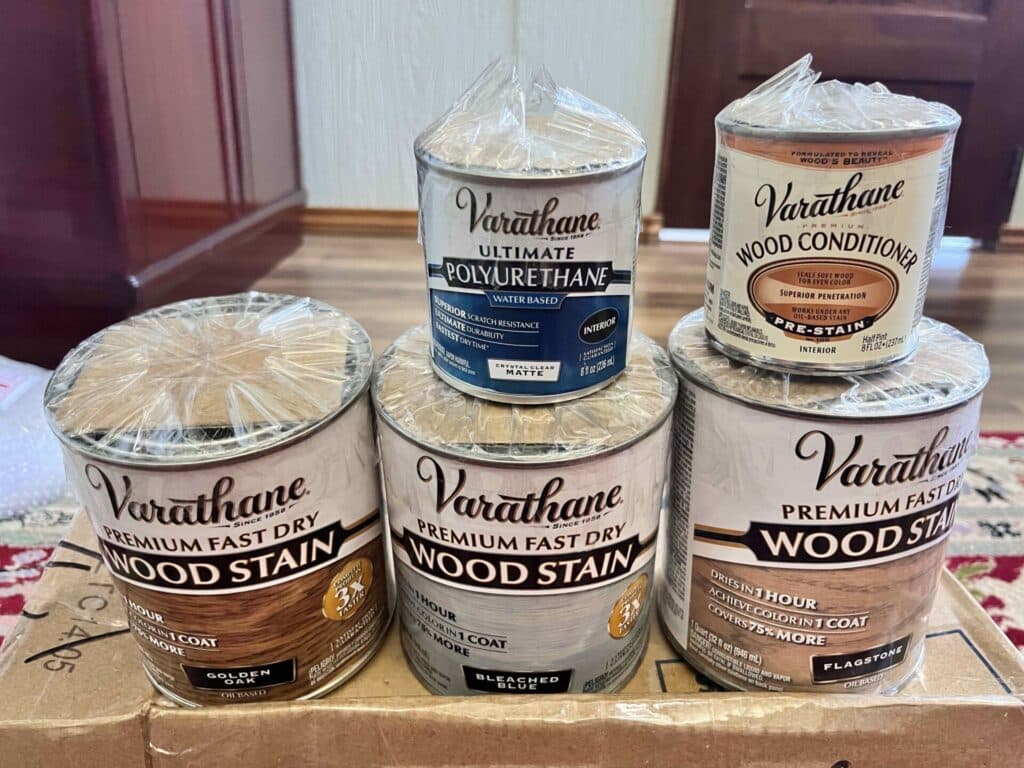
7. Finishing Products (optional, depending on your project):
- Wood stain or oil if you plan to change the colour
- Sealant or varnish for protection and shine
8. Miscellaneous:
- Work gloves for hand protection
- A flat surface or workbench to place the worktop on, if removable
Remember, the quality of your materials and tools can significantly affect the outcome of your kitchen worktop sanding project. Investing in good-quality sandpaper and tools can make the process easier and ensure a more professional finish on your kitchen worktop.
Preparing Your Kitchen Worktop for Sanding
Before you dive into the sanding process, it’s crucial to prepare your kitchen worktop properly. Proper preparation ensures that the sanding is effective and that you achieve the desired results. Here are the essential steps to prepare your worktop:
1. Clear the Area:
- Begin by removing all items, appliances, and objects from the worktop. This includes dishes, small appliances, and any decorative items. Clearing the area will not only make sanding easier but will also protect your belongings from dust and debris.
2. Protect Surrounding Surfaces:
- Use painter’s tape to cover and protect any adjacent surfaces, such as walls, cabinets, or appliances. This prevents accidental damage and ensures a clean finish.
3. Assess the Worktop:
- Examine the condition of your kitchen worktop. Identify any major scratches, dents, or stains that need special attention. Mark these areas with a pencil or chalk so you can focus on them during sanding.
4. Remove Hardware:
- If your worktop has any hardware, such as knobs or handles, consider removing them. This makes sanding easier and ensures you don’t damage the hardware during the process.
5. Clean Thoroughly:
- Dust and debris can interfere with the sanding process. Use a vacuum cleaner with a brush attachment to remove loose dirt and particles from the worktop. Then, wipe it down with a tack cloth or a damp rag to eliminate any remaining dust.
6. Check for Repairs:
- If your worktop has any structural damage, such as loose seams or chips, address these issues before sanding. Repair any damaged areas using appropriate filler or adhesive, and allow them to dry completely.
7. Plan Your Sanding Sequence:
- Decide on the order of sandpaper grits you’ll use. Typically, you start with coarse grit to remove imperfections and gradually move to finer grits for smoothing. This ensures a progressive and effective sanding process.
Choosing the Right Sandpaper for Your Kitchen Worktop
Selecting the appropriate sandpaper is crucial for achieving the desired finish on your kitchen worktop. Different sandpaper grits are used for specific purposes in the sanding process. Here’s a guide to help you choose the right sandpaper for your project:
Coarse Grit (40–60 Grit):
- Use for initial sanding on heavily damaged or uneven surfaces.
- Effective for removing deep scratches, paint, or old finishes.
- Provides rapid material removal but leaves rougher scratches.
Medium Grit (80-120 Grit):
- Ideal for intermediate sanding after the coarse grit to smooth out the surface.
- Removes the scratches left by coarse-grit sandpaper.
- Prepares the worktop for the final smoothing stage.
Fine Grit (150–220 Grit):
- Use for the final smoothing and polishing of the worktop.
- Creates a smooth, even surface free of visible scratches.
- Essential for achieving a polished and refined finish.
Extra Fine Grit (320-400 Grit, optional):
- If you desire an exceptionally smooth finish, you can use extra-fine-grit sandpaper for a final pass.
- This grit level helps achieve a high level of polish and is often used for fine woodworking projects.
When selecting sandpaper, consider the current condition of your kitchen worktop. If it has deep scratches, stains, or old finishes, start with a coarse grit and gradually progress to finer grits. Always follow a logical sequence to ensure that you remove imperfections effectively and achieve a smooth, even surface.
Additionally, it’s a good practice to use sandpaper with a backer pad or sanding block. This provides better control and even pressure during sanding, resulting in a more consistent finish.
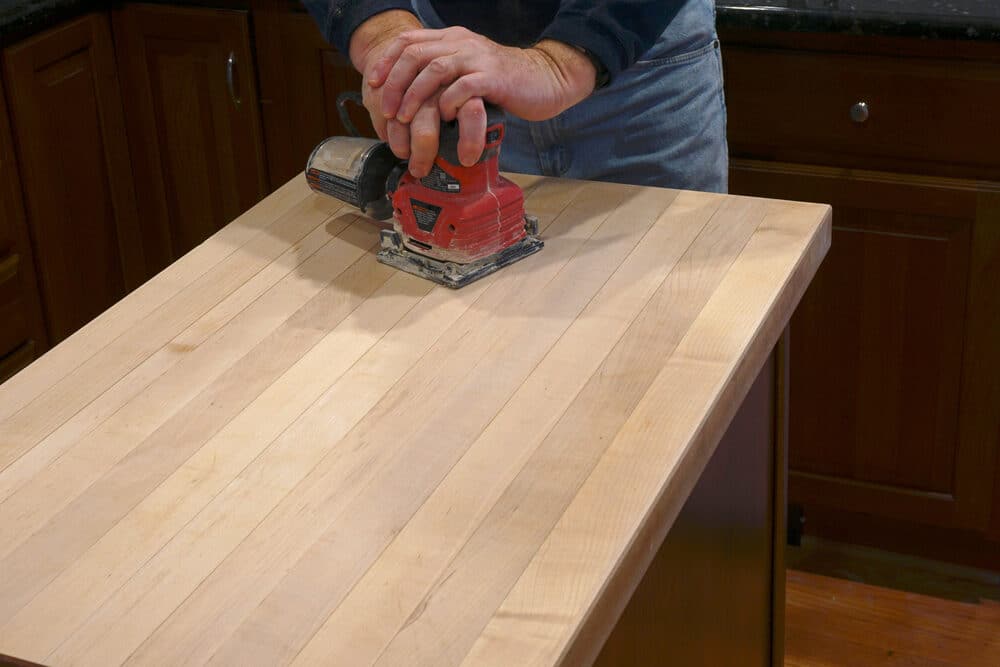
Sanding Techniques for Beginners
Sanding your kitchen worktop may seem intimidating if you’re new to DIY projects, but with the right techniques, you can achieve a professional-looking finish. Here’s a step-by-step guide to sanding your worktop effectively:
Step 1: Safety first
- Before you begin, put on safety gear: safety glasses to protect your eyes from dust, a dust mask or respirator to prevent inhaling particles, and ear protection if you’re using a power sander.
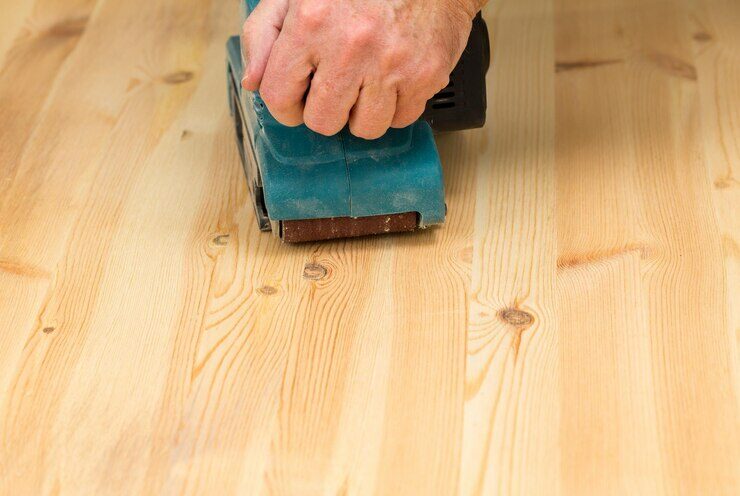
Step 2: Start with coarse grit
- Begin sanding with coarse-grit sandpaper (around 40–60 grit) if your worktop has significant imperfections or old finishes to remove.
- Hold the sandpaper securely around a sanding block or use a handheld sander.
- Sand in the direction of the wood grain to avoid creating cross-grain scratches.
- Apply even pressure and move the sandpaper in long, smooth strokes.
- Keep the sander or sandpaper flat against the worktop to prevent uneven sanding.
Step 3: Progress to Medium Grit
- After the initial sanding with coarse grit, switch to medium-grit sandpaper (80–120 grit) for intermediate smoothing.
- Sand in the same direction as before, gradually removing the scratches left by the coarse grit.
- Be thorough, but avoid excessive sanding, which can create uneven surfaces.
Step 4: Final Sanding with Fine Grit
- For a smooth finish, use fine-grit sandpaper (150–220 grit) for the final sanding.
- Sand in the direction of the wood grain with light pressure.
- Continue until the worktop feels smooth to the touch and there are no visible scratches or imperfections.
Step 5: Check Your Progress
- Periodically wipe the worktop with a tack cloth or a damp rag to remove dust and inspect your progress.
- Ensure that all imperfections, scratches, and old finishes are completely removed.
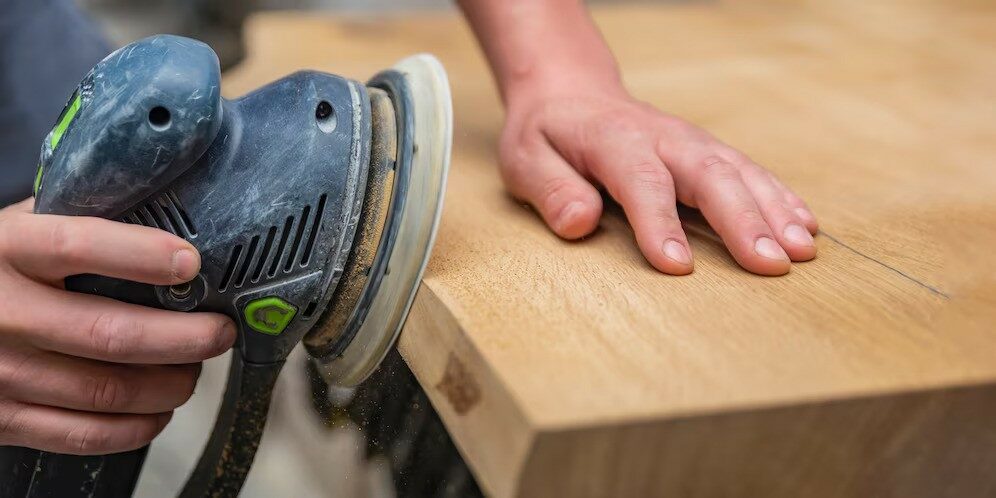
Step 6: Edge Sanding
- Pay special attention to the edges of the worktop. Use a sanding block to sand these areas evenly.
- Keep the edges smooth and free from sharp corners.
Step 7: Final Inspection
- Carefully inspect the entire worktop for any remaining imperfections or scratches.
- If necessary, spot-sand problem areas with the appropriate grit sandpaper until they are smooth.
Step 8: Clean up
- Use a vacuum cleaner with a brush attachment to remove all dust and debris from the worktop and surrounding areas.
- Dispose of used sandpaper and other materials properly.
Dealing with Common Sanding Challenges
Sanding your kitchen worktop can sometimes present challenges, but knowing how to address them can help you achieve a flawless finish. Here are some common sanding challenges and how to deal with them:
1. Deep Scratches or Stains:
- If you encounter deep scratches or stains that are difficult to remove with regular sanding, you may need to spot-sand these areas with a lower-grit sandpaper (coarse grit). Gradually transition to finer grits until the entire worktop has an even finish.
2. Uneven Sanding:
- Uneven sanding can result in an uneven surface. To address this, make sure you apply even pressure and use long, smooth strokes when sanding. Pay extra attention to corners and edges to ensure they are uniformly sanded.
3. Over-Sanding:
- Over-sanding can lead to excessive material removal and uneven surfaces. To avoid this, periodically check your progress, especially when transitioning between grits. If you notice any areas that have been sanded too much, you may need to spot-sand with a finer grit to even out the surface.
4. Dust Buildup:
- Sanding generates a significant amount of dust. To prevent dust buildup on your worktop, periodically wipe it down with a tack cloth or a damp rag. Additionally, use a vacuum cleaner with a brush attachment to remove dust from the work area.
5. Grain Reversal:
- Grain reversal occurs when sanding causes the wood fibres to stand up, creating a rough surface. To address this, lightly sand the affected area with a finer-grit sandpaper, following the wood grain’s direction.
6. Gummy Sandpaper:
- Sandpaper can become clogged with wood particles, making it less effective. To prevent this, periodically clean or replace the sandpaper as needed. You can also use a sandpaper cleaner or abrasive pad to remove debris from the sandpaper’s surface.
7. Fuzziness or Wood Fibres Standing Up:
- If the wood fibres become raised during sanding, you can lightly wet the surface with a damp cloth. Allow it to dry, and then lightly sand with a fine-grit sandpaper to smooth out the raised fibres.
8. Inadequate Dust Control:
- Dust can be harmful to your health, so ensure proper dust control. Use a dust mask or respirator, work in a well-ventilated area, and consider using a dust extractor with your power sander to minimise airborne particles.
Post-Sanding Steps for Your Kitchen Worktop
Once you’ve completed the sanding process and achieved the desired smoothness and finish on your kitchen worktop, it’s time to take some post-sanding steps to wrap up the project and ensure the best results. Here’s what you should do:
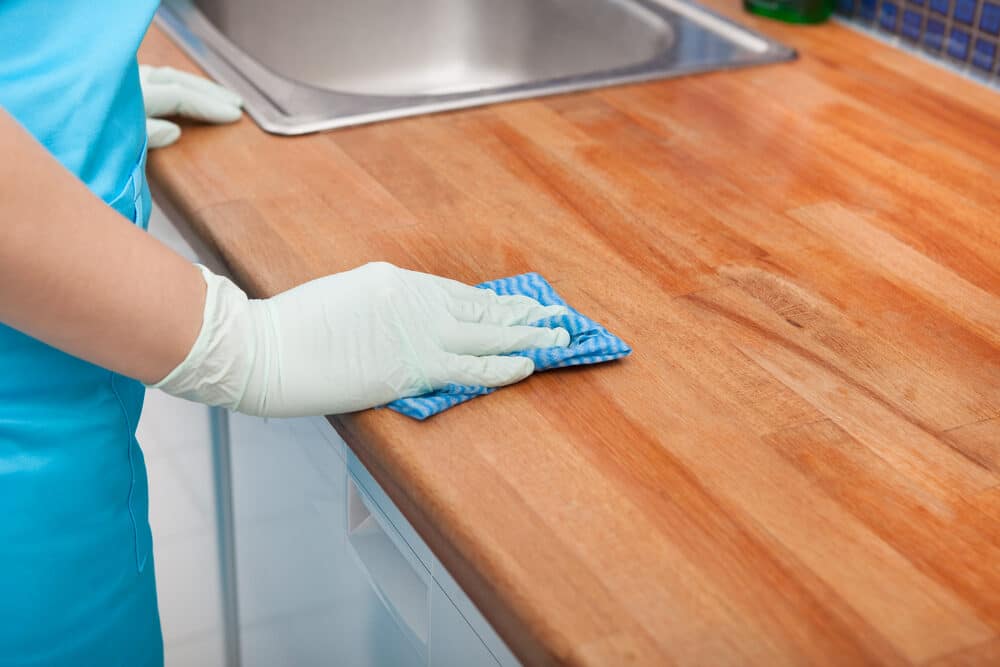
1. Clean up thoroughly:
- Use a vacuum cleaner with a brush attachment to remove all dust and debris from the worktop and the surrounding areas. Pay attention to corners, edges, and any crevices where dust may accumulate.
2. Wipe down the worktop:
- Use a tack cloth or a damp, lint-free rag to wipe down the worktop. This will remove any remaining dust and ensure a clean surface for the next steps.
3. Assess the worktop:
- Inspect the entire worktop to ensure that it is smooth and free from imperfections. Check for any scratches or spots that may need further attention.
4. Apply sealant or varnish:
- To protect the worktop and give it a beautiful finish, apply a suitable sealant or varnish. Water-based polyurethane or oil-based varnish are popular choices. Apply multiple thin coats, allowing each coat to dry thoroughly before the next application.
5. Sand Between Coats (If Using Varnish):
- If you’re applying varnish, lightly sand the worktop between coats with fine-grit sandpaper (220 grit) to ensure a smooth and even finish. Wipe away the sanding dust before applying the next coat.
6. Allow for Proper Drying and Curing:
- Follow the drying and curing times recommended by the sealant or varnish manufacturer. Proper drying ensures the finish sets correctly and provides maximum protection.
7. Reattach hardware and clean up:
- If you removed any hardware, such as knobs or handles, reattach them once the finish is fully dry. Ensure they are secure.
- Clean your tools and dispose of any used materials and empty containers properly.
8. Enjoy Your Newly Sanded Worktop:
- Once the sealant or varnish is completely dry, you can start using your kitchen worktop again. It will not only look great but will also be more durable and resistant to daily wear and tear.

Maintenance Tips for Your Sanded Kitchen Worktop
Maintaining your sanded kitchen worktop is essential to preserving its beauty and functionality over time. Here are some maintenance tips to keep your worktop in excellent condition:
1. Regular Cleaning:
- Wipe down the worktop regularly with a damp cloth or sponge to remove spills, food residue, and everyday dirt. Avoid harsh abrasives or scouring pads that can damage the finish.
2. Use cutting boards:
- To prevent scratches and knife marks, always use cutting boards or chopping blocks when preparing food. Avoid cutting directly on the worktop surface.
3. Immediate Spill Cleanup:
- Quickly clean up spills, especially acidic substances like vinegar or citrus juice, to prevent staining or damage to the finish. Use a mild dish soap and water solution for cleaning.
4. Avoid excessive heat:
- Hot pots and pans can damage the finish or leave burn marks. Use trivets or heat-resistant mats to protect the worktop from heat exposure.
5. Prevent Moisture Damage:
- Wood is susceptible to moisture damage. Wipe up any spills promptly, and use coasters or placemats under glasses and cups to prevent water rings.
6. Reapply and finish as needed:
- Over time, the sealant or varnish on your worktop may wear down. Monitor the surface for signs of wear and reapply the finish as recommended by the manufacturer to maintain protection.
7. Avoid harmful chemicals:
- Refrain from using harsh chemicals or abrasive cleaners on your worktop, as they can strip the finish and damage the wood. Stick to gentle, wood-friendly cleaning products.
8. Repair minor damage:
- For minor scratches or scuffs, you can use wood filler or a touch-up pen to repair the damage. Follow the manufacturer’s instructions for the specific product you choose.
9. Sand and Refinish Periodically:
- Depending on usage and wear, consider sanding and refinishing your worktop every few years to maintain its appearance and protection. This will refresh the surface and remove any minor imperfections.
10. Follow Manufacturer Recommendations:
- Always follow the care and maintenance instructions provided by the manufacturer of the sealant or varnish you used. These recommendations may vary depending on the product.

Conclusion:
Congratulations on completing the journey of sanding your kitchen worktop! You’ve taken an important step towards enhancing the aesthetics and functionality of your kitchen. Through the careful application of sanding techniques and proper maintenance of your kitchen worktop, you’ve achieved a beautifully smooth and refined worktop surface.
In this guide, we’ve covered the essential steps and tips for sanding your kitchen worktop, from selecting the right sandpaper to dealing with common challenges and post-sanding finishing touches. With dedication and attention to detail, you’ve transformed your worktop into a stunning centrepiece that adds elegance to your kitchen space.
Remember that maintenance is key to preserving the beauty and durability of your sanded worktop. Regular cleaning, protection from heat and moisture, and timely refinishing will ensure that your worktop continues to shine for years to come.
We hope this guide has empowered you to take on DIY projects with confidence and creativity. Your beautifully sanded kitchen worktop is a testament to your craftsmanship and dedication to creating a space that you can truly enjoy.
Thank you for choosing our guide to sanding your kitchen worktop. We wish you many wonderful moments and delicious meals in your newly refreshed kitchen!


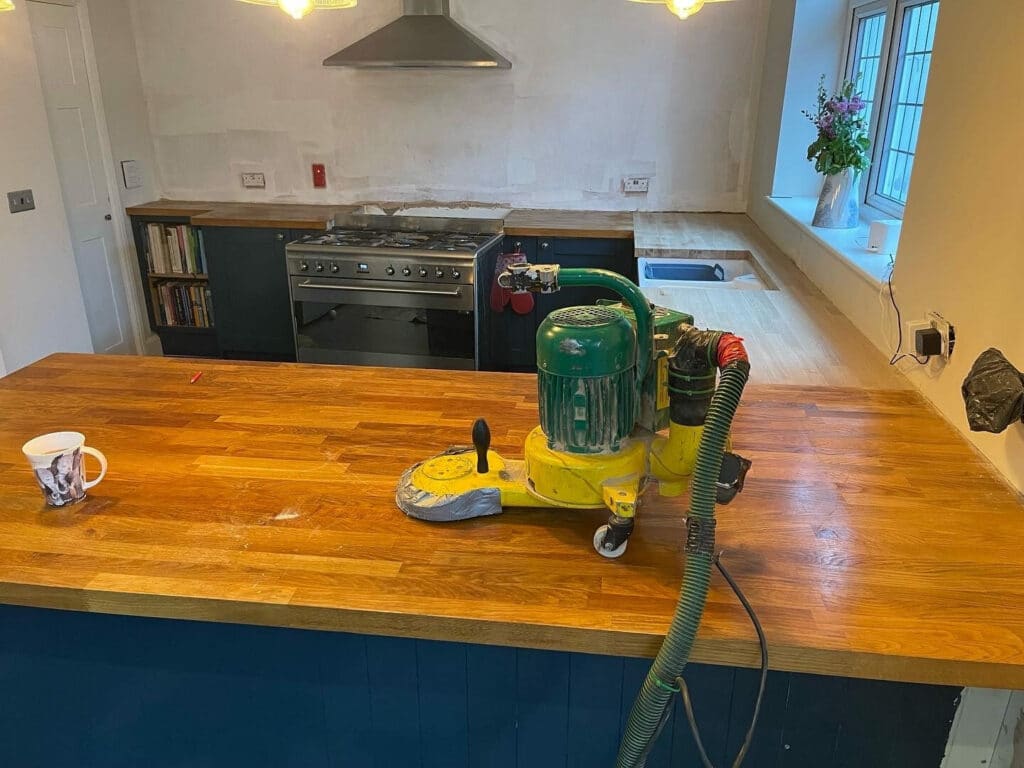
Sanding
We provide virtually dust-free sanding with our continuous belt machinery with mobile extraction units, giving you a safer environment for your family.
Oiling
This organic finish not only adds beauty to your home but also has exceptional water-repellent characteristics, making it easier to clean and maintain.
Waxing
This natural floor finish offers the softest and most mellow appearance – and leaves your floor able to breath.
Buffing
Using soft buffing machines (and hand-polishing where required) will bring a wonderful sheen to your newly-finished floor.
Repairs
We offer a full assessment of your wooden floors to determine what repairs are needed to provide the perfect working surface for the later stages of sanding, staining and sealing.
Restoration
We offer a comprehensive restoration process designed to address floors that are improperly fitted or damaged over time through wear and tear.
Request a fixed price quote for your wood floor restoration now
Simply enter your postcode below to get started.
Services
Wood Floor Sanding Wood Floor Restoration Wood Floor Scratch Repair Squeaky Wood Floor Repair Parquet Floor Sanding Parquet Floor Restoration Commercial Floor Sanding Church Floor Sanding Community Centre Floor Sanding School Floor Sanding Gap Filling Gap Filling with ResinCopyright © Mr Sander®
Privacy & Cookies Terms & Conditions Complaints Procedure Cancellation Rights Sitemap

Get An Instant Price Estimate Before You Go…
Simply enter the rooms you need sanded and we’ll provide you with a price estimate instantly! Try our price calculator now.
Get a Price Estimate NowLocal Floor Sanding Experts
Over 500 5-Star Reviews
Safe, Dust Free Sanding
Operating Since 1994