London:
Nationwide:
25,000+
Floors Restored
27 Years Experience
Wood Flooring Association Certified
Can Sanding Remove Stains from Your Kitchen Worktop?
Posted on December 25, 2023
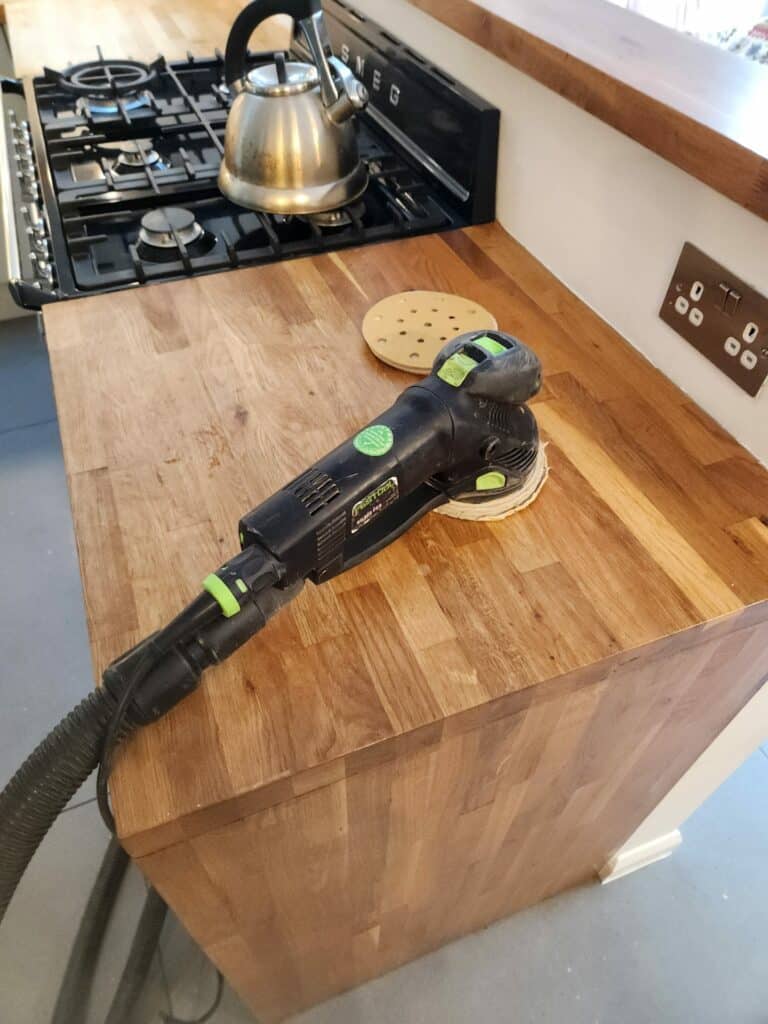
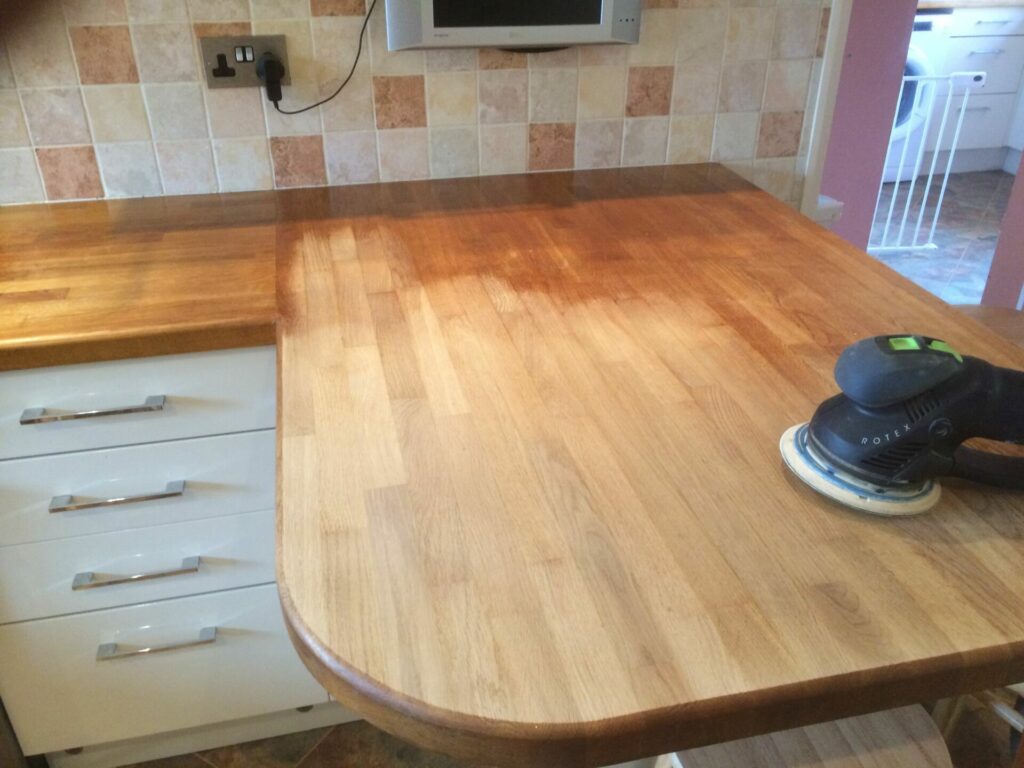
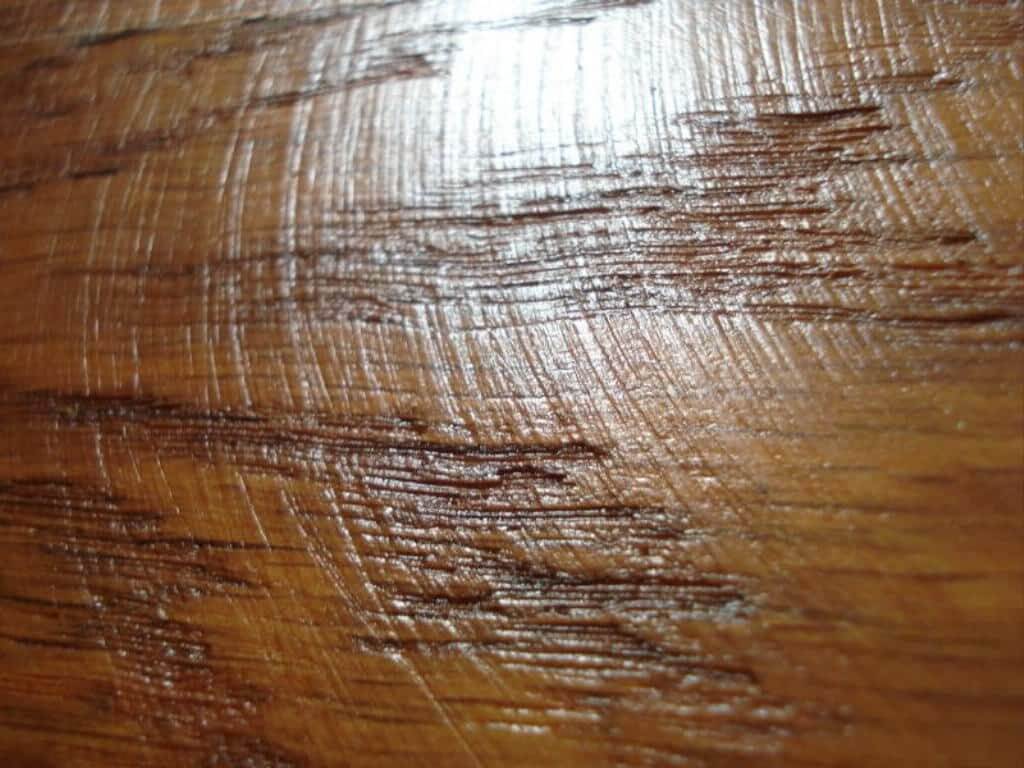
Kitchen Worktop sanding
Is Sanding an Effective Stain Removal Method for Your Kitchen Worktop?
Your kitchen worktop serves as the heart of your culinary space, where countless meals are prepared, conversations are had, and memories are created. However, over time, it’s not uncommon for unsightly stains to mar the beauty of this essential surface. Whether it’s a stubborn coffee ring, a wine spill, or the aftermath of a cooking mishap, these blemishes can be both aesthetically displeasing and a source of frustration for homeowners.
If you’ve found yourself grappling with the question of how to restore your kitchen worktop to its former glory, you’re not alone. Stains on worktops are a common issue faced by many homeowners, and they can be particularly noticeable on lighter-colored materials. While there are various remedies and cleaning products available, one method that often comes to mind is sanding.
In this comprehensive guide, we’ll dive deep into the world of kitchen worktop stains and explore whether sanding can be an effective solution. We’ll provide you with a step-by-step process for sanding your worktop, discuss alternative methods, and offer expert tips to ensure your kitchen worktop remains a pristine centrepiece of your home. So, if you’re tired of those stubborn stains and wondering if sanding is the answer, read on to discover the truth and regain the beauty of your kitchen worktop.
Let’s embark on a journey to uncover whether Kitchen Wood Worktop sanding can indeed remove stains from your kitchen worktop and how to go about it successfully.
Understanding Kitchen Worktop Stains
Stains on kitchen worktops are more than just an eyesore; they can also be a persistent nuisance. Before we delve into whether sanding kitchen worktop is an effective solution, let’s take a closer look at the nature of these stains:
Types of Stains You May Encounter
- Surface Stains: These are the most common and typically sit on the top layer of your worktop material. Examples include coffee spills, juice splatters, and food residue. Surface stains are often easier to remove than deeper, penetrating stains.
- Penetrating Stains: These stains seep into the pores of the worktop material, making them more challenging to eliminate. Common culprits include red wine, oil, and ink. Penetrating stains can be particularly stubborn, requiring more aggressive removal methods.
- Heat Stains: Caused by hot pots, pans, or dishes placed directly on the worktop, heat stains can discolour and mar the surface. These can be a mixture of surface and penetrating stains, as the heat can cause materials to bond with the worktop.
- Chemical Stains: Harsh cleaning chemicals or acidic substances can etch the surface of the worktop, leaving behind stains or dull spots. These require specialised attention to restore the original finish.
Factors Contributing to Stains
Understanding what causes kitchen worktop stains is crucial for effective stain removal. Here are some common factors contributing to stain formation:
- Material Type: Different worktop materials, such as granite, marble, quartz, laminate, or wood, have varying levels of stain resistance. Some materials are more porous than others, making them more susceptible to stains.
- Sealing: The presence (or absence) of a protective sealant or finish can significantly impact stain resistance. A well-sealed worktop is less likely to absorb spills and stains.
- Timeliness: Promptly addressing spills and stains is essential. The longer a stain sits on the surface, the more likely it is to penetrate and become stubborn.
- Maintenance: Regular cleaning and maintenance play a vital role in preventing and managing stains. Neglecting routine care can lead to a buildup of grime and stains.
Now that we’ve gained a better understanding of the types of stains and the factors that contribute to their formation, we can explore whether sanding kitchen worktop is a viable solution for restoring your kitchen worktop’s pristine appearance.
The role of sanding in stain removal
When it comes to eliminating stains from your kitchen worktop, sanding is a method that often piques interest. But what exactly is the role of sanding in stain removal, and is it a suitable solution for your specific situation? Let’s explore the mechanics of sanding and when it might be the right approach:
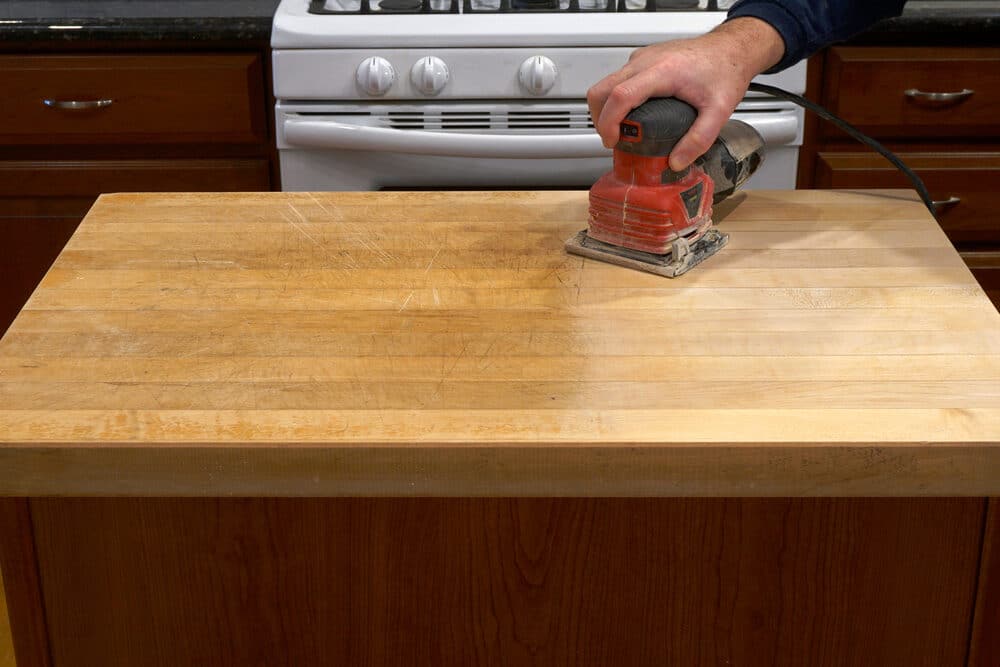
How Sanding Works as a Surface Treatment
Sanding involves the careful removal of the top layer of the worktop’s surface. It employs abrasive materials, such as sandpaper or sanding discs, to gently abrade the stained or damaged area. The goal is to remove the stained portion of the worktop’s surface, revealing a fresh, unblemished layer underneath.
Here’s how sanding can play a role in stain removal:
- Smoothing Out Surface Stains: For surface stains like coffee spills or minor scratches, sanding can be effective in smoothing out the affected area. By removing the stained top layer, you can often restore a uniform appearance to the worktop.
- Removing Superficial Damage: Sanding can also address superficial damage, like heat stains or light chemical etching. By carefully sanding the affected spot, you can eliminate the discoloured or damaged layer.
- Restoring Finish: After sanding, the worktop may appear dull or lack its original finish. This is where refinishing or resealing comes into play. You can choose to reapply a protective finish or polish the worktop to restore its shine.
When is sanding an appropriate solution?
While sanding can be effective in certain situations, it’s not a one-size-fits-all solution for every type of stain or worktop material. Here are some factors to consider when determining if sanding is an appropriate approach:
- Worktop Material: The suitability of sanding depends on the material of your kitchen worktop. Solid surface materials like granite, quartz, or marble are typically candidates for sanding. Wood worktops can also be sanded, but the process may differ.
- Depth of Stain: Sanding is most effective for stains that are relatively shallow and haven’t penetrated too deeply into the worktop. Deeper stains may require more aggressive methods or professional intervention.
- Skill Level: Sanding requires skill and precision to avoid causing further damage. If you’re inexperienced with this technique, it’s essential to practice in a small, inconspicuous area or consider professional help.
- Post-Sanding Care: Remember that sanding is only one part of the stain removal process. You’ll often need to follow up with refinishing, polishing, and sealing to achieve the desired results and protect the worktop.
Preparing Your Worktop for Sanding
Before you embark on the sanding process to remove stains from your kitchen worktop, it’s crucial to properly prepare the worktop and gather the necessary tools and materials. This preparation phase ensures that you’re ready for the task at hand and can help you achieve the best results. Here’s how to get started:
Necessary Tools and Materials
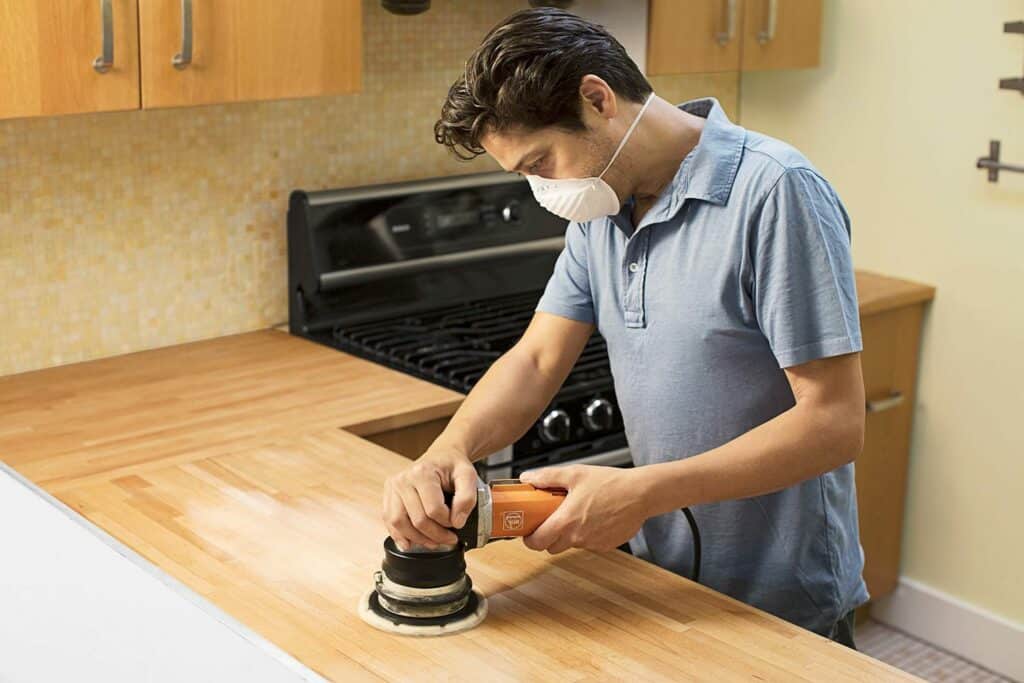
- Safety Gear: Prioritise safety by wearing appropriate gear, including safety goggles, a dust mask, and gloves. Sanding can generate fine dust and debris that you want to avoid inhaling or getting in your eyes.
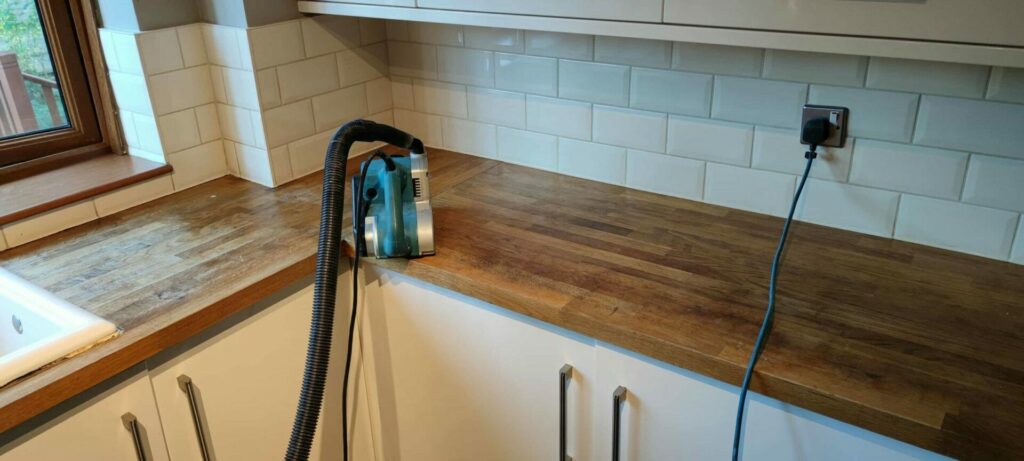
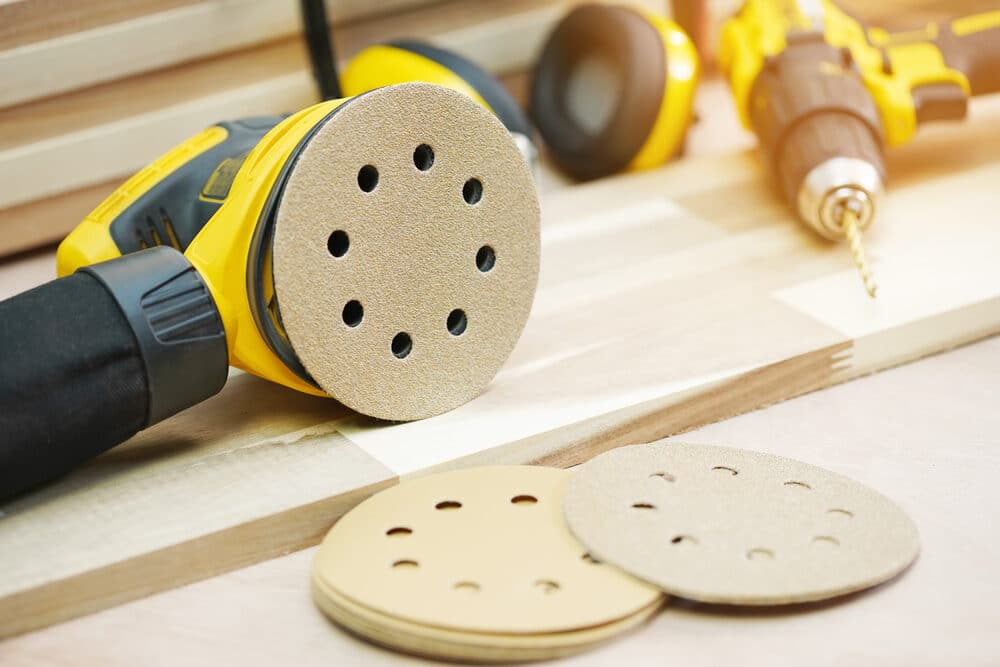
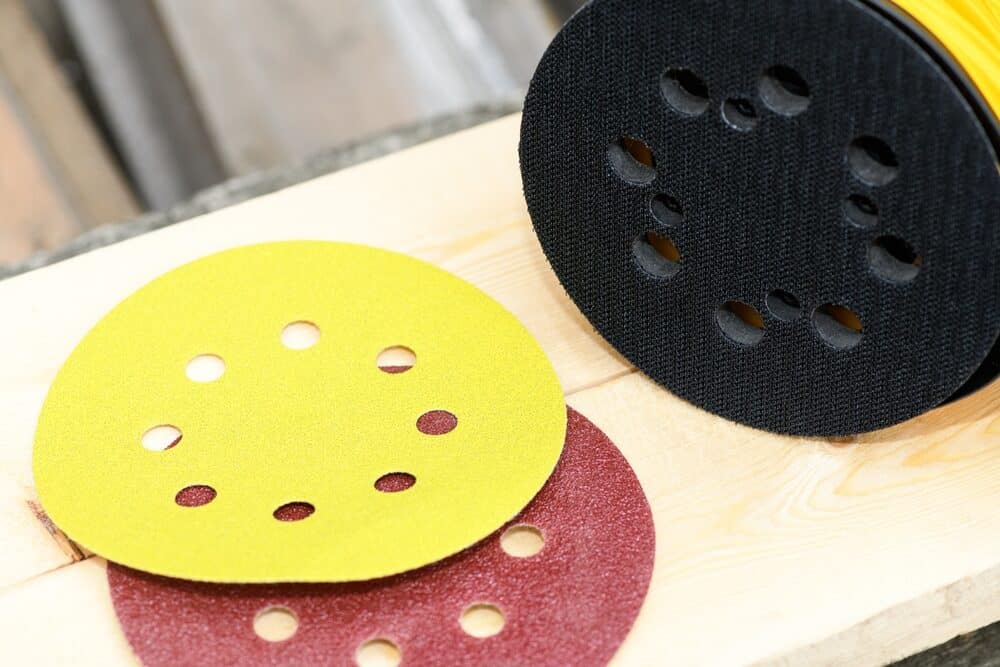
- Sanding Equipment: Depending on the size of the stained area and the material of your worktop, you’ll need sanding tools. Common options include sandpaper with various grits (coarse to fine), a sanding block or pad, or an electric orbital sander.
- Cleaning Supplies: Begin by thoroughly cleaning the stained area with a mild detergent or cleaner and warm water. You may also need a soft cloth or sponge for this task.
- Filler (if applicable): For deeper scratches or gouges in wood worktops, you may need a wood filler to fill in the damaged areas before sanding.
- Sealant or Finish: Depending on your worktop material, you may need a sealant or finish to apply after sanding to protect the surface and restore its shine. Ensure you have the appropriate type for your worktop material (e.g., stone sealer for granite or wood finish for wooden worktops).
- Sandpaper Grit Selection: Choose the appropriate grits of sandpaper for your project. Coarse grits (60–120) are suitable for removing stains and scratches, while finer grits (180-400) are for smoothing and finishing.
- Drop Cloth or Plastic Sheeting: To protect your kitchen area from dust and debris, lay down a drop cloth or plastic sheeting around the worktop.
Safety precautions to keep in mind
- Ventilation: Ensure proper ventilation in your workspace by opening windows or using exhaust fans. This helps dissipate dust and fumes generated during sanding.
- Eye and Respiratory Protection: Wear safety goggles to protect your eyes from dust and debris. A dust mask will prevent you from inhaling potentially harmful particles.
- Gloves: Protect your hands with gloves, especially if you’re handling chemicals, cleaners, or wood filler.
- Workspace Preparation: Remove any items from the worktop and adjacent areas that could be damaged or contaminated during the sanding process. Cover appliances, cabinets, and nearby surfaces to prevent dust accumulation.
- Read Instructions: Familiarise yourself with the manufacturer’s instructions for your sanding equipment, sealant, or finish. Following these guidelines ensures safe and effective usage.
By gathering the necessary tools and materials and taking appropriate safety precautions, you’ll be well-prepared to tackle the stain removal process through sanding. In the next section, we’ll provide you with a step-by-step guide on how to effectively sand your kitchen worktop to eliminate those unsightly stains.

Step-by-Step Guide to Sanding Your Kitchen Worktop
Sanding your kitchen worktop is a precise process that requires attention to detail. Follow these steps to effectively remove stains and restore the beauty of your worktop:
Step 1: Prepare the Work Area
- Clear the worktop of all items and cover nearby surfaces, appliances, and cabinets with plastic sheeting or drop cloths to protect them from dust and debris.
Step 2: Safety First
- Put on safety goggles, a dust mask, and gloves to protect yourself from dust and debris generated during sanding.
Step 3: Clean the Stained Area
- Begin by cleaning the stained area with a mild detergent or cleaner and warm water. This removes surface dirt and grime, allowing you to focus on the stains during sanding. Rinse thoroughly and let the worktop dry completely.
Step 4: Select the Right Sandpaper
- Choose the appropriate gritty sandpaper for your project. Start with a coarser grit (60–120) to remove the stain. If you’re unsure, begin with a medium grit (e.g., 80) and adjust as needed.
Step 5: Sand the Stained Area
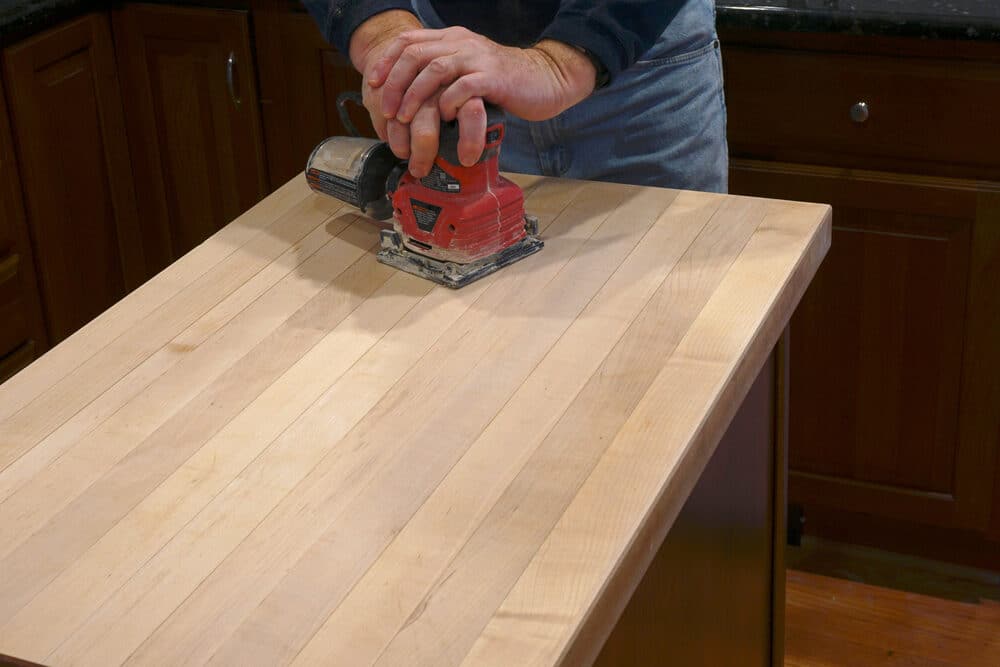
- Fold the sandpaper or attach it to a sanding block or pad. Begin sanding the stained area with gentle, even strokes. Always sand in the direction of the wood grain or in a circular motion, depending on your worktop material.
- Keep the sandpaper flat against the surface to avoid creating uneven spots. Apply consistent pressure, but avoid pressing too hard to prevent gouging.
- Continue sanding until you see the stain has been removed and the worktop’s surface appears uniform and smooth.
Step 6: Gradually Move to Finer Grits
- If the stain persists or the worktop appears scratched from the coarse sandpaper, switch to a finer grit (e.g., 180 or 220). Sand the area again, progressively smoothing the surface.
- Repeat this process with even finer grits until the worktop surface is smooth and free from any visible scratches or sanding marks.
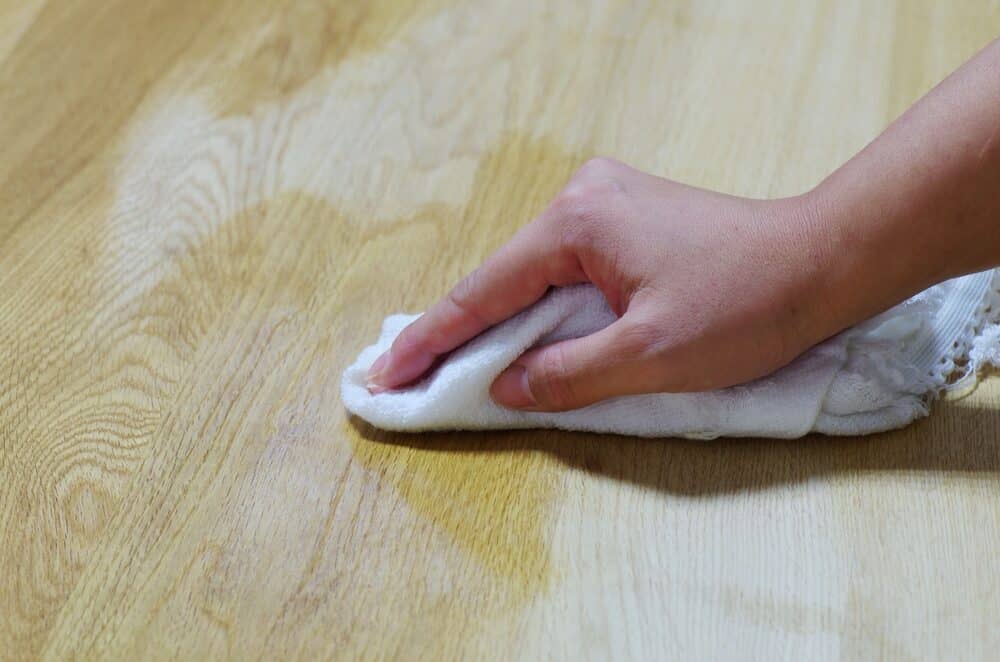
Step 7: Clean the Worktop
- After sanding, thoroughly clean the worktop to remove any dust and residue. Use a damp cloth or sponge and allow the surface to dry completely.
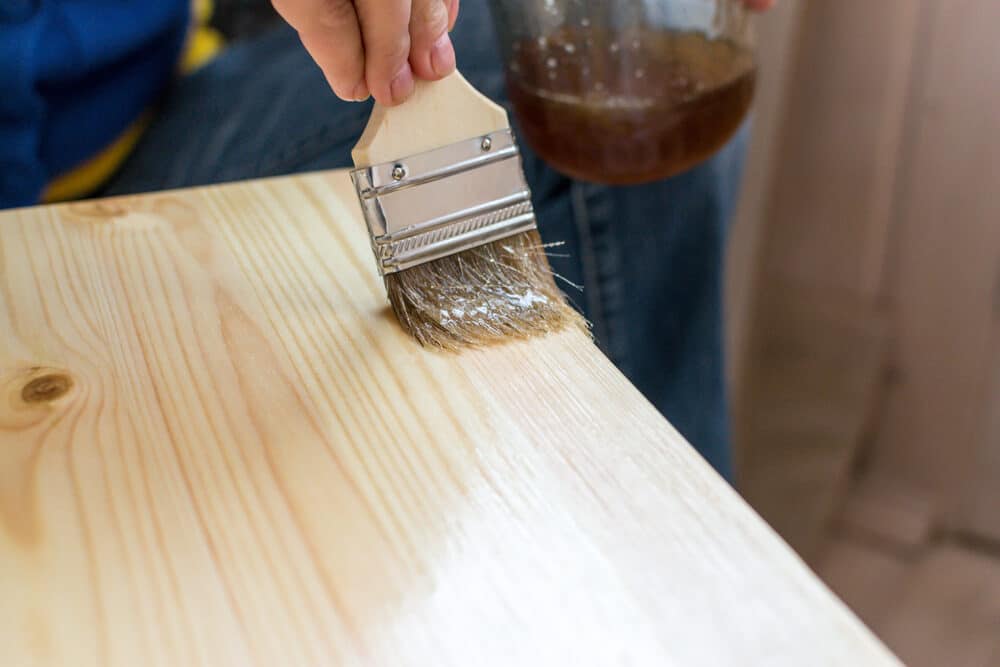
Step 8: Apply sealant or finish (if applicable).
- Depending on your worktop material, you may need to apply a sealant or finish to protect and restore the surface. Follow the manufacturer’s instructions for the specific product you’re using.
Step 9: Final Inspection
- Examine the worktop carefully to ensure that the stain has been completely removed and that the surface is smooth and even. If necessary, repeat the sanding process on specific areas until you achieve the desired result.
Step 10: Post-Sanding Care
- Maintain your worktop’s beauty by practicing regular cleaning and maintenance. Follow the appropriate care guidelines for your worktop material to prevent future stains.

Post-sanding care and maintenance
Congratulations on successfully removing stains from your kitchen worktop through sanding! However, the work doesn’t end with the sanding process. To ensure your worktop remains pristine and stain-free for the long haul, it’s essential to implement proper post-sanding care and maintenance practices. Here’s what you need to know:
Clean Thoroughly:
- After sanding, thoroughly clean the entire worktop surface to remove any lingering dust and debris. Use a damp cloth or sponge, and ensure the surface is completely dry before proceeding.
Apply a sealant or finish (if applicable):
- Depending on the type of worktop material you have, you may need to apply a sealant or finish to protect the newly sanded surface. Follow the manufacturer’s recommendations for the specific product you’re using.
Routine Cleaning:
- Maintain a regular cleaning routine to prevent new stains from forming. Use a mild, pH-neutral cleaner and warm water to wipe down the worktop daily or as needed. Avoid abrasive or acidic cleaners that can damage the surface.

Use cutting boards and trivets:
- To protect your worktop from scratches and heat damage, always use cutting boards for food preparation and trivets or hot pads for placing hot cookware or dishes on the surface.
Wipe up spills immediately:
- Don’t allow spills to linger on the worktop. Wipe up any spills, especially acidic or staining substances, immediately to prevent them from penetrating the surface.
Avoid harmful chemicals:
- Stay away from harsh chemicals, abrasive scrubbers, and scouring pads when cleaning your worktop. These can damage the finish and make the surface more susceptible to stains.
Reapply sealant or finish periodically:
- Over time, the protective sealant or finish on your worktop may wear off. Depending on the material, consider reapplying the sealant every 1-2 years to maintain its stain resistance and appearance.
Use coasters and mats:
- Place coasters under glasses and use mats or placemats under plates, especially if they contain coloured liquids or hot dishes. This prevents condensation rings and heat damage.
Regular Inspection:
- Periodically inspect your worktop for signs of wear, stains, or damage. Catching issues early can prevent them from becoming more challenging to address later.
Seek professional maintenance:
- If you encounter deep stains or damage that you can’t handle on your own, or if your worktop requires professional maintenance, don’t hesitate to seek expert assistance. Professional restoration can bring your worktop back to its original glory.

Conclusion
Your kitchen worktop is more than just a functional surface; it’s the centrepiece of your culinary haven, where memories are made and meals are prepared. However, over time, stains can mar its beauty and leave you wondering how to restore kitchen worktop to its former glory.
In this comprehensive guide, we’ve explored the world of kitchen worktop stains and the potential solution of sanding. We’ve learned about the types of stains that can plague your worktop, the factors that contribute to their formation, and the role of sanding in stain removal.
Sanding, when done correctly, can be a highly effective method for removing surface and shallow stains and restoring the beauty of your worktop. We’ve walked you through the entire process, from preparation and selecting the right sandpaper to the final touches of post-sanding care and maintenance of kitchen worktop.
We’ve also discussed the importance of recognising when it’s time to seek professional help, ensuring that you don’t inadvertently worsen the situation.
As you embark on your journey to restore your kitchen worktop, remember that patience, attention to detail, and the right tools are your allies. Regular maintenance and prevention are key to keeping your worktop stain-free and looking its best for years to come.
Your kitchen worktop is a reflection of your home’s character, and with the knowledge and techniques you’ve gained from this guide, you’re well-equipped to maintain its beauty and enjoy countless more moments around it. So bid farewell to those stubborn stains and welcome back the radiance of your kitchen worktop.
Here’s to a kitchen that not only serves your culinary needs but also adds warmth and elegance to your home!

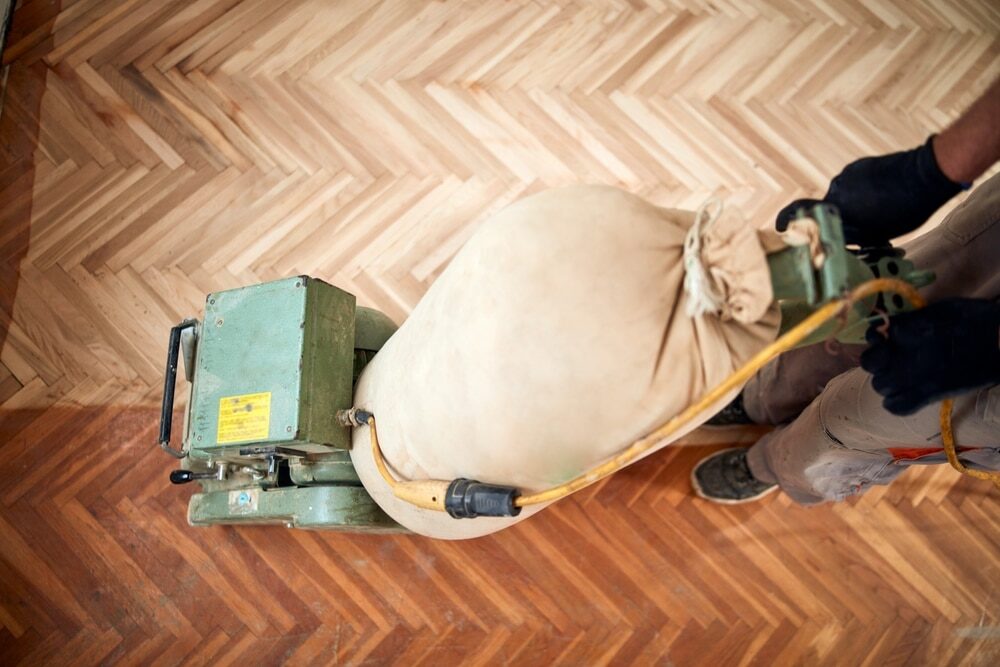

Sanding
We provide virtually dust-free sanding with our continuous belt machinery with mobile extraction units, giving you a safer environment for your family.
Oiling
This organic finish not only adds beauty to your home but also has exceptional water-repellent characteristics, making it easier to clean and maintain.
Waxing
This natural floor finish offers the softest and most mellow appearance – and leaves your floor able to breath.
Buffing
Using soft buffing machines (and hand-polishing where required) will bring a wonderful sheen to your newly-finished floor.
Repairs
We offer a full assessment of your wooden floors to determine what repairs are needed to provide the perfect working surface for the later stages of sanding, staining and sealing.
Restoration
We offer a comprehensive restoration process designed to address floors that are improperly fitted or damaged over time through wear and tear.
Request a fixed price quote for your wood floor restoration now
Simply enter your postcode below to get started.
Services
Wood Floor Sanding Wood Floor Restoration Wood Floor Scratch Repair Squeaky Wood Floor Repair Parquet Floor Sanding Parquet Floor Restoration Commercial Floor Sanding Church Floor Sanding Community Centre Floor Sanding School Floor Sanding Gap Filling Gap Filling with ResinCopyright © Mr Sander®
Privacy & Cookies Terms & Conditions Complaints Procedure Cancellation Rights Sitemap

Get An Instant Price Estimate Before You Go…
Simply enter the rooms you need sanded and we’ll provide you with a price estimate instantly! Try our price calculator now.
Get a Price Estimate NowLocal Floor Sanding Experts
Over 500 5-Star Reviews
Safe, Dust Free Sanding
Operating Since 1994