London:
Nationwide:
25,000+
Floors Restored
27 Years Experience
Wood Flooring Association Certified
Choosing the Right Sander for Your Deck
Posted on January 8, 2024
Deck Sanding

Selecting the Ideal Sander for Your Deck
Sanding your deck may not be the most glamorous DIY project, but it’s a crucial step in maintaining and revitalizing your outdoor space. A well-sanded deck not only enhances its visual appeal but also prolongs its lifespan by preventing rot and decay. However, before you dive into this task, it’s essential to understand that choosing the right sander for your deck is the first and most crucial decision you’ll make in this process.
In this blog post, we’ll guide you through the process of selecting the perfect sander for your deck sanding project. We’ll discuss the various types of sanders available, factors to consider when making your choice, and essential safety precautions to keep in mind. Whether you’re a seasoned DIY enthusiast or a first-time deck owner, by the end of this post, you’ll have the knowledge you need to tackle your deck sanding project with confidence and achieve professional-quality results. Let’s get started!
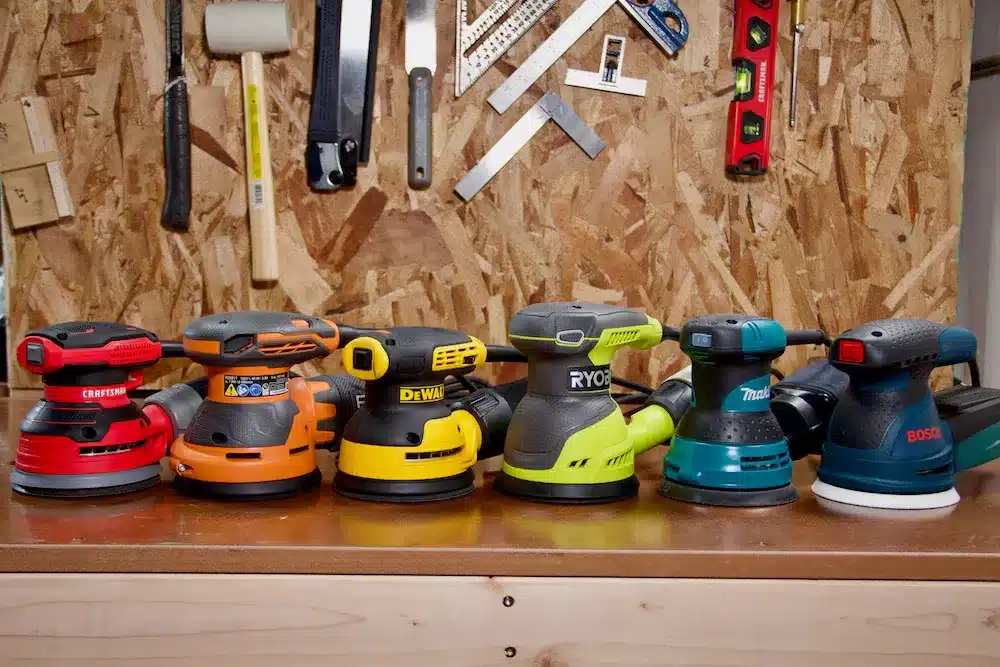
Types of Sanders
When it comes to sanding your deck, choosing the right type of sander is crucial to achieving the best results. Each type of sander has its own set of advantages and disadvantages, and understanding their differences will help you make an informed decision. Here are the primary types of sanders commonly used for deck sanding:
Belt Sanders:
Pros: Belt sanders are powerful and efficient, making them ideal for large deck surfaces. They quickly remove old finishes and uneven spots.
Cons: They can be challenging to control, potentially causing gouges or uneven sanding if not used correctly. Belt sanders are best for experienced users.

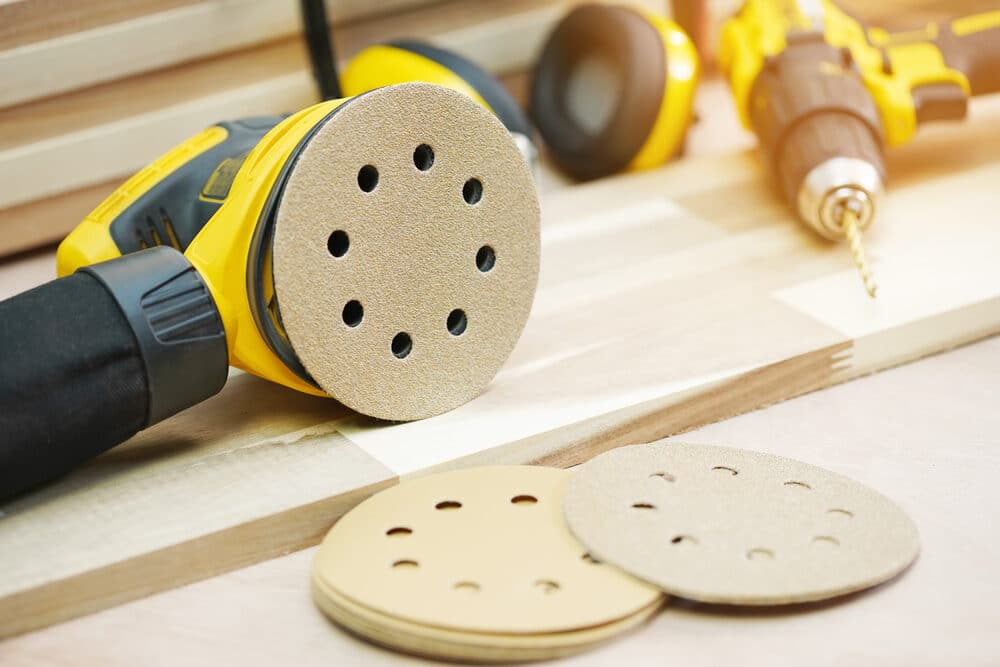
Random Orbital Sanders:
Pros: Random orbital sanders are versatile and user-friendly. They provide a smooth, swirl-free finish and are suitable for both professionals and beginners.
Cons: They may take a bit longer to remove heavy material compared to belt sanders, but their ease of use makes up for it.
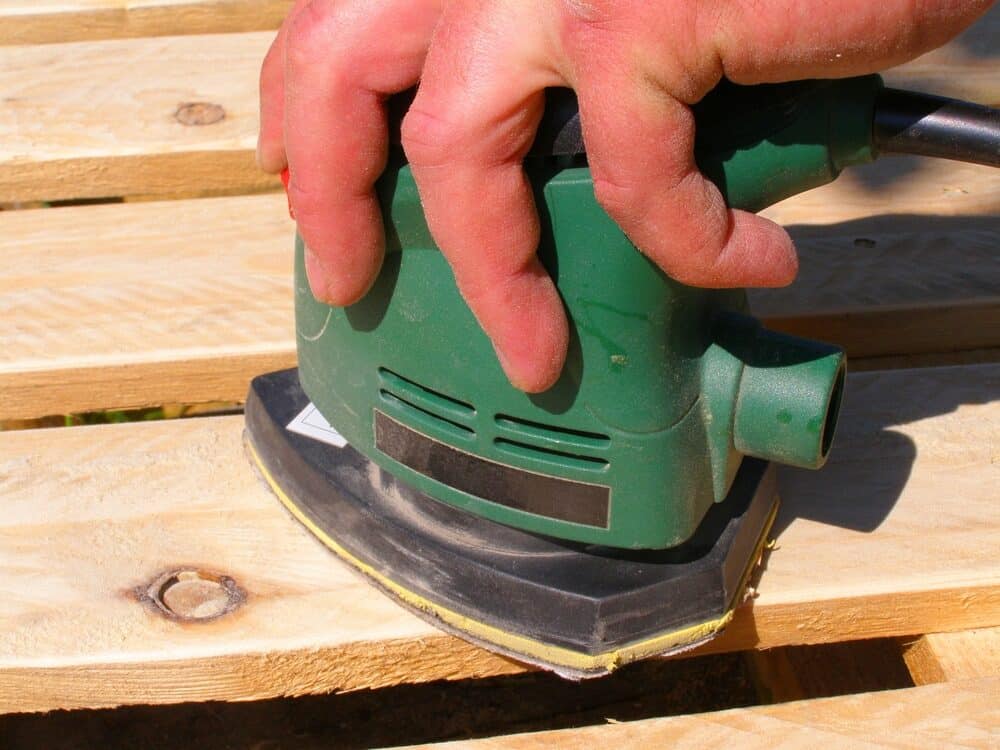
Detail Sanders:
Pros: Detail sanders, also known as mouse sanders, are perfect for getting into tight spots, corners, and edges that larger sanders can’t reach. They are lightweight and easy to maneuver.
Cons: Detail sanders are not suitable for sanding large deck surfaces efficiently. They are more of a supplementary tool for intricate work.
Drum Sanders:
Pros: Drum sanders are heavy-duty machines designed for aggressive material removal. They are typically used by professionals for large deck restoration projects.
Cons: These sanders can be challenging to handle for beginners and can leave behind noticeable sanding marks if not used correctly. They are often best left to the experts.
Choosing the right sander largely depends on the size of your deck, your level of experience, and the finish you want to achieve. In the next sections, we’ll delve into these considerations to help you make an informed choice for your specific deck sanding needs.

Considerations for Deck Sanding
Before you select the right sander for your deck, it’s essential to take several factors into account. Your deck’s material, size, current condition, and the finish you desire all play a crucial role in determining the best sander for the job. Here are the key considerations:
- Deck Material:
- The type of wood your deck is made from matters. Softer woods, like pine, cedar, or redwood, require gentler sanding to avoid damage. Hardwoods, such as oak or mahogany, can withstand more aggressive sanding. Choose a sander that suits your deck’s wood type.
- Deck size and shape:
- The size and layout of your deck will impact your choice of sander. For larger decks, a powerful and efficient sander, like a belt sander or a random orbital sander, might be preferable. Smaller, intricate areas may require a detail sander.
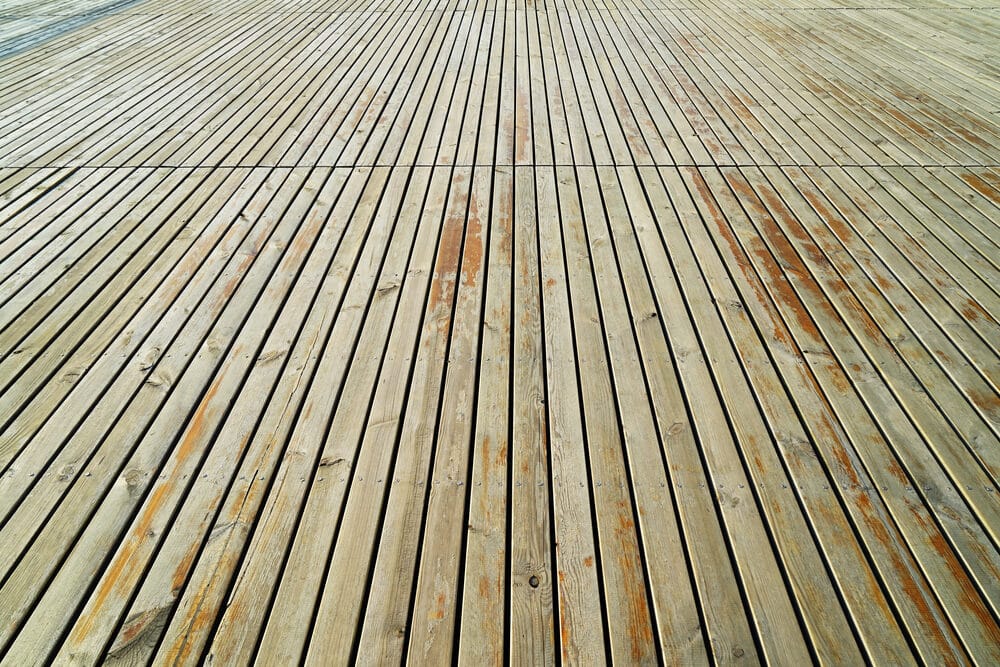
- Current Deck Condition:
- Assess the current condition of your deck. Is it a new deck that needs minimal sanding to prepare for finishing, or is it an older deck with layers of paint or stain that require removal? Decks with more significant wear and tear may need heavier sanding equipment.
- Desired Finish:
- Consider the finish you want for your deck. Do you prefer a smooth, pristine surface, or are you going for a rustic, textured look? Different sanders produce varying finishes, so align your choice with your aesthetic goals.
- Budget and experience:
- Your budget and level of experience are also essential factors. High-quality sanders can be an investment, but they often deliver better results and last longer. If you’re a novice, you may want to opt for a user-friendly sander that doesn’t require advanced skills.
- Time Constraints:
- Think about your project timeline. Some sanders work faster than others. If you’re working on a tight schedule, you may need a sander that can cover more area in less time.
By carefully considering these factors, you’ll be better equipped to choose the right sander that matches your deck’s specific requirements and your personal preferences. In the next sections, we’ll delve deeper into selecting the appropriate grit for your sandpaper and essential safety precautions to ensure a successful deck sanding project.
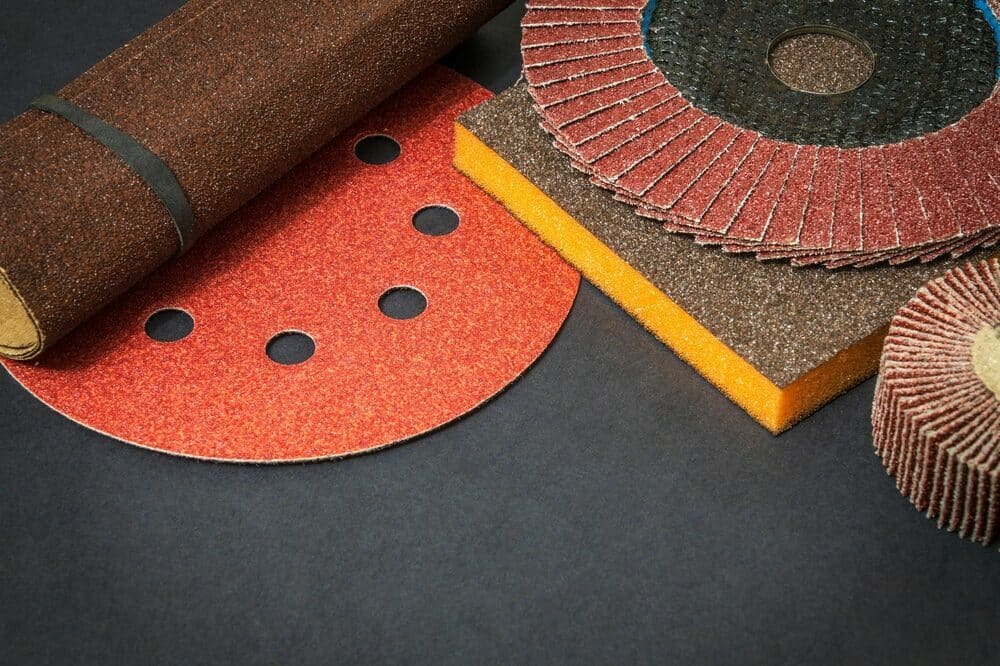
Selecting the Right Grit
Choosing the correct grit for your sandpaper is a critical step in achieving the desired finish for your deck. Grit refers to the coarseness or fineness of the abrasive particles on the sandpaper. Different grits are suitable for various stages of the sanding process. Here’s how to select the right grit for your deck sanding project:
- Coarse Grits (40–60):
- Use coarse-grit sandpaper (40–60) for the initial sanding phase, especially if your deck has old paint, stains, or heavy wear. Coarse grits are excellent for removing surface imperfections and stubborn coatings.
- Medium Grits (80-120):
- Once you’ve removed the majority of the old finish and achieved a smoother surface with coarse grits, switch to medium-grit sandpaper (80–120). This grit range helps refine the surface and remove any remaining scratches or imperfections.
- Fine Grits (150–220):
- For the final sanding before applying a finish (such as paint or stain), use fine-grit sandpaper (150–220). This grit range creates a smooth, even surface, perfect for accepting the finish and achieving a professional look.
- Extra Fine Grits (240+):
- Extra-fine grits (240 and above) are used for sanding between coats of finish to achieve an exceptionally smooth and polished result. This step is optional but can enhance the final appearance of your deck.
Remember that the choice of grit also depends on the type of sander you’re using. Some sanders may require specific grits to work effectively, so consult the manufacturer’s recommendations for your particular sander model.
It’s essential to progress gradually through the grits, starting with the coarsest and moving to finer grits, to achieve the best results. Skipping grits or using too fine a grit too early can lead to inefficiencies in the sanding process and may not yield the desired finish.
Always keep an ample supply of sandpaper on hand, as the amount you’ll need depends on your deck’s size and condition. With the right grit and proper sanding techniques, you’ll be well on your way to transforming your deck into a beautiful outdoor space.
Safety Precautions
Sanding a deck can be a dusty and potentially hazardous task if not approached with the right safety precautions. Protect yourself and ensure a safe working environment with these essential safety measures:
- Wear personal protective equipment (PPE):
- Safety Glasses: Protect your eyes from flying debris, dust, and wood particles.
- Respirator or Dust Mask: Prevent inhaling harmful dust and particles generated during sanding. Make sure it’s rated for fine dust, especially if you’re working with treated wood.
- Hearing Protection: Reduce the noise generated by power sanders to prevent hearing damage.
- Work gloves: Keep your hands safe from splinters, sharp edges, and abrasive surfaces.
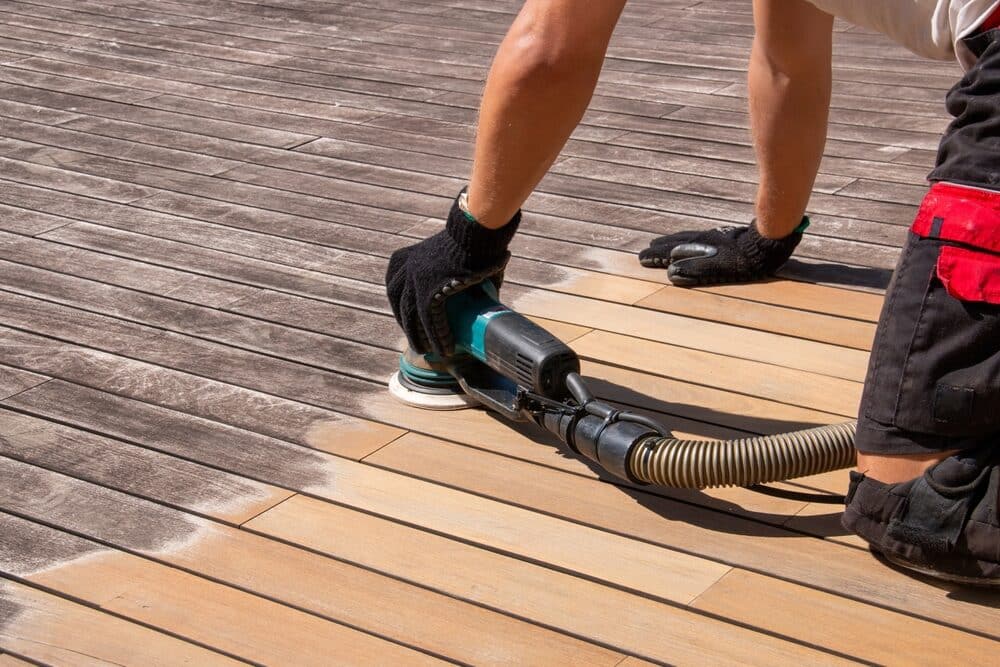
- Dust Control:
- Use a dust collection system or a shop vacuum with a HEPA filter to minimize airborne dust. This not only protects your health but also keeps your work area cleaner.
- Consider working outdoors or in a well-ventilated area to allow dust to disperse more effectively.
- Clothing and footwear:
- Wear long-sleeved clothing and pants to protect your skin from flying debris.
- Choose closed-toe shoes with non-slip soles to prevent accidents while working on the deck.
- Safety precautions for Power Sanders:
- Read and follow the manufacturer’s instructions for your specific sander.
- Keep both hands on the sander at all times when it’s in operation.
- Never leave a running sander unattended.
- Disconnect the power source when changing sandpaper or making adjustments.
- Check the sander’s cord for damage before use, and avoid using extension cords that are too long or damaged.
- Work Area Preparation:
- Clear the deck of obstacles, loose objects, and furniture to create a safe and clutter-free workspace.
- Secure any loose boards or railings to prevent accidents.
- Fire Safety:
- Remove flammable materials from the work area to reduce the risk of fire.
- Keep a fire extinguisher nearby in case of emergencies.
- Electrical Safety:
- Ensure all electrical connections and outlets are dry and in good condition. Do not use power tools in wet conditions.
- Use ground-fault circuit interrupters (GFCIs) to protect against electrical shock.
- First Aid Kit:
- Have a well-equipped first-aid kit on hand in case of minor injuries.
- Follow the safety guidelines:
- Adhere to all safety guidelines and recommendations provided by the manufacturer of your sander and any other power tools you use.
Taking these safety precautions seriously is essential for your well-being and the success of your deck sanding project. Safety should always be a top priority when working with power tools and performing DIY tasks.

Step-by-Step Guide to Deck Sanding
Now that you’ve chosen the right sander, considered the deck’s specific needs, selected the appropriate grit, and taken safety precautions, it’s time to dive into the deck sanding process. Follow these step-by-step instructions to achieve a beautifully sanded deck:
Step 1: Preparation
- Clear the deck of all furniture, plants, and obstacles.
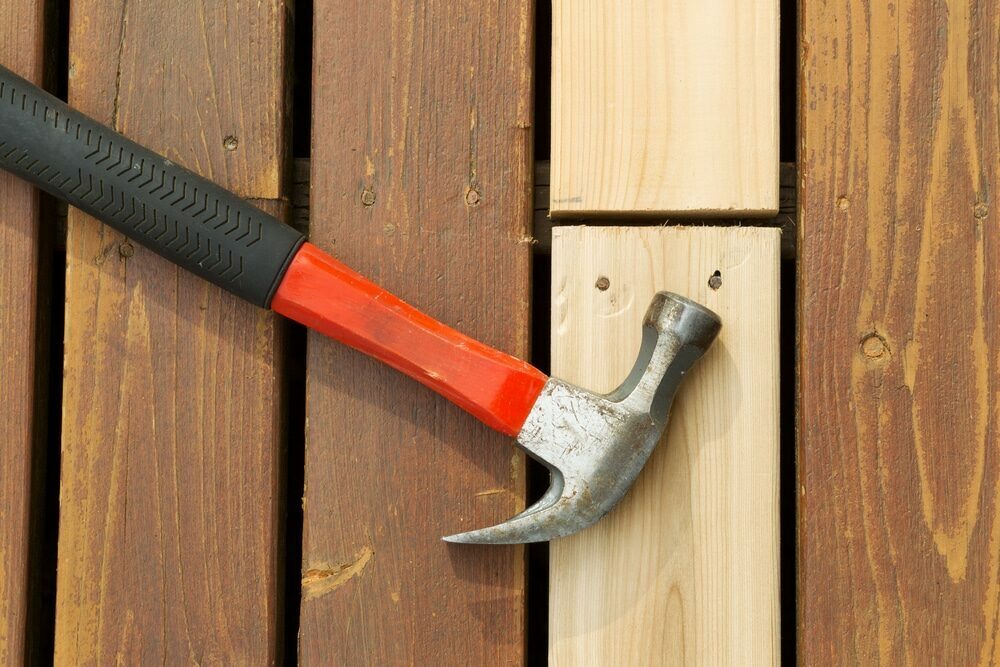
- Inspect the deck for loose boards, nails, or screws, and secure or replace them as needed.
- Sweep the deck thoroughly to remove loose debris and dirt.
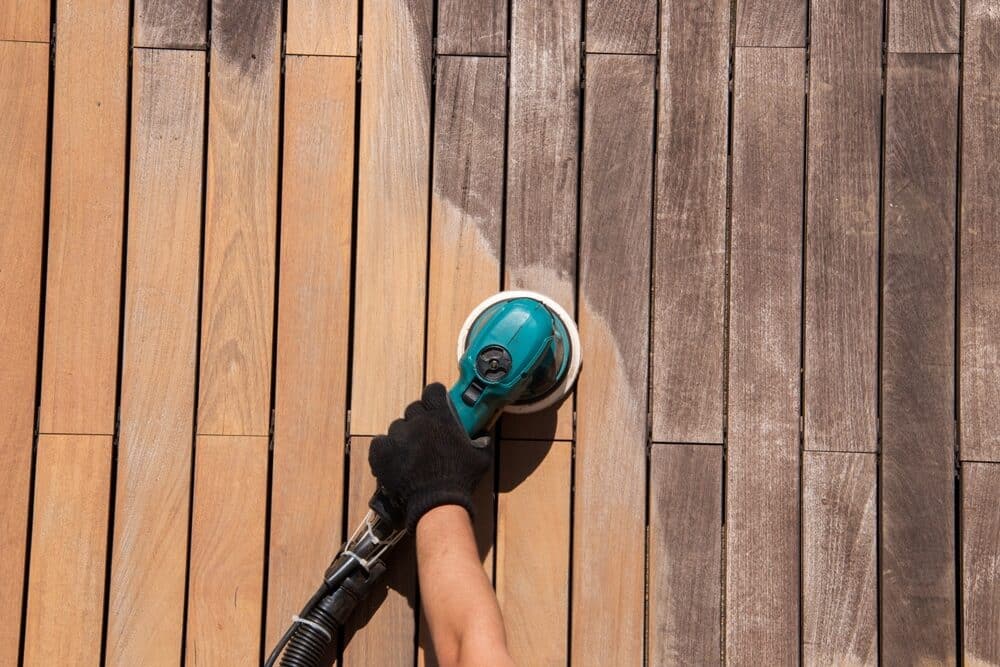
Step 2: Initial Sanding (Coarse Grit)
- Attach the appropriate coarse-grit sandpaper to your sander.
- Start sanding in the direction of the wood grain, using slow and even passes.
- Overlap each pass to ensure consistent sanding.
- Focus on heavily weathered or painted areas, making sure to remove all old finishes.
- Check for and fix any gouges or uneven areas as you go.
Step 3: Intermediate Sanding (Medium Grit)
- Replace the sandpaper with a medium-grit one.
- Sand the entire deck surface again, following the wood grain.
- This step smooths out the surface and removes any scratches left by the coarse-grit sandpaper.
- Be thorough, but avoid over-sanding, which can lead to unevenness.
Step 4: Final Sanding (Fine Grit)
- Switch to a fine-grit sandpaper for the last sanding pass.
- Sand the entire deck once more, ensuring a smooth and even finish.
- Pay attention to detail, especially around corners and edges.
- This step prepares the deck surface for finishing.
Step 5: Clean the Deck
- Use a broom or vacuum to remove dust and debris from the deck.
- Wipe down the deck with a damp cloth or tack cloth to pick up any remaining fine dust particles.
Step 6: Apply Finish (Stain or Paint)
- Once the deck is clean and dry, you can proceed to apply your chosen finish, whether it’s a deck stain or paint.
- Follow the manufacturer’s instructions for your finished product regarding application, drying times, and recoating if necessary.
- Apply the finish evenly using a brush, roller, or sprayer, depending on your preference.
Step 7: Maintenance
- Regularly inspect your deck for signs of wear and apply touch-ups as needed.
- Consider applying a protective sealant to extend the life of the finish and protect against the elements.
By following these steps carefully and taking your time, you can achieve a beautifully sanded deck that’s ready to shine with a fresh finish. Remember to work patiently and safely throughout the process to ensure the best results.
Maintaining Your Sander
Proper maintenance of your sander is essential to ensuring it continues to perform well and lasts for many projects to come. Neglecting maintenance can lead to reduced effectiveness, decreased lifespan, and even safety hazards. Here are some maintenance tips for keeping your sander in top condition:
- Regular Cleaning:
- After each use, unplug the sander and clean it thoroughly. Remove all dust and debris from the sander’s surface, air vents, and dust collection system (if applicable). Use compressed air, a brush, or a vacuum with a nozzle attachment to clean hard-to-reach areas.
- Sandpaper Replacement:
- Change the sandpaper regularly, as worn or clogged sandpaper will decrease the sander’s efficiency. Follow the manufacturer’s recommendations for the type and size of sandpaper to use with your specific sander model.
- Inspect the sanding pad.
- Check the condition of the sanding pad or disc. If it’s worn, damaged, or uneven, replace it. A damaged pad can lead to uneven sanding results.
- Bearings and Gears:
- Periodically inspect the bearings and gears for signs of wear or damage. If you notice any issues, consider having a professional technician service your sander.
- Power Cord and Plug:
- Inspect the power cord for fraying or damage. Replace any damaged cords immediately. Ensure that the plug is securely attached and in good condition.
- Dust Collection System:
- If your sander has a dust collection system, regularly empty the dust bag or container to maintain efficient dust collection. Clean or replace filters as needed.
- Lubrication:
- Some sanders may require occasional lubrication of moving parts. Refer to your sander’s user manual for specific instructions on lubrication.
- Storage:
- When not in use, store your sander in a clean, dry, and cool environment. Protect it from extreme temperatures and moisture to prevent damage.
- Manufacturer’s Recommendations:
- Always follow the manufacturer’s maintenance recommendations and guidelines provided in the user manual. These guidelines are specific to your sander model and should be your primary reference for maintenance tasks.
- Professional Service:
- If you encounter issues beyond your ability to repair or maintain, such as motor problems or major malfunctions, consider taking your sander to a professional technician for servicing and repairs.
Regular maintenance ensures that your sander remains safe to use, operates efficiently, and delivers consistent results. By taking the time to care for your sander, you’ll prolong its lifespan and get the most out of your investment in woodworking and DIY projects.

Conclusion
Deck sanding is a critical step in the maintenance and revitalization of your outdoor space. Choosing the right sander, considering your deck’s unique characteristics, selecting the appropriate grit, and following safety precautions are all key factors that contribute to the success of your project. By adhering to these guidelines, you can achieve professional-quality results and transform your weathered deck into a beautiful and inviting outdoor retreat.
Remember that the choice of sander depends on factors such as your deck’s size, material, and level of experience. Whether you opt for a powerful belt sander, a versatile random orbital sander, a detail sander for intricate work, or a heavy-duty drum sander, each tool has its place in the world of deck sanding.
Additionally, the selection of the right sandpaper grit is crucial to achieving the desired finish. Coarse grits remove old finishes and imperfections; medium grits refine the surface; and fine grits prepare it for the final finish application.
Prioritizing safety throughout the sanding process is non-negotiable. Wearing proper personal protective equipment, controlling dust, and following safe operating practices for your sander are essential for your well-being and the success of your project.
Once the deck is beautifully sanded, the application of the finish of your choice will protect and enhance its appearance for years to come. Regular maintenance and upkeep, including touch-ups and sealant applications, will ensure that your deck remains an enjoyable and safe outdoor space for your family and guests.
By following the step-by-step guide and adhering to maintenance best practices, you can tackle your deck sanding project with confidence. With a little effort and the right tools, your deck will become the centerpiece of your outdoor living experience, providing a beautiful and welcoming environment for relaxation and entertainment. Enjoy your newly sanded and finished deck!


Sanding
We provide virtually dust-free sanding with our continuous belt machinery with mobile extraction units, giving you a safer environment for your family.
Oiling
This organic finish not only adds beauty to your home but also has exceptional water-repellent characteristics, making it easier to clean and maintain.
Waxing
This natural floor finish offers the softest and most mellow appearance – and leaves your floor able to breath.
Buffing
Using soft buffing machines (and hand-polishing where required) will bring a wonderful sheen to your newly-finished floor.
Repairs
We offer a full assessment of your wooden floors to determine what repairs are needed to provide the perfect working surface for the later stages of sanding, staining and sealing.
Restoration
We offer a comprehensive restoration process designed to address floors that are improperly fitted or damaged over time through wear and tear.
Request a fixed price quote for your wood floor restoration now
Simply enter your postcode below to get started.
Services
Wood Floor Sanding Wood Floor Restoration Wood Floor Scratch Repair Squeaky Wood Floor Repair Parquet Floor Sanding Parquet Floor Restoration Commercial Floor Sanding Church Floor Sanding Community Centre Floor Sanding School Floor Sanding Gap Filling Gap Filling with ResinCopyright © Mr Sander®
Privacy & Cookies Terms & Conditions Complaints Procedure Cancellation Rights Sitemap

Get An Instant Price Estimate Before You Go…
Simply enter the rooms you need sanded and we’ll provide you with a price estimate instantly! Try our price calculator now.
Get a Price Estimate NowLocal Floor Sanding Experts
Over 500 5-Star Reviews
Safe, Dust Free Sanding
Operating Since 1994